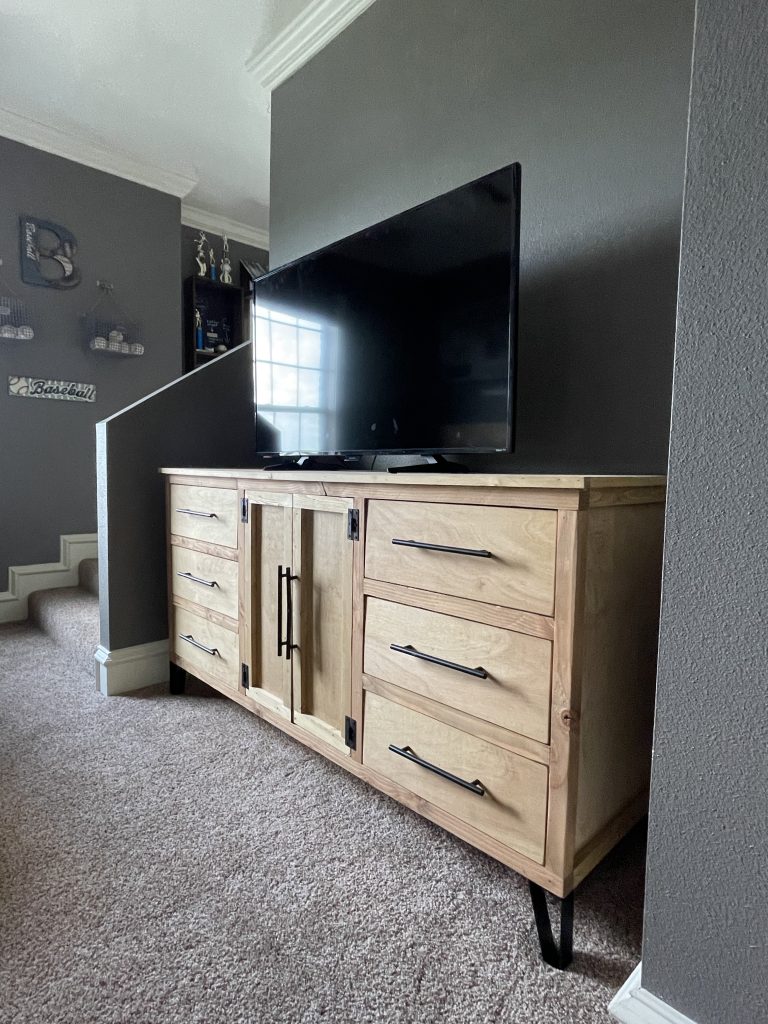
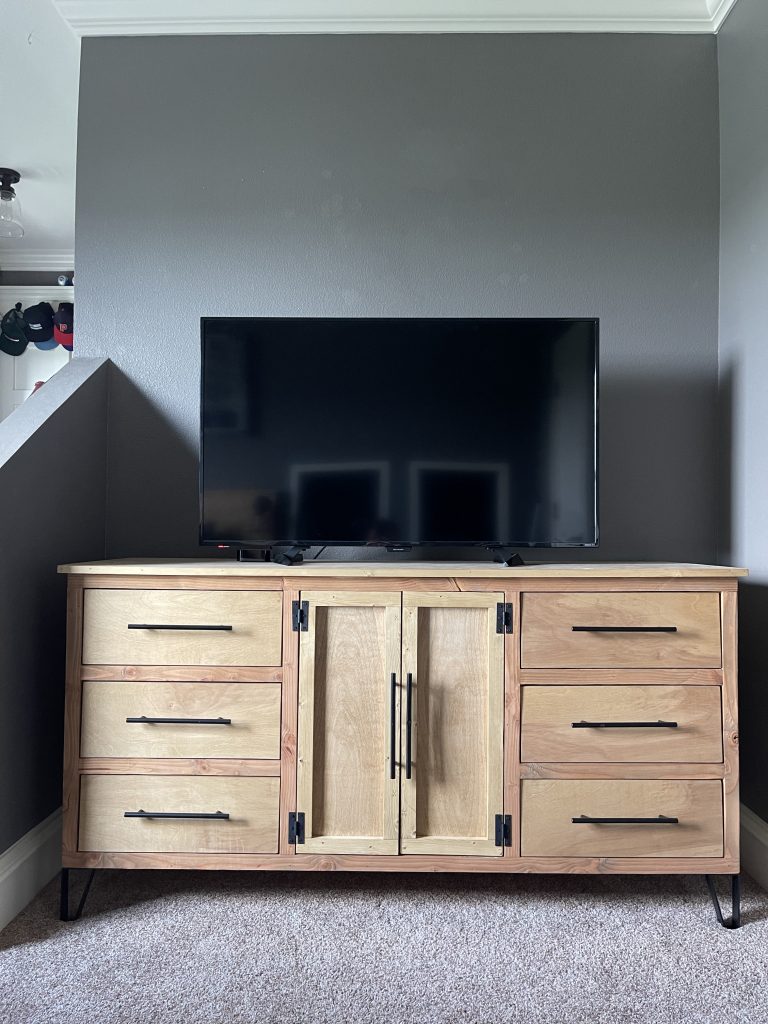
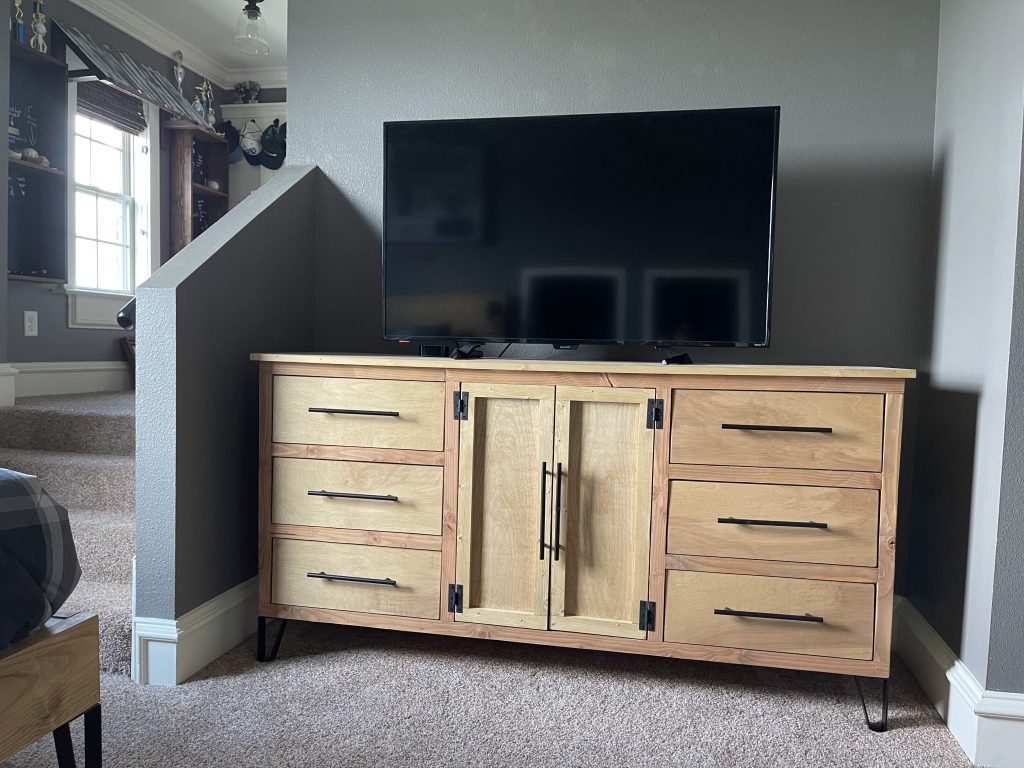
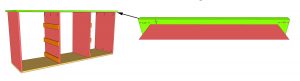
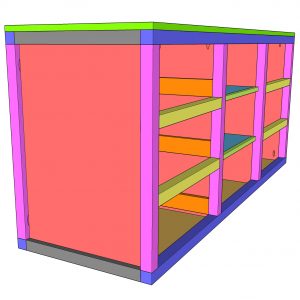
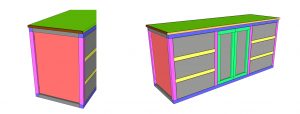
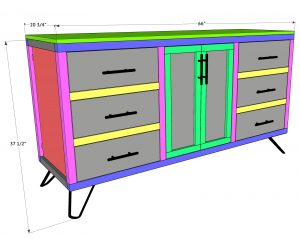
Learn how to build this DIY Modern Dresser with free plans and a how-to video by Shanty2Chic! This is an easy build, makes the perfect TV stand and doubles as a dresser with tons of storage space!
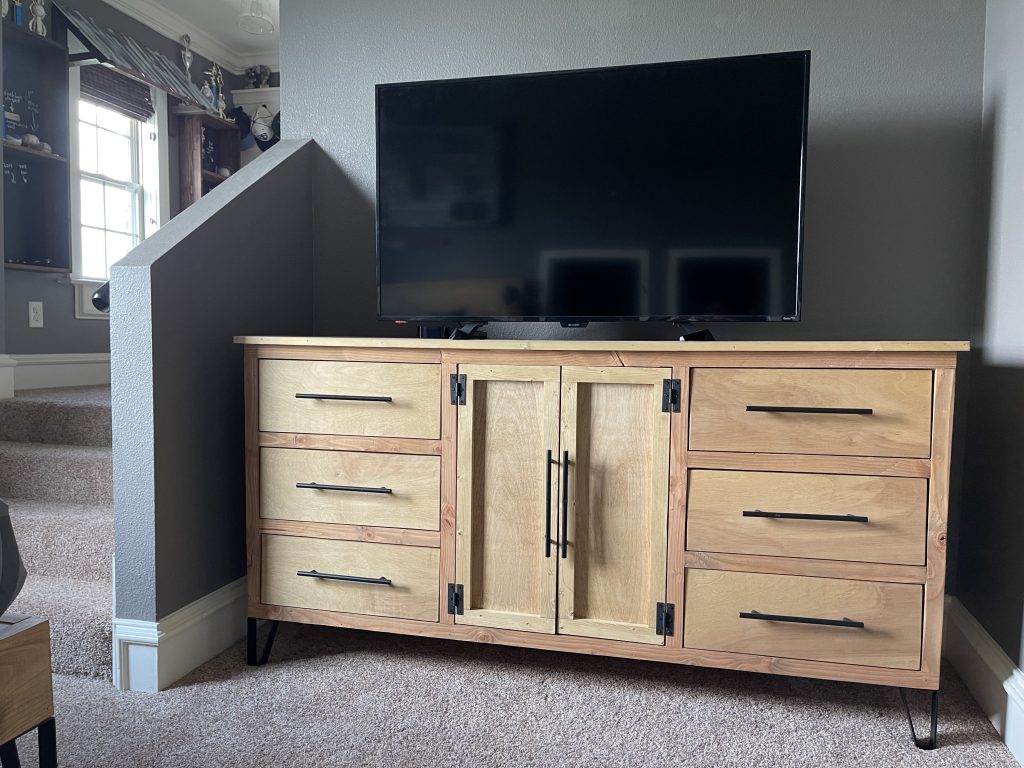
This DIY Modern Dresser has been a long time coming! My son had a set of DIY Lockers that I built him for his “dresser” but the organization was out of control! He told me he would rather have a dresser with drawers and a spot for his game consoles, so that’s exactly what he got! I recently built him this DIY Modern Full Size Bed so I used that as my guide for the style of this dresser!
Check out the how-to video below to watch!
Make sure to download the free printable plans!
Click here to jump to the free printable plans!Table of Contents
Tools:
- Miter Saw
- Drill
- Kreg Jig
- Brad Nailer
- Sander
- Stapler (optional)
- Table Saw (optional)
Supplies:
- 8 – 2x2x8 Common Board (I ripped from 2×4 studs)
- 3 – 1x4x8 Common Board
- 2 – 3/4″x48″x96″ Hardwood Plywood
- 1 – 1/2″x48″x96″ Hardwood Plywood
- 1 – 1/4″x48″x96″ Hardwood Plywood
- 1 1/4″ Pocket Hole Screws
- 2 1/2″ Pocket Hole Screws
- 1 1/4″ Brad Nails
- 2 1/2″ Finish Nails
- 5/8″ Staples (optional)
- Wood Glue
- 8 Pulls
- 4 Legs
- 4 Hinges
How to Build a DIY Modern Dresser
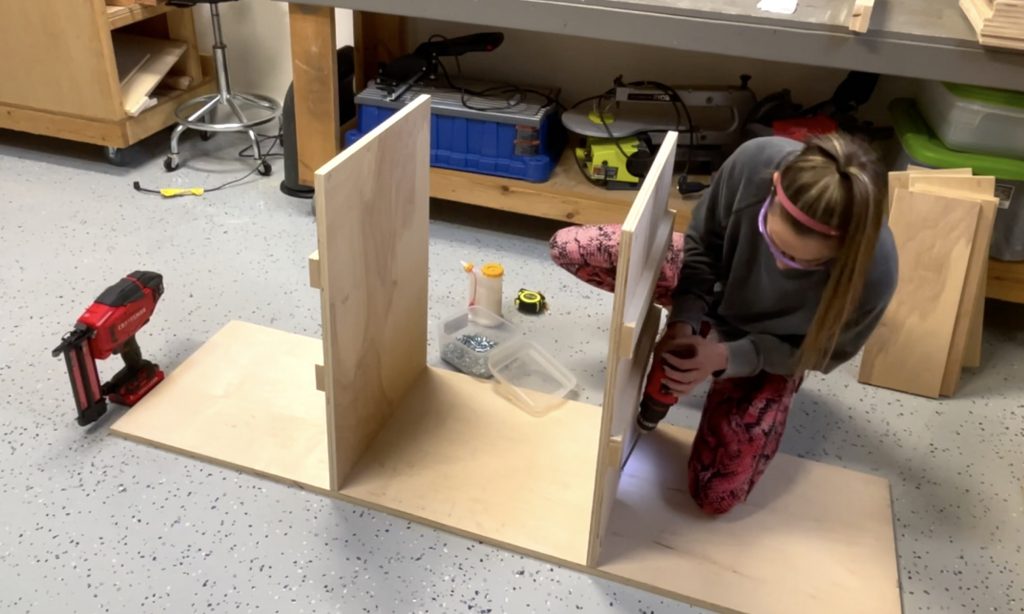
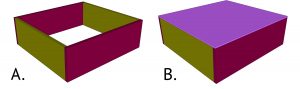
Building the Cabinet Frame
Step 1:
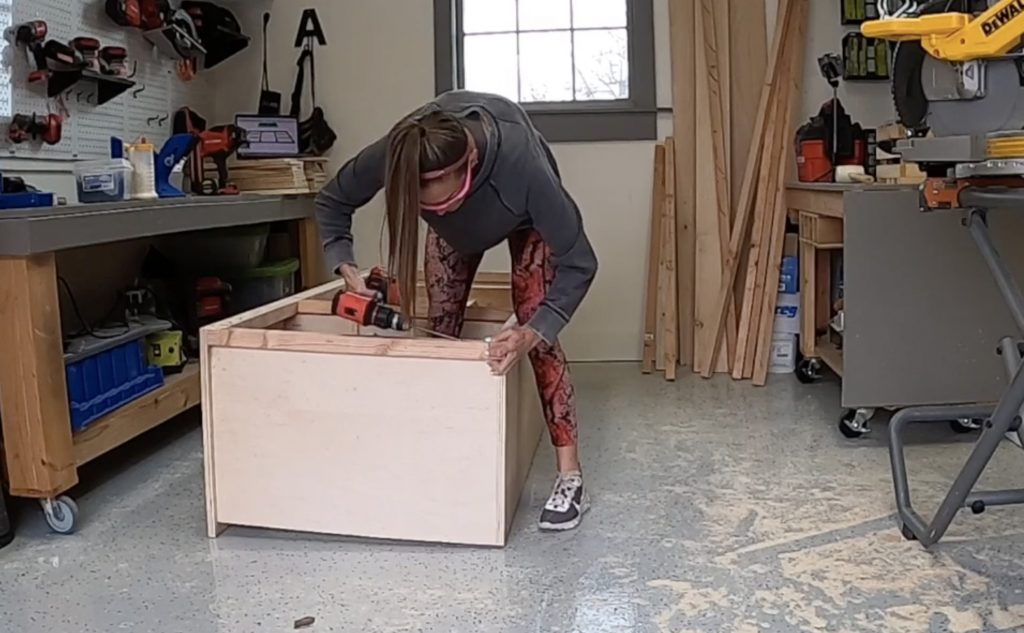
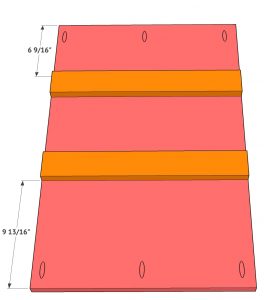
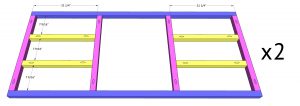
Cut the vertical dividers and cleats to size. Drill 3/4″ pocket holes at both ends of each divider. Attach the top two cleats to two of the dividers with 1 1/4″ brad nails and wood glue.
Step 2:
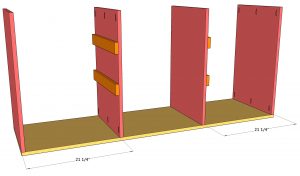
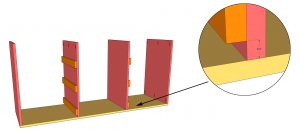
Cut the bottom cabinet board to size. Attach the vertical dividers to the bottom board with 1 1/4″ pocket hole screws and wood glue.
Step 3:
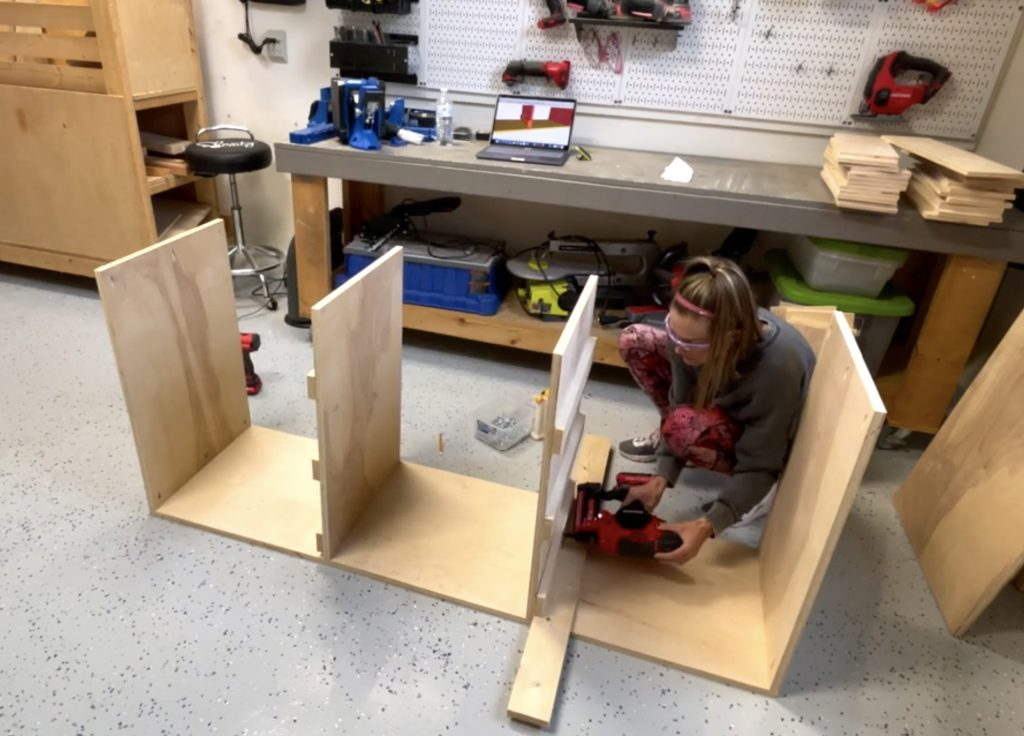
Attach the bottom cleats to the middle dividers with 1 1/4″ brad nails and wood glue.
Step 4:
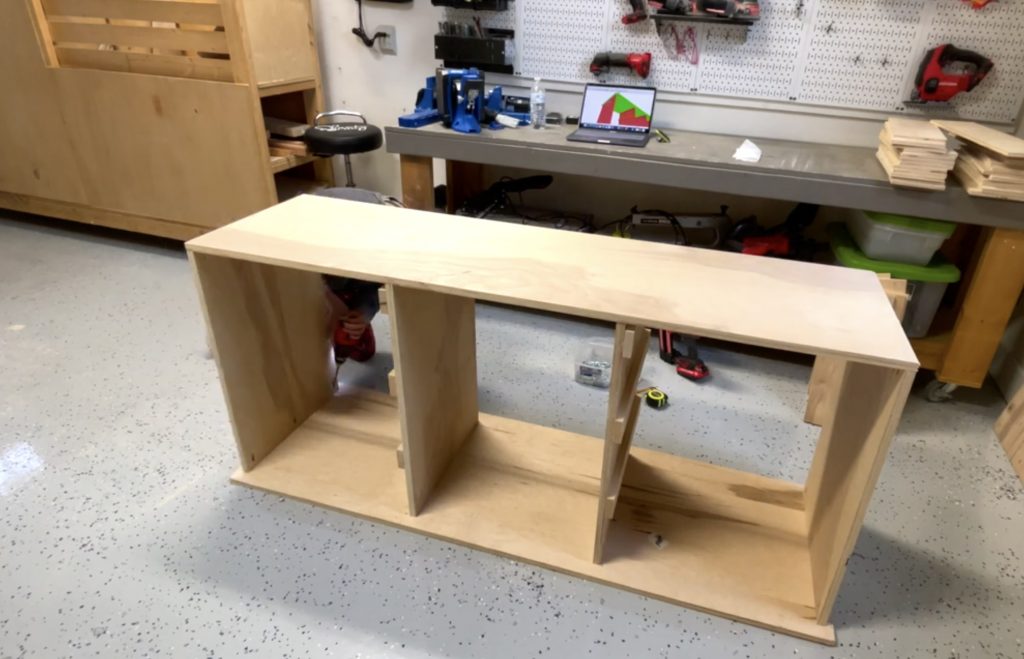
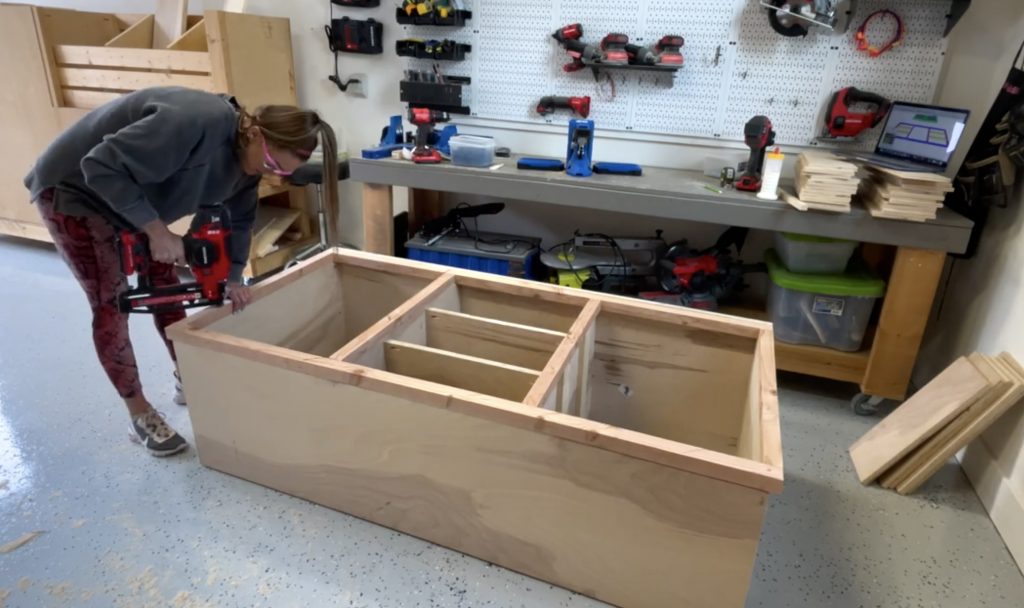
Cut the cabinet top piece to size and attach it to the cabinet dividers with 1 1/4″ pocket hole screws and wood glue.
Step 5:
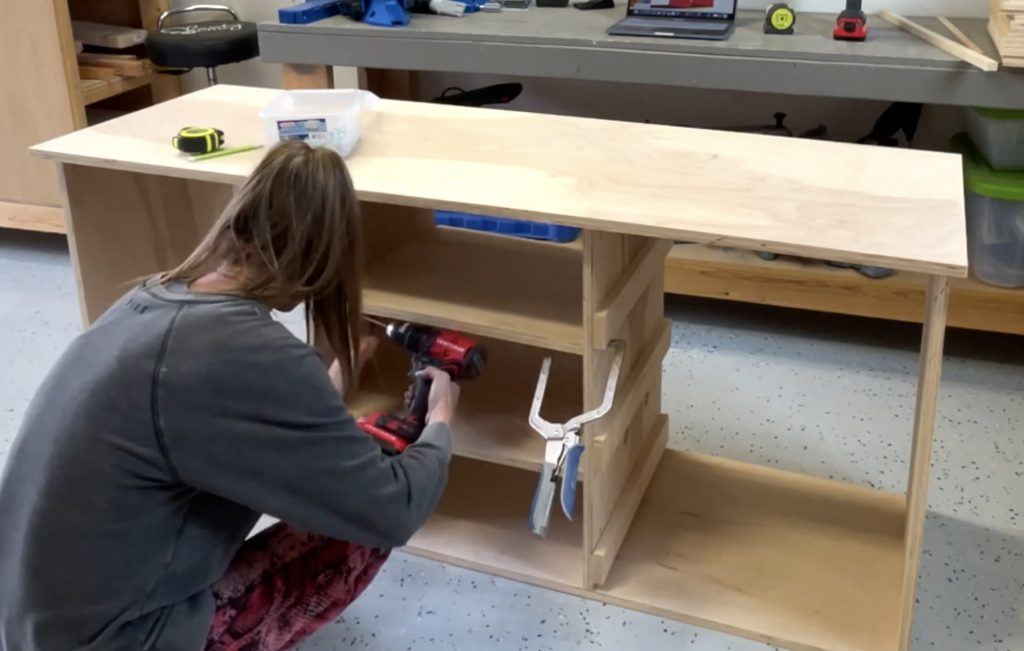
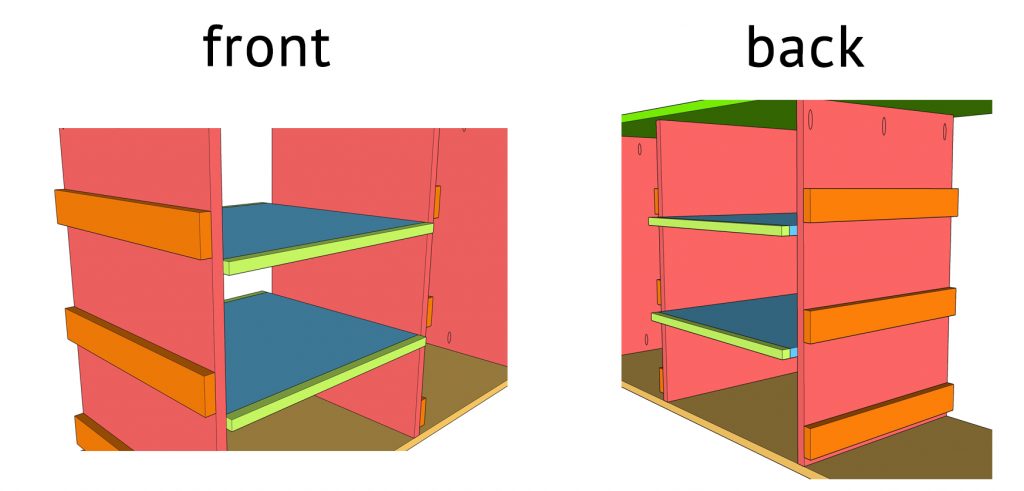
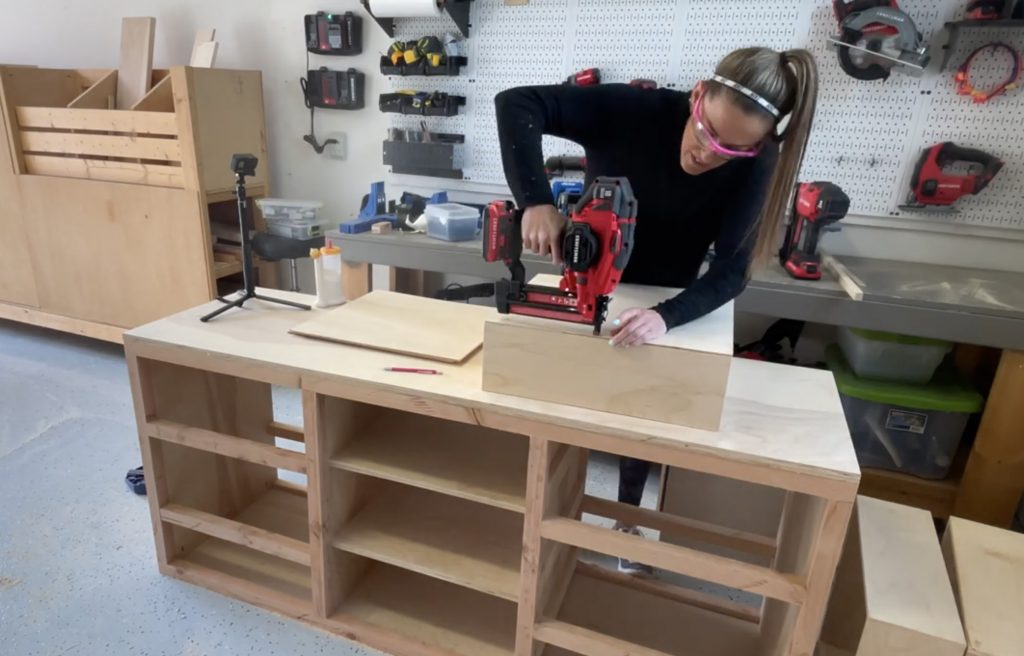
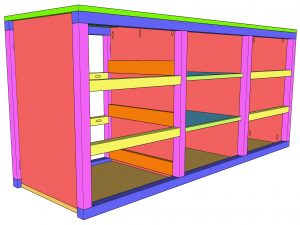
Cut the shelf pieces to size and drill 3/4″ pocket holes on the ends. Attach them to the inside of the cabinet with 1 1/4″ pocket hole screws and wood glue. Note the inset and overhang on the front and back.
Step 6:
Cut the shelf trim to size and attach it to the front and back of the shelves with 1″ finish nails and wood glue.
Step 7:
Cut the face frame pieces to size and drill 1 1/2″ pocket holes according to the cut list.
Attach the pieces together with 2 1/2″ pocket hole screws and wood glue. Build two face frames.
Step 8:
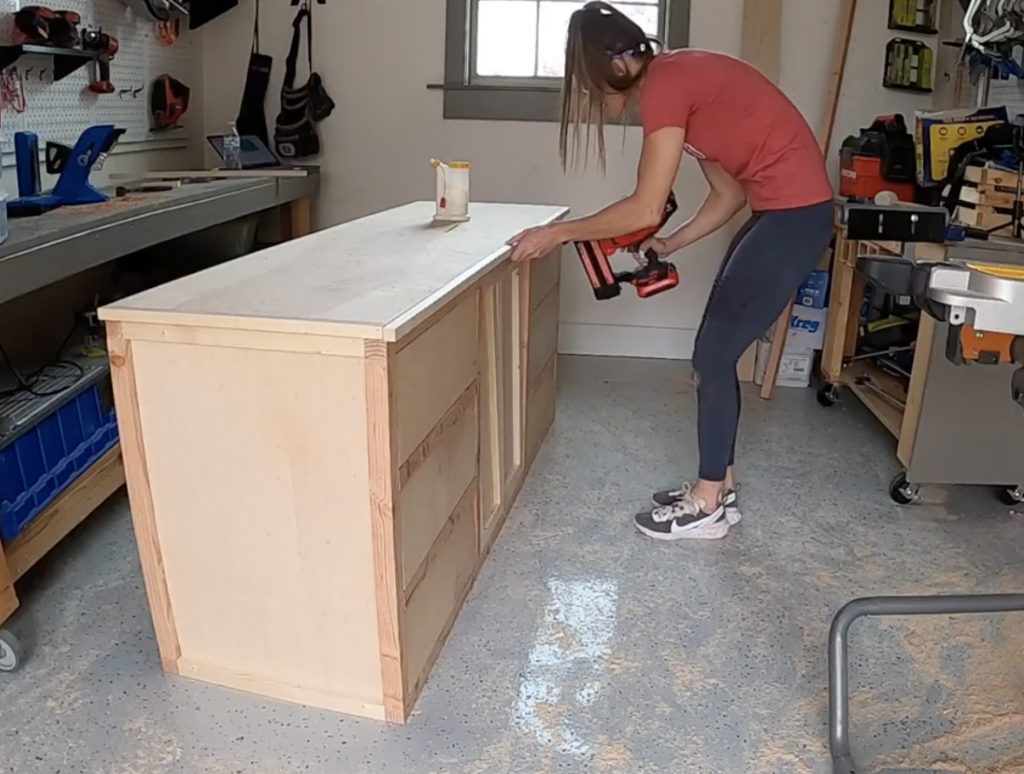
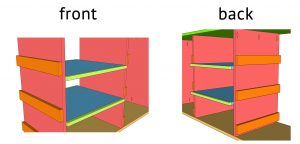
Attach a face frame to the front and back of the cabinet. They should line up flush with the top of the cabinet and the pocket holes should face inside.
Step 9:
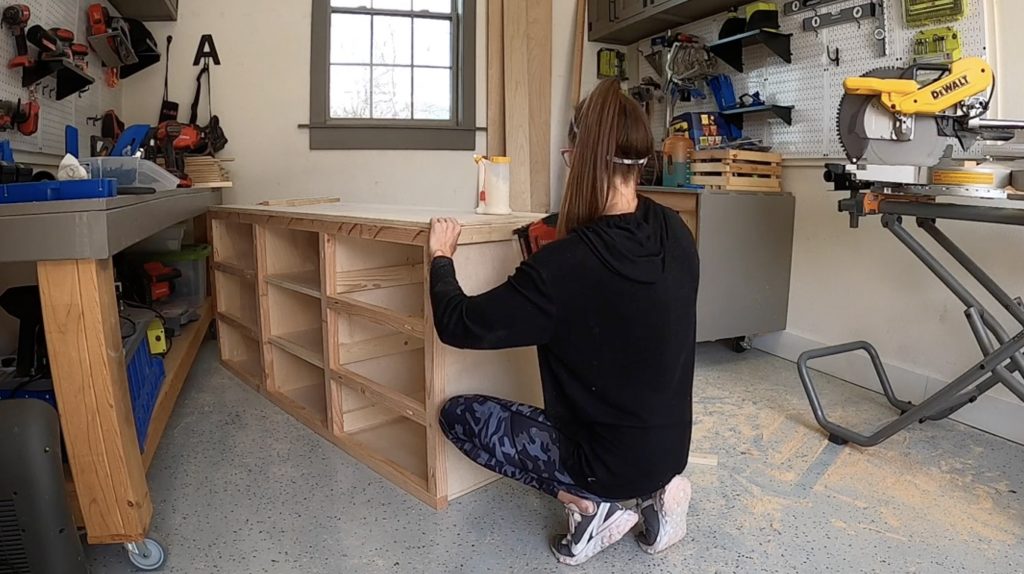
Cut the side trim pieces to size and attach them to the sides of the cabinet with 2 1/2″ finish nails and wood glue. They should line up flush with the top and bottom face frames.
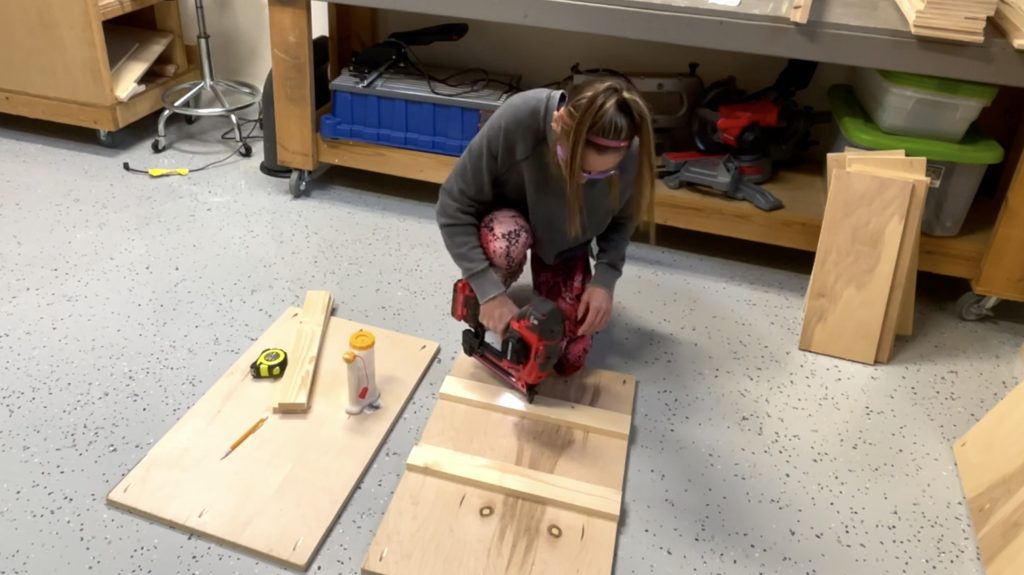
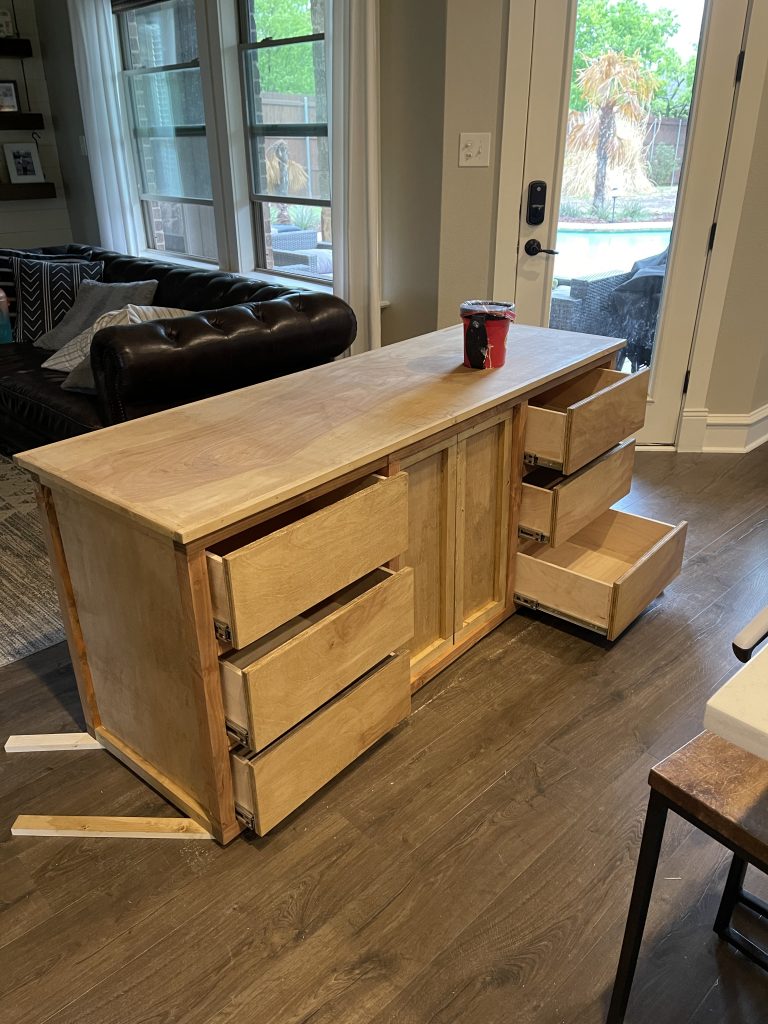
Building the Drawers:
Step 1:
A. Cut the drawer front and side pieces to size. Attach them together with 1 1/4″ brad nails and wood glue.
B. Cut the drawer bottoms to size and attach them to the bottom of the drawers with 1 1/4″ brad nails and wood glue.
Step 2:
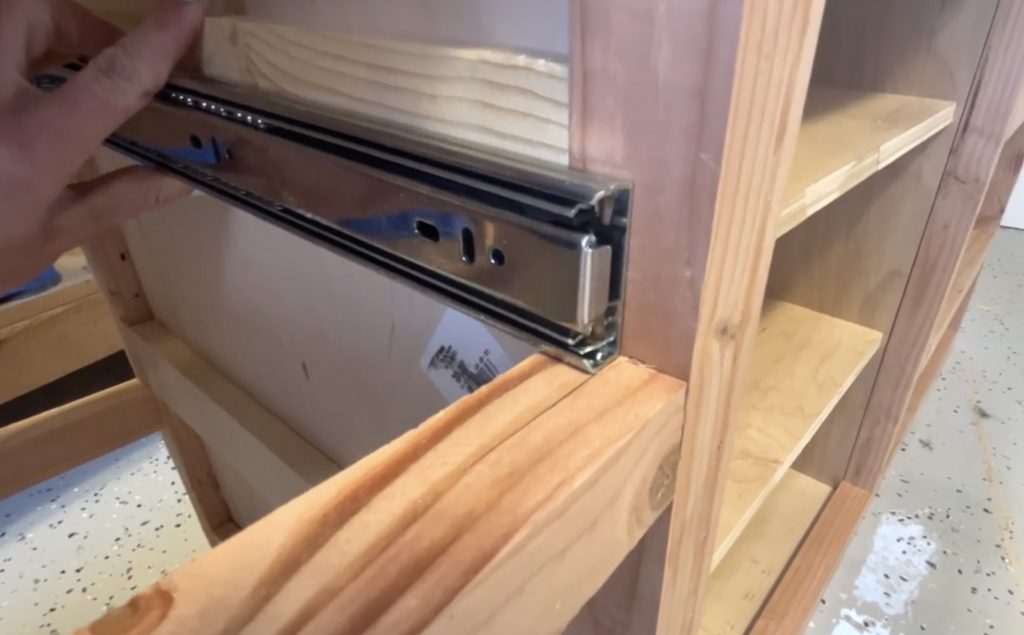
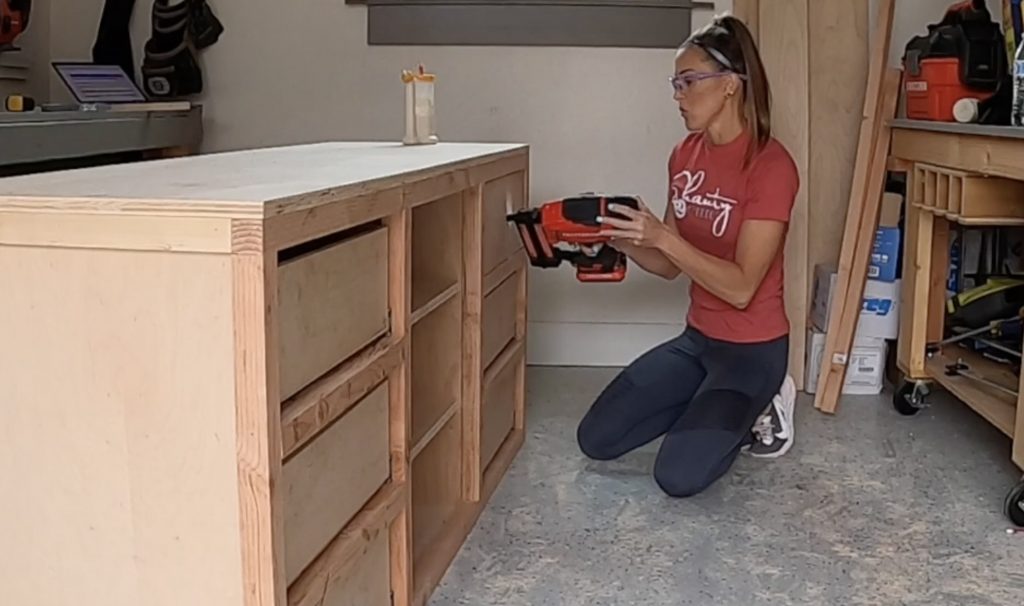
Install the drawers with drawer slides. You can get the detailed instructions for the install in our video!
Step 3:
Cut the drawer faces to size and attach them to the front of each drawer with 1 1/4″ brad nails, from the back of the drawer and into the back of the drawer face. There should be a 1/8″ gap around all sides
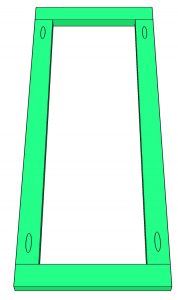
Building the Doors
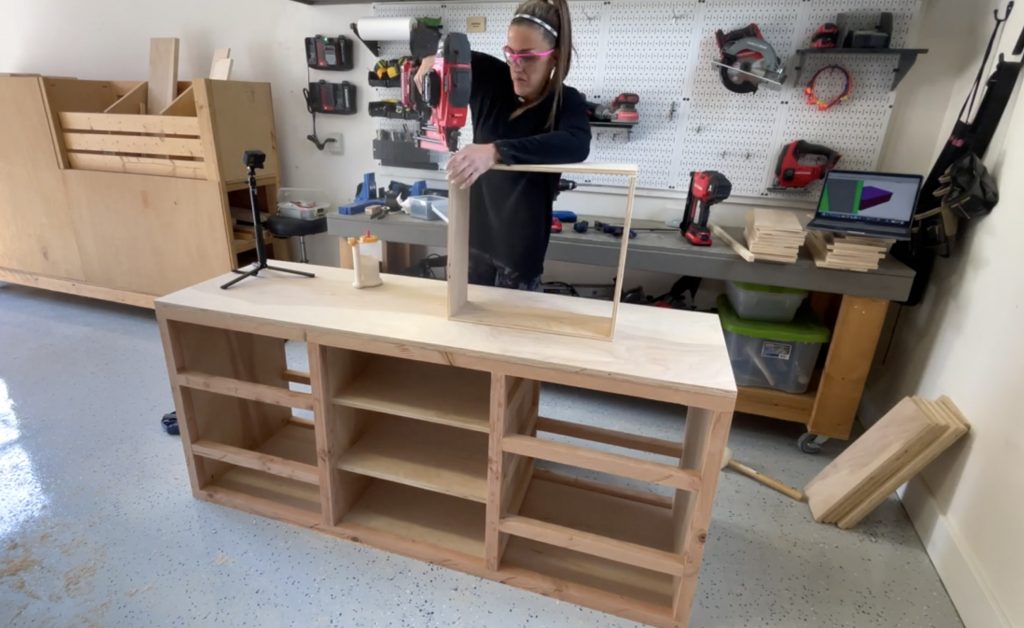
Step 1:

Cut the door frame pieces to size. Drill 3/4″ pocket holes on both ends of the long boards. Attach them to the short boards with 1 1/4″ pocket hole screws and wood glue.
Step 2:
Cut the plywood for the back of the doors to size. Attach them to the back of the door frames with 5/8″ staples and wood glue.
The Finish!
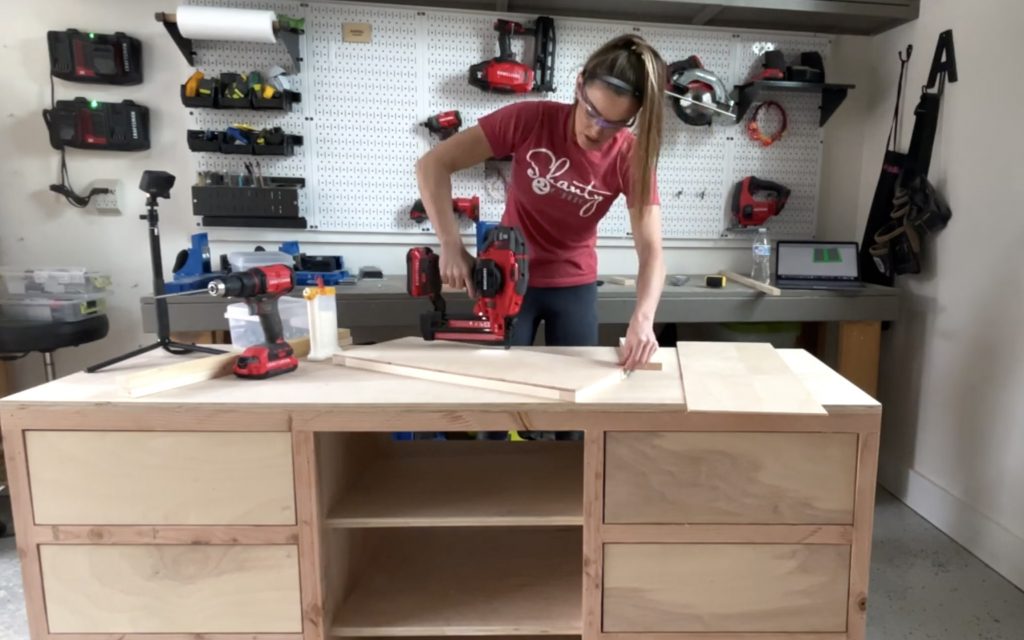
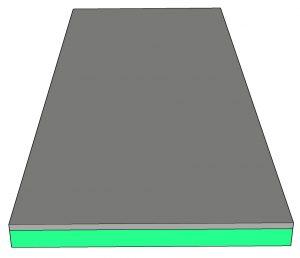
Step 1:
Cut the side top trim pieces to size and attach them to the sides of the top plywood sheet with 1 1/4″ brad nails and wood glue. Measure and cut the fron and back trim pieces to size and attach them the same way.
Step 2:
Fill all your nail holes, sand it down and add a finish!
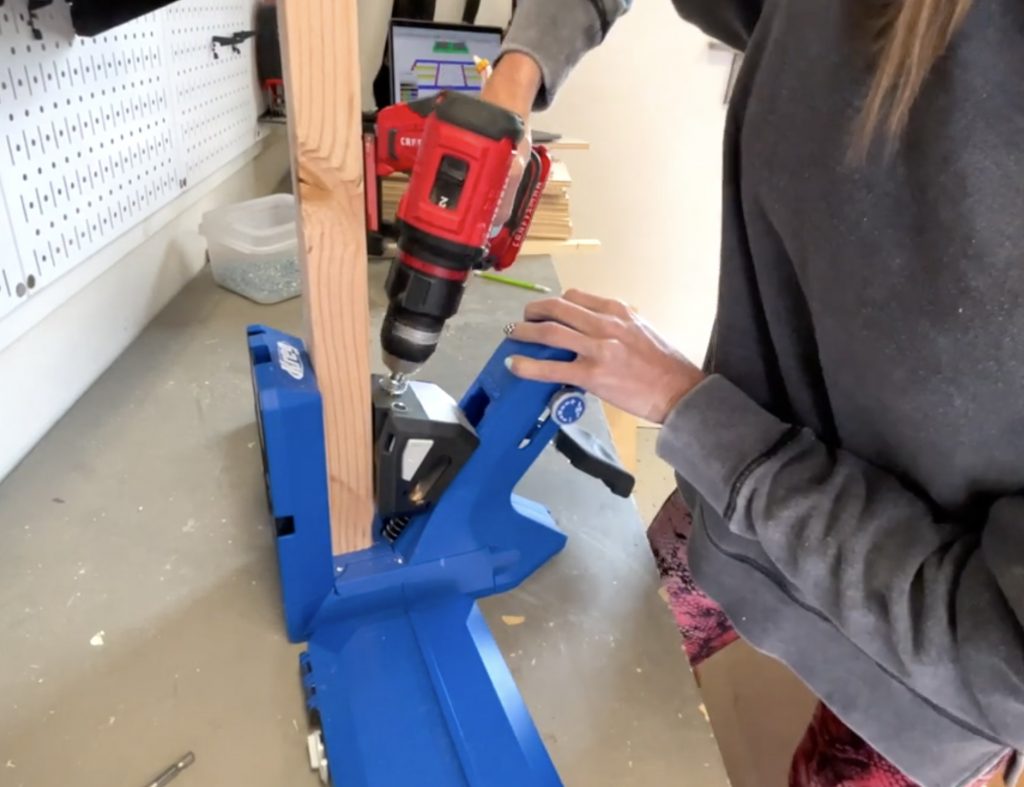
Step 3:
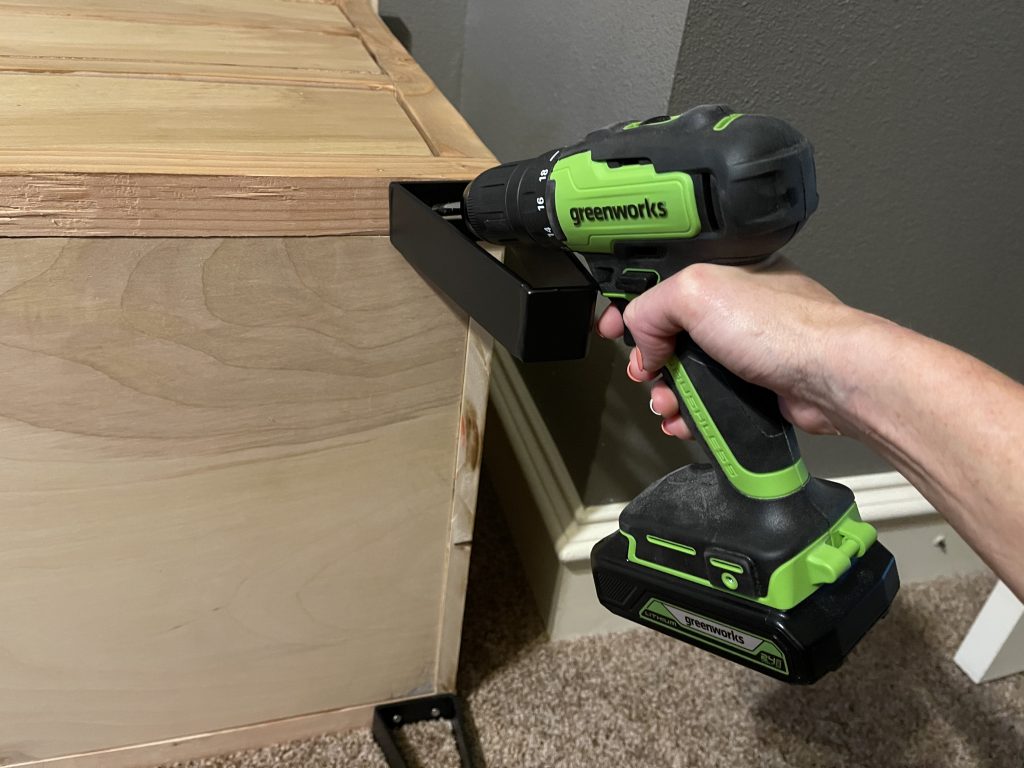
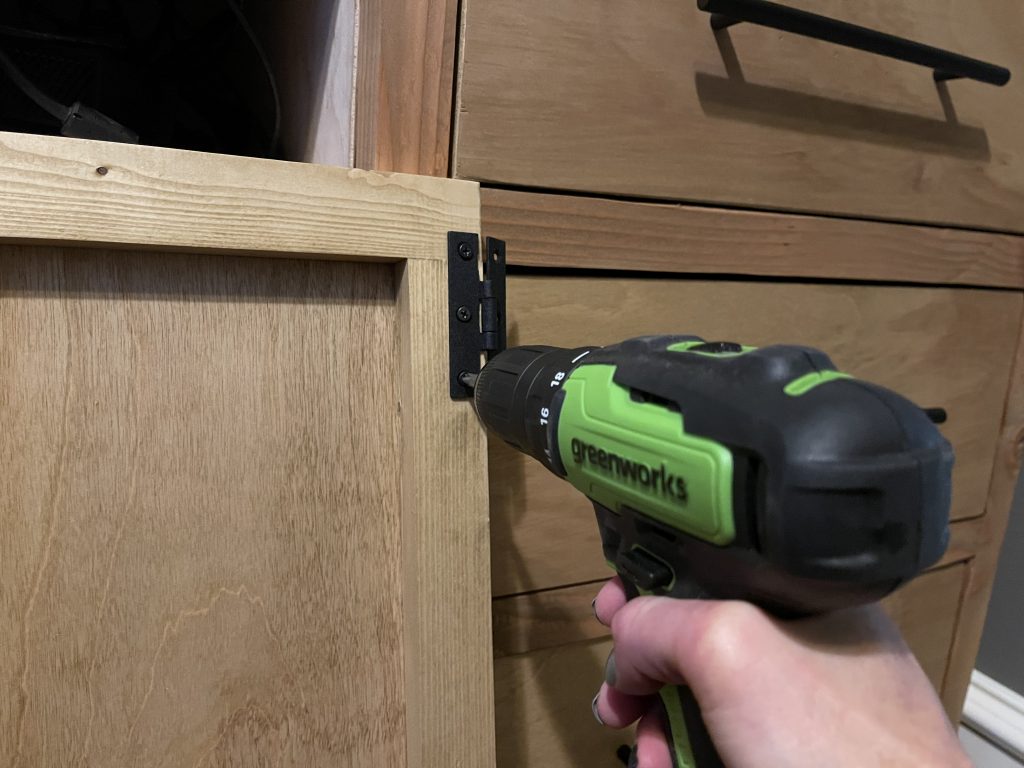
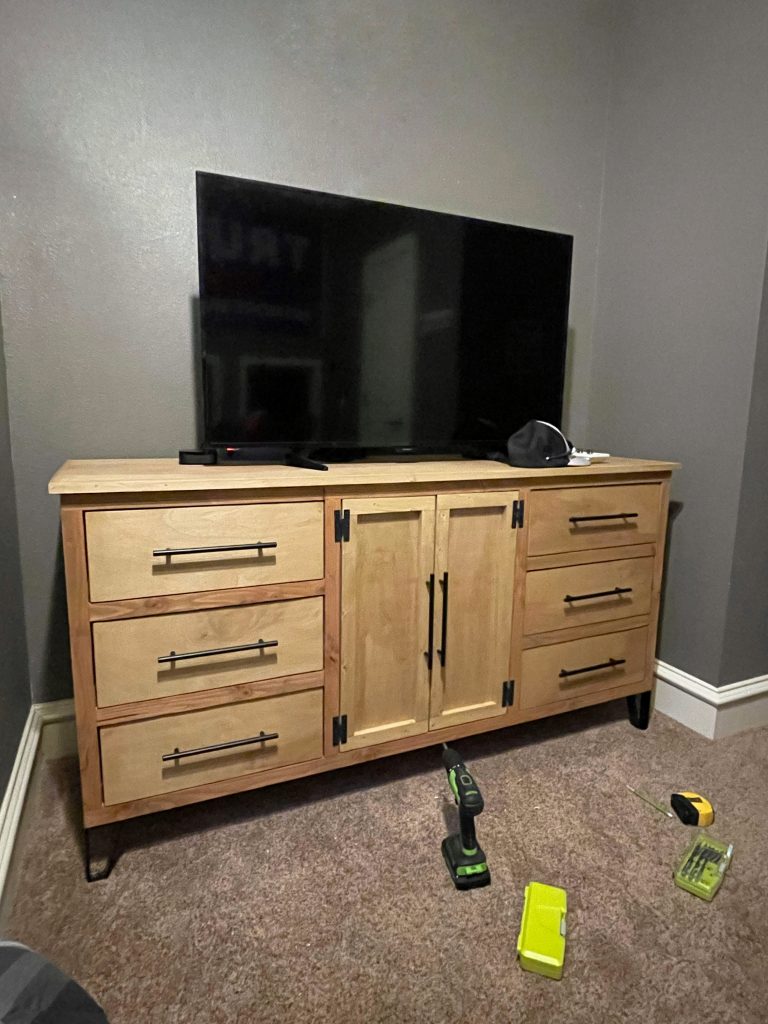
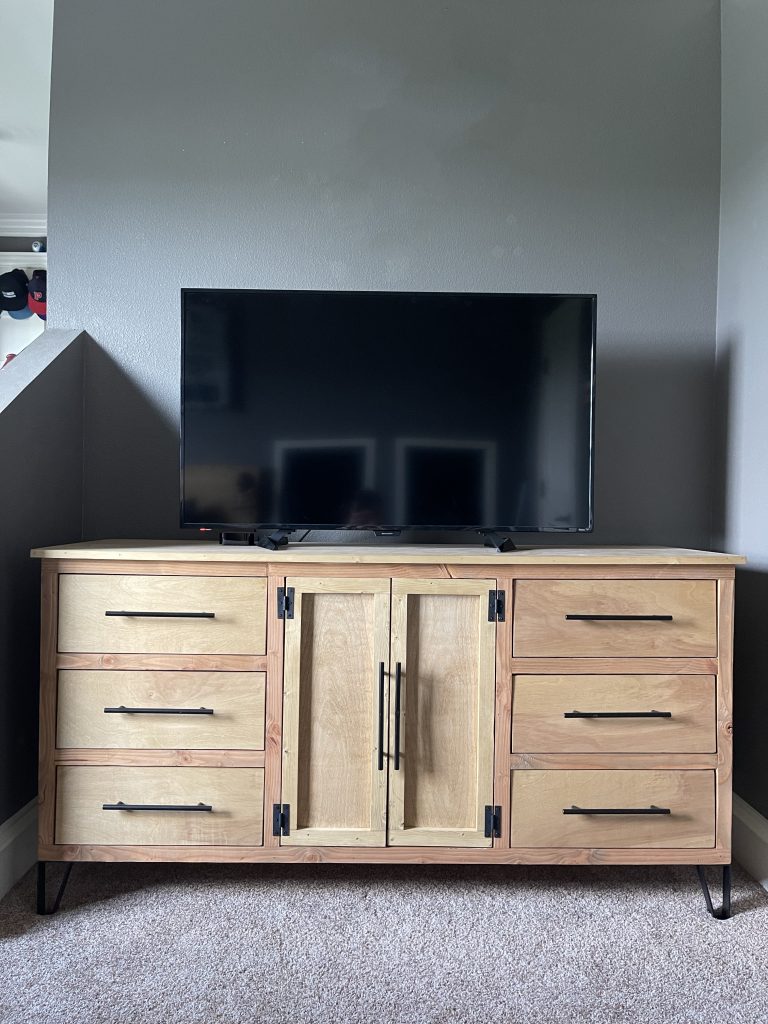
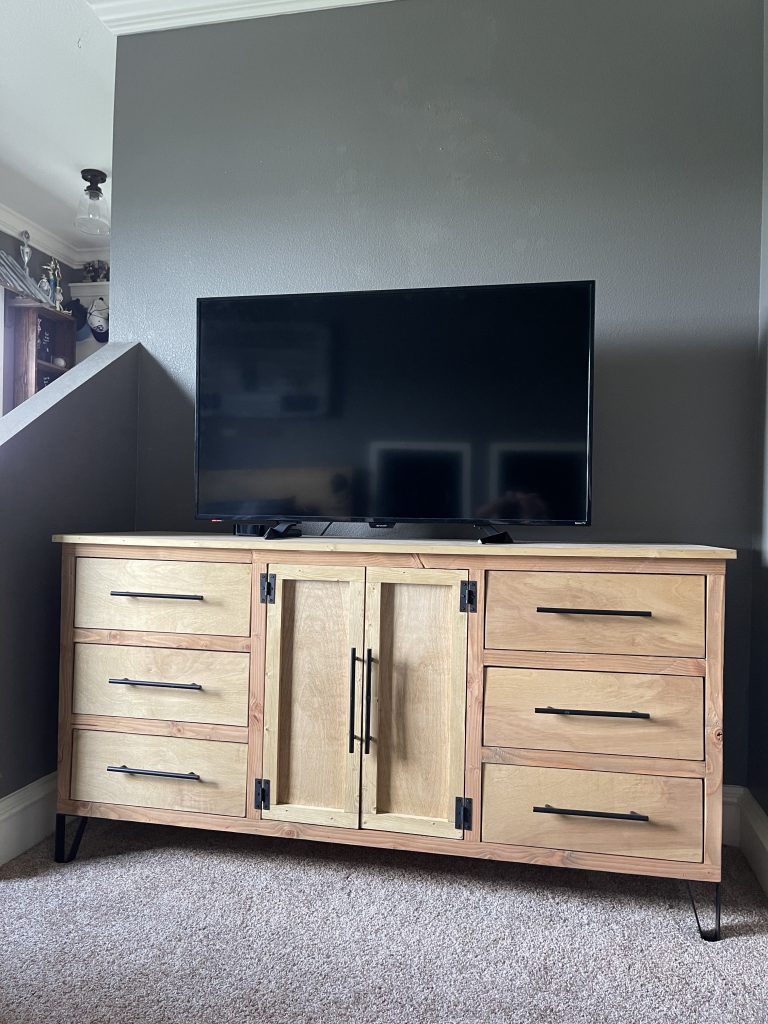
I added modern hairpin legs, bar pulls and exposed hinges for the doors.

Make sure to share your builds with us on social media and use #shanty2chic so we can share them too! Happy Building!
More Dresser Plans!


DIY Modern Dresser
Tools
- Miter Saw
- Drill
- Kreg Jig
- Brad Nailer
- Sander
- Stapler (optional)
- Table Saw (optional)
Supply List
- 8 2x2x8 Framing Lumber Ripped from 2×4
- 3 1x4x8 Common Board
- 2 3/4"x48"x96" Hardwood Plywood
- 1 1/2"x48"x96" Hardwood Plywood
- 1 1/4"x48"x96" Hardwood Plywood
- 1 1/4" Pocket Hole Screws
- 2 1/2" Pocket Hole Screws
- 1 1/4" Brad Nails
- 2 1/2" Finish Nails
- 5/8" Staples
- Wood Glue
- 8 Pulls
- 4 Legs
- 4 Hinges
Instructions
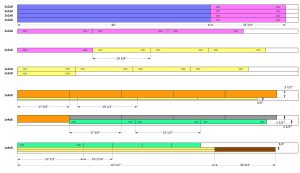
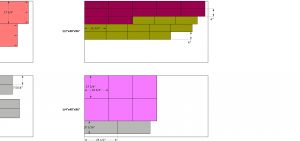
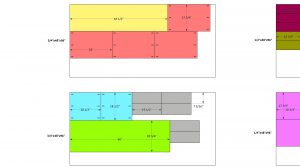
Cut List
- Cut List 1

- Cut List 2

- Cut List 3

Building the Cabinet Frame
- Cut the vertical dividers and cleats to size. Drill 3/4" pocket holes at both ends of each divider. Attach the top two cleats to two of the dividers with 1 1/4" brad nails and wood glue.

- Cut the bottom cabinet board to size. Attach the vertical dividers to the bottom board with 1 1/4" pocket hole screws and wood glue.

- Attach the bottom cleats to the middle dividers with 1 1/4" brad nails and wood glue.

- Cut the cabinet top piece to size and attach it to the cabinet dividers with 1 1/4" pocket hole screws and wood glue.

- Cut the shelf pieces to size and drill 3/4" pocket holes on the ends. Attach them to the inside of the cabinet with 1 1/4" pocket hole screws and wood glue. Note the inset and overhang on the front and back.

- Cut the shelf trim to size and attach it to the front and back of the shelves with 1" finish nails and wood glue.

- Cut the face frame pieces to size and drill 1 1/2" pocket holes according to the cut list. Attach the pieces together with 2 1/2" pocket hole screws and wood glue. Build two face frames.

- Attach a face frame to the front and back of the cabinet. They should line up flush with the top of the cabinet and the pocket holes should face inside.

- Cut the side trim pieces to size and attach them to the sides of the cabinet with 2 1/2" finish nails and wood glue. They should line up flush with the top and bottom face frames.


Building the Drawers
- A. Cut the drawer front and side pieces to size. Attach them together with 1 1/4" brad nails and wood glue.B. Cut the drawer bottoms to size and attach them to the bottom of the drawers with 1 1/4" brad nails and wood glue.

- Install the drawers with drawer slides. You can get the detailed instructions and a link to the slides I used on our website.

- Cut the drawer faces to size and attach them to the front of each drawer with 1 1/4" brad nails, from the back of the drawer and into the back of the drawer face. There should be a 1/8" gap around all sides.


Building the Doors
- Cut the door frame pieces to size. Drill 3/4" pocket holes on both ends of the long boards. Attach them to the short boards with 1 1/4" pocket hole screws and wood glue.

- Cut the plywood for the back of the doors to size. Attach them to the back of the door frames with 5/8" staples and wood glue.

The Finish!
- Cut the side top trim pieces to size and attach them to the sides of the top plywood sheet with 1 1/4" brad nails and wood glue. Measure and cut the fron and back trim pieces to size and attach them the same way.

- Fill all your nail holes, sand it down and add a finish! Get creative with it and make it your own! I added modern hairpin legs and pulls!Make sure to share your builds with us on social media and use #shanty2chic so we can share them too!Happy Building!


This is a beautifully designed DIY project that perfectly balances modern aesthetics with everyday functionality. The clean lines and practical storage make this dresser a great addition to any bedroom, and the step-by-step instructions make the build process approachable for DIY enthusiasts of all skill levels.
Creating furniture like this requires not only good craftsmanship but also high-quality materials to ensure durability and a professional finish. For anyone planning custom furniture projects, **https://www.plywoodbazar.com** is a valuable resource to explore a wide range of plywood, boards, laminates, and other interior materials.
Thank you for sharing such a detailed and inspiring tutorial. It’s a fantastic resource for anyone passionate about woodworking and creating custom furniture for their home.
I absolutely love this DIY dresser project! The design is so modern and stylish, and I appreciate all the detailed instructions you provided. I can’t wait to try this out in my own home. Thank you for the inspiration!
This is a very stylish and practical furniture project. The modern dresser design feels clean, functional, and versatile enough to suit many bedroom interiors. I appreciate how the build combines useful storage with a sleek contemporary look. It’s always inspiring to see bedroom furniture ideas alongside broader interior and material trends here: https://plywoodbazar.com/
A smart and well-crafted DIY creation.
I absolutely loved this DIY Modern Dresser tutorial! The step-by-step instructions were super clear, and the tips on finishing really made a difference. I can’t wait to try this out in my own space! Thank you for sharing!
I absolutely love this DIY modern dresser idea! The step-by-step instructions are clear and easy to follow. Can’t wait to give it a try in my own home. Thanks for sharing such an inspiring project!
I love how you transformed this dresser with such a modern touch! The step-by-step instructions were super helpful, and I can’t wait to try it out myself. The choice of colors really makes it pop! Thanks for the inspiration!
I absolutely love this DIY modern dresser tutorial! The design is so sleek and stylish, and I can’t wait to try it out for my own space. Thanks for sharing such clear instructions and helpful tips!
I absolutely love this DIY modern dresser! The design is so sleek and stylish, and I can definitely see it fitting in with my decor. Thanks for the detailed instructions and helpful tips! Can’t wait to try this project out!