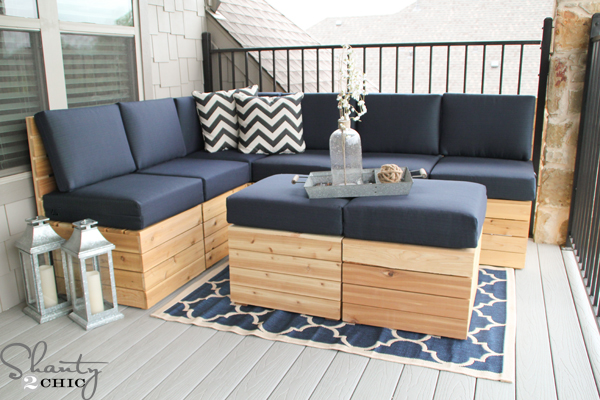
Hey guys!! I’m back today to share the corner piece plans to the Modular Sectional I built!
If you missed the plans for the other pieces you can see them HERE!
To print the plans for the corner piece, you can click the image below or HERE.
 A big thanks to Jay from Jay’s Custom Creations for the printable version to these plans!
The construction of this piece is basically the same but the measurements are different from the other pieces.
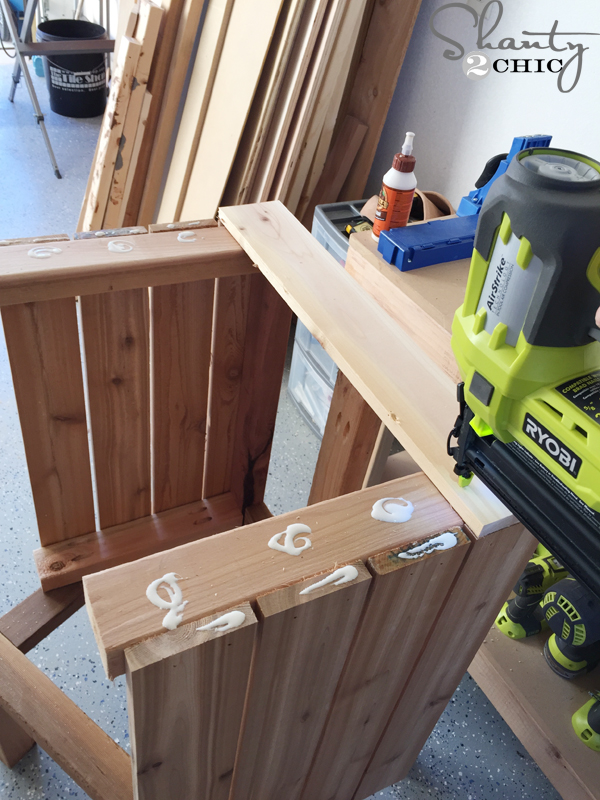 I built the base the same why that I built the others.
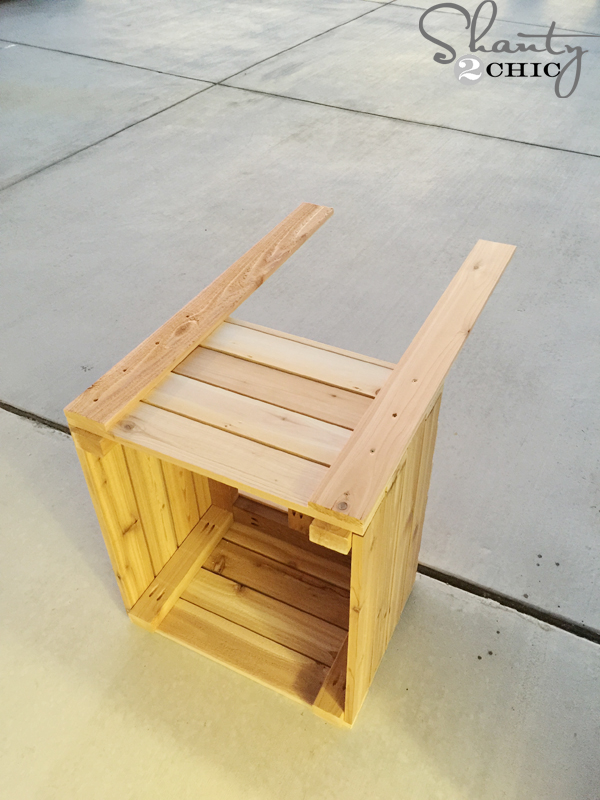 Then, attach the first set of back posts
 Then the second set.
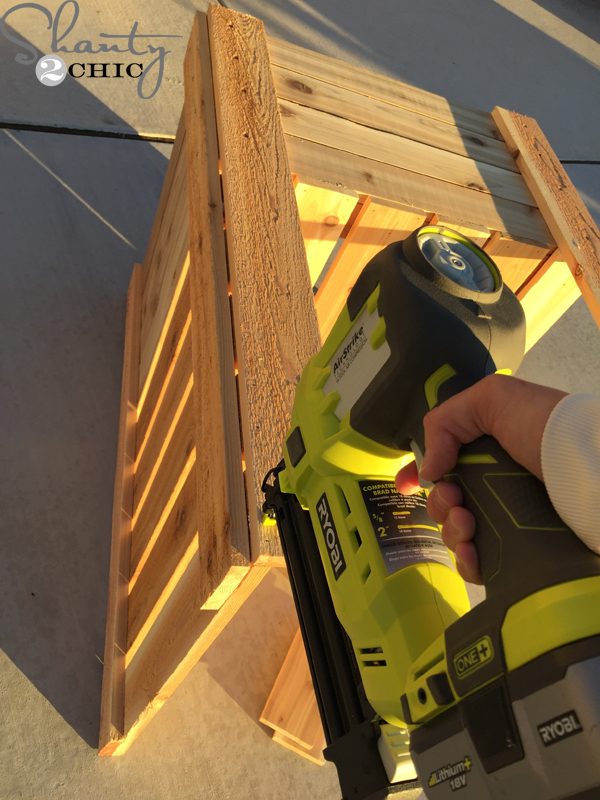
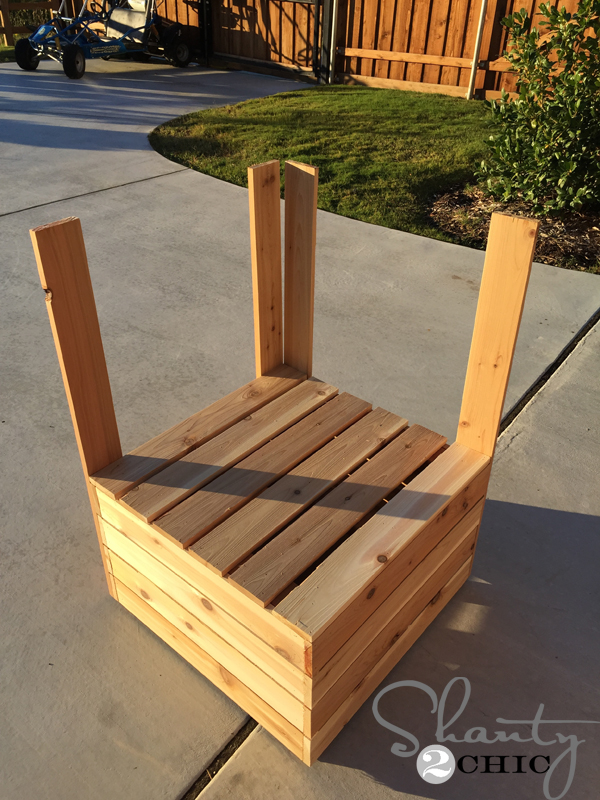
After attaching the first set of back slats, nail the corner post to the other corner post and slats.
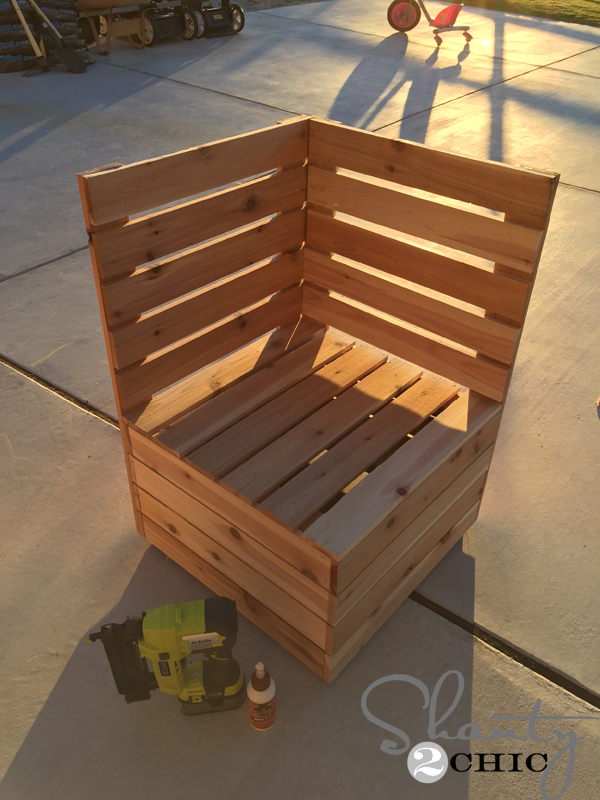 Then, follow up with the slats on the other side.
Easy enough right! This is hands down, my favorite place to spend my time right now 🙂
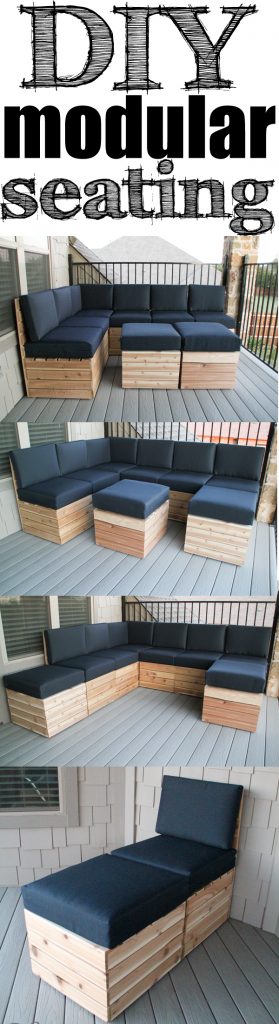 I love all of the different ways you can set up these pieces! And, you can add to it as your budget and time allows! I purchased the cushions at Target and designed the seats to fit the cushions. If you choose different cushions, make sure to modify the measurements on the plans if necessary. You can see the corner cushion that I bought for this piece HERE. ***Update – the link has not been working. You can type the item # in the search bar on target.com and see the cushion there -16343152 The back of the cushion didn’t fit but I had two cushions for my ottomans and used the back cushions for the corner piece. I needed up with one left over corner back cushion but the cost still beat similar cushions that I found.
*Total cost for this build – each base is $20-$25, the optional back rests are $10-$12 making this entire sectional with the ottoman/coffee table included – $225-$250!
Before I go, I need to share with you an AWESOME product that I’m totally impressed with right now!
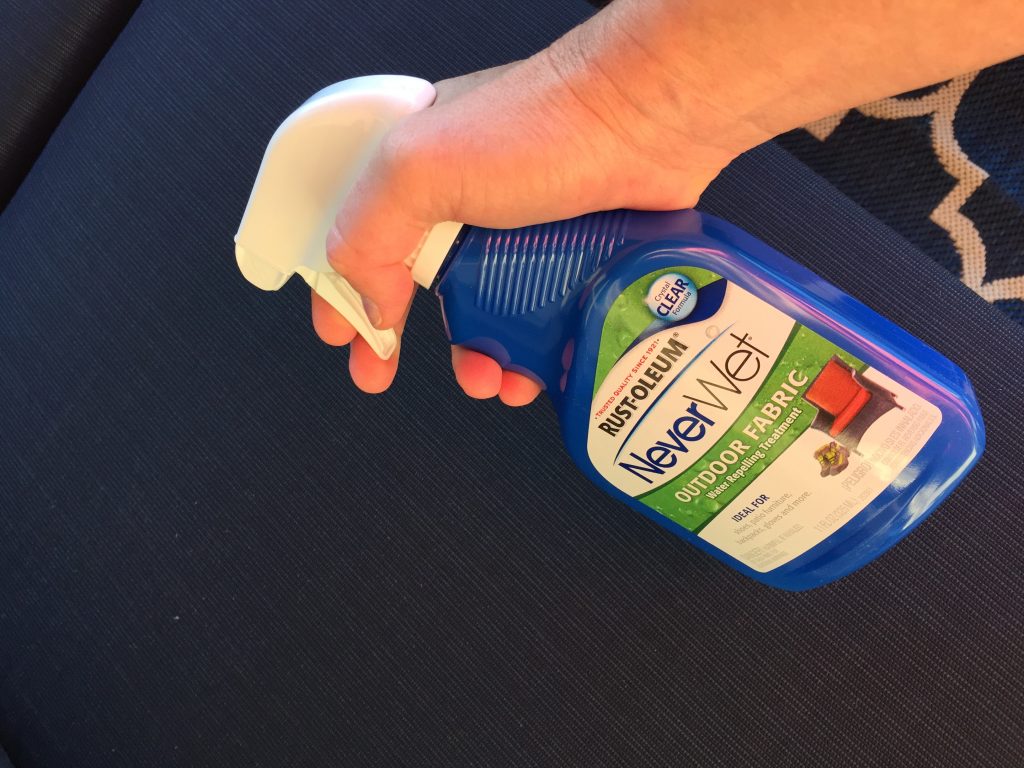 It’s a new product from Rust-Oleum called NeverWet. This one is specifically for outdoor fabric. We learned about it when we visited the Rust-Oleum headquarters a couple of months ago and I was dying to give it a try. We tested it by pouring a coke over the fabric and the coke just ran right off of the cushions. It was incredible! There’s nothing worse than watching a new set of cushions fade and ruin from the elements. This bottle is only $15 at Home Depot and worth every penny. You just spray it all over the cushions and let it dry for 24 hours and that’s it!
Check out this video for more information on it!
Seriously, how cool is that? I’m hooked 🙂
Thanks so much for stopping by!
~Ashley


How am I just seeing this plan🤦♂️. This would have worked great at my previous home where we had a large back patio and plenty of room to entertain! Hope to be building or forever home within the next couple years and I will deffinatly be saving these plans for when we have an actual patio or deck again!
Does the corner HAVE to be a different size? Why can’t I just make it the same size as the others?
I know this post came out years ago, but I’m seeing it now and hoping to build it soon! I was wondering if I could make each seat square instead of slightly rectangular, and then make the corner seat the same square size? I found some cushions online that are 24″x24″ and was hoping to use them for each seat including the corner if I can make it the same size?
These look great! What did you use to finish the wood? A stain, oil, something else?
Hello, is it possible to get an itemeized list of things I would need to complete this project, The corner piece included?
?❤?❤????⭐??❤?❤
⭐?⭐?⭐?⭐?⭐?⭐?
?❤?❤
I built my own using the plans at www. WoodworkPlans.info – highly recommended you check those out too. They are detailed and super easy to read and understand unlike several others I found online. The amount of plans there is mind-boggling… there’s like 16,000 plans or something like that for tons of different projects. Definitely enough to keep me busy with projects for many more years to come haha
Head on over to www. WoodworkPlans.info if you want to learn more – click the pink link above for some more plans! Best of luck on your building adventures!
?❤?❤
⭐?⭐?⭐?⭐?⭐?⭐?⭐?⭐?
✌✌✌✌✌✌✌✌✌✌✌
I built these last week and they turned out great. One thing that I didn’t like is that there was no slant on the back. I felt like they sat up too straight. So what I ended up doing was cutting a treated 2×4 about 2″ wide with a 10 degree slant and attached it to the back of the cube and then installed the back section. I also cut some 1″ sections and installed them further down for support. This made it way more comfortable for me! Just thought that I would share my experience. Thanks for all the plans and the ideas.
Any way you could take a pic and show your tweak on the slant? I want to make mine slanted too. Thanks!!!
Yes, a picture please! Thanks
Picture!!! I like this diy but have been trying to envision the slant!!
I so wanted to make this, I love it! Just priced the cushions on Target using the item number given- $99 for the corner piece alone. Then each bottom/top combo is $65 – that is over $400 in just cushions. Sadly searching online for other cushions…
Deep cushions are expensive. I searched for a long time for deep cushions and this was the cheapest I found for the quality. Please share with everyone if you find something!
just make 7 standard ones and use 3 for a sofa and 2 on each side as a chaise and you don’t need to buy the corner cushion. You can buy 2 chaise cushions and 3 chair to match and this turns out cheaper.