I finally got around to building my son nightstands for his room! I have been waiting for a design to come to me and it finally did! What’s even better is that this is such an easy nightstand to build! I was able to build 2 with only 5 1×12 boards, which is only about $90 in lumber!
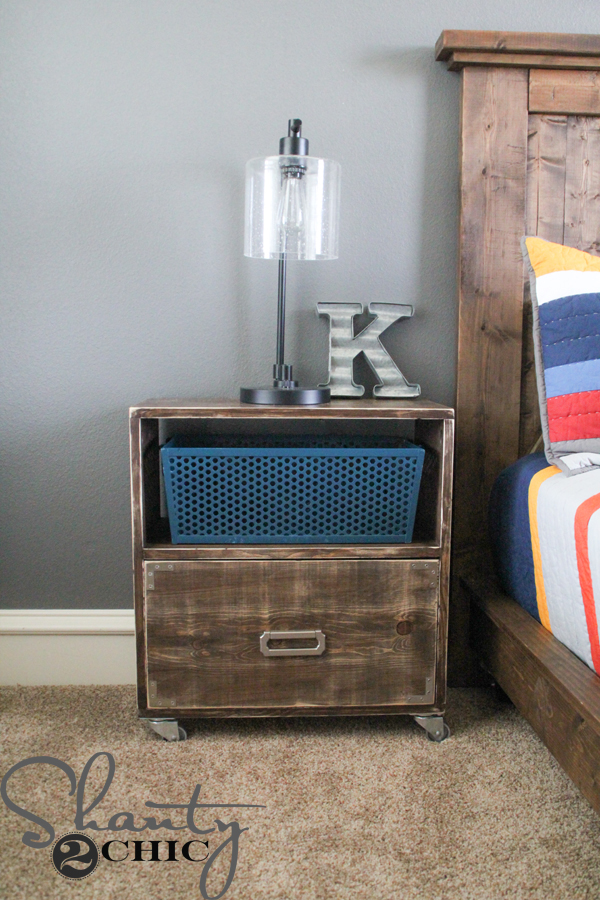
I love the how rustic and industrial it is! It’s a perfect fit with the platform bed that I built him.
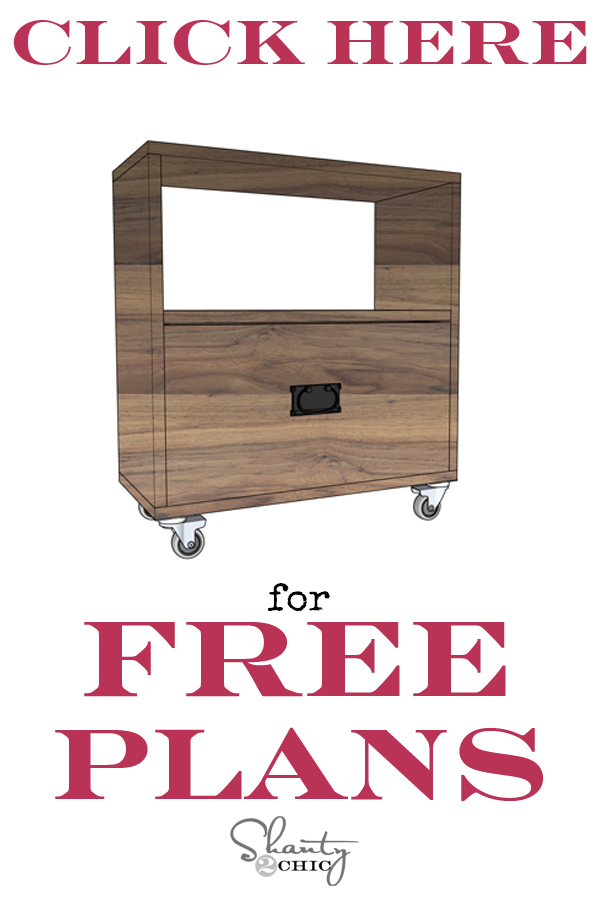
Now for the plans 😉 You can click HERE or the image below to print the free PDF plans. Also follow the tutorial below, for help as you are building! (The plans are for one nightstand).
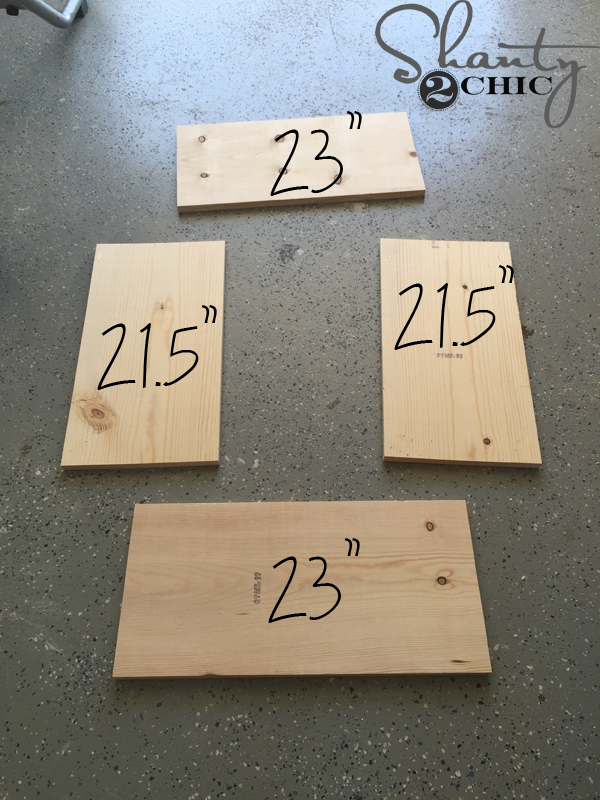
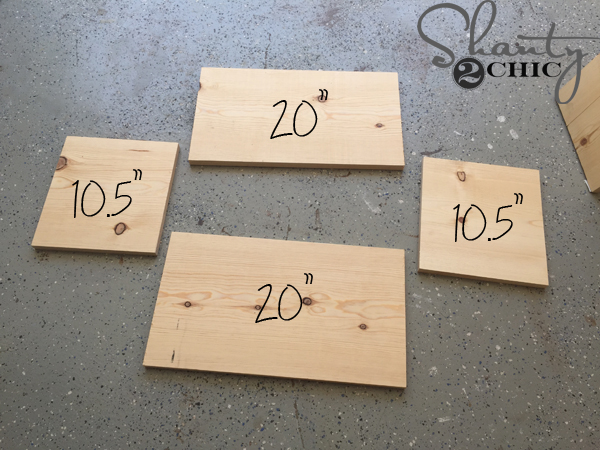
I started by making the cuts for the frame of the nightstands.

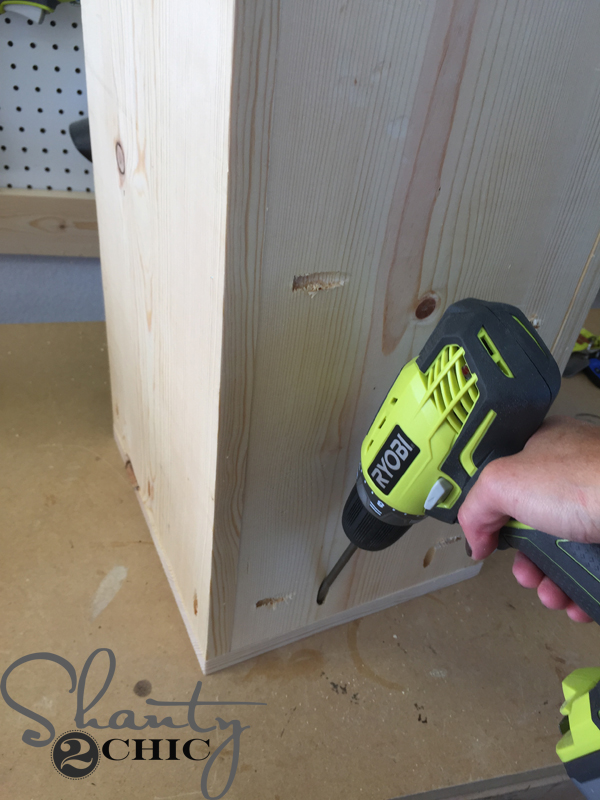
Then I used my Kreg K5 to drill 3/4″ pocket holes into the ends of the side pieces. You can see the Kreg K5 HERE.

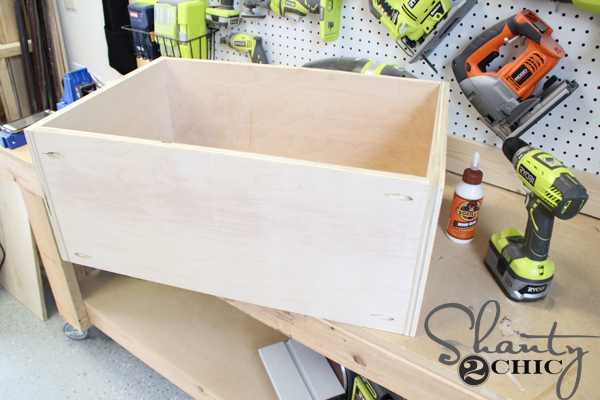
I used wood glue and 1 1/4″ pocket hole screws to attach the side pieces to the top and bottom pieces of the frame.
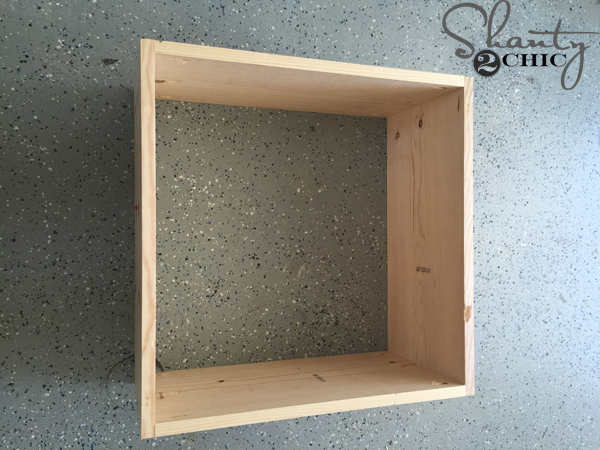
Now you should have an open box for the frame.

Next, add the shelf with 3/4″ pocket holes and 1 1/4″ pocket hole screws. Refer to the plans for the correct placement of the shelf.
Once the shelves were attached, I made my cuts for the drawers and drilled 3/4″ pocket holes on the front and back drawer pieces.
I used wood glue and 1 1/4″ pocket hole screws to assemble the drawers.
Now, for the drawer bottom, measure the inside of the bottom of the box and you will cut down a piece of 1×12 to fit. This way you can build the entire nightstand with 1×12 boards. Drill 3/4″ pocket holes on the bottom side of the piece and attach it to the inside of the drawer with 1 1/4″ pocket hole screws.
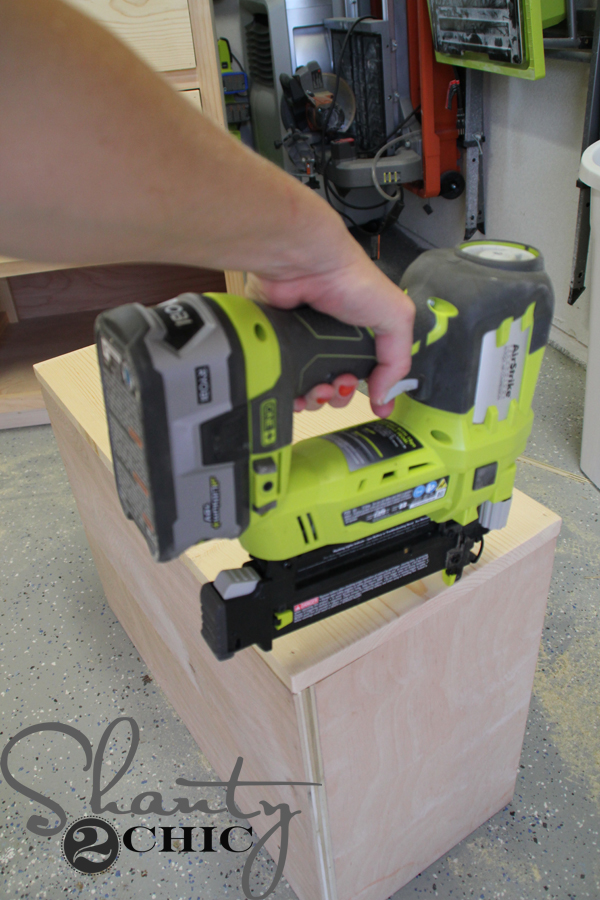
Finally, attach the face of the drawer with 1 1/4″ brad nails and wood glue.

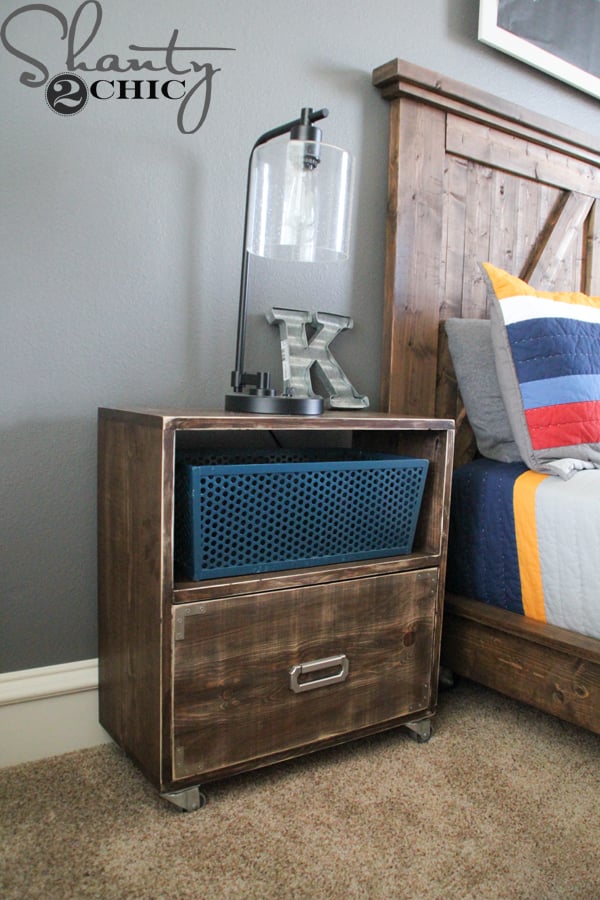
Ready for stain 🙂
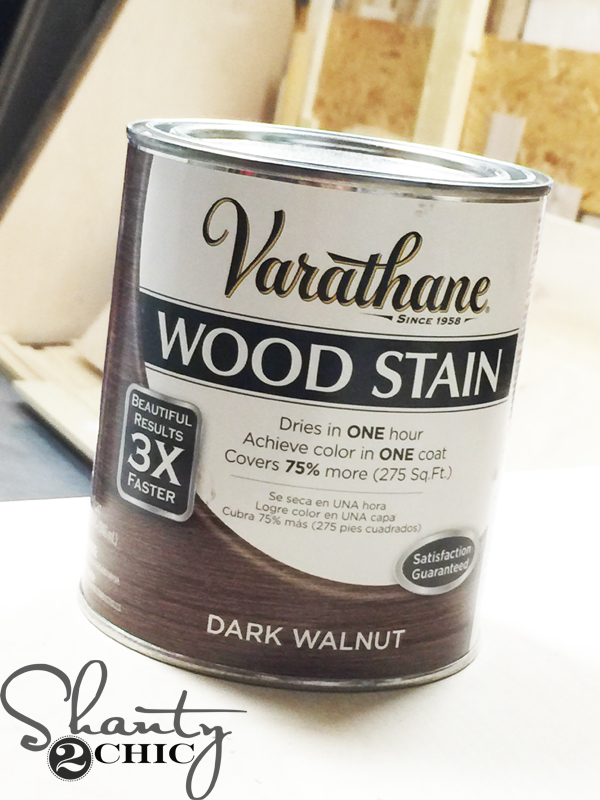
I applied one coat of Varathane Dark Walnut to the entire piece. Wipe it on with a clean cloth, wait about 5 minutes and wipe the stain with a new clean cloth to spread the stain evenly on the wood.
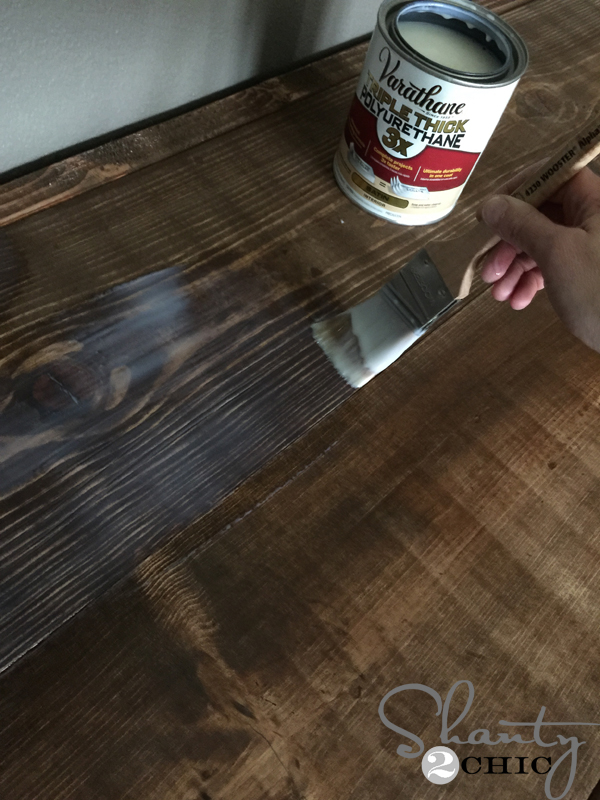
When the stain was dry (about one hour) I applied one coat of Varathane Triple Thick Polyurethane, in satin, to the entire piece. This poly is amazing, it won’t yellow and it is equal to three coats of basic poly.
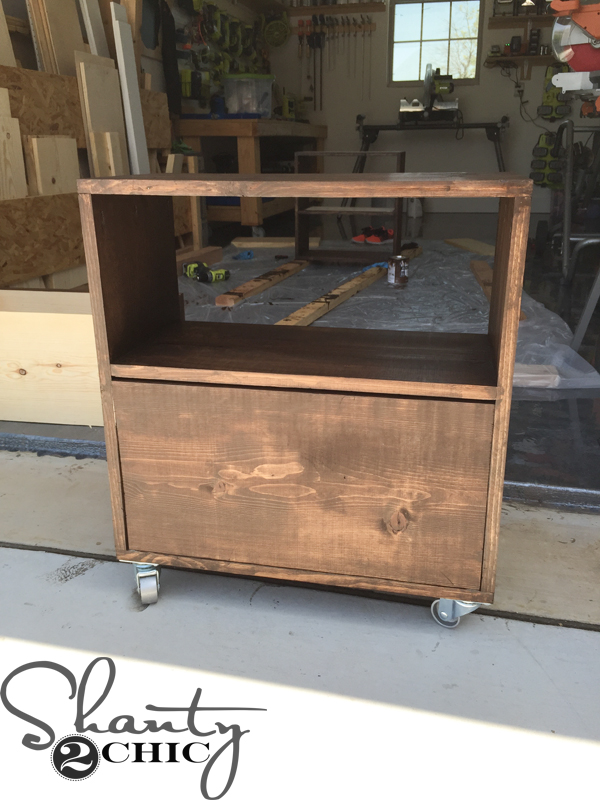
When the finish was dry, I attached four, 2″ casters to each nightstand. I bought these casters.
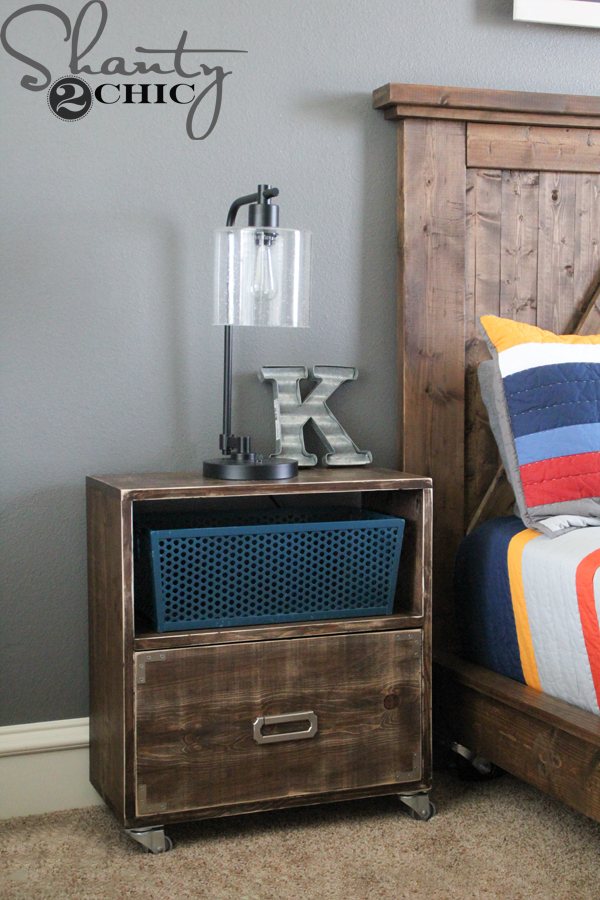
I attached the drawer hardware. I used the Liberty Campaign hardware from Home Depot.
That was it! I found the cute blue baskets on clearance at Michael’s 🙂
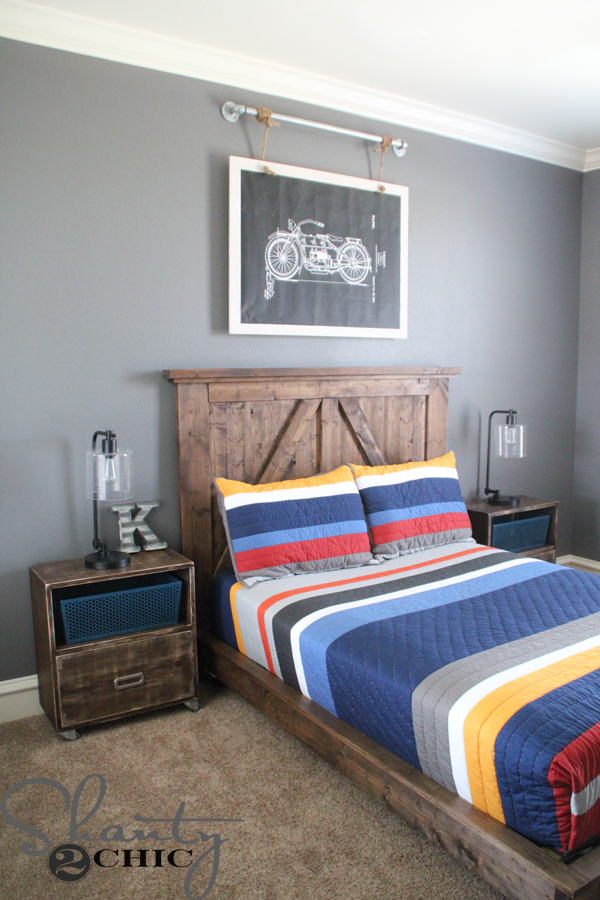
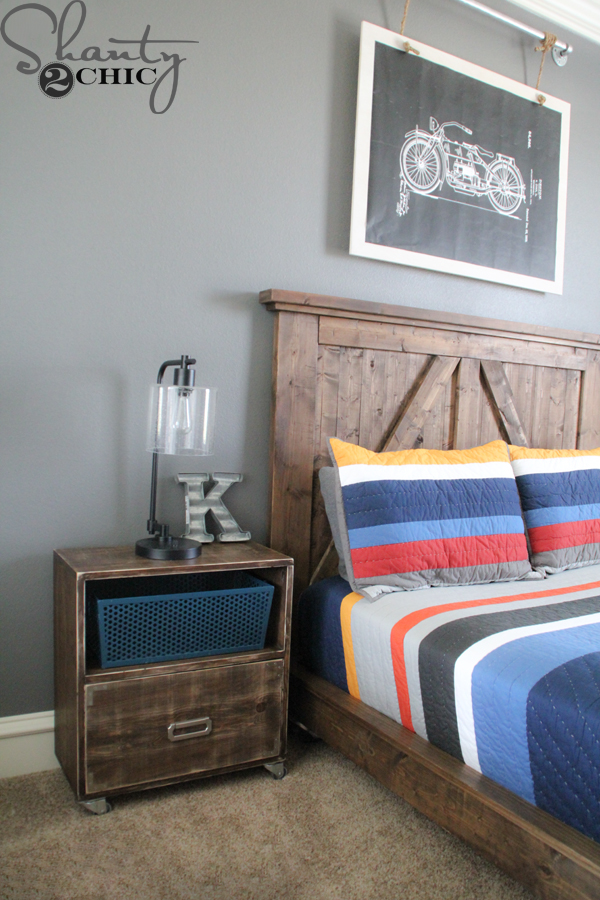
I’m loving how is room is shaping up 🙂 I’ll be back soon to share the tutorial for that motorcycle wall hanging – it’s an easy DIY!
You can find the plans to the bed HERE and the headboard HERE!
The quilt is from Pottery Barn Teen, the lamp is from Target and the “K” is from Michael’s.
Thanks so much for stopping by!
~Ashley


This DIY Nightstand on Wheels from Shanty 2 Chic is perfect for any bedroom! Stylish, functional, and easy to build. Great project! Don’t forget to check out jackets at https://blackleatherjackets.co.uk/product/cafe-racer-motorcycle-distressed-jacket/
Great Post! I really like it.
Thanks for this fantastic article, it gives me very helpful information.
Global satellite geodata has become available with almost free access around the world. The miniaturization of space technologies contributes to their flexible use in various industrial zones.
We have an onsite bar and delicious, freshly prepared seafood for lunch and dinner at all of our restaurants across the United States, which are open seven days a week.
That’s nice and beneficial post. Great job!
Wow! Thank you so much for these gardening tips. This information has been really important thanks for sharing this fabulous post…
Does the drawer need glides? I don’t see any information on this?
Everything you guys do are beautiful. 🙂 I can’t wait for that motorcycle art work tutorial. Thanks again!