Hey friends! Happy Friday! To keep up with all of our projects from beginning to end, be sure to follow w us on Instagram!
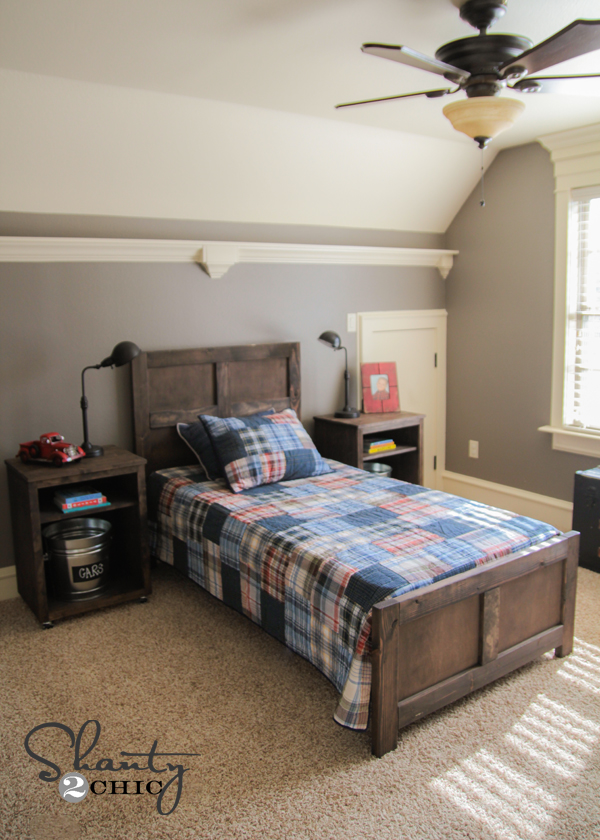
Many of you know that I have 5 kiddos. My youngest (and by far craziest) little guy turned two a few months ago. I have been avoiding putting him in a big boy bed because I knew that basically meant the end of my life. 😉 I did have to follow through when he recently mastered the crib escape.
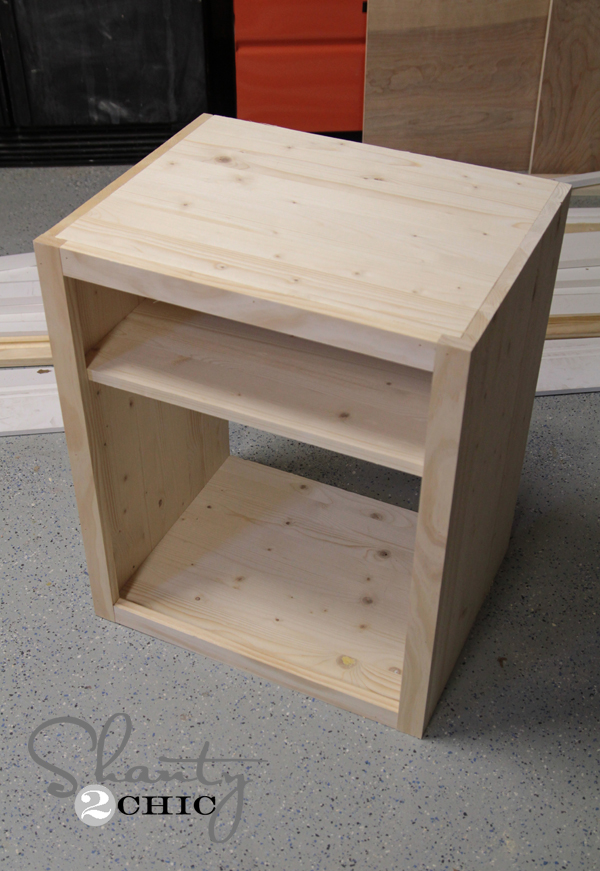
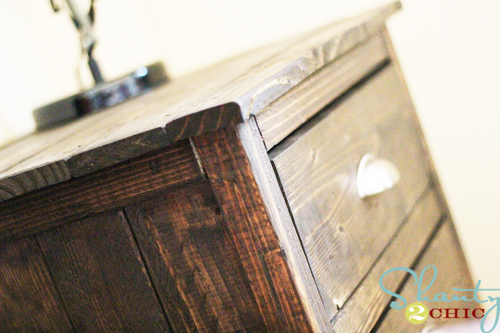
I just built his older sister a new bed, and I knew her old Pottery Barn inspired bed I built her would go perfectly in his room. I set it all up and decided to design him some fun storage nightstands to go with it. Here is how they turned out!
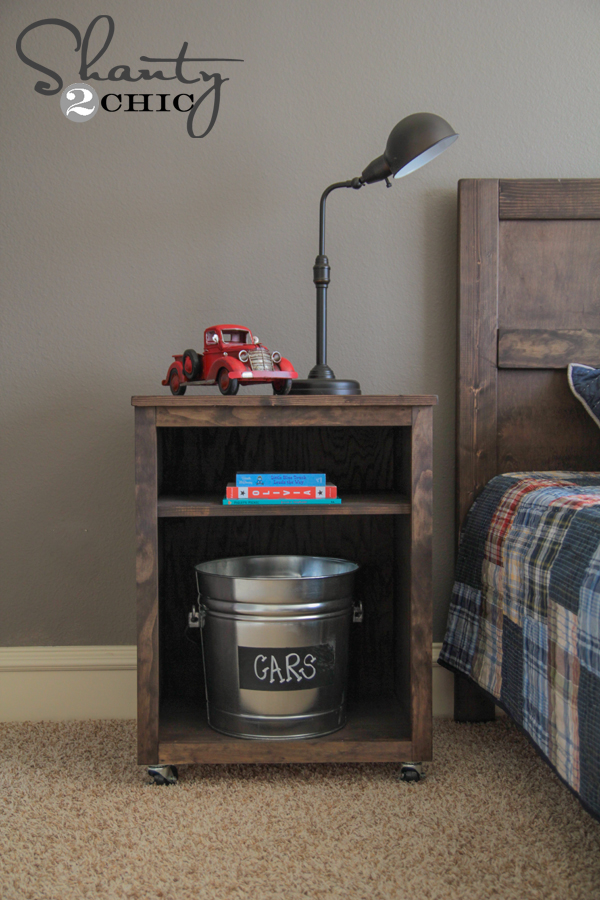
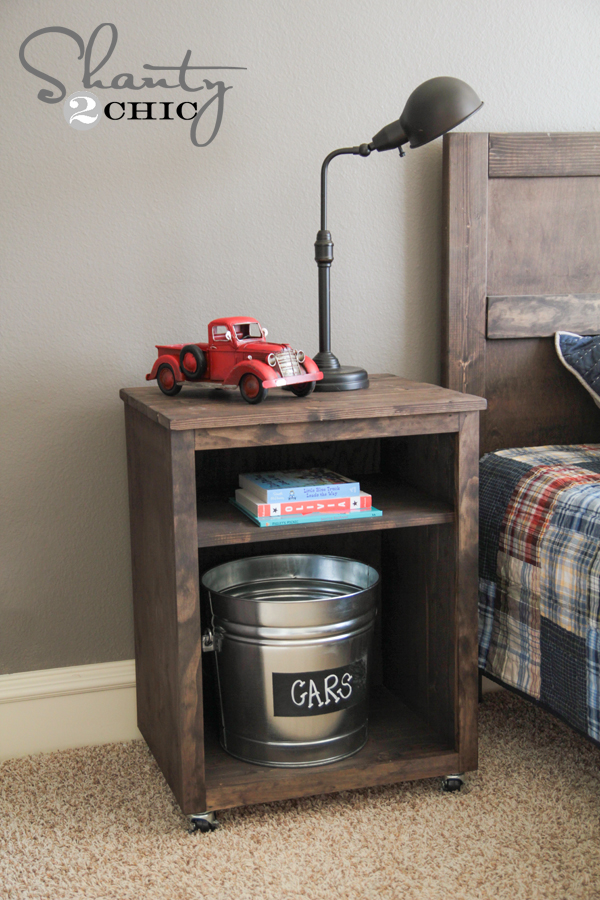
How cute are those? These are so simple and cheap to build!
Let’s get started!
DIY Nightstand Wood List
1 4×8 sheet of 3/4″ Purebond Hardwood Plywood ripped into 16″ boards (you can also use 16″ x 8′ pine project panels, but the cost will be higher
1 – 1 x 2 x 8 pine board
2 – 1 x 4 x 8 pine board
1/4″ hardwood plywood for the back (optional)
I opted to use project panels for these nightstands. I was in a huge hurry when I picked up my supplies, and I didn’t want to wait and have my wood ripped down. It made the cost higher, but I do like how they turned out. I do prefer using hardwood plywood when I can.
Start by making your cuts!
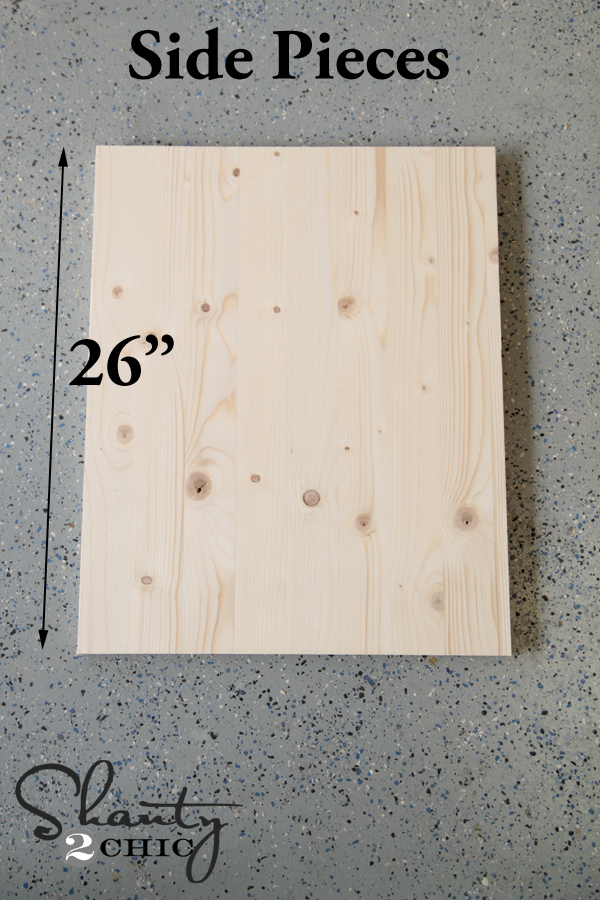
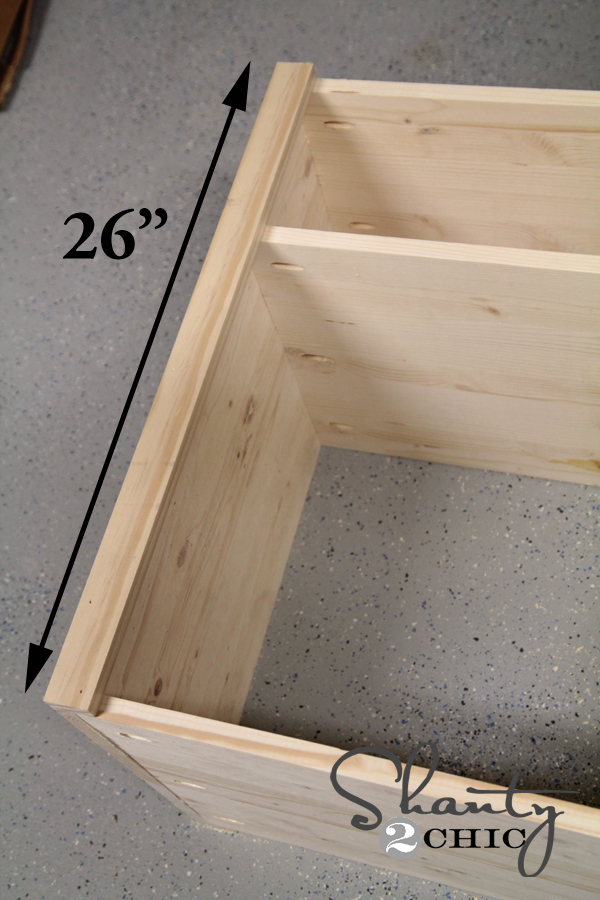
I used my Ridgid miter saw for this part. From the 16″ boards, you will have 2 sides at 26″ each.
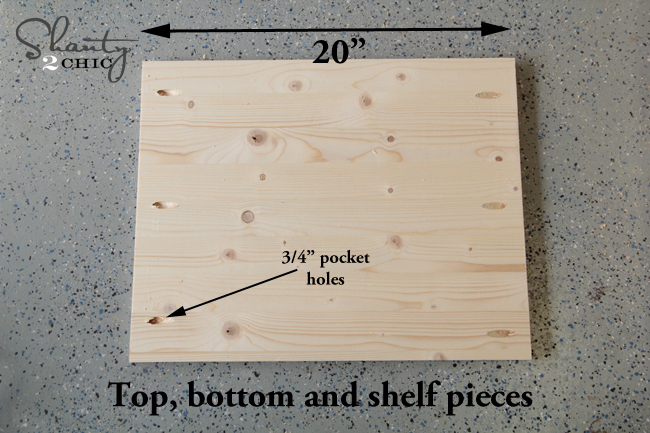
You will also have 3 pieces at 20″ each that will be your top, bottom and shelf pieces. I used my Kreg Jig to add 3/4″ pocket holes on one side of each of these pieces.

This is what those 3 pieces should look like now…
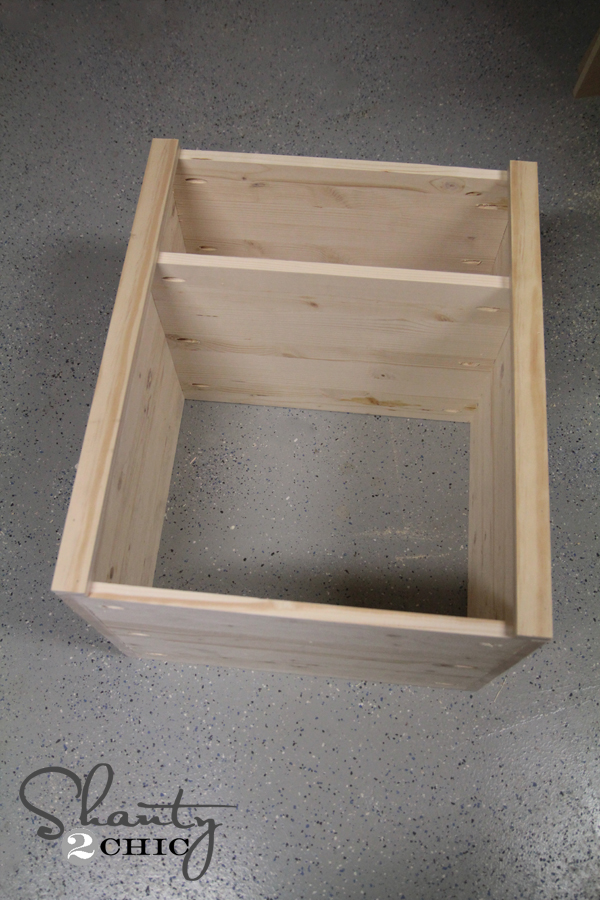
Now to assemble! I used a bit of Gorilla wood glue and 1 1/4″ pocket hole screws to attach my shelf pieces to my sides. Here is how I lined them up!
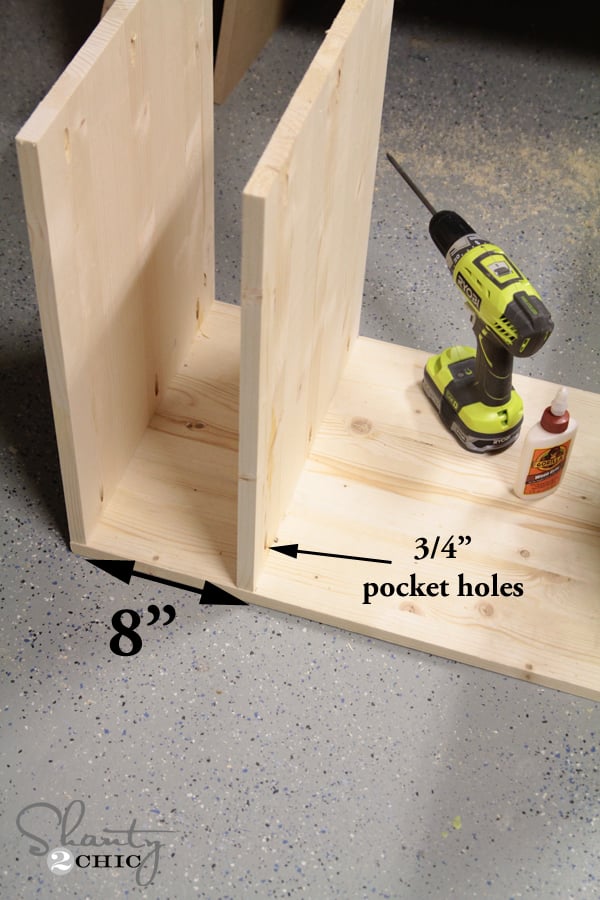
When you have all 3 pieces attached it should look like this.
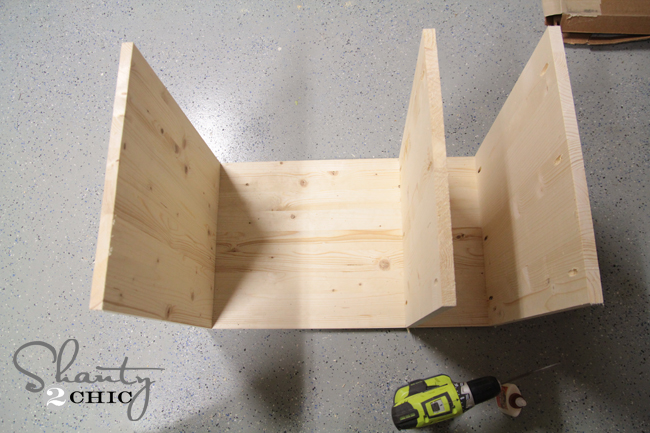
Next, I flipped the whole thing over and attached it to my other side piece the exact same way… Easy peasy! Here it is ready for trim!
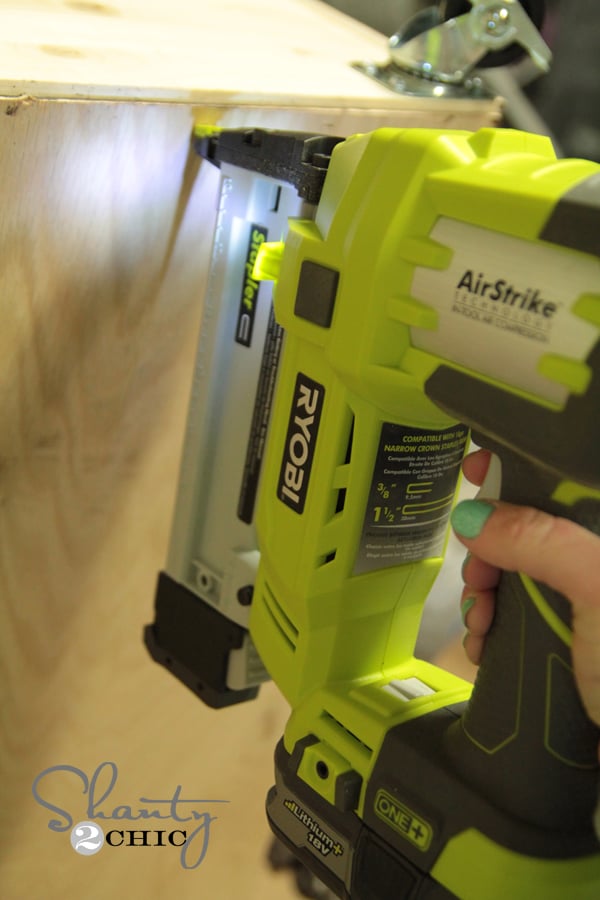
For the trim I used my Ryobi Airstrike Nail gun and wood glue to attach each piece. I can’t tell you enough just how easy and awesome this tool is. It’s easier than using a hot glue gun people! You just stick it where you want your nail and shoot a nail in… Bam. That easy. Get one. You will thank us 😉
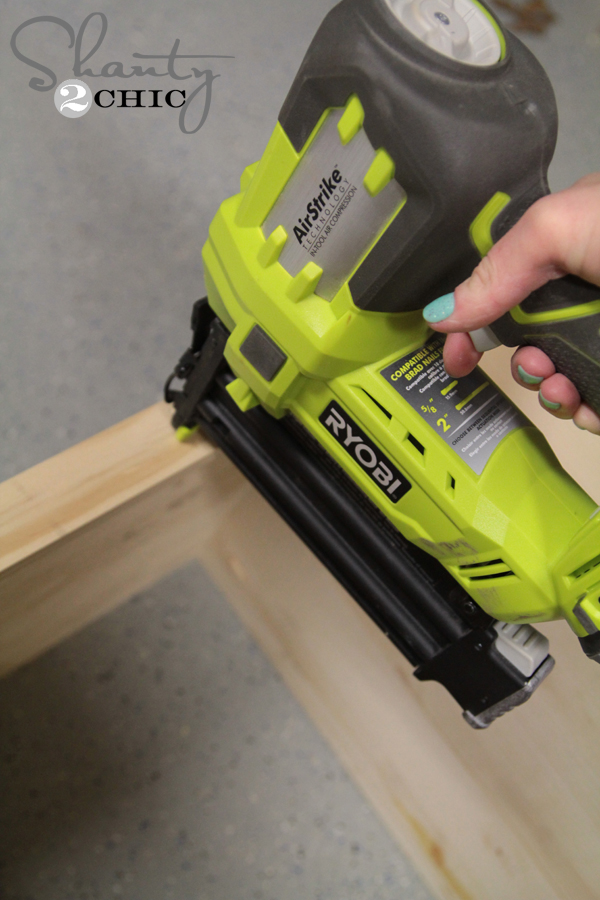
I did my side pieces first like this. I used the 1×2 board for this part.
Both sides attached…
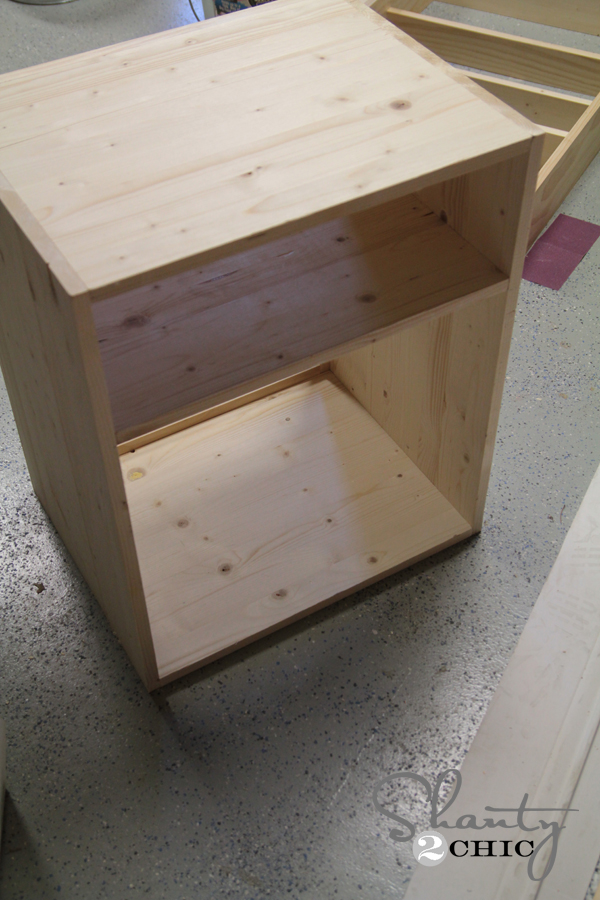
Now for the top and bottom pieces!
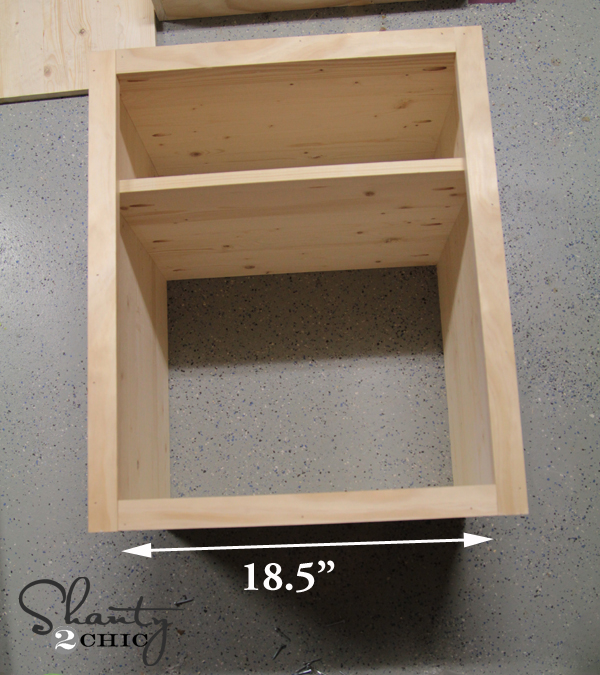

Almost done! Here it is ready for the planks on top!
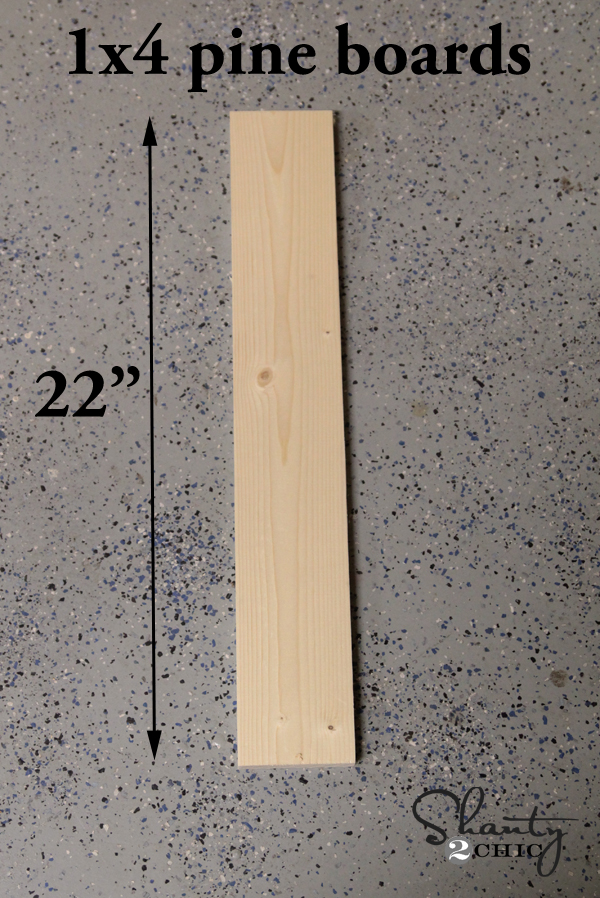
I decided to plank the top of these to dress them up a bit. I used the 1×4 board for this part. You can save more money and use furring strips too… I love how they look planked. For each table, I used 5 cuts at 22″ each.
Before attaching them, I used my Ryobi Corner Cat sander to round each of my edges on each board. I feel like it gives them a “I didn’t make this in my garage” look… Don’t you think?
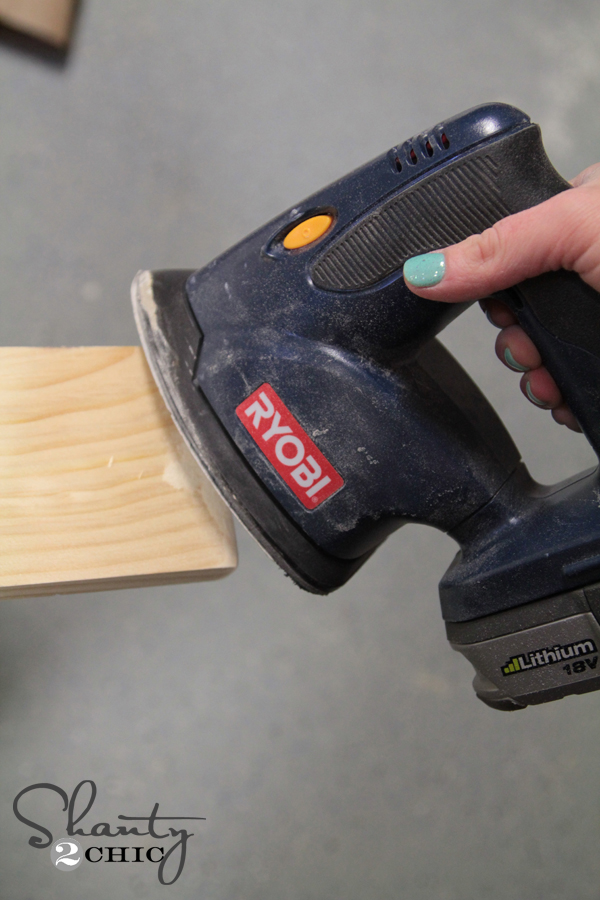
See how they are a bit rounded now?

Again, I used my nail gun and wood glue to attach each plank. These have about a 1/2″ hangover all the way around the table.

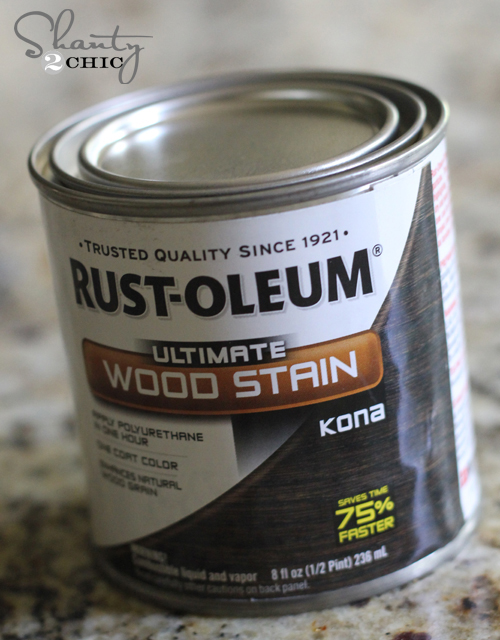
My next step was stain! I used the same color I used on the Pottery Barn knockoff bed for these. It’s Rust-Oleum Ultimate Wood Stain in Kona. Oh Kona… How I love you.
Staining is SIMPLE. It’s even easier than painting! All you do is use a brush to wipe on a little bit at a time. I do one side at a time and this is my favorite staining brush…
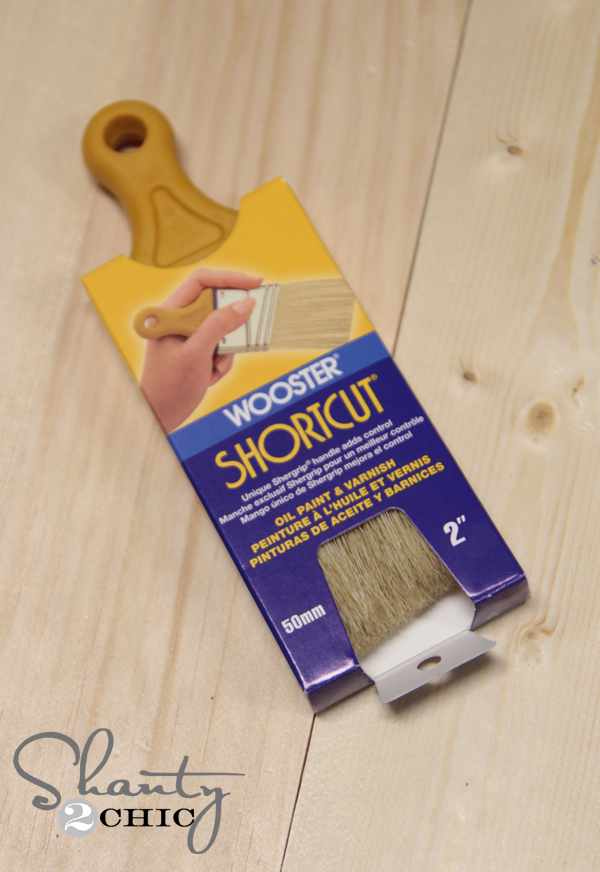
It’s a Wooster Shortcut brush and it fits into tight spaces, doesn’t drip and it fits my hands well. Once you have applied the stain to one side, just use a wiping cloth or old shirt to wipe all of the excess off. That’s it! That’s why I love this brand of stain too… It only takes one coat and it dries in under an hour… Woohoo!
After the stain dried, I added 2″ locking casters to the bottom of the tables. I love the look of wheels on furniture! You can find the super cheap at the hardware store.

I also used my new cordless staple gun to attach my 1/4″ wood to the back. This is optional! You can also leave it open for a different look!
That’s it! My final step was setting them up! What do you think??
Thanks so much for stopping by! You can make these for under $5o a piece which definitely fit my budget. Wish me luck on keeping him in his bed… I need it 😉
I would LOVE for you to share and pin these with your friends!
And for those of you that may ask…
Wall Color – Seine by Valspar
Bedding – Pottery Barn Teen
Metal Buckets – Lowe’s in the paint section
Hope that covers it!
~Whitney

epic gamer superior bruh moment lol. Very tactical muy epic
Big question. When you say “ ripped into 16″ boards”, is that lengthwise? I think I recall from a video when you say “rip plywood” they do it longways giving me 3 – 16”x 8’ boards. Is that correct?
I cant find a plan list for this nightstand. Could you please help me. I would love to make this for my daughter bedroom
Thank you
Denise
Bước 2: sử dụng các sản phẩm làm sạch bình thường.
Does the supply list make one or two night stands?
Hi,
Could be I missed it but I am looking for the total cost of each nightstand?
Thanks! They are perfect!
is there a printable or PDF for this plan?
I love this project and will build my own… the only improvement to this article is if there are pictures of how each board is attached. Especially the planks….
Hello
Is the shopping list for one night stand or two night stands ?
Thank you
One 🙂
okay so if i got the list right for 2 night stands the up dated shopping list should be
1- 4×8 plywood
2- 1×2 board
3- 1×4 board
1 sheet of 1/4 plywood
correct?
Is there a printable plan for this nightstand?
I made this yesterday but I still need to stain it! I’m in love! I do have 2 questions… 1.When you use the nail gun and it doesn’t go all the way in how do you pull it out with out ruining your whole project? 2. Why is staining done at the very very end? How do you get stain in cubby very well when it is all together?
I personally do all my staining before
How much did it cost to make these?
Hi! Is there any way to put a door on hte front bottom part?? Not the top open part. I need a door and this is PERFECT with an opening at the top for small things like our phones!
Hi,
So I am just learning to “build like a girl”:) and I might me missing something obvious but the 16″ x 8′ is supposed supposed to give me 2- 26″ sides and 3 -20″ shelves which adds up to 112″, not 96″. I’m probably doing my math wrong but if someone can clarify this,
I’d appreciate it!
Yeah, I think the pieces you mentioned are cut from the sheet of plywood, which will yield more than one 16″ strip along it’s length. I see this comment is from a while back, but I hope you managed to complete your project!
Love the nightstand. Where did you get the light?