Table of Contents
Free DIY Platform Bed Plans (Beginner-Friendly Design)
Learn how to build a DIY Platform Bed with free woodworking plans! This is a great build for beginners, you only need 3 basic tools and about $50 in lumber.
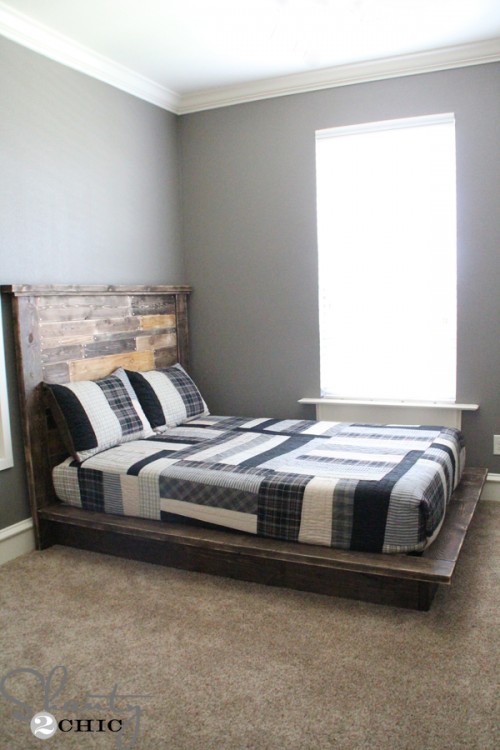
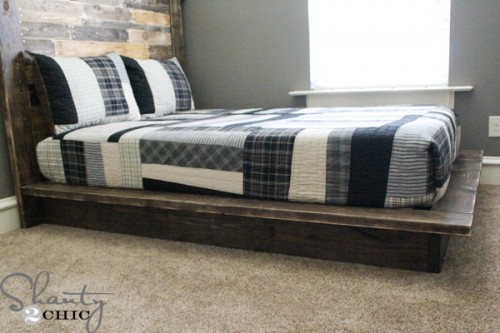
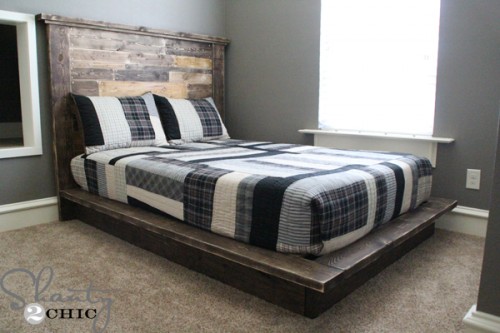
I’m back to share the Easy DIY Platform Bed that I made for my son 🙂 If you missed the Free Plans for the Planked Headboard, go check them out! I saw a platform bed in a West Elm catalog and loved how chunky the base and platform were, so that was my inspiration and I built it for about $55!!!
CLICK HERE TO JUMP TO THE FREE Platform Bed PlansThis is a very simple build so it is perfect if you are a beginner! You can follow along in the instructions below! This plan is for a full size bed but it is very easy to adjust the measurements to accommodate another size 🙂
Materials and Lumber Cut List
Supplies You’ll Need
- 8 – 1x3x10 Furring Strips for Slats
- 1 – 2x8x10 Pine Boards or Common Boards
- 2 – 2x8x8 Framing Boards
- 3 – 2x6x8 Framing Boards
- 1 – 2x4x8 Framing Boards
- 3 – 2x2x8 Pine Boards or Common Boards (I ripped from 2×4’s)
- 2 1/2″ Pocket Hole Screws
- 1 1/4″ Screws (to attach the slats if you don’t use a brad nailer)
- 2 1/2″ Wood Screws
- Wood Glue
Tools Required
- Miter Saw
- Drill
- Kreg Jig
- Sander
- Brad Nailer (optional)
How to Build a DIY Platform Bed Frame
Step 1 – Assemble the Bed Frame Base
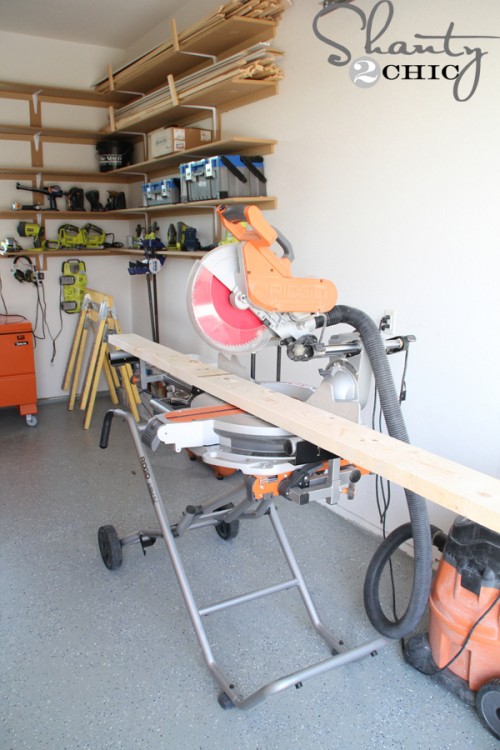
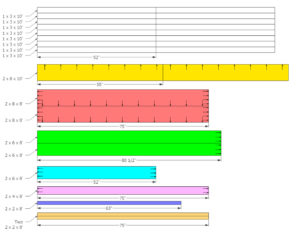
I started by making all of my cuts for my top and bottom frame. You can find the cut list diagrams in the fee plans. Watch our How to Use a Miter Saw video HERE!
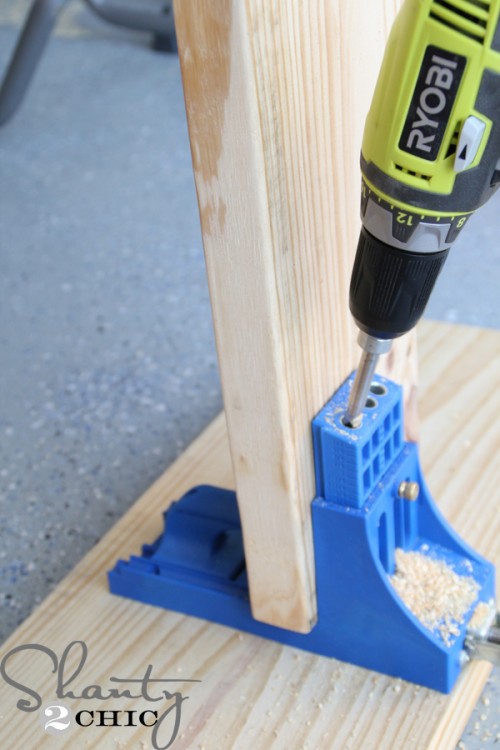
Then, I drilled all of my pocket holes with my Kreg Jig pocket hole jig set for 1 1/2″ thick boards. (You can find the Kreg Jig HERE on Amazon) and check out our How to Use a Kreg Jig Video HERE!
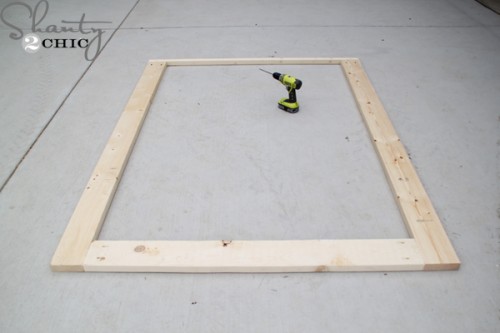
I attached the top frame with 2 1/2″ pocket hole screws and wood glue.
I followed up and did the same for the bottom frame.
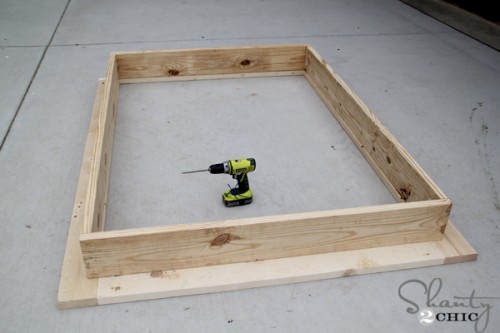
Next, I flipped the top frame over and attached the bottom frame to the side rails with 2 1/2″ wood screws and wood glue.
Step 2 – Attach the Bed Frame Supports
I flipped it back over and attached the center support with 2 1/2″ pocket hole screws to the headboard and footboard. You may need help flipping the bed back over, at this point, because it is heavy.
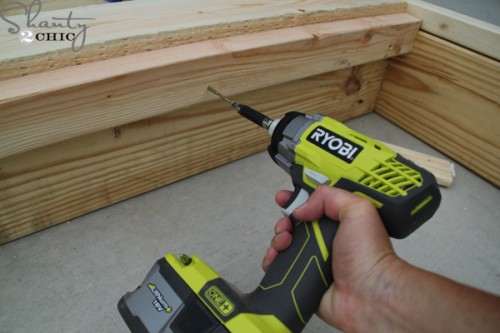
Finally, I attached the 2×3 cleats, to the sides of the bed, with 2 1/2″ wood screws (I call for 2×2 in the plans because 2×3’s are not available in every region. If you do use 2×2’s for the cleats, get furring strips to save money). I like to use the Spax self-tapping screws. I find them at Home Depot and they are pricey but you don’t need to pre-drill with them! If you use regular wood screws, make sure to pre-drill first to prevent the wood from splitting.
Step 3 – Sanding and Finishing the Wood
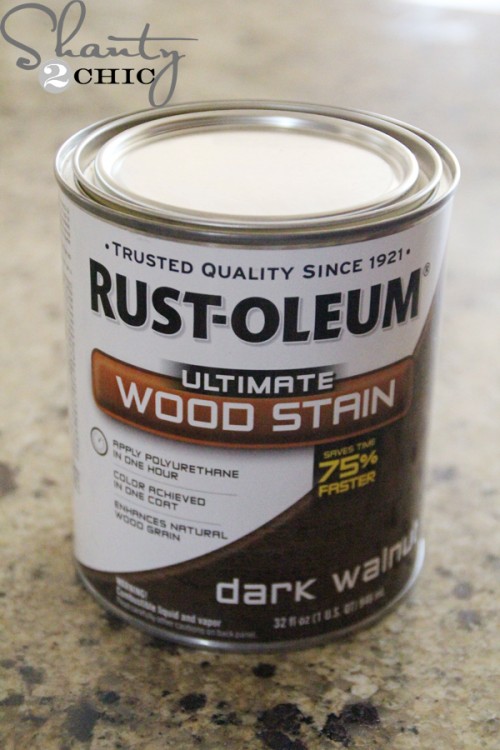
After sanding the entire Platform Bed down, I applied one-coat of Rust-Oleum Dark Walnut Stain (you can find it HERE on Amazon). If you are buying your supplies at Home Depot, get the Varathane brand in Dark Walnut (it’s the same stain).
Step 4 – Install the Mattress Slats
When the bed was dry, I took it inside and into my little man’s room! I used my brad nailer, with 1 1/4″ brad nails to attach the 1×3 slats. I just spaced them out evenly and attached them to both cleats and the center support. You can use the cheap furring strips (douglas fir) for this part, Just make sure they are smooth so they don’t tear-up your mattress. Note: you can also use 1 1/4″ wood screws to attach the bed slats.
Step 5 – Attach the DIY Headboard
To attach the headboard to the bed, I drilled 2 1/2″ spax screws from the backside of the headboard legs into the bottom and top frames of the platform.
I just love this DIY Platform Bed so much! It’s the perfect combination of rustic and modern farmhouse and it’s so sturdy! I know my son loves it just as much. I’ve overheard him bragging to his friends (on a few occasions) that his mom built his bed – which is the best part for me 😉
Don’t forget to check out the headboard plans and if you like the wall color in his room (I’m obsessed!) you can read about it my wall color choices! I have received a lot of questions about the quilt on his bed, it is from Pottery Barn Teen but, I bought it a couple of years ago so I’m not sure that it is still available.
Modification Options and Measurements
We always get questions on how to modify the measurments to fit other mattress dimensions. This DIY Bed Frame is easy to modify to fit any mattress size.
- Twin Size Mattress – Subtract 15″ from the width.
- Queen Size Mattress – Add 7″ to the width and 5″ to the length
- King Size Mattress – Add 23″ to the width and 5″ to the length.
- California King Size Mattress – Add 19″ to the width and 9″ to the length.
DIY Platform Bed FAQs
How much does it cost to build a platform bed?
The cost to build a platform bed can vary by design, materials used and current lumber prices. We typically build with framing lumber, like this platform bed design. We always share our supply list which makes it very easy to research the current lumber prices in your area to get an exact price on the cost to build your bed.
What size mattress fits this DIY bed frame?
This bed frame was designed and built to fit a full-size mattress but you can always modify the dimensions to fit your mattress.
Can I build a platform bed without a headboard?
You absolutely can! We shared these platform bed plans separate from the headboard plans because it can stand alone without a headboard or, you can mix and match the platform bed plans with a different headboard design.
Is this bed sturdy enough without a box spring?
This bed is incredibly sturdy and no box spring needed! The cleats offer the support for the mattress slats. You can make the bed frame even more sturdy with short support blocks installed underneath the slats. This is highly recommended for mattresses larger than a full-size. Using the slats verse a box spring is a good option to save money and allows for a lower profile, more modern looking bed.
More DIY Bed Frame Plans You’ll Love
- DIY Modern Farmhouse Platform Bed
- Free Platform Bed Plan with Headboard
- DIY Twin Platform Bed with Chevron Headboard
- Platform Bed on Wheels
- How to Build a Platform Bed with Storage
Free Printable DIY Platform Bed Plans
Tools
- Miter Saw
- Kreg Jig
- Drill
- Sander
- Brad Nailer
Supply List
- 8 1x3x10
- 1 2x8x10
- 2 2x8x8
- 3 2x6x8
- 1 2x4x8
- 3 2x2x8
- 2 1/2″ Pocket Hole Screws
- 2 1/2″ Wood Screws
- Wood Glue
- Finish of Choice
Instructions
- Cut List

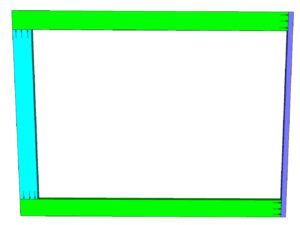
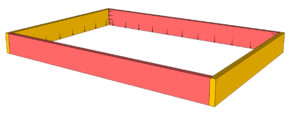
- Assemble the bed upside down. Start with the top frame. Use glue and 2 1/2″ pocket hole screws at each connection.

- Assemble the lower frame. Make sure the edge pocket holes are facing the same direction.

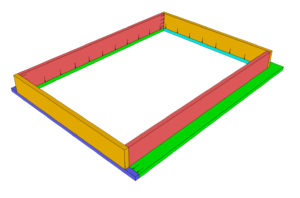
- Lay the top frame on the floor with the pocket holes facing up and stack the lower frame on top. Secure them together with pocket hole screws.

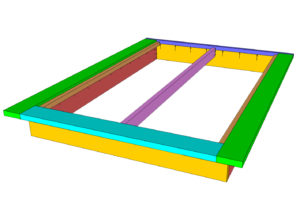
- Attach the 2×2 cleats to the sides and the center 2×4 support in the middle. The 2×2 cleats are just screwed into the bed frame with wood screws and the 2×4 support is secured with pocket hole screws on each end. All three of these pieces should be 3/4″ lower than the top of the top frame.

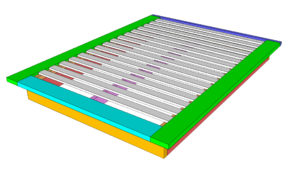
- Add your slats and the construction is done! Now, all you have to do is sand and finish as you wish and enjoy your new platform bed. This platform bed was made for a previous headboard that I also made. Search our site for “Planked Headboard” to see it. As always, if you decide to make this bed be sure share it on social media and use #shanty2chic so we can share it too!






lol nvm just saw the “here” linlk 🙂
I’m a little late to the party.
Is there a separate post on the headboard?
Hi! Thanks for the plans and the inspiration. My 13 year old son and I are going to try to make this together. We visited our Home Depot this weekend, however, they did not have the white board or pine in these large sizes – only for the slats. We had to purchase framing boards instead (Douglas fir). I’m hoping it will look as great as yours. Unfortunately, my cost to build is already $150 (including the device to make the holes @$39). I will keep you posted with the results in case anyone else has trouble finding the wood like I did. Thanks again for the plans!
Can’t wait to see it! I did use the fir for the 2x boards. I’m guessing your cost is high because you went with pine slats? I used furring strips for the slats and those are about $2 each.
How did you build the headboard? I was also thinking about adding some side supports for the mattress to fit in. That way it doesn’t move. Great Job. I will be building one for a King size select comfort.
As a furniture salesperson, I highly recommend that you add center feet to the center bar of this bed. I realize it is a 2×4, but without those center feet, that board will begin to bow, bend, and sag, resulting in a sagging mattress. Most mattress companies will not warranty mattresses without those center feet, we recommend 3 feet. Weight on a bed adds up quickly. Two adults, weight of mattress and bedding, easily reaches 400-500lbs for 6-9 hours a night. That’s a lot of weight on one center bar. The slats won’t hold that much weight, and also may want to consider adding a “bunkie board”, sold at mattress stores, or lay a piece of plywood over the slats for a flat surface. Over a period of time you will see a wave effect on the bottom of your mattress which will ultimately change the way your mattress feels, especially if you have an all foam or pocketed coil mattress.
Do NOT put plywood over the slats. Mattresses need to breathe and if they can’t they will grow mold that will make you very sick. That is why you have slats or a box spring- so the mattress will still get clean air.
If you are concerned about air ventilation, then at least buy a “bunkie board”, it’s essientially a 1″ foundation that is built like a regular foundation.. The slat only method with warp your mattress.
yes it will
When a mattress lays on a boxspring it does not breath either
My husband and I saw this and HAD to build it. We had been looking at frames at stores and they are so expensive. Thank you so much for this, it was so easy and with both of us building it, it only took about 2 hours and then we had to let the stain dry. Very easy construction, but soooooo heavy. We wont be moving it for a while now lol.
I’m planning on building this but im kind of lost on the plans measurements. When I went to home depot to get the wood they don’t have any 1 * 3 * 10 they have it by 8 can i use that size? and they also said it would be soo big considering the full size bed measures 75 x 54.
Typically in these plans when blue prints call for a 10 foot board when nothing about the piece is over 8 foot (the typical length of boards most would buy) is because it’s more cost effective. Whatever they are using it for requires 2 boards less than 5 feet each. So they buy 1 10 footer and cut it down, saving money. I couldn’t get a 10 foot board home safely myself, so if I were to build this I’d have to replace any 10 ft boards with 2 8 footers. Or ask the fine people at Lowe’s/Home Depot/other lumber place to cut down the 10 footer for me.
My husband built this bed yesterday afternoon and we are super excited about how it turned out. Printable plans were easy to follow. Thanks for sharing!
Hello in a previous comment you said to add 22″ to the width and 5 to the length. which is which!?! Please help 😀
For example the 2x8x10 is the yellow piece. And it is 52″ in is that in length or width? The directions say add 22″ to the width and 5″ to the length, how would I do that?
Is it 52+22=74 (is that the width)??
then where do i add the 5??
Sorry not good at geometry apparently!
Jeka
I know I’m replying way after here but anyone else reading this remember that all you have to do is figure the size difference between a full size bed (size the plans are for) and the size you’re wanting to build. Next the Width is from side to side. Length is from head board to foot board. Think about how a mattress is. Is a king a lot wider or longer than a full size mattress?
Im sorry but lm really late here. Love the bed. Only question for anyone is what did everyone make it out of 2×6 or 2×8. It looks like to me half and half not sure. If l can get some help that would be great. Thxs
I cannot locate any 2x in pine or whitewood in my area what other wood do you recommend
Douglas Fir/Fur is the typical type of lumber found at many Lowes/Home Depots and I’d believe will work fine. I’ve seen other plans for tables and such that called for whatever white construction grade lumber you can find.
California King dimensions ?
I was wondering the same for a regular king but figured I would just measure the mattress myself and add an additional 2 to 3 inches for the part that sticks out but I also plan to add legs to mine to elevate it.
Are these Plans for a queen?
Just as a friendly reminder to those of you who are going to try this with the queen or kind sized dimensions. DO NOT forget that you will need to replace the 2x8x10 sized board with a 2x8x12. This is very important, because you will not be able to cut your 2x8x10 piece into 2 61″ lengths and you will end up having to purchase another piece.
So to
Make this a queen just replace 2x8x10 with 2x8x12? Do I need to replace any other boards with bigger ones?
Did those measurement work for you?
I might be confused, but are there box springs on the bed? Are they not needed? I’ve never had a bed without them…
You can use box springs if you want but our platform beds do not use them. The cleats and slats inside the frame take the place of a box spring. Hope this helps 🙂
It does indeed! Thank you for your reply – and your constant inspiration!
Dimensions for a California King Size bed? 🙂
72″ wide by 84″ long but all mattresses can vary by an inch or two