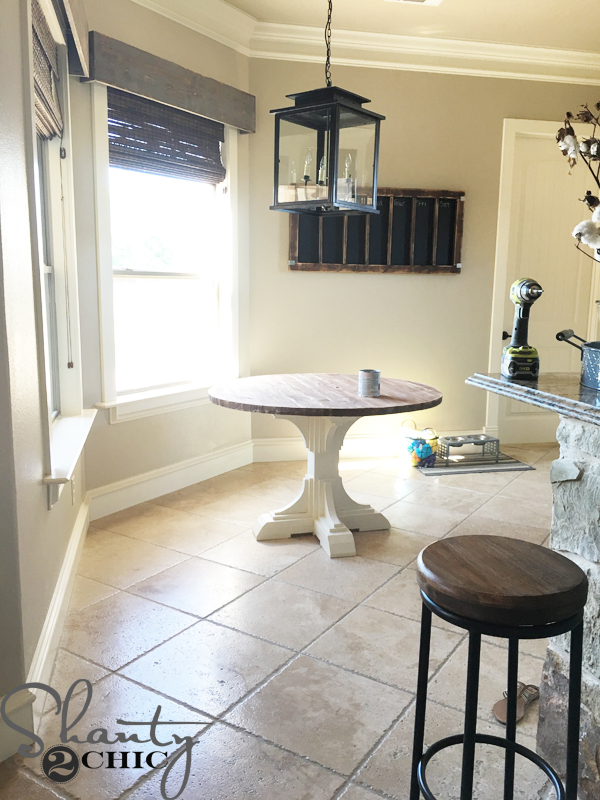
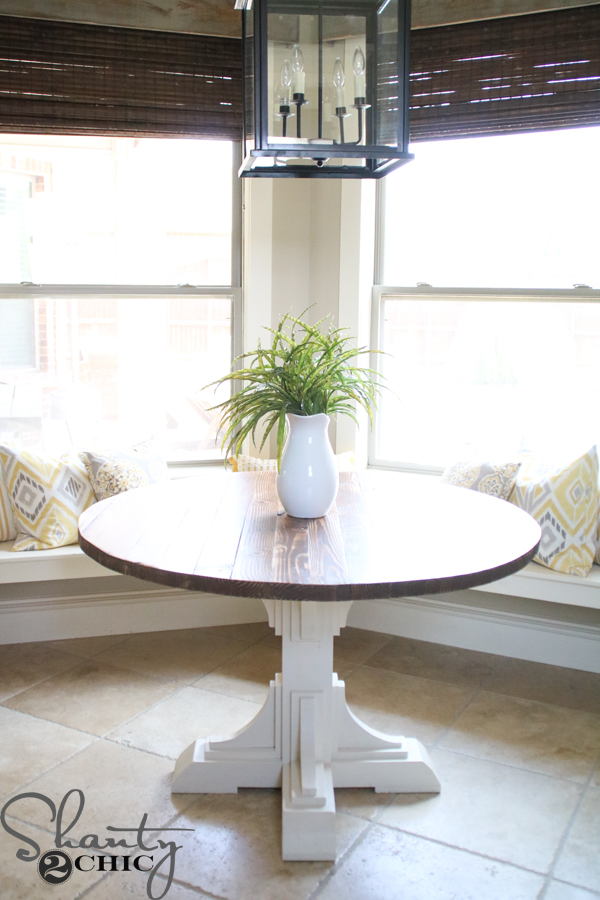
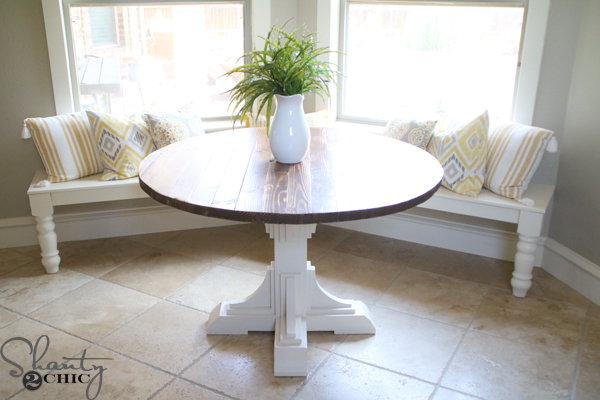
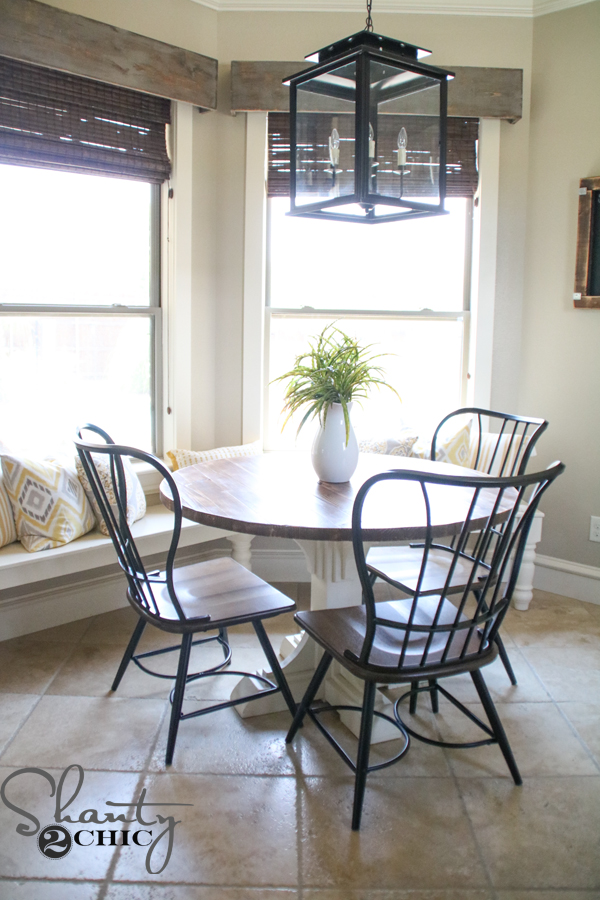
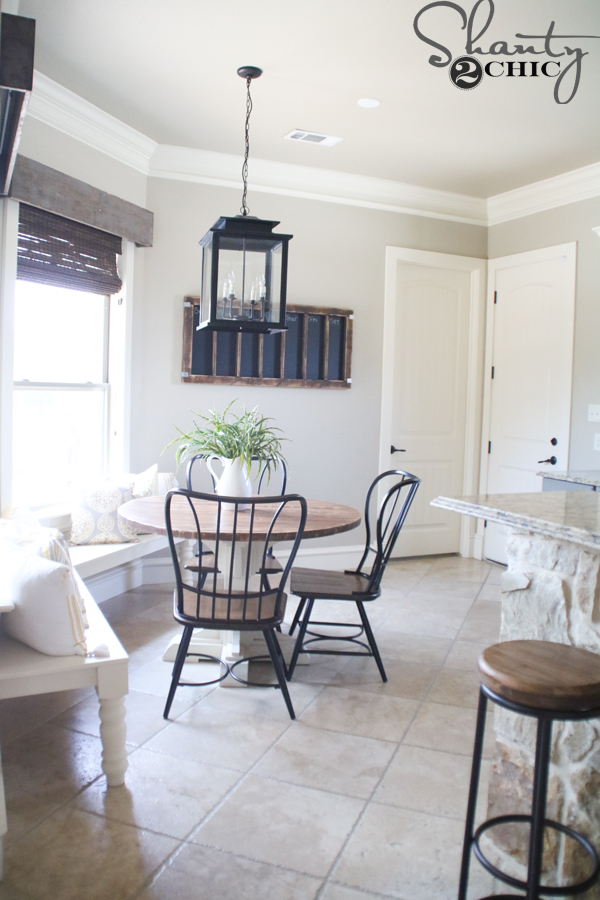
I am LOVING my new kitchen nook area! I had a larger table, that I built for this spot when we first moved in, that had six chairs and the chandelier was in the middle of the ceiling. This cramped up the space so much (sometimes you don’t know exactly how you will use a space in your home until you have lived in it for a while). The majority of the traffic through our house is the door in the kitchen that leads from the garage. So, I had an electrician out doing some work and asked him to move my chandelier to center it on the bay window nook. Then, I decided to build a smaller table with a built-in bench 🙂
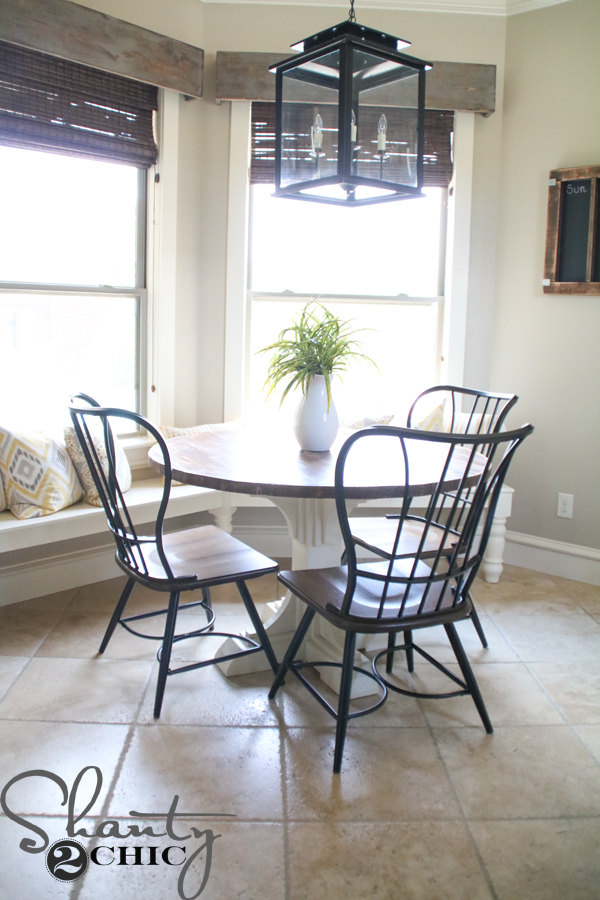
I couldn’t be happier now! I love this table, I love how it is centered in front of the bay window and the chairs are the icing on the cake!! You can find the chairs HERE! (*** The chairs come in a set of 2 and are priced for a set***)
The best part? I built this table for only $75 in lumber! You can click HERE for the free printable plans and follow along with the how-to tutorial below 🙂
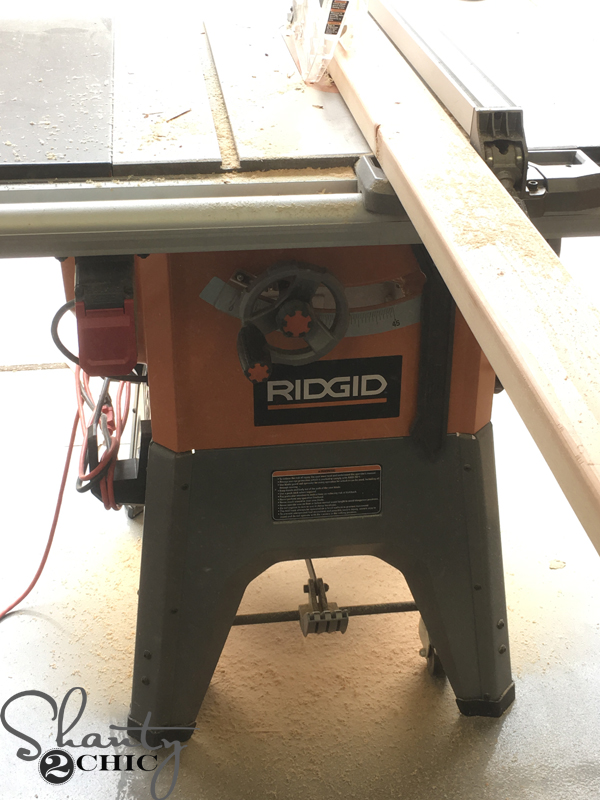
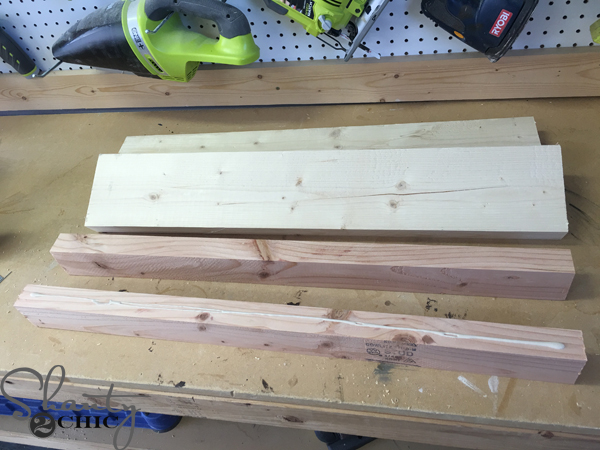
My first step was to rip the round edges off of each 2x board. This is a bit time consuming but it makes the table look nicer and it creates a smooth table top. You don’t have to do this but you will have “crumb catchers” on your table top if you don’t 😉 I used my Ridgid table saw (which I LOVE) but you can purchase a less expensive table saw and get the job done just fine. It’s a great investment if you plan to build lots of furniture 😉
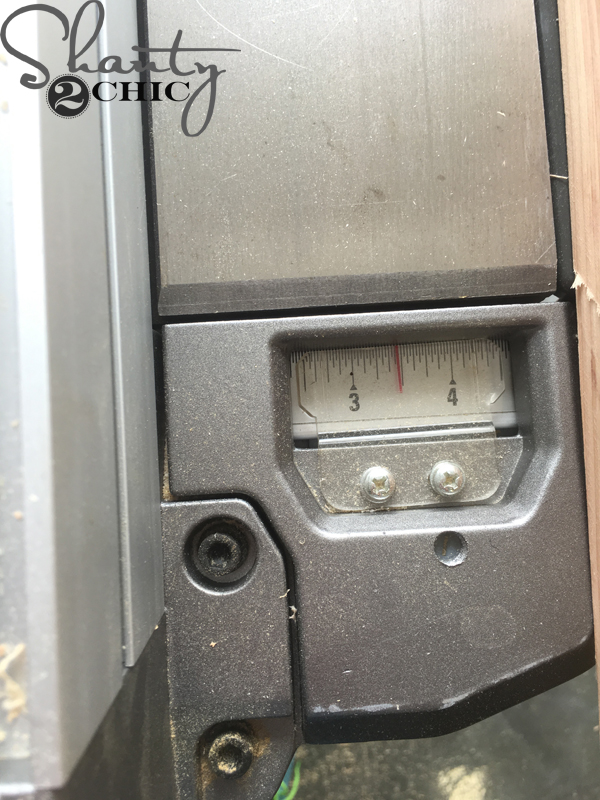
Just set the guide on your table saw about 1/8″ less that the width of the board you are ripping. A 2×4 is 3 1/2″ wide so I set it for 1/8″ less than that.
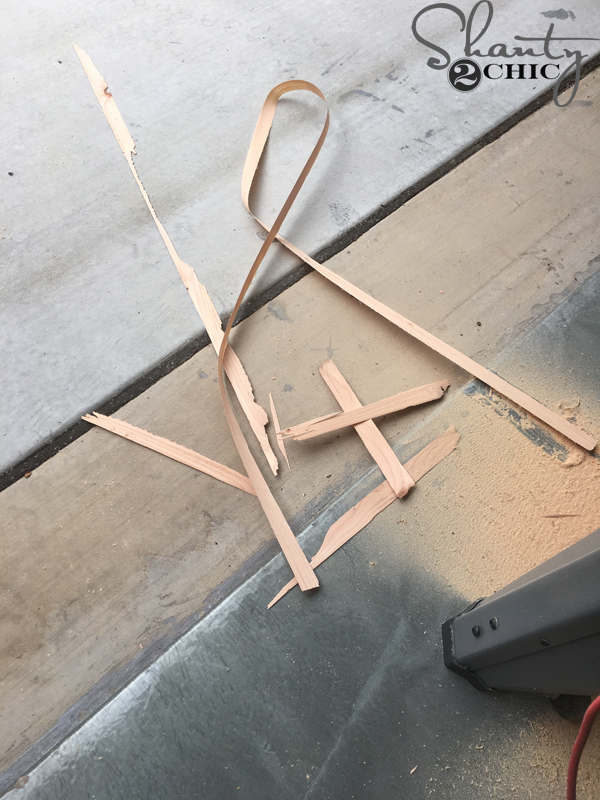
Once you make one cut on one side of every board, flip them over, take another 1/8″ off of the width and cut the other sides. Total you will cut about 1/4″ of the width off of the boards total. The pic above is the “waste” from the rips.
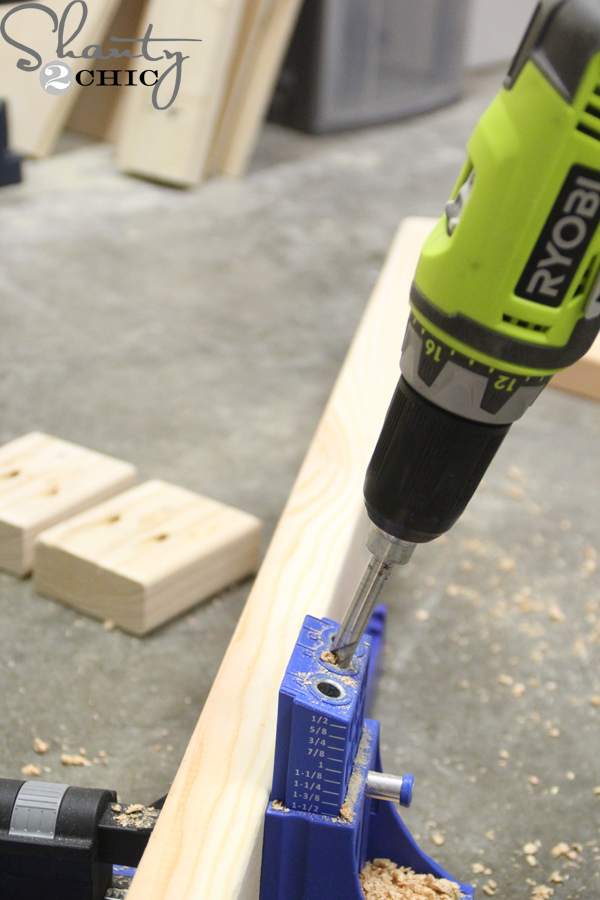
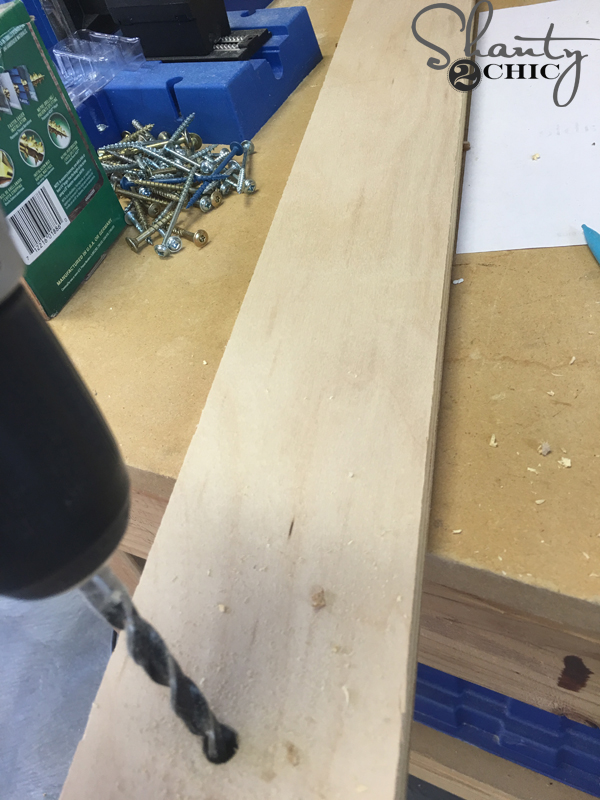
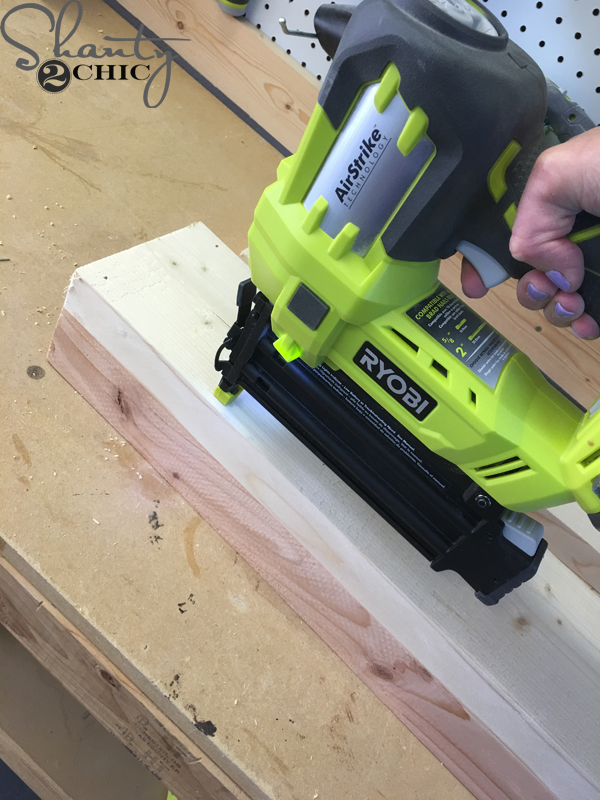
Next, I used my Kreg Jig to drill 1 1/2″ pocket holes into the 2×4 planks. You can find the Kreg Jig K5 model that we love HERE on Amazon.
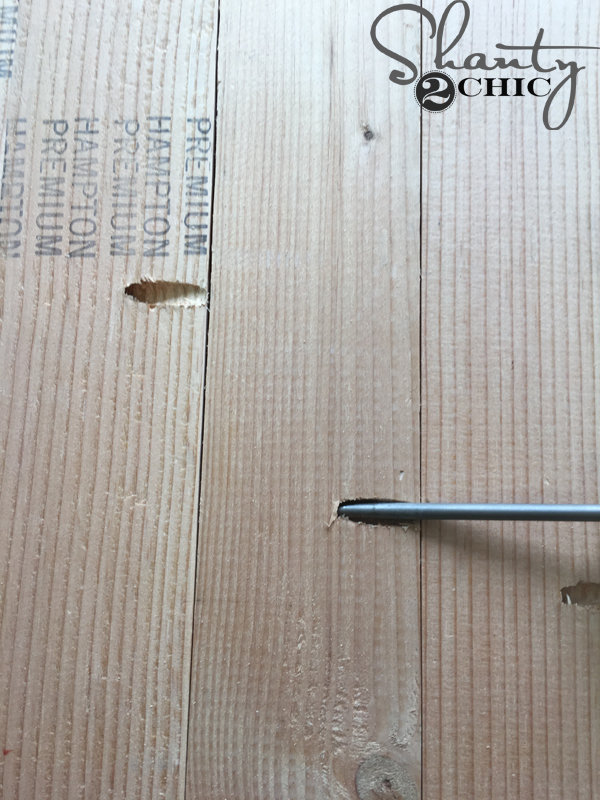
Then, I attached all of the planks together with 2 1/2″ pocket hole screws.
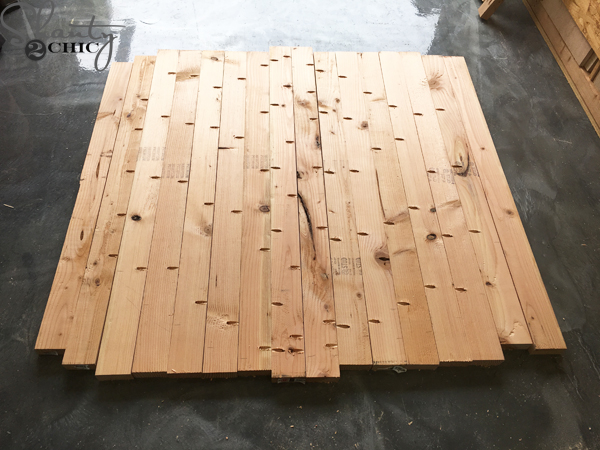
This creates the table top that you will cut to make round. Notice where I put the pocket holes. You want to make sure that they will clear the cuts you make for the round top.
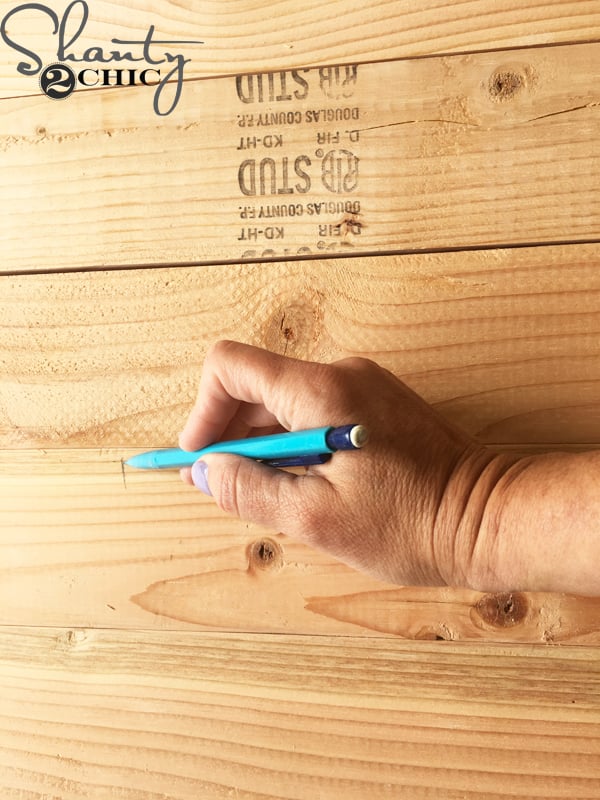
Next, mark the very center of the planked top.
Then, cut a scrap board that is longer than the radius of your table and drill one pilot hole at one end.
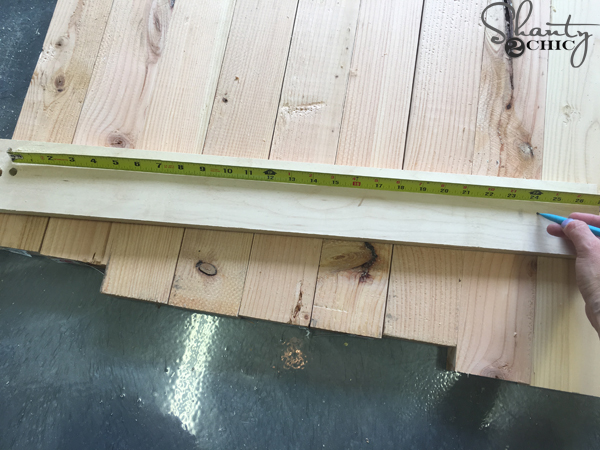
Then, measure from the center of that pilot hole and make a mark that is the length of the radius of your table.
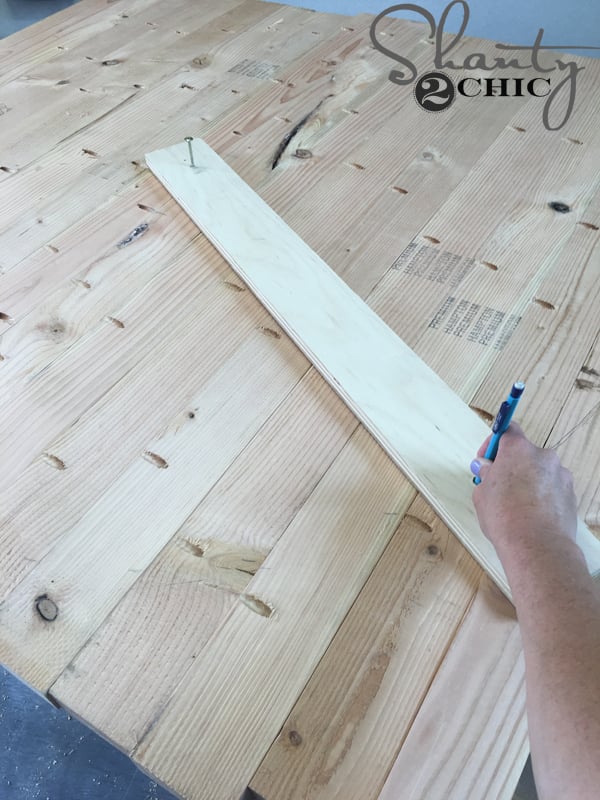
Hammer a nail into the mark that goes into the bottom of the table top at the very center mark that you made on the table top. Then put a pencil in the pilot hole and drag the scrap board around the table top planks. This will mark an even circle for you to cut!
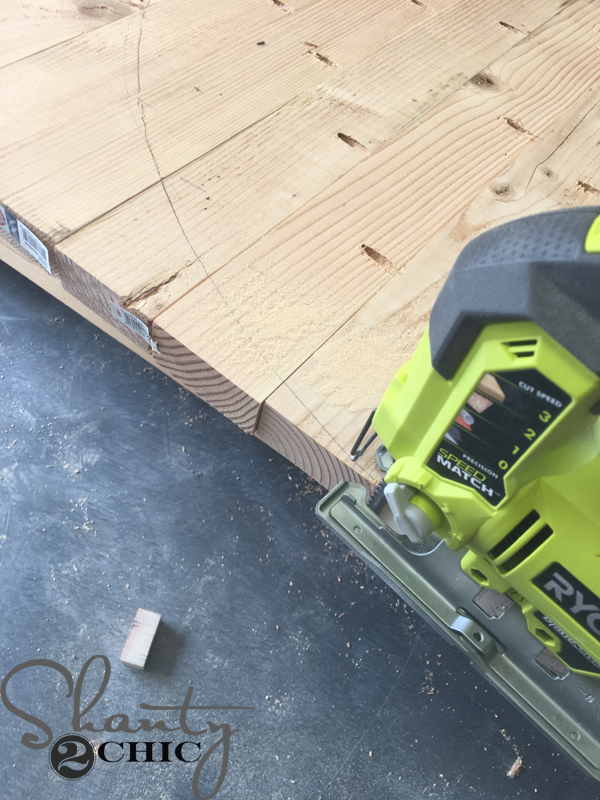
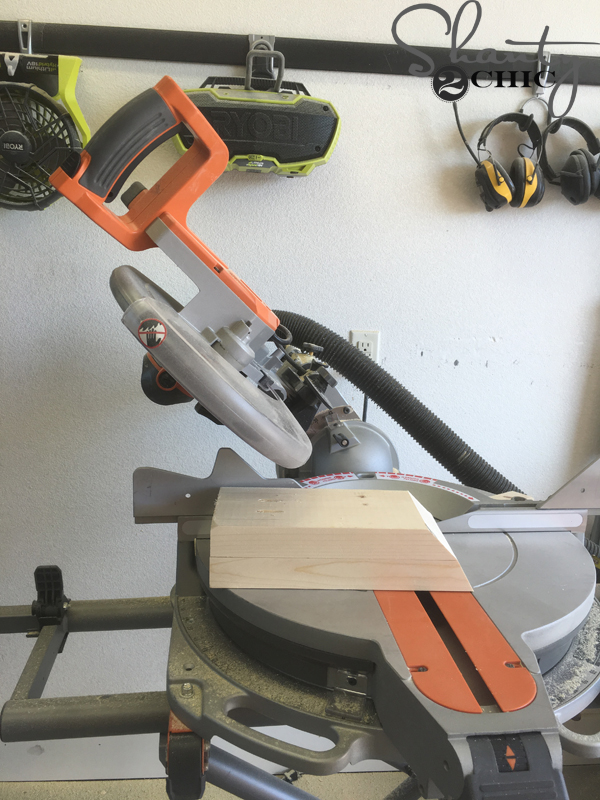
Once the circle is draw, you can use a router or a jigsaw to cut the circle. A jig saw is much less expensive and will work just fine. I used mine, just make sure to cut slow and don’t lean into the jigsaw. This will cause the blade to bend on the 2″ thick boards and give you a “wonky” cut. No worries, just go slow 🙂
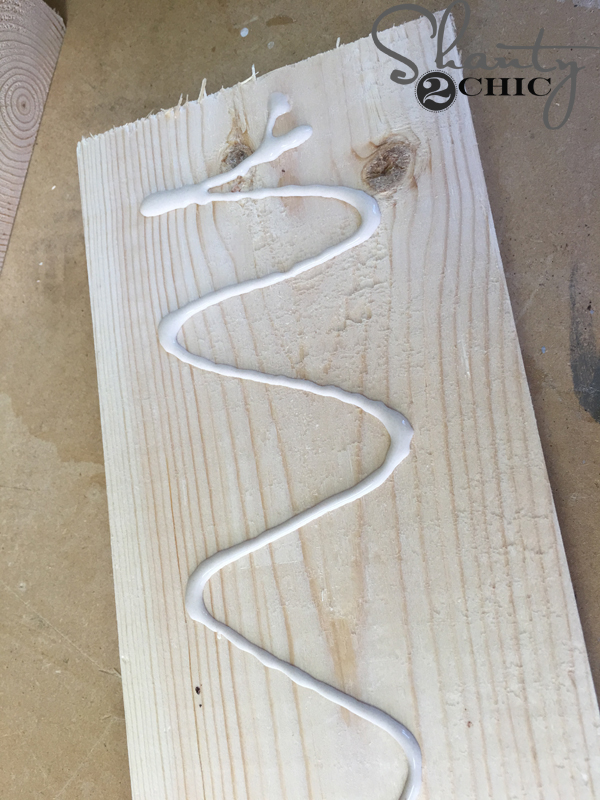
Now, make your cuts for the table base and apply glue to the 2×3 pieces.
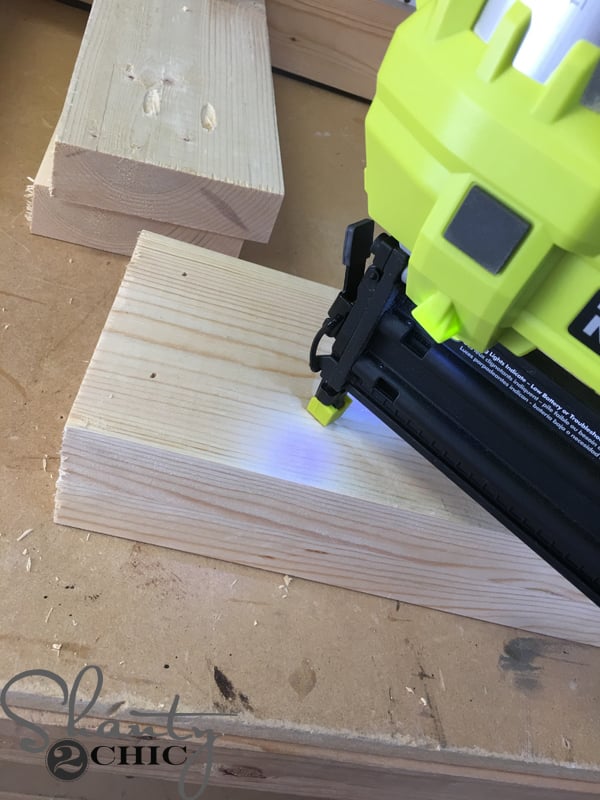
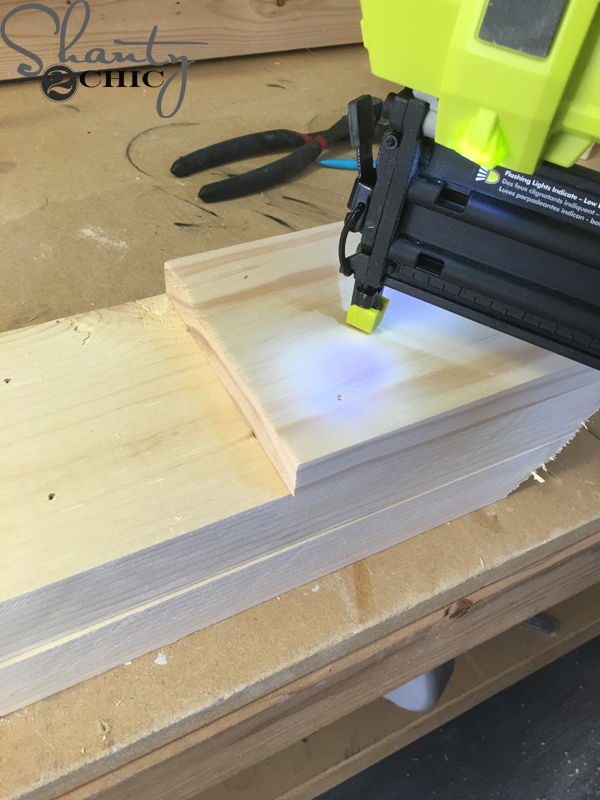
I used my Airstrike 18 gauge nailer with 2″ brad nails to attach the 2×6 board to the 2×3 boards.

It should look like this. Now, you can attach the other 2×6 board the same way.
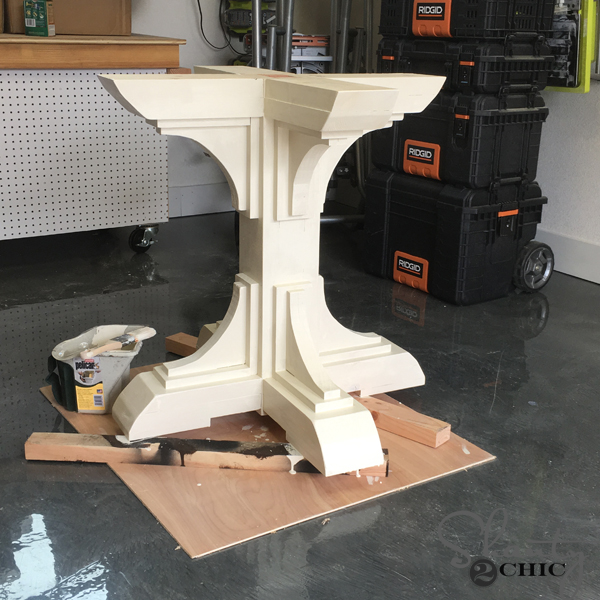
Make sure to sand the base so that the base looks like one solid piece of wood.
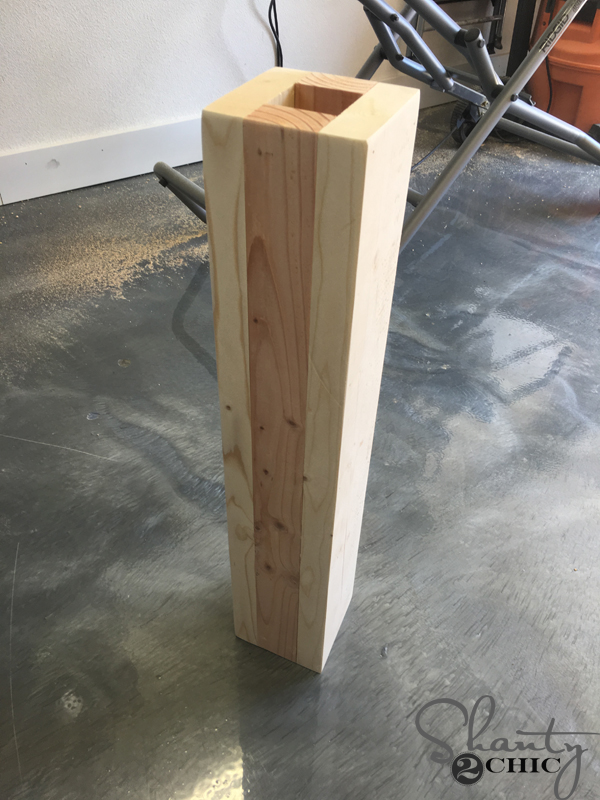
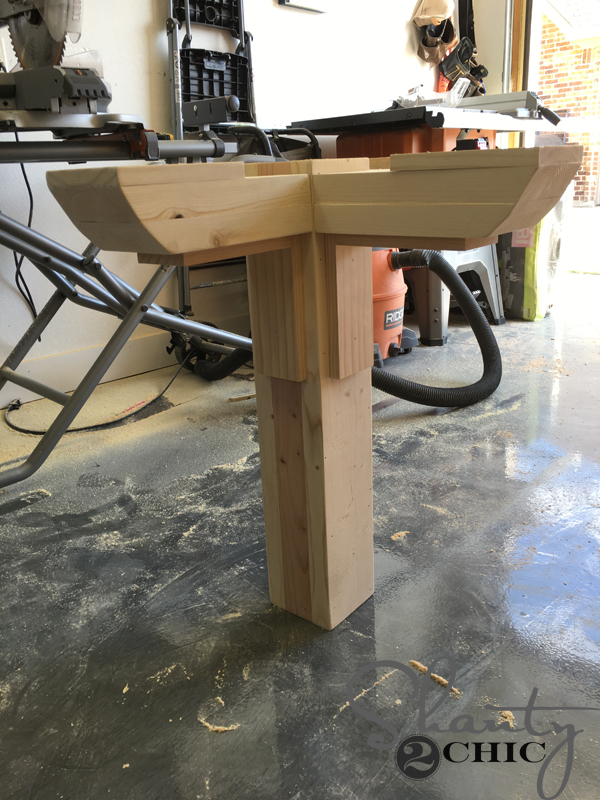
Here she is 🙂 Now, let’s build her some feet 🙂
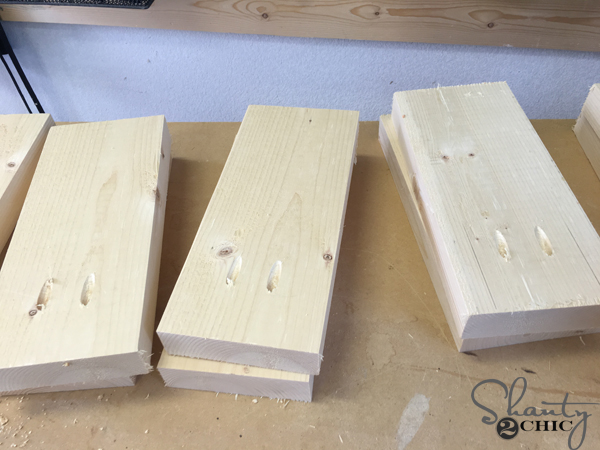
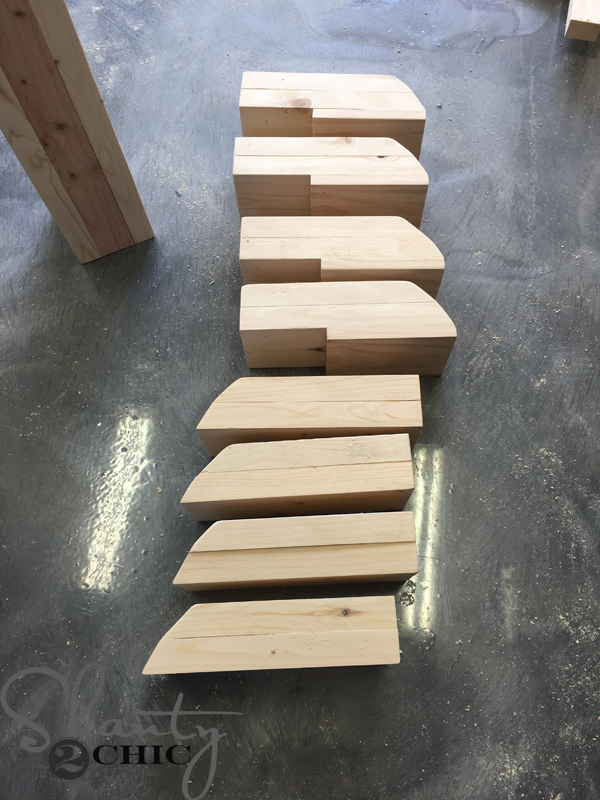
Now, Make all of the cuts for the legs and supports and drill 1 1/2″ pocket holes in one end of half of the boards. Make sure to keep the pocket holes towards the center of the 2×6 boards. These will be covered with 1×3 blocks.
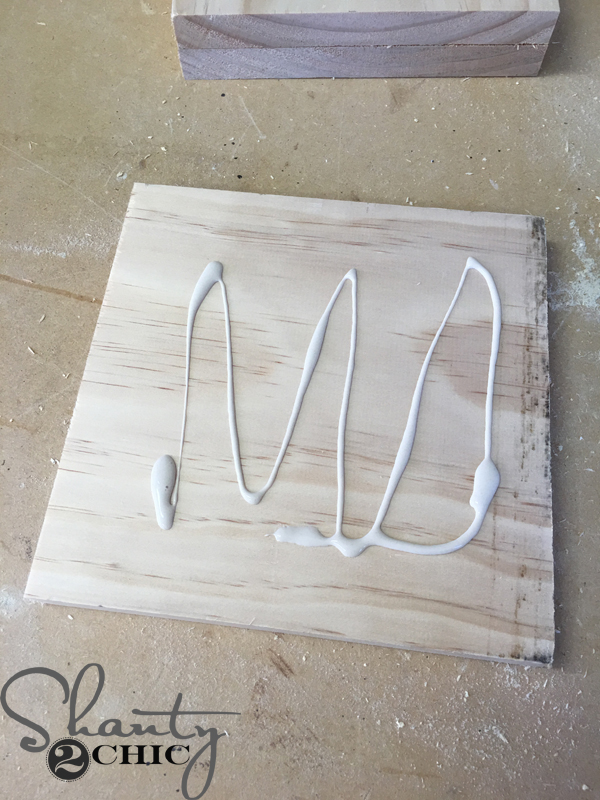
Apply glue to a 2×6 board with pocket holes (glue goes on the side that does not have pocket holes)
place it on top of a board that does not have pocket holes and attach them with 2″ brad nails.
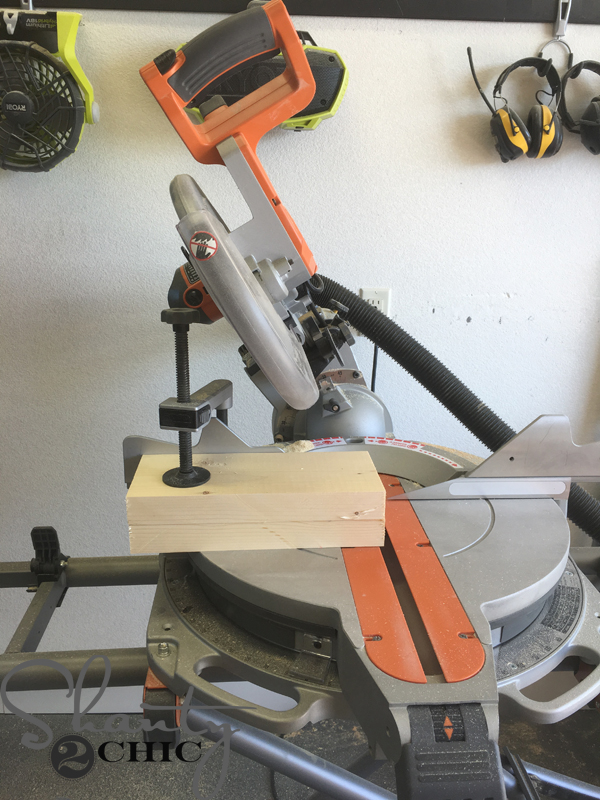
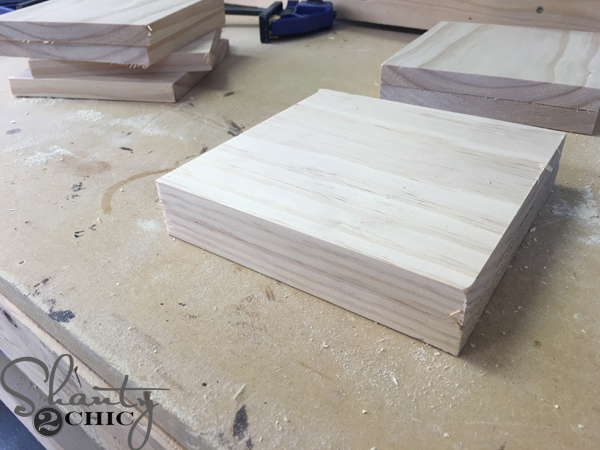
Once the glue dries, you should have 8 blocks of 2×6 that you have attached together. Now, you can use your miter saw to cut the angles off of the ends of the blocks (refer to the plans for the exact angle measurements). To make these angle cuts, you will adjust the top of your miter saw so that the top swings to the angle you want to cut. This is called a bevel cut. This is the first angle cut. (***Pocket holes should be facing up on these cuts).
The second angle cut is off of the top piece. If you don’t feel comfortable making this cut, you will get the same overall look if you skip this step. No worries.
Cut the pieces for the foot pads and attach them to the four feet with wood glue and brad nails.
Now, you should have 4 table top support pieces and 4 feet with foot pads on the bottom.
Attach a foot to each side of the table base with wood glue and 2 1/2″ pocket hole screws.
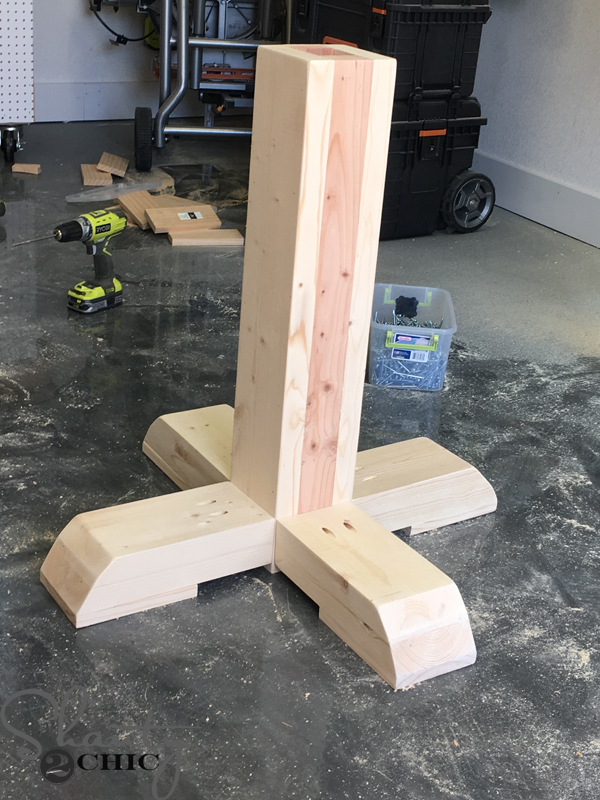
When you have attached all 4 feet your table base should look like this.
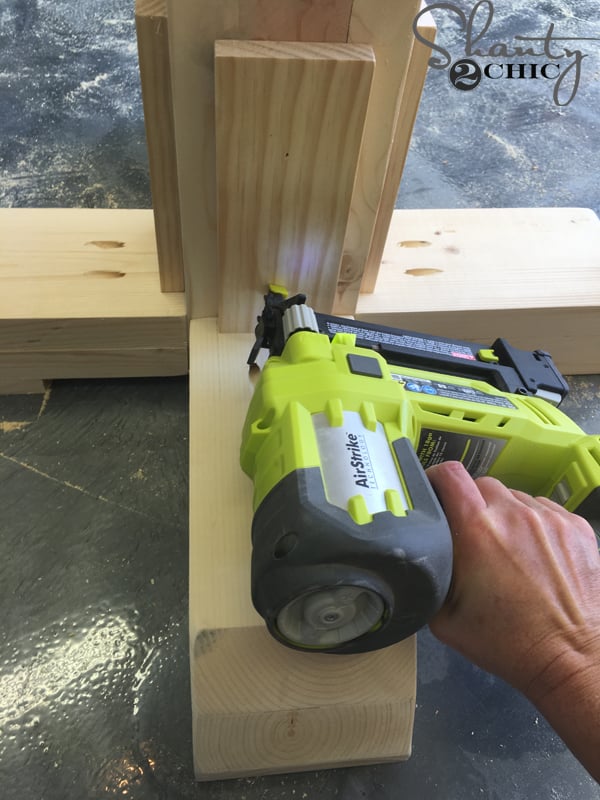
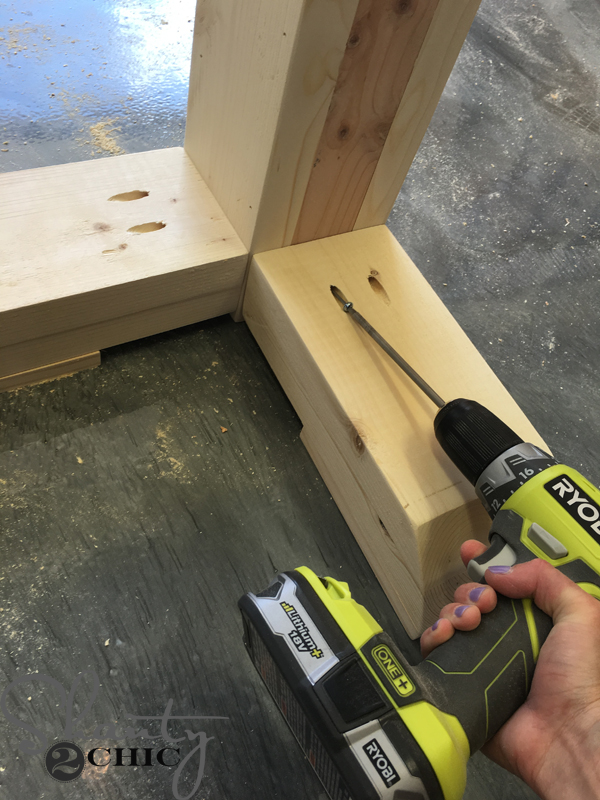
Cut the 1×3 blocks and attach them to the table base with 1 1/4″ brad nails and wood glue. Start with the vertical pieces first.
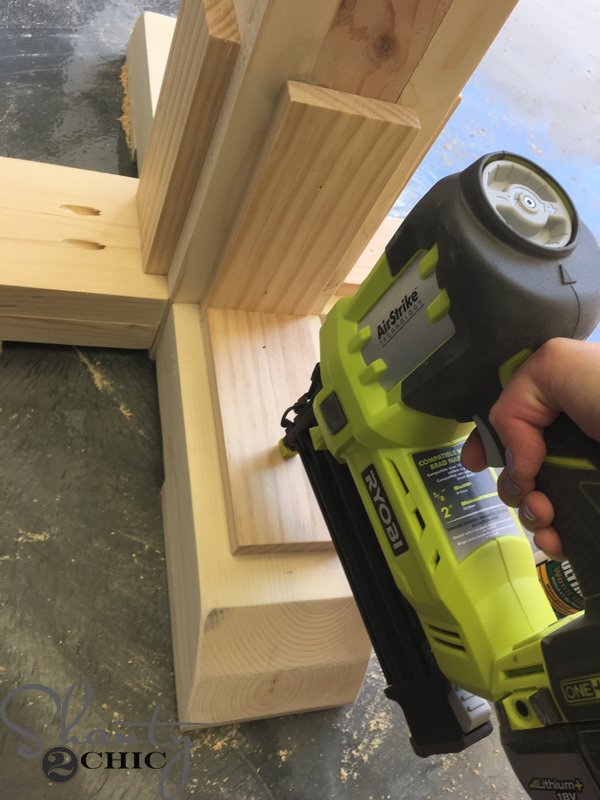
Then follow up with the horizontal pieces. Attach them the same way. This will cover up the pocket holes 🙂
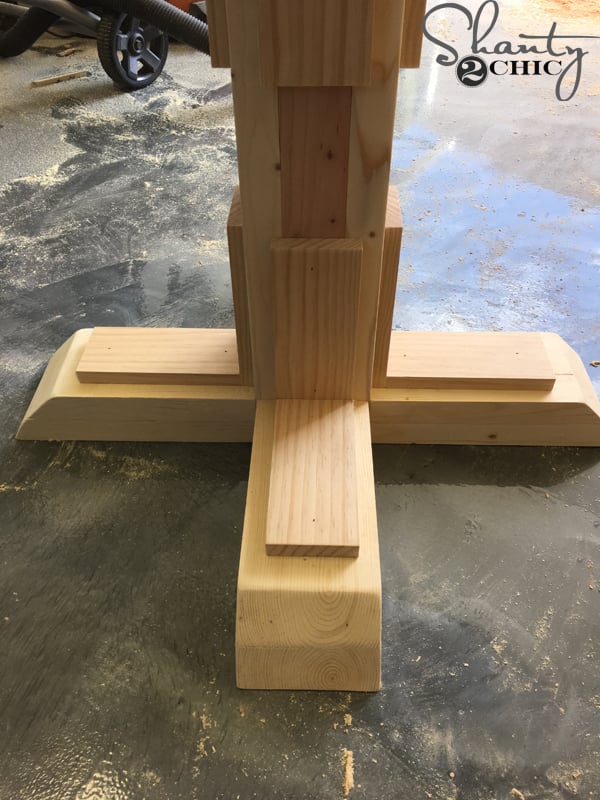
Here is the table base with the blocks attached.
Now, flip the base upside down and attach the top supports and blocks the same way.
Make your 1×8 cuts and attach two pieces together with wood glue.
And let them dry. If you don’t want to wait for the glue to dry, go ahead and do this step at the very beginning of your build. This way, the wood glue should be dry in time for you to cut the corbels 🙂
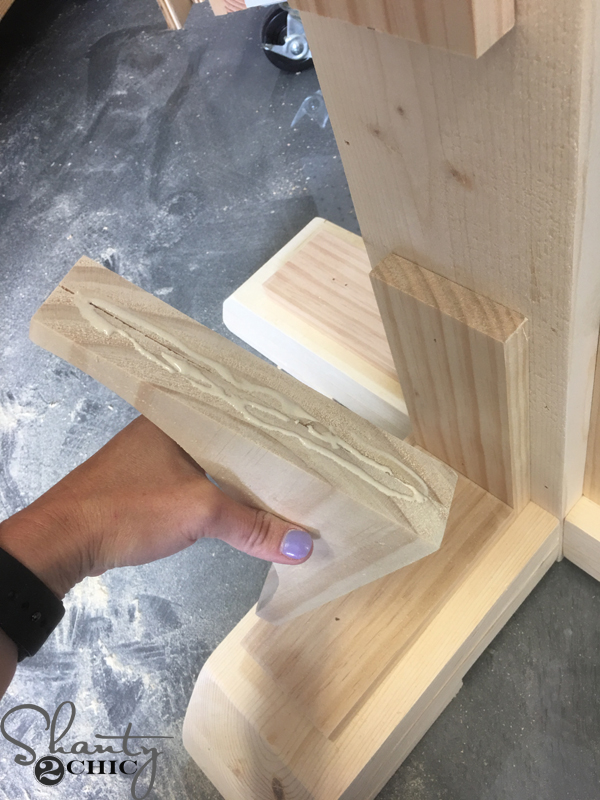
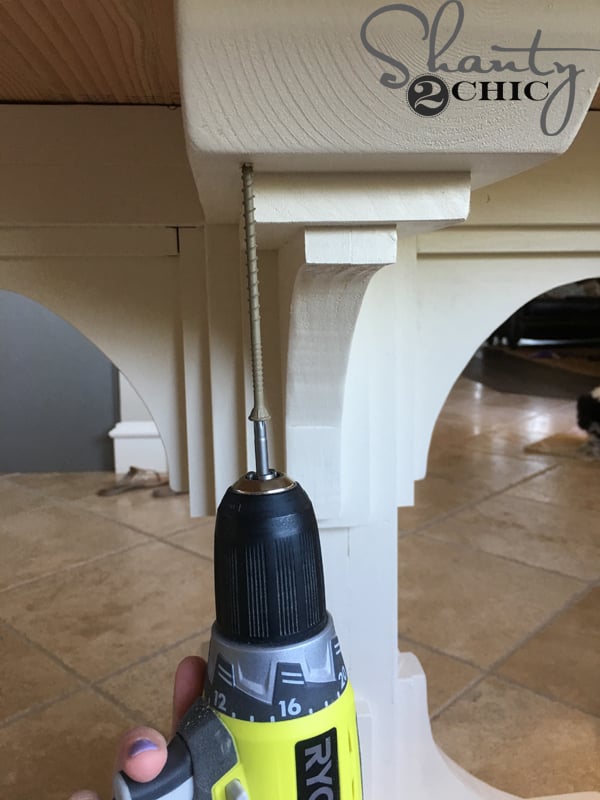
I used my jigsaw and cut 8 corbels from the 1×8 blocks. Then, I applied glue to the back sides and attached them to the table base with 1 1/4″ brad nails.

Do this for all 4 feet and supports and it’s ready for the finish!
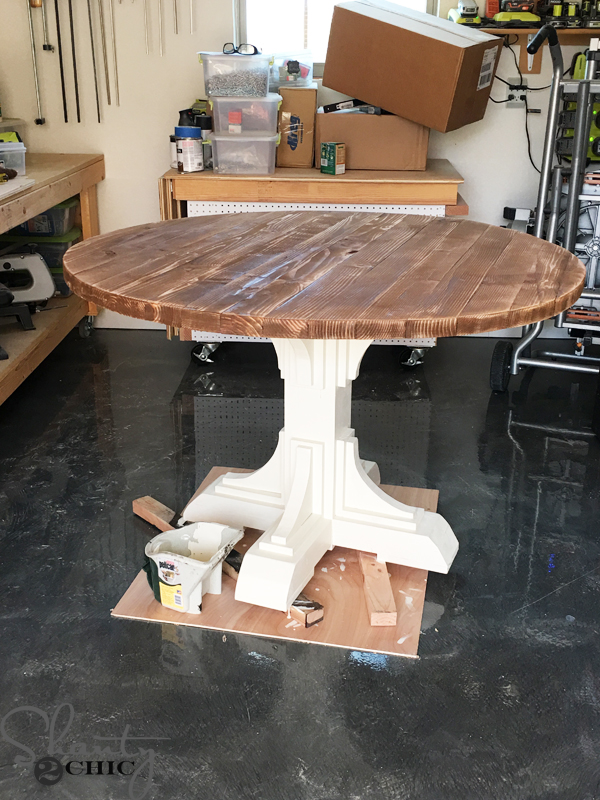
I painted the table base Antique White by Sherwin Williams.

While I waited for the paint to dry, I stained the table top. I used Varathane Early American stain (find it HERE on Amazon) and applied it with a lambswool applicator. This is by far our favorite way to apply stain. The lambswool is a bit pricey but it is worth the cost when you are staining a large piece. It makes it so much faster to stain – trust! You can find the Lambswool HERE on Amazon.
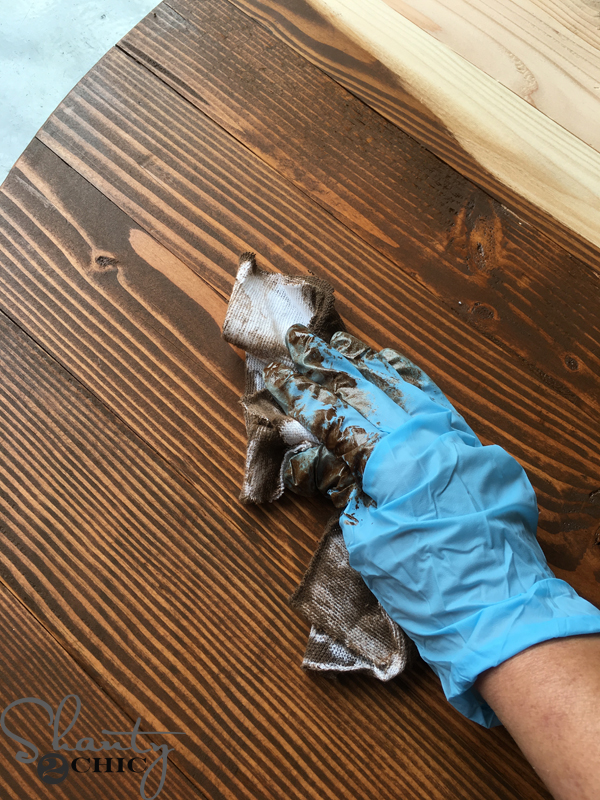
Let the stain sit for about 5 minutes and then wipe it with a clean rag. Don’t wipe the stain away, just blend it so that they stain is even over the piece.
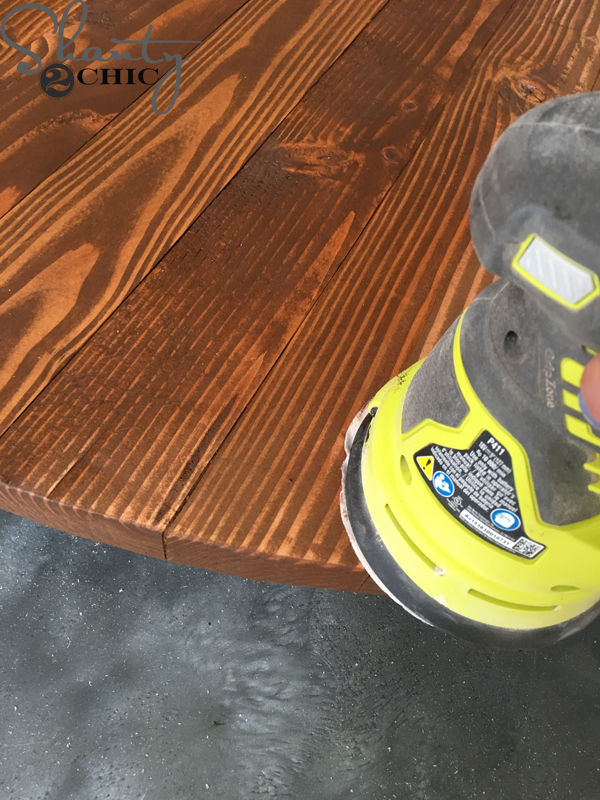
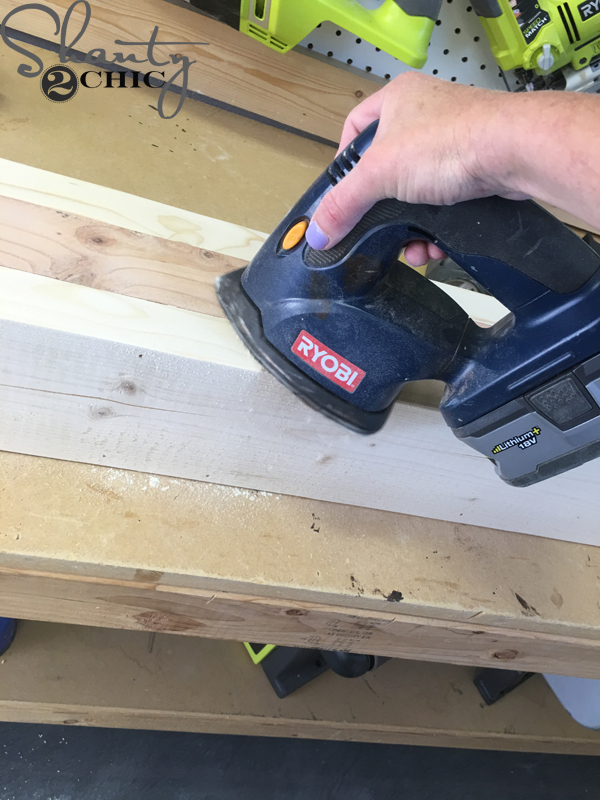
Once the stain has dried (about 1 hour) you an distress it if you want a more rustic look. I used my Ryobi 18-volt orbital sander. I use the Corner Cat a lot but this piece is pretty large and this sander was faster.
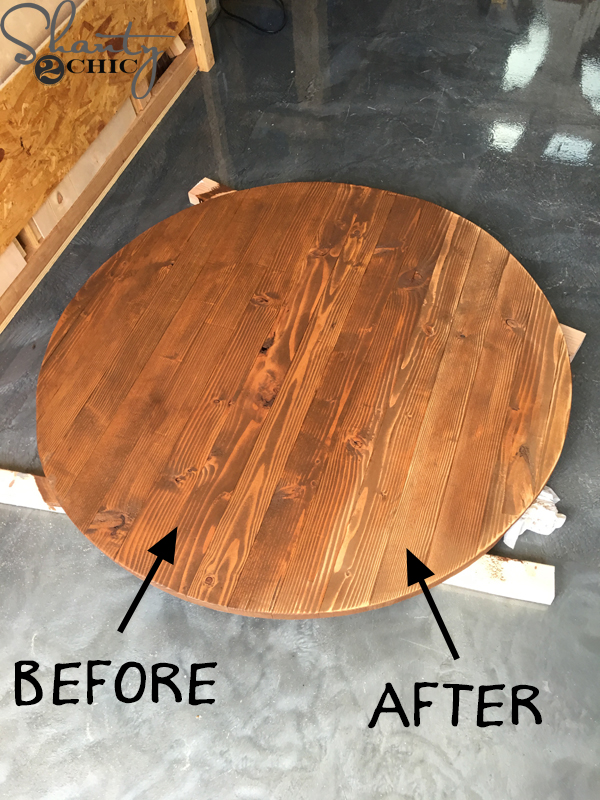
Here you can see the difference in the distressed color and the original color. A lot of people ask how we get the stain to look the way we do and this is how 🙂
I tried the table top on for size. I didn’t attach it to the base yet because it would have been too hard to get in the house.
Once I brought it in the house, I used 4″ wood screws to attach the table top onto the supports.
Now for the top coat. I like to apply my polyurethane inside the house. There’s no sawdust in the air and it’s not 100 degrees 😉
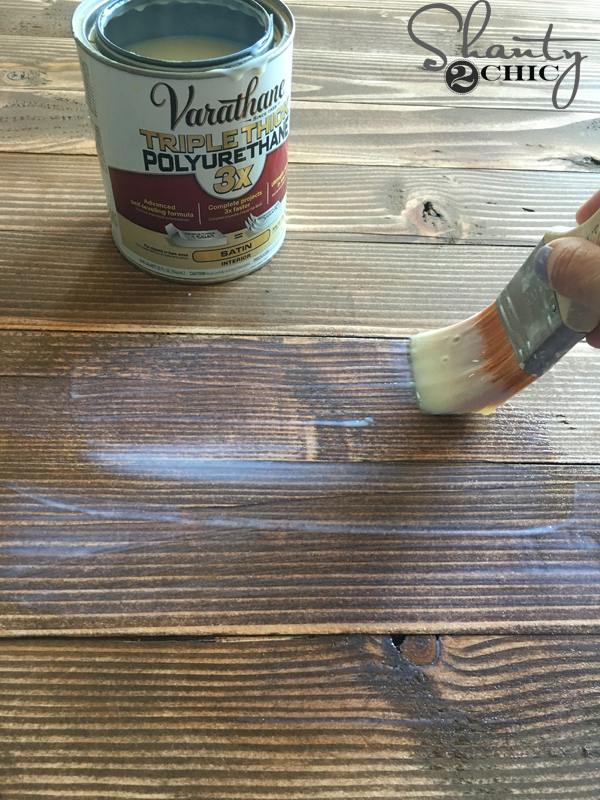
I love to use the Varathane Triple Thick Polyurethane in Satin! It goes on equal to 3 coats of regular polyurethane. This is water based so there really isn’t a smell and it’s easy to clean up. I applied one coat with a bristle paint brush and let it dry. You can find the Triple Thick HERE on Amazon.
That was it! I built a bench to fit the bay window (plans for that coming soon) added some cute pillows and awesome chairs and now I have a functional and beautiful kitchen nook 🙂


Not bad for $75 in lumber right? 😉
Here is more info on the items in the pics 🙂
Tassel Pillow – HERE
Other pillows – HomeGoods
Chairs – HERE
Bench – Free plans coming soon!
Chalkboard Calendar – HERE
Stools – HomeGoods
Tile – HERE
Chandelier – HERE
Window Box Cornices – HERE
White Pitcher – HERE
Paint Colors – HERE
Window Shades – HERE
Find more styles in our DIY dining table tutorials! We have over 25 free plans to fit any style, skill level and space!


Where is the cut list
Hi. Great plan. I want my table to be a counter height pub table. It will only be about 40” in diameter. I’m going to extent the height to 34.5”. Should I cut the table supports and feet back from 30”.
I would like to make this counter height.
I want a 48 to 54 inch DROP LEAF round table top.
Would any adjustments for possible tippiness be required?
Would I need to add some sort of weights into the base?
Brooke
Built this and the table top warped so bad, then continued to crack once attached to the base. how do you keep this from happening to your table top?
Love your projects and follow you on all platforms… my to-do list is too long thanks to you two 🙂