Hey guys! I have been dying to share this new DIY with you all! If you follow us on Instagram, you may have seen a couple of sneak peaks of the building process and may have even tried to take a guess at what it was going to be. Well, how about a round table that seats 6 for only $110!!!!!
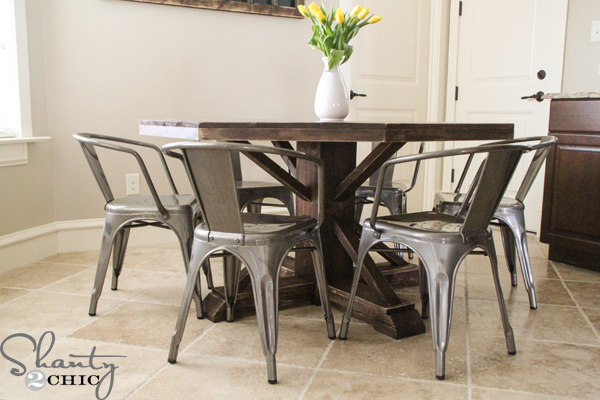 I’m not even kidding, the price tag shocked me too! Especially considering the piece that inspired it, from Pottery Barn, is $1,899 BEFORE tax and shipping. I’d say I made out like a bandit 🙂
This is the very first piece of furniture that I have built for our new home. I mentioned, a while back, when we sold our house that we decided to sell the furniture as well. I knew that I would want to build new furniture and couldn’t justify paying to have it all stored and then moving it in temporarily. Needless to say, my plate is quite full trying to build furniture to fill our home up (and get our mattresses off the floor 😉 ) BUT, I wouldn’t have it any other way. I’m in a woodworkers heaven 🙂
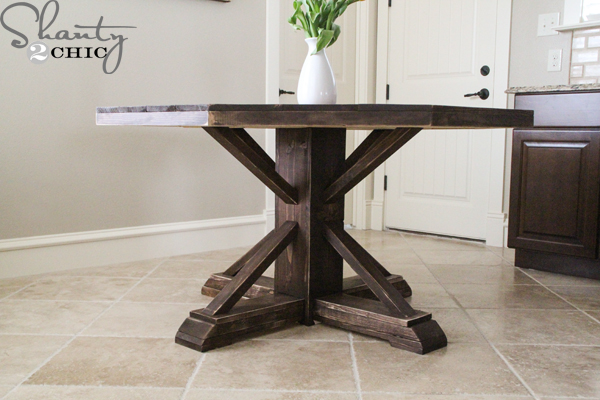
I enlisted the help of our super talented friend, Ana White, for this build. I knew that I needed a round shaped table to fit in our breakfast nook so after a bit of thought, we decided to go with an octagon shape. It would be easier to build than a round top and it would still give my space the round shape that it needed! You can get the free plans HERE and I’ve shared my step-by-step pictures to help you when you are building your own!!
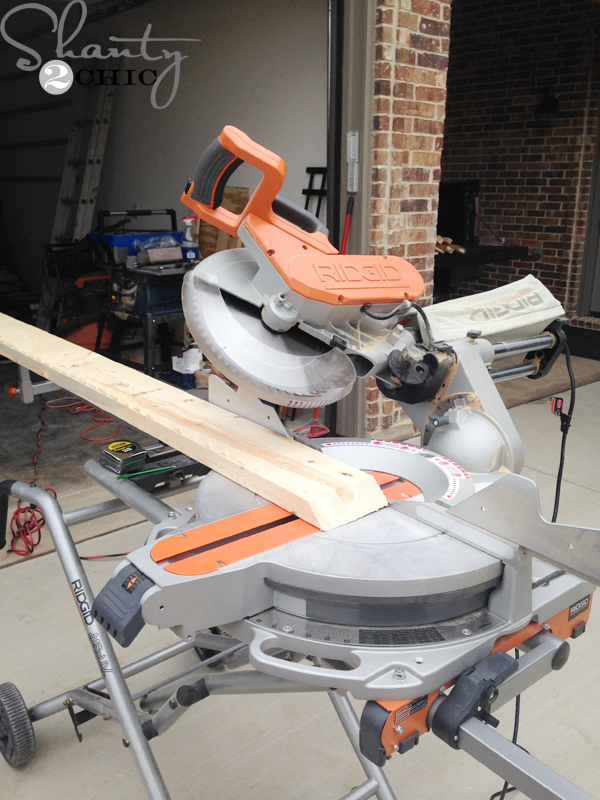 There are lots of angle cuts in this piece but don’t let that scare you! If you have the right tools it’s a piece of cake! I used my Ridgid 12′ sliding compound miter saw for this job. The bevel and miter slide to both sides which makes cutting all these angle super fast.
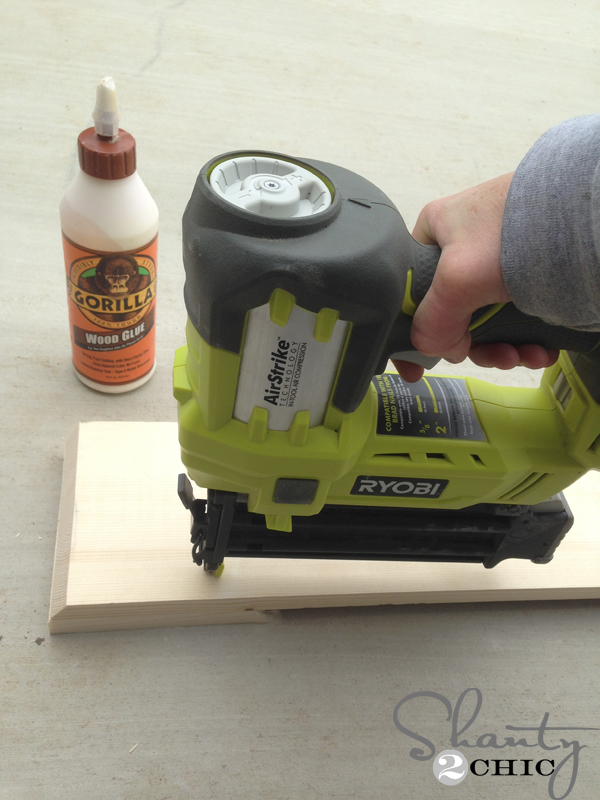
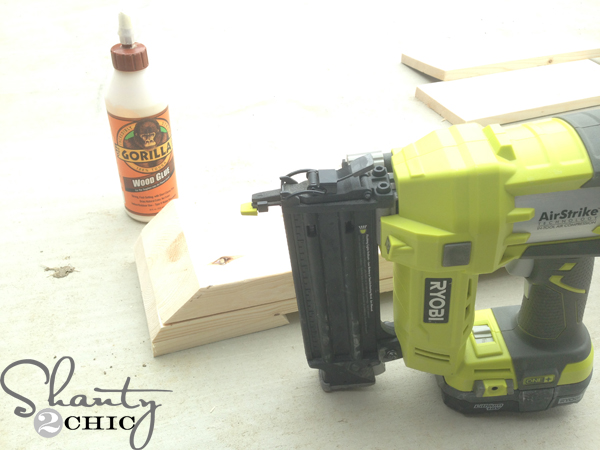 The first step is to build the legs. It’s as simple as stacking boards on each other, glueing and nailing!
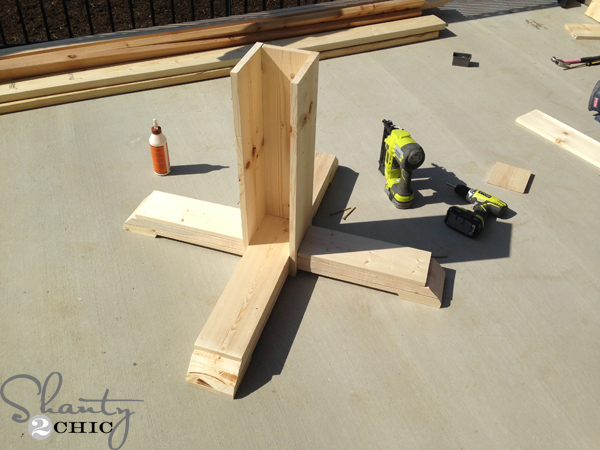
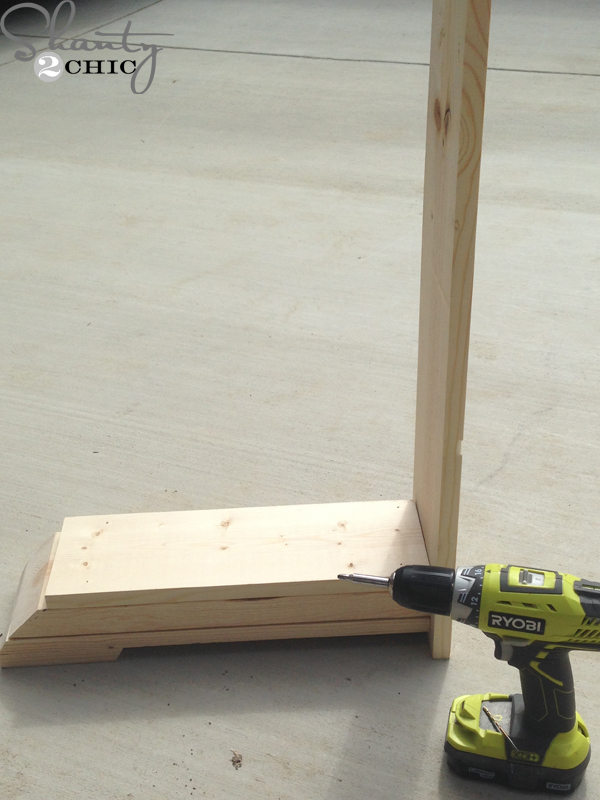 Here is one leg attached to the base. I just predrilled and followed up with 2 1/2″ wood screws to attach the board for the base to the leg.
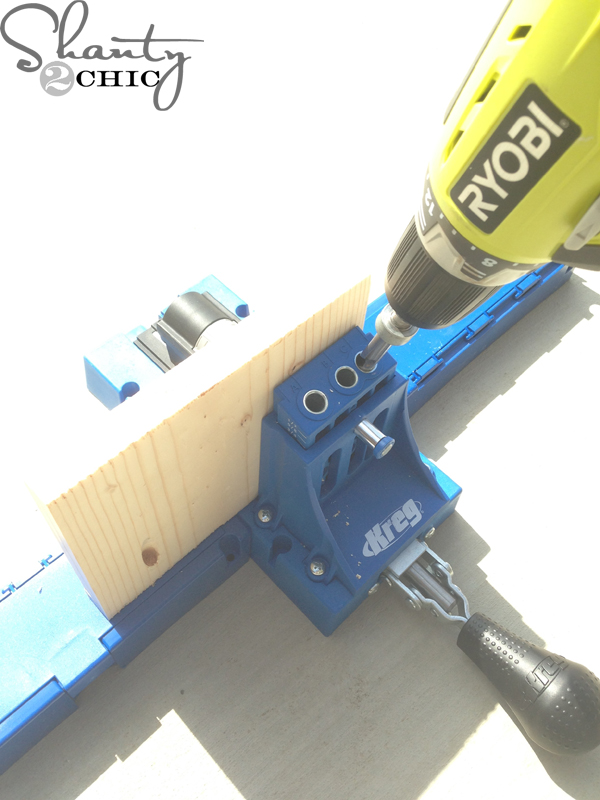 To put the two short legs together, I used my Kreg Jig K5. This was my first time to use this bad boy and OH MY GOODNESS what a difference. I loved the previous models but this one makes building so much faster. It has a self adjusting clamp so there’s no more loosening and tightening the little bolts! I appreciated it so much on this table because I was drilling though both 2x boards and 1x boards!
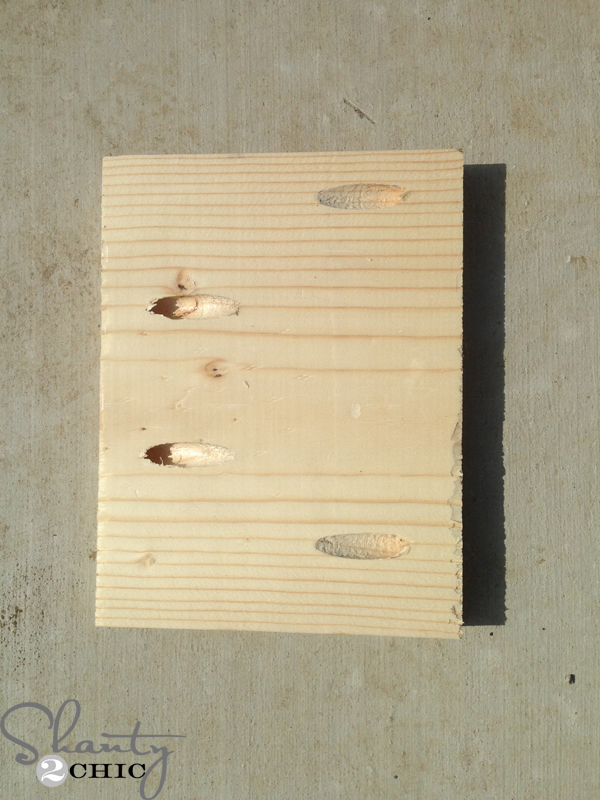 Where I drilled my pocket holes for this piece. (goes between the two short legs)
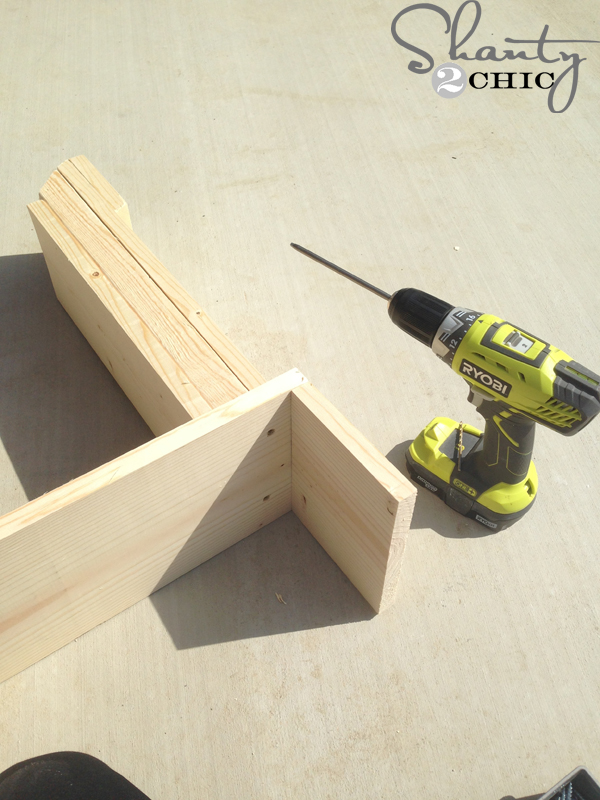 More base construction
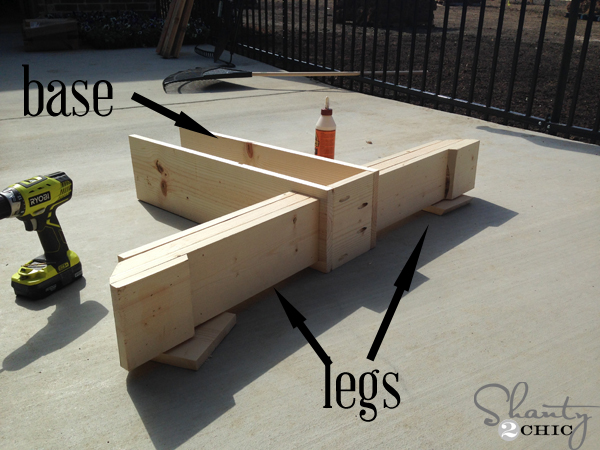 Now we have half of our legs and base completed! EASY!
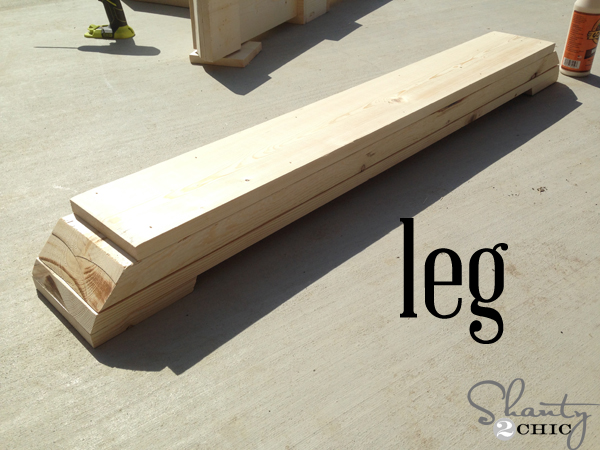 Construction of the long leg. Same steps as the other two legs but it’s just one long piece.
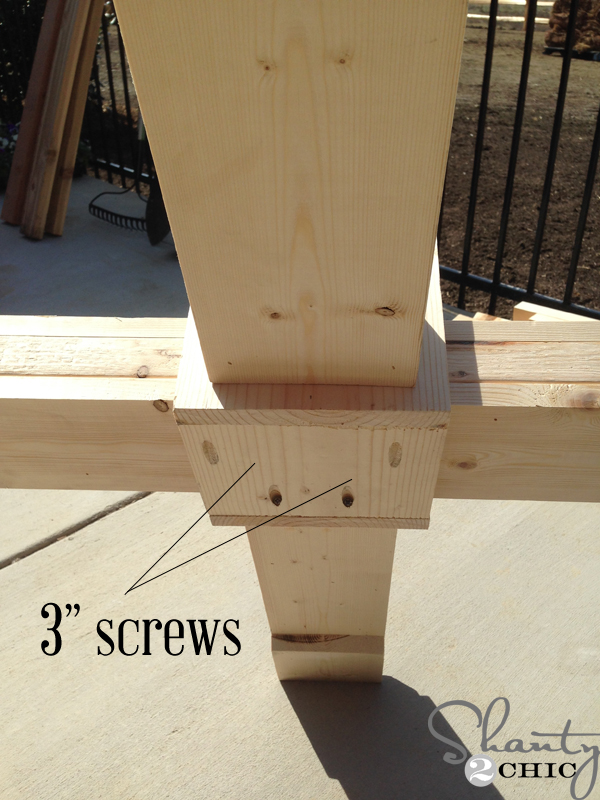 This is a picture of how I attached the long leg to the base and other two legs. If you have an extra hand have them hold this piece up while you pre drill and screw. I wasn’t as lucky so I resorted to resting it on my head…don’t try this at home 🙂
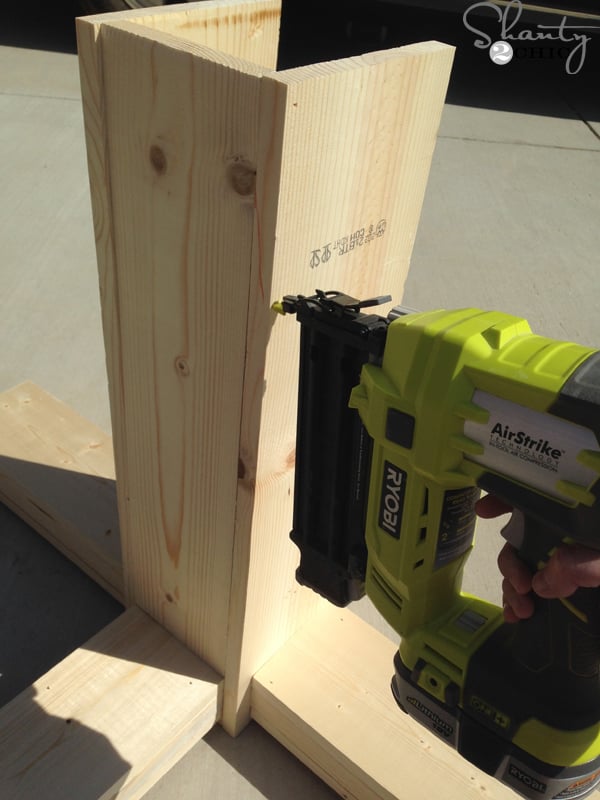
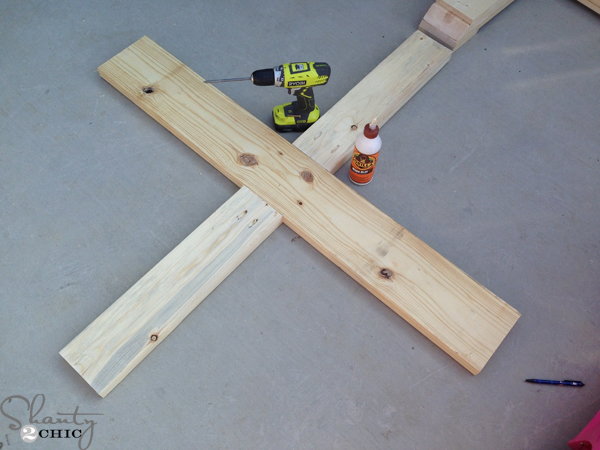
 Adding the last two boards to create the base. I just used wood glue and my brad nailer on this part as well!
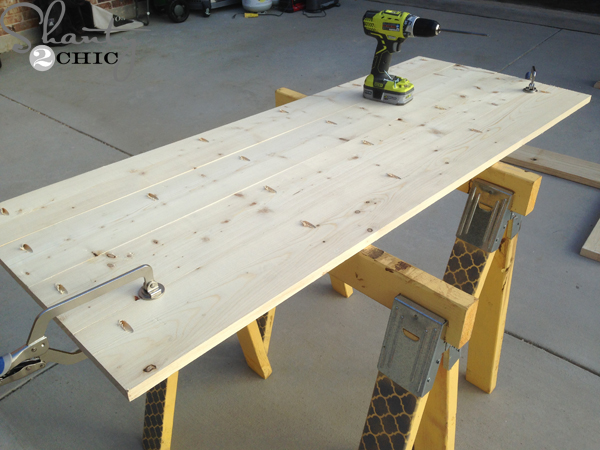
 Once the base and legs were built, it was time for the top. This is the piece that supports the top.
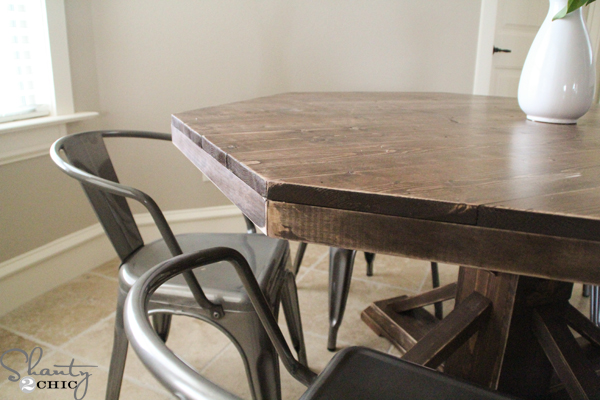
 A tip for the table top – Ana suggests to cut as you go which is key! For the mitered planks, I would cut my first angle, line it up
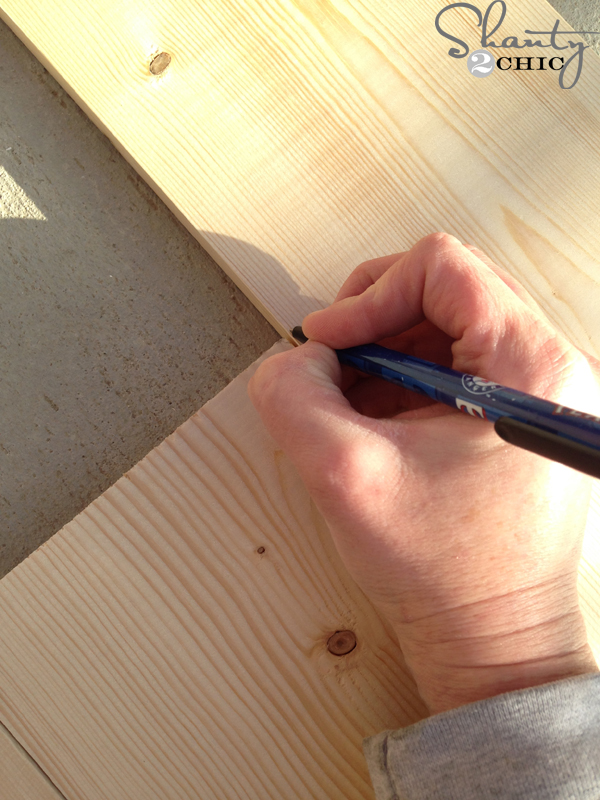 and mark where the angle should be cut on the other end. This is the best way to get the most accurate cuts!
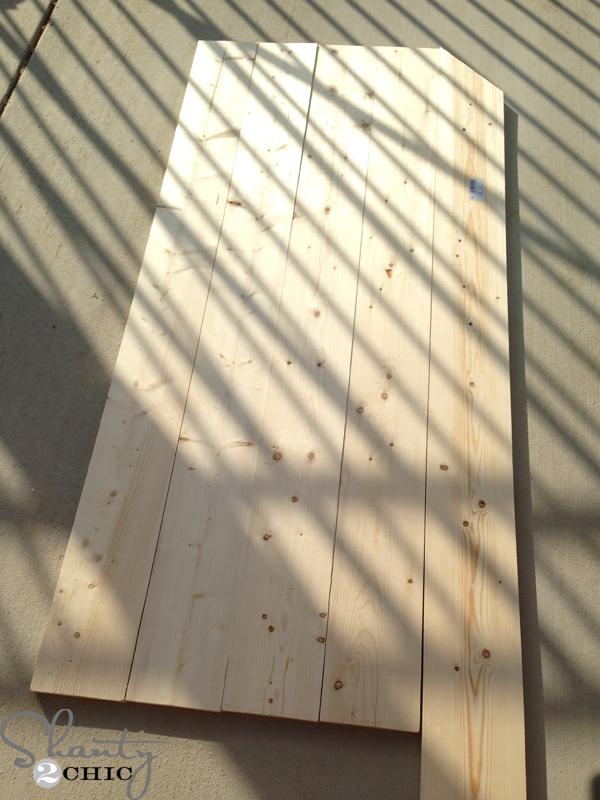
 Once all of my planks were cut, I used my Kreg Jig to join them and clamped every joint to make sure the the planks made a smooth top!
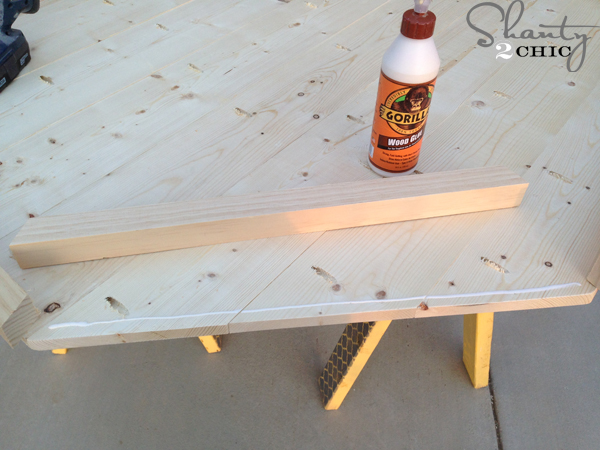 The final building step is to trim out the table top with the 2×2. I used wood glue and my nailer to attach them.
 It was easier for me to nail from the top of the table so I just filled the nail holes with wood glue.
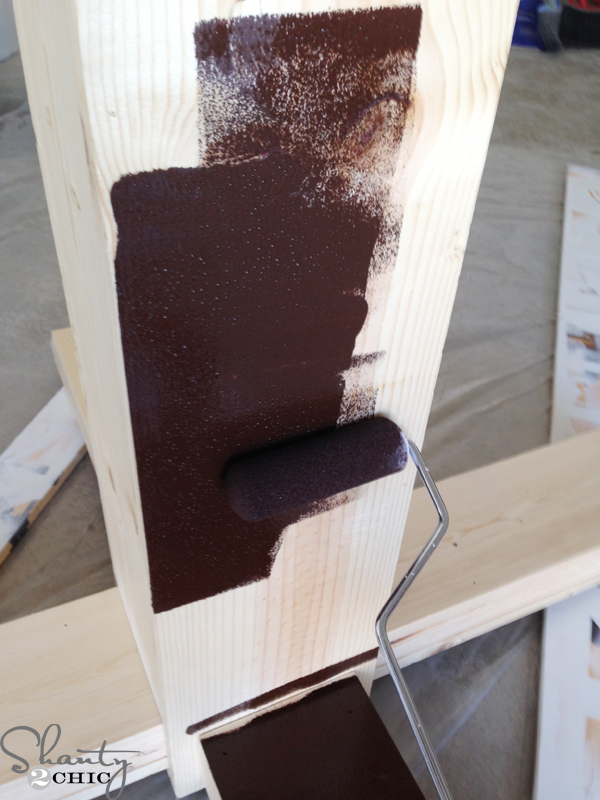 I used a foam roller to apply 1 coat of Carrington stain by Varathane. Varathane is the Rust-Oleum brand sold at Home Depot. Same colors and product!
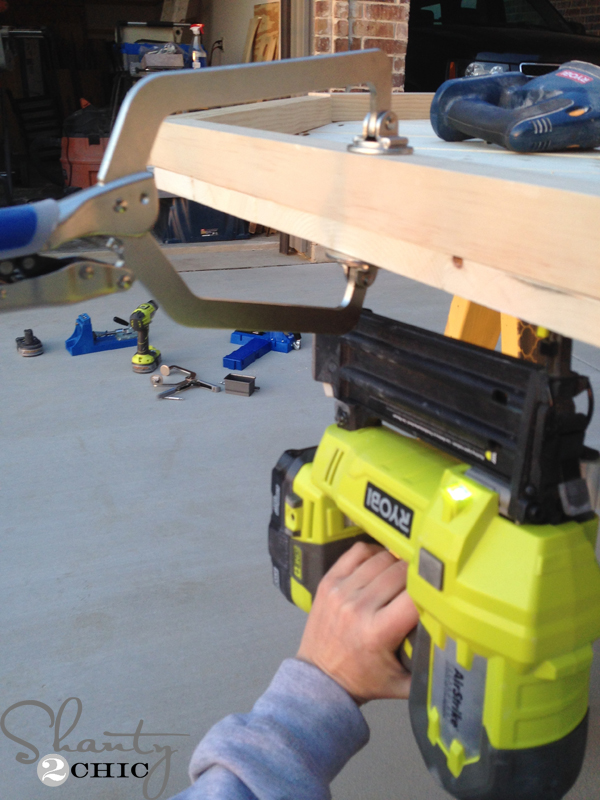
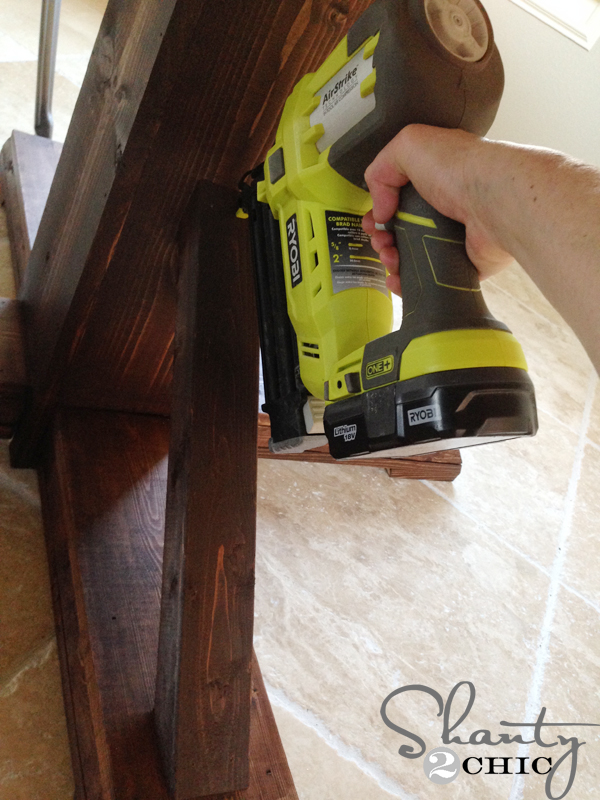 I waited to attach the top to the base until we could bring it inside because it was too big to get the entire thing through the door. I attached the trusses with my Airstrike Nailer.
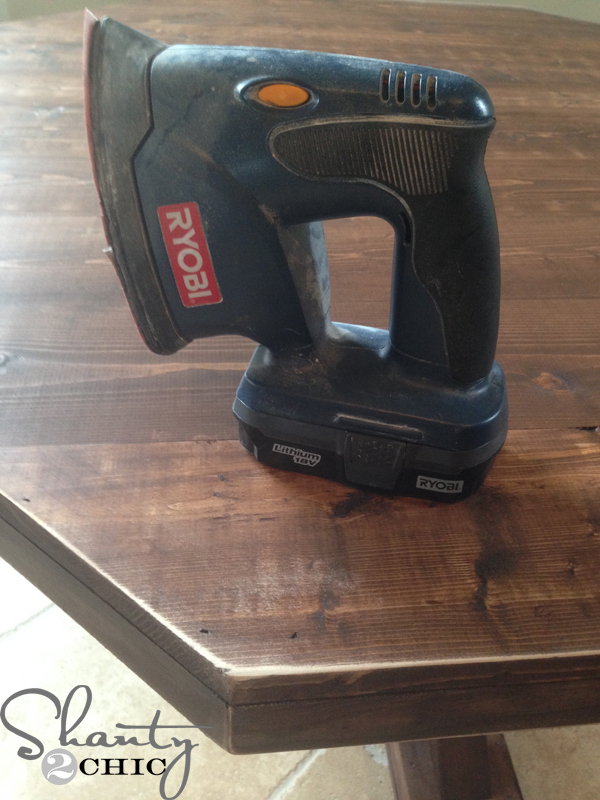 And after much debating, I decided to distress all of the edges just a tad. I used my Corner Cat sander for this and it was perfect for getting to the little angles on the trusses!
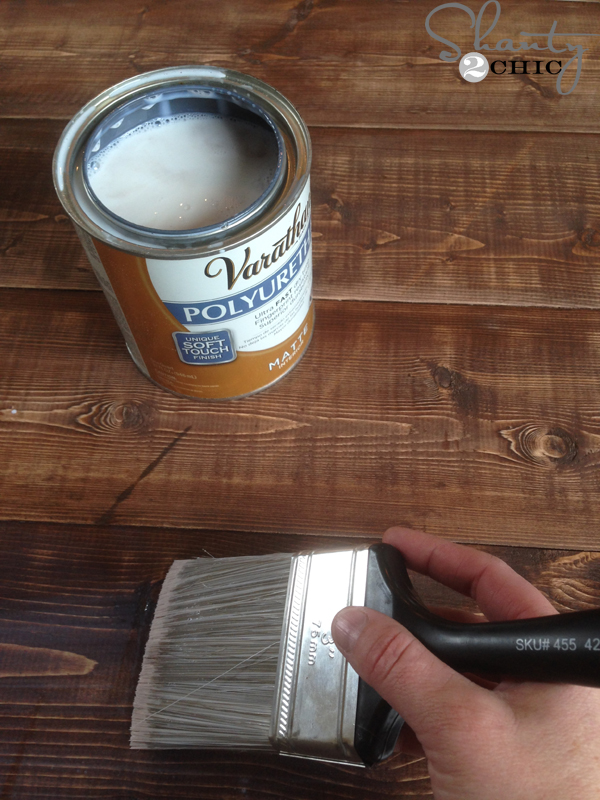 Now, we don’t put a finish on all of our pieces, just the ones that will need protecting. I think I put like 5 coats of Varathane Polyurethane in Matte finish on the table top. I really wanted to be able to wipe it down after our little monsters eat 🙂
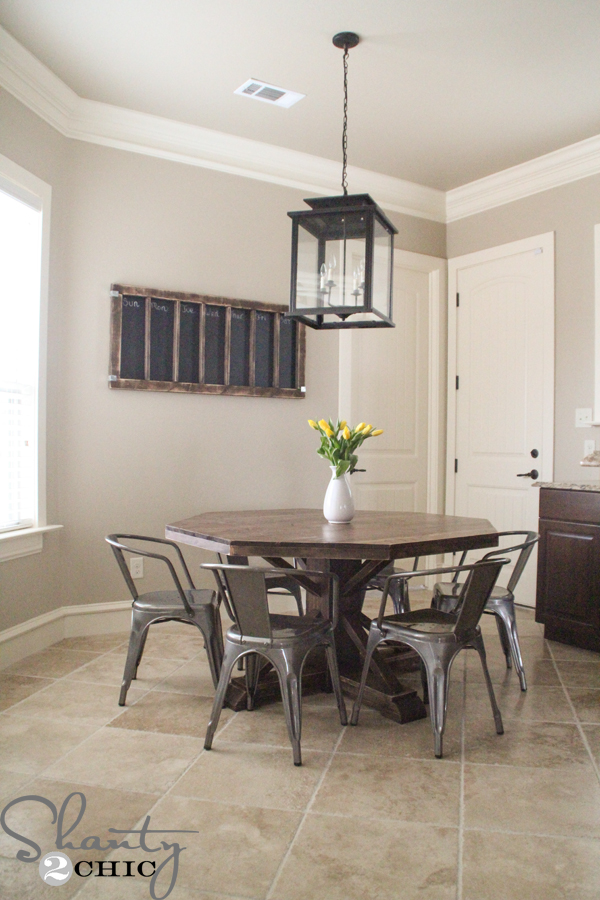 That was it!! With all of the money I saved building this table myself, I splurged on some metal chairs 🙂 I purchased these at Target. I had my heart set on a more expensive chair from another store but, I needed 6 of these. The reviews on this chair aren’t great so I made my sisters go with me to Target and the other store to compare. We sat in them, measured them, debated and couldn’t justify spending double the price, per chair, because Targets were great! So I was able to get 6 chairs at $50 a piece!

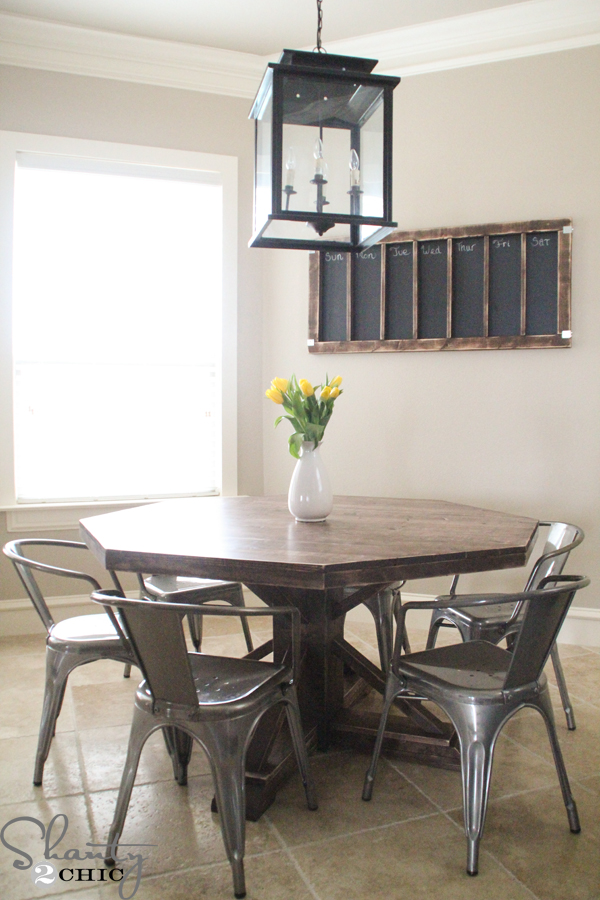
 I’m just swooning over this pretty table! It was VERY easy to build and a savings of at least $2,000 isn’t bad either 😉 Thanks so much to Ana White for these awesome plans!
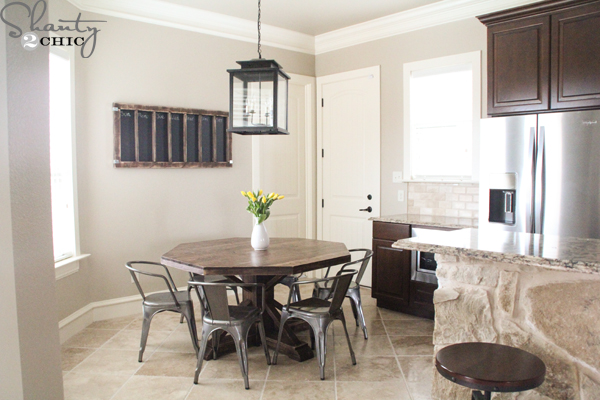
See something else in the room that you like? You can get more info below!
DIY Chalkboard Calendar – HERE
Lantern Chandelier – HERE
Valspar Paint Colors – HERE
Cabinotch Cabinets – HERE
Cambria Countertops – HERE


Hi! I absolutely love this table! Quick question, we have a smaller breakfast nook and would like to make this table about ten inches smaller than yours. Would we need to make the base smaller or leave it as is?
I am wondering if I can make this into an outdoor table. It would be perfect on my deck.
You would want to finish it in a spar varnish which is flexible enough to withstand temperature and humidity changes and usually has uv protection as well otherwise it wouldn’t last long in the outdoors
Agreed with Joshua! Also, you will need to put about a 1/2″ gap between the planks to allow for swelling and shrinking and to let water run through rather than puddling on the top.
Hi! My husband and I are going to build this table and the link for the plan isn’t working. It was last night though. Would you mind emailing it to me? mlfilberto@yahoo.com. I’d really appreciate it! I LOVE this table!! Thanks! 🙂
Hi Michelle,
So sorry about this. It’s not our plan, it’s Ana’s and her site does this sometimes. We don’t have access to her plans but they should be back up shortly!
Thanks for letting me know! 🙂
What kind of lumber do you use for all your projects? Do you basically just go to Lowes or Home Depot and get the best looking boards they have?
Yes, we buy all of our lumber at Home Depot. Sometimes it takes some digging though 😉
What type of wood did you use?
Pine:)
Hello. I will be making my own Restoration Hardware style dining table in just a week or so and I am trying to study up on what would be the best finish. The last table I did I used a product that said it was furniture grade and water proof that I paid a pretty good price for online but unfortunately it was not water proof and I have water stains to prove it. It also does not wipe clean easily. Not good! Anyway I was wondering how your table with the Varathane Poly in the matte finish is holding up. Is it truly waterproof and good for dining room furniture that gets spills and does it wipe down easy? I would love your input. Thanks.
Yes! It is holding up great. I clean it with a towel and windex!
How do you attach the table supports to the pedestal? Thanks!
This table is gorgeous! I was just wondering, about how heavy would you say the finished table is? Thanks!
How long are the 8 supporting pieces that attach from the center to the table top and the legs? Ana White’s site is down and I don’t know how long to cut them.
They are 18.5″ long point to long point 🙂
much appreciated
I love this table! But it is too big, do you think it would work just to scale down the table top, or would i have to scale the base down too?
wondering if you tried this? I need the table to be a max of 40″ and wondering how to tackle downsizing the plans
I just used simple ratios and crossed multipled to downsize. I made the table top round and its 48 inches in diameter and my base lengths are rounded to 38 inches. So if you start with your top length, 40 multiply by Anna’s base 44 = 1760 and divide by Anna’s top (55) gives you 32 inches for your longest base length. You have to do a little more math to figure out the lengths of the two shorter side feet to equal out to be 32.
Got it, thank you for taking the time to reply!
Did you ever end up making the table with adjusted the measurements? I’m also looking to downsize the table, and am looking for guidance! Thanks!
Sorry, I haven’t yet… I have to do all my woodworking outside and the weather turned before I could get started so I’ve shelved the project until spring.
What type of wood did you use for the table?
White wood pine:)
I love this table! Do you still have the plans? I’d love them eamiled vinadauphney@gmail.com
The plans are available on Ana’s site but we site is down at the moment. Should be back up and working soon and the links will work then as well 🙂
Hi. I’d love to take on this project. So gorgeous!! But I definitely need the plans. The link no longer works. Is there another way to post the plans? Or email perhaps? I would greatly appreciate it!! Thanks! 1Chelsea
email is ChelseaJoP@gmail.com 🙂
Hi Chelsea,
It looks like Ana’s website is out down right now. Try again in an hour and hopefully it will be back up 🙂 so sorry!
What kind of wood did you use?
Any suggestions or advice will be much appreciated.