This DIY Rustic Modern King Bed is hands down, my favorite bed that I have ever built (and I’ve built a lot 😉 )!

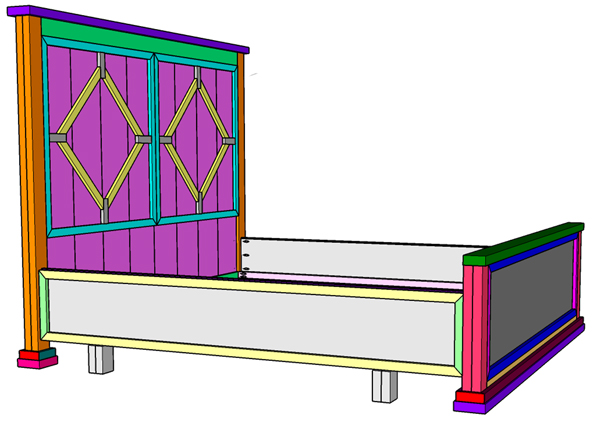
DIY Rustic Modern King Bed
After I repainted my Sliding Barn Door Media Cabinet and built the barn doors, which I stained Briarsmoke, I had to either paint my old bed or….build a new one. My old bed was a queen and I stained it Early American. I have since fallen in love with Briarsmoke and we have been wanting to upgrade to a king mattress so, it was a no-brainer! I got busy designing plans for the bed I had envisioned in my head 🙂
You can download the FREE PLANS HERE!
This is a 4-piece bed, headboard, footboard, side rails and frame. The plans have a lot of steps BUT, they are very simple. Just take on one piece at a time and before you know it, you’ll have a beautiful king bed! Make sure to download the free plans and you can follow along on the step-by-step tutorial below 🙂
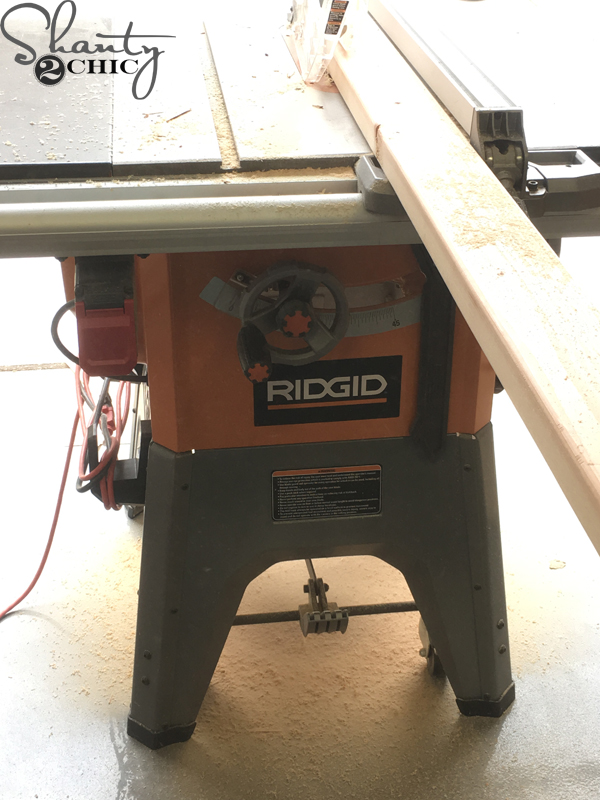
First, I ripped the rounded edges off of all of the 2x boards. This isn’t a necessary step but it is if you want the headboard and footboard laminated sides to be smooth. If you don’t, there will be a little grove on the side where you see the boards meet. To save in lumber cost, I also ripped my own 1×2’s and 2×2’s. If I had purchased the lumber, according to the supply list, I would have spent $342 in lumber. Instead, I ripped 1×2’s from 1×4 boards (this gave me 2 1×2’s for the price of 1) and I ripped my 2×2’s from 2×4’s (select prime 2×2’s are about $8 and this gave me 2 2×2’s for $3). The total cost in lumber for me was $287, which saved me $55. I do this for all of my builds and it saves me so much money. Please remember that lumber prices vary by location. If you need an exact estimate for your build, you can use the supply list to price the lumber in your area.
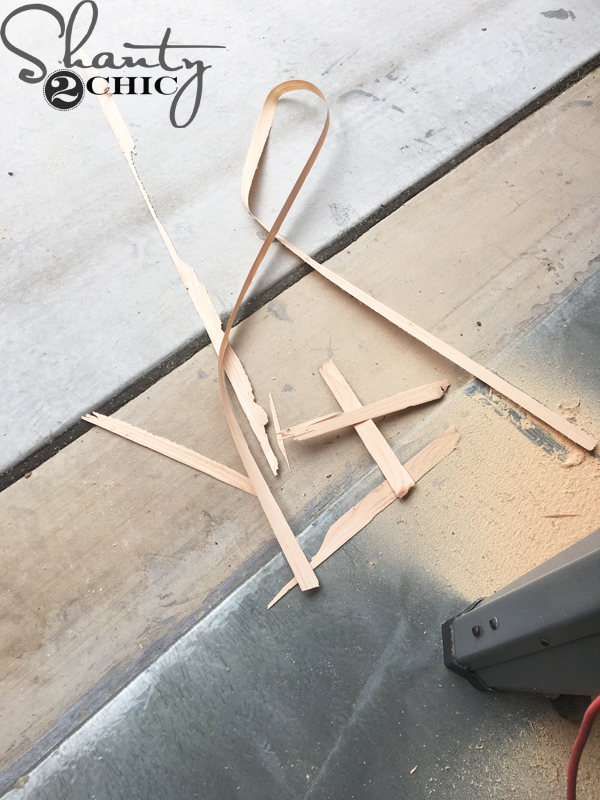
This is what you will see when you rip the rounded edges off. Note in the plans the width that I ripped the boards down.
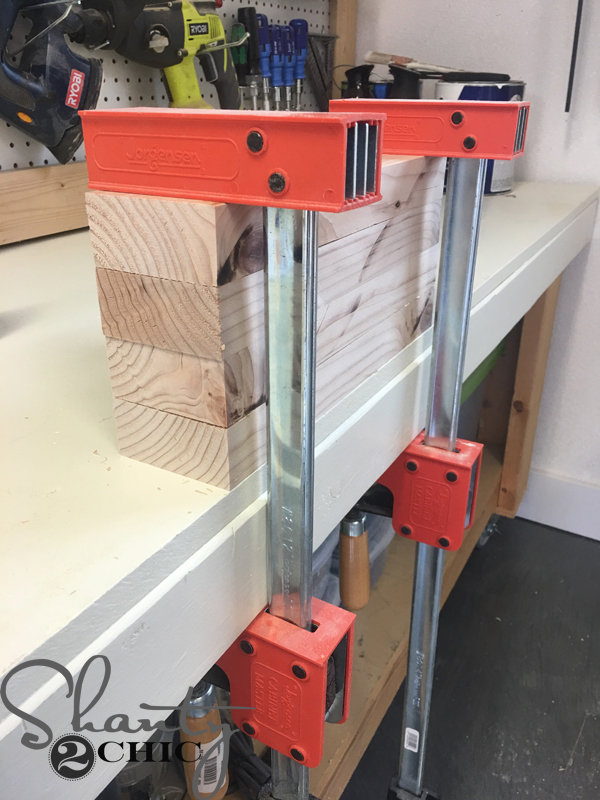
Before you start building, cut the sides of the headboard and footboard to size, apply glue to one piece and stack the other piece on top of it. Then, clamp the boards until they are dry. This is called laminating and it will give us chunky side pieces for the bed.
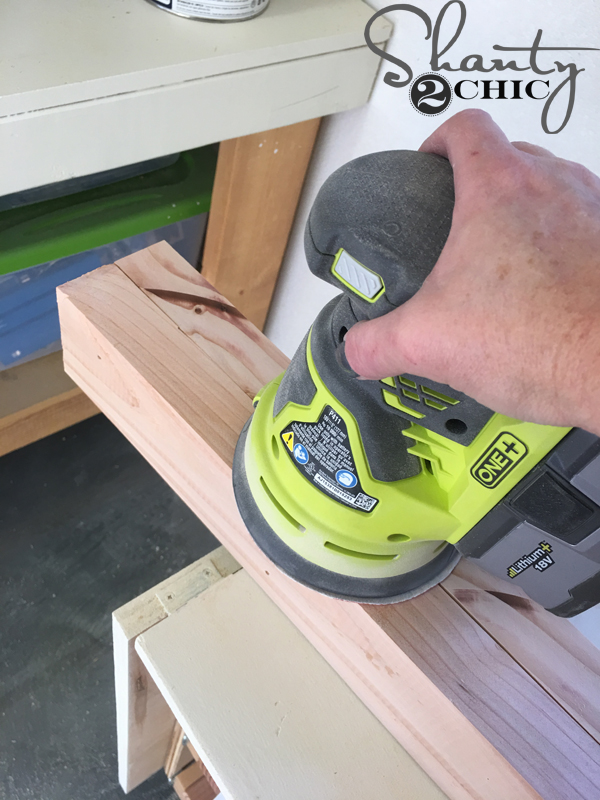
Once the glue dries, sand all of the sides smooth.
BUILDING THE HEADBOARD:
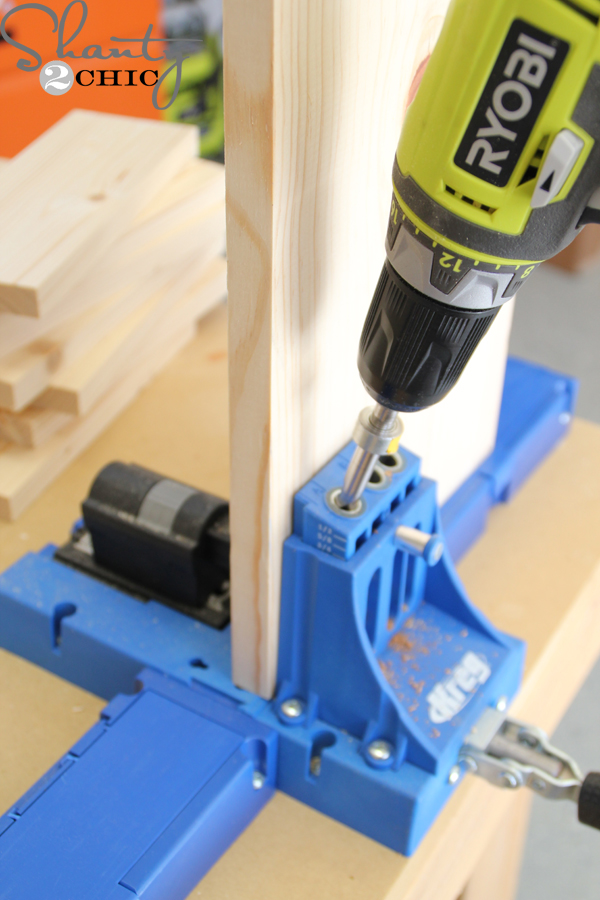
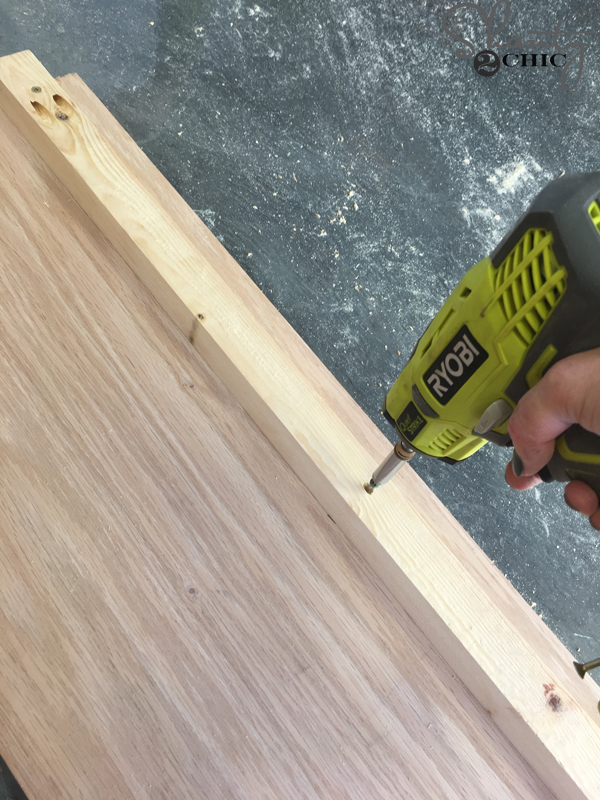
I cut the 1×10 headboard planks to size and drill 3/4″ pocket holes, with my Kreg Jig, according to the plans. You can find our favorite model of Kreg Jig HERE on Amazon! Watch our How to Use a Kreg Jig video HERE!
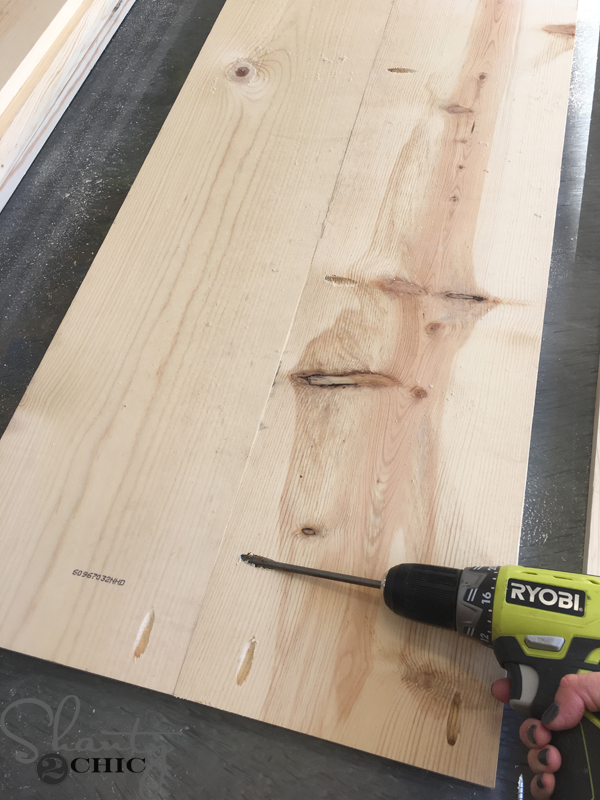
Then, you can begin attaching the planks together with 1 1/4″ pocket hole screws.
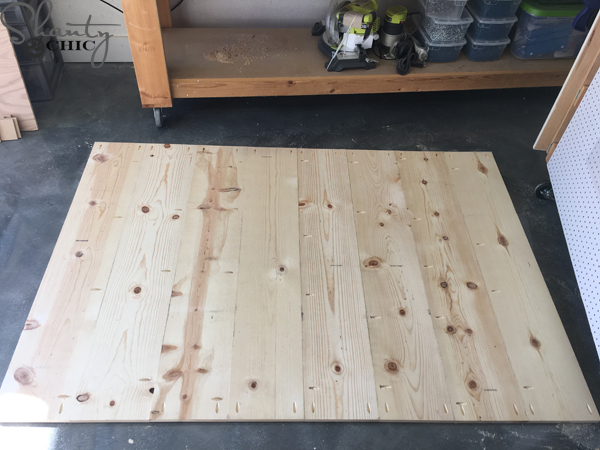
This is what the headboard will look like once all of the planks are attached.
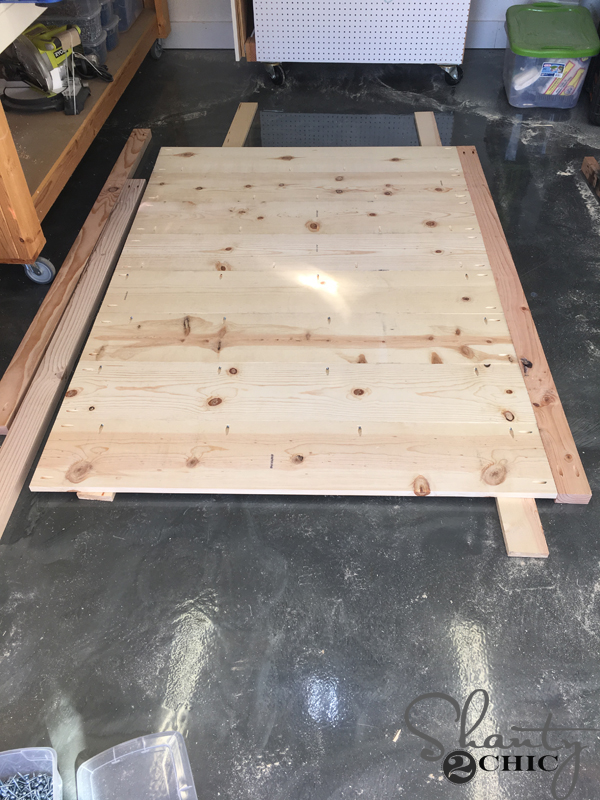
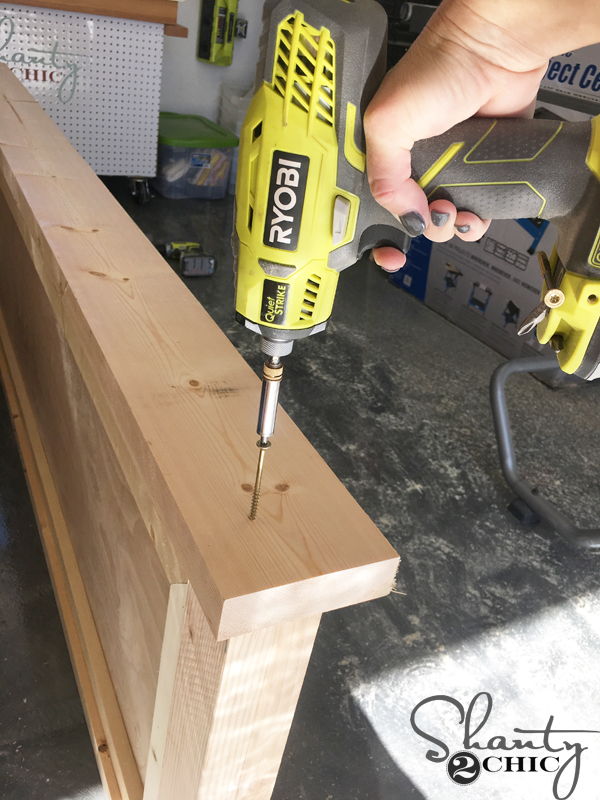
Cut the 2×4 supports to size and drill 1 1/2″ pocket holes in the ends. Prop the headboard planks up on 2, 3/4″ scrap boards (you can use the 1×4’s) and attach one support to each end with 1 1/4″ pocket hole screws.
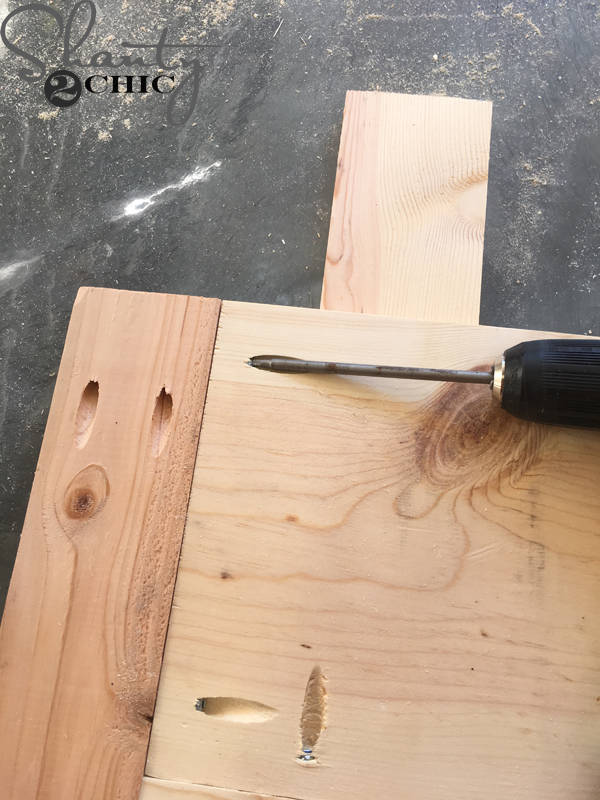
You will use the pocket holes that you drilled into the ends of each headboard plank to attach the supports.
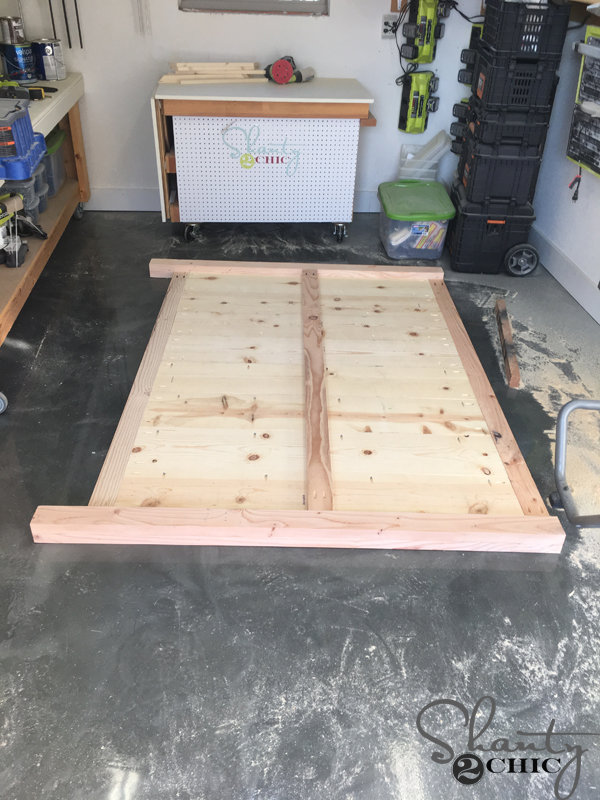
Here is the headboard with a support attached on both ends.
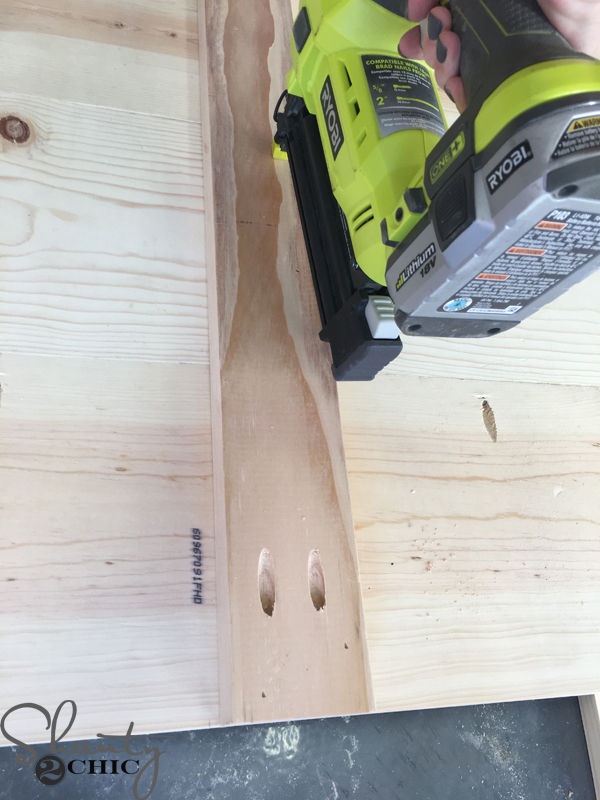
Now, you can attach the third support down the center of the headboard. Refer to plans for the placement. Attach with 2″ brad nails and wood glue. I used my 18-volt Ryobi Airstrike Brad nailer.
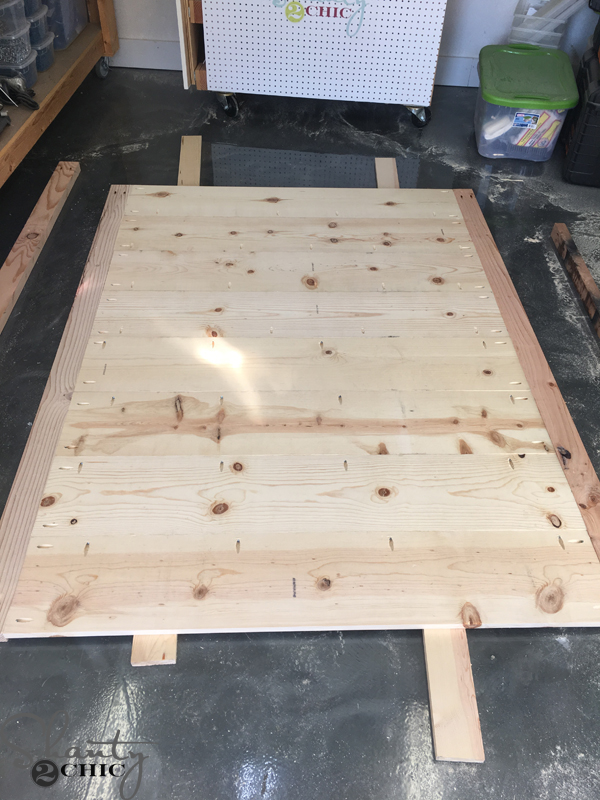
Now, attach the laminated sides to the headboard planks and supports with 3/4″ pocket holes screws (from the planks) and 2 1/2″ pocket hole screws (from the supports) and wood glue.
The side pieces should be flush with the top of the headboard and extend 5″ past it at the bottom.
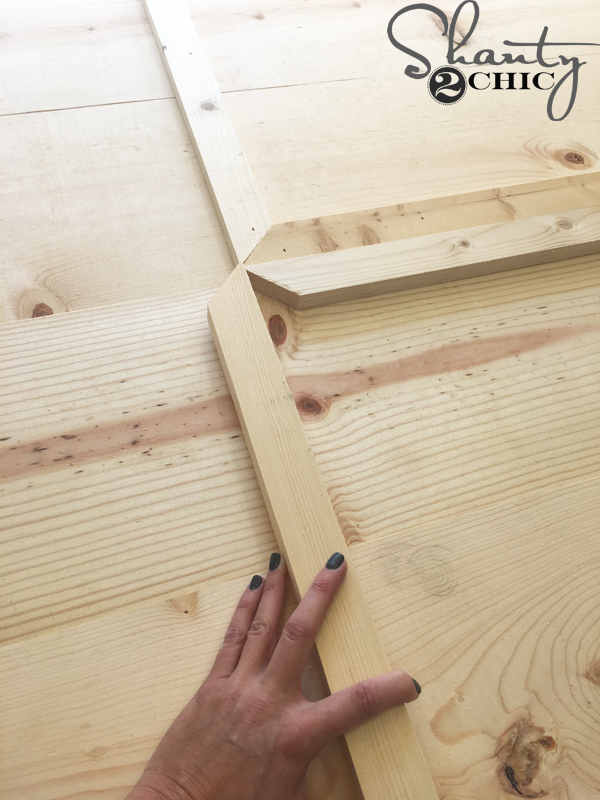
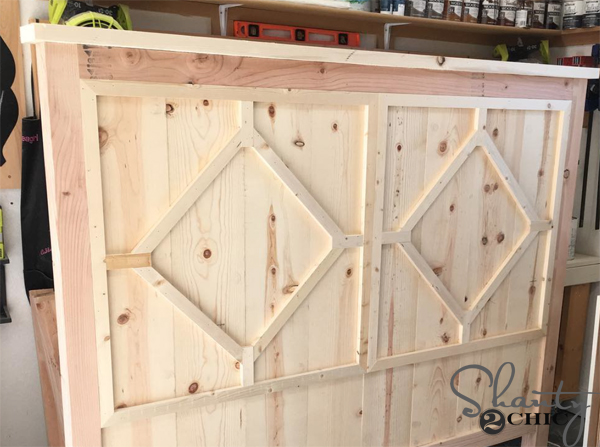
Time for trim. Start with the top pieces of trim. Both ends will be miter cut at 45°. The end of the trim will fit into the top corner of the headboard and the other end will stop at the center of the headboard. The trim will fit directly under the top support of the headboard. Attach with wood glue and 1 1/4″ brad nails. Tip: I like to make the first 45° miter cut, hold the piece in place and mark where the second miter cut should be.
Continue with the other top piece
Cut the vertical trim pieces to size and attach with 1 1 /4″ brad nails and wood glue.
To cut the bottom trim to fit, make the first 45° miter cut, flip the board upside down and mark where the next cut should be.
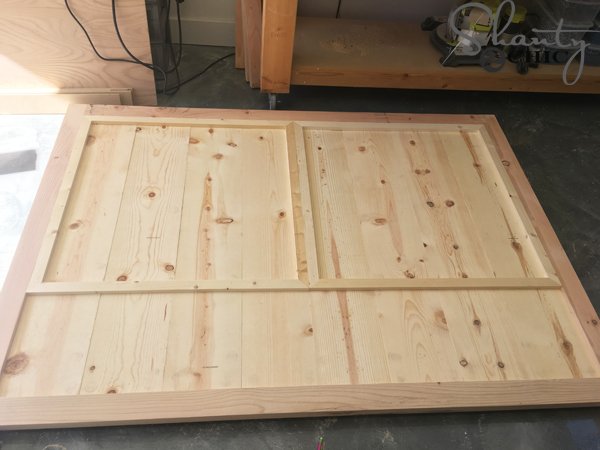
Your headboard should look like this now.
Cut the short trim pieces and attach one to each side of the “squares”. They will be centered on each trim piece. Attach each piece with 1 1/4″ brad nails and wood glue. Refer to the plans for the exact measurements.
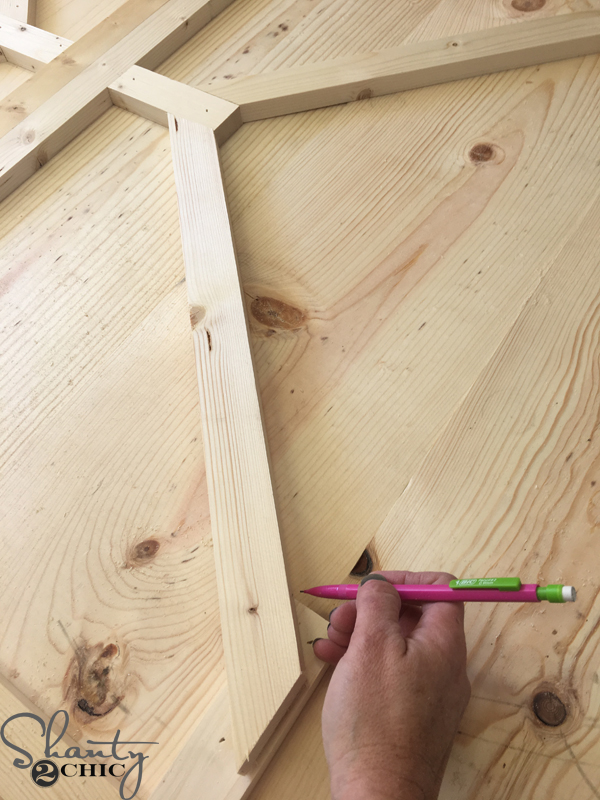
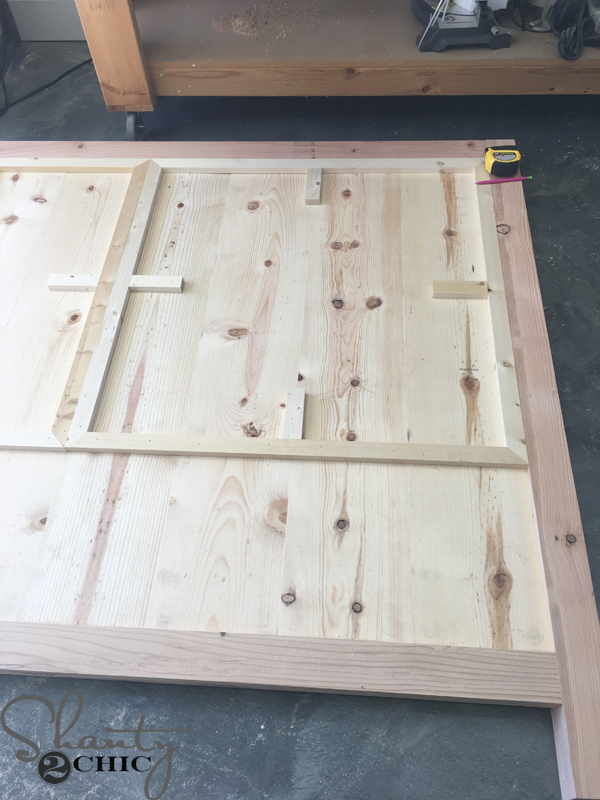
Now to add the diamond trim. I use the same technique to get the exact measurement for these trim pieces. Make your first 45° miter cut, hold the piece in place and mark for the second cut.
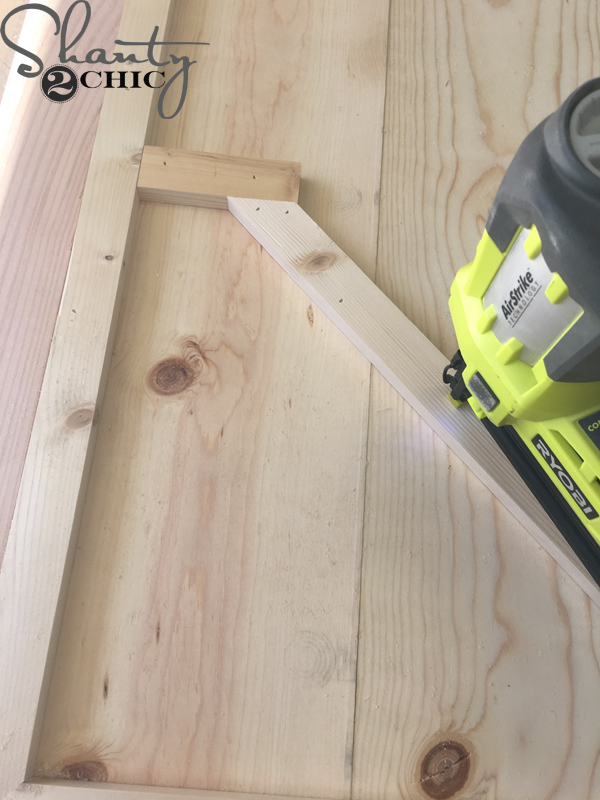
Attach with 1 1/4″ brad nails and wood glue.
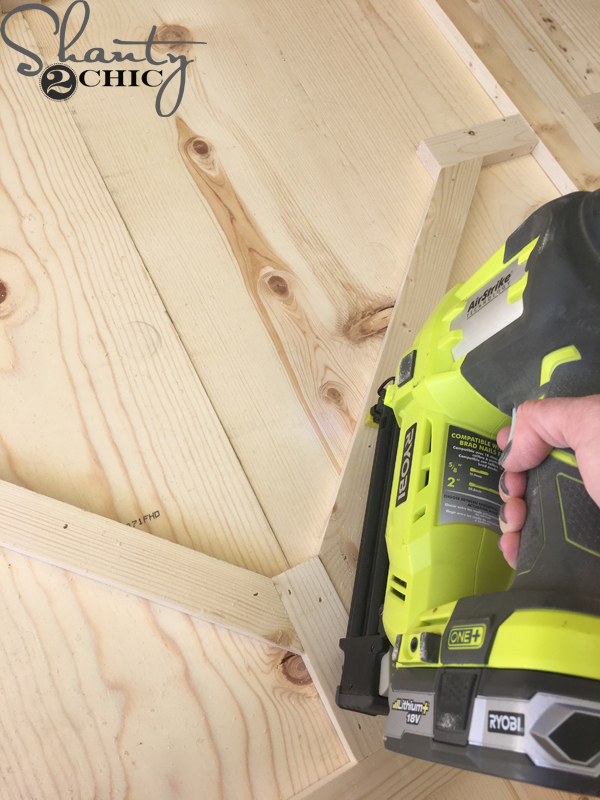
Continue with the remaining diamond trim pieces.
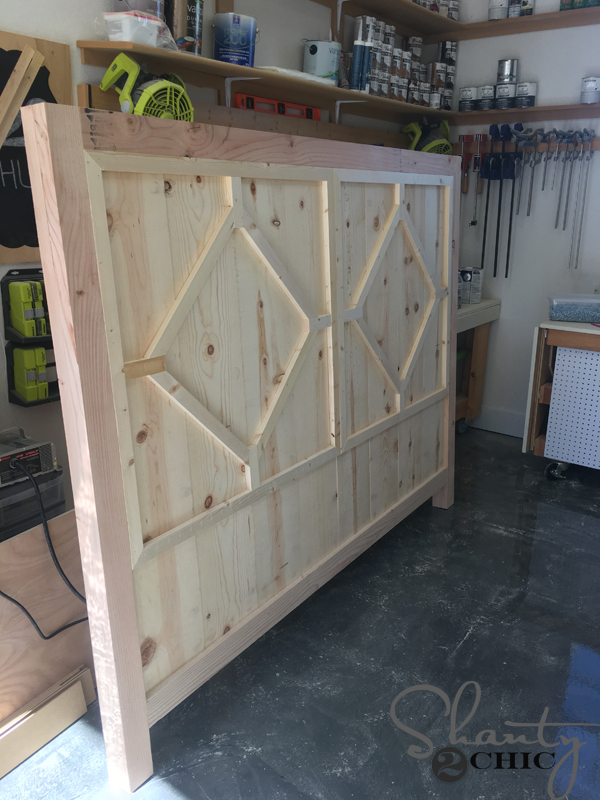
Now your headboard should look like this. Not bad! Just a lot of measuring, cutting and nailing!
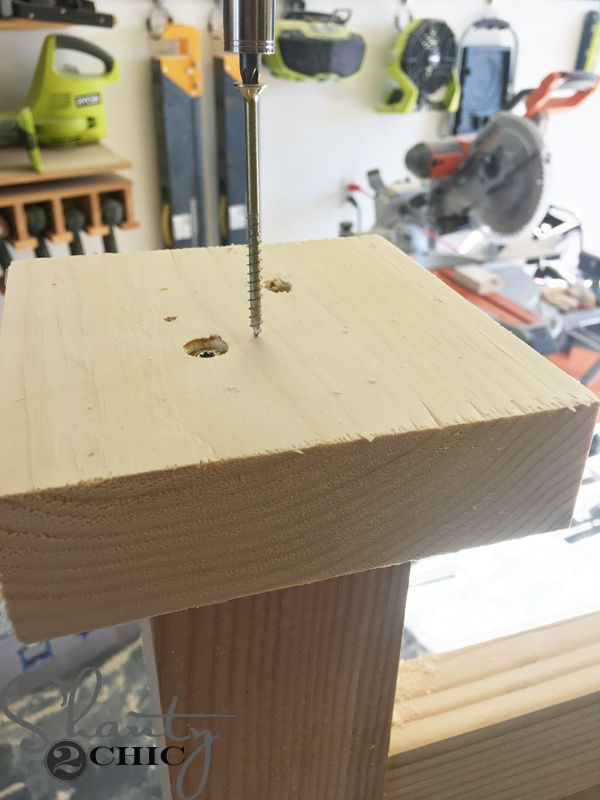
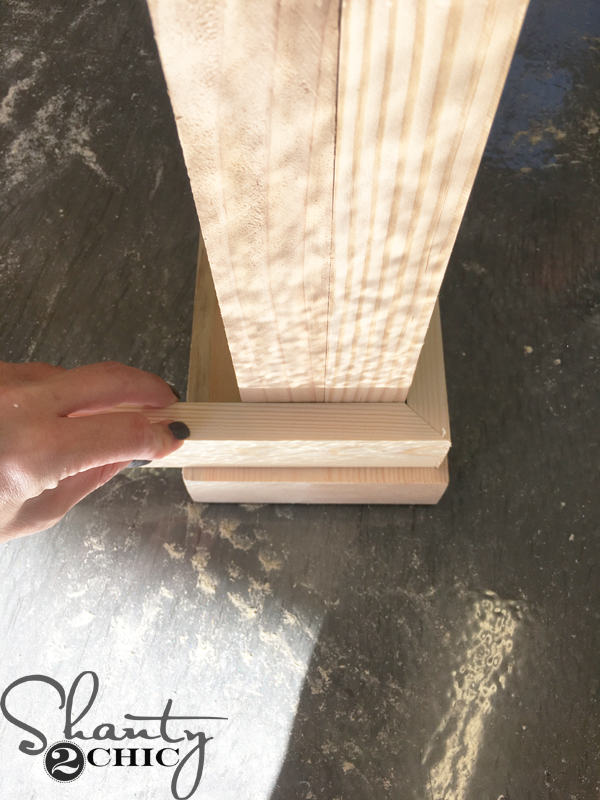
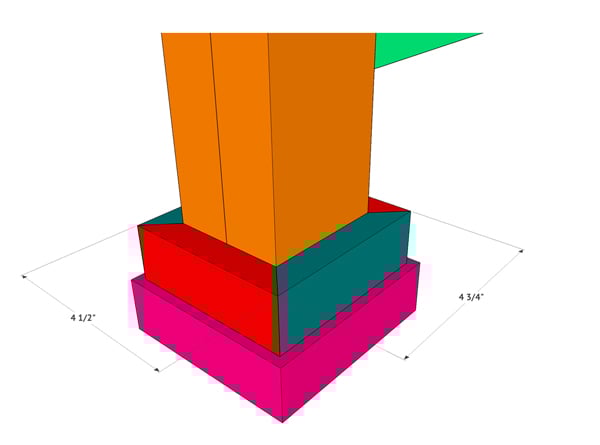
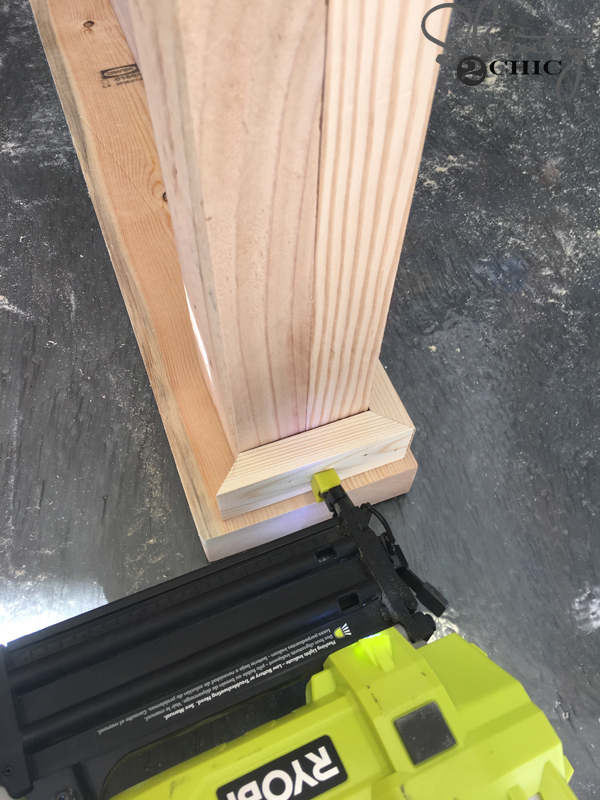
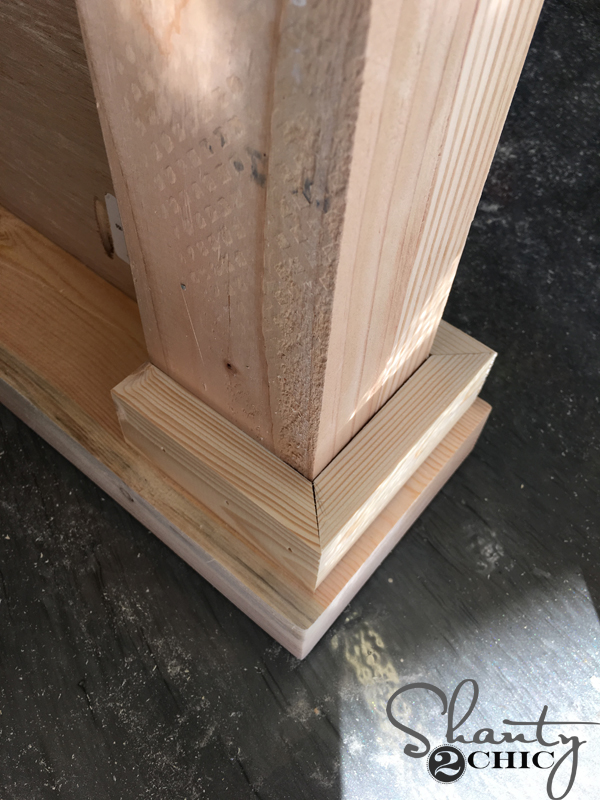
Attach one foot pad to each headboard leg. This will be centered on the leg, leaving a 1″ overhang on all sides. Attach with wood glue and a couple of 2 1/2″ wood screws.
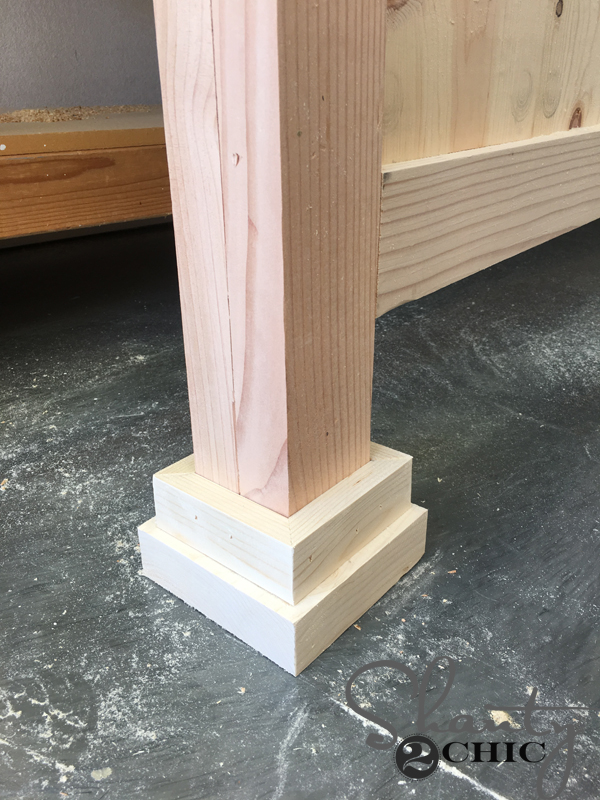
Now, to add this trim to the foot pad.
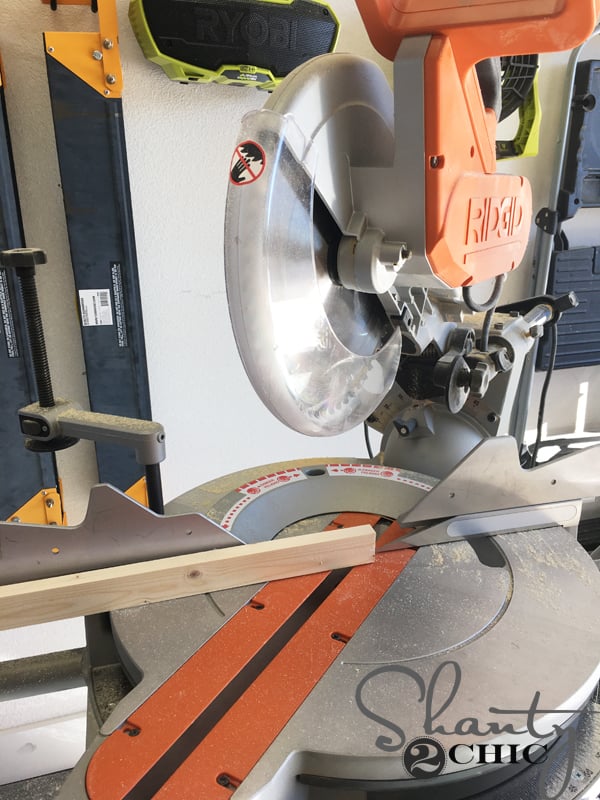
These pieces will be bevel cut at 45° on each end. To get a bevel cut, on the trim pieces, you can use the miter arm. Just flip the board up so that the face of the board is against the fence of the miter saw. Then, make your 45° cut. Check out our How to Use a Miter Saw video HERE!
Same technique, as we used with the headboard trim. Make your first bevel cut, hold the piece up in place and mark for the second bevel cut.
Work your way around each leg of the headboard and attach the pieces with 1 1/4″ brad nails and wood glue.
The final step, for the headboard, is to attach the top 2×6 cap. This 2×6 is ripped down to 5″.
There will be a 1″ overhang around the entire headboard. Attach the cap with 2″ brad nails and wood glue.
BUILDING THE FOOTBOARD:
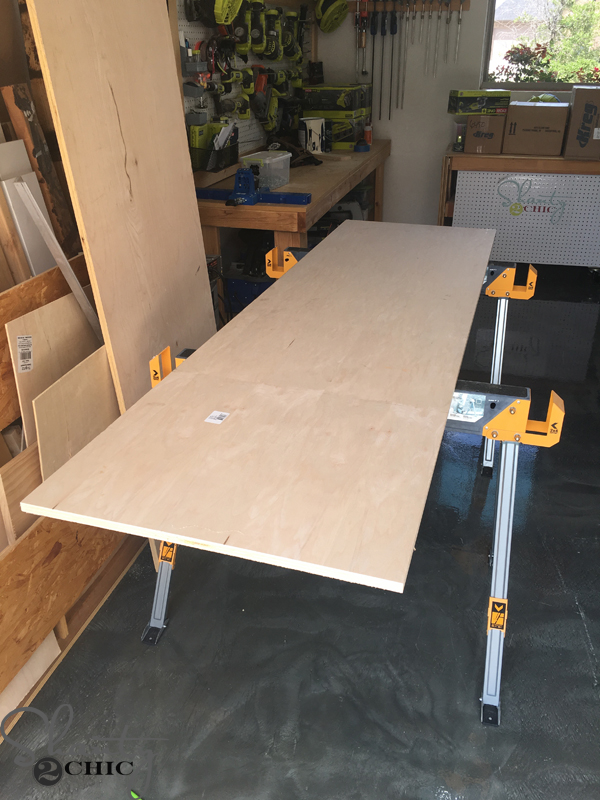
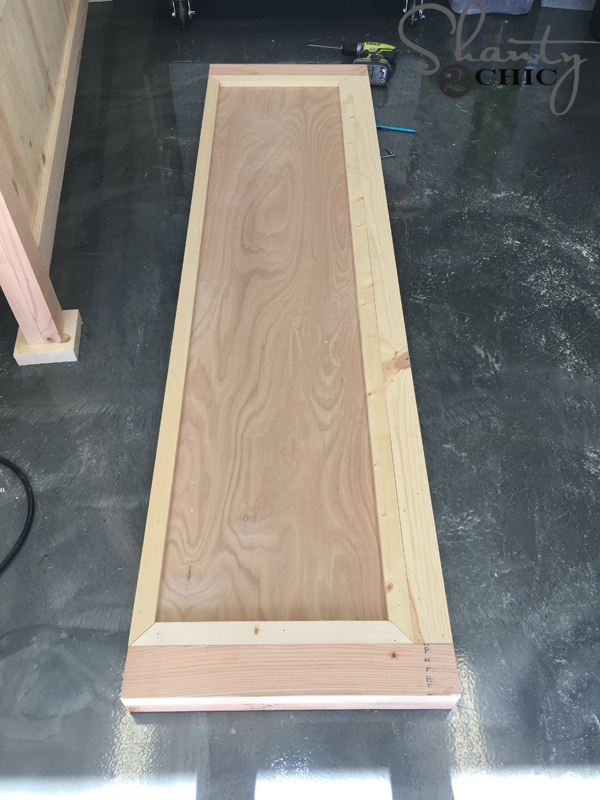
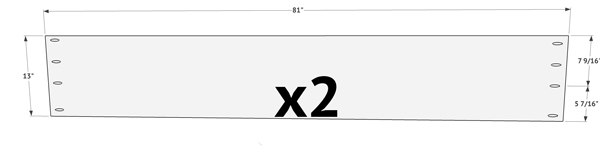
Start with the footboard plywood piece cut to size. You can watch our How to Rip Plywood Video HERE. Drill 3/4″ pocket holes on each side of the plywood. Refer to the plans for proper placement of the pocket holes.
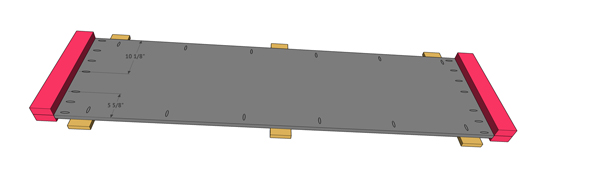
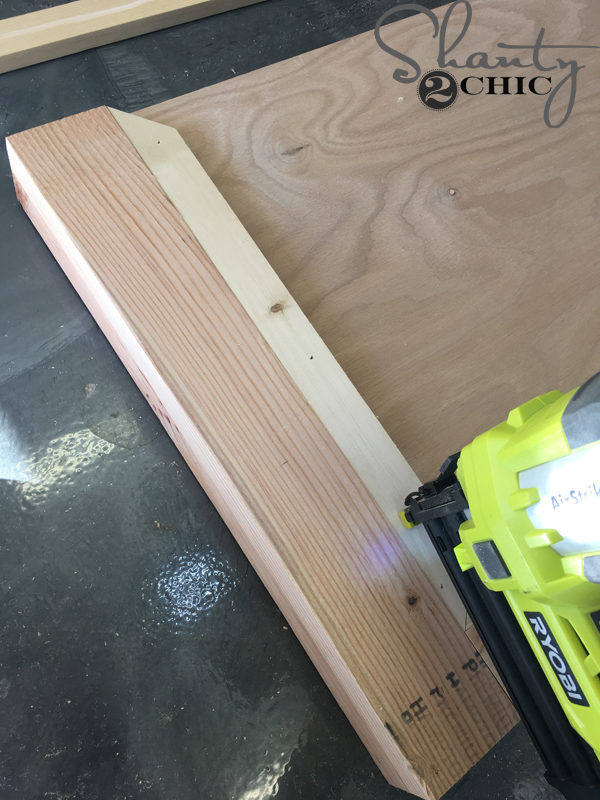
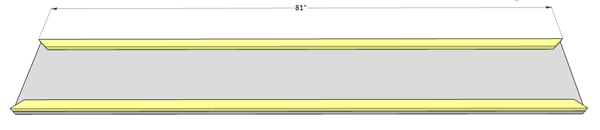
Prop the plywood up on 3/4″ scrap boards and attach the two laminated side pieces to the plywood with 1 1/4″ pocket hole screws and wood glue.

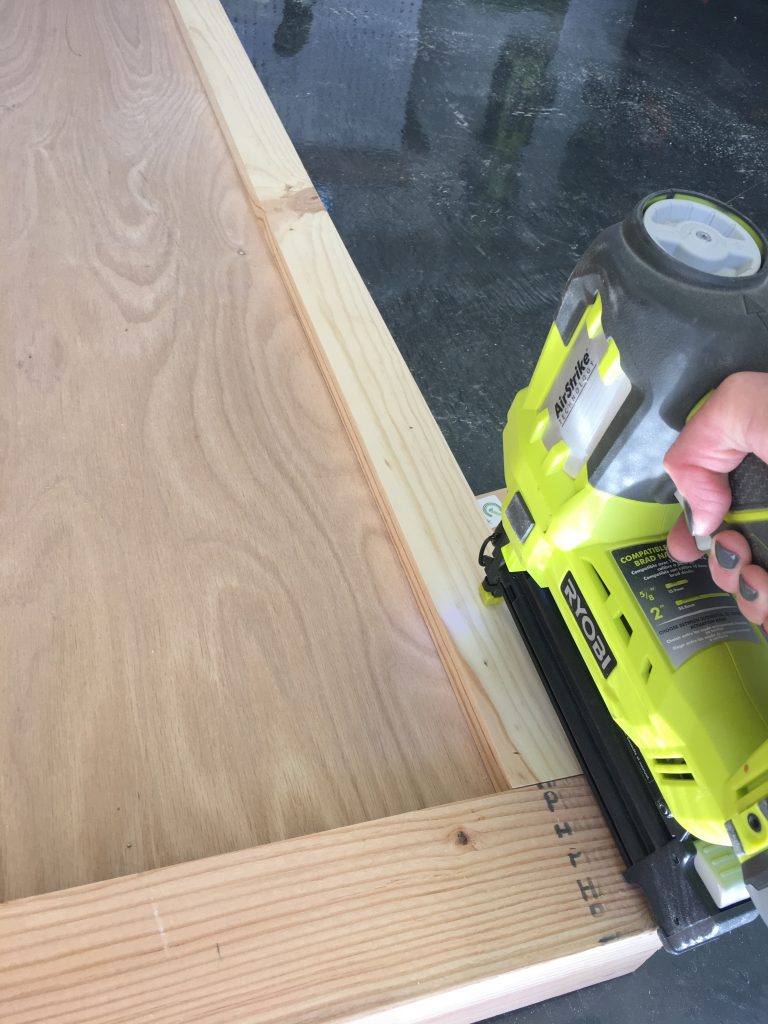
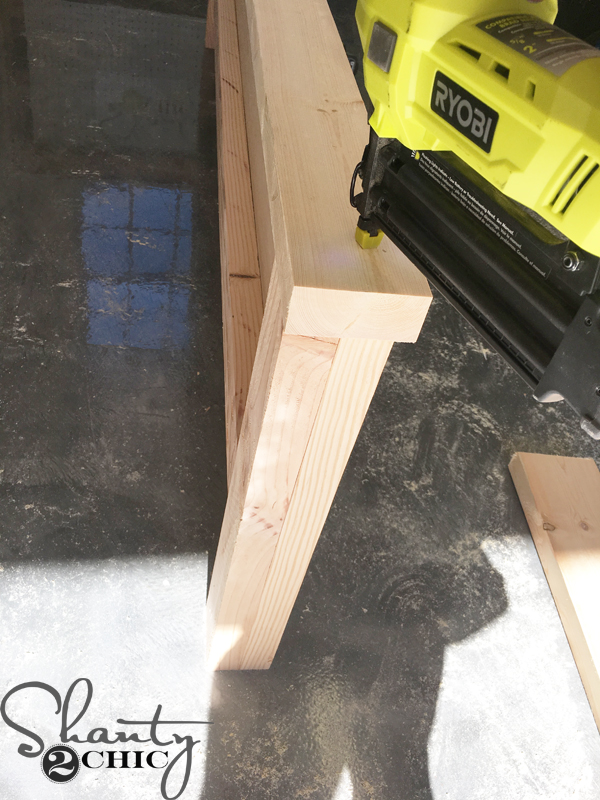
Cut the footboard support to size, drill 1 1/2″ pocket holes, in each end, and attach it to the side, laminated pieces with wood glue and 2 1/2″ pocket hole screws. Follow up by securing the support to the plywood with wood glue and 2″ brad nails.
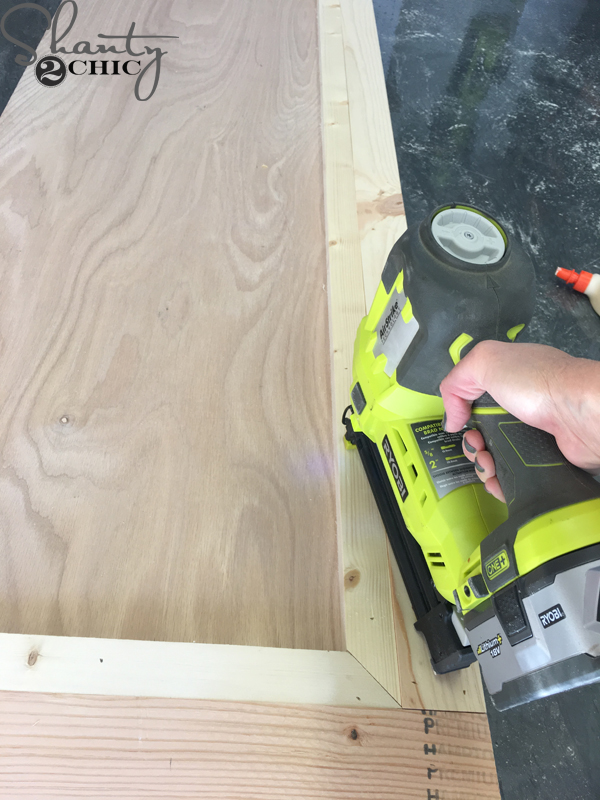
Flip the footboard over to the front side. Then, cut the bottom 1×3 trim piece to size and attach it with 1 1/4″ brad nails and wood glue.
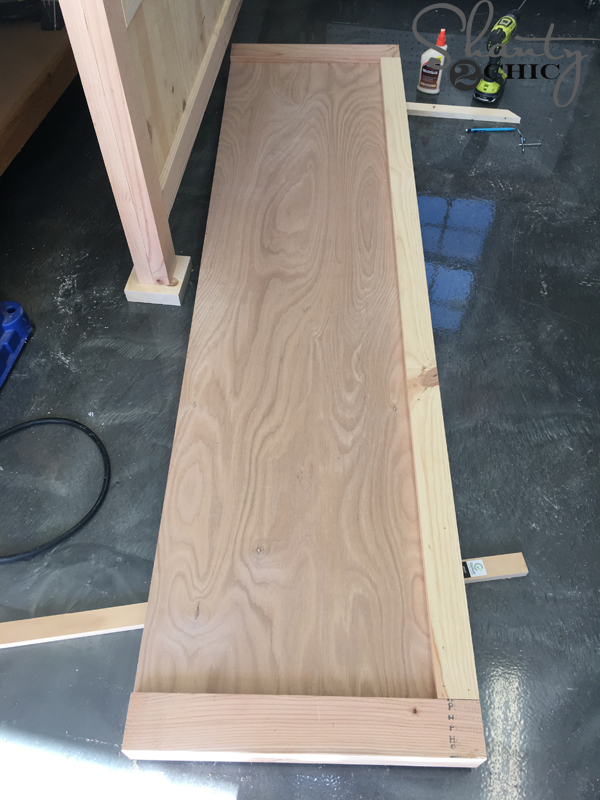
The footboard should look like this now.
Time for more trim! Measure and cut the horizontal trim pieces to size. The ends of these trim pieces will be miter cut at 45° angles. The trim will butt up against the laminated, side pieces. Attach with 1 1/4″ brad nails and wood glue.
Measure and cut the horizontal trim to size. The ends of these pieces will also be mitered at 45°. This trim will sit against the 1×3 bottom trim piece and the other horizontal piece will be flush with the top of the plywood sheet.
The footboard should look like this now.
Flip the footboard upside down and attach the base 2×6 to the bottom of the footboard with 2 1/2″ wood screws and wood glue. This 2×6 piece has been ripped to 5″ wide.
Now to trim the base of the footboard.
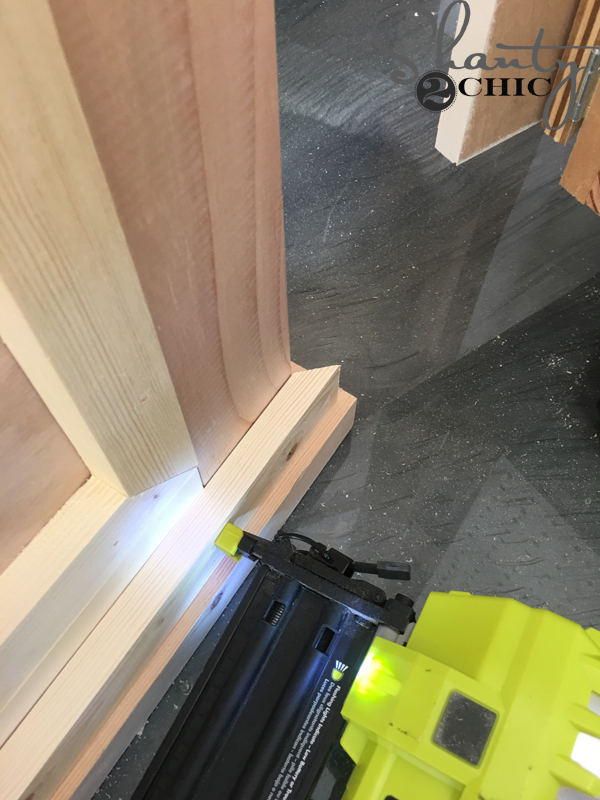
Start with the long front pieces. Both ends will be beveled at 45° angle. Use the same technique as we did for the headboard foot pad trim, to get a perfect fit. Attach the trim piece on top of the footboard base and attach it with 1 1/4″ brad nails and wood glue, into the 1×3 base trim.
Now, move to the side pieces. Make your first 45° bevel cut, hold the piece up and mark for the second bevel cut.
Attach with 1 1/4″ brad nails and wood glue.
The back trim will be bevel cut on one side and there will be a straight cut on the other. There is no need to continue the trim because it will not be seen, once the bed is fully assembled. Attach with 1 1/4″ brad nails and wood glue.
Flip the footboard right-side-up and attach the 2×4 cap with 2″ brad nails and wood glue. There will be a 1/4″ overhang on the sides and a 1/2″ overhang on the front. ***My 2×4 is 3 1/2″ wide. I ripped this from a 2×6 board but you can use a 2×4 ripped to 3 1/4″ wide. If you do, you will only have a 1/4″ overhang on the front of the footboard.***
Here is the footboard, completely done!
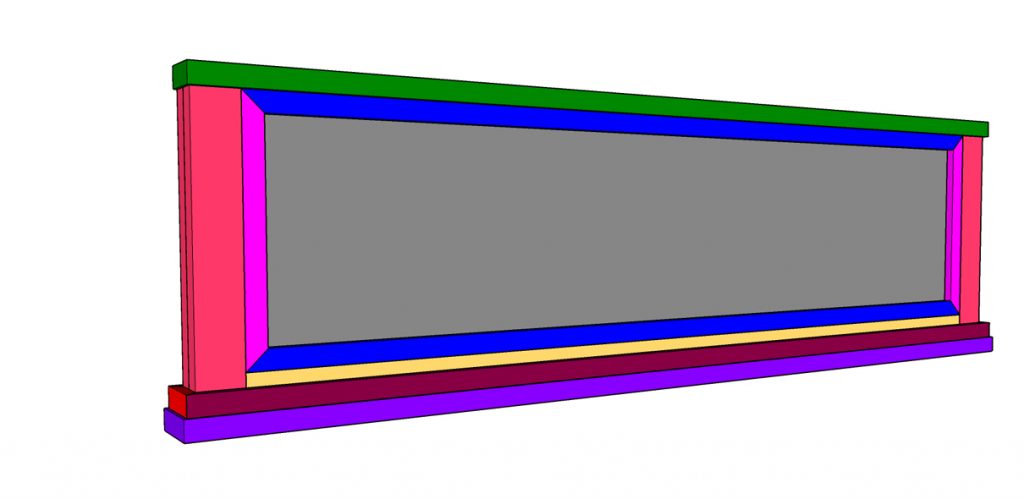
BUILDING THE SIDE RAILS:
Drill 3/4″ pocket holes into both ends of the side rails. Refer to the plans for proper pocket hole placement.
Flip the side rails over to the front, measure and cut the top and bottom trim pieces to fit. The ends will be miter cut at 45°. Attach with 1 1/4″ brad nails and wood glue. The edges of the trim pieces should be flush with the edges of the side rails.

Now, cut the side trim pieces to size and attach with 1 1/4″ brad nails and wood glue. The ends of the trim pieces will be miter cut at 45° and the edges will be flush with the edges of the side rail.
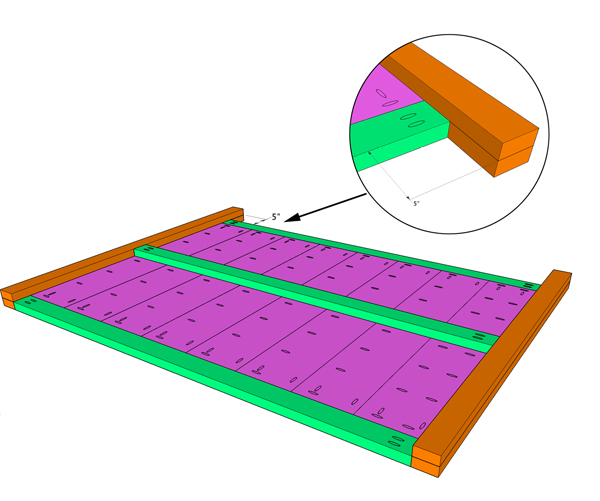
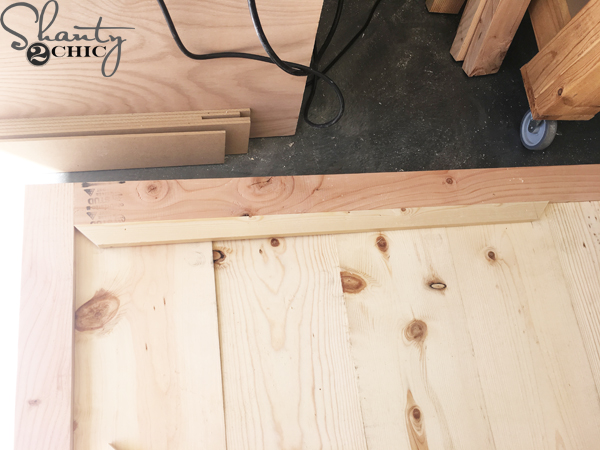
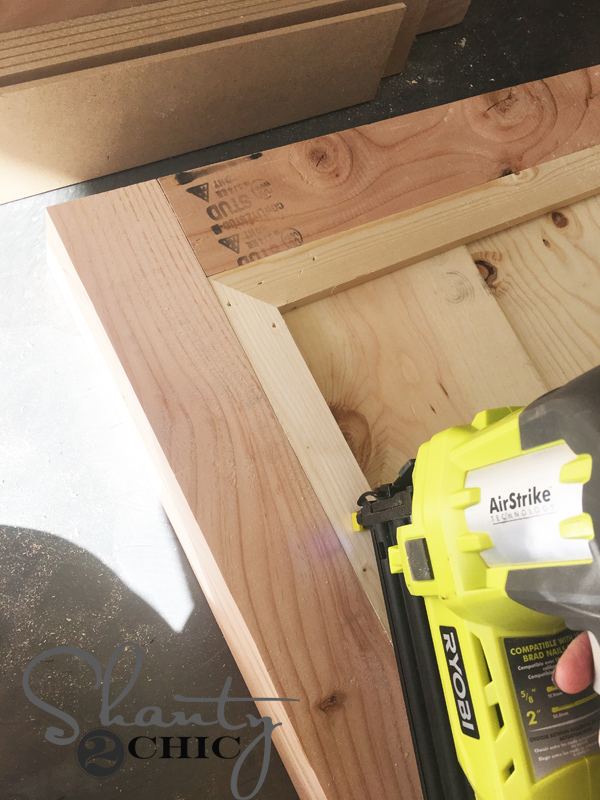
Cut the side rail cleats to size and drill 1 1/2″ pocket holes into each end. Attach the cleat to the back of the side rail with 2″ wood screws and wood glue.
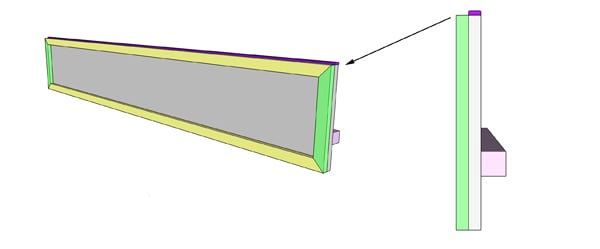
The final step on the side rails is to measure and cut the screen moulding to fit. This screen moulding will go on top of the plywood edge of the side rail. This will give the side rail a finished look, rather than the rough plywood edge. Attach the moulding with 1 1/4″ brad nails and wood glue.
NOW IS A GOOD TIME TO ADD A FINISH TO ALL OF THE PIECES. LET THEM DRY AND THEN BRING THEM INSIDE TO ASSEMBLE.
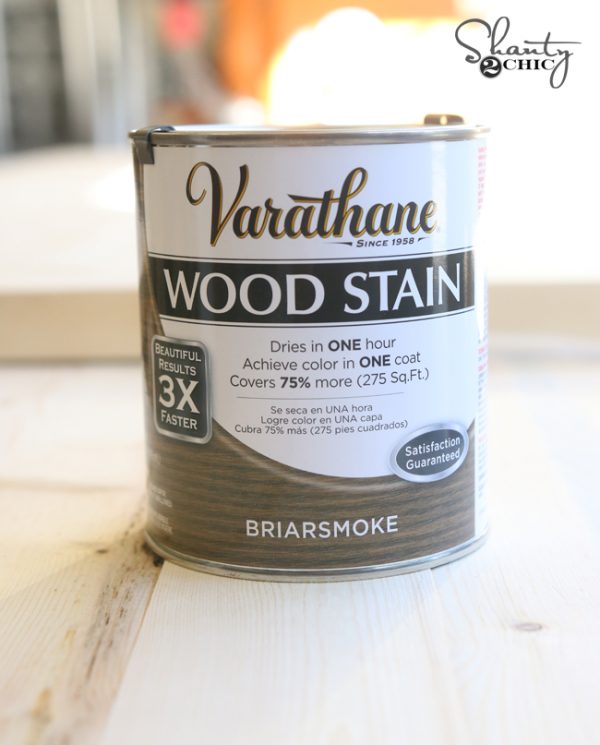
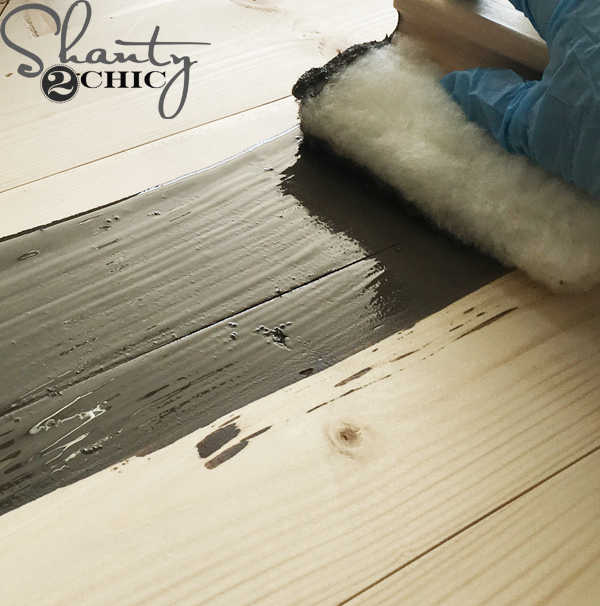
I used one coat of Briarsmoke stain by Varathane on every piece. You can find Briarsmoke stain HERE on Amazon! I like to use this Lamb’s Wool Applicator to stain large pieces. Make sure to check out our How to Stain Wood video HERE!
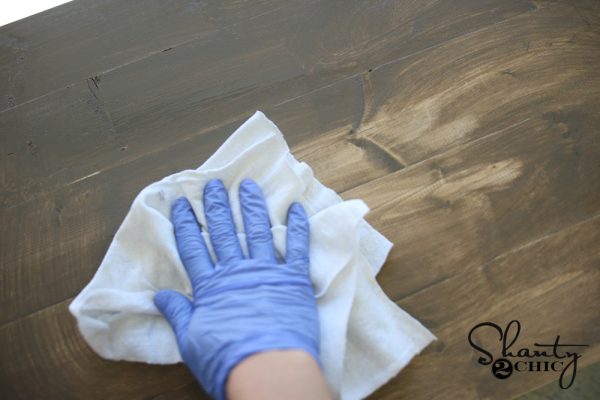
Let the stain sit for about 5 minutes then wipe with a clean cloth.
ASSEMBLING THE BED
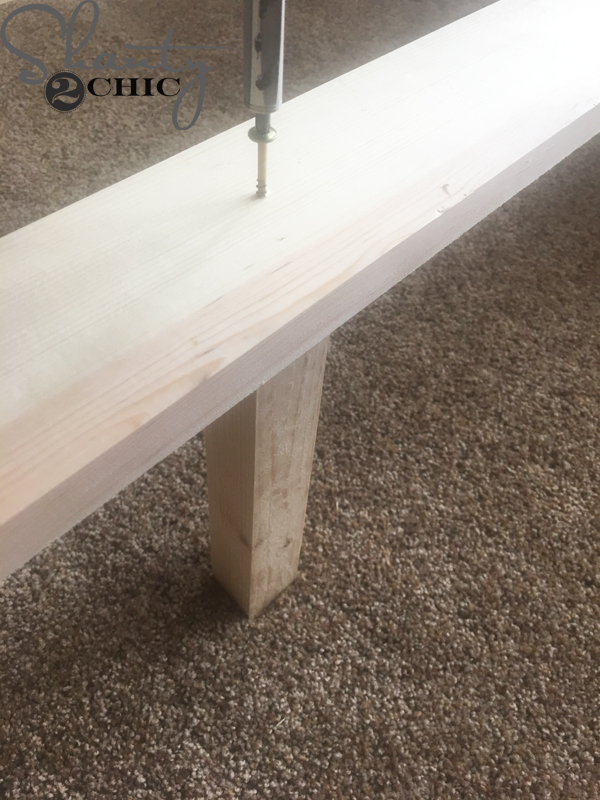
Use scrap blocks (from the cut list) to prop up the side rails while you attach them.
Attach the side rail to the headboard with 1 1/4″ pocket hole screws from the plywood pocket holes and 2 1/2″ pocket hole screws from the pocket holes in the cleats. Do not use wood glue here or you won’t be able to disassemble the piece if it needs to be moved. Refer to the plans for the proper placement of the side rails on the headboard.
Now, attach the sides rails to the footboard. Use 1 1/4″ pocket hole screws from the plywood pocket holes and 2 1/2″ pocket holes screws from the cleat pocket holes. Refer to the plans for the placement of the side rails on the footboard.

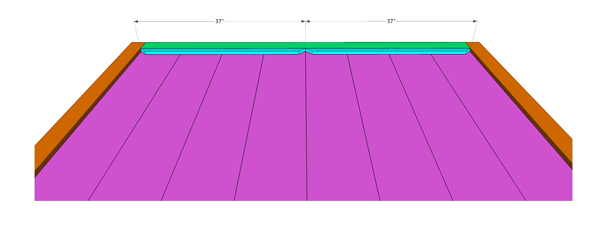
Cut the slats to size and lay them out evenly across the cleats.
If you didn’t attach the slat supports to the slats, you can do this now. Center the support on the slat and attach with 1 1/4″ wood screws and wood glue.
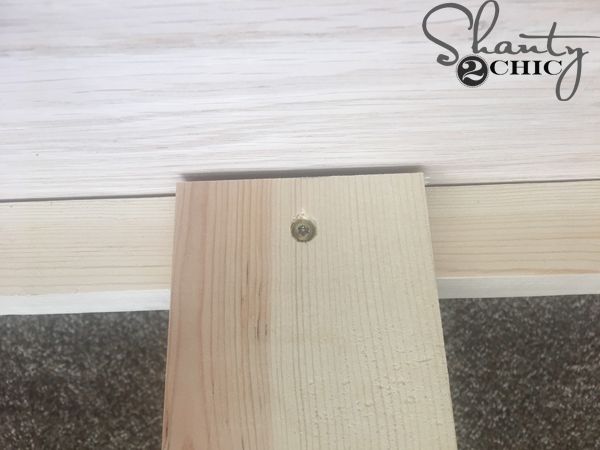
Finally, attach each slat to the cleats with a 1 1/4″ wood screw (no wood glue).
That’s it!!!
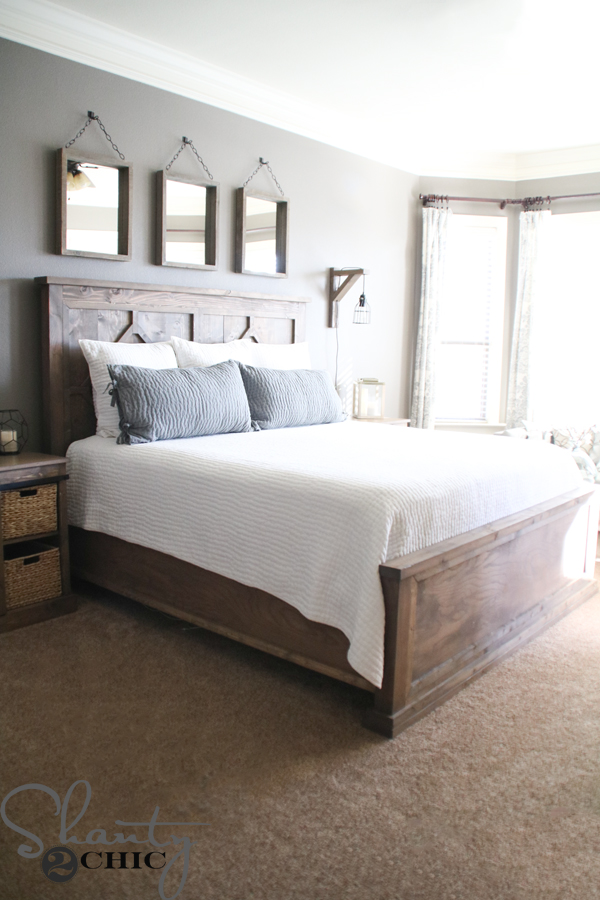
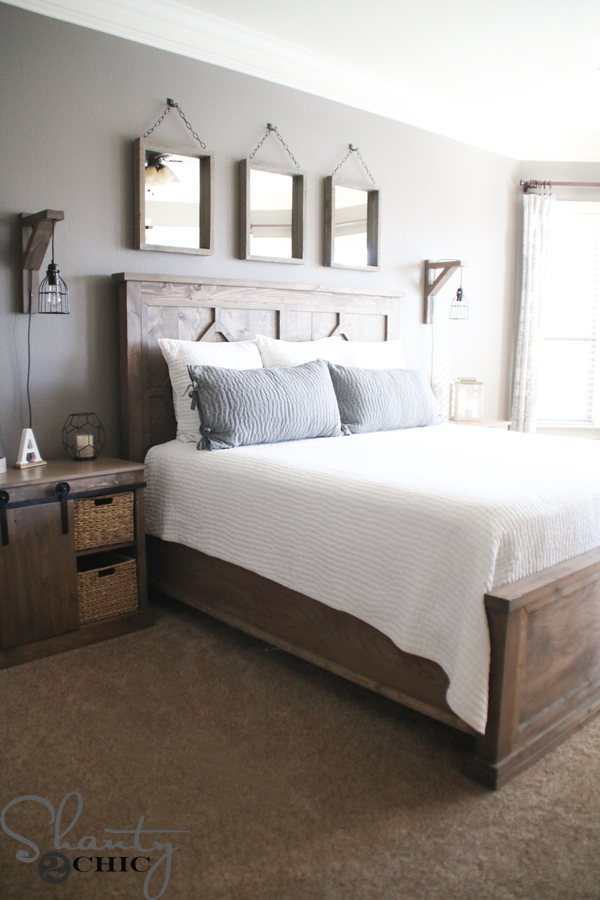
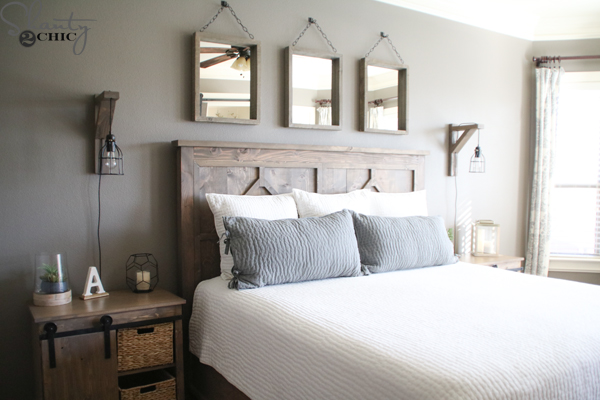
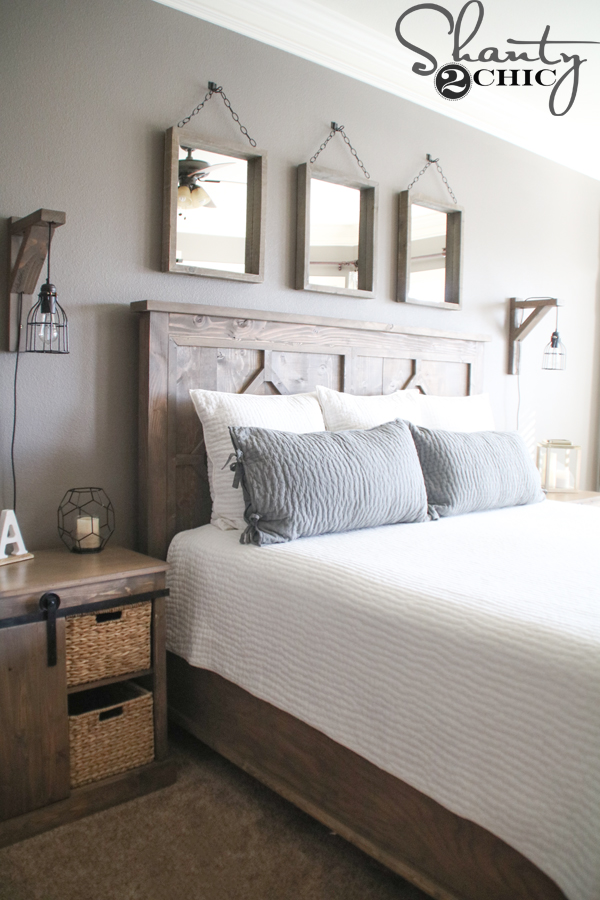
I’m so happy with my new DIY Rustic Modern King Bed! You can find out more about the pieces in this room below!
Sliding Barn Door Nightstand with $20 Hardware – Free Plans and How-to Video coming in 2 weeks – Subscribe HERE to our Youtube channel so you don”t miss it!
Corbel Sconce Light – Free Plans and How-to Video coming soon! Subscribe HERE to our Youtube channel so you don”t miss it!
Bedding – HERE from Pottery Barn
Mirrors: Found on clearance at Hobby Lobby – removed brass anchors and rope and replaced with eye hooks and chain.
Hooks for Mirrors: HERE on Amazon
Decorative Chain for Mirrors: HERE on Amazon
Baskets in nightstands: AtHome
Letter A on nightstand: HomeGoods
Candle Holder: HERE from Target
Large Lantern: HERE from Target
Curtains: Here from Pottery Barn
Wall Color is Seine by Valspar
Trim Color is an oil-based paint that I had matched to Ivory Lace by Valspar
If you want to modify this bed – here is a list of standard mattress dimensions.
-To adjust the width of the bed, modify the headboard planks and the length of the plywood footboard. Then, just measure and cut the trim pieces accordingly. When the bed is assembled, measure for the length of the slats.
-To adjust the length of the bed, modify the length of the plywood side rails first, then measure and cut the rest of the pieces accordingly.
Twin: 38″x74″
Twin XL: 38″x80″
Full: 54″x74:
Queen: 60″x80″
King: 76: x 80″
California King: 72″x84″


How much was the material for this bed?
I would like to build this but without a headboard since I have a tufted headboard already, How would I build the back of it without a headboard?
Did you run into any issues with ripping the 2x’s? I used 2×4 framing studs (as mentioned in the plans), but they have some knots in there. Not sure how that will go when I try to rip a straight edge into them. Tips?
We are in the process of staining the headboard. Did you use any poly to seal this?
What kind of wood do you use?
I don’t as just putting together a materials list for this project to price it out and noticed that the plans say 1x10x8. It looks like from the dimensions on the plans that they should be 1x10x6 and you only need 51” of it. About $4 cheaper per board at my Home Depot between the lengths. Just a note to keep this $400 bed cheaper. Plans look great! My wife wants it so I will begin shortly. Thanks so much.
I was wondering if I could get plans for just the headboard. I do not have enough space in my tiny room for the footboard.
Simple question. I wish to build this bed as a queen. So for the width, do I simply subtract 16″ from the cut list? Thanks
Cliff when we did a queen bed for my friend we used eight 1x8s (58″) instead of eight 1x10s (74″) for the headboard. We cut the headboard supports to 58″ & the footboard plywood to 58″. The top 2x4s for the headboard & footboard we cut to 66 1/2″. All of the changes gave us the same scale we needed for the queen instead of the king.
Sorry, a correction to my previous comment. The 2×4 top piece for the footboard we cut to 65″ (58″ for the 1x8s width + 3 1/2″ for the left laminated side piece + 3 1/2″ for the right laminated side piece + 1/4″ for the left side overhang + 1/4″ for the right side overhang). The footboard bottom piece is what we cut to 66 1/2″ (same dimensions as the footboard top piece but with a 1″ overhang on each side instead of 1/4″). We didn’t do the headboard trim so I can’t help with those cut lengths but they shouldn’t be too hard to figure out if you wanted to do them.
Another correction, the laminated side pieces are 3 1/4″ wide as given in the plans not 3 1/2″ like I previously commented.
I am so upset, I absolutely adore this bed but have no way of making it. My favorite part is the headboard ! It’s gorgoeu. I saw that the headboard is available at AtHome but it’s only Queen. Would you gals ever consider selling the King size headboard??
I’m 100% a beginner and am looking everywhere for king size plans on barn door headboard. I know this is tohe full bed but do you have plans for just a king headboard? I would REALLY appreciate it!
Where does the screen moulding come in?
Are these plans for a king or a cal king?
These are King Size plans.
The California King is 72×84 inches.
What kind of stain did you use for this one? I often have trouble getting the right look when I stain pine, but this looks great!
where can I find the nightstand? Also do you have plans for a dresser? Or possibly know of pieces to match the bed? I’d love to do this room for my daughter…
I just finished this build and I have to say how great it was to work on. The plans are detailed and easy to work from. I definitely recommend the Kreg jig (I only have the K4) as it is the best for pocket holes. Thank you I will definitely be building other items from your site
Are the plans as they are written for a king or a cal king?
Ryan,
We just built the headboard. We are staining now. Did you use poly on yours and if so, what do you recommend? I don’t want it shiny.
I used a satin finish poly on this. Three coats gave me the protect level I was looking for.
When drilling the pocket holes in the headboard is there a specific spacing they need to be or is it just based on preference? Are any of the pocket holes in the whole project drilled to a specific dimensio?