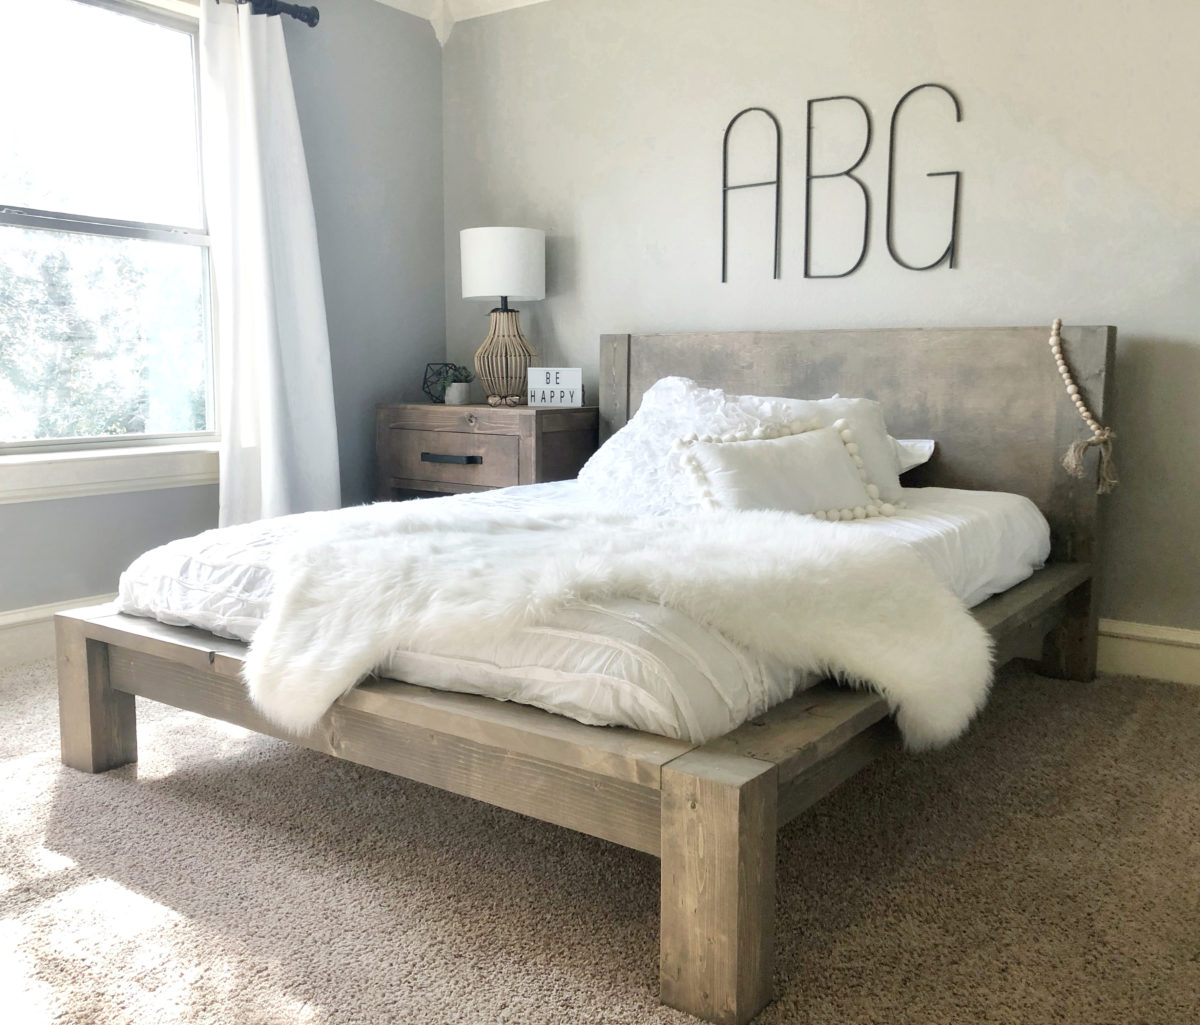
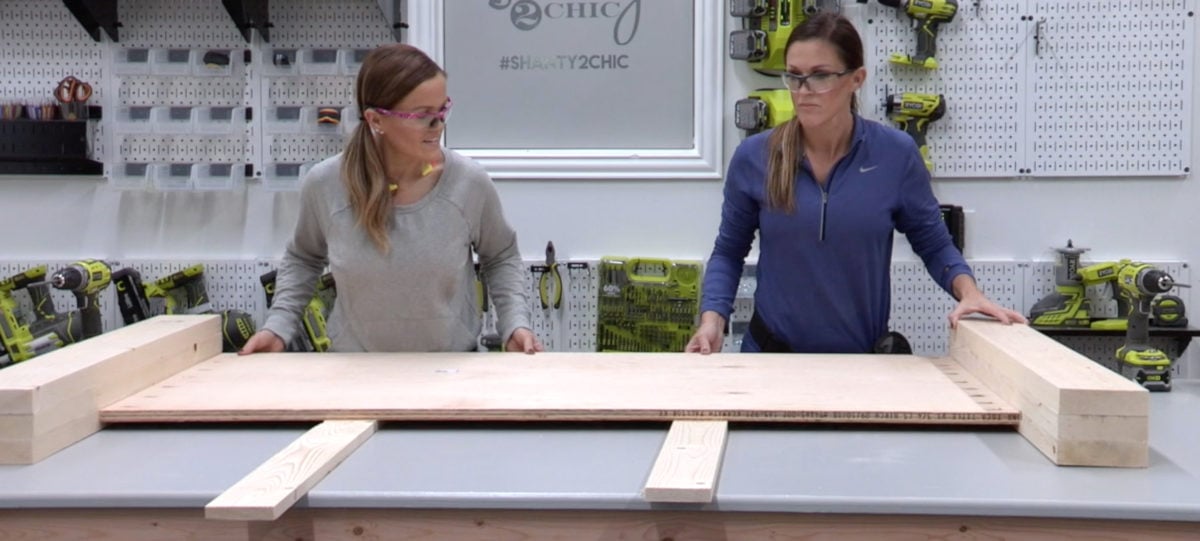
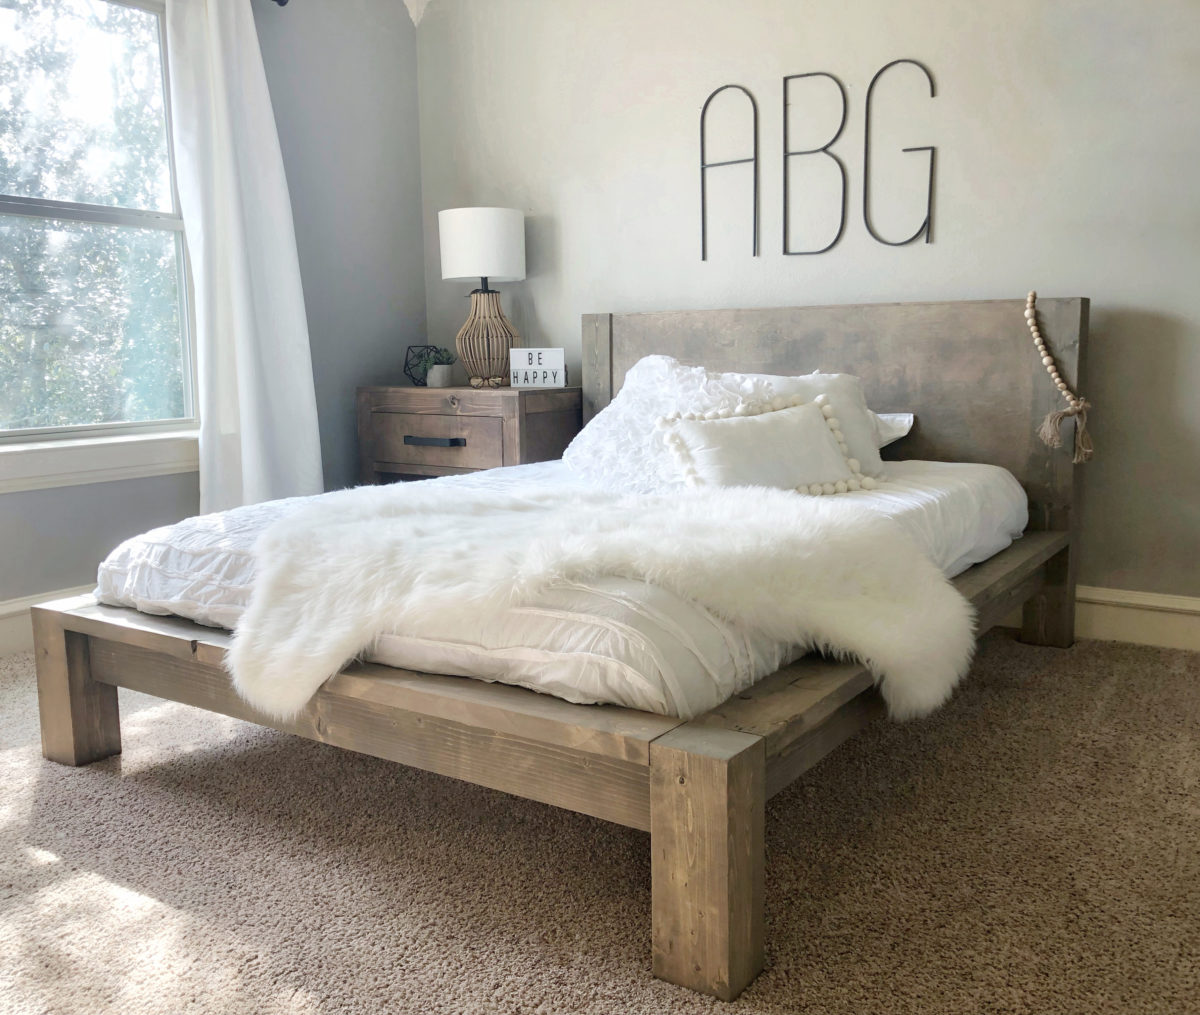
My oldest princess turned 16 this month and decided she needed a queen bed. So, I got to designing and came up with the cutest bed that I was able to build for under $100 of lumber! This bed is so darn cute and perfect for kids or adults. I love the clean lines and modern yet super rustic look. Check out how we built this bed by watching the video below!
How cute did this thing turn out??
Before we get started, be sure to download and print the FREE PLANS by clicking HERE!
DIY Rustic Modern Queen Bed
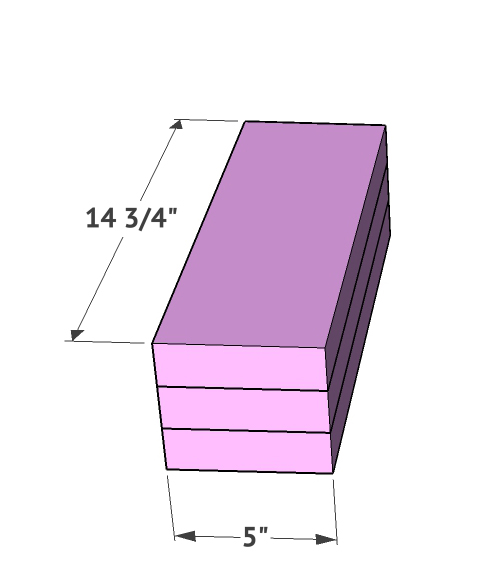
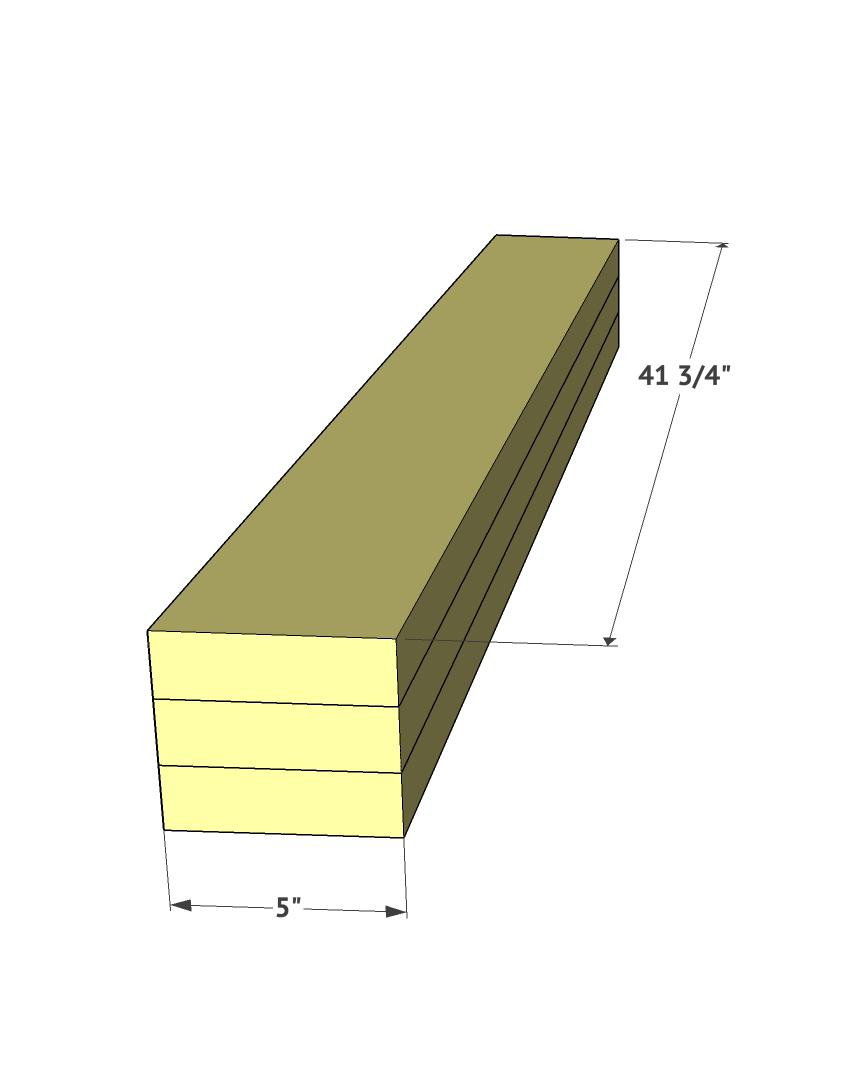
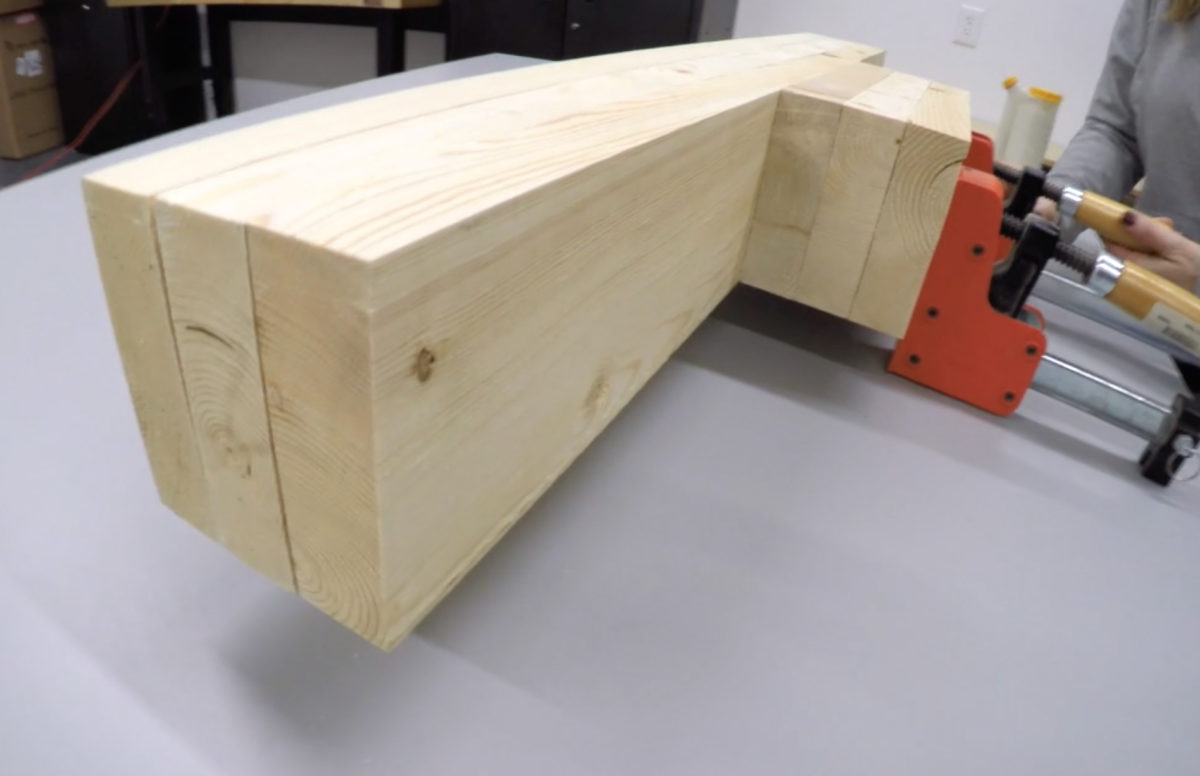
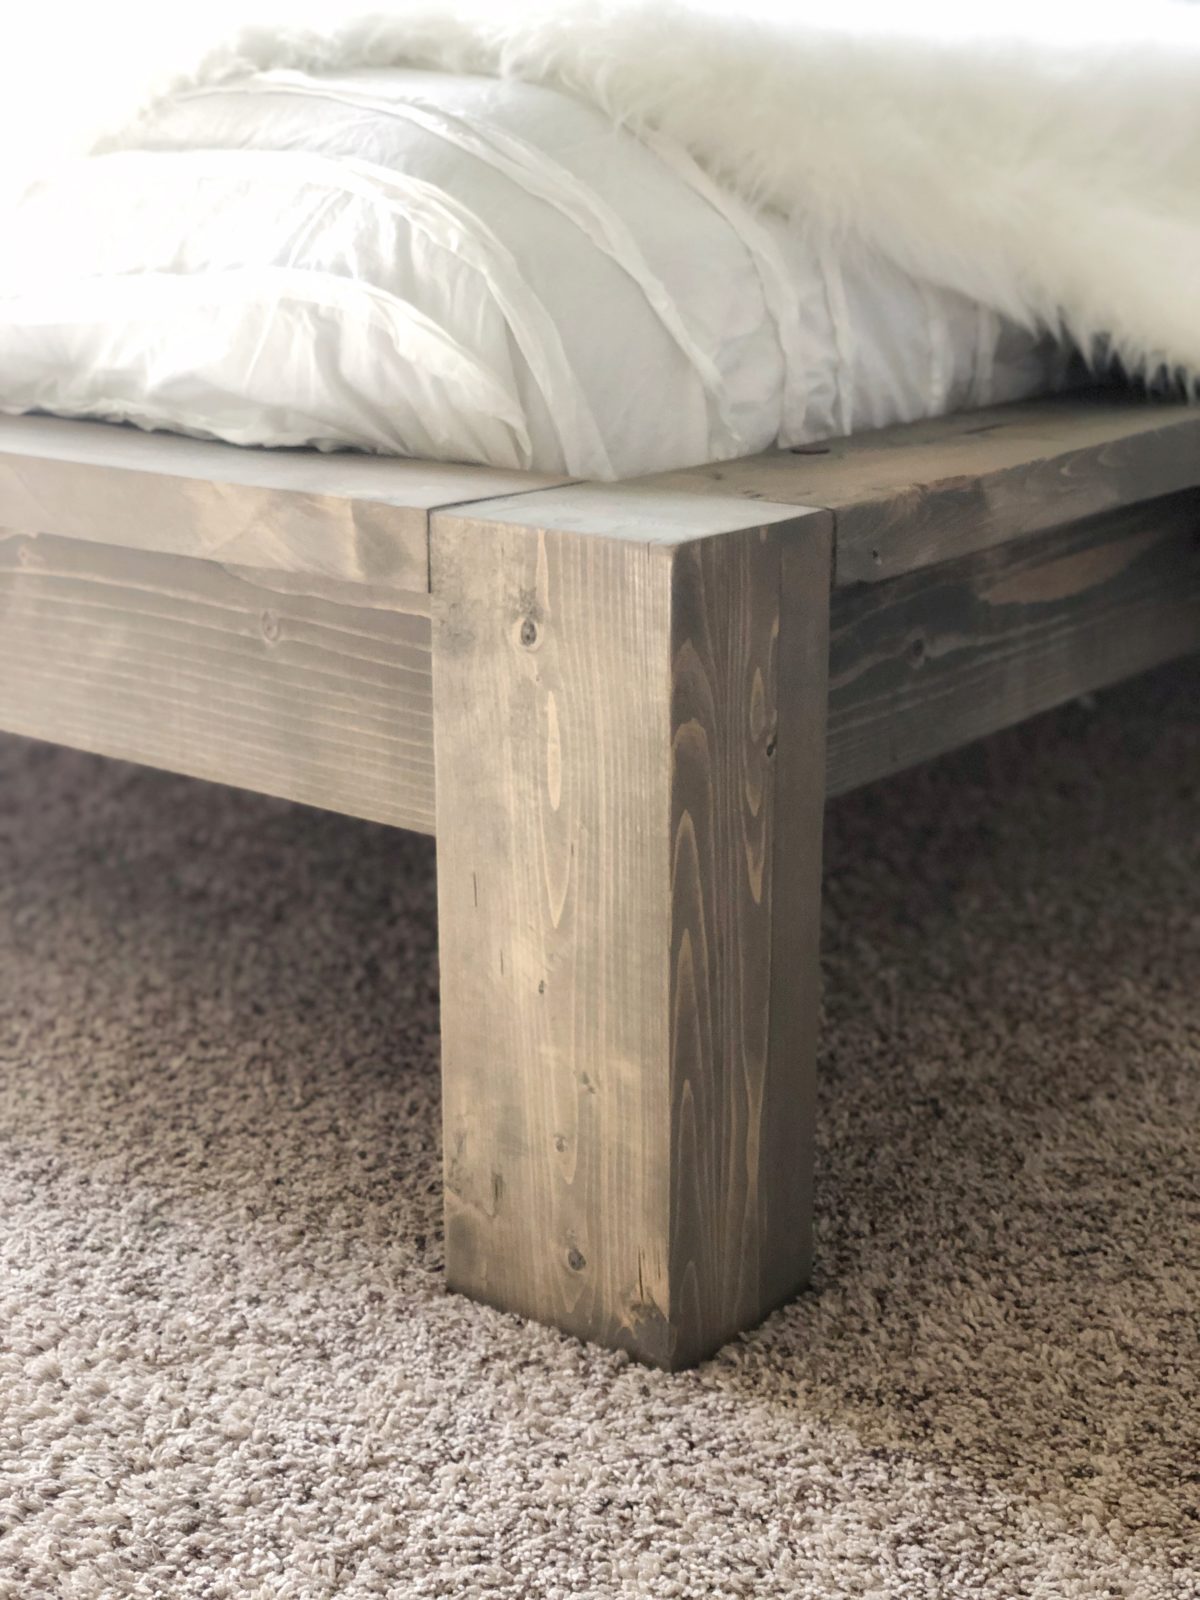
The first step is building your legs. You will build two taller legs that will be a part of your headboard, and two shorter legs that will be a part of the footboard. These are 2×6 boards that we ripped to 5” with the table saw. If you choose to not rip your boards, you need to refigure your measurements as it will change the rest of this plan. We attached each board together using wood glue and clamped them together until the glue dried. Then, sand any rough or uneven edges.
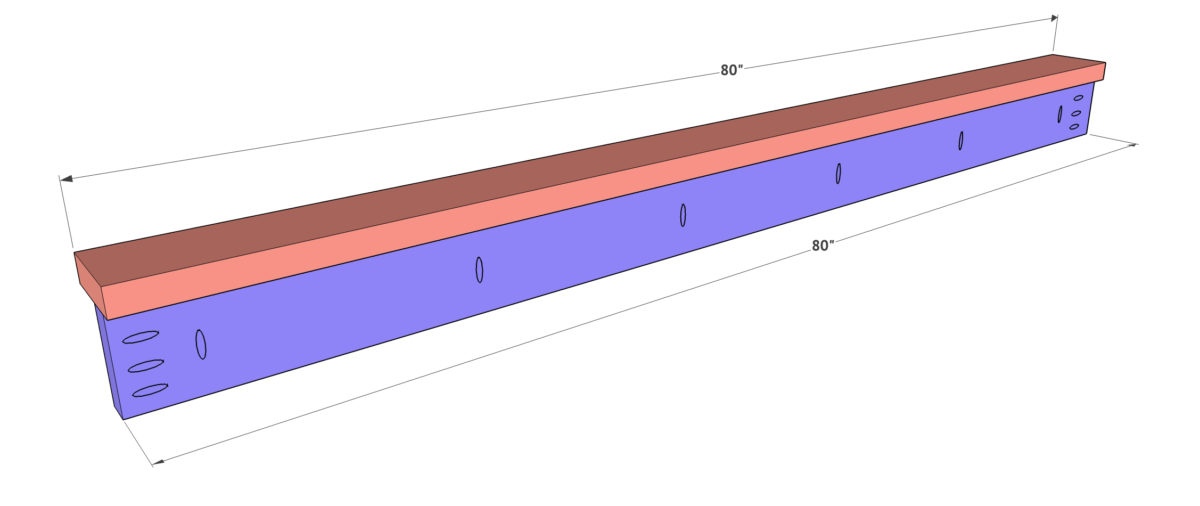
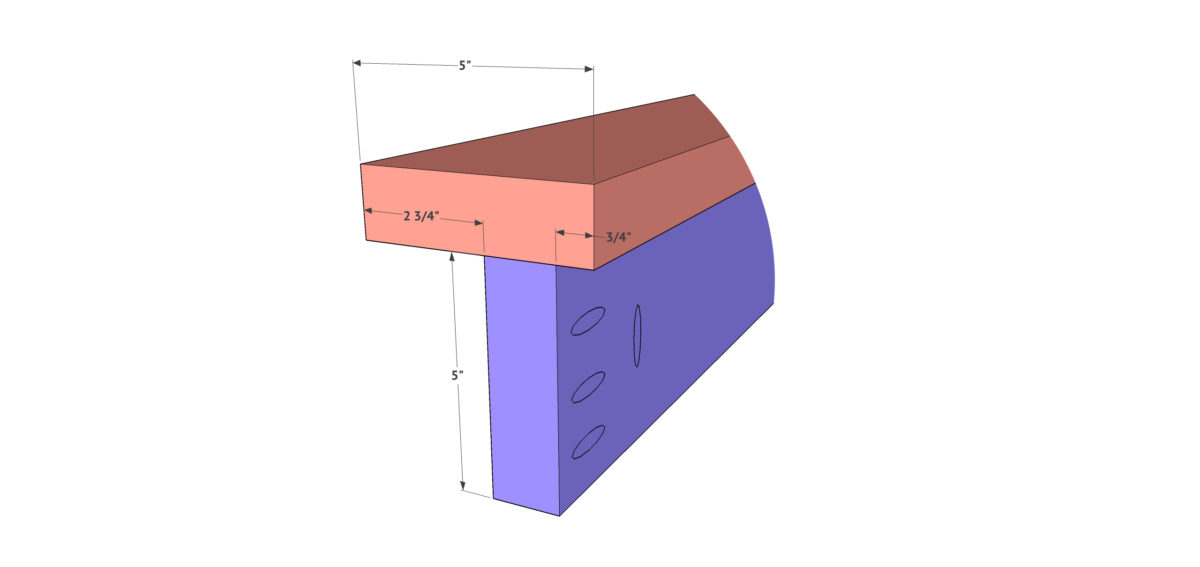
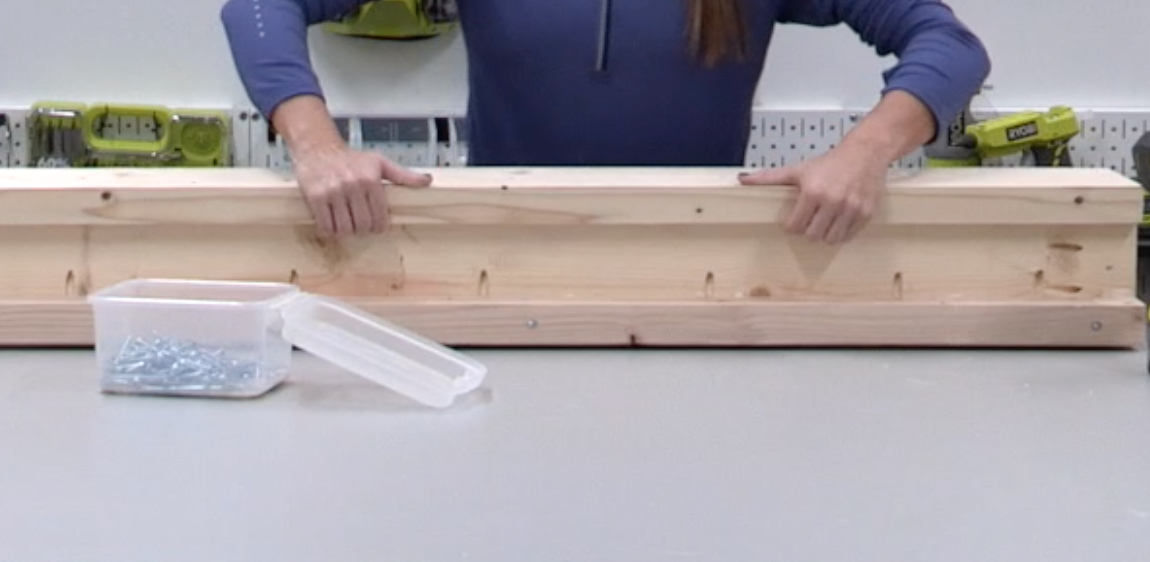
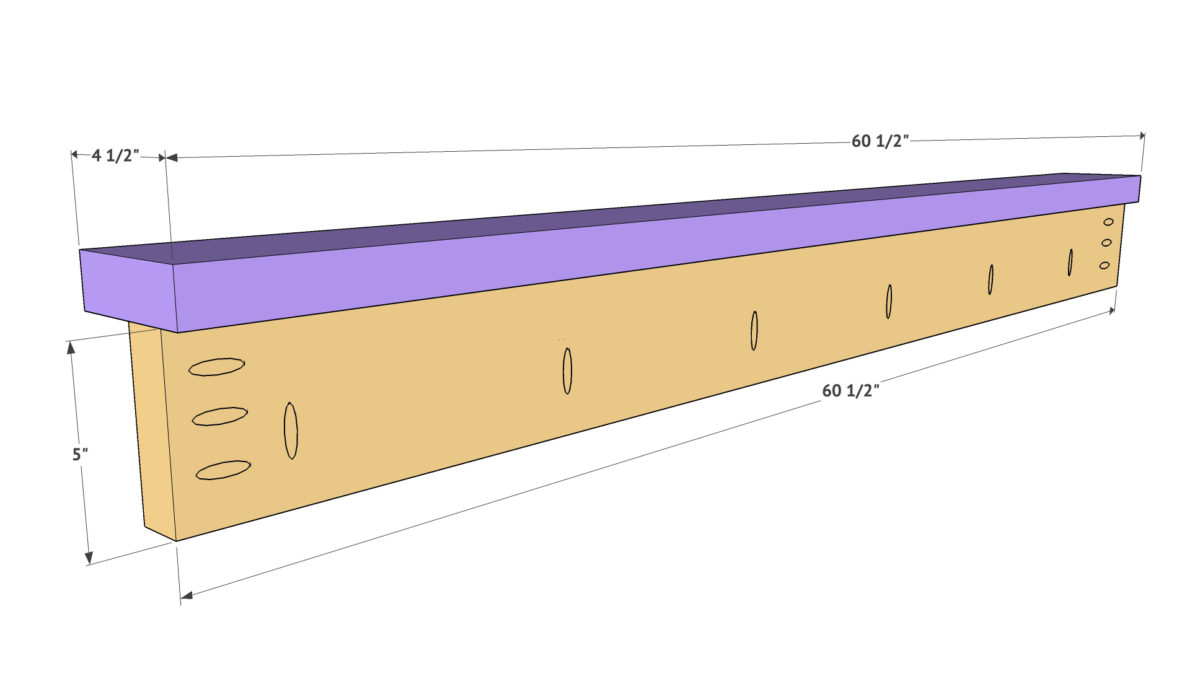
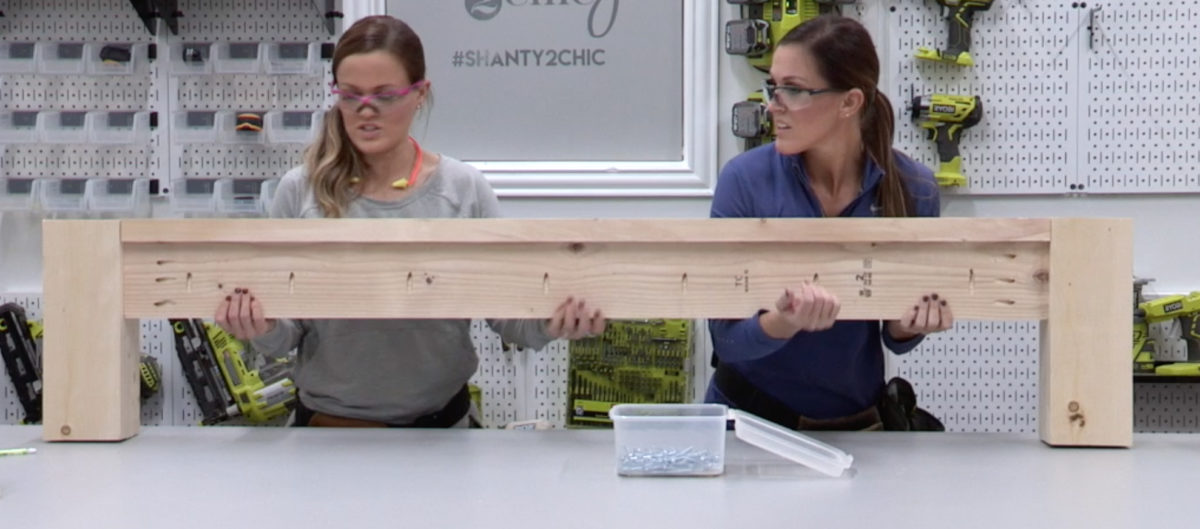
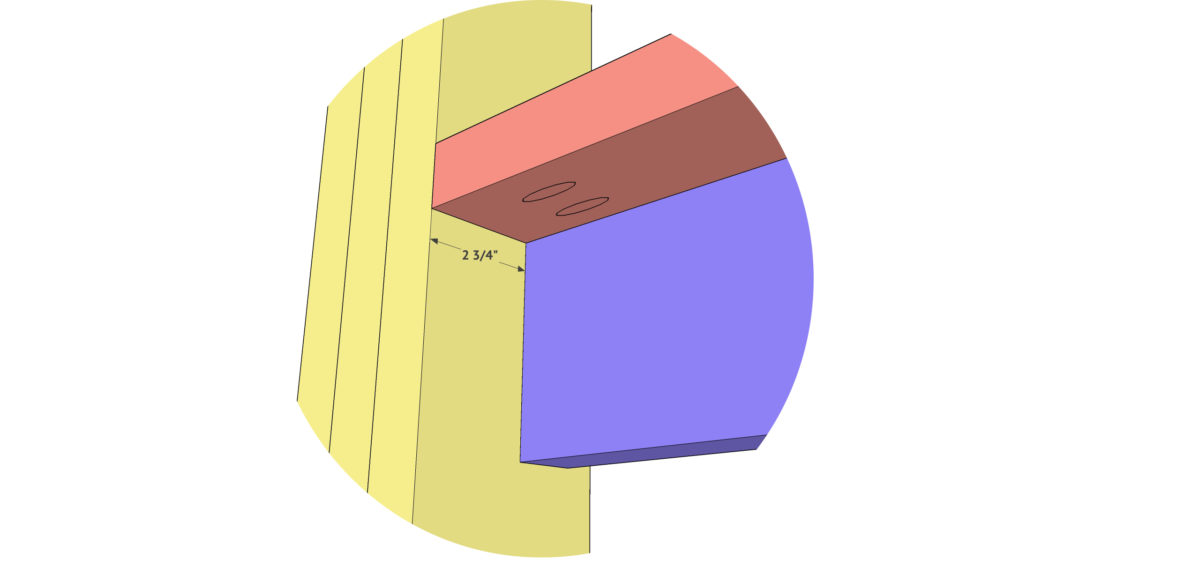
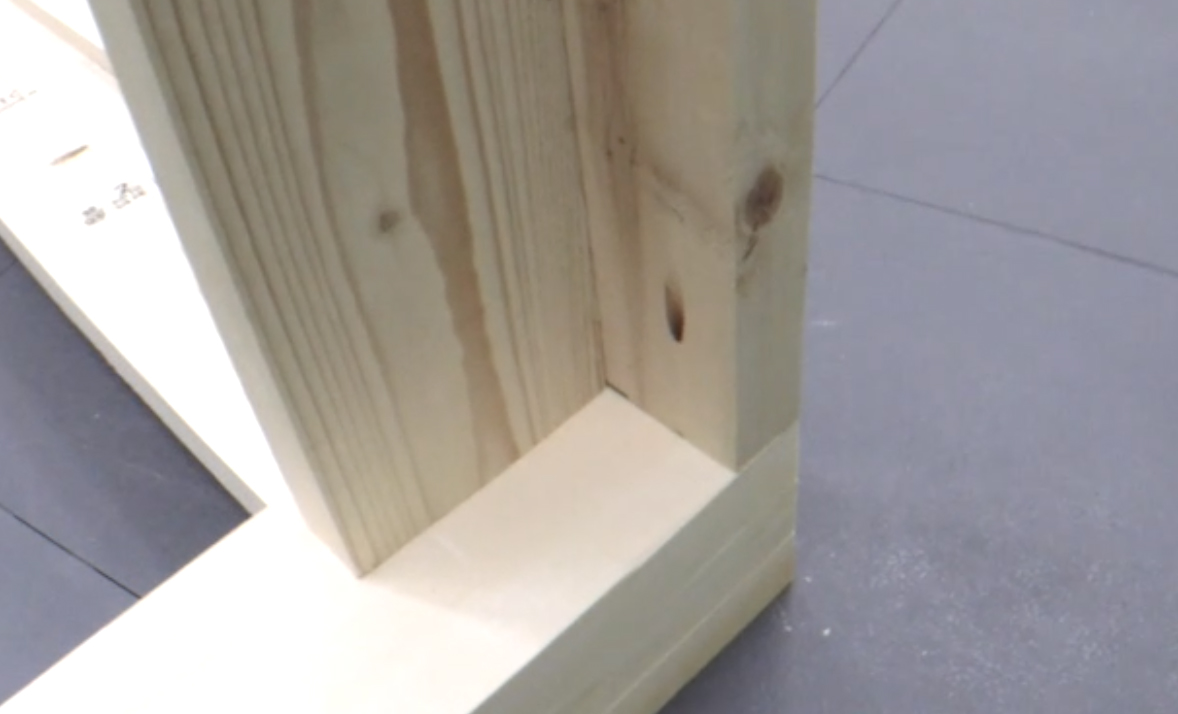
While the legs are drying, you can start building the rest. The side rails are also 2×6 boards that we ripped to 5”. Add 1.5” pocket holes to one side of the vertical board and 1.5” pocket holes on one side of the horizontal board that sits on top of it. Attach these boards together using wood glue and 2.5” pocket hole screws. Notice the alignment of the boards in the picture.

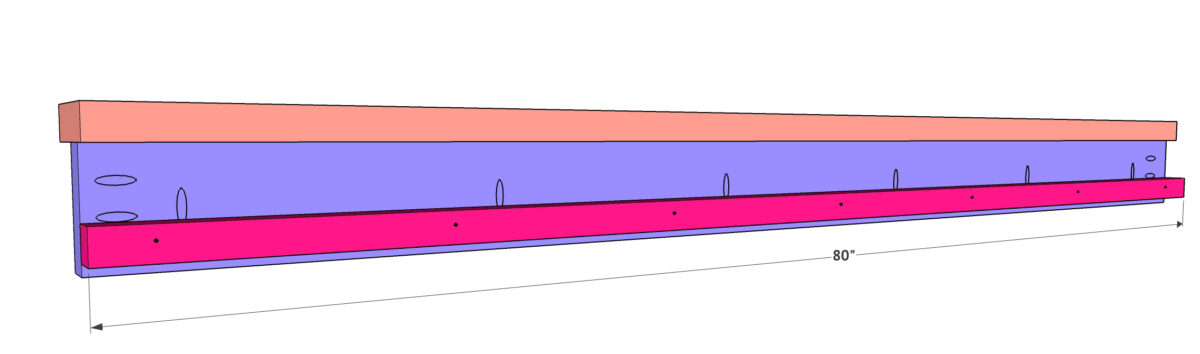
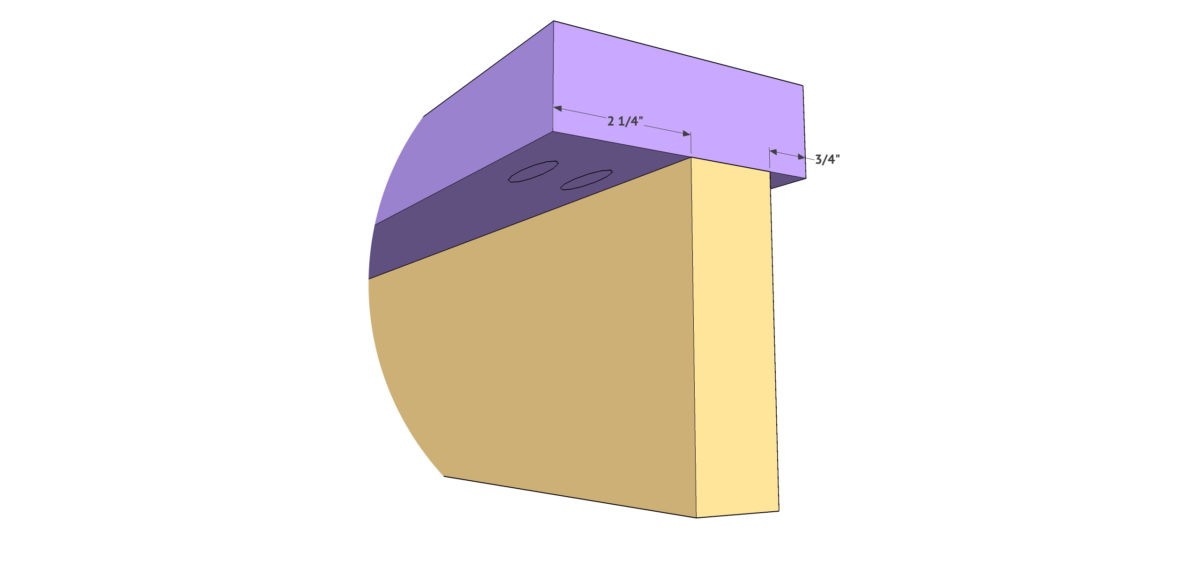
Now add the cleats to both sides. These are 2×2 boards that we attached to each side using wood glue and 3” Spax or wood screws. Notice the alignment in the bottom picture.

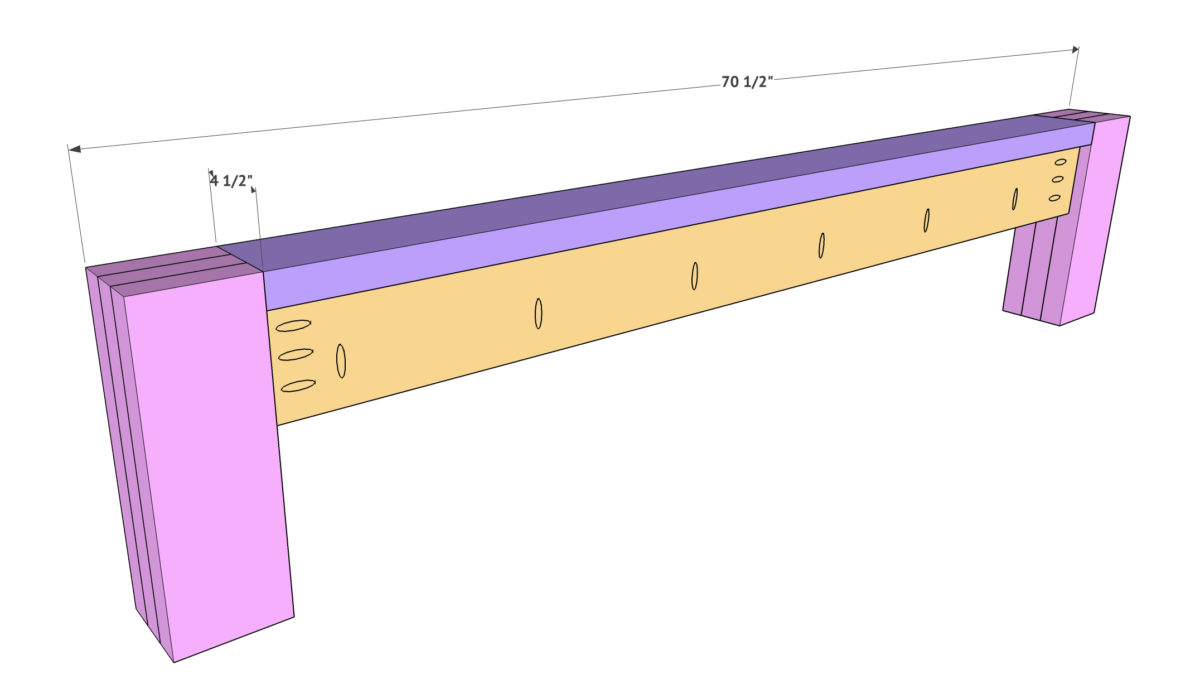
Now build the footboard. The top of this assembly is also a 2×6 board, but we ripped this one to 4.5” so it would line up flush with the legs. Add 1.5” pocket holes to both boards, and attach them using wood glue and 2.5” pocket hole screws.
Now attach these boards to the footboard legs we built in the first step. Attach them using 2.5” pocket hole screws through the pocket holes you made and into each leg. You want the top of the slat to sit flush with the top of the feet.
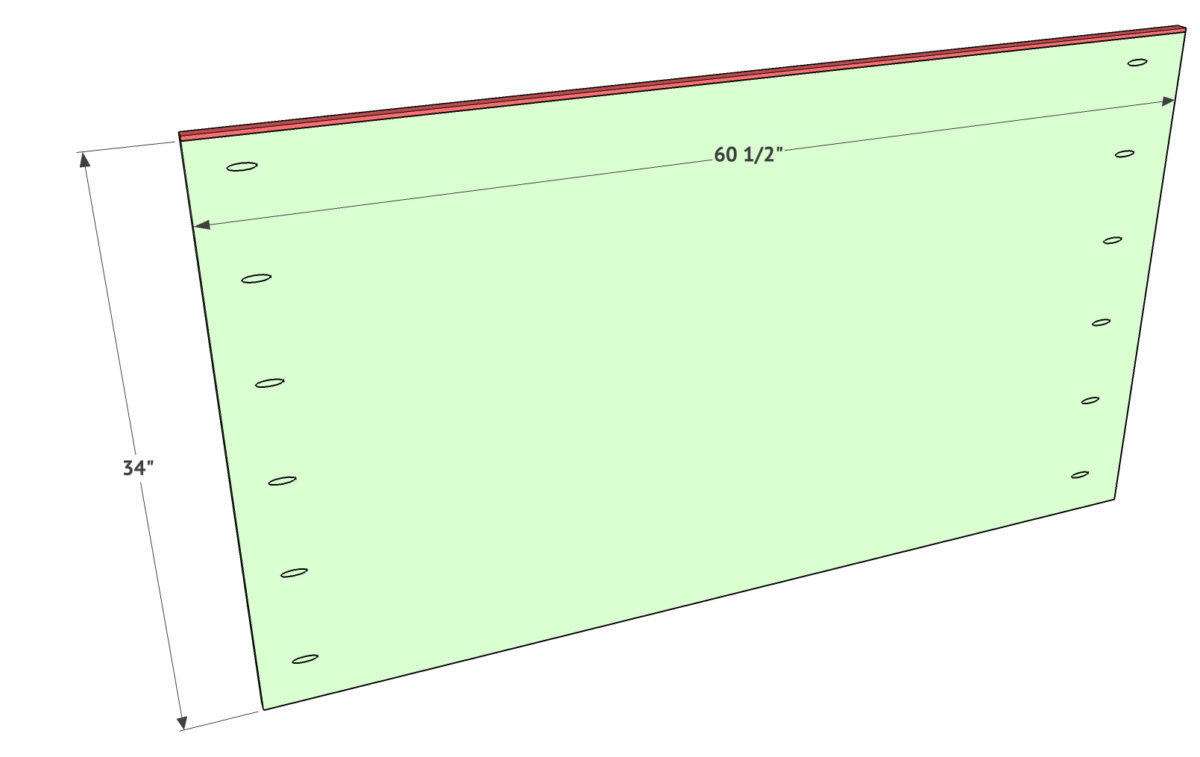
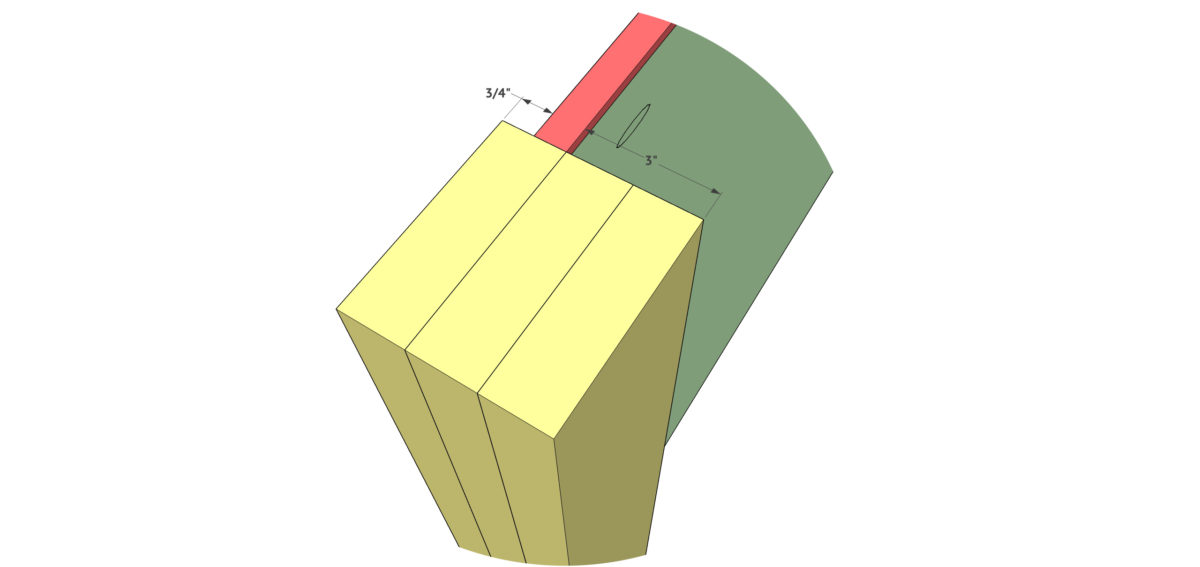
Attach the small trim piece to the top of the headboard panel first. The panel is 3/4” hardwood plywood with 3/4” pocket holes on the sides of the back of the panel. The trim piece is 1/4” thick x 3/4” wide and attach it using wood glue and brad nails.
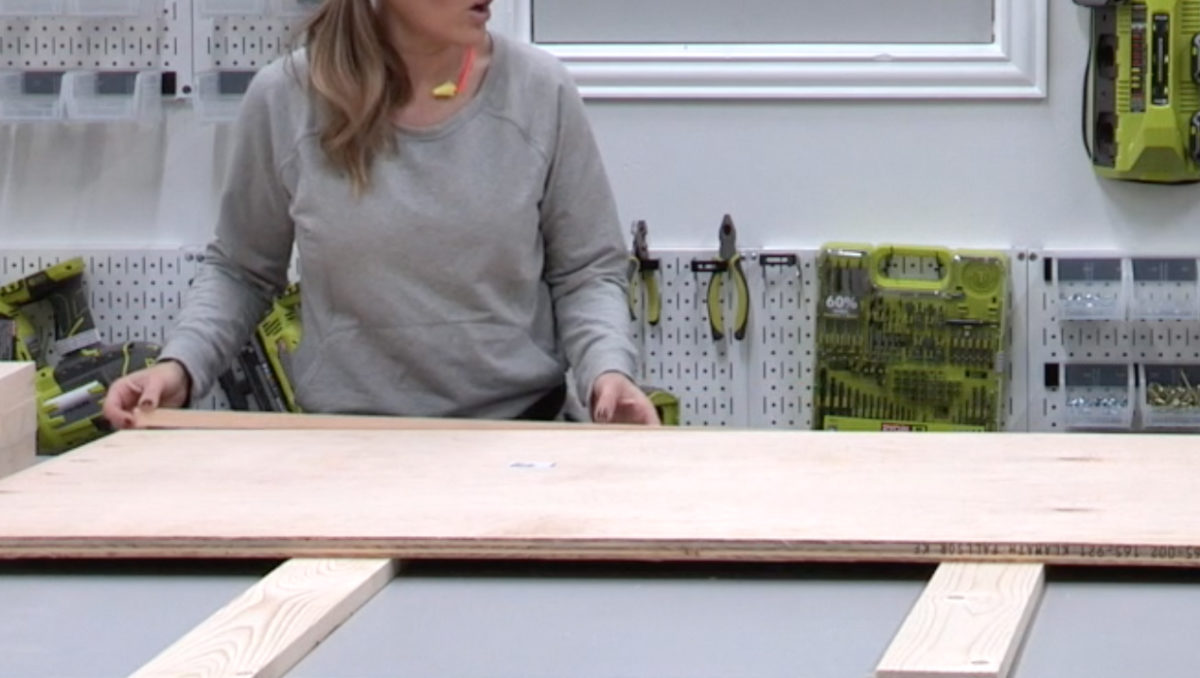
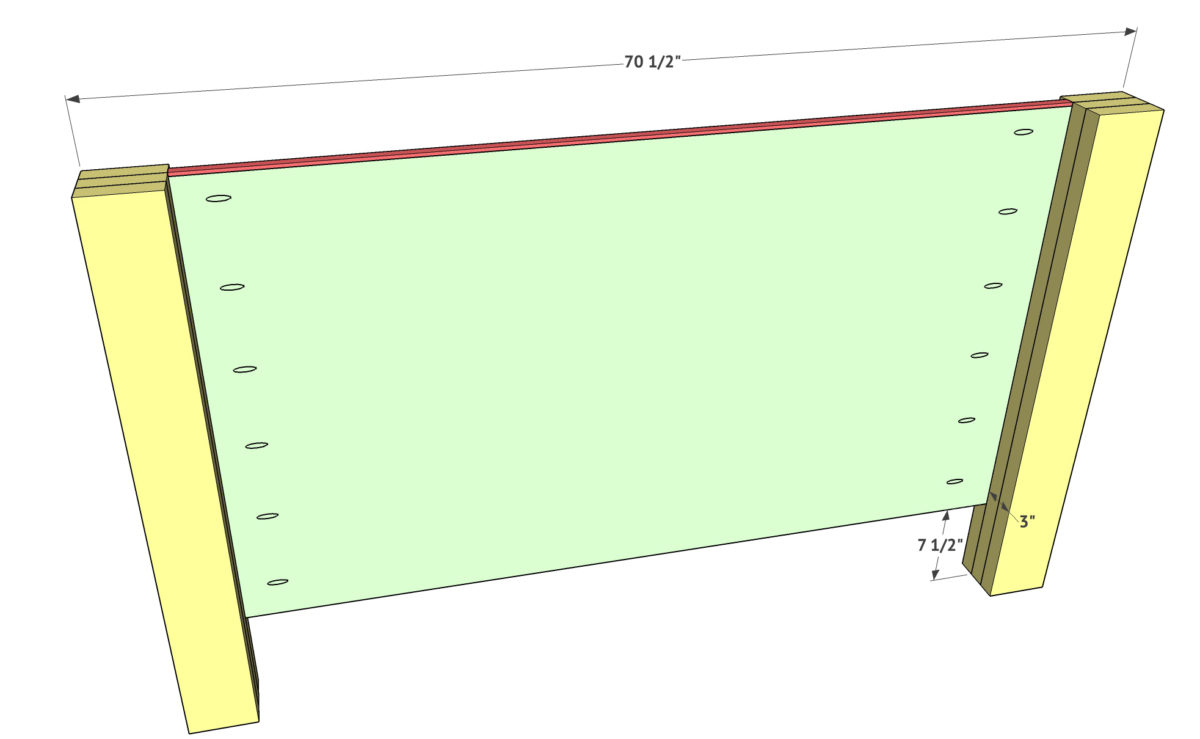
Now attach the headboard panel to the legs using wood glue and 2” pocket hole screws. You want the headboard panel to line up 3/4” from the front of the legs. The top of the trim piece will be flush with the top of the legs.
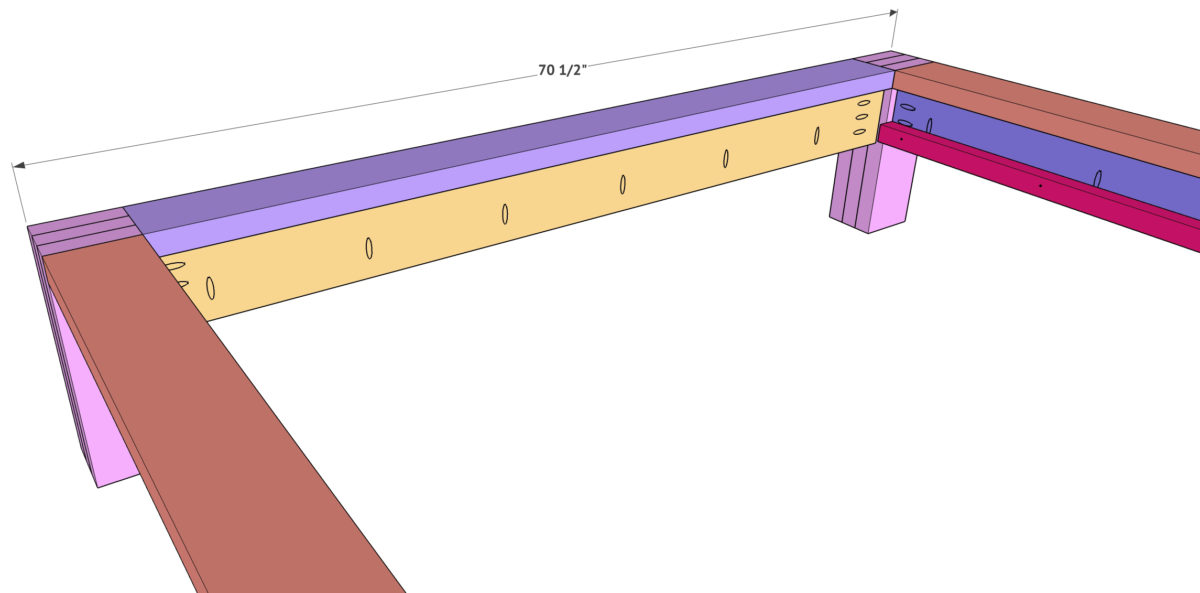
Now attach the rails to the headboard using 2.5” pocket hole screws through the pocket holes on the rails and into each leg.


Attach the footboard to both legs using 2.5” pocket hole screws. Make sure the tops and sides are all flush.
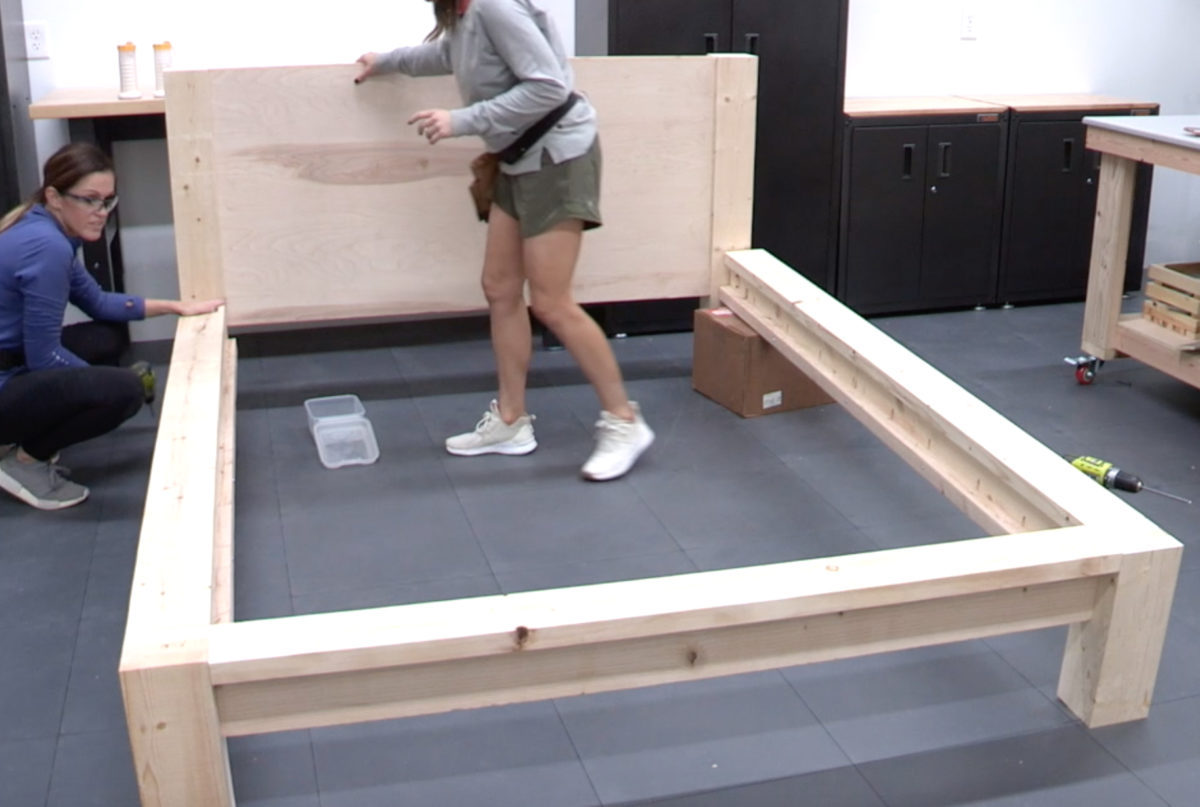
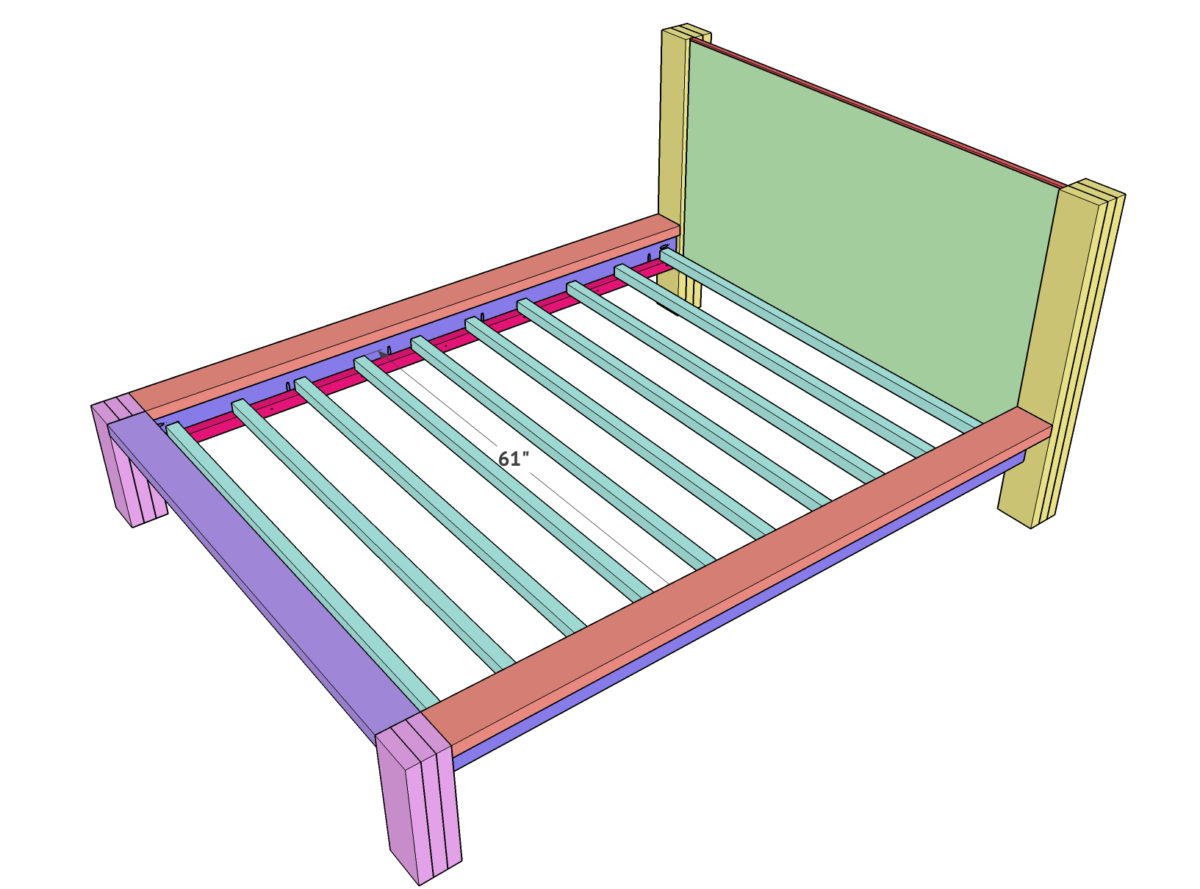
Time for slats! We used 2×2 boards for this part and attached them using wood glue and 3” Spax or wood screws. We suggest not using glue to attach the slats and the runners to both the footboard and headboard so you are able to move your bed around from room to room and disassemble it easily.

Here it is all finished up! I just love this bed so much!


Howdy, we’re planning on building this bed very soon! My wife and I are very excited to embark on our first woodworking challenge!
I do have a question: the cut list says to rip one of the 2x6x8 to 4″ but the instructions say 4.5″. Which one is it!?!? Please help!!
Thank you so much for this amazing design.
Rip the cap rail for the foorboard to 4.5″. The mention of 4″is incorrect.
We found that out after we ripped all the boards to the cut list, LOL
If I remove the slats would this work with an adjustable base in the middle?
How easy would this be to convert for a king size?
I want to know as well, please gives us measurements for king size
I would like to have king size measurements as well! Please!
Increase headboard and footboard width by 22″. Increase side rails by 5 inches. Added a 2×4 support down the center with a center leg for extra support since it’s a much longer span.
Full size mattress is 54×75.
King size mattress is 76×80.
An adjustable base is self supporting. You would just see the metal support legs. You would also not need the support ledge for the slats.
I’m 99% sure they used Valspar Briarsmoke for the stain color. It’s a very popular choice of theirs.
DOES this plan allow for the installation of metal brackets to join railings to headboards instead of using Kref screws? I would like to be able to disassemble and move the bed around as needed.
Can you please share details on the stain used?
I’m 99% sure they used Valspar Briarsmoke for the stain color. It’s a very popular choice of theirs.
What stain was used for this bed?
How much weight can slats like this hold? Is it different when stretched across a king? Would we need to put in center support(s) as asked below? My current king situation has a beam in the center and you can feel it up in the mattress. I hate it. I’m looking for a better solution.
Thanks!
I made one of their king size beds and I ended up putting a 2×4 beneath each slat as a support. Look at the bed with the diamond headboard as a reference. It says use 2×2 but I found that it wasn’t sturdy enough so I replaced the 2×2 with 2×4’s. I hope that helps!!
Can you give me the measurements for your build?? I want to build this bed for a king mattress but I have no clue on how to measure everything!
What type of clamps did you use and where did you purchase them?
Would you put a center support for a king sized bed? If so, how would you recommend doing it?
I just completed the build of a king using this plan. I installed a 2×3 along the center acting as a beam using metal brackets at the extremities (brackets used for deck construction ). One bracket screwed to the footboard and one to the headboard. It works good.
I want to build this design in a king. Instead of the 61″ width, what should it be for a king?
Saw the measurements for king below after I posted. 🙂
Would you put a center support for a king sized version?
What stain did you use?
Twin size plans please. Also stain color.
Thanks..
Standard measurement for a Twin (not XL Twin, but Twin) is 39”x 75”.
Your side rail pieces will be cut at 75” instead of 80”, like it shows on their plan. If you have an XL Twin (standard measurements at 39”x80”) you don’t have to change the side measurements.
Headboard, footboard, and trim piece for top of the headboard would be measured at 39.5” for a Twin and Twin XL. (their’s is 60.5”, standard measurement is 60”…they went up a .5”).
Your slats will be 40”. (They went up an inch in their’s, too.)
Love this!! King sized measurements pretty please??
The bed they completed is a Queen (standard measurement for a queen is 60”x80”). Their headboard and footboard panels are measured at 60.5” (so, a 1/2” bigger). The slats for the mattress are measured at 61”, so a full inch from the measurement of the Queen.
The standard measurement for a King is 76”x80”. So, your headboard AND footboard pieces will be measured at 76.5”, and the slats will be 77”.
So, when you look at their cuts list on their plans, any piece you see measured at 60.5”, you will do at 76.5”, and where you see 61” on the plans, you will make 77”.
The sides of the bed and the legs don’t need any modifications, as the length is the same for a Twin XL, Queen and King. They touch on this a little bit in the video.
I have a California King which measures 84 x 72. Any chance I can get the above translation fro a Cal King? Thank you!
See comments below for information regarding a King size bed and the measurements. ?
Could I get full size measurements??
What stain did you use for this bed?
I love this so much! Could you give measurements for a full?
The bed they completed is a Queen (standard measurement for a queen is 60”x80”). Their headboard and footboard panels are measured at 60.5” (so, a 1/2” bigger). The slats for the mattress are measured at 61”, so a full inch from the measurement of the Queen.
The standard measurement for a Full is 54”x 75”. So, your headboard AND footboard pieces will be measured at 54.5”, and the slats will be 55”.
So, when you look at their cuts list on their plans, any piece you see measured at 60.5”, you will do at 54.5”, and where you see 61” on the plans, you will make 55”.
Your side boards will be 75” instead of their 80”.
Beautiful bed!! Can you provide measurements to convert this to a king?
The bed they completed is a Queen (standard measurement for a queen is 60”x80”). Their headboard and footboard panels are measured at 60.5” (so, a 1/2” bigger than the standard measurement.). The slats for the mattress are measured at 61”, so a full inch from the measurement of the Queen.
The standard measurement for a King is 76”x80”. So, your headboard AND footboard pieces will be measured at 76.5”, and the slats will be 77”.
So, when you look at their cuts list on their plans, any piece you see measured at 60.5”, you will do at 76.5”, and where you see 61” on the plans, you will make 77”.
The sides of the bed and the legs don’t need any modifications, as the length is the same for a Twin XL, Queen and King. They touch on this a little bit in the video.