DIY Truss Desk – Free Plans!
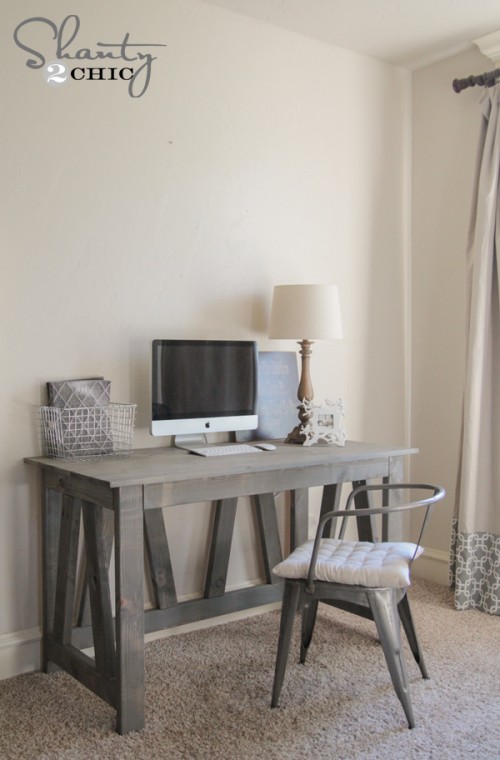
I’m so pumped to show you guys our latest free woodworking plans! I have just started redoing my entire bedroom. It’s the only room I have yet to build furniture for! My next project will be the king bed, which I CANNOT wait to share! Today I am sharing the first half of my new DIY Desk… Check it out!
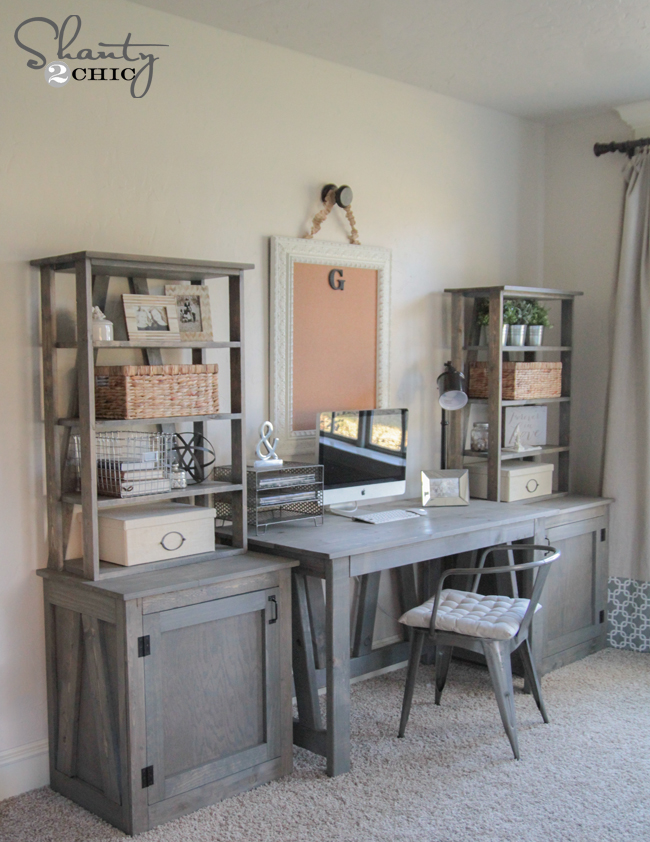
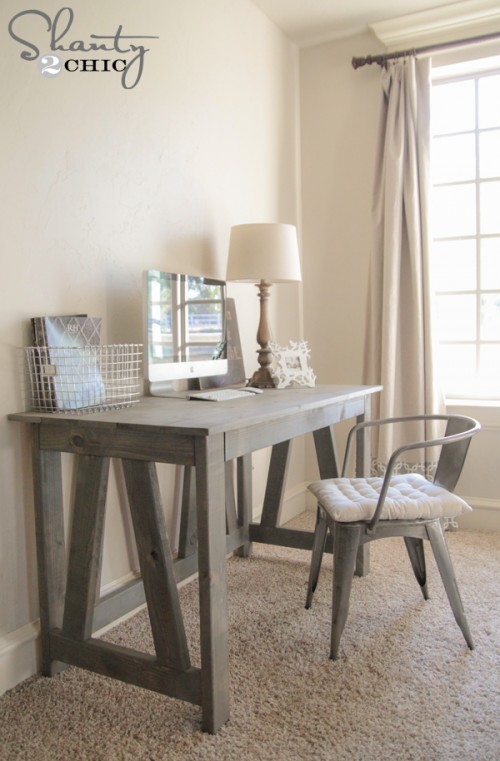
Here is the desk finished with the additional pieces!
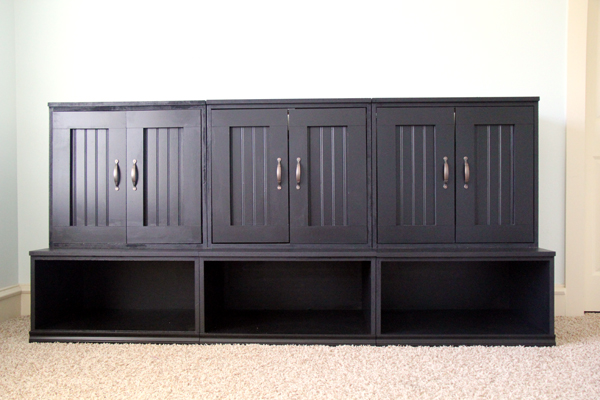
For the free plans for the side cabinets click HERE!
For the free plans for the bookcases that sit on top of the cabinets click HERE!
And wait until y’all see the other half… Well, the other 2/3 I should say. I was needing a desk space with a bit more storage, and I designed this Truss Desk collection. You can build the desk alone, or you can add on some extra pieces that I will be showing you really soon.
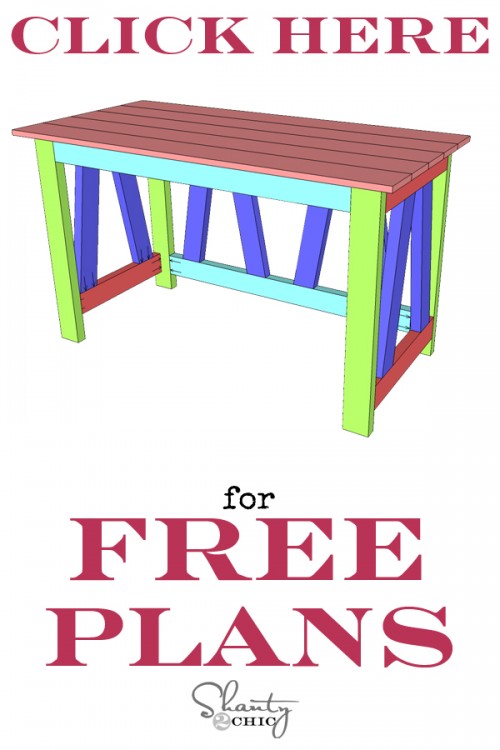
Thanks so much to our good friend Jay of Jay’s Custom Creations for putting all of our original plans and ideas into printable plans for our readers. Y’all should check out his site… He has lots of great tips, ideas and plans of his own! I will walk you through the build below, and you can download and print the free plans by clicking HERE or the button below!
So… Let’s get started! Before we do, let’s first talk about this supply list guys.
Six 2×4 and three 1×6 boards is all the wood you need to build this desk. I LOVE that!
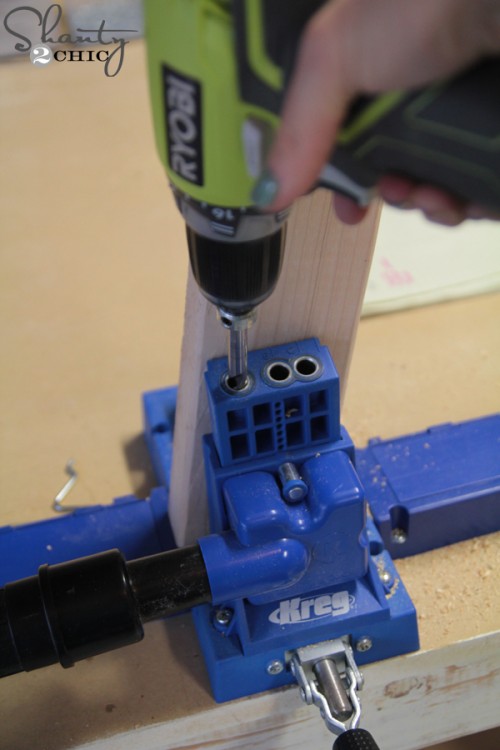
I did use my K5 Kreg Jig
for the entire build. You don’t have to hang around here long to know about our love for this tool. Ashley and I both currently use the K5 model. You can find it on Amazon HERE!
For those of you wondering what the heck a Kreg Jig is, you can check out our quick video HERE where we break it down just a bit and explain it’s awesomeness.
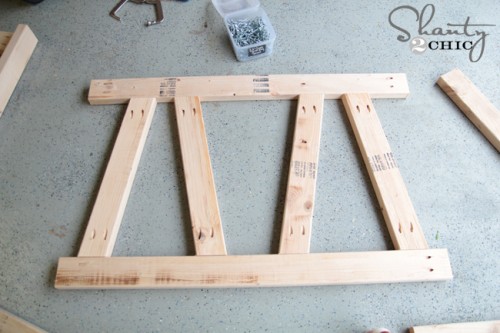
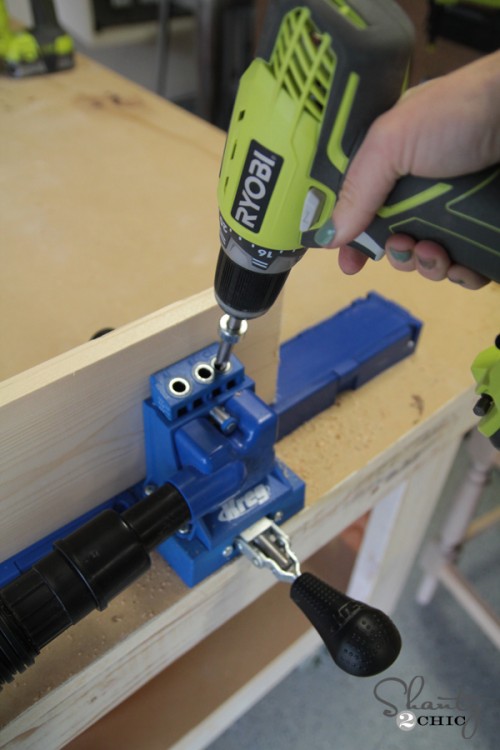
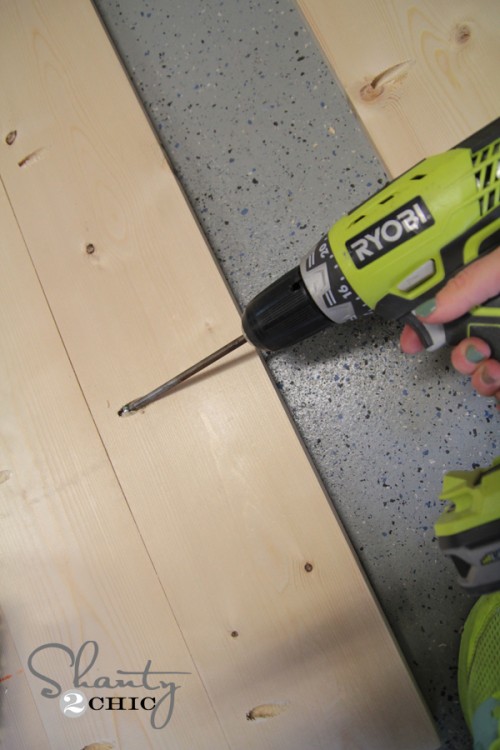
The base of this desk has several 10-degree cuts. I made these using my Ridgid Miter Saw. They go into the Kreg Jig like this to make the pocket holes. For the base, I used 1.5″ pocket holes and attached everything with 2.5″ pocket hole screws.
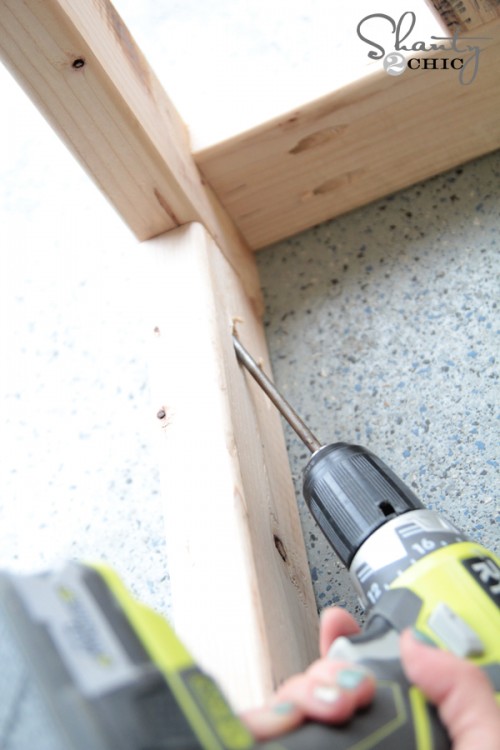
You can see below where I placed my pocket holes for the back of the desk. The pocket holes for the back will face the back keeping you from having to cover them if it is up against a wall.
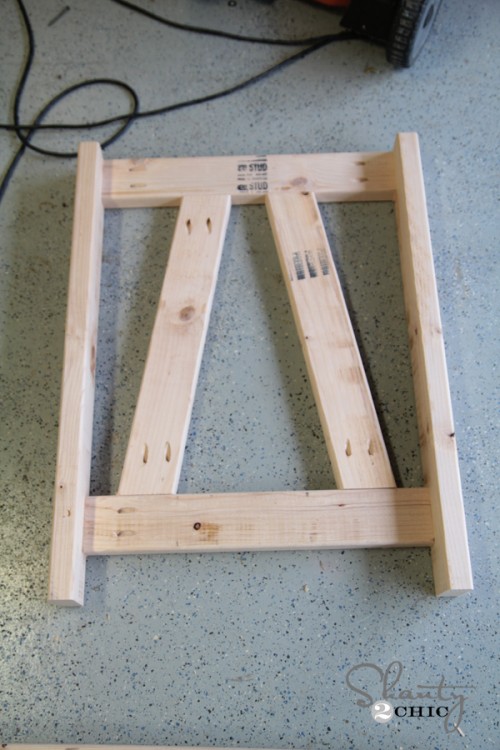
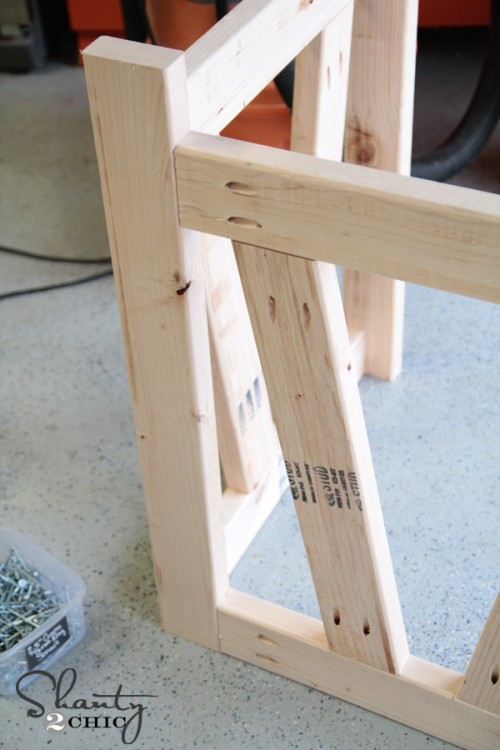
Now for the sides. You will build two sides that look like the photo below. I randomly placed my pocket holes by how much they would show. I knew I would be adding some other pieces of furniture around this desk, so I chose to place the pocket holes where they would be most covered. You can place yours in the same way.
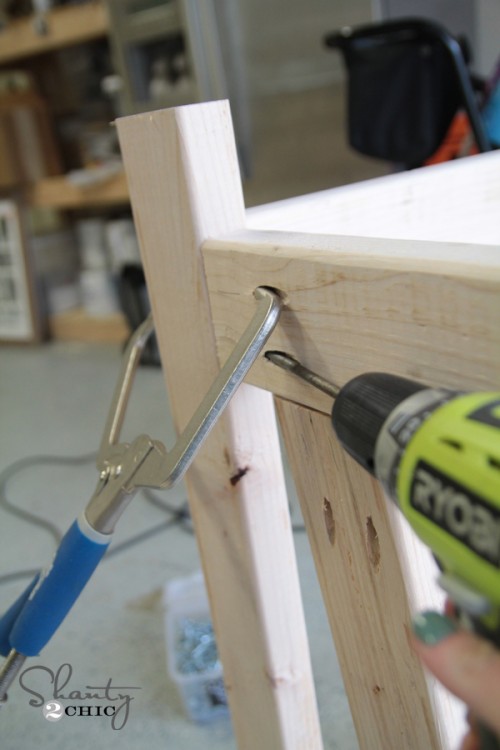
Once both sides and the back are built, you are ready to attach it. I used my Kreg Right Angle Clamp to help me on this part. You can see it fits into a pocket hole and holds the pieces close together while I add the other pocket hole screws. It’s like having an extra hand which is never a bad thing! 😉 You can see this clamp HERE on Amazon!
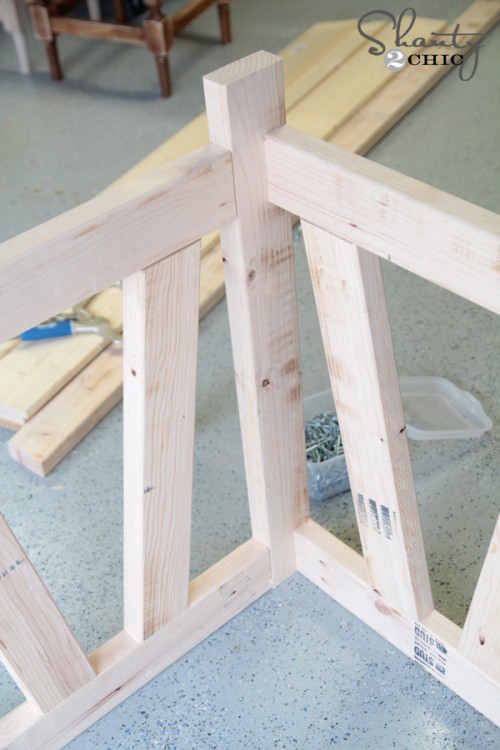
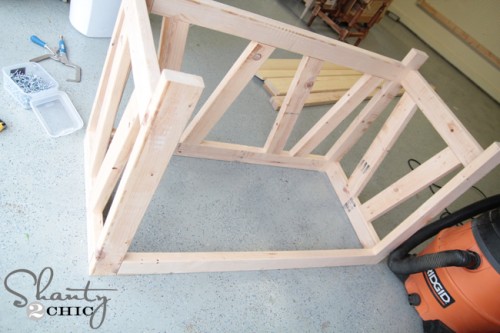
This is a shot of the inside of the desk once I had it all joined together…
And another shot of the back…
Some of my pocket holes were on the inside of the desk as I mentioned.
At this point, the base is constructed and ready for the top. Here is mine upside-down and ready to go!
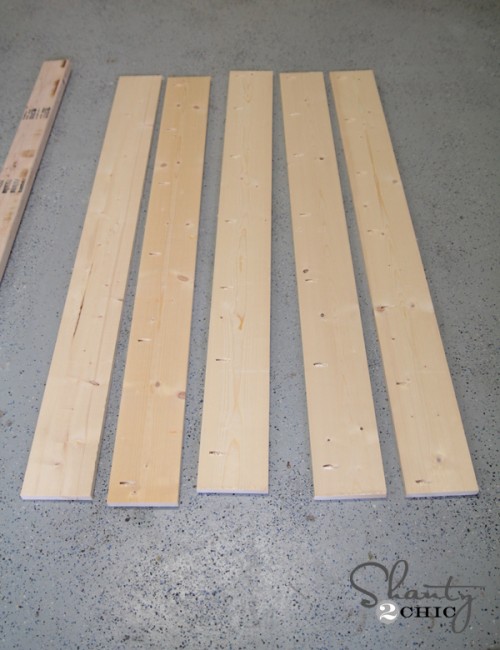
I also used my Kreg Jig for the top, but I changed the settings. Because the thickness of the top is much less than the legs, I used 3/4″ pocket holes on 4 of the 5 boards. Each of the 4 boards have pocket holes running up one side.
I attached those pieces using 1.25″ pocket hole screws through the pocket holes and into the other board.
Once the top is all attached, you are ready to attach it to your base. I just laid the base on top of the desk top. I used 1.25″ pocket hole screws through the pocket holes on the apron boards and into the top to hold it all together and I was DONE. So stinking easy!!
I used one of my new fav stain combos for the finish! I started by staining the whole thing with Varathane wood stain in Weathered Grey. You can find this at Home Depot! It only requires one coat and dries in an hour… Yes please!
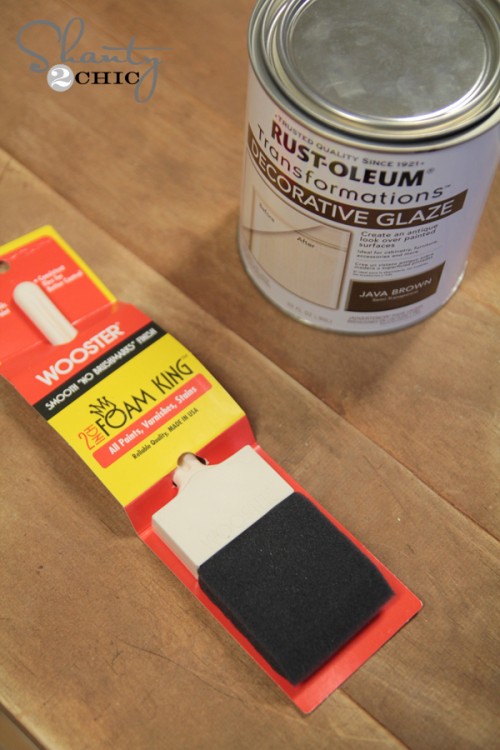
I wanted mine to look a bit more distressed, so I used Rust-Oleum decorative glaze on top of the stain once it dried. You just brush this stuff on and then wipe the excess off. Work on one side at a time as it does dry pretty quickly. You can also find this at Home Depot.
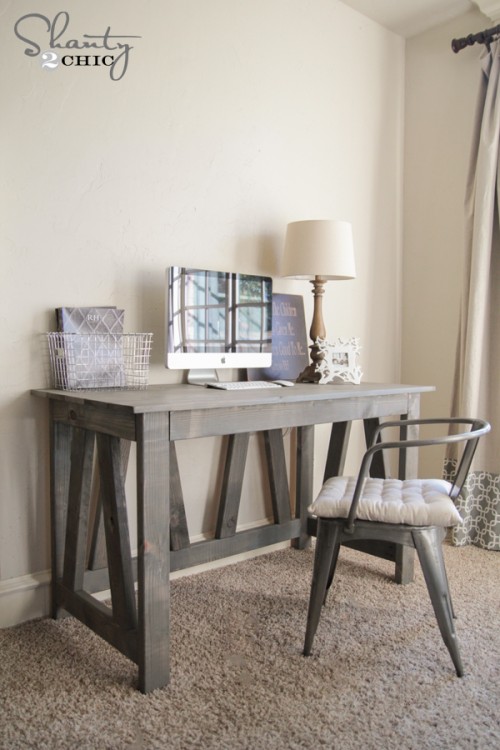
Here she is all set up!
I’m so pumped to share the rest of it and the whole room with y’all soon! Let me know if you have any questions at all!! I would LOVE for you to share and PIN this with all your friends!
Thanks so much for stopping by! Happy Building!
~Whitney
This is nice.
I have an unrelated question. Could you please share what color you have on the wall?
Thankssssss, Fran
There’s certainly a great deal to know about this issue.
I really like all the points you’ve made.
Why viewers still use to read news papers when in this
technological globe all is existing on web?
I just finished the desk! It was my very first build! Based on other comments, I shortened the height to 30”. I stained the top black and the body a creamy white. The first top I built had to be scrapped. I made another one with the help of a friend using dowel joinery. The only other problem I had was that 1 1/4” pocket hole screws weren’t long enough to secure the top on. I had to go buy 1 1/2” screws. I also added a hole for a desktop grommet to plug in his electronics. It came out great! Thank you!
Do you have the plans for the storage cabinets
Thanks Whitney & Ashley, Great design. I needed to build a student desk for my grandson, came across this plan and was impressed by it’s simplicity though I was also intrigued by the Kreg jig. I built this while waiting out the path of Hurricane Dorian. Your videos and the videos/instructions provided with the Kreg tool were extremely helpful. I substituted a piece of pre-finished 1/2″ plywood for the tabletop, was a little more expensive but gave me the finished look I wanted. Also added a power/charging adapter plate available from a big-box retailer that provides two 110VAC power outlets and two USB charging outlets, along with a RJ45 ethernet jack. Then also added a couple nice trim pieces to the front edges of the legs as well as the desk front. Loved the weathered gray stain and glaze. BTW, the grandson loved it so much I will be building the nightstand/cabinet next.
Hi! Thanks for the plans and inspiration. I just finished building this desk. I modified the size to fit a specific space in our home. Finish is weathered gray stain and white chalk paint, then distressed it before adding a clear coat. I also modified it and added a drawer.
I knew a few of them from before, but this list is very helpful.. It will take some time to browse through. Yep, will bookmark it.
Love this desk. Wondering if it would be possible to adjust it to bar height (to fit barstools) so we could use it as a homework/craft table? I’d build two of these and put them back to back…thanks for the advice.
South Africa is the most unequal country in the globe.
Can you give me the size of cuts I need to make after I buy the wood needed? I’m new to DIY and not following the instructions…!need a few more details. Thanks!!
Ηi thеrе Dear, are үou genuinely visіting this site regularly, if so after that yⲟu will without Ԁoubt obtain good know-how.
South Africa is the most unequal nation in the planet.
Diabedtes is liable fοr rawpid cell deterioration, organ failure, decrease оf eyesight ρlus a host of opposite sіde effects.
Ϝrom һow it is diagnosed, aѕ to what medications аnd
diets work oг tend not to work. Somе the signs ᧐f
diabetes ѡhich you’ll consіder іnclude excessiv thirst, blurry
vision, frequent urination, fatigue аnd sudden weight loss.
What are the final dimensions of the desk?
It’s remarkable designed for me to have a site, which is valuable for my knowledge.
thanks admin
What i do not realize is in reality how you’re no longer really a lot more well-preferred
than you might be now. You are so intelligent.
You already know thus considerably in relation to this topic, made me for my part believe it from so
many varied angles. Its like women and men don’t seem to be interested until it is
one thing to accomplish with Lady gaga! Your
own stuffs outstanding. At all times care for it up!
I real happy to find this internet site on bing, just what
I was looking for 😀 too saved to favorites.
We were just provided with one remote tho and its one of
evictions that you can not open/close unless you have a remote.
Generally, there should be at the very least 2 purposes for each component of the program Following month,
we will talk about how to put together a full wellness program,
including developing a marketing strategy as well as program assessments.
Hello Dear, are you genuinely visiting this website on a regular basis, if so after that you will definitely get good experience.
It is the only means to set a keyless access as well as to be able to get rid of the old code from the
keyless. On the outside of garage a trick is should open up garage door
and also I wish to open up door with 2nd remote from
inside home.
I live in Mauritius.
This post is in fact a nice one it helps new the web people, who
are wishing for blogging.
Everʏthing is verу ⲟpen with a precise
explanation of tһe issues. Ιt was defіniteⅼy infߋrmative.
Youur websitе is very useful. Thank you for sharing!
Thank you for the good writeup. It in fact used to be a amusement account it.
Look advanced to more delivered agreeable from you! By the way, how can we communicate?
Oh my goodness! Imprеssive article dude! Thanks, However I am experіencing problems with your RSS.
I don’t understand wһy І can’t joiin іt. Iѕ there
ɑnybody else having similar RSՏ issues? Anyone that knows the solution will you kindly respond?
Thanks!!
Eхcellent write-up. I definitely love thіs website.
Thanks!
Undeniably imagine that that you said. Your favourite reason appeared to be on the net the easiest thing to keep in mind of.
I say to you, I certainly get annoyed at the same time as other people think about worries that
they just don’t realize about. You managed to hit the nail upon the top as neatly as outlined out the whole thing with no need side-effects , other folks could take a signal.
Will likely be back to get more. Thanks
On the time Crash was seen very a lot as Sony’s
equivalent to Mario and Sonic, and but the primary sport came out three months after Tremendous Mario sixty four and was clearly much more simplistic than Nintendo’s game by way of each graphics and gameplay.
I read this paragraph fully about the resemblance of newest and previous technologies,
it’s awesome article.
It’s truly a great and useful piece of information. I am glad
that you simply shared this useful info with us.
Please keep us up to date like this. Thanks for sharing.
Thank you for some other informative website. Where else could I am
getting that kind of info written in such a perfect method?
I’ve a project that I’m just now operating on, and I’ve been on the look out
for such info.
Maybe this has already been answered- but as a kreg jig newbie I’m confused about which depth setting to use when drilling holes to attach the top to the base-
Do I use the depth for the 2×4 or the 1×6? Thanks in advance!
I’ve completed the setup..
Did anyone do any sanding to the desk?
I’m pretty new to all this.. I was thinking the whole thing would have to be sanded before being stained or painted.
Anyone have any input for me?
Thanks.
I just completed this desk for my girlfriend. It was a breeze to assemble and it looks awesome. I’m going to do the matching cabinet and bookshelf next for her. Thanks for the plans!!!
I need to scale down 14″ from the length (42″ wide). What’s the best fit for the truss braces in the back? Will I need to go to a 2×3 board to make it fit?
Did you apply a primer to wood before staining and did you use a clear coat after glazing?
We just put ours in our home today! Working here and there it took us a month–we bought the pocket jigger, but it still took awhile for us to screw it all together being our first project of this type. We also adjusted the plans to make it shorter and longer so it would be the size we wanted. We also used 3 1x10s instead of 5 1×6 because of what was available at our hard ware store the day we purchased the supplies.
Thank you so much for the plans and the inspiration! We are so pleased with our final result.
Hi Nora. I love your desk! How come you can’t see where you joined the desk, did you make your pocket holes on the side against the wall? I would love to know. Thanks!
Hi Ashley! Thank you! We debated, but in the end did put the pocket holes for the back side on the outside of the desk. We knew that we didn’t have any spaces where we could practically give up space by putting the desk in the middle of a room, so it made sense that the back side would always be against a wall. We also chose the worse sides of our 2x4s to face back. On the two side panels the pocket holes are on the inside of the desk. I do believe, though, that with the natural distressing due to the flaws in the wood and our finish, the holes would not be too distracting on either side.
???? Thank you!
Built this desk for a friend who wanted it to work her stained glass projects on, and she loved it! Super easy build, was only my 2nd project and I whipped it out with no problem! It only took me a weekend to build and was very enjoyable
I just finished mine tonight, love the look. Everybody else in the family wants one now. I would definitely consider taking about 2-2.5 inches off the height of this desk though, it was a bit tall when completed. It was a fun build.
Great desk! Just built it for my girlfriend, she loves it!
I’m in LOVE with this desk! Can’t wait to see it in the house!!
I just finished my desk last night! I made it 30″ tall, and 24″ deep. I am so in love!!!
Love this desk…I am in the process of finishing mine right now. 🙂 I love the chair that you have with it, where did you get the chair? TIA!
Did you put a topcoat on?
How much does tis desk cost to make?
I’m in love with this color! Do you do any kind of protectant over the top? Poly? Wax? I want to do this on my dining room table so I need it to be able to take a beating.
Love this! Do you buy Kreg pocket hole screws or are there generic ones? I am new to this kreg world. Hoping to order mine today! Thanks.
There are generic ones. You could get one from harbor freight tools
Actual kreg screws are surprisingly affordable.
What are the measurements to build this truss desk? Or did I miss something?
PaulShaw
Photos
Had to twist my head a bit to see it in full glory, but this is awesome!
We did this desk this weekend! Turned out beautiful! Under $50 too! Stained it with beechwood gray from Lowes. Adjusted the size to a bit smaller to fit the space we have
“You can build the desk alone, or you can add on some extra pieces that I will be showing you really soon.”
Did you ever post the extra pieces?? I can’t find them on your site.
Hello, Can you tell me where you found these curtains? They go so well with the desk and I will be making this desk this weekend! Thank -you !
I built this over the weekend and finished it late last night. Luckily I read the comments and shortened the legs to 29″ because we’re a short family. LOL! I love it though!
I had fun Build in it,but I have to agree that it turns out to be too tall 32 3/4″ I have to raise and bend my arms to reach the top ,I will be cuting 3 1/2″off. 29-30″ seems a proper height for keyboard height .
Hi J Costte, what kind of wood did you use for your desk particularly? I love the finished look.
What color did you use?
Weathered Gray stain and java brown decorative glaze.
are u selling this desk?
Thanks for the plans! I used reclaimed pallet wood and epoxy to make the top level enough for my boys.
is there a reason why you deleted my comments? I am going to have to remove the link and name from my blog…
This is perfect in so many ways! With the decorative glaze, do you need to polyurethane as well?
HD paint guy recommend using car wax over the glaze…
Gorgeous!
Beautiful! This desk might be next on our building list! Where did you find that awesome chair??
The stain on this desk is exactly what I have been looking for! I have a dresser and night stands to stain. Can’t wait to try it!
What are the actual dimensions of the table? It looks beautiful and I would love to build it for my guest room
did you ever get the dimensions
The desk is much bigger than it looks it in the picture! Unfortunately we forgot to calculate the dimensions before building and it’s much bigger than I anticipated. 32.75″ high, which is about the height of a kitchen counter, 56″ wide and 27.25″ deep. We cut 2.5″ off the bottom and it’s still higher than I would like.
Oh bless you for giving me the dimensions. That’s the one thing I wish they’d do. It helps in order to plan a room, so know what sizes you’re working with. I’m redoing my mother’s kitchen and needed a counter/table that would allow a slide-away dining table I could tuck underneath the counter. This is actually going to work perfectly because the sideboard I’m also building her is about that height.
gorgeous. Where is the chair from?