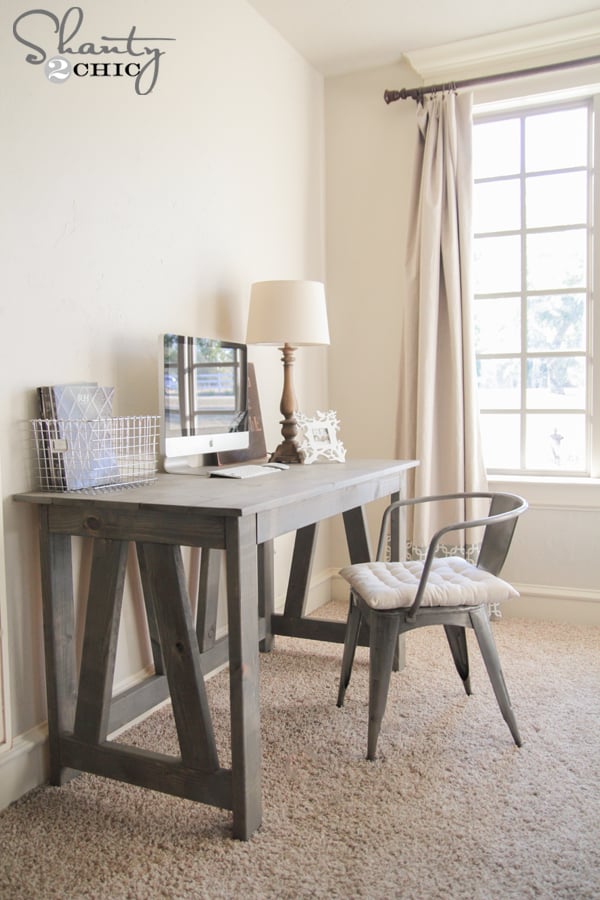
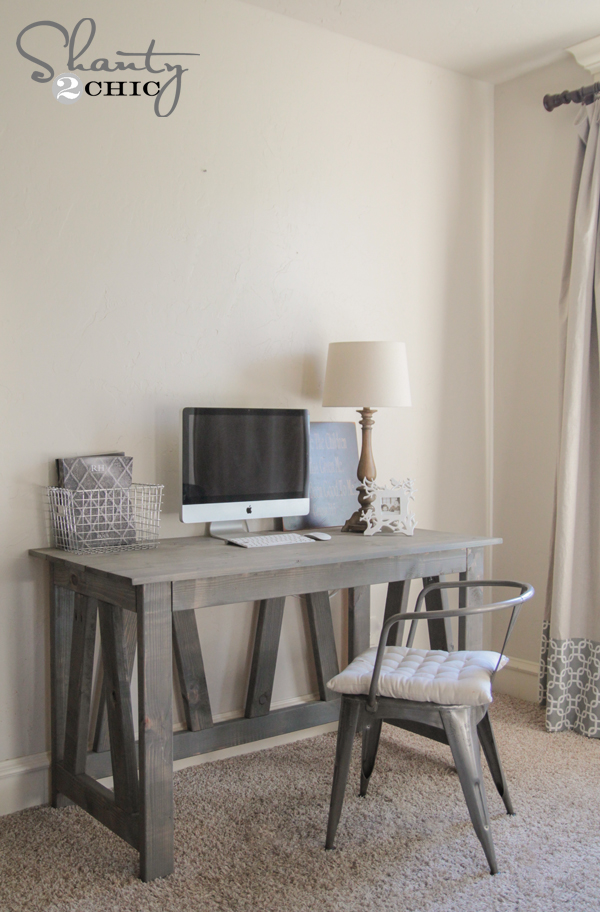
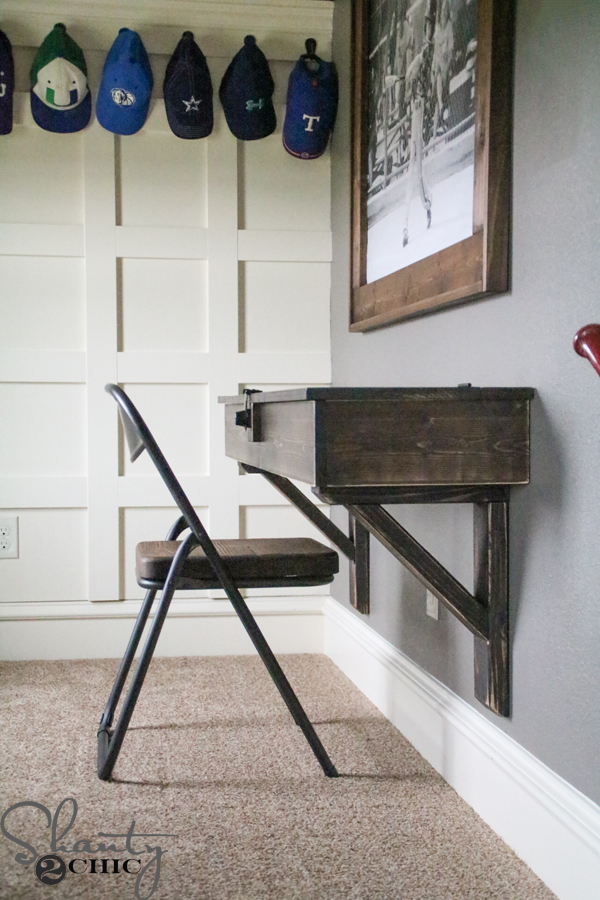
I’m so pumped to show you guys our latest free woodworking plans! I have just started redoing my entire bedroom. It’s the only room I have yet to build furniture for! My next project will be the king bed, which I CANNOT wait to share! Today I am sharing the first half of my new DIY Desk… Check it out!
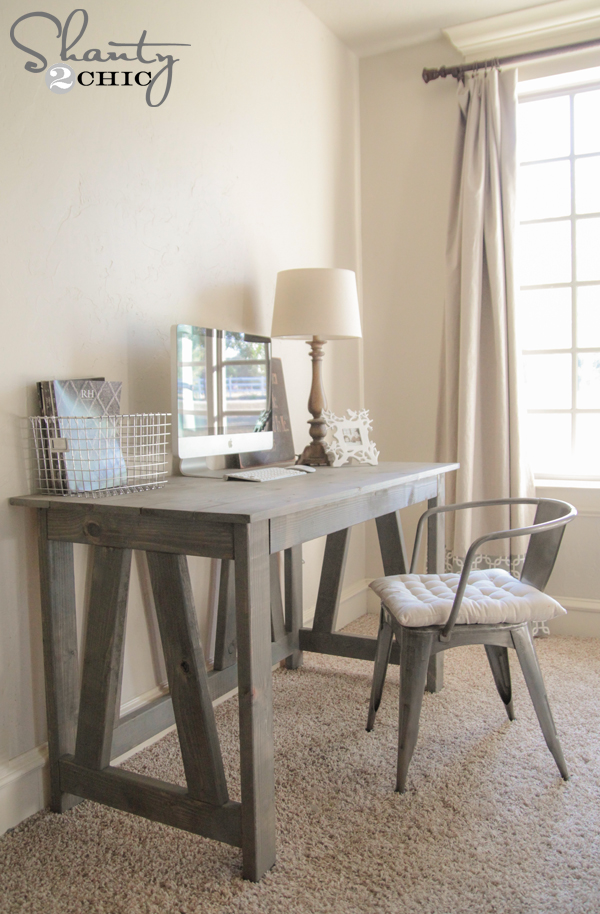
Here is the desk finished with the additional pieces!
For the free plans for the side cabinets click HERE!
For the free plans for the bookcases that sit on top of the cabinets click HERE!
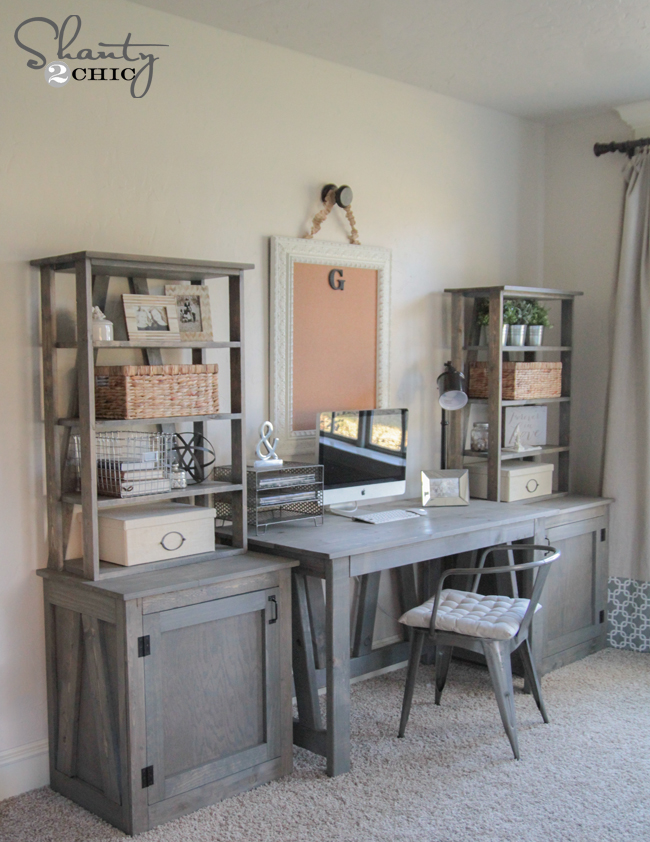
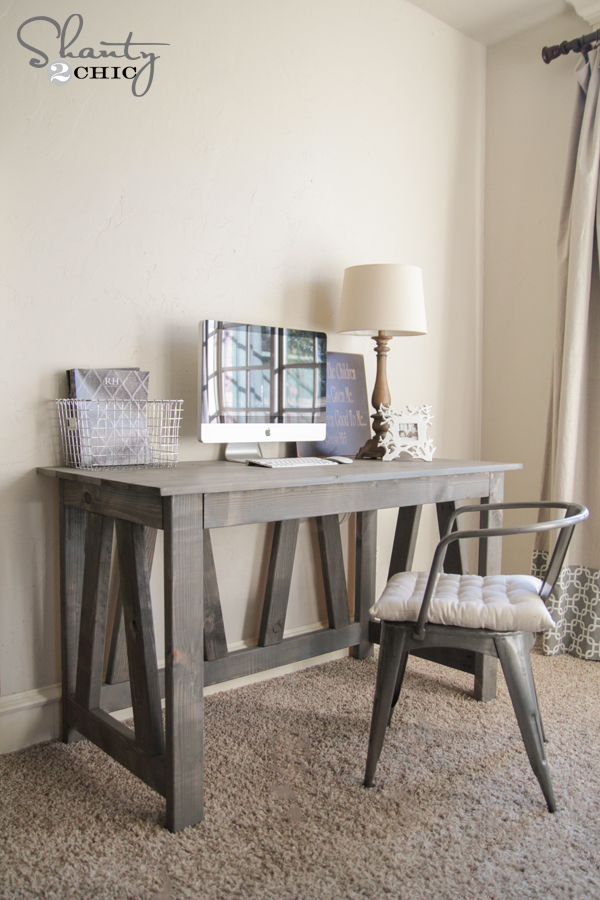
And wait until y’all see the other half… Well, the other 2/3 I should say. I was needing a desk space with a bit more storage, and I designed this Truss Desk collection. You can build the desk alone, or you can add on some extra pieces that I will be showing you really soon.
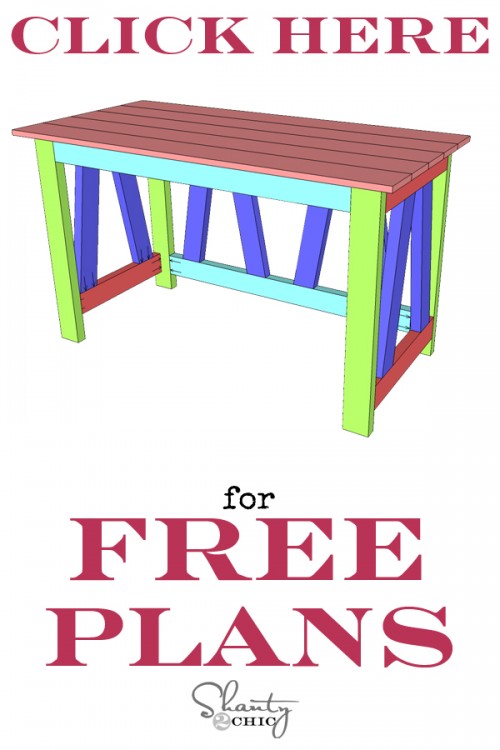
Thanks so much to our good friend Jay of Jay’s Custom Creations for putting all of our original plans and ideas into printable plans for our readers. Y’all should check out his site… He has lots of great tips, ideas and plans of his own! I will walk you through the build below, and you can download and print the free plans by clicking HERE or the button below!
So… Let’s get started! Before we do, let’s first talk about this supply list guys.
Six 2×4 and three 1×6 boards is all the wood you need to build this desk. I LOVE that!
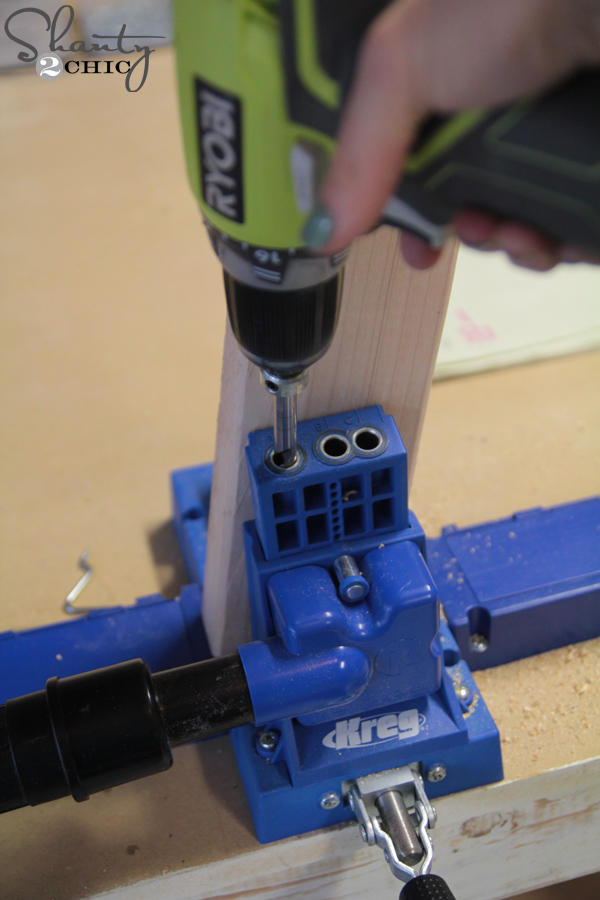
I did use my K5 Kreg Jig![]()
for the entire build. You don’t have to hang around here long to know about our love for this tool. Ashley and I both currently use the K5 model. You can find it on Amazon HERE!![]()
For those of you wondering what the heck a Kreg Jig is, you can check out our quick video HERE where we break it down just a bit and explain it’s awesomeness.
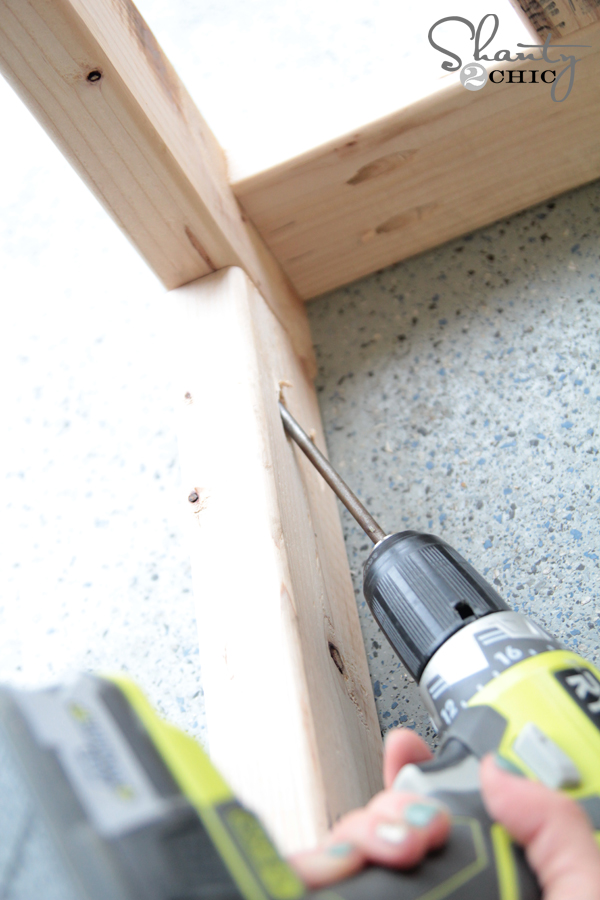
The base of this desk has several 10-degree cuts. I made these using my Ridgid Miter Saw. They go into the Kreg Jig like this to make the pocket holes. For the base, I used 1.5″ pocket holes and attached everything with 2.5″ pocket hole screws.
You can see below where I placed my pocket holes for the back of the desk. The pocket holes for the back will face the back keeping you from having to cover them if it is up against a wall.
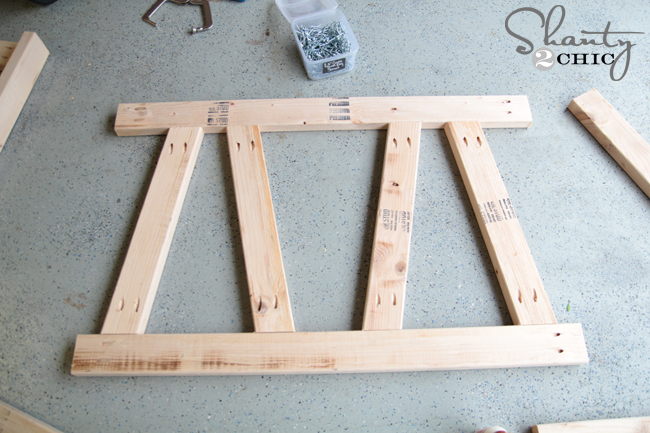
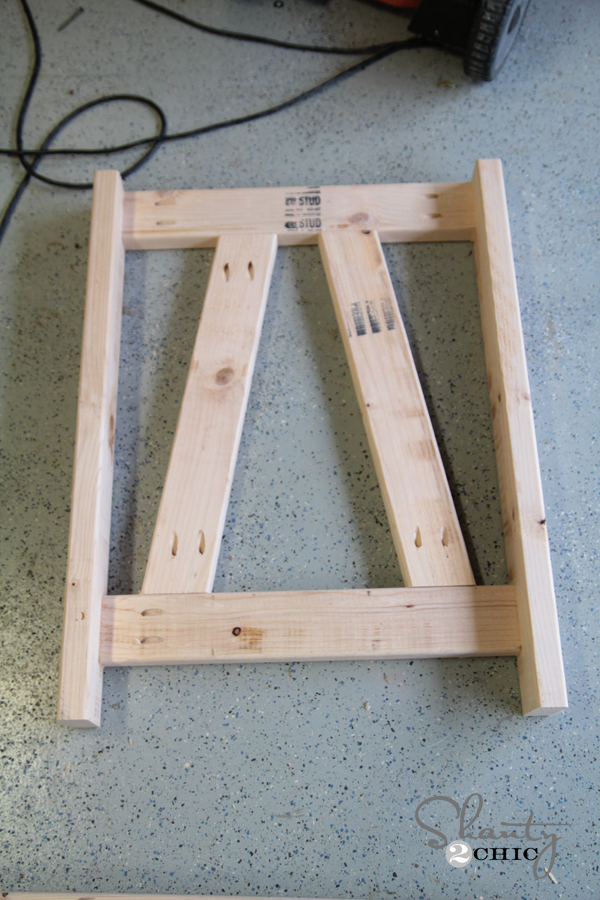
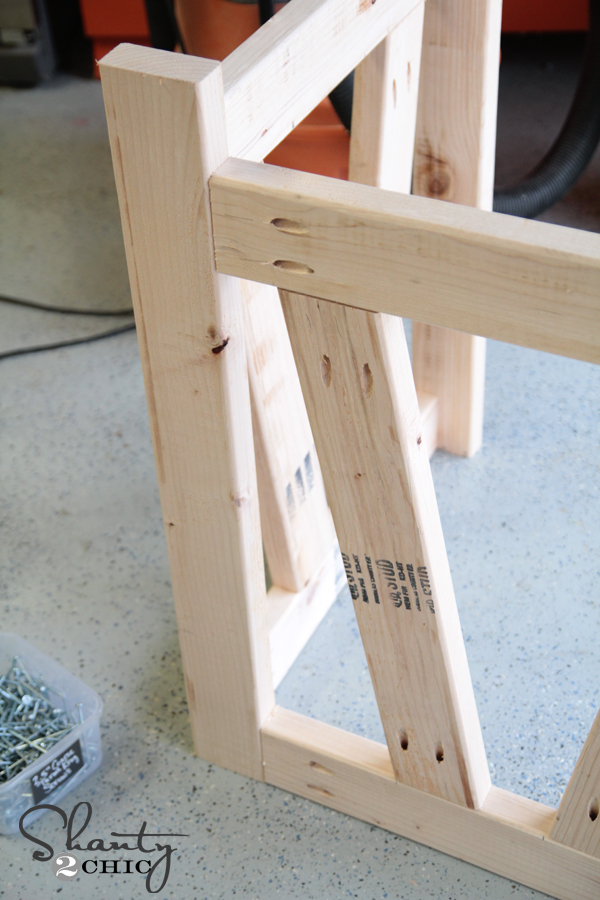
Now for the sides. You will build two sides that look like the photo below. I randomly placed my pocket holes by how much they would show. I knew I would be adding some other pieces of furniture around this desk, so I chose to place the pocket holes where they would be most covered. You can place yours in the same way.
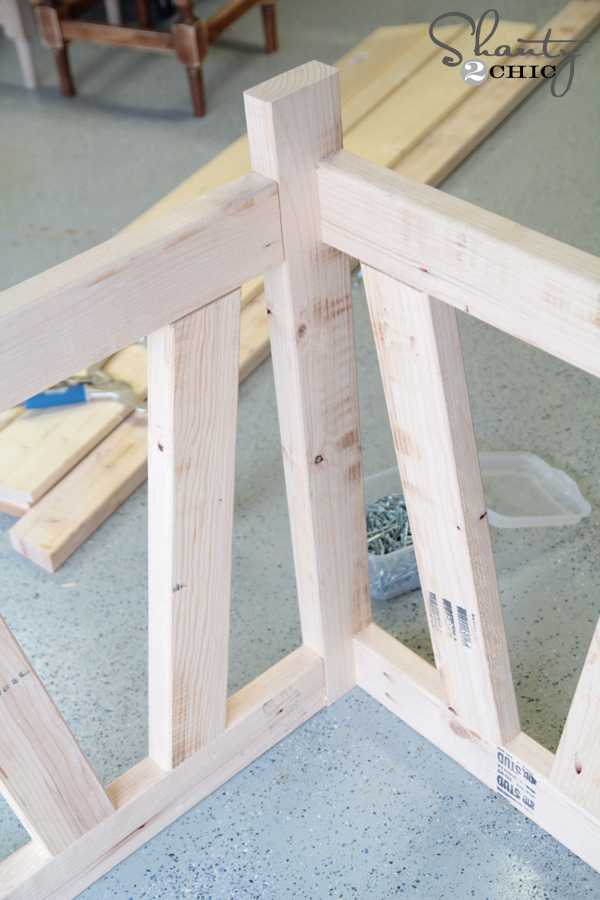
Once both sides and the back are built, you are ready to attach it. I used my Kreg Right Angle Clamp to help me on this part. You can see it fits into a pocket hole and holds the pieces close together while I add the other pocket hole screws. It’s like having an extra hand which is never a bad thing! 😉 You can see this clamp HERE on Amazon!![]()

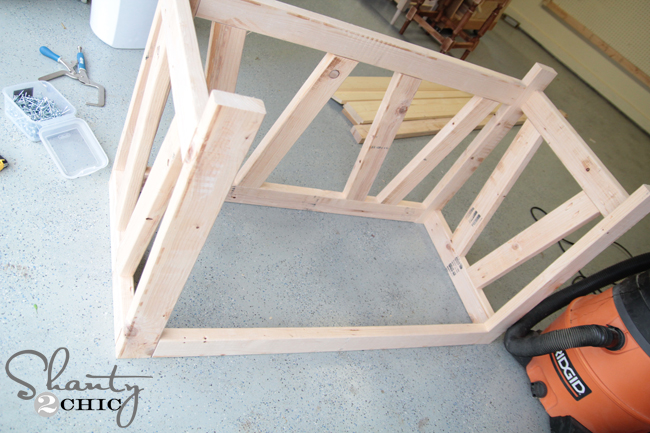
This is a shot of the inside of the desk once I had it all joined together…
And another shot of the back…
Some of my pocket holes were on the inside of the desk as I mentioned.
At this point, the base is constructed and ready for the top. Here is mine upside-down and ready to go!
I also used my Kreg Jig for the top, but I changed the settings. Because the thickness of the top is much less than the legs, I used 3/4″ pocket holes on 4 of the 5 boards. Each of the 4 boards have pocket holes running up one side.
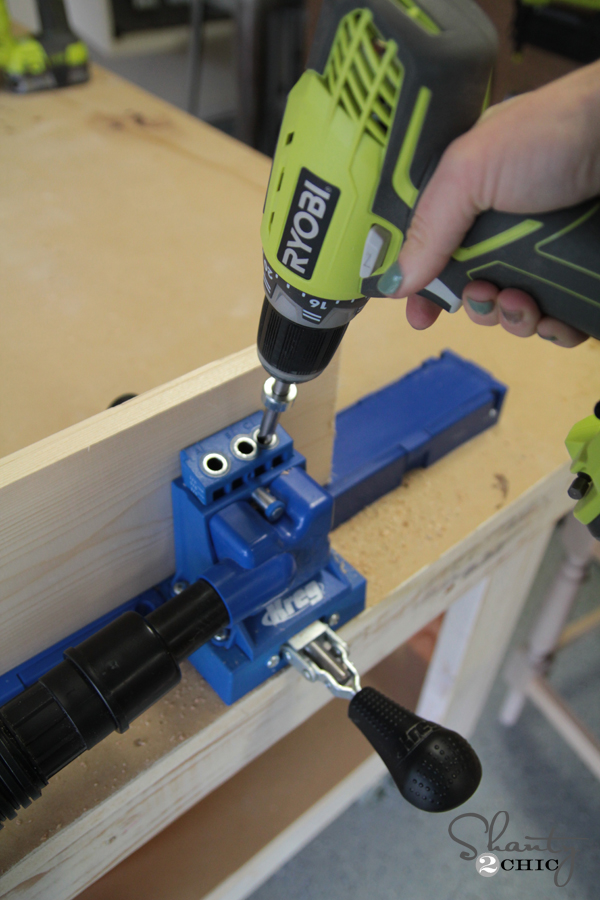
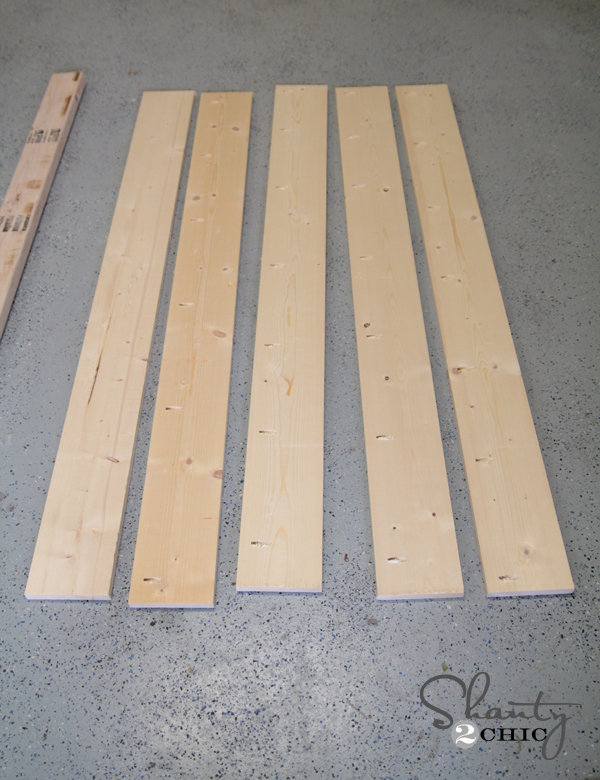
I attached those pieces using 1.25″ pocket hole screws through the pocket holes and into the other board.

Once the top is all attached, you are ready to attach it to your base. I just laid the base on top of the desk top. I used 1.25″ pocket hole screws through the pocket holes on the apron boards and into the top to hold it all together and I was DONE. So stinking easy!!
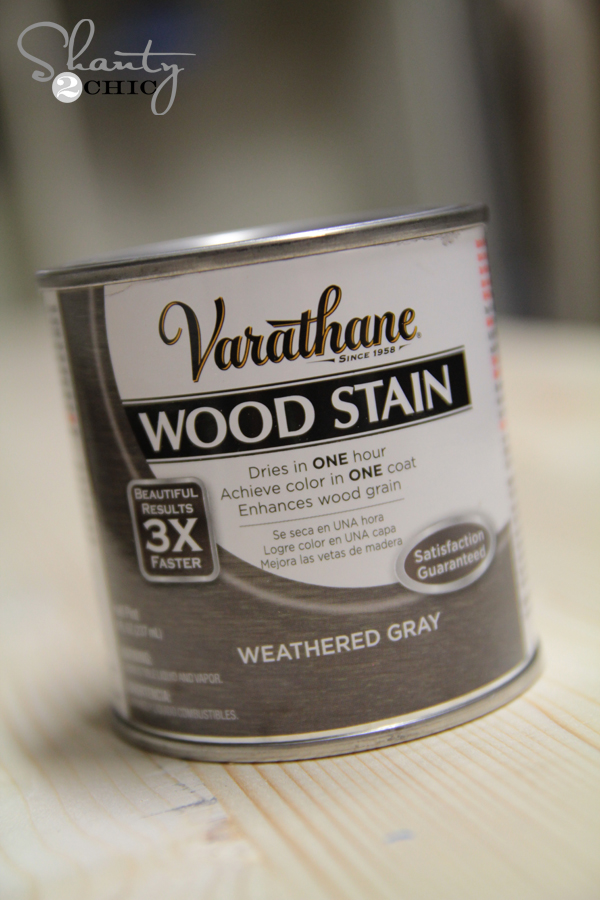
I used one of my new fav stain combos for the finish! I started by staining the whole thing with Varathane wood stain in Weathered Grey. You can find this at Home Depot! It only requires one coat and dries in an hour… Yes please!
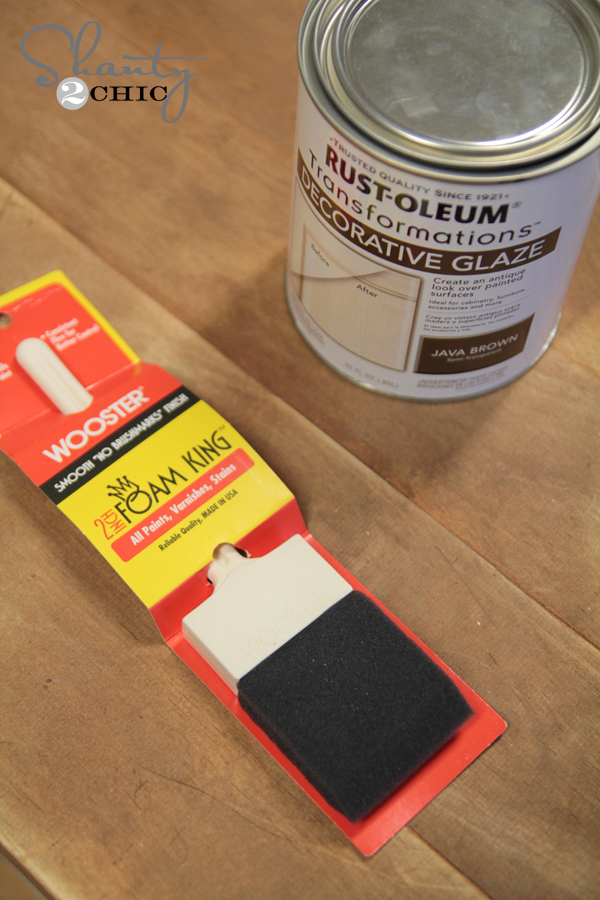
I wanted mine to look a bit more distressed, so I used Rust-Oleum decorative glaze on top of the stain once it dried. You just brush this stuff on and then wipe the excess off. Work on one side at a time as it does dry pretty quickly. You can also find this at Home Depot.
Here she is all set up!
I’m so pumped to share the rest of it and the whole room with y’all soon! Let me know if you have any questions at all!! I would LOVE for you to share and PIN this with all your friends!
Thanks so much for stopping by! Happy Building!
~Whitney

Maybe this has already been answered- but as a kreg jig newbie I’m confused about which depth setting to use when drilling holes to attach the top to the base-
Do I use the depth for the 2×4 or the 1×6? Thanks in advance!
I’ve completed the setup..
Did anyone do any sanding to the desk?
I’m pretty new to all this.. I was thinking the whole thing would have to be sanded before being stained or painted.
Anyone have any input for me?
Thanks.
I just completed this desk for my girlfriend. It was a breeze to assemble and it looks awesome. I’m going to do the matching cabinet and bookshelf next for her. Thanks for the plans!!!
I need to scale down 14″ from the length (42″ wide). What’s the best fit for the truss braces in the back? Will I need to go to a 2×3 board to make it fit?
Did you apply a primer to wood before staining and did you use a clear coat after glazing?
We just put ours in our home today! Working here and there it took us a month–we bought the pocket jigger, but it still took awhile for us to screw it all together being our first project of this type. We also adjusted the plans to make it shorter and longer so it would be the size we wanted. We also used 3 1x10s instead of 5 1×6 because of what was available at our hard ware store the day we purchased the supplies.
Thank you so much for the plans and the inspiration! We are so pleased with our final result.
Hi Nora. I love your desk! How come you can’t see where you joined the desk, did you make your pocket holes on the side against the wall? I would love to know. Thanks!
Hi Ashley! Thank you! We debated, but in the end did put the pocket holes for the back side on the outside of the desk. We knew that we didn’t have any spaces where we could practically give up space by putting the desk in the middle of a room, so it made sense that the back side would always be against a wall. We also chose the worse sides of our 2x4s to face back. On the two side panels the pocket holes are on the inside of the desk. I do believe, though, that with the natural distressing due to the flaws in the wood and our finish, the holes would not be too distracting on either side.
???? Thank you!
Built this desk for a friend who wanted it to work her stained glass projects on, and she loved it! Super easy build, was only my 2nd project and I whipped it out with no problem! It only took me a weekend to build and was very enjoyable
I just finished mine tonight, love the look. Everybody else in the family wants one now. I would definitely consider taking about 2-2.5 inches off the height of this desk though, it was a bit tall when completed. It was a fun build.
Great desk! Just built it for my girlfriend, she loves it!
I’m in LOVE with this desk! Can’t wait to see it in the house!!
I just finished my desk last night! I made it 30″ tall, and 24″ deep. I am so in love!!!
Love this desk…I am in the process of finishing mine right now. 🙂 I love the chair that you have with it, where did you get the chair? TIA!
Did you put a topcoat on?
How much does tis desk cost to make?
I’m in love with this color! Do you do any kind of protectant over the top? Poly? Wax? I want to do this on my dining room table so I need it to be able to take a beating.
Love this! Do you buy Kreg pocket hole screws or are there generic ones? I am new to this kreg world. Hoping to order mine today! Thanks.
There are generic ones. You could get one from harbor freight tools
Actual kreg screws are surprisingly affordable.
What are the measurements to build this truss desk? Or did I miss something?
PaulShaw