Happy Friday!!! I’m just going to cut to the chase and show you what I’ve been busy with!
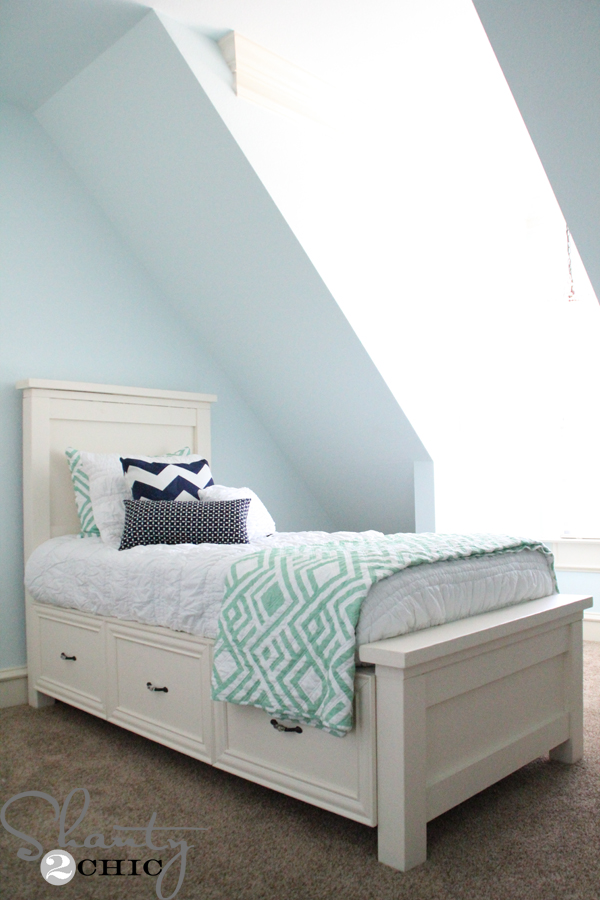 Ahhhh! I LOVE this bed! It’s my daughters’ big girl bed! I am seriously in LOVE with her room too. It’s the smallest of the 3 kids rooms but it has so much character with the ceiling angles and little cubby areas that our dad was able to create during our build. I was super excited to get started on her room and this was the first of many projects to come 🙂
I snagged the plans for this bed from Ana’s site but, because her room is a tad small, I really wanted a bed that made great use of her space so I opted to modify the plans to fit a twin mattress. I also added casing around each drawer to make it a little fancy 😉
Here are some of the modifications and steps that I took to get our little lady her one-of-a-kind-bed!
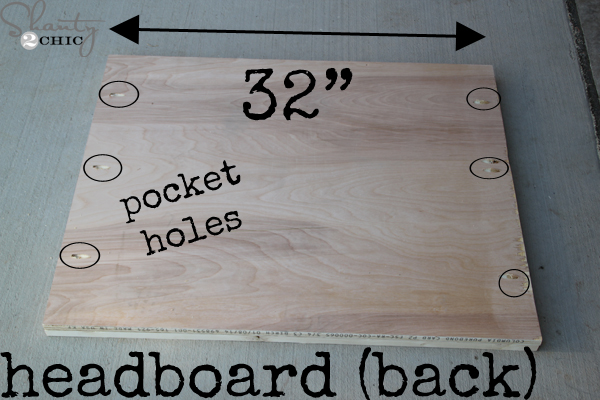
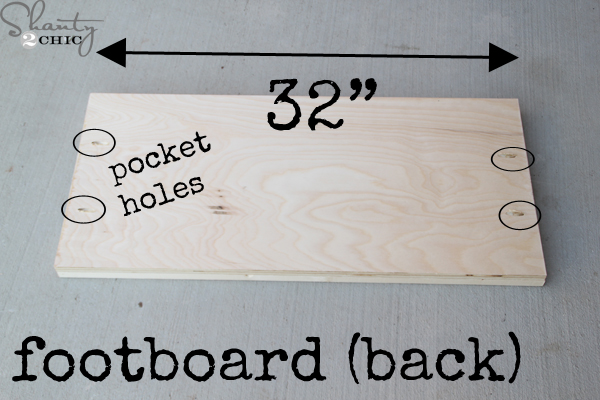 To start, I cut the headboard and footboard panels down to 32″ (I kept the height of the bed the same as the plans). I used Purebond Plywood for the majority of this bed! You can have your local hardware store rip these panels down for you if you don’t have a saw 🙂 You can see in the pictures above that I circled where I drilled my Kreg Jig Pocket holes.
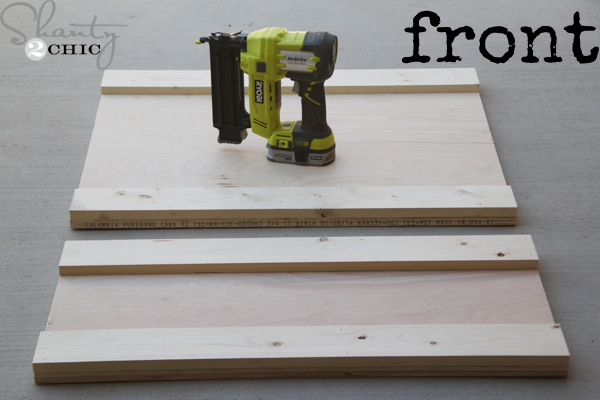 I flipped them over and added the 1×4 boards (also 32″). I attached them with wood glue and my brad nailer.
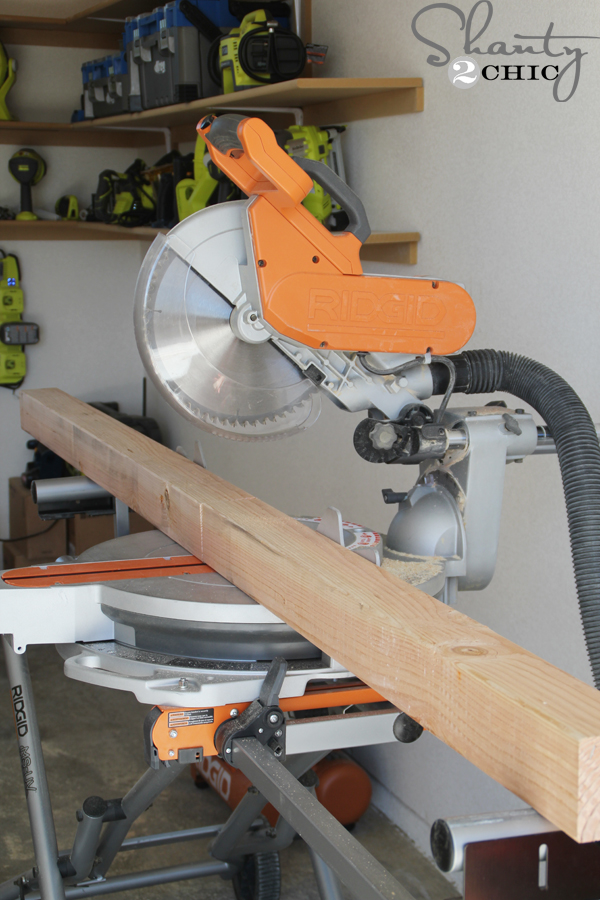 I used my Ridgid 12″ sliding compound miter saw to cut through these 4×4’s. Don’t worry, if you don’t have a saw, you can have your hardware store make these cuts as well!
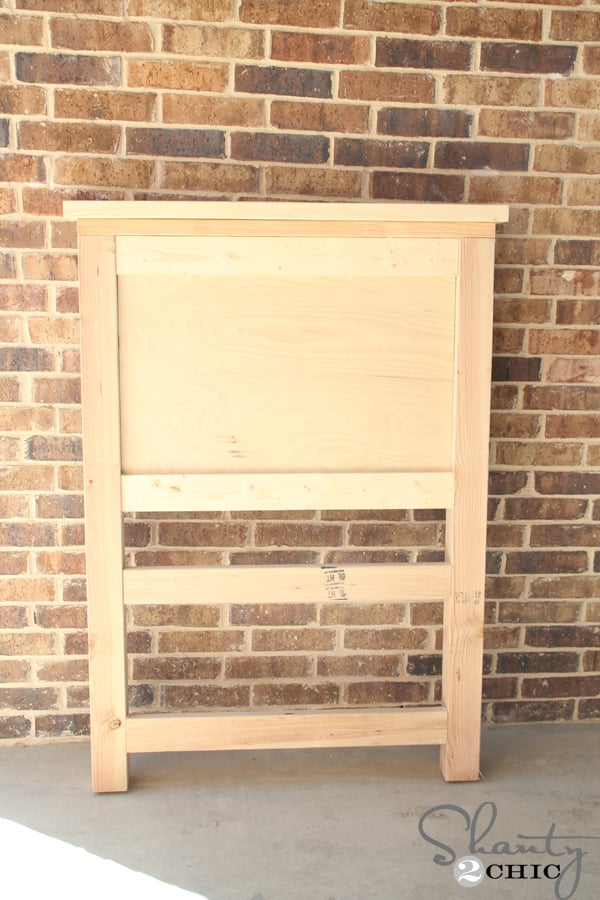 Here is the headboard complete!
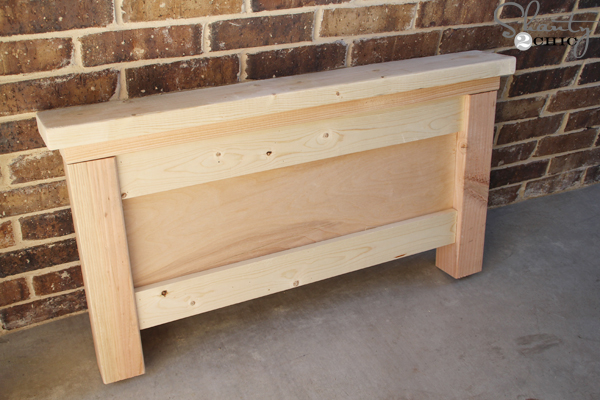 And the footboard 🙂
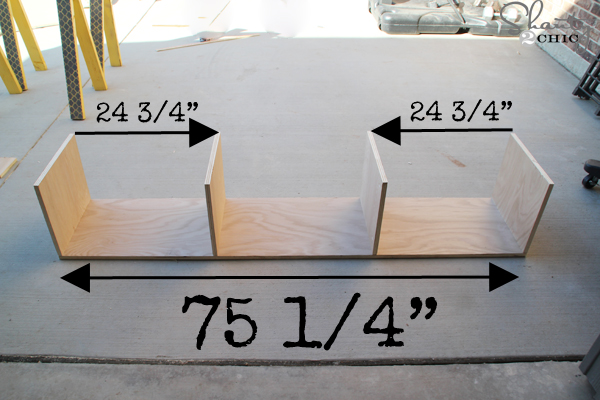 Now for the base with drawers! I modified the length of the bases to 75 1/4″. To add the dividers just measure 25 3/4″ from each end. I attached these with Kreg Jig pocket holes and 1 1/4″ screws.
 This is the top attached.
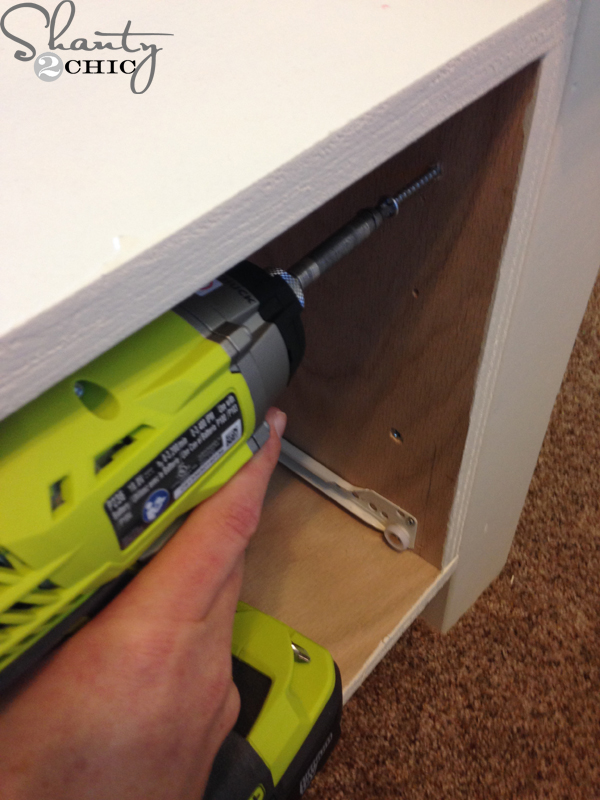
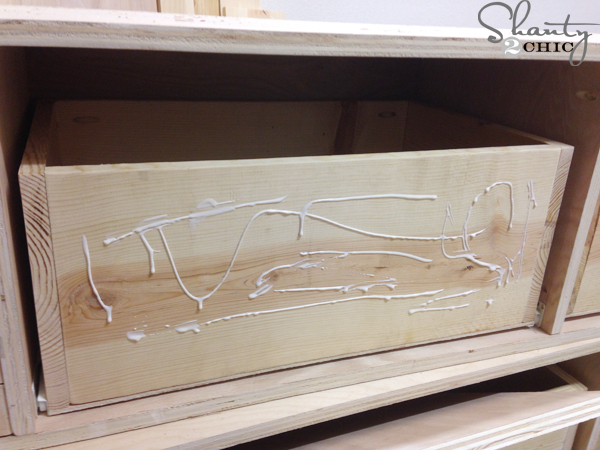 Now for drawers 🙂 The length of the drawers are about 23″ but it’s best to measure and cut as you go! You can check out my very detailed tutorial for installing the drawers HERE!
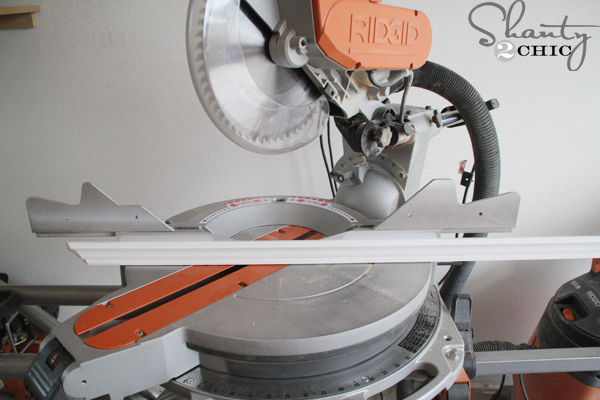 Now for the pretty casing!!!! I used my saw to cut all of the casing at 45 degree angles.
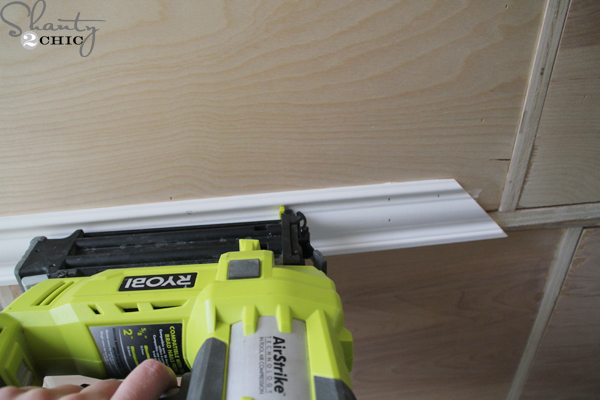 Then, I used wood glue and 5/8″ finishing nails to nail casing around each drawer.
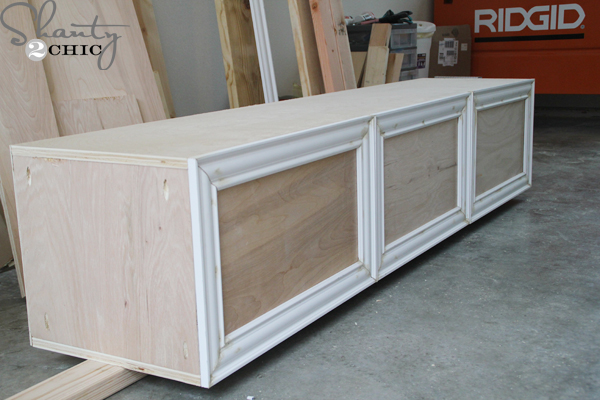 You can see that the casing is all flush with the top and bottom of the bases. The ends are also flush and for the center drawers, you can see that I lined the casing up with the middle dividers.
I gave every piece of the bed two coats of cream latex paint and took the pieces in the room before I attached them together.
 I used my Impact Driver to attach the bases to the headboard and footboard. You can also use a drill but the impact driver is my new best friend!! It is great for driving into larger pieces of wood, like the 4×4’s on this bed, because it is hammering as it drills – saves my arms 😉
 I added some pretty handles and that was it 🙂 Curious about the bedding??? I purchased the white quilt and sham from Pottery Barn and then found a great deal on the green quilt and sham at Homegoods ($29). I wanted a pop of navy and scored the two navy pillows at Target ($15 each – they are outdoor but oh so cute)!
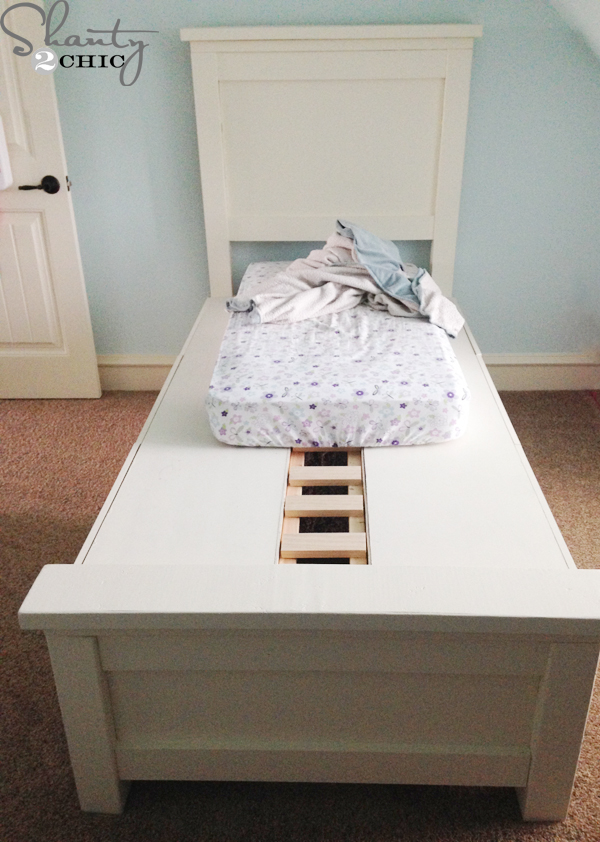 We may have put her toddler mattress on top for a few nights while we waited for the new mattress 😉
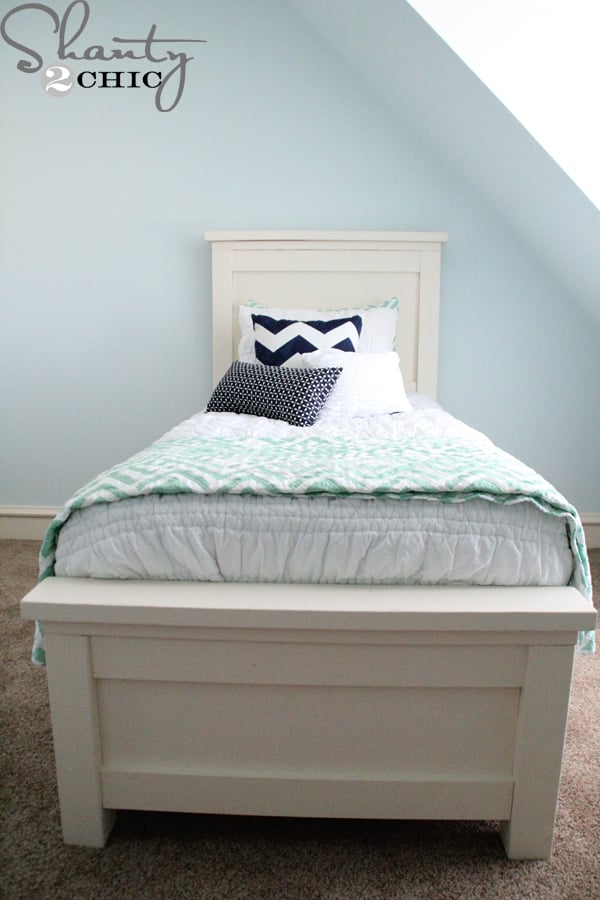
This bed is the perfect space-saver for any room! The drawers are massive and while the bed did run about $350, she really has a large 6 drawer dresser and a bed in one! That’s a lot of storage and bang for my buck! The headboard and footboard are definitely for beginners while the drawers are more advanced but, be sure to check back for my tutorial on installing drawer slides!
Do you love how her room is coming along? You can see the paint color choices for this room HERE!
And, make sure to check out some other pieces that I have built for our new house! The list continues to grow!!!!

Thanks so much for stopping by!
Ashley


beautiful!!! would love to see plans for a trundle day bed
Love this! Would you be willing to send a wood/cut list? This wood be perfect for my little girl’s first big girl bed!
I love this…it is so pretty. I don’t need the drawers but would need the bed in a queen size. Sorry to be ignorant…but what is “ana’s site”? Congratulations on a great project.
Would love a wood/cut list if available really want to make a pair of these for my kids
I need this too. I am trying to get it cut at home depot but can’t figure out the actual cuts to make. And the size of the drawers in the picture the width I 24 3/4″ but in the text it is 25 3/4″, please advise…
Can you share the cut/wood list? Thank you!
I am realizing I would like to combine this and the storage built in bed. I need this footboard but need the drawers to go all the way across and no headboards… hmmmm, i hope i can figure this out…. what wood do you suggest for staining?
do you think this plan can be modified for the drawers to go all the way across the width of the bed?
Does anyone have King size measurements for this bed?
Admin
Did you ever find plans for a king size version of this bed?