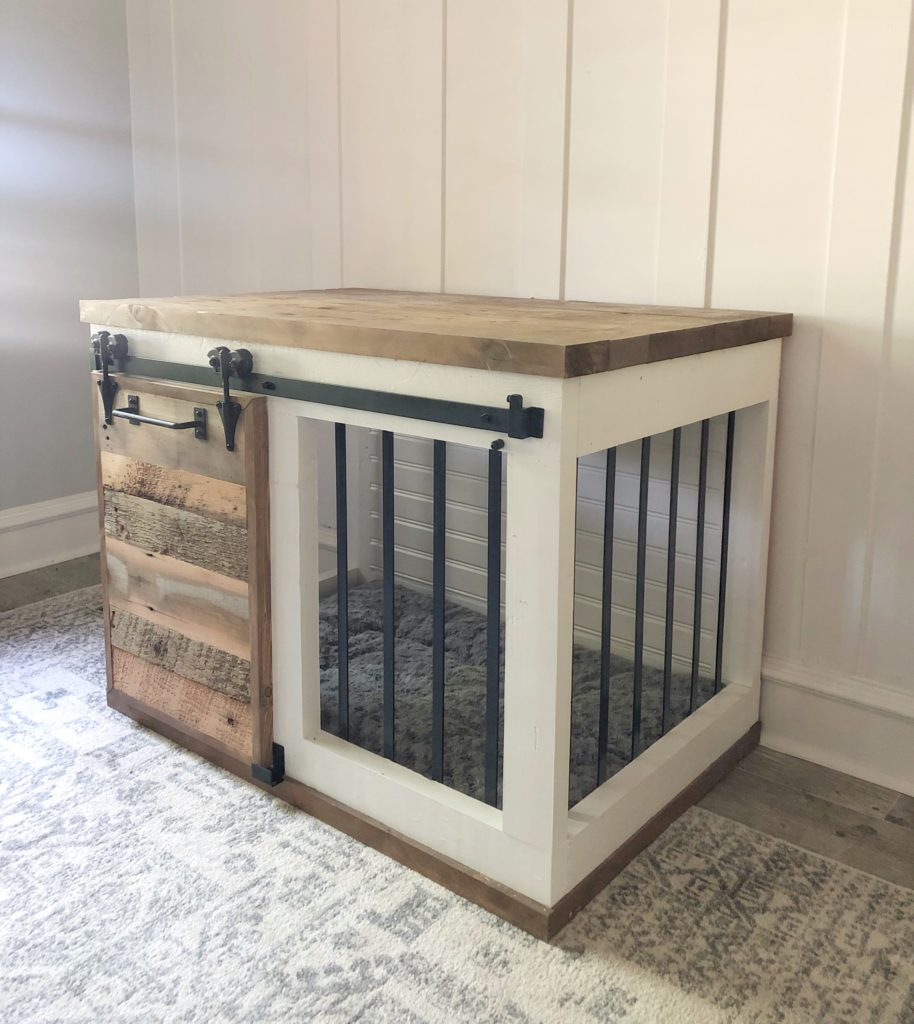
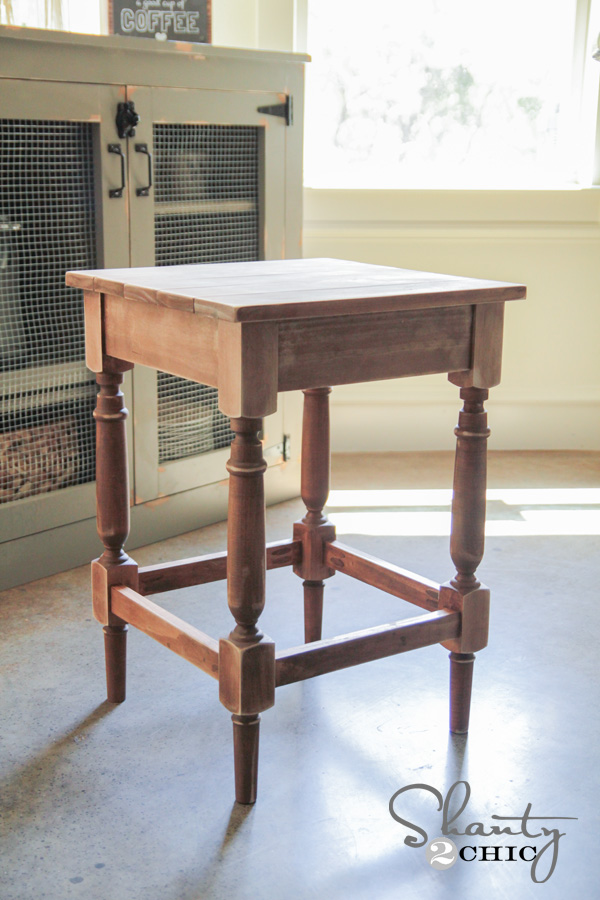
I can’t even wait for my new fur baby coming at the end of this month! Our whole family is so excited! I wanted to build him a crate built for a king, and I think this farmhouse barn door dog crate one fit the bill :-).
I added a link to the FREE printable plans at the bottom of this post! I also linked to the cushion on Amazon and all the hardware!
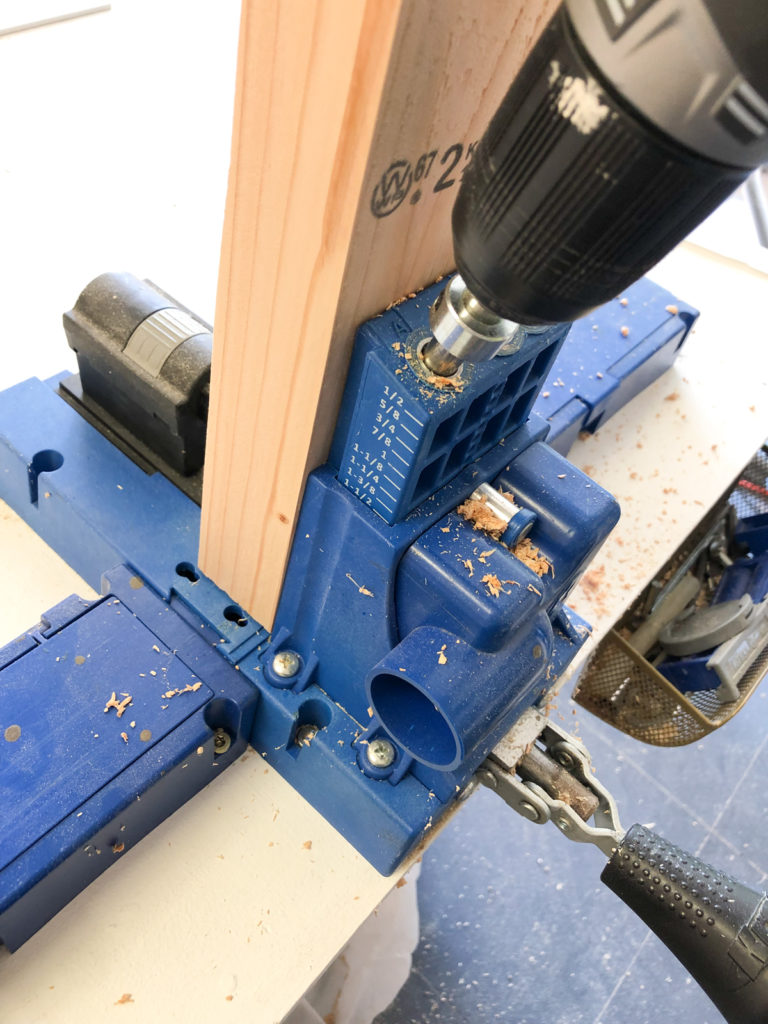
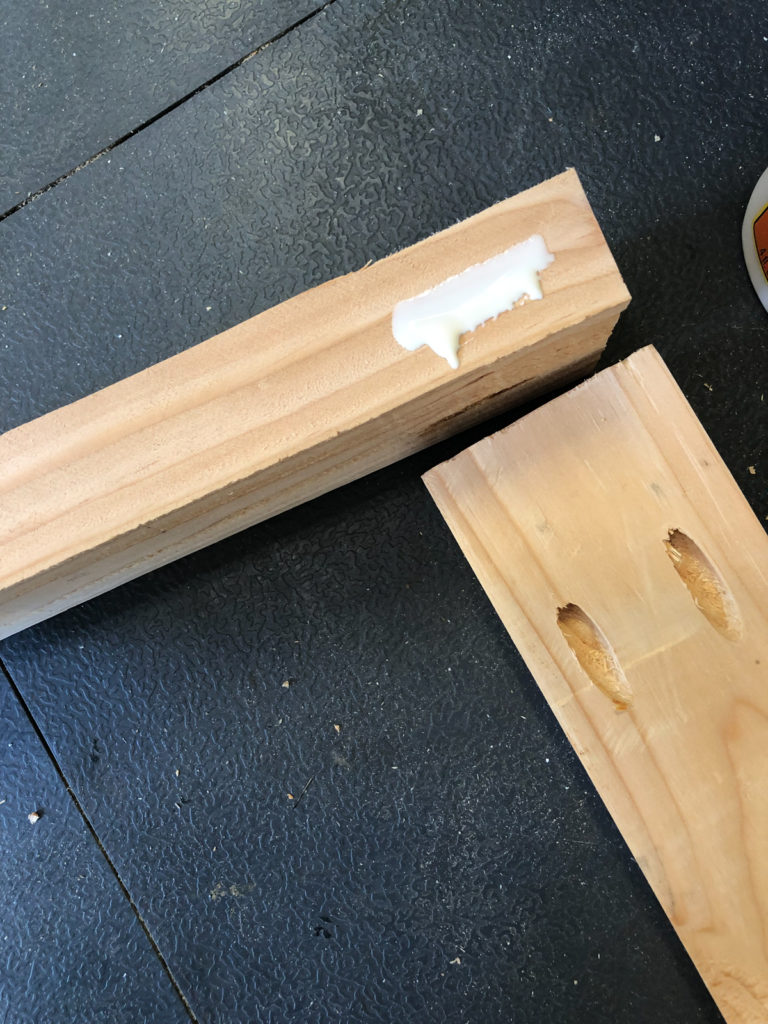
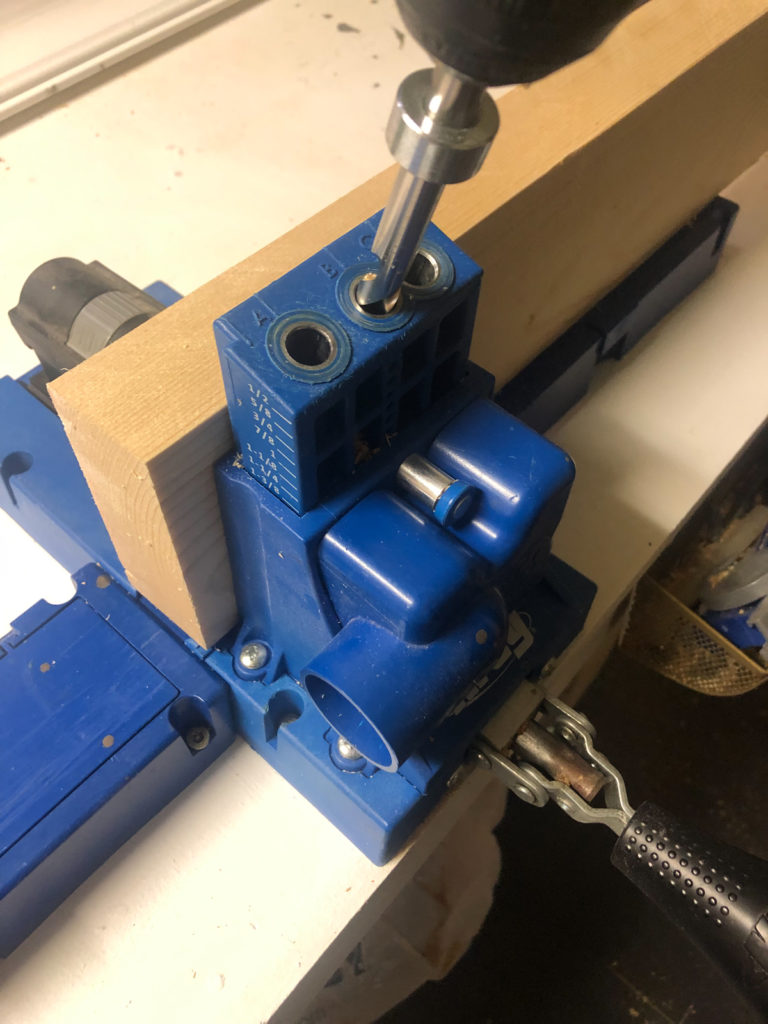
The first step is to create the base of the crate. The outside pieces are 2×4 that we ripped to 3″ wide each. Cut each of these to size with the ends being cut at 45˚ angles. Add two 1.5″ pocket holes to the end of the two shorter pieces.
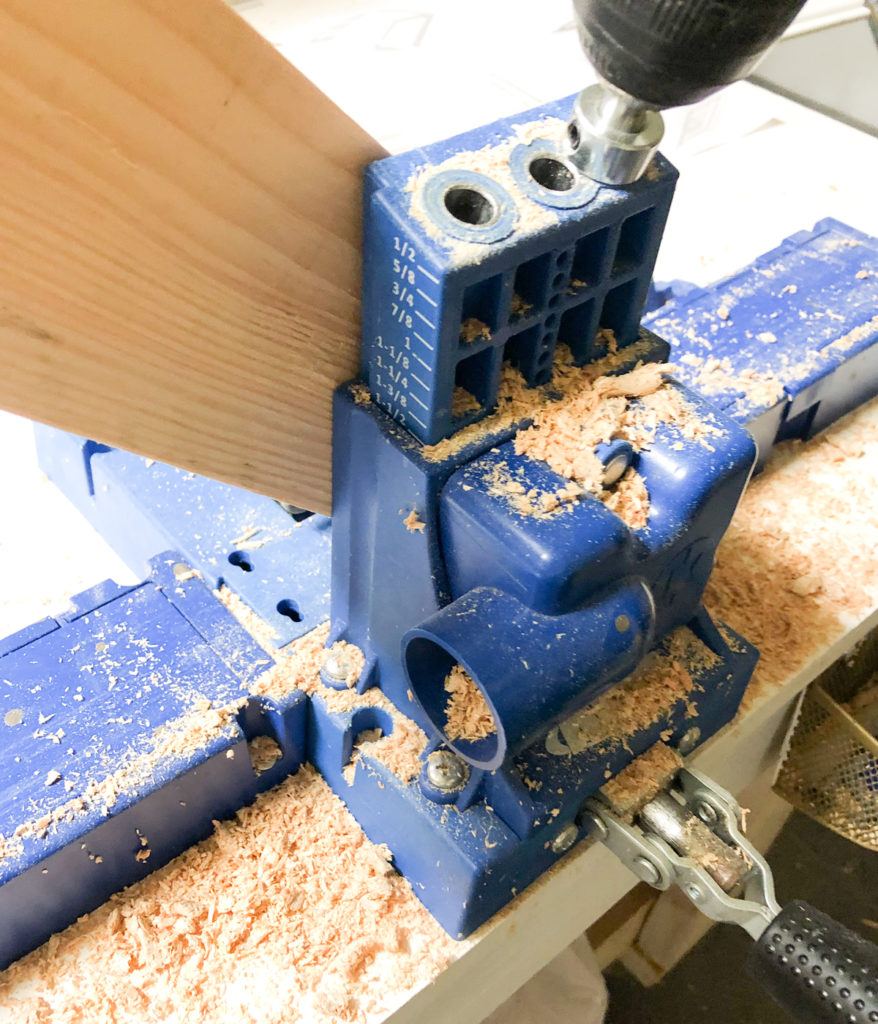
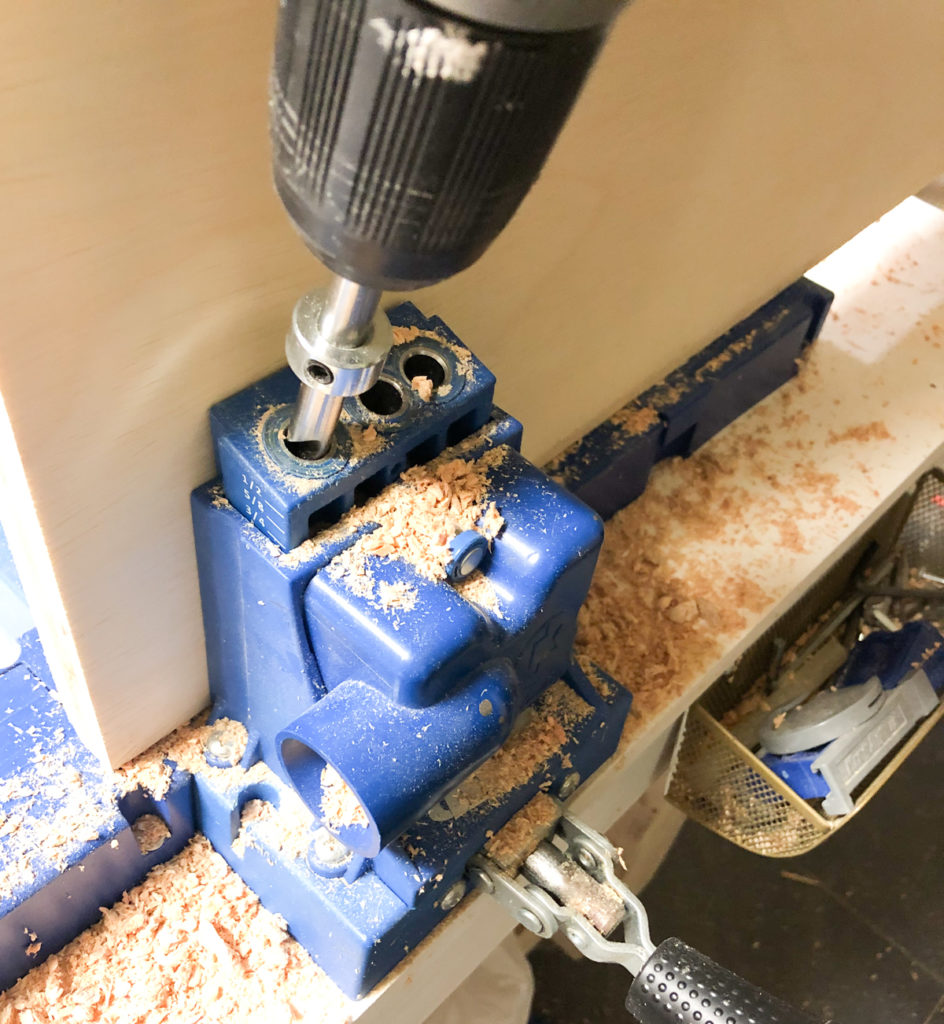
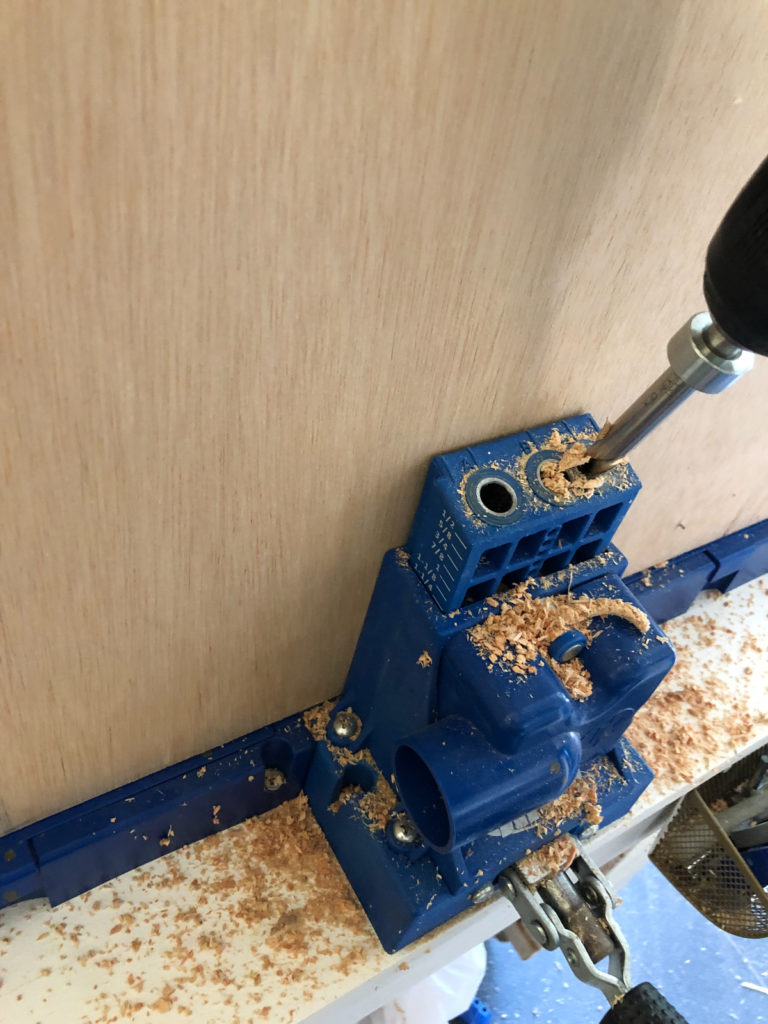
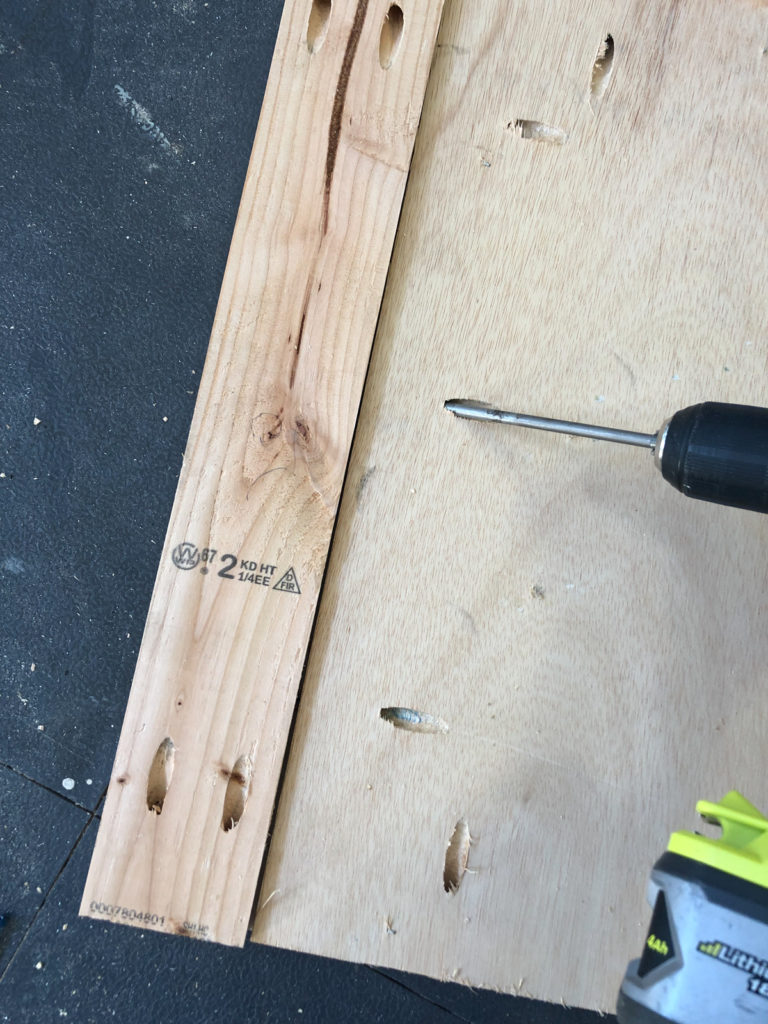
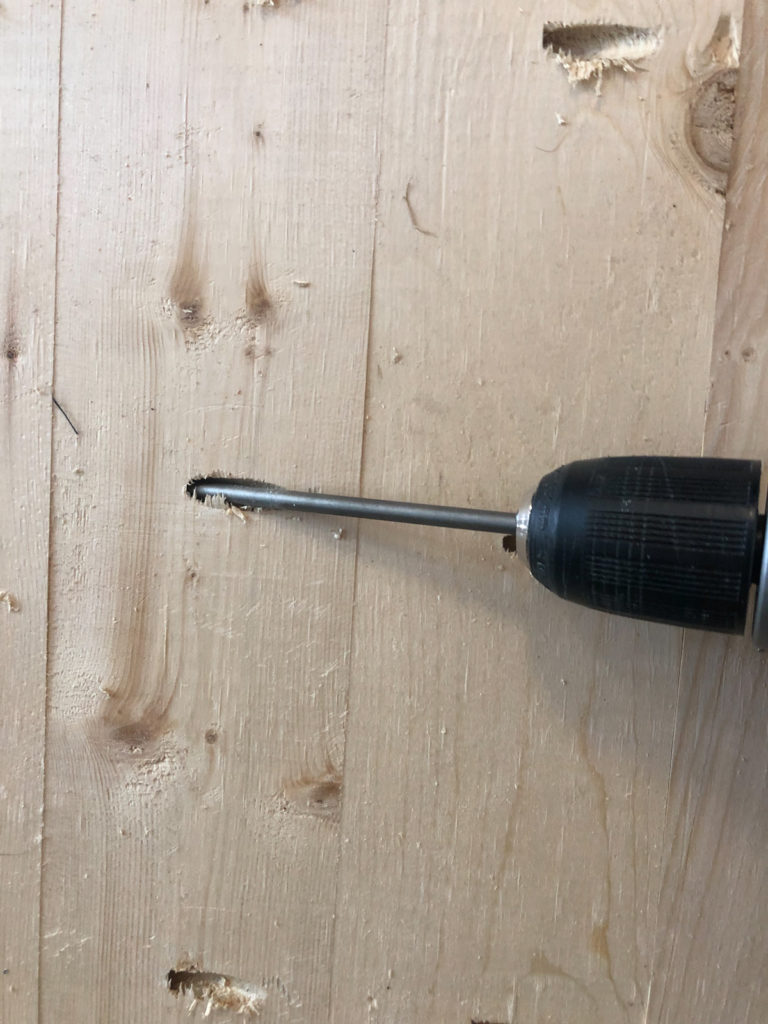
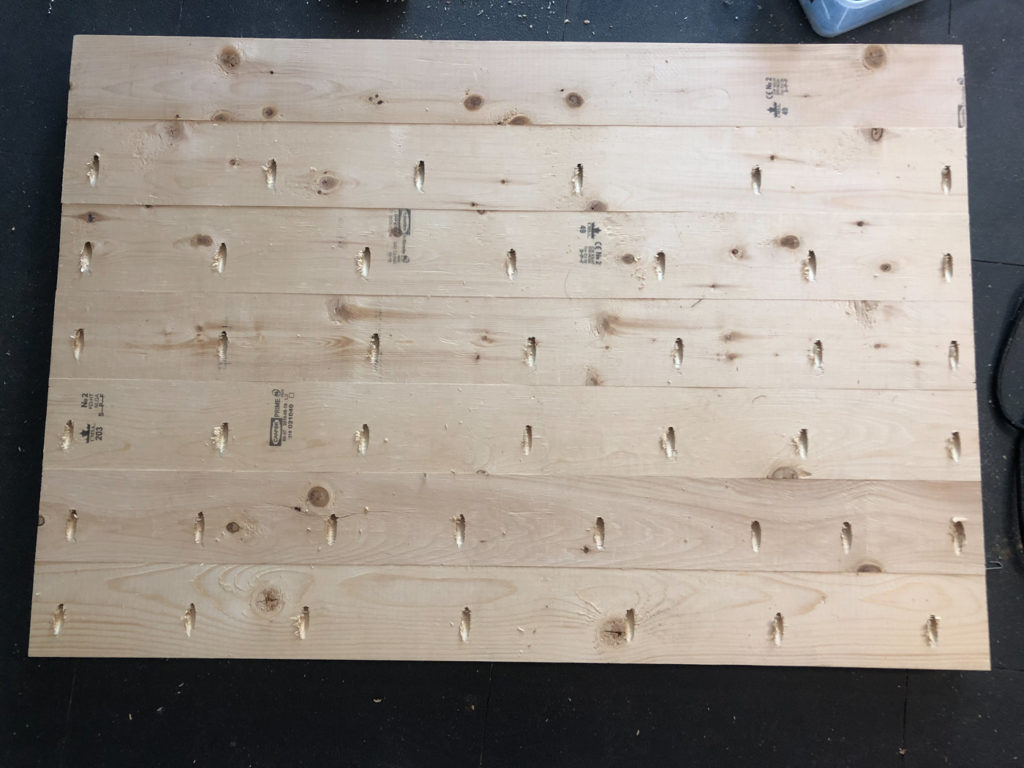
Next, cut the base plywood piece to size and add 3/4″ pocket holes around all sides.
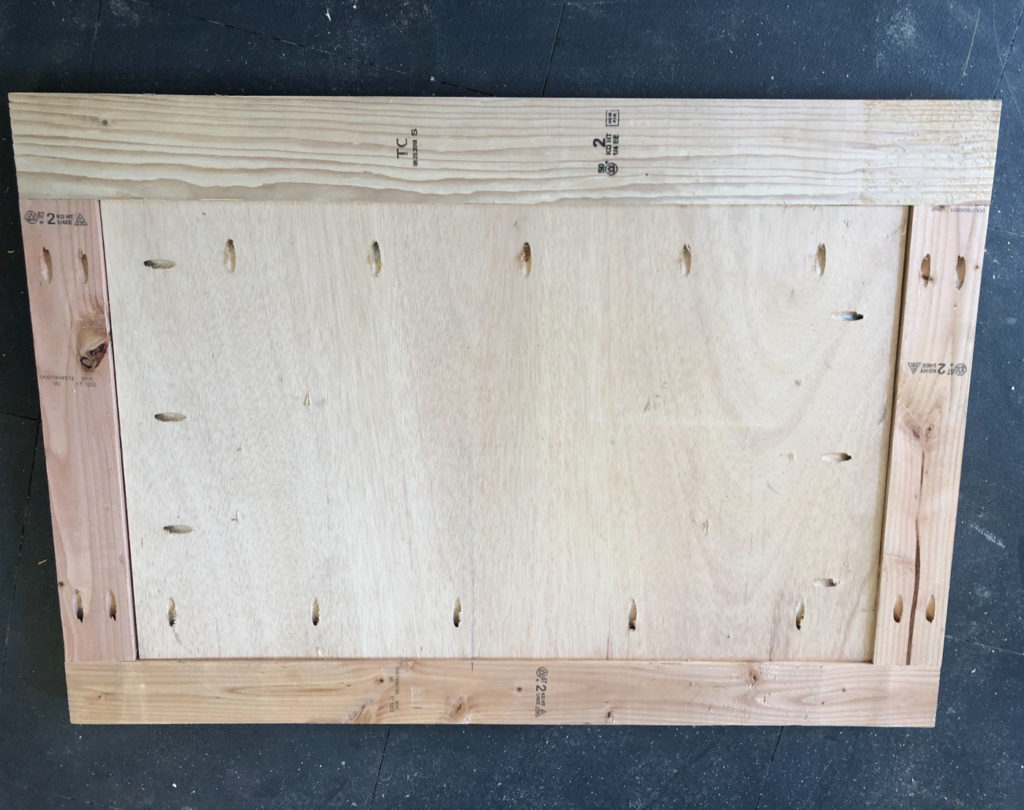
Attach the shorter sides to the plywood piece first. Add a line of wood glue and attach the sides through the pocket holes and into the frame using 1.25″ pocket hole screws. Next, attach the longer sides also using wood glue and 1.25″ pocket hole screws to create the frame around the plywood. You want the top of the plywood to be flush with the top of your frame.
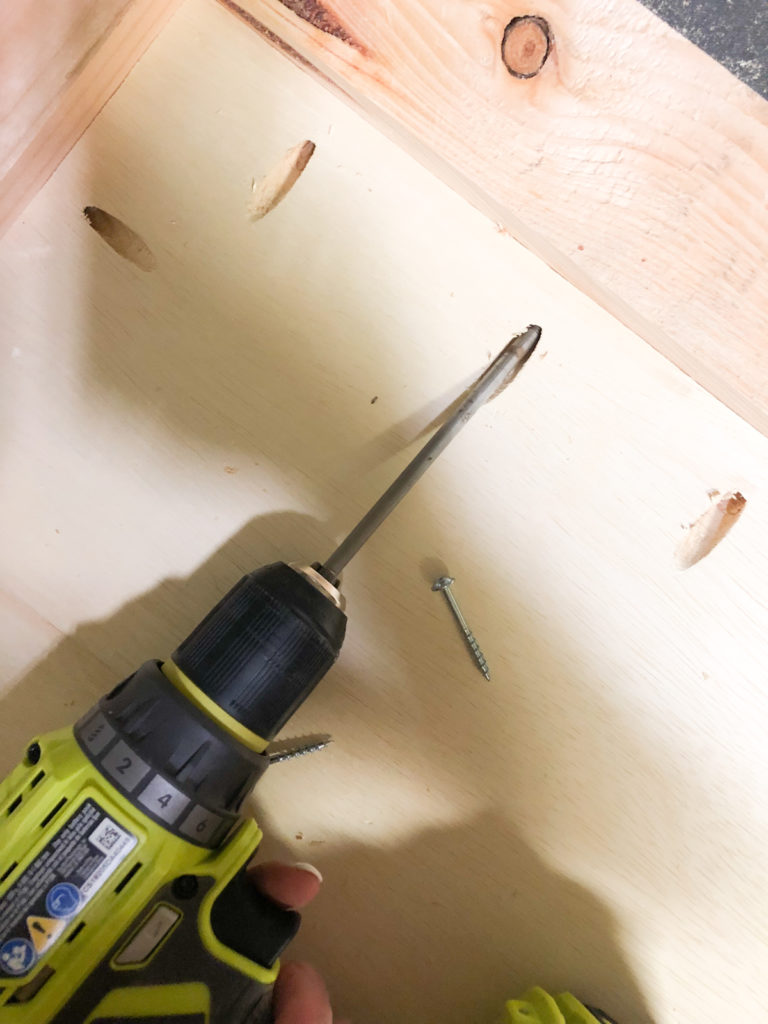
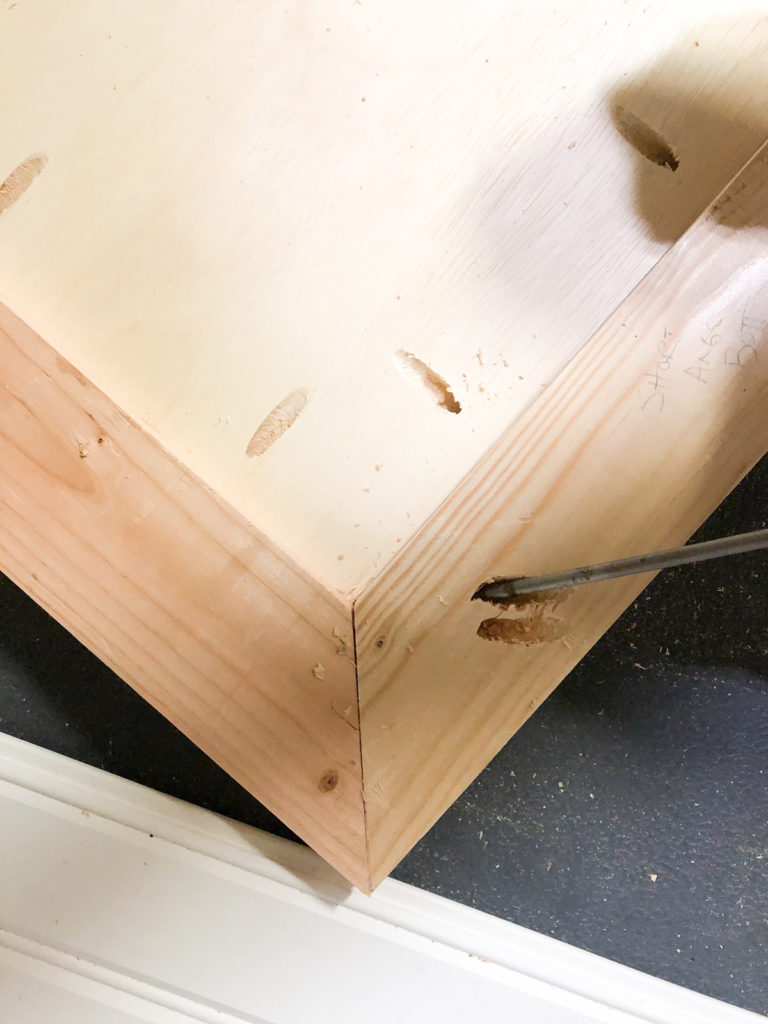
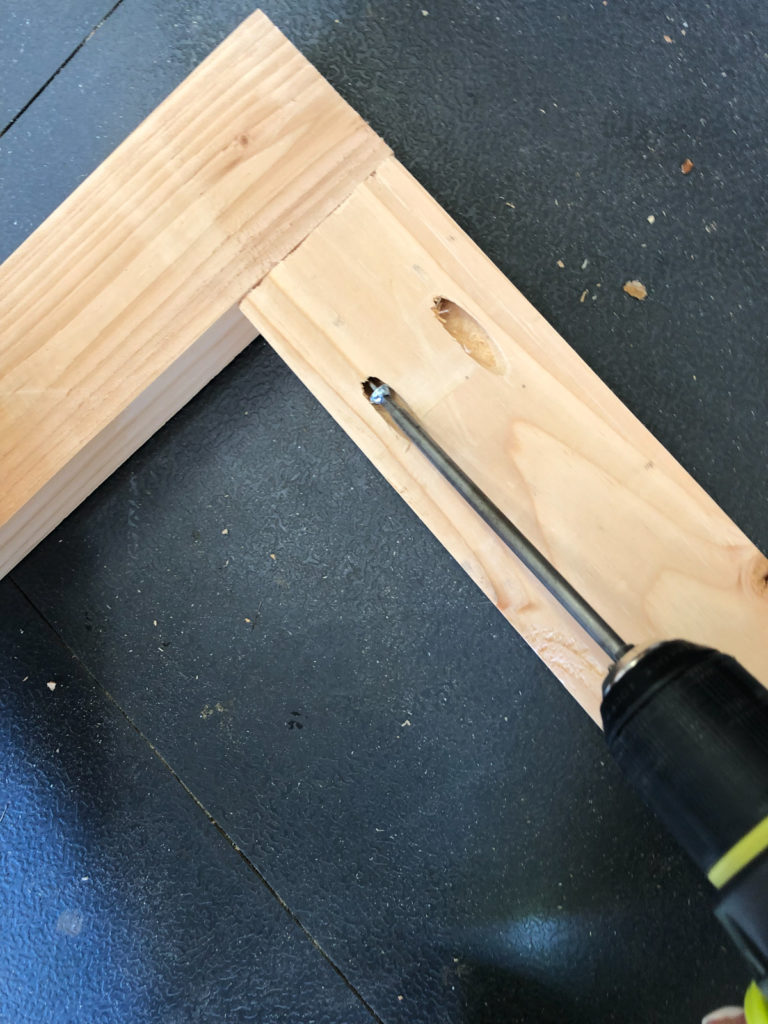
Attach the corners together now. Use 2″ pocket hole screws through the angled pocket holes and into the adjoining corners.
Set the base to the side and begin building the frames of the crate next. Build the back frame first. The base and side pieces of this frame are 2×4″ that we ripped to 3″. The top board of the frame is a 2×6 board that we ripped to 4″. Cut these to size and add 1.5″ pocket holes to each end of both of your vertical pieces.
Cut the back plywood piece to size, and add 3/4″ pocket holes around every edge.
Attach the smaller vertical frame boards to the plywood first. Add a line of wood glue to the end of your plywood and attach these boards through the pocket holes in the plywood and into each board using 1.25″ pocket hole screws.
Next attach the top and bottom pieces the same way using a line of wood glue in between the plywood and frame pieces and 1.25″ pocket hole screws. Once those are attached, add 2.5″ pocket hole screws through the vertical frame pieces and into the top and bottom frame pieces.
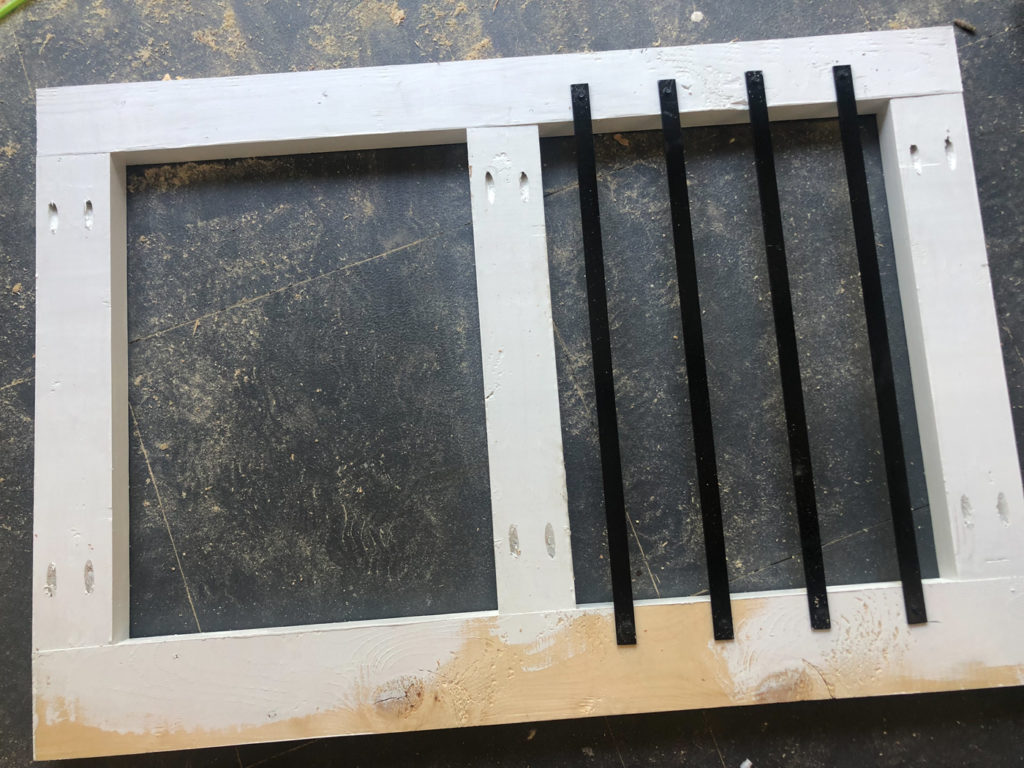
Now build the front frame. The bottom and vertical boards of this frame are also 2×4 boards ripped to 3″, and the top board is a 2×6 ripped to 4″ Add 1.5″ pocket holes to each end of all 3 vertical boards. Add glue to each end.
Attach the vertical boards to the bottom frame board using 2.5″ pocket hole screws. These boards should line up flush with the ends of each horizontal board. The middle board will line up in the center of both sides.
Cut the side pieces to 23″. You will have 4 of these pieces, but they won’t attach to anything until a later step. Add 1.5″ pocket holes to the very top of the 4″ wide boards and add 1.5″ pocket hole screws to the very bottom of the 3″ boards.
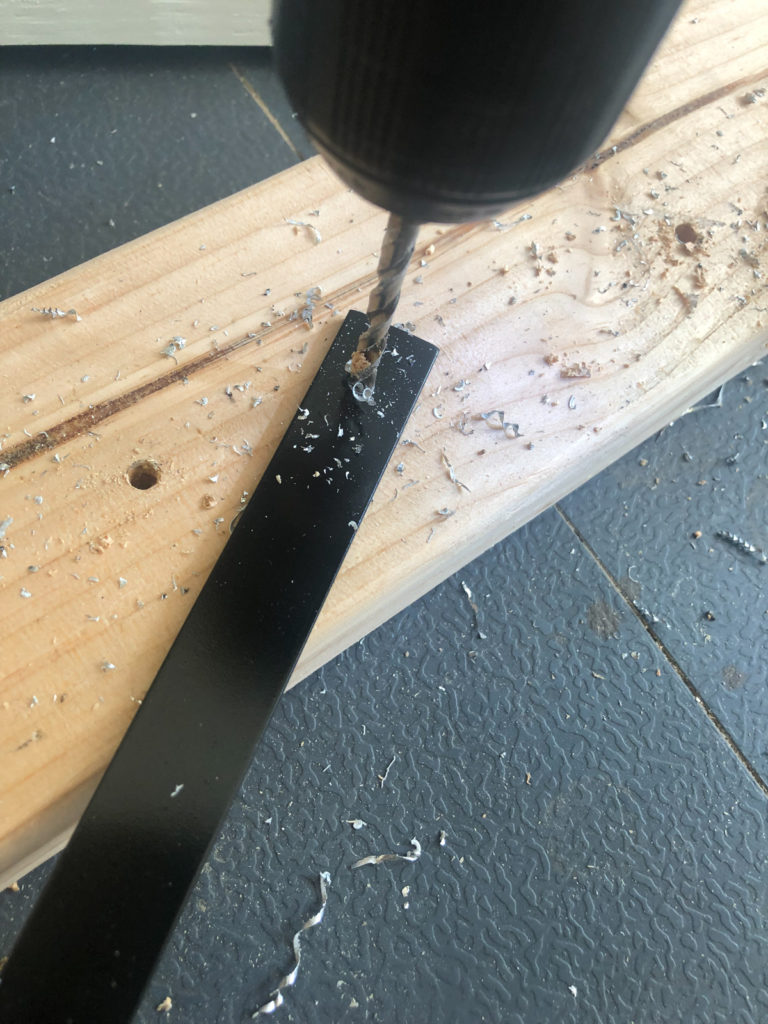
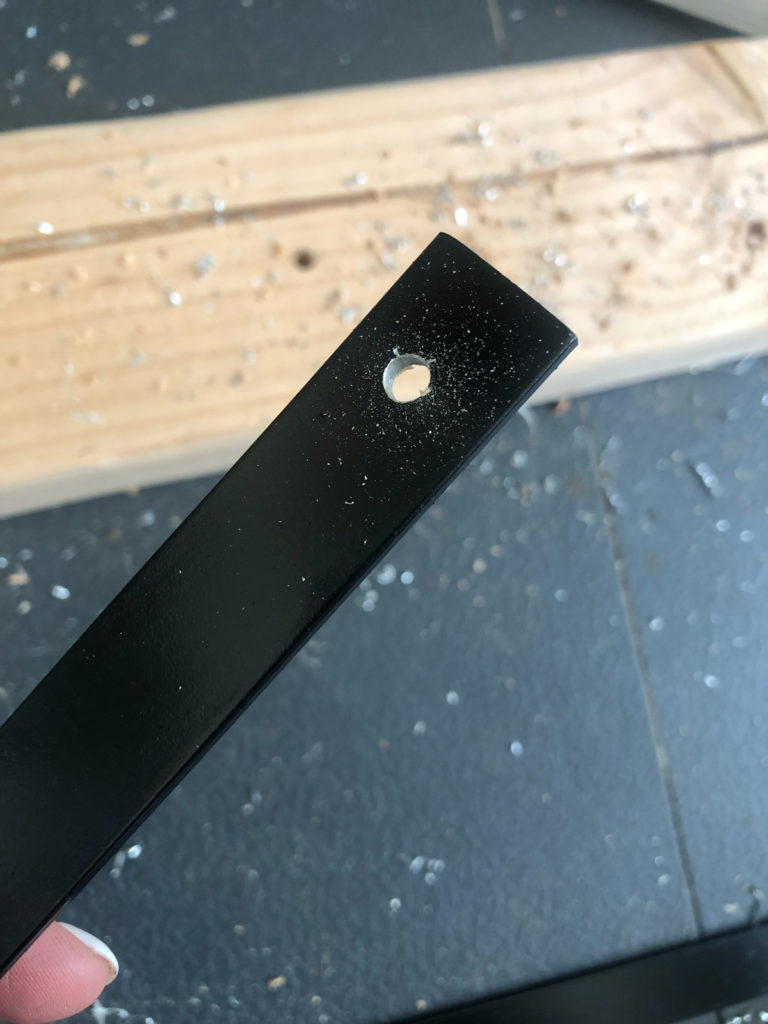
At this point, you need to paint or stain your wood assemblies. This will also include the 23″ cuts you will use to create the sides of the crate. While that is drying, you can begin working on the metal bars that you will attach next. I used aluminum flat bar on this part. These came in 3/4″ x 48″ pieces. I used my jig saw with a metal blade to cut 14 bars at 23″ long each. This bar cuts smoothly and quickly. I sprayed these bars with black satin spray paint before adding the holes in both ends of each bar. Use a cobalt drill bit to make these holes the fastest.
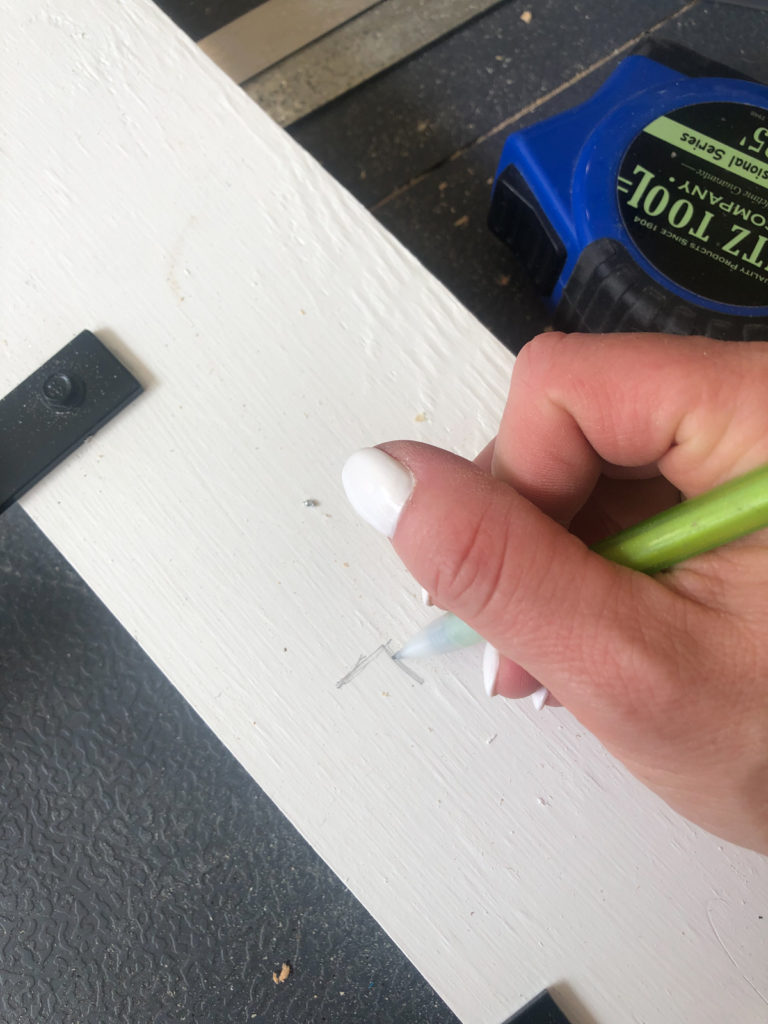
Once all of your wood pieces are dry, create the side pieces. I attached my bars to the wood pieces using 1″ self tapping black screws.

I spaced the metal bars for the sides of the crate each 3″ apart, starting 1.75″ from the ends of each board. If you have a smaller dog, you can adjust the bar spacing to fit your needs!
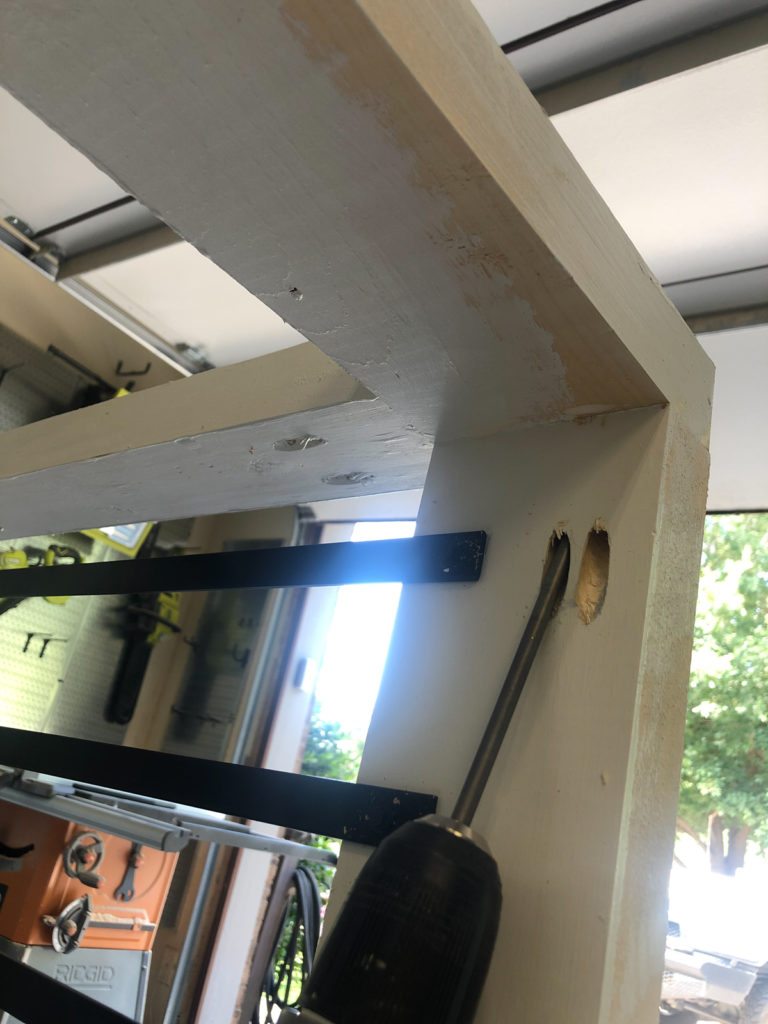
Once both side assemblies are built, attach them to the back of the crate using wood glue and 2.5″ pocket hole screws. Everything should line up flush both on the sides and tops and bottoms.
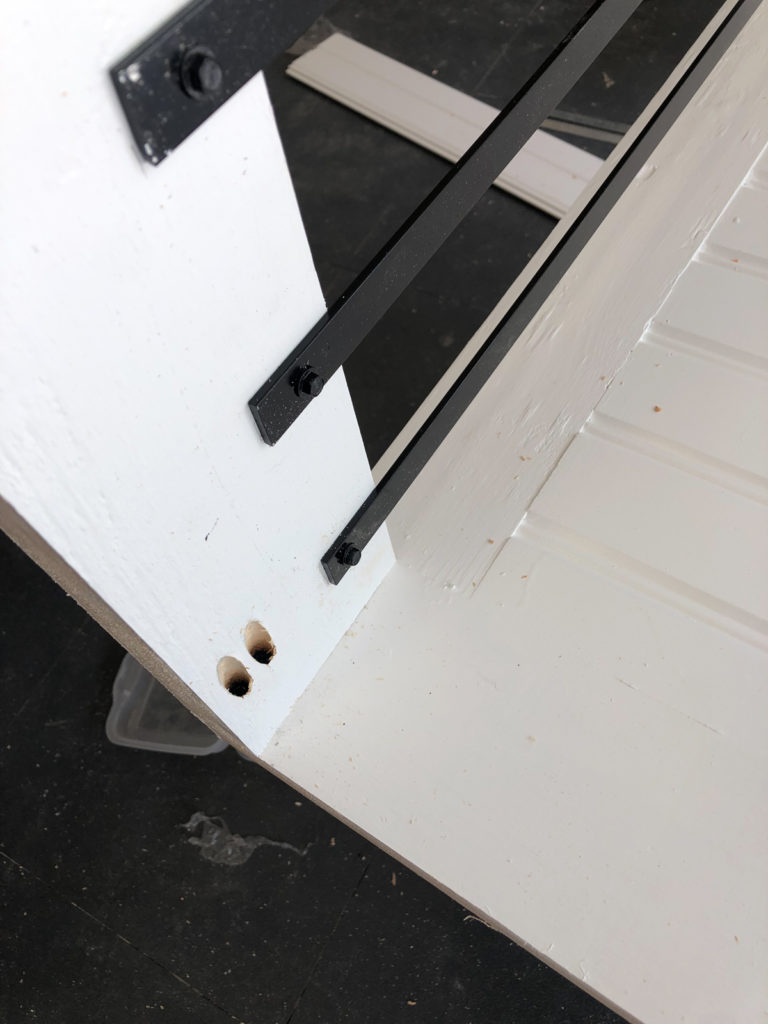
Add the flat bars to front crate assembly next. These will attach to only one half of the front. I spaced these 3″ apart and placed the outside bars 1.5″ from the edges of the inside of the wood frame.
Attach the front assembly to the rest of the crate using wood glue and 2.5″ pocket hole screws through the pocket holes in the side assemblies and into the front.
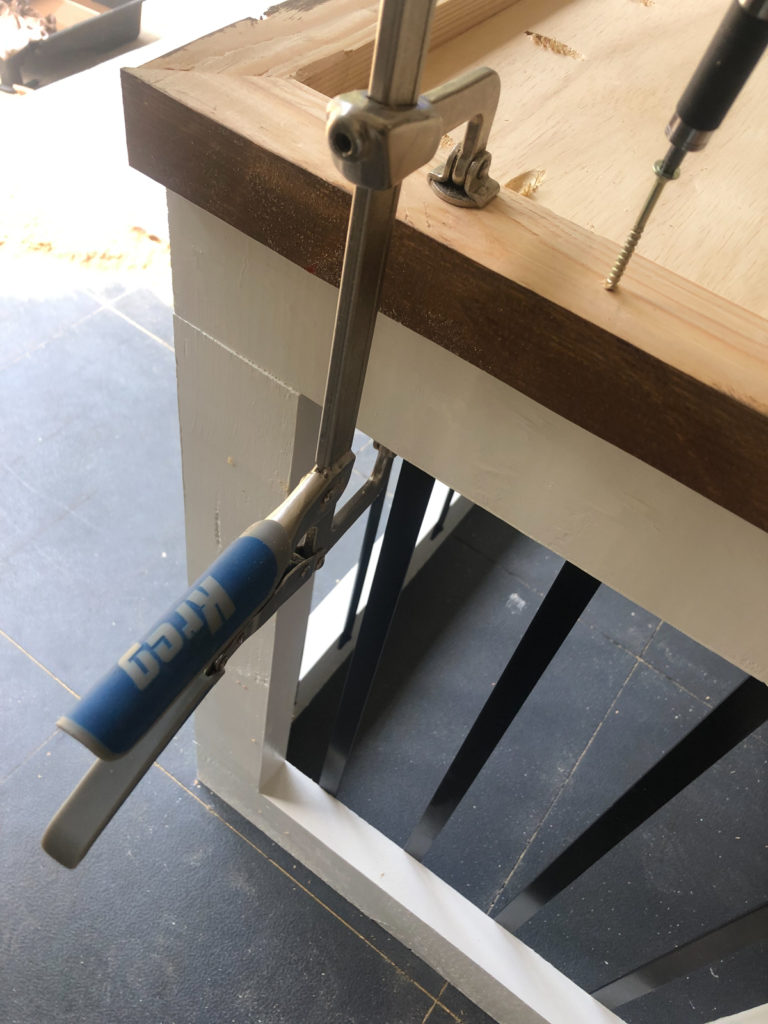
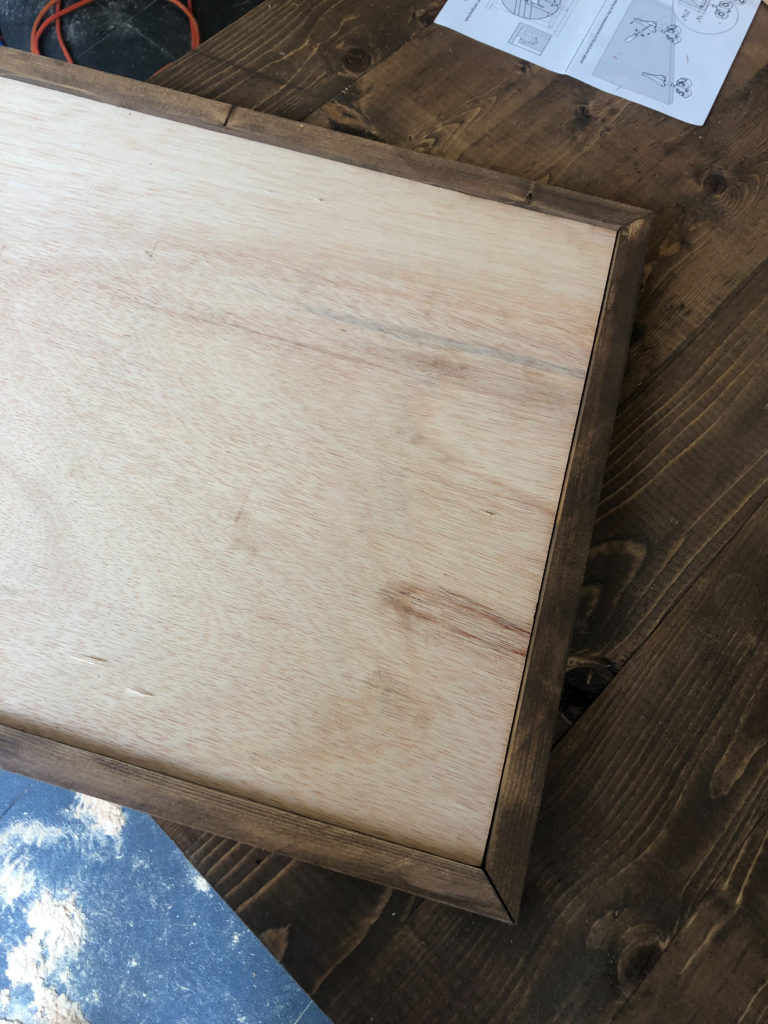
Now it’s time for the base! flip the crate assembly upside-down. Run a line of wood glue around the crate assembly and place the base upside-down on top of it. Attach them by using 2.5″ wood screws through the base and into the crate assembly all around.
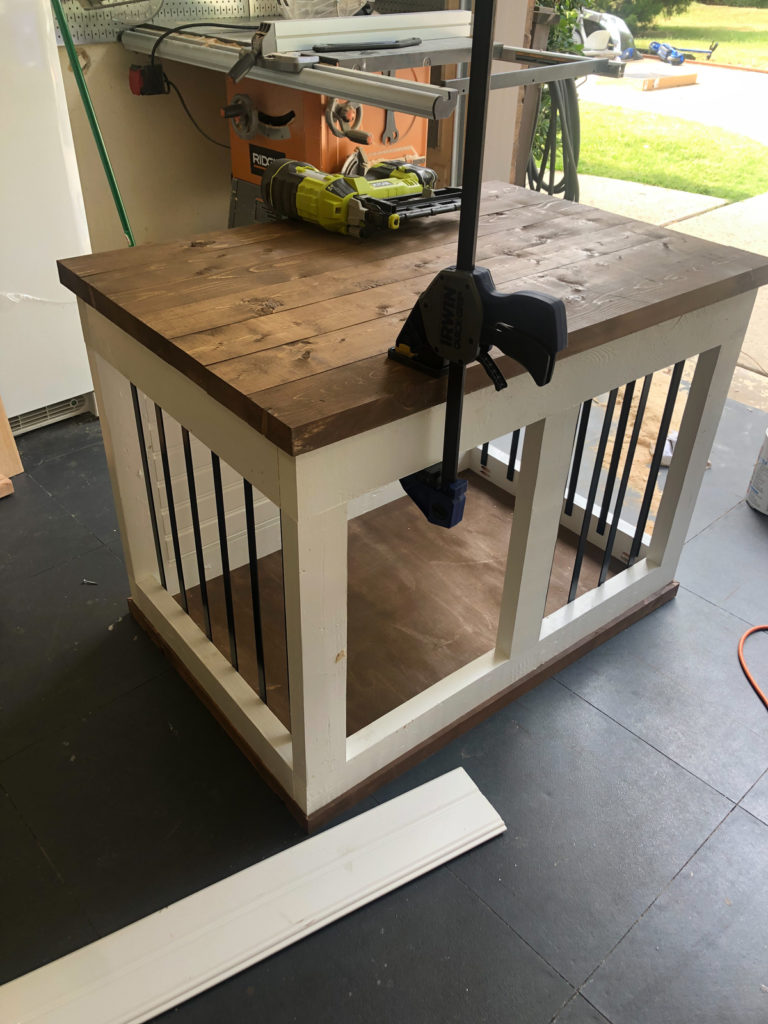
The planks for the top of the crate are 2×6 boards we ripped to 3 7/8″ wide. Cut these to size and add 1.5″ pocket holes down one side of 6 of the 7 boards. Place them side to side and attach using 2.5″ pocket hole screws. Once they are all attached, this is a good time to stain or paint the top before attaching it to the crate.
To attach the top, add glue to the top of the crate assembly and place the top on top of it. Make sure its equal all-around and nail it in place using 2″ finish nails.
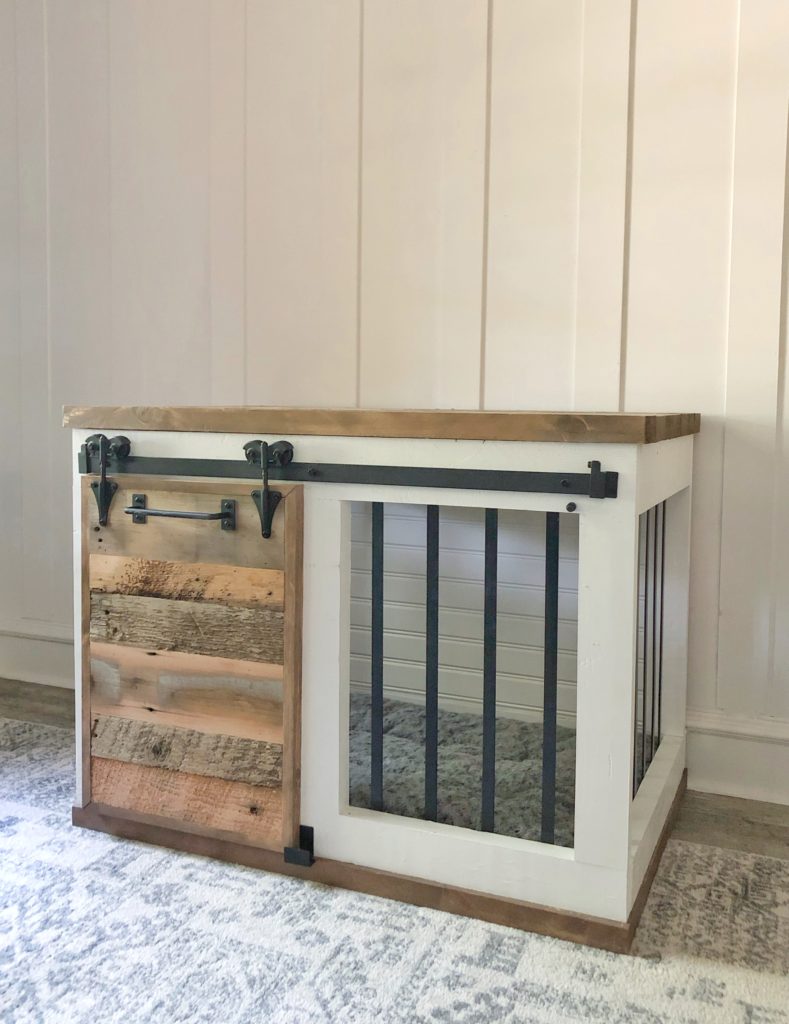
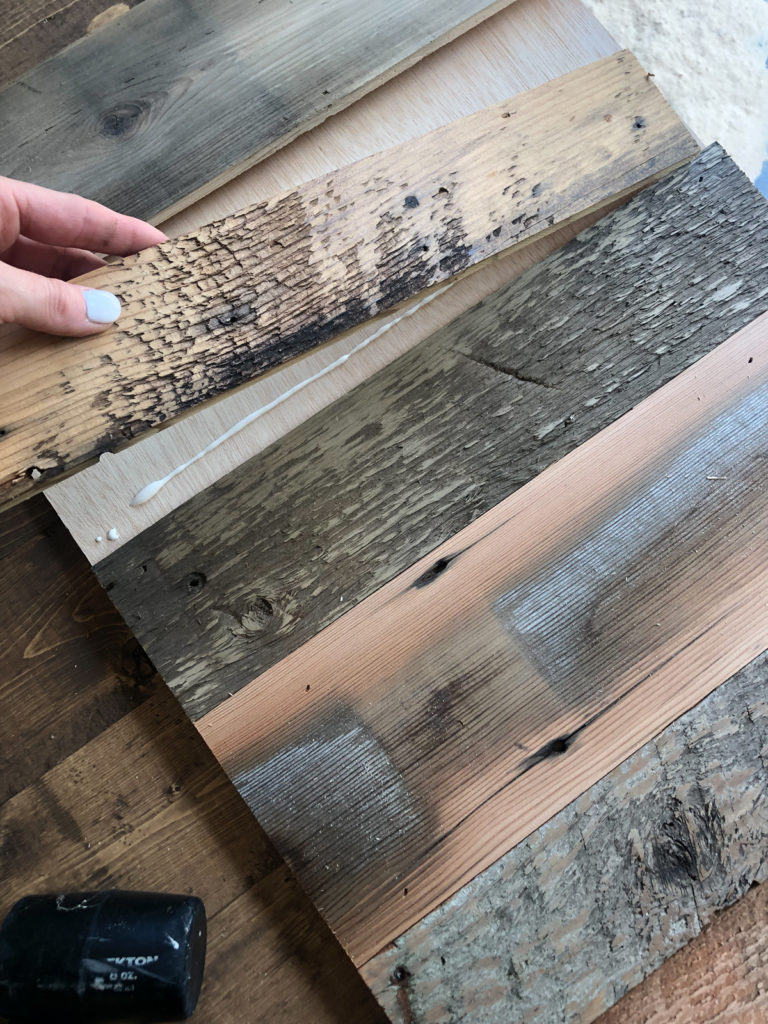
The final step is creating and attaching the door. I used a piece of 1/2″ plywood cut to 15″ x 22″. You can have fun with this part! I used some barn wood left over from an old project I did and glued and nailed the planks to cover the plywood. You can also add decorative trim or whatever style you like… Just make sure you keep the door flush on front to accommodate the hardware.
I ripped 1×2 boards to 1″ thick each. This barn door hardware will work with doors up to 1 1/8″. I mitered the edges to 45˚ and attached them with wood glue and 1.25″ brad nails. Make sure the front of the planked door is flush with the front of the 1×2 boards.
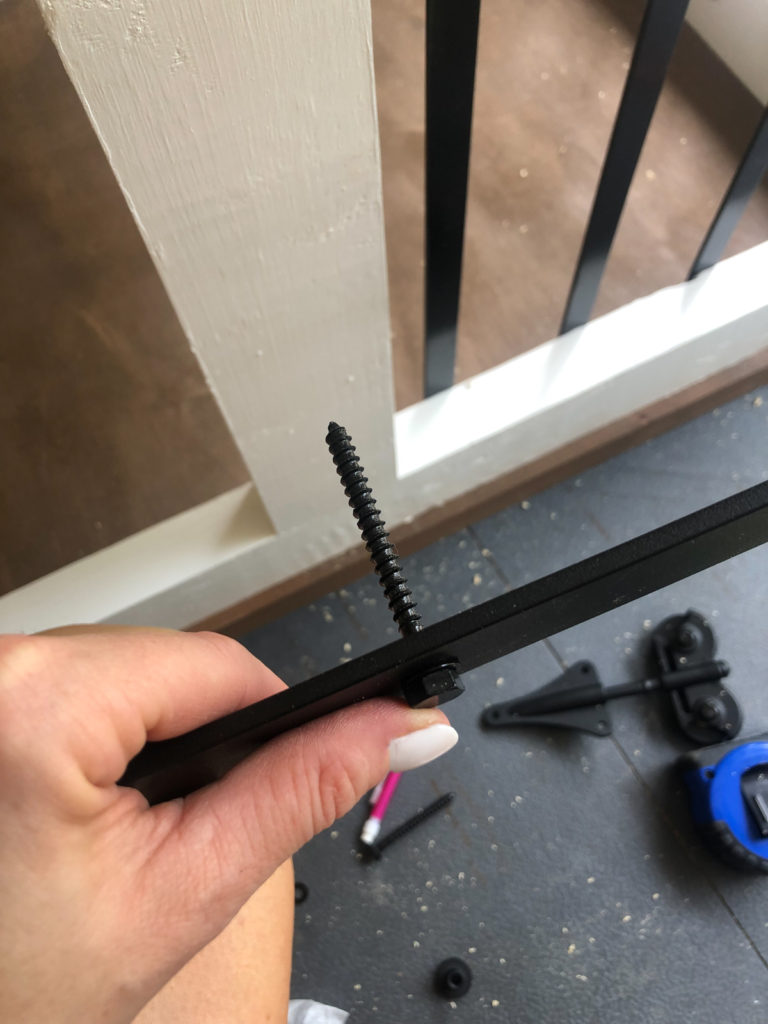
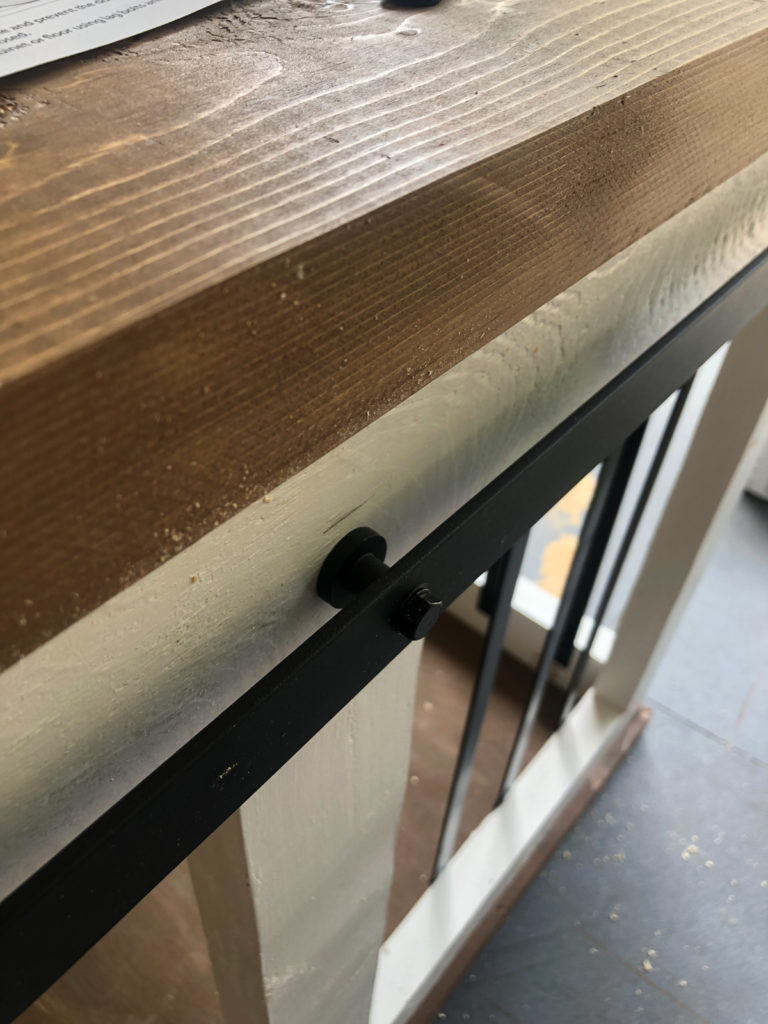
The hardware is super easy to attach! You just run the long screw through the bar and then place the spacer after that. I attached mine to allow about 1/2″ space between the base of the door and the top of the trim piece.
CLICK HERE for the barn door hardware!
CLICK HERE for the universal cushion!
CLICK HERE for the metal door guide!
CLICK HERE for the barn door pull!
CLICK HERE for the free printable plans to build the dog crate!

This farmhouse barn door dog crate is a great example of how functional pet furniture can be thoughtfully integrated into interior design. The barn door detail gives it a strong farmhouse character while still allowing the piece to blend naturally with surrounding furniture. It’s impressive how the design balances practicality for pets with aesthetics for the home.
From an interior industry perspective, multifunctional furniture like this is becoming increasingly popular, especially as homeowners look for ways to incorporate pet spaces into overall interior layouts. Well-crafted wooden pieces that combine utility and design are gaining attention in both residential and hospitality interiors. We’ve also been observing similar furniture and material trends across the interior industry here: https://plywoodbazar.com/
I would love an extra large version of this kennel for my dog but I saw where you can custom make for customer??
I cannot seem to find the link to the plans
I am not affiliated with Shanty but I can respond with they are below the last picture on this site. In bold red letters.
I have no idea why you put in 2 x 4 and 2 x 6 lumber. You ripped the 2 x 4’s to 2 x 3’s and the 2 x 6’s to 2 x 4’s. Why not just use the proper lumber to start with. Yes you may have had this lumber on hand but no reason to expect these people to rip put the correct size in plans.
Hello, I’m interested in this dog crate. I live in NH, and my pup is a German Shepherd for size reference. Could you tell me a quote build & ship ?
Thank you!
Hey! Just wondering where you bought the aluminum rods? Let me know. Thanks!
Home Depot
I’d like to purchase one! Trying to find you on FB, is that your only method of ordering?
You can also find me on Esty. MdtrdrDesigns
How much would this cost for a dog that will not get any larger than 10 pounds + shipping?
Shipping depends on where you are located. If you would like a smaller dog crate please let me know.
Hi I absolutely love your dog crate. I am a travel nurse which means all of my tools are on the east coast and I am in Seattle currently. Do you make and ship these by any chance? I am getting a new fur baby in the form of a Dalmatian who will grow to about 50#.
I am also not opposed to a road trip as I saw you live in So Cal. Lol. I used to live in San Diego so could probably navigate my way around. So look forward to hearing back from you.
Such beautiful work.
How much for a double dog one?
$700
What’s the size range?
The size can be built to what you need. The price ranges per size and material. The size of the crate in the picture is 40″ length by 30″ high by 28″ deep.
Would it be possible to get a really rough price range? Or an average price?
$600
Where can I find that exact barn door and where? And what would the exact dimensions be for a medium sized one of these?
You have to build the barn door.
Hi! Can I order this for my pup? Or is it just plans to build it?
Good Morning:
We can build this for you pup. Look me up on facebook and we can talk more. Johnette Hristov
I sent you a message on FB. Hope I found the correct person
How did you lock this crate? We’ve built based off your plans
Barn Door Lock, 2 Pack 4” Barn Door Latch, Heavy Duty Solid Thicken Stainless Steel Gate Latch Lock, Add More Security and Privacy. Cabin Hooks and Eye Latch Best for Barn Door, Bathroom
Hey my name is Gena! And I love this crate it’s beautiful! I was wondering if you guys sell it in a large size? I would love this for my fur baby.
Yes
Okay great! What’s a good way for me to reach you so we can talk about the pricing?
You can message me on facebook and we can take it from there
Okay thank you! I just sent it!