Happy Friday guys!
Well… I got an itch a few weeks ago.
I decided it was time to finally overhaul one of the most used rooms in my home. My garage!
I have been working like crazy over the last two weeks and I am SO pleased with how it’s coming along. I feel like I have gained square footage to my home. I have found some AMAZING products along the way that I can’t wait to share with you guys.
So… First was first. I had to clean the place out before doing anything. I decided to tackle the beast first. And by beast I mean my ever growing scrap wood pile that was taking up half my garage!
Let me show you what I came up with!

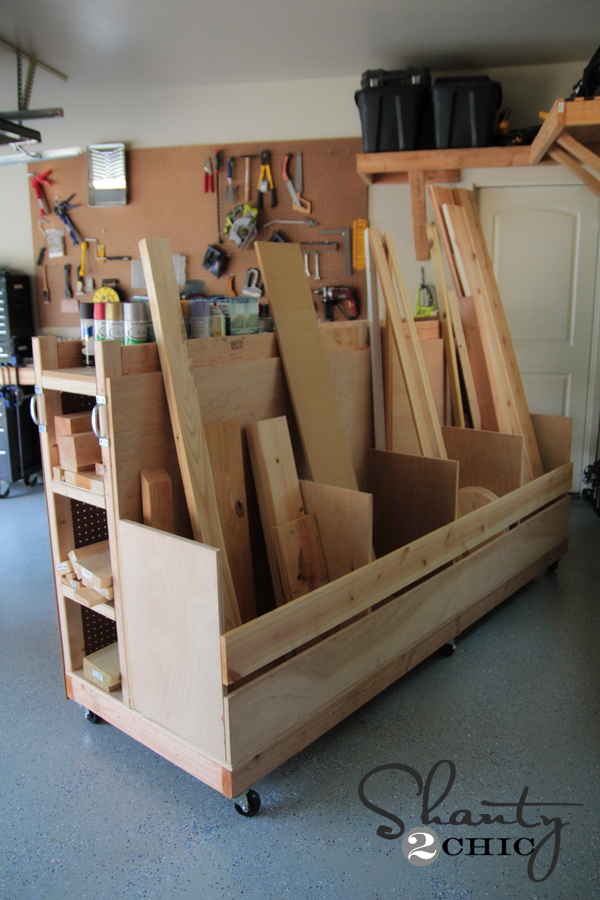
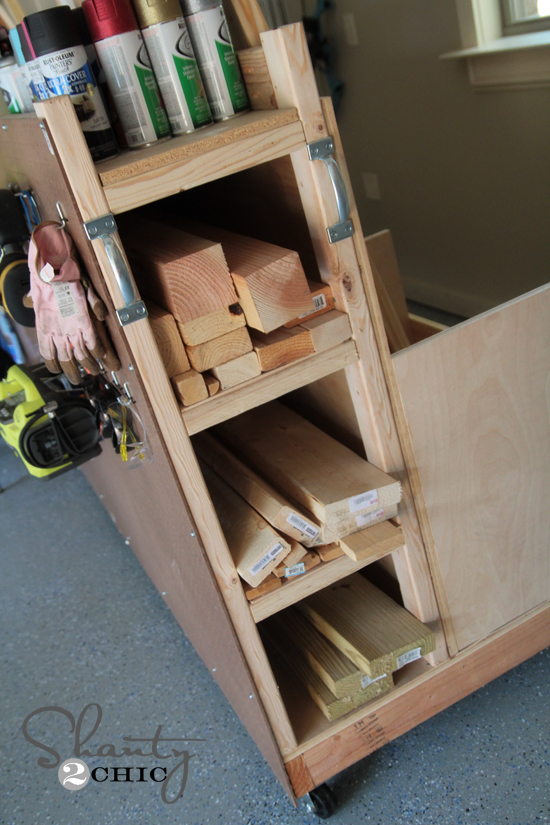
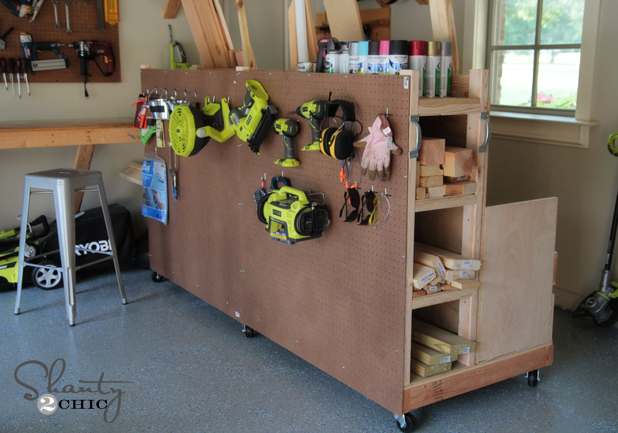
How fun is that?? It’s my Shanty Garage Storage Cart! Not even kidding… I LOVE this guy. It has storage for my scrap wood and long boards. It also has a full sheet of peg board for tools on one side and there is a great shelf on the top for my spray paint and stains. Can I get a woohoo??
You can click the button below to download the FREE printable plans! Thanks to Jay from Jay’s Custom Creation for putting all of Shanty2Chic’s original designs into printable plans for our readers! He’s too legit to quit! Check his site out… He has some great plans of his own!

Let me show you how I made it!
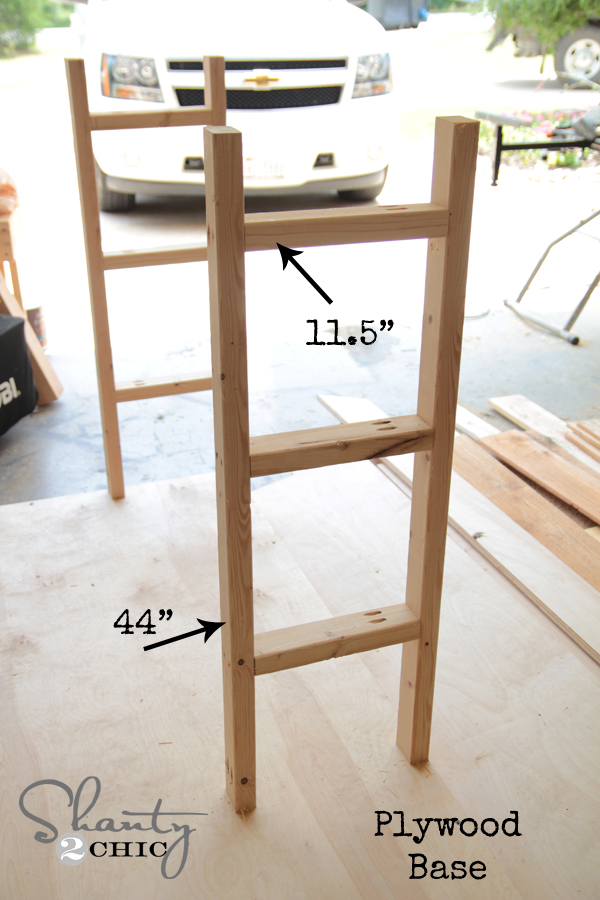
I started by creating the frame for the base. This is what it looks like. I used 2x4x8 for the whole frame.
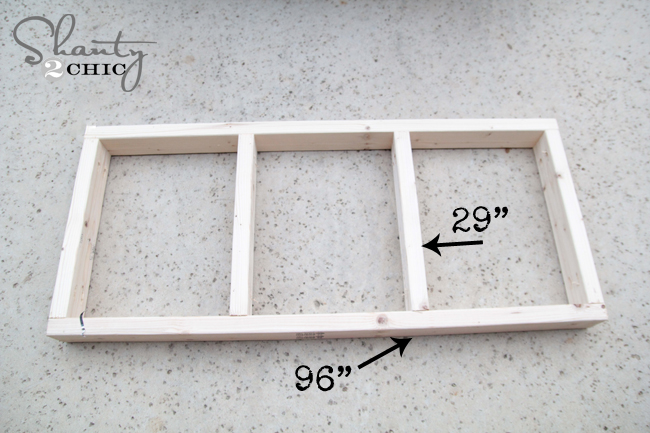
This is actually a different frame photographed because my shot turned out terrible. But… It is the same exact build. Only I added an extra 29″ piece to my frame when building the cart.
I used my Kreg Jig to build this whole thing!
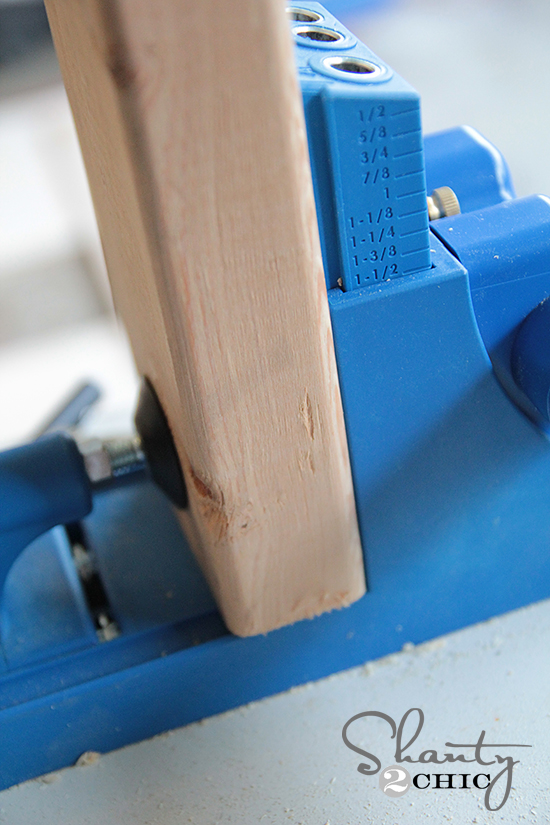
For those of you thinking… What the heck is a Kreg Jig?… Be sure to check out our quick video explaining it. You can see that HERE.
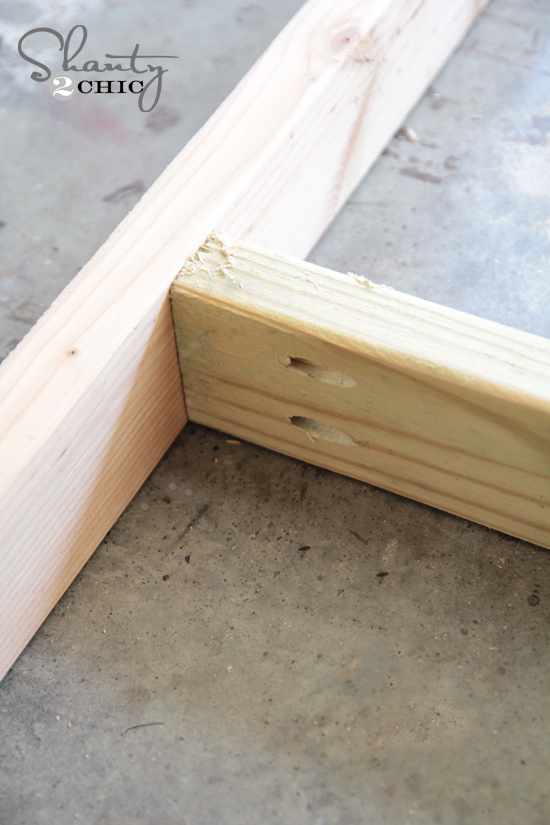
I used 1 1/2″ pocket holes and 2 1/2″ pocket holes for all of the corners like this.
Next, I covered that frame with 3/4″ PureBond Plywood. I love me some PureBond! After learning all of the benefits of this great brand, it has become our number 1 choice for plywood. Plus, it’s beautiful! Win win.

I had the guys at Home Depot cut this base piece to 32″ x 8′. I used the remaining 16″ piece on the dividers below.
On top of the 3/4″ plywood base, I built the storage rack for my long boards. These are all made from the 2x3x8 boards. I made three of these, all the same size. I attached them to the plywood base using pocket hole screws. You can place your shelf boards where you want them as long as all three are in the same place. Mine are all about 12″ from each other.
After finishing those, I attached another piece of PureBond to the back of these 3 frames. I used wood screws through the plywood and into the back of the frames to hold them in place. I had Home Depot cut this piece to 40″ x 8′. I use that 8″ scrap on a part below.
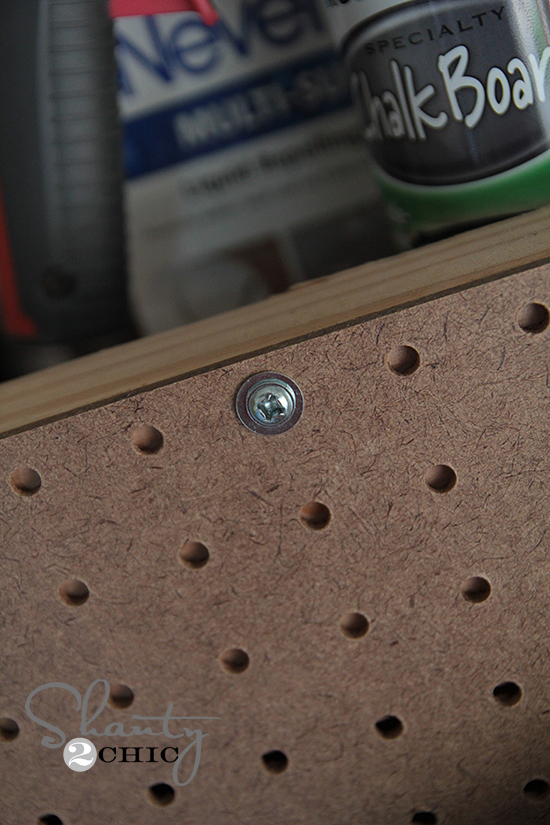
I added a 2 4×4 sheets of peg board to this side. I would have done a full 4×8′ sheet, but it didn’t fit so well with the 5 kids in the Suburban 😉 I used wood screws with small washers to attach it to the frame like this.
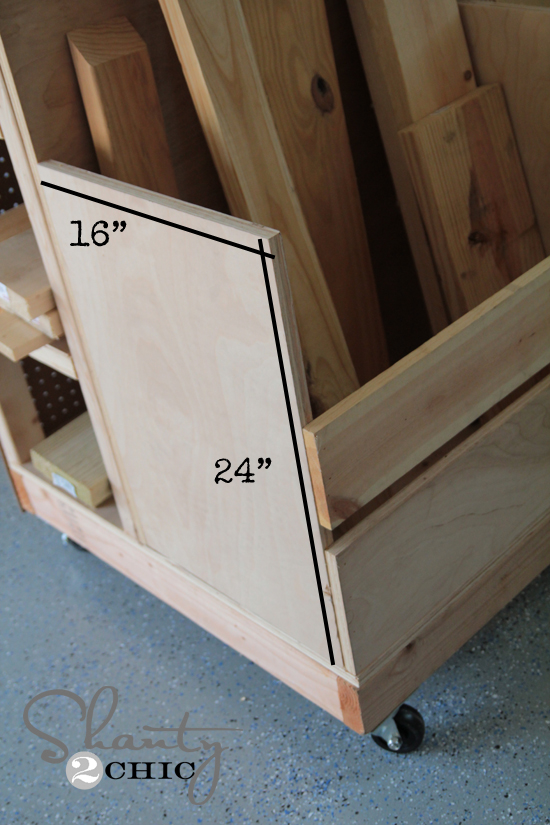
Next, I cut 5 pieces of 3/4″ PureBond Plywood for the dividers. These were all 16″ x 24″.
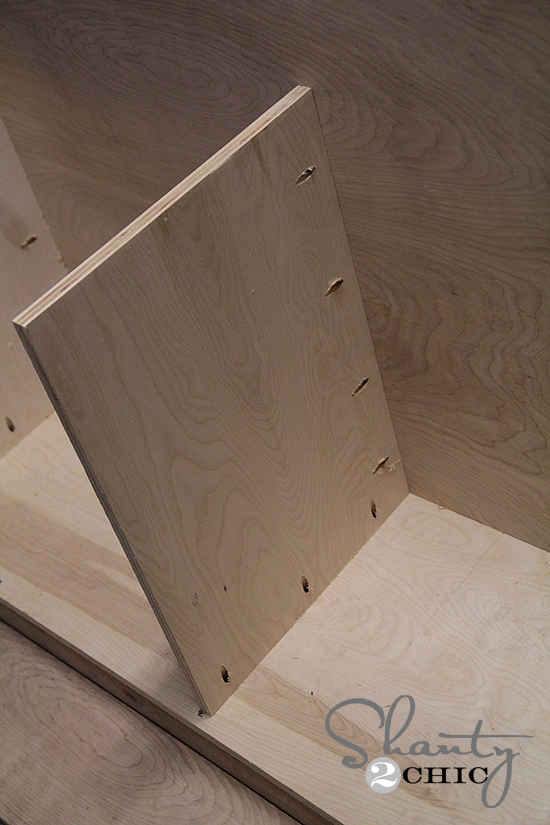
I used 3/4″ pocket holes and 1 1/4″ pocket hole screws into both the base and the back plywood piece like this…
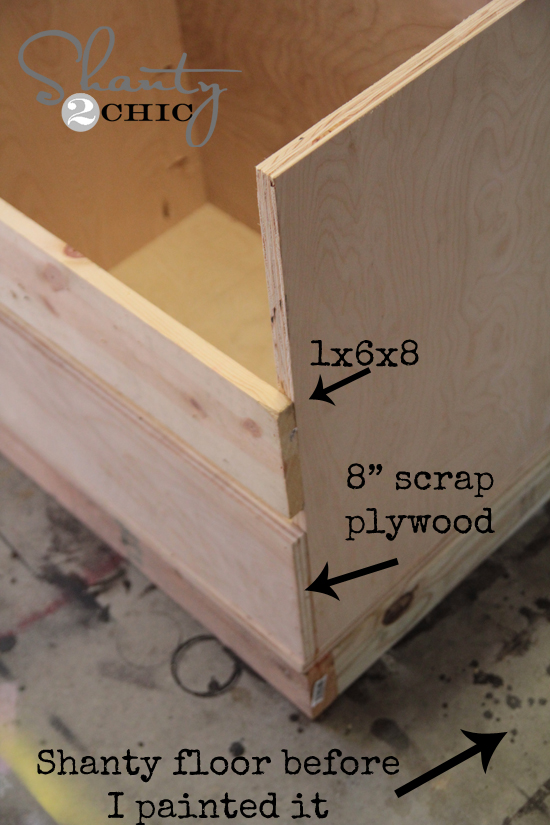
For the front I used an 8′ scrap from one of the PureBond pieces and a 1x6x8 board to keep the wood inside the dividers. For this part I used Gorilla Wood Glue and finish nails.


For the long board shelves I added 1/4″ PureBond plywood strips to create a shelf. These would normally be too thin as a shelf, but since I will only be using 8′ pieces in this area, the weight is even over the whole thing and it helps the boards slide in easy.

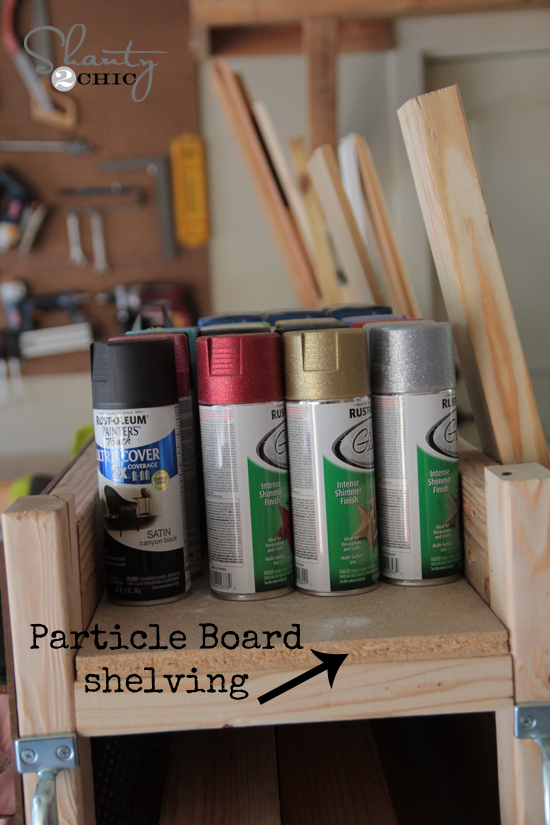
I used particle board shelves for my top shelf. These were the cheapest option and the perfect size for that to shelf. I wanted it to be strong and hold my extra goodies.
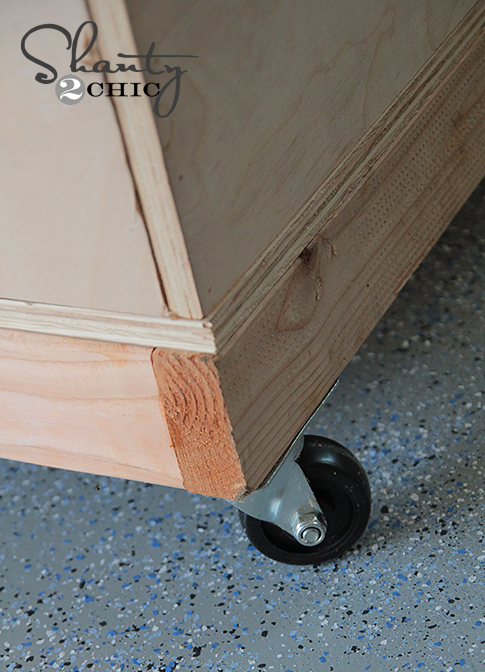
Finally I added some casters! I started with four 250lb casters, but decided it would roll much easier by adding a couple more to the center. So glad I did this. It only cost about $10 more, and this baby is super easy to move around… Even loaded down with wood!
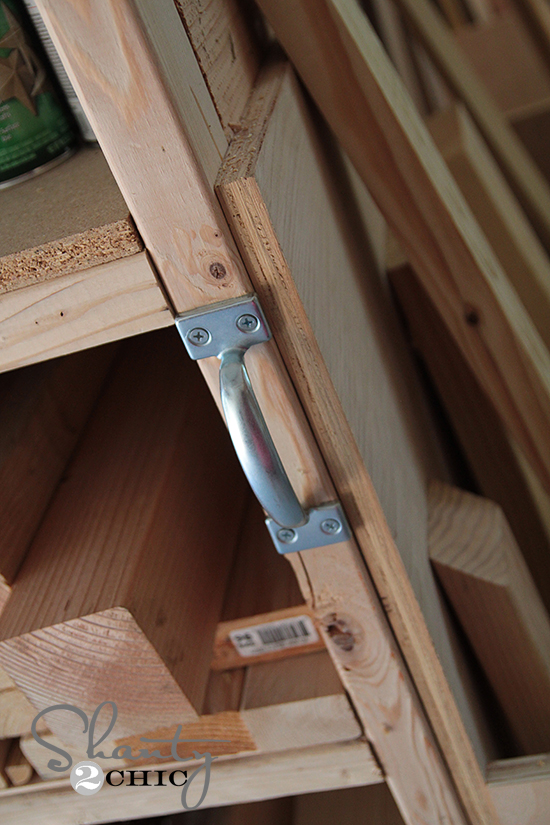
I topped it off with a set of pull handles on each side close to the top. These are great! I found them at Lowe’s. They are actually called gate pulls and you can find them in the outdoor hardware aisle.
And my final FINAL step was loading it up!!

What do you think?? This has been a lifesaver for me. Literally… I am not tripping over wood anymore. And, I can actually see my scraps and what I have! Did I mention that I love it?? Good… Just checking.
Remember, you can download or print the full set of FREE plans by clicking HERE!!
Thank you so much for stopping by! I hope I explained everything well, but let me know if you have any questions at all! I would love for you to pin this and share it with your peeps below!
Have a great weekend!
~Whitney
Click below to purchase a Kreg Jig Master System!


I used these lumber cart plans to make a custom version for my workroom today! I shortened to 48” wide, left out the horizontal storage section to make space for plywood half sheet storage, and eliminated the dividers from the vertical storage section. I used only scrap wood and plywood to make mine and only had to pick up some more pocket screws today. Spent $4 and it took me about 4 hours, even with mistakes. 🙂 Thanks for the inspiration! I’d like to share a photo or two, but don’t know where to post it.
Lovely stuff…can’t share it though…all measurements still in old un- western imperial units 🙂
This is a great piece, however, your design .pdf needs to be corrected. the base frame is 2×4, not 2×3. Also, really need to account for the 1/8″ (approx) blade width per cut in your cut list. Since this is a scrap lumber piece its obviously not a big deal.. lol. but if you have multiple cuts on a precision / furniture piece, people would be wondering why their cuts aren’t all the same.
haha. I built a modification of this piece w/ a cantilevered rod hanger on each side 8′ long, end to hang painted items from while they dry. Wouldnt have thought of it w/ out coming accross this design. So, thank you very much.
Built mine over the last two days. I found that 1 1/2 pocket screws work better for the uprights. Also, you didn’t explain how to attach the 250 lb casters to the bottom. Since the rails are 2×4’s they would not accommodate the screw holes for the casters and I had to attach another 2×4 scrap to the corner so a caster would fit. Everything else went very well. Thank so much for the very easy to follow plans.
Thank you for this great idea. It definitely freed up garage space for me 🙂
Very cool idea! I will be attempting to make this with a slight modification. I want to add a slot to be able to store full 4 x8 sheets of plywood as I usually have a couple lying around.I think if I make the bins on the side a bit more narrow, I can fit what I need in there.
It took me a whole day, but I made it! It’s going to work great in my multi-purpose-haven’t-parked-here-in-twenty-years garage. I do have one question…I used my Kreg to make the slots in both ends of the 11.5″ crossbars for the three “towers” per the plans. However, after I screwed one side in, I didn’t have enough room for my drill to attach the other side. It looks like in these photos that you screwed straight in on one side and only did the Kreg on one side (sixth photo down)?
I’m trying to get better at my woodworking so I don’t know if I did something wrong and need to learn something new!
Great plans! Thanks so much 🙂
Glad I came across this! Made this and the workbench this weekend. Great day projects and they are so practical!
That’s so great! We would love to see pics!
Love Love your site… such valuable information… My hubbs and I are about to get a new 20x 40 workshop… I will definitely this wonderful workbench…..I have already put a Kreg Jig on my Christmas list….so now I just need to be one of the lucky winners for the Ryboi air compressor…. that would so ROCK….
Very good idea. Thanks for sharing.
I love this! I decided to make something very similar to this after seeing this post 🙂 I got all the stuff I’ll need this evening and I plan on starting on it tomorrow morning 🙂 Thank you so much for sharing this.
Oh that’s great!! So happy to hear it…. Send a pic when you get it all done!
love this project and I want that Ryobi Airstrike Nailer. I met you guys at the Spice It Up workshop at Haven. You are amazing!
A friend show this to me and I HAD to have one! It took me 4 days (nights really, as I have 4 little ones who won’t let me get anything done during the day!) And I am all about “re-purposing” so I used and old 8ft door I had as the base which was 36″ wide but worked like a charm! Now on to my next project!!! Great idea, thanks!!!!
Love it! I totally need something like this. Something else to add to my list! 🙂
Love this! Great job. Thanks for sharing the how to.