Hey everyone! To keep up with all of our Christmas posts make sure to FOLLOW us on Instagram!
I hope you all had a great Thanksgiving! We did for sure! I am always trying to think of thrifty, unique and thoughtful gifts to make my family and friends each year. I love making custom pieces that they wouldn’t receive from anyone else. This year I decided to make my niece and nephew name signs for their room. I decided that this would be our teacher gifts this year as well, only I will use their last names!
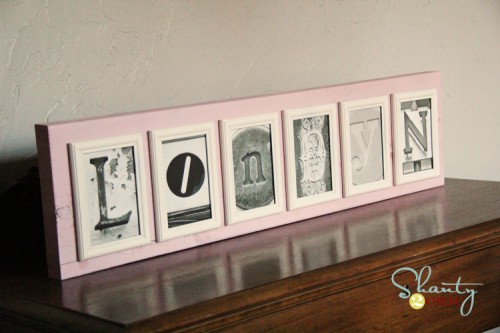
Today I am showing you the sign I made my for niece Londyn.
I found a GREAT flickr photo site on Pinterest. It is an amazing source for letter photos. There are literally hundreds of each letter. You can see that site HERE! You simply download for FREE and print from your own printer… Pretty darn cheap and easy! I found her letters and got started on the rest.
I bought 6 4×6 frames at the Dollar Tree for a buck a piece.

I removed all the plastic and glass from the frames like this…

I gave them all a coat of my very favorite…
You can get it at Home Depot.
I used Heirloom White for the frames…
 Here they are drying…

While those were drying, I started on my wood.
I used a 2×10 for my sign. This is heavy and will sit alone on a table without support. If you are wanting to hang yours on a wall, you could also use a 1×10.
I paid $4.50 for an 8ft board and made 2 signs from it.
I cut a 36″ piece and painted it Sweet Pea.
 While that was drying I finished up my frames. I added the glass back into each frame and also added my new FREE letter photos. Once I attached the back I gently pulled the support piece off the back of each frame. That was quite easy to do on dollar store frames 😉

Then, I added a bit of hot glue to the corners of each frame and attached them to my new pink board.

The result…


What do you think?
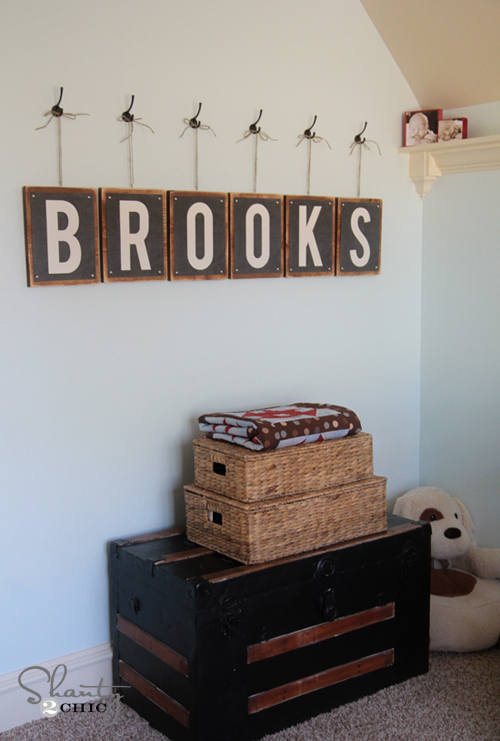
I am so excited to also make these for the kiddos teachers. I am planning on staining the boards and going with a neutral frame color so they can use them anywhere.
If you are making a longer name, I would suggest going with 3×5 frames and using a 2×6 or a 2×8 as your board.
And now let’s do the math… I paid $6 for the frames, $2.50 per sign for the wood, and the pictures were free. That’s about $10 a sign if you count the spray paint… My kind of gift!
Thanks so much for stopping by! Let me know if you have any questions!
~Whitney


Hey. I want to do this, but I want to be able to hang it on the wall. Have you tried doing it on a 1×10? My dad says that 1×10’s warp so I’m a little worried about that.
Any help anyone? Any ideas of something that would work instead of a board to avoid warping?
If you buy a higher grade wood it shouldn’t warp, especially hanging inside. It will cost more though.
book book partner mainstream mainstream mainstream
I found you on Pinterest. Thank you for sharing, I have been wanting to have something like this, now with the FREE printable letters, I can!
Awesome Terri!!
Hi there! What size letter did you print to fit in the 4’6 frame? I’m on the website to print the letters now and I can’t figure out what size I need. =/ lol. Thanks in advance. =)
I actually downloaded them, and then resized them in my photo editing program before printing!
I am pretty proficient with photo editing software and cant figure out how to get a square pic, which all on the website seem to be, to a 4×6 without cropping?? Any advise? I love love love this idea! Was searching for something to do with my last name to hang over the door as you go into my sun porch – this was perfect!!
This is genius, thank you for sharing!
Thanks so much!
Probably a dumb question… but where did you get the wood for this project? Home depot, Lowes? Do they cut it down to size for you?
Love this idea – I have been eyeballing the expensive versions of this for years! Thank you 🙂
Did you use two different styles of frames? The first few images, of the Dollar Store frames, are of plain frames with no decorative detail… But the final board features frames with a sweet little decorative detail around the pictures – were both styles of frames from the Dollar Store? Either way they look great, I was just wondering…
I made more than one. The steps were from another board.
YAY!! I figured it out, how to crop it to fit the frame! This project is just simply beautiful, thank you for sharing it!! Keep em’ coming!!
I absolutely adore this idea and plan to make this as gifts!!! An easy way to scale down photos would be to save the image, and have them printed @ Walgreens in a 4×6 print – then they’re glossy, and save ink! Walgreens always has special discounts for photos and you can get them cheap!
also! Walgreens photo editor has an option to change it to black and white – this way, all of your photos will have the same level of saturation!
Did you use regular print paper or picture paper to print these on?
WOW! Thank you! I’m going to create a dry erase board with the letters in the frames … oh my gosh … is Dollartree open? Tee hee!
Ok…so I was a bit of a smararse in my last post, so to make up for it…I’ll post detailed instructions of…
HOW TO PRINT THE 4X6 LETTERS (PC not Mac):
1) The website for the letters (per this blog) is at: http://www.flickr.com/photos/lwr/collections/72157594587080023/
2) Click on the letter group that you would like to use. (ie: Letter S or Letter C, etc)
3) When you’ve see the perfect letter from the small thumbnails, click on it.
4) If you think you want to use it, move on to #5, if not, go back an choose a different letter.
5) Click on the picture again…it will open on a new screen that will be surrounded by all black.
6) At the top right of the page, click on VIEW ALL SIZES.
7) You’ll see all different sizes: Square, Thumbnail, Small, Medium 500, Medium 640, Large, Original.
8) The default seems to be Large, and I’ve just been leaving it on that one.
9) Right Click on the photo and click on Save Picture As…
10) Up at the Top, Click on the drop down box next to Save In and choose Desktop. (To make this easy…if you know what you’re doing, you can save where ever you want.)
11) Next to File Name at the bottom, enter a file name…ie: Letter S, etc. and then click Save.
12) The file should now ben on your desktop…make sure that it’s there.
13) Right Click on that file and click on Open With…and choose Microsoft Picture Manager.
14) That letter should now be open.
15) Choose Edit Pictures… from the formatting menu bar. You should now see a new menu bar on the right side.
16) Choose “Crop” under the EDIT USING THESE TOOLS,
17) Under CROP SETTINGS change the Aspect ratio from None (default) to 4×6.
18) The Crop box will be in Landscape, but change it to Portrait under CROP SETTINGS. You’ll be able to see what the picture will look like as a 4×6. If the picture won’t fit in that 4×6 box, or you don’t like the crop you might want to choose a different letter because there won’t be a way to get the exact same measurements due to the original crop.
19) If you’re happy with the way it looks (you can move the box by clicking and moving it around), click OK on the right under PICTURE DIMENSIONS.
TO MAKE BLACK AND WHITE (SKIP AND GO TO #22 IF YOU DON’T WANT BLACK AND WHITE)
20) Now click on Edit Pictures (at top) again and this time choose “Color” under EDIT USING THESE TOOLS
21) On the Saturation slider, move the slide all the way to the LEFT.
22) Click on “File” and “Save” (or “Save As” if you don’t want to save over the original picture) and you’re done.
NOW IT SHOULD PRINT PERFECTLY AS A 4X6!!!
Kathy youre awesome!! I couldnt figure out how to save them!!!!
Nevermind the question I posted earlier. lol. I JUST saw this and think I have it under control now. haha. By the way, great idea! I hope mine turns out as good as yours did. =)
I am not able to get the letters to print 4 x 6. Any ideas on what to do before I keep wasting more ink and paper?
I have 4 weddings to go to within the next 6 months, and am just about finished creating “last name boards” to use as gifts for each one! Thank you so much for sharing this idea and for such detailed instructions (coming from a detail person)! Great project!