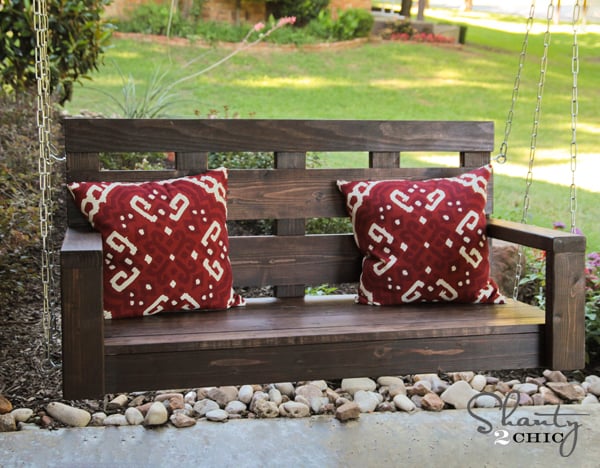
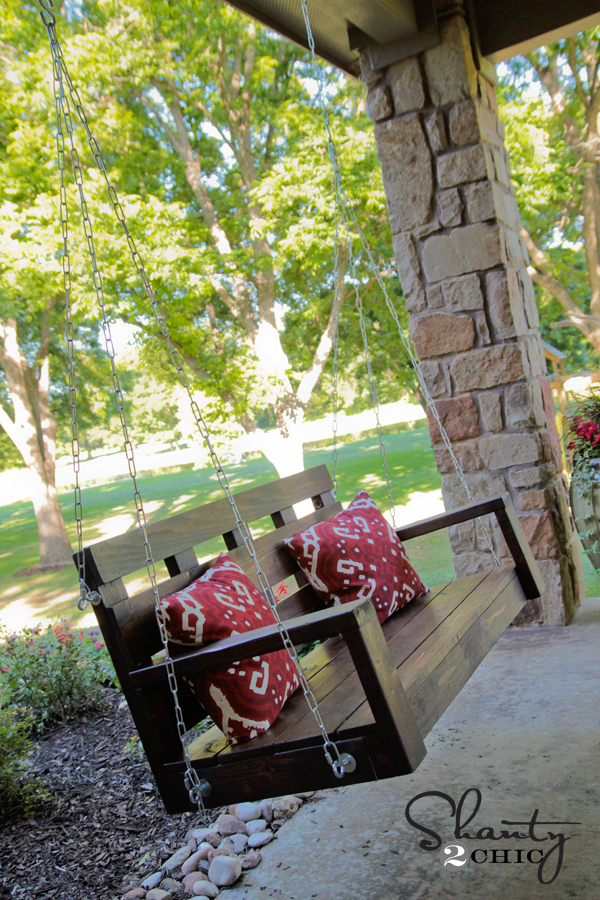
I hope you guys are having a great week! I am SO excited to share this last build with you! Today I teamed up with my good friend, Miss Ana White to design and build this porch swing!

How cute is she??
I have wanted a porch swing for FOREVER. My Meme and Papa have one at their house that we grew up on… So many memories on it! I wanted to give my kids and home the same thing. This is a VERY basic build. It really is a great beginner Kreg Jig project.
I will share some tips and photos here, and you can get the full set of plans at Ana White’s site!
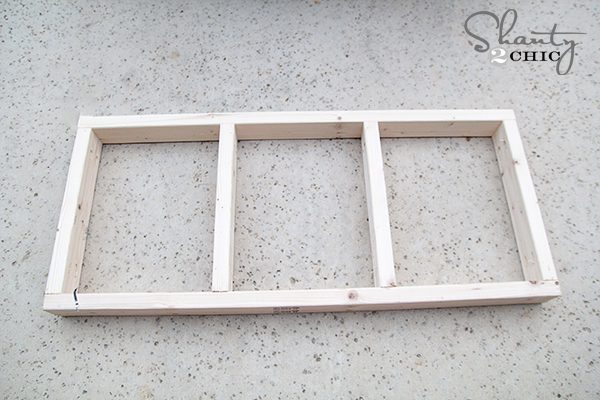
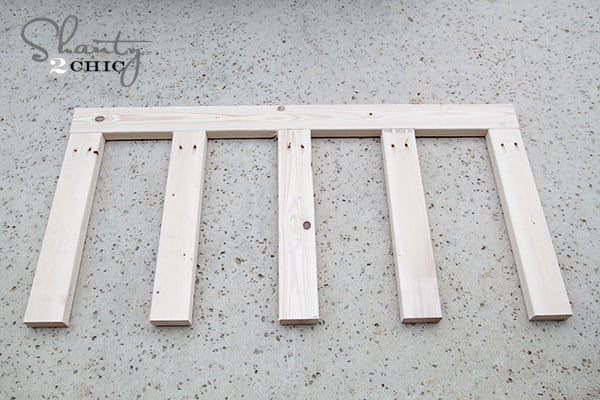
So… Let’s start with the base! Here it is…
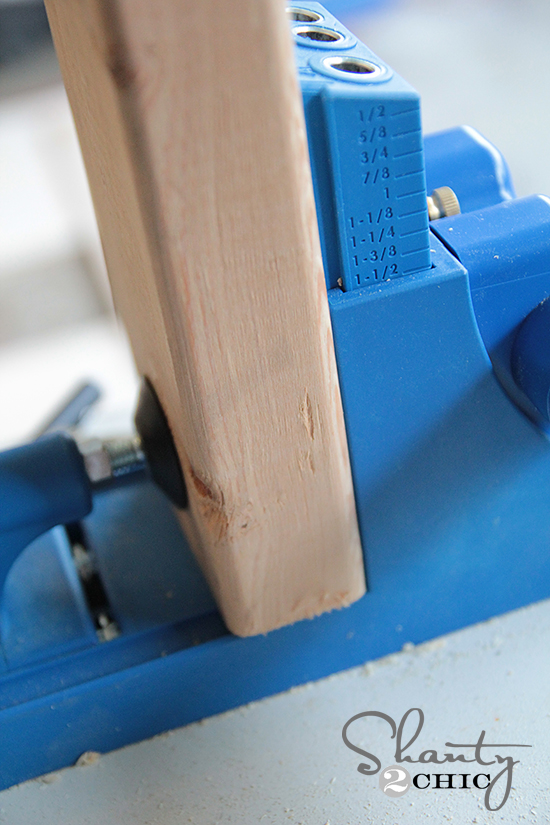
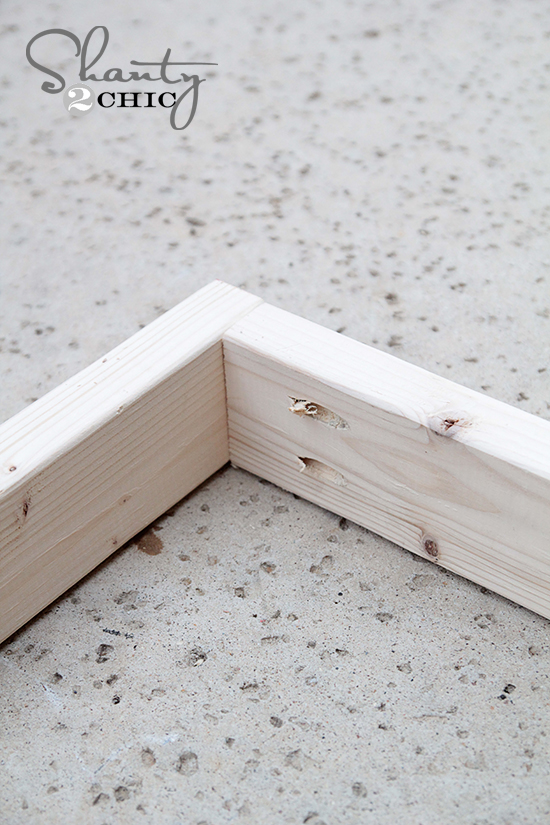
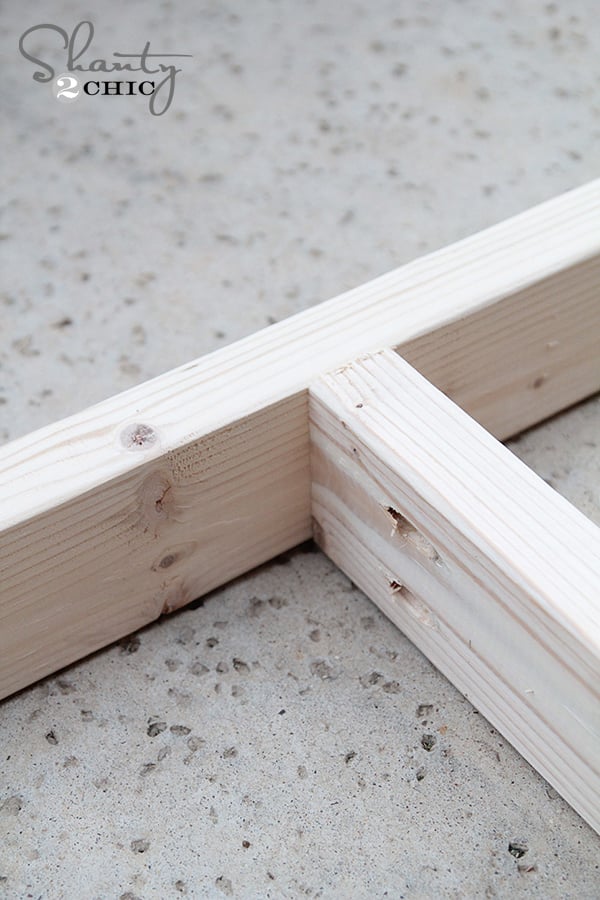
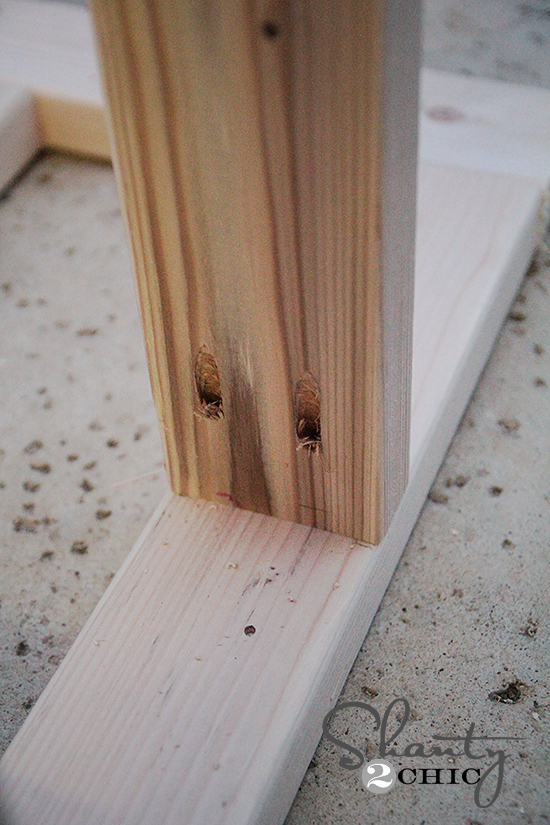
I attached all of my short pieces to the long pieces with 1 1/2″ pocket holes and 2 1/2″ Blue Kote pocket hole screws. I put 2 pocket holes in the ends of each small board like this…
Next I built the back support of the swing. Again, I used 1 1/2″ pocket holes and 2 1/2″ pocket hole screws just like this!
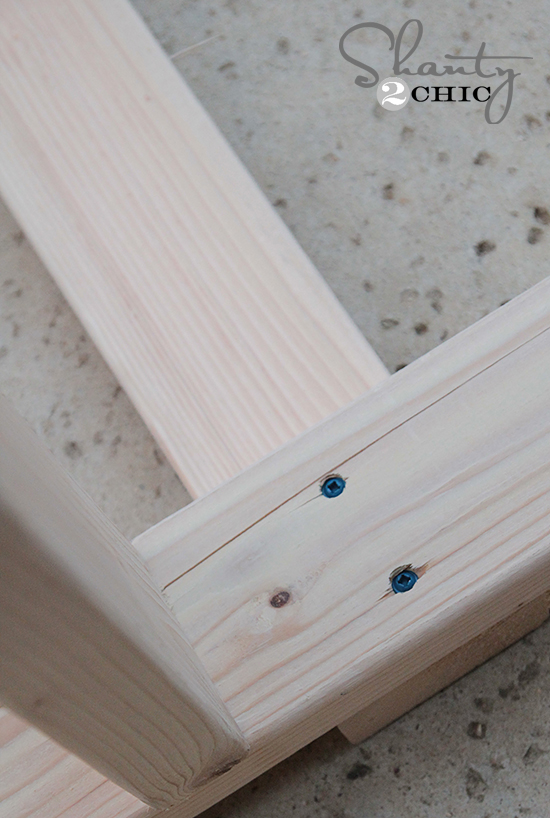
To attach the back support of the swing to the base, I used the same Blue Kote 2 1/2″ screws but did them through the 2×4 on the base and into each brace. I also used Gorilla Wood Glue in between every joint!
Now for the arm supports!
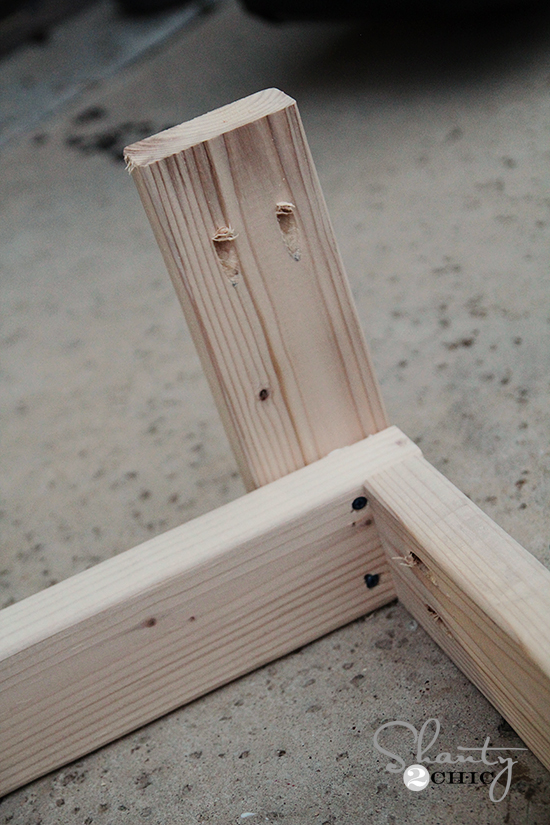
Before attaching the arm supports, I did 2 pocket holes at the top of each piece. This is how I will attach the arm.
I used the same screws to come through the base and into the back of the arm support like this…
Another view…
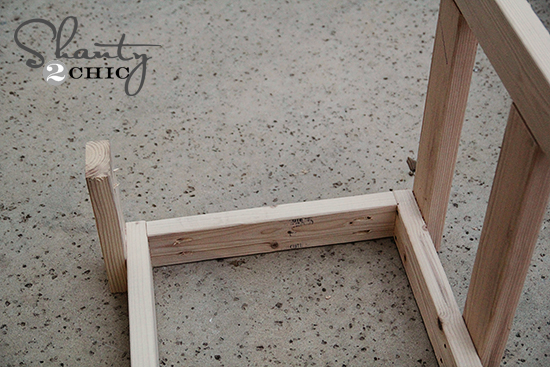
For each arm I also did 2 pocket holes on the side that would attach to the back support of the swing. Then I used pocket holes to attach the front and the back. Easy peasy! (thanks to the Kreg Jig!)
This is a shot of where the arm attaches to the back support of the swing.
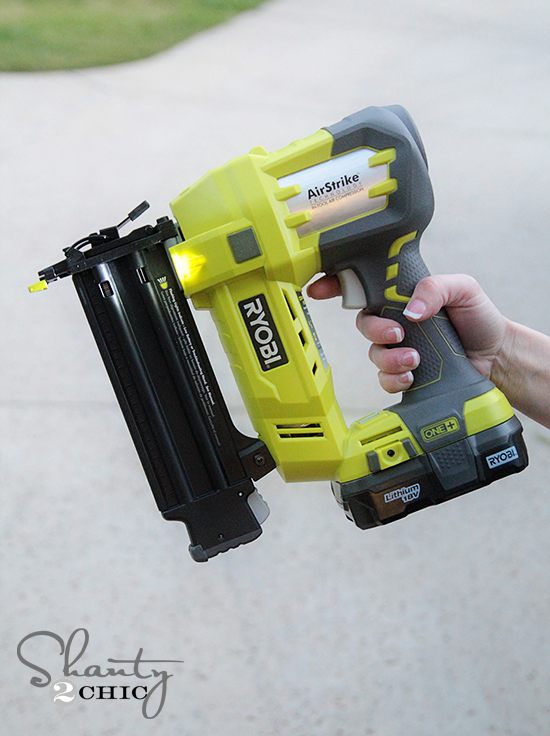
To attach all the 1x boards on the seat and back rest I used Gorilla Wood glue and my Ryobi 18v Cordless Airstrike Nailer. I LOVE this tool. So easy and cheap too! You can find it at the Home Depot.
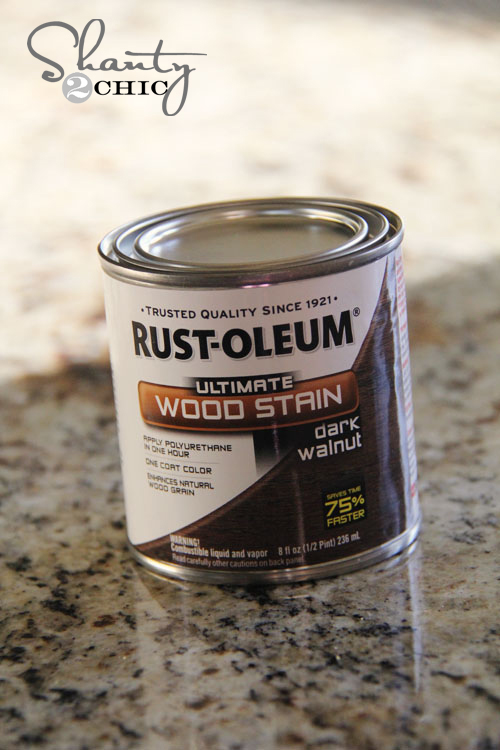
DONE! My final step before hanging it was to finish it. I used the same stain I used on my outdoor dining table to finish my swing.
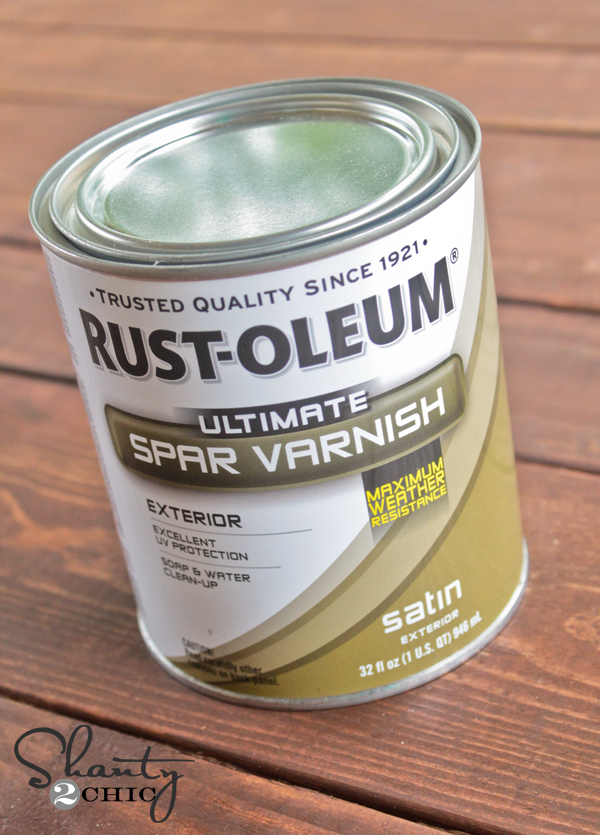
Because this swing needs to stand up to the elements outdoors, I used 3 coats of Rust-Oleum Spar Varnish on top of the stain after it dried! This stuff is super easy to apply and doesn’t smell strong. It goes on white and dries clear.
After that dried it was time to hang!
Before giving you tips here, I must say this….
I am telling you how I hung my swing. I am doing this to provide tips. Every house is different and each swing will be attached in different places. Consequently, I am in no way responsible for any injuries that may occur from you hanging your own swing improperly.
Ok… That’s it.
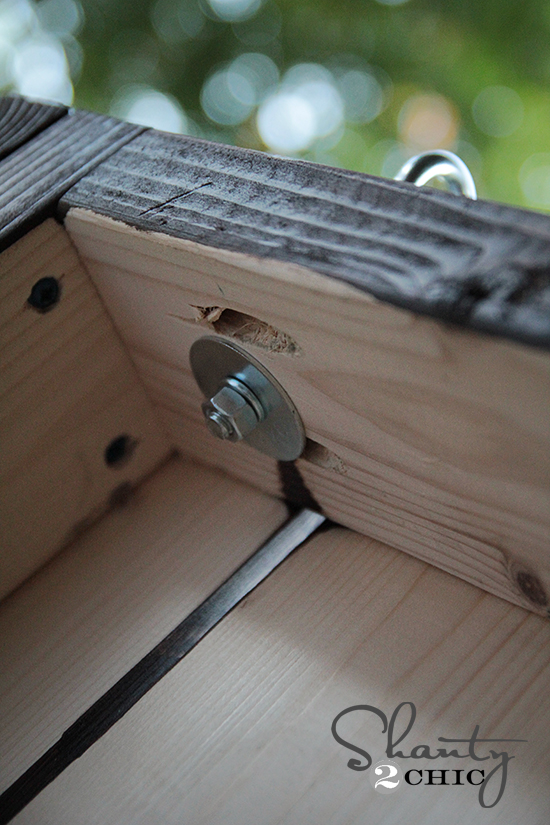
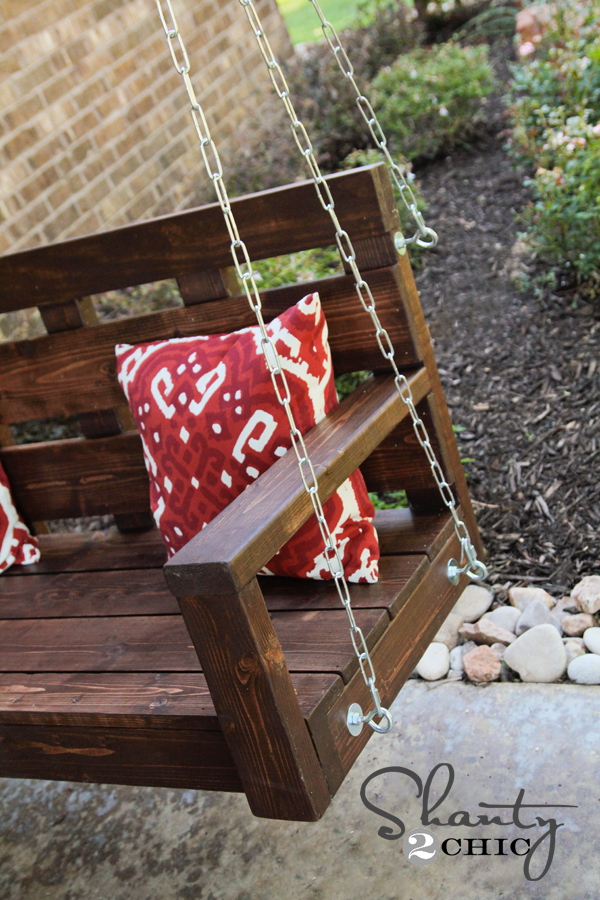
I knew that I would have precious cargo swinging in this. So I did a lot of research on tips to hang my swing. I met a great helper at the hardware store who pointed me in the right direction. This is the hardware I used on my porch swing.

I originally added 2 on each side of the base, but found it to be a bit tippy. I added a 3rd to the top of the back of the swing. It may seem like overkill, but you haven’t met my kids 😉
This is how these look on the inside of the swing…
And this is what they look like on the outside…
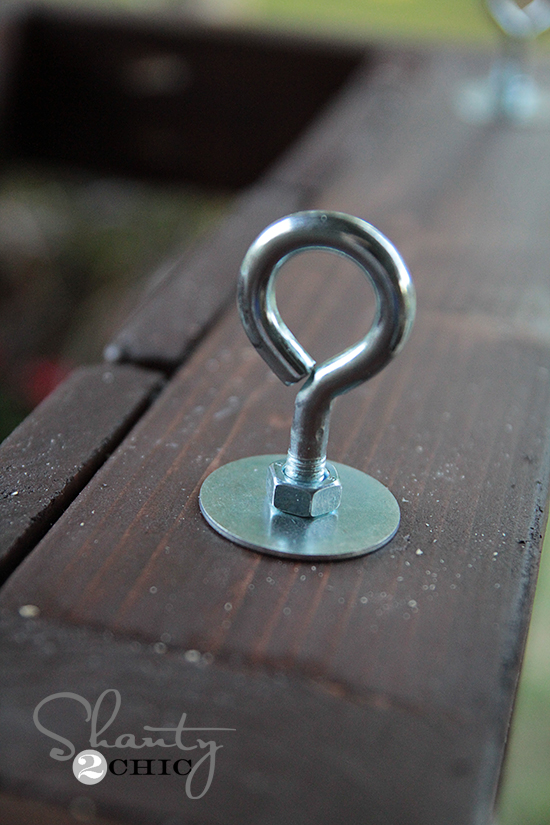
I used chain to attach it to 2 S pieces and then up to the ceiling.
To attach mine to the ceiling, I found heavy duty swing hangers. You can also use eye screws with a large enough weight limit. We also made the back hang just a tad lower (like 4-6 chain links) to give it a slight recline. It’s perfect!
That’s it! Now it’s time to swing 🙂
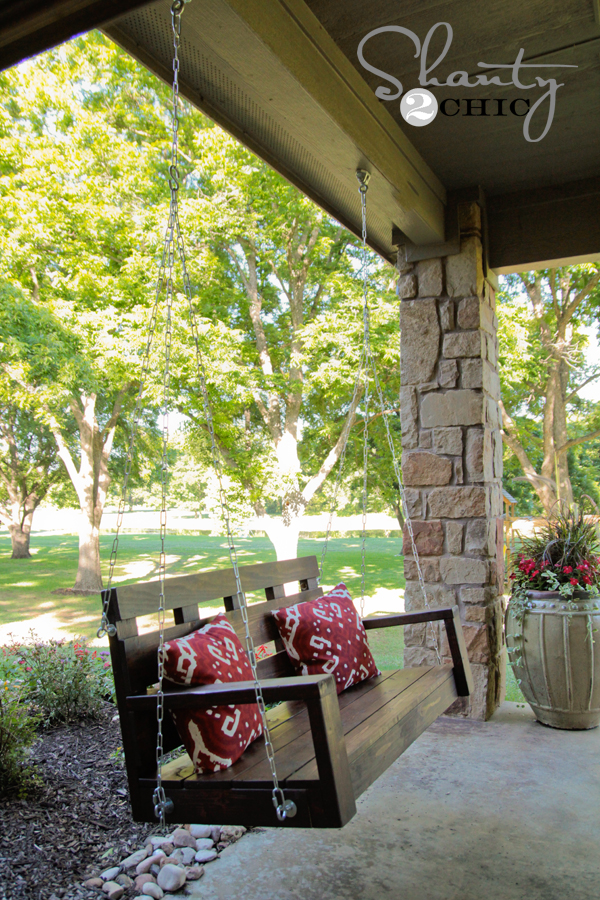
Oooooh I do love it! My kiddos do too!
I would LOVE for you to share and PIN this swing below!
Make sure to check out the full set of free plans over at Ana’s site! Thanks so much for stopping by! I’m off to swing ;-)!
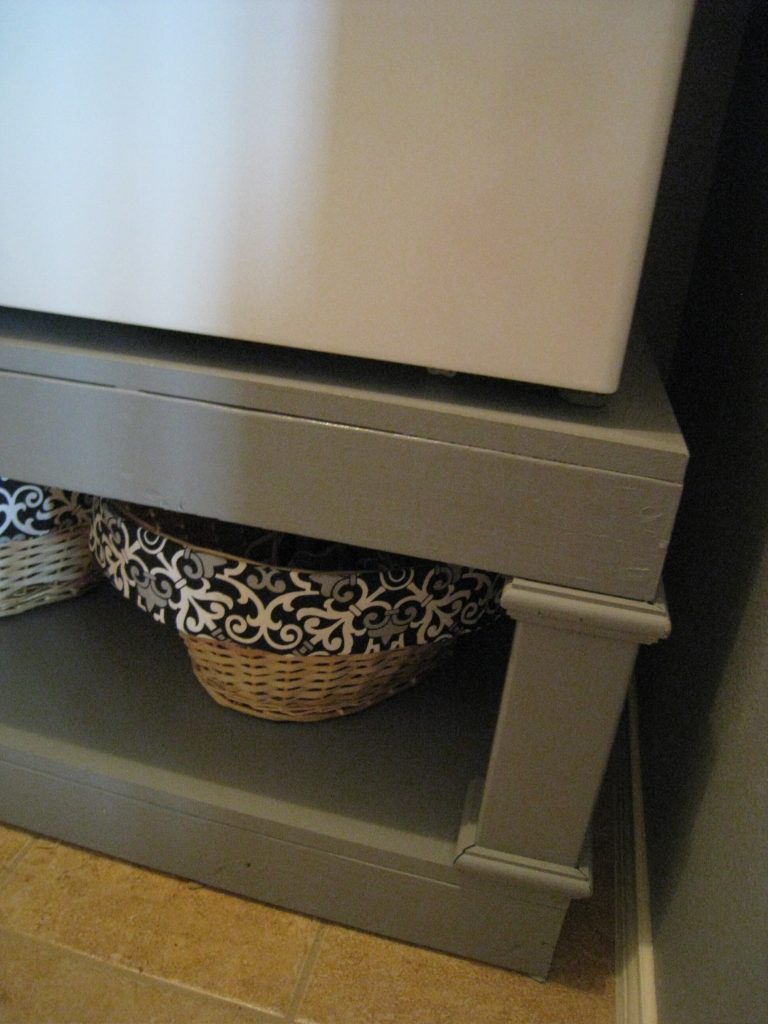
Make sure to check out my other outdoor projects as well!


Thank you very much for these detailed instructions.
Two comments:
– It appears that the inside nut and washer also includes a locking washer.
– It appears that the eyebolt for the third chain on the seat back goes through the 3 1/2 width of 2 x 4 so you’d need at least a 6″ eyebolt with a 3-3/4″ Thread Length.
Again, thanks for these great instructions! Looking forward to building it!
I made one of these swings for my daughter’s cottage. To solve the instability feature, I added a 1/4” lag screw through the rear chain anNd into the top of the back. Problem solved.
I would like to know how install the eye bolts in the back in the swing and what kind chain I can use. Thanks
About how much weight will this swing hold?
That porch swing have a great rustic look…you did an awesome job!!! We are planning to build a porch swing next summer!
The photo of the purchased eye bolt shows it has 2 nuts and one washer. Yet the photo on the swing shows 2 washers being used – one on either side of the wood. Meaning buy extra washers?
There are 3 chains attached to the 3 bolts (2 on bottom of swing and 1 along the back) on each side of the swing.
How does the chain itself attach to the “CLOSED eye bolts screwed into the bottom of the swing seat? There is not a wide enough opening in the eye bolts to slip a chain link onto.
Hi Tom, This is an old post, but maybe someone else would like to know the answer. If you look at the picture of the chain mount on the seat, you can see there is a locking carabiner through the eye that attaches to the chain. You will probably need them for the mount to the ceiling as well although it is hard to see from the photos. Get strong ones used for climbing and it will be safe.
Also you want the eye as close to the wood as possible so the shank doesn’t bend under weight and weaken the eye.
Quick Warning! Make sure the eye bolts to attach the chains to the seat and back have the opening in the loop pointed down, so the chain is attached to the strongest part of the loop. With the opening pointed up (as shown in your picture) the eye may open up and the chain could slip off.
Thank you! Between you and Ana White I think my home may just come together some day 😉
If you cut the wood as mentioned, the arms are about half an inch too short. I made my armrests 24in long and it is much better.
I love your porch swing. Living in south Alabama, it is an extended part of our house. I have two on my front porch. I got a kick out of the third chain. Yes. Tip my hat to the Mom builder. I finished 4 window boxes yesterday, so I feel another project coming on before I get all the sawdust out of my hair. 🙂 Good job. I love the hose holder, too. Lord, I like power tools.
Cannot find the full set of plans for this swing on Ana’s site. 🙁 Can you provide a direct link to these plans on her site??