Hey guys! We recently discovered Ana’s blog ~ Knock Off Wood ~ and I have been on a furniture high ever since! Ana is a carpenter who makes knock off furniture on the cheap…and she is generous enough to share her detailed plans with the blogging world! Not only does she offer the plans for FREE, she gives you the exact cutting deminsions, a supply list and detailed how to’s on many techniques she uses when building!
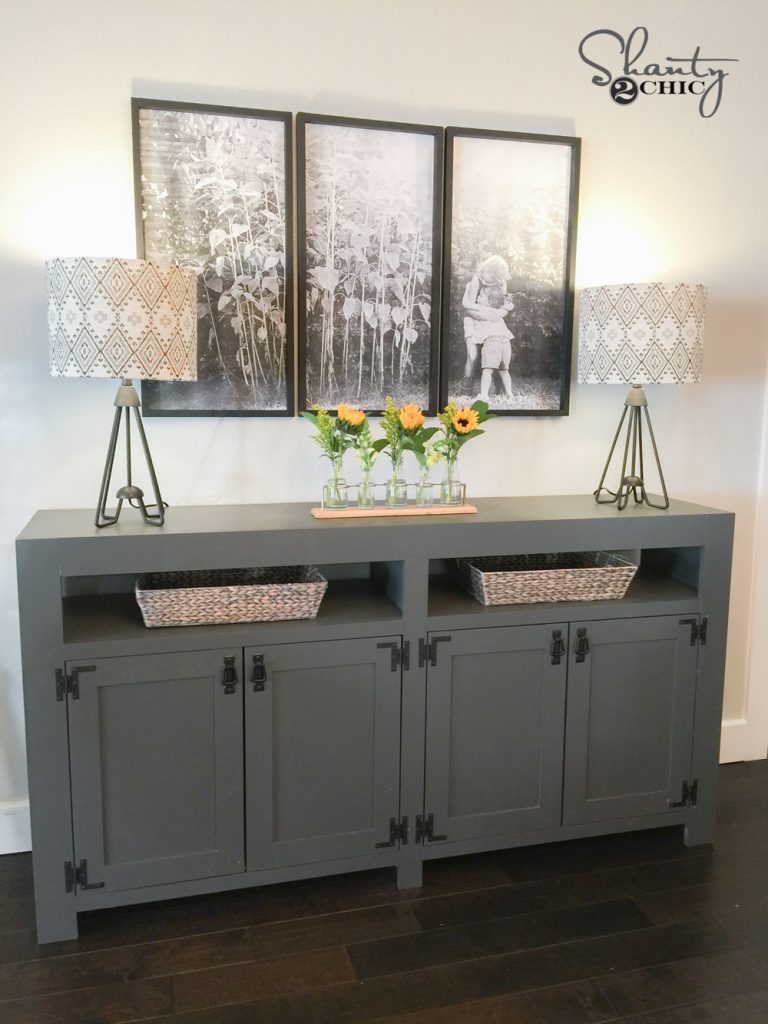
Have you ever looked through a high-end magezine and longed for playroom storage? Well, I haven’t simply because they are so out of my budget, so I glance but I never let it enter my mind but that is about to change! Ana offers the plans for a similar storage system and PLEASE believe me when I say ANYONE can make this ~ NO SAW NEEDED! It may be a little overwhelming for you when you first read the plans so I am going to take you with me on my journey to conquer the largest piece of furniture I have ever made from scratch. I am starting with the outside bases. You can see the plans for it HERE!

When I said NO SAW NEEDED that is because Home Depot will cut all of the measurements you need for FREE!

I took my supply list along with all of the measurements I needed to my local Home Depot.

This is Stephan. I told him what types of wood I needed and how I wanted them cut. He picked them out for me, carried and cut them. I just told him the measurements as he went. (I did get home with a piece that was cut too short. I took it back the next day and they replaced it at no extra charge. However, for the next set I will bring my tape measure with me and make sure they are right before I leave so I don’t have to make another trip).

These suckers spank my circular saw!

and here are all of my pieces (because they were cut I was able to fit them in my backseat and they were very easy to handle)! FYI: I used 3/4″ thick MDF for the sides, bottom and top and 1/4″ thick MDF for the back.

When I got home I marked all of the boards A-E according to the plans (next time I will mark them as I measure them at Home Depot to save time).

Now, you don’t need a saw but you MUST have a drill…

and Gorilla Glue Wood Glue. When attaching the boards together spread wood glue generously between every piece you are attaching ~ the screws will act as clamps while the glue is drying.


You will need to predrill holes for all of your screws. Choose a drill bit that is a tad smaller than the thickness of your screws so that the screws will only cut the thread. (MDF is soft and this will protect the wood from splitting.

Because I could not find the suggested cabinet screws, a Home Depot employee (and my hubby) suggested these Deck Mate screws. I’m not sure what the difference is but they worked like a charm!

After predrilling I inserted the screws. (You will be drilling blind so a line is helpful to mark where the other board is located).

Looking good! (Ana offers a how-to square and level HERE).

Another step ~ per plans!

The plans suggest 2 1/2″ base moulding but I could not find any under 3″. So, I just picked a preprimed trim that I liked at 2 1/2″. It worked great!

Almost done!

Predrilling the top (note the penciled line).

Adding screws to the top.
Now for the back side. Ana suggests 1/4″ thick plywood for the backside because it is cheaper than MDF or hardwood plywood. I opted for 1/4″ MDF because the cubbies will be open, exposing the back. It was more expensive but I know I will be more pleased with the look.

I used these 1″ wire nails to hammer the backside on.


Finally, go back and fill in the holes made by the screws with Elmer’s Wood Filler (this step is important because your piece will look much nicer without screws and holes showing).

This step is also easy! Just squeeze a bit of wood filler in each hole…

then, pack and smooth. If the filler is not flush you can sand it down with a light grit sand paper.

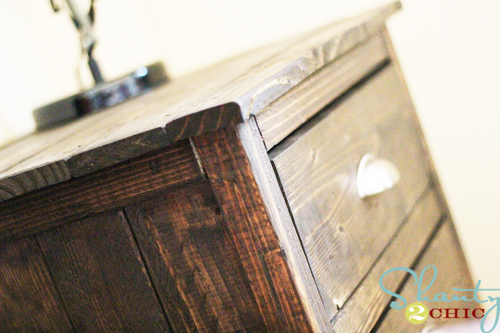
and here we are! Now remember these are just the two bottom bases that go on either side of the TV stand. The total cost for these together was $42. It took me 30 mintues at Home Depot and 45 minutes to build each cabinet. NOT BAD!!! Ana also provides plans to add drawers inside of these cabinets but I am going to wait until the entire system is built before I decide if I will add the drawers. Stop by next week as I try to tackle the media stand that goes between these ginormous bases. I can’t wait!!!
TO BE CONTINUED….
~Ashley


Thanks so much guys! April ~ It's so funny that you mention that your husband wants to do it for you! Mine has been pouting about this project since I started. He actually went with me to Home Depot when I had to get a piece corrected and he went to the other side of the store while I got it cut. I hate that it hurts his feelings but he really doesn't have time to do it NOW which is when I want it done:) I'm sure he will warm-up to the idea eventually….
Love it! You've done a great job. I've seen Ana's site and have wanted to try something. It's great to see what you've done. So motivating and inspiring! Thanks!
I can't wait to get started on this piece. Thanks for the pictures, it certainly takes the intimidation out of the project. I was showing all of this to dh last night and I mentioned that I could get all the wood cut at Lowe's (the one near us will cut it). He said, "I'll cut your wood." I'm all, "But they'll do it for free.." and he said "I'm not letting some other man cut my wife's wood." Lol, he was so serious, I didn't argue. So much for me doing it on my own 🙂
I love her blog … can't wait to try my first project.
I've always wanted to tackle a project like this but have always been too intimidated. Thanks for sharing such a great tutorial!
Have a wonderful week!
愛情是盲目的,但婚姻恢復了它的視力。.........................
LOVE your blog! I gave you an award! Just know I SO appreciate your work on here! Thanks!
This is awesome! I have always been intimidated when it comes to this type of stuff…Not anymore! And you did that section in such short time! I am for sure going to check Ana's blog. Thanks!
Stephanie
Wait … they'll cut the wood for you at those places? Geez. All the ideas I've tossed simply because I don't have a saw.
I've just started my first Knock Off Wood Project and it is taking ALL my strength to not run down to the garage to keep working on it!!!
Can't wait to see how yours turns out.
You're so brave! I wish I had a place to put these because they're gorgeous.
Can't wait to see the finished product. My girlfriend has the exact Pottery Barn unit you showed and I have never been impressed by it. Poor quality for all that money!
Thank you so much for the step by step and the awesome pictures- it really takes the intimidation factor out for me… can't wait to see the continuation!
Oohh, I just discovered her blog a few days ago and I've been dying to try something out! Every time my husband sees me looking around, he says…"I know what your doing…don't you think you have enough projects going?"…never!
Thanks for introducing that new blog. I am so impressed that you are going to build that wonderful unit. Can't wait to see the finished product. Love & blessings from NC!