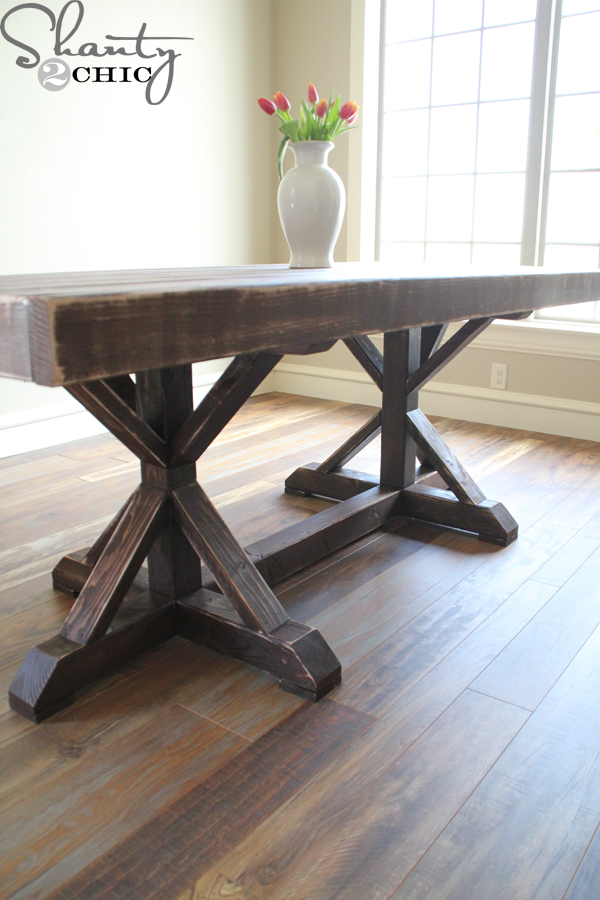
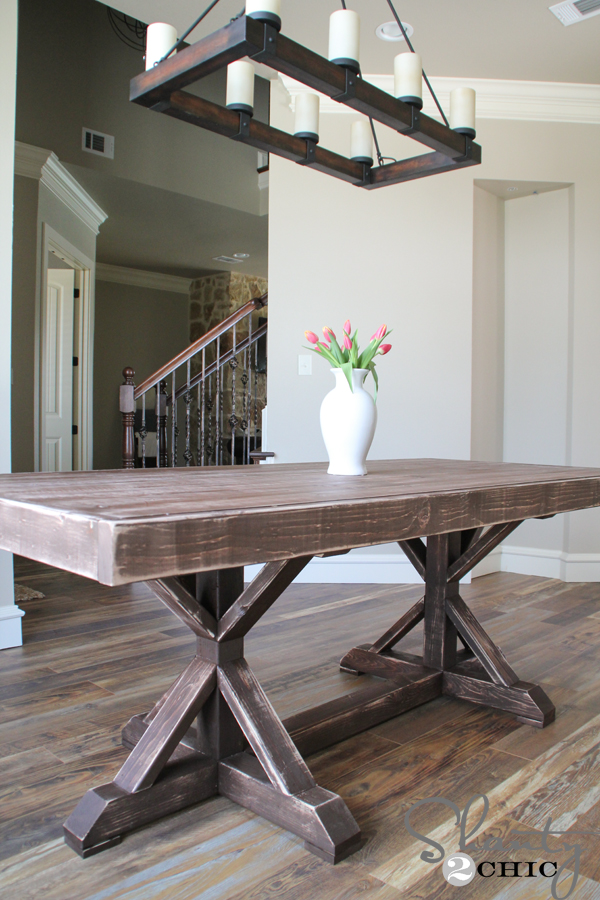
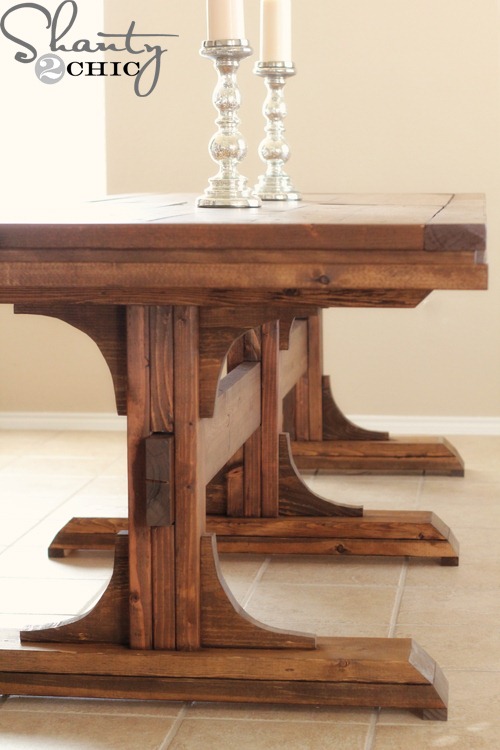
Restoration Hardware Inspired Dining Table for $110
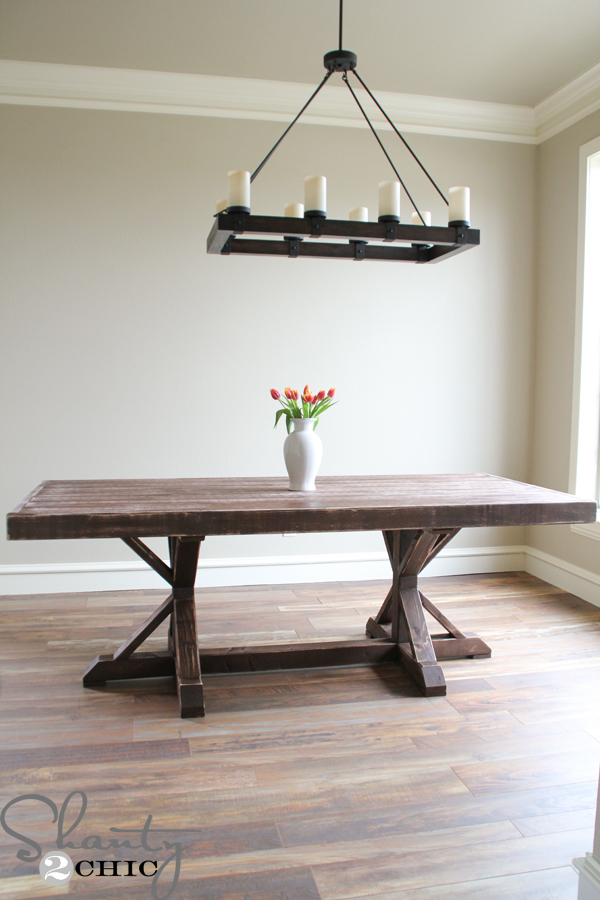
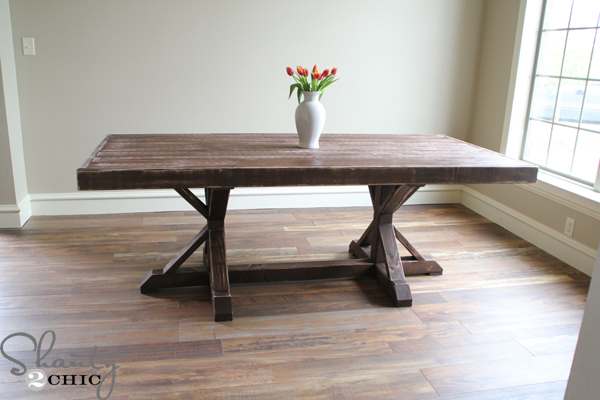
Learn how to build a farmhouse style dining table for $110 with free plans and a full tutorial. This design is inspired by Restoration Hardware and you can build this solid wood table for a fraction of the price!
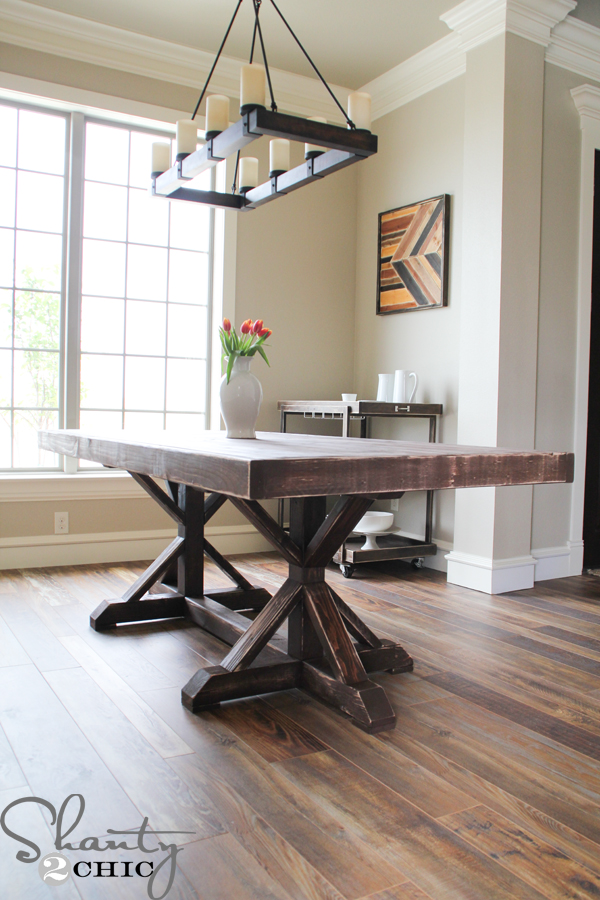
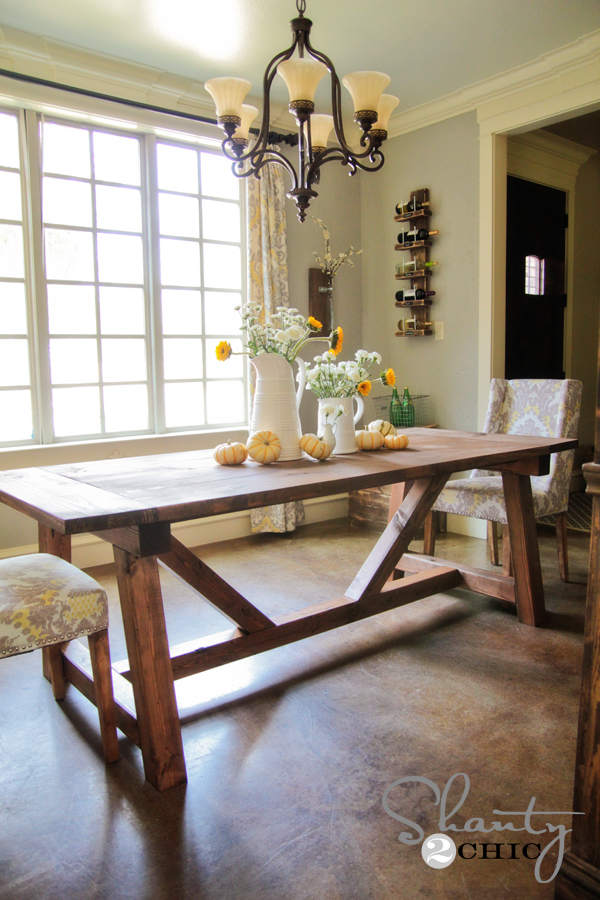
Hey there! I’ve been moving right along trying to fill up all of the empty rooms in my new house. This week I moved into my dining room and I have been dying to build this Restoration Hardware inspired Dining Table since I started building my new house! You may have seen a sneak peak of this beauty on our Instagram! I love the look of a rustic dining table, like the boards came out of a 100-year-old building. Solid pine timbers never looked so good!
Make sure to follow us on Instagram and Pinterest to keep up with our most current projects!
Man I love this table! The farmhouse table that inspired it is a Restoration Hardware Table that costs $2,205 to purchase, before tax, and I built mine for $110! Wow, wow, wow! I still can’t believe it!
How to Build a Farmhouse Dining Table
Supplies:
- 7 – 1x6x8 Pine or Whitewood Boards
- 8 – 2x4x8 Pine or Whitewood Boards
- 2 – 4x4x8 Pine or Whitewood Posts (can laminate 2 2×4’s)
- 1 1/4″ Pocket Hole Screws
- 2 1/2″ Pocket Hole Screws
- Kreg HD Screws (for 4×4’s)
- 1 1/4″ Brad Nails
- 2 1/2″ Wood Screws
- Wood Glue
- Stain and/or Paint
Tools:
- Miter Saw
- Drill
- Kreg Jig
- Brad Nailer
Of course, we want you all to be able to build one too so we have FREE Printable plans for you! Just click the image below or HERE for the free Farmhouse Table Plans.
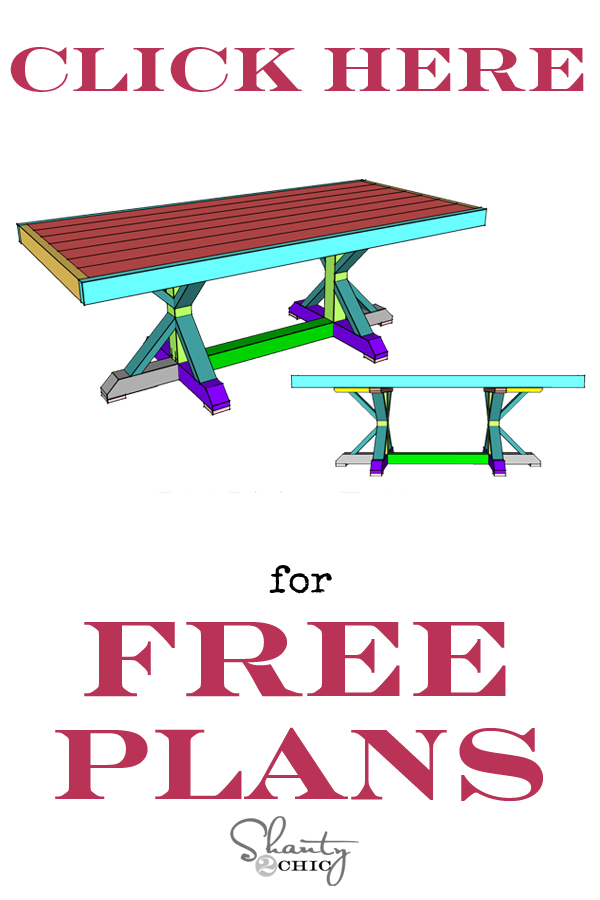
And, as always, I’ve provided my tutorial pictures to make it even easier for you to create your own! I love building farmhouse tables because you get so much bang for your work and money. They look intimidating but this one, especially, is VERY EASY to build! So, let’s build this DIY Restoration Hardware Dining Table!
Building the Table Top
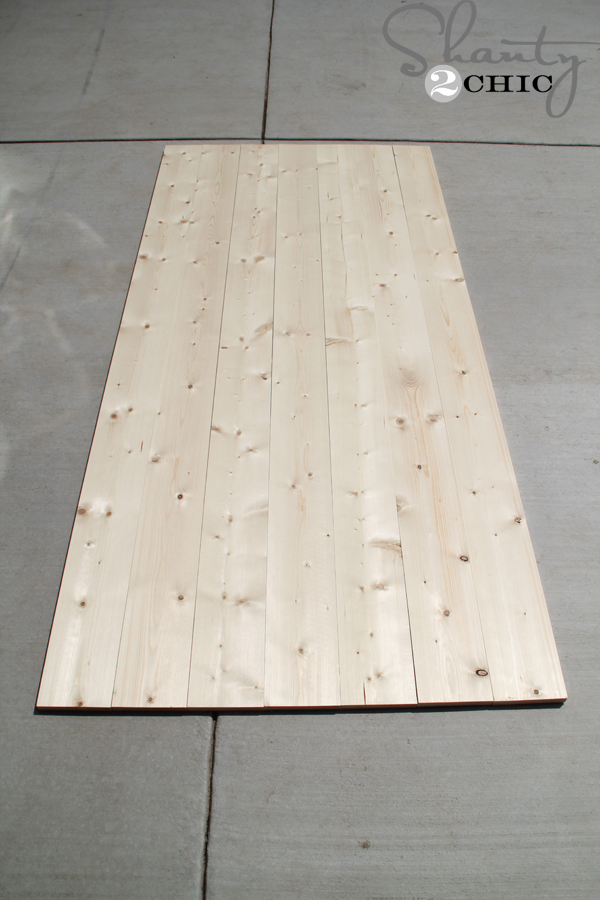
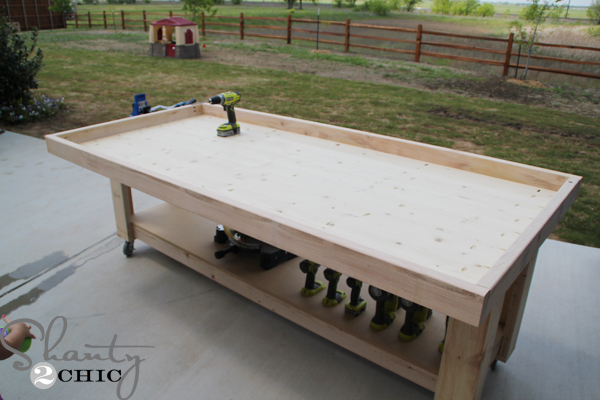
I started by attaching the tabletop planks, with the 1×6 boards, to create the planked top!
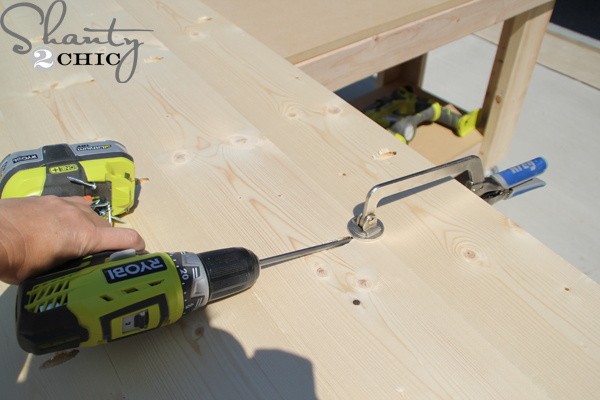
First, I used my Kreg Jig set at 3/4″ to drill pocket holes around the edges of the boards.
- You can find the Kreg Jig HERE on Amazon.
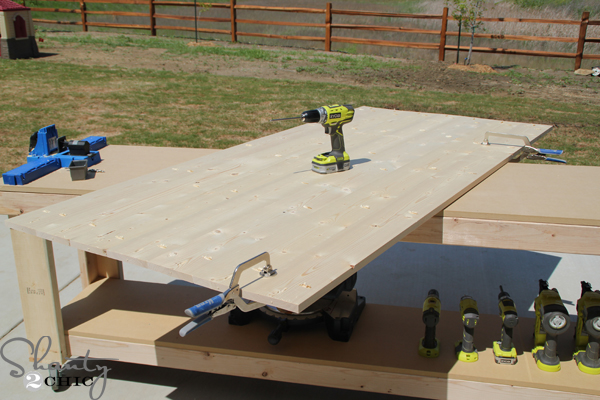
Next, I used 1 1/4″ screws to attach the boards. To create a smooth surface and to keep the top from bowing, just clamp each pocket joint as you go. We love our Kreg Face Clamp for planking table tops.
- You can find the Kreg Jig Face Clamps HERE on Amazon.
Easy enough! Time for the table top trim!
Make sure to measure and cut as you go for the trim pieces.
I started by cutting the long side pieces to size. Then, I attached them to the sides of the table top with 1 1/4″ pocket hole screws and wood glue.
I followed up by measuring for the width of the table top. I cut my end trim pieces to size and attached them with 1 1/4″ pocket hole screws from the end of each plank, into the trim pieces.
Step 2: Building the Base of the Table
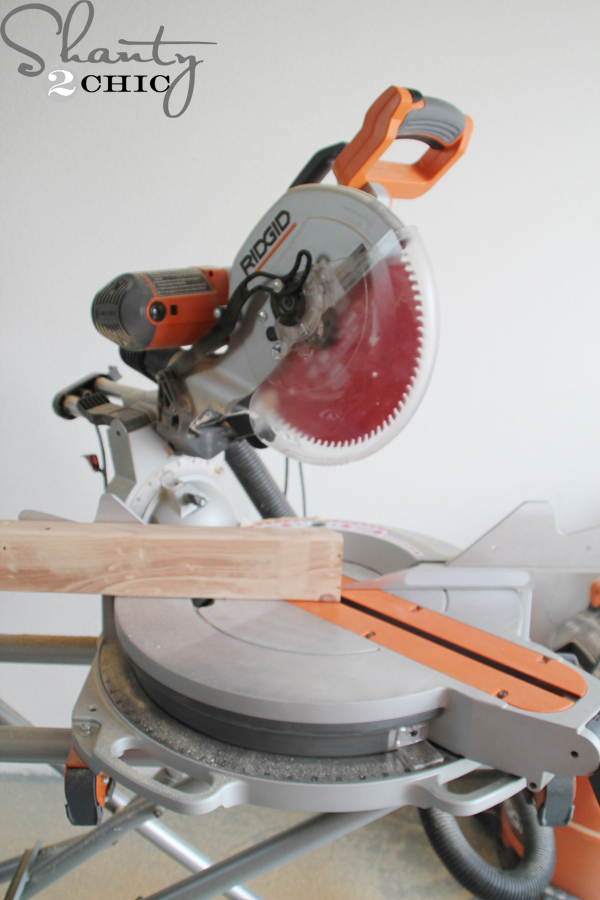
I used my Ridgid 12″ sliding compound miter saw to cut the 4×4 table base pieces.
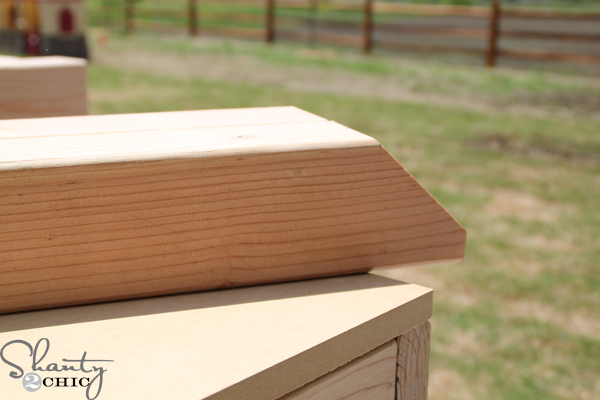
Here’s a pic of the 45 degree miter that you will need to cut for the feet.
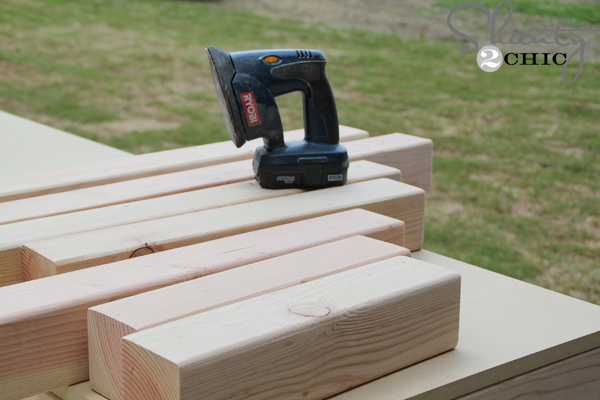
Before assembling the pieces, I gave them a good sanding with my Corner Cat sander. I don’t always do this before assembly but the 4×4’s were dirty and pretty rough. I used a 50-grit sanding pad for this. I used a 50-grit sanding pad for this and sanded with the grain of the boards.
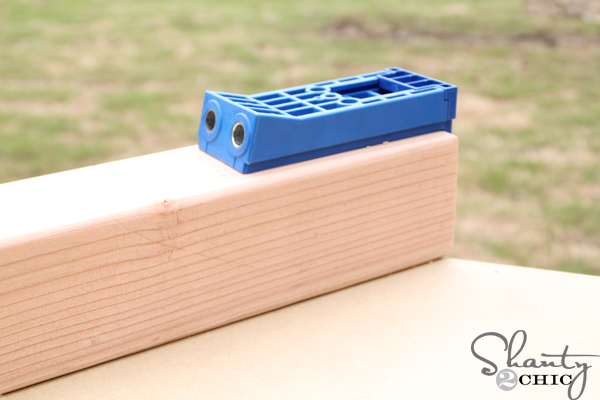
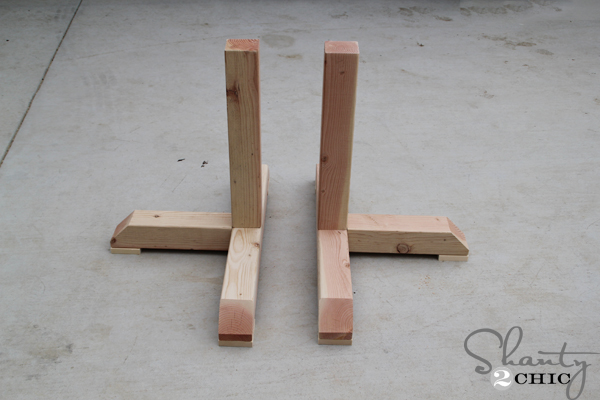
To attach the 4×4 leg pieces together , I used my Kreg HD to drill the pocket holes into the long base runner. It’s super easy, just clamp and drill! I attached the runner to the feet with Kreg HD screws.
- You can find the Kreg Jig HD HERE on Amazon.
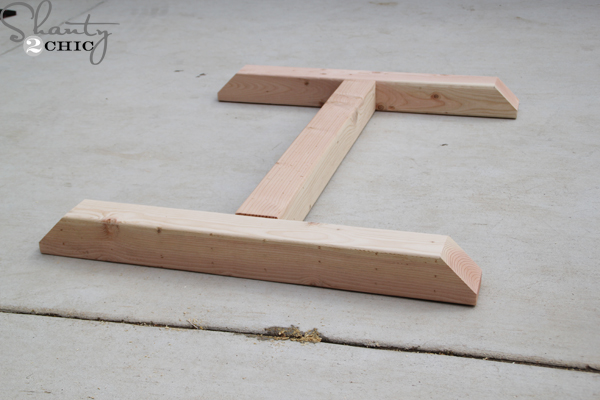
Here is the runners and the feet assembled. Don’t use wood glue here because this is a temporary assembly just to establish the pocket hole joints. After assembled, remove the stretcher.
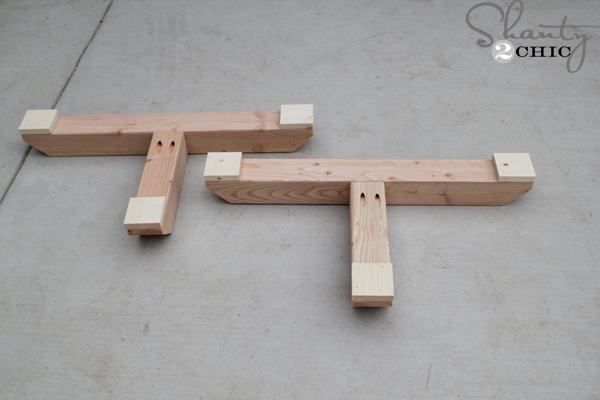
Then, attach the short feet.
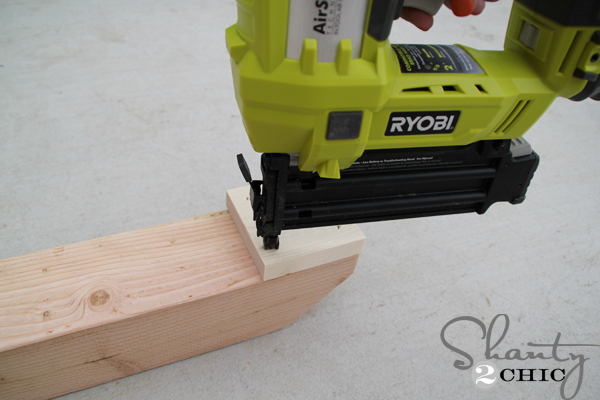
With the table feet upside down, attach a foot pad to each foot.
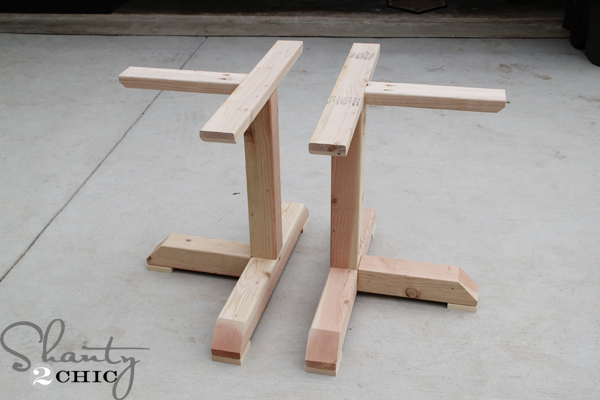
Flip the feet right-side-up and attach the table legs.
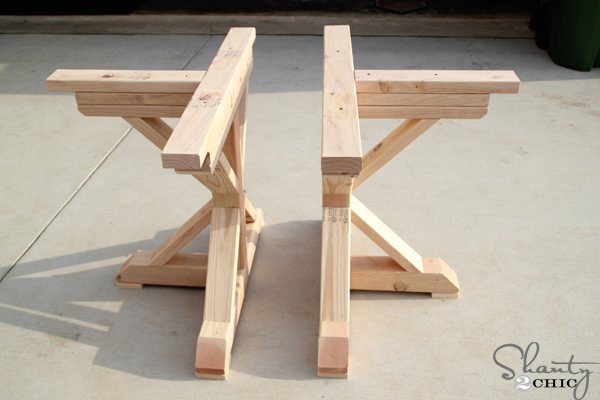
Then, start stacking the 2×4 cuts on top of the legs. I used 2 1/2″ spax screws. They are a bit pricey for wood screws but you don’t have to pre-drill!
Here are the legs completely assembled and now, believe it or not, it’s time to stain! Don’t assemble the table yet, stain first!
Step 3: Staining the DIY Dining Table
Before staining, we like to use the water-popping technique. Just use a damp cloth to wipe the entire table down and let it dry.
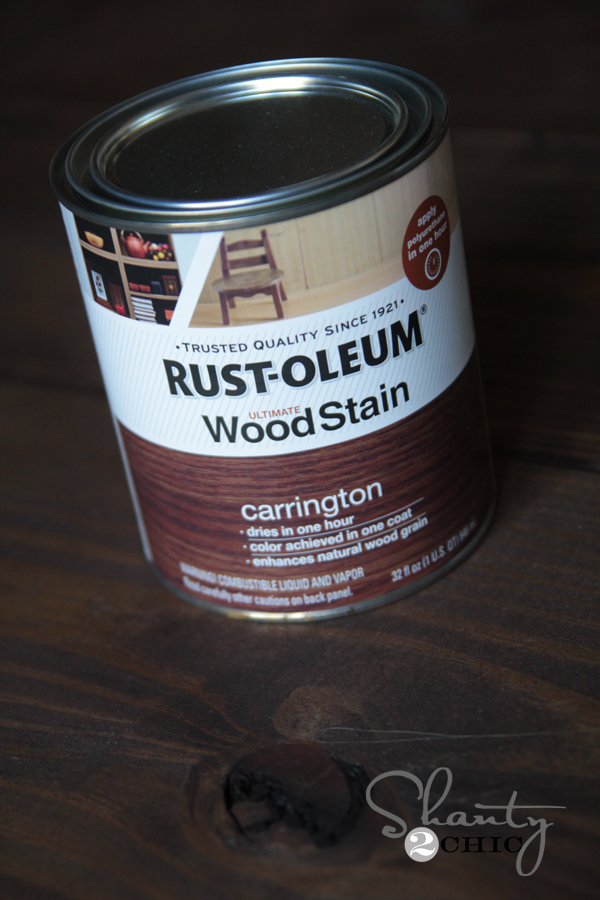
I chose Carrington by Rust-Oleum to finish the table. Just wipe on one-coat with a dry cloth, wait 5-minutes to let it sit, then wipe with another clean cloth to blend it. Make it your own with any finish you like! We love the variety of stains that Rust-oleum carries!
- You can find Rust-oleum Stain HERE on Amazon
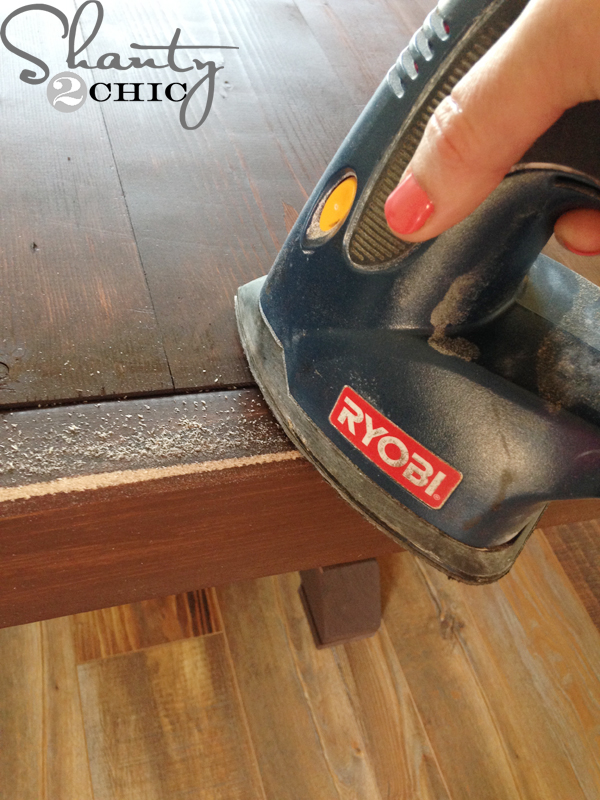
I wanted the table to look worn so I used my Ryobi Corner Cat sander to distress all over. I used an 80-grit sanding pad for this part. (I didn’t decide to do this until the table was inside and assembled. It made a big mess so if you know you will do this, do it before you bring it inside.
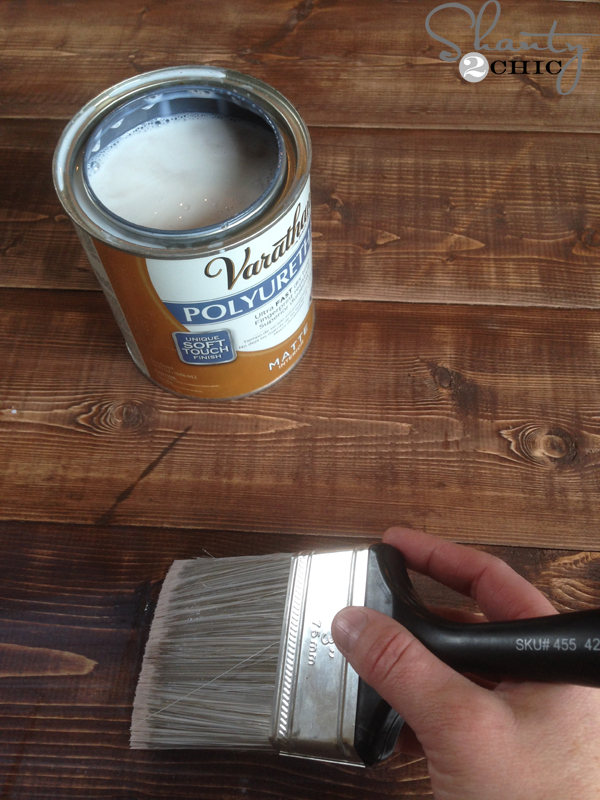
I did add 3 coats of Varathayne polyurethane to the table in, matte finish, with a bristle brush. The matte gives it a very natural finish and protects the table top from minor spills. Now the table top is more kid-friendly 😉 I would still use coasters and placemats when using the table but this finish makes clean up super easy!
- You can find the Poly HERE on Amazon
Step 4: Attaching the Table Top to the Table Base
To attach these angle pieces we suggest screws in the plans. However, if you have a nailer, that will work great! If you choose to use wood screws, just predrill from the top of the angle piece into the leg post at an angle (bottom pieces angle down, top pieces angle up). Follow with 2″ wood screws and fill your screw holes with wood filler.
LOVE it 🙂
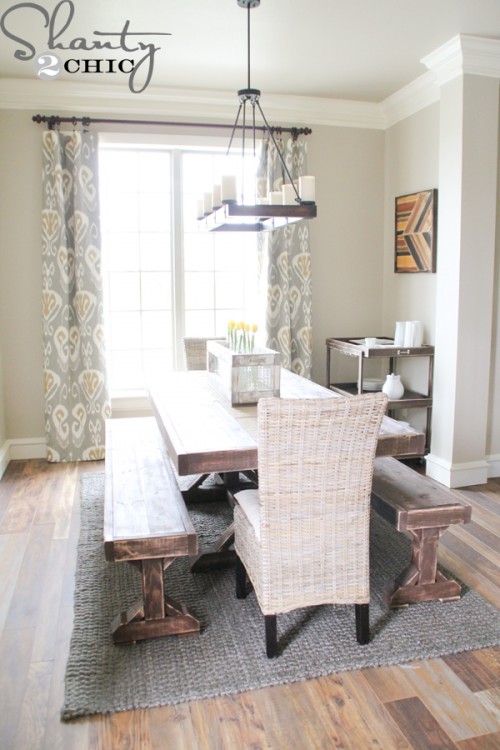
I love my new dining room table! Now I need to get busy on the benches and filling up the rest of the room! I have to say that this is by far my favorite Farmhouse Table that I have built so far! It completely transformed my dining room and it adds the perfect touch of farmhouse style!
Free plans for the matching benches can be found HERE
Thanks so much for stopping by 🙂 – Ashley
Curious about some of the other things you have seen in this room? Just click the links below for more info!
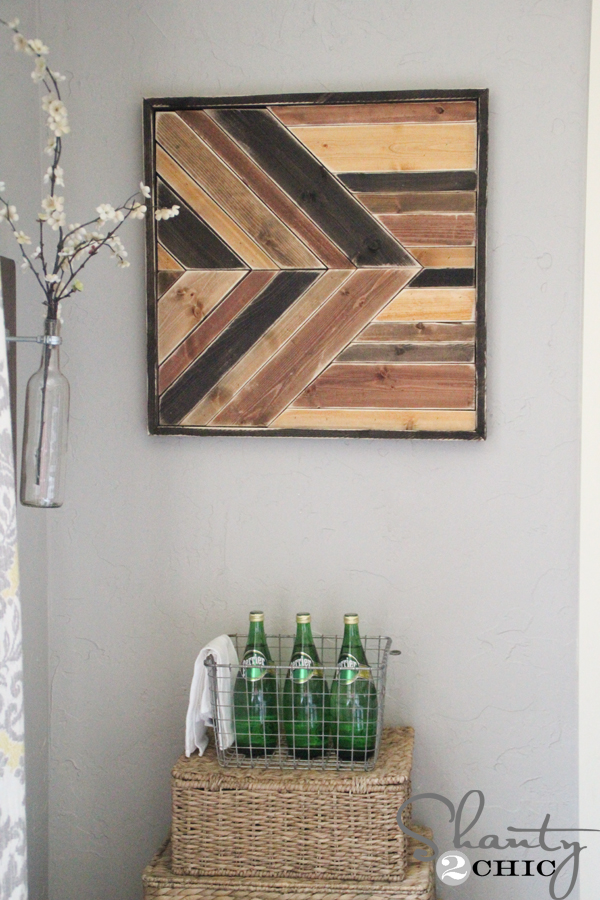
Pottery Barn Inspired Pallet Art
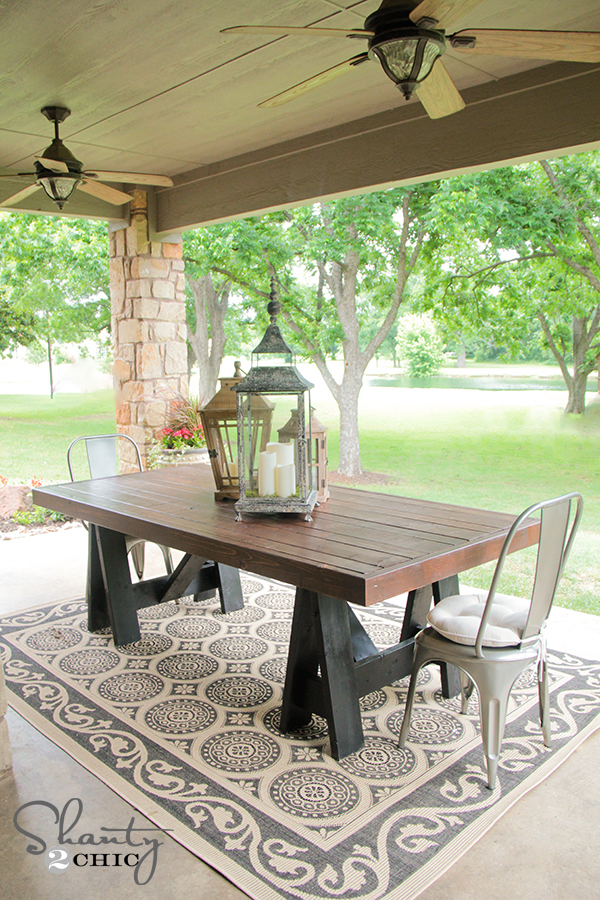
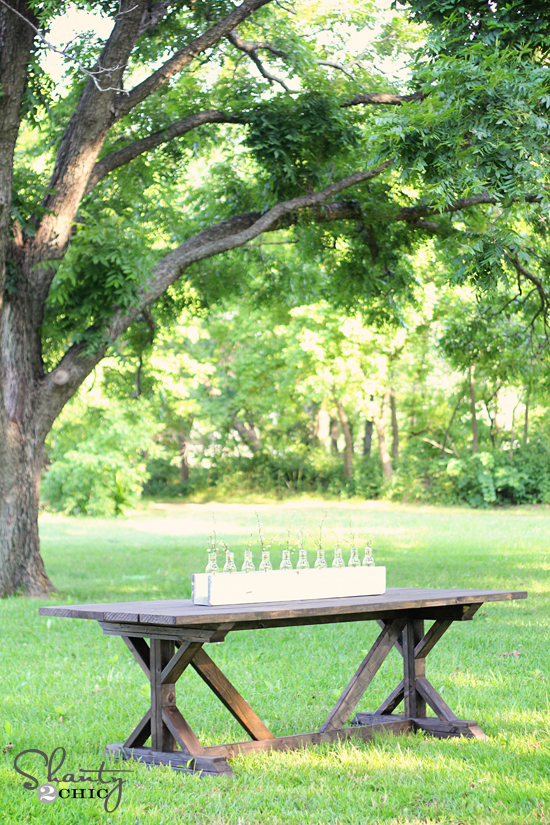
We have built a ton of gorgeous farmhouse tables over the years! You can click the images below for more free Dining Table Plans.
How long and wide is this table?
If I wanted to shorten the table to around 76 inches how would I know how to adjust the rest of the table and what measurements
I’ve been looking at your different table plans and on one of the plans you said you ripped the round edges to prevent crumb catchers. Do I need to do this to the 1x6s or do they come with straight edges? I’m new to this. 🙂
I have a question about how the table top holds up to lots of kid use. I love the table, but I am wondering if the cracks between the 2×4’s get filled with crumbs, or how it is sealed well. Any comments about use would be appreciated! Thanks!
We built this and all seemed well except when completed the table top seems ro have one corner lower that the others like it is twisted. It’s nearly a half inch off. What would cause that and how can we correct it? We haven’t stained it yet.
LOVE,LOVE, LOVE this. The plan was easy to follow and the table came out great. I have been wanting a rustic huge table. I built 2 of these before Christmas and attached them at the center for a 16 foot table. Had to make a few modifications so the table looks like one large table. It was great to have all our family at one table for the holidays. My grandsons said it was a castle table. I told him he was in Meme’s castle. ? They love it and so do I . Thanks again for some great plans. I will be using some more of your plans in the near future.
Fast Free Shipping onwood screws
You’re so cool! I do not think I’ve truly read through
anything like this before. So good to find someone
with a few genuine thoughts on this subject matter.
Seriously.. many thanks for starting this up. This web site is something that is needed on the internet, someone
with some originality!
Hi there!
I absolutely love this table! Do you have a “how to” video for this table anywhere?
Thank you!
Have you had any issues with wood movement with the table?
I followed the directions to a tee….used pine from Home Depot….about 6 months to a year after assembly there is serious splitting and separation in the middle of the table, knowing what I know now of how wood still moves even after it is ‘dry’ I do not know how they got around this…….
Hi, did you apply finish to the whole table or just the table top? I’ve seen it go either way, but wanted to check. Thanks!
For the top, do you glue each 1×6 and then use pocket screws?
So we used polycrylic on the table not really thinking because we had it on hand and what I use to seal wood signs. But the more I think the more I feel this wont be a good finish for a long life. Plus I’ve always heard that a polyurethane yellows overtime and I don’t want that to happen. Do I sand it down and apply the polyurethane? Or just place a coat of the polyurethane over the polycrylic? Advise?
Hi Whitney and Ashley,
Thanks for posting the design and plans, I’m really looking forward to starting this. Couple of quick questions though concerning how to best hide some of the more noticeable joints.
Specifically steps 7 and 8 on your plans.
Step 7 – The HD screws and drill bit as you know are pretty enormous, leaving two huge pocket holes in the 4×4 in a visible location. How did you fill these? Did you use the Kreg plugs? Wood filler? Saw dust and glue? I’m noticing on a lot of the user pictures that these joints in particular are clearly visible. Any pro tips for making these seamless?
Step 8 – There are the holes created by joining the angled braces. I understand you nail those pieces? So I guess you end up with a smaller hole to fill as compared to drilling? Any specific recommendations for those? Between the 3 lower angled braces and the bottom of the top braces you’ve got 18 holes within eye-site, so I want to do the best I can to make sure those dont show.
Any recommendations would be greatly appreciated!
Thanks for everything!
Andrew
Has anyone made this table counter-height?
Hi there, is there a big difference between the K4 jig and the K5 kreg jig? I’m hoping to get away with using the K4 because it is quite a bit cheaper.
Is there any way to make this only 5ft long? would I have to alter the size of the legs? or just the length between them? Thanks!
I just finished the legs and there is a slight wiggle. Is this ok or normal until they get attached to the stretcher and table? I used brad nails instead of screws for the angled pieces. I’m worried that may be the cause?
This is likely me being an idiot, but make sure you still use 1-1/4″ pocket screws when you’re drilling into the 2×4 trim pieces. I read the instructions as needing to use 2-1/2″ screws when drilling into the 2x4s. Those are only for drilling the 2x4s to each other.
Do you have a video for this table or one similar?
Timely comments – my business partner a few weeks ago was told about to edit pdf ! It’s very uncomplicated to try and it’s economical – I think I heard that they will give a 30 day trial ongoing
Hi there,
Can you make the table longer than the plans? We were hoping to make a 12 foot long table.
Thanks,
C-
Anyone know how to mount and use the jig to drill the pocket holes to mount the tabletop? I do not understand the last step. I assume I am using the K5?
Hi Mary, I just came on here to share what I did and saw your comment! Unfortunately the K5 can only clamp on to 1.5″ material and less. Some, including Shanty2Chic said they just screwed the the pedestals onto the top using normal wood screw from below (2″ screws would be my best estimate). I ended up buying a kregjig mini for about $20. I used a 6″ C clamp (though any clamp that would fit around the wood would be fine) and clamped the kregjig mini to the leg and the marked locations. for actual 3/4″ wood top you just follow the instructions that come with the kregjig mini. I hope this helps. I can add pictures later when i go out to the table if it will help.
Hi Michael,
I’m stumped on mounting the top and trying to wrap my head around how to do it. Would it be possible to post a photo of how you did the pocket hole to mount the top? I thought I had it figured out from reading the explanation, but when I attempted it, I became confused. I would be very grateful!
You can just drive wood screws from the bottom of the base arms into the table top. To make the pocket holes on the base arms you would have to take the kreg jig block out of the jig and clamp it to the arm to drill the hole. Wood screws will work fine. Hope this helps!
Sounds good! I am going to give this a shot tonight. I appreciate the quick response.
Will 2″ spax screws work?
Finished the table! Going to tackle the benches next. For the stain, I went with a 60/40 mix of Weathered Oak and Classic Grey and then distressed. Love how it turned out!
Just about finished with mine. I love this table! Thank you for the plans. I modified the top with reclaimed wood to give a different character. I am so happy how it came out. I also made chairs to match instead of a bench.
Can you tell me how tall the table is… We’d like to order some chairs for it before building it, but can’t figure out the height. Thanks.
Hi! I’m late to the party but I reeeally want to build this table. I bought almost everything, including equipment like a miter saw, kreg jig kit, most of the wood….only to realize that I can’t find 4x4x8’s anywhere!!! 🙁 I can special order knotty white pine in 4x4x12’s but they’re unfinished and quite pricey. Are there other alternatives or suggestions you could offer?? Thanks in advance!
Just finished my table and made 2 matching benches. Building my house currently so don’t have it installed and set up fully. Used Select 1’1/8′ pine from Home depot for the tops and used douglas fur 4×4’s for the bases. Hand sanded everything, filled all holes and jig bores and routed the corners with a 1/4” round over bit on my rigid hand router. Finished with Sherwin williams new ebony and 8 coats of semi gloss wipe on poly by minimax with 400 grit and extra fine steel wool between coats. Now on to building a coffee and end tables 🙂
Hi there! I LOOOVE this table and was all prepared to build it…we even got most of the wood and any equipment we didn’t already have, only to realize that 4x4x8’s in pine are nowhere to be found where we live!! 🙁 I can special order rough knotty pine but it’ll be 12′ and pretty expensive, too. 🙁 Do you have any suggestions for alternatives to the 4x4x8’s?? Thanks in advance! 🙂
Hello Shanty 2 Chic,
What a beautiful table you have built! Your website is like a candy store for my wife as we like rustic furniture.
I am planning to build this table for my wife. I was looking into different types of wood as I am not sure what I want to use yet. It would be more expensive but do you have any opinions on wood such as Notty Pine, Oak, Cedar, or Maple? What in your opinion would be the most durable wood to use? Also I am looking through your plans to build a patio table as well, what type of would would you suggest for outdoor durability. I live in Alberta so we defiantly have changing climates so the more durable the better.
Thank You
Markus
Hi, I love this table. I just got done building mine but I had to put some wood filler into the inside joint of all of the 2x4s around the table edge because some of the gaps were too large. Any idea how to smooth the filler down a bit as my sander can’t fit down in between the joints?
Hello, I write from Italy, great plan and explanation. I have a question: how much weight can tolerate the pedestals? I would like to use one of the beams you see in the pictures that have thicknesses of about 8 cm of solid wood. Thanks for the reply. Hello.
I had a really hard time leveling the table. I followed all the directions but when I put the stretcher on the first time I only screwed in slightly to make the holes. I think I should have screwed the HD screws all the way in to make sure it was sitting level before I removed it and proceeded? Any tips you can give would be appreciated I still had to schim the top before I screwed in to the base to get it level as well. Was a bit of a challenge. I want to make another one for my daughter so any help would be appreciated.
Hi. I’m about to embark on this project for my kids and their new home. My son is concerned the thin 1x6s for the top will sound hollow and not substantial. I’m concerned the thin planks could split and check. Could you provide your thoughts on this? Thanks
Great plans and explanations. Very dry wood is a must if you use 1″ on the bench and table top, otherwise it will separate from the 2″x 4″ frame. I did a 99″ table and bench , would not have been possible without the Kreg system.
Thanks again for your time and all the details.
jyg
Hi Jean-yves,
What did you do to attach the angled braces to the feet and vertical 4×4? Screws? Nails? The plan calls for drilling screws down into the feet and into the 4×4, which leaves some eye sores of holes. But I don’t notice those holes in your picture. Did you do something differently? Or did you just fill them really well? If so, how did you fill them?
Thanks!
Hi there! Attempting to make this table next weekend. I see that you need the Kreg HD for the 2×4 and 4×4 pieces. Is it possible to use the Kreg Jig R3 for the 1×6 pieces? Excited to start – wood working first timer! 🙂
Hi Shanty2Chic…we made a farmhouse table using your plans with some modifications. For the tabletop we wanted breadboards…so we used the tabletop from another one of your tutorials and for the base we used this one. We mostly used mortise/tenon joints. Wanted to share the pictures here, and thank you guys for providing the plans and inspiration. 🙂
Here’s another view.
Hi there, what color stain did you use for this?
Hey I’m so sorry I wasn’t able to respond earlier. The stain we used was varathane dark walnut. We applied it wiped it right off so it didn’t get too dark. Hope that helps!
Awesome, thank you! Did you use a rag to stain? or a sponge brush?
No problem! 🙂 We used a brush and then wiped off with a rag.
Also we did use a wood conditioner prior to staining.
Hi …sorry took so long to respond! We used Varathane Dark Walnut…applied it and wiped it right off so it wouldn’t become too dark. Hope that helps! Feel free to ask any other questions…I’ll reply sooner this time 🙂
Maria
Hi Maria,
What did you do to attach the angled braces to the feet and vertical 4×4? Screws? Nails? The plan calls for drilling screws down into the feet and into the 4×4, which leaves some eye sores of holes. But I don’t notice those holes in your picture. Did you do something differently? Or did you just fill them really well? If so, how did you fill them? Same question with the pocket holes on the 4×4 going down into the base foot.
Thanks!
Hey Andrew!
For most of the joining we used mortise/tenon joinery. But for the angled pieces we did screw it in but countersunk before putting in the screw then covered with wood putty. I am out of town right now but when we are back home I can send you a picture of the wood putty we used. Please feel free to ask if you have any other questions.
Thanks,
Maria
Thank you for the awesome plans! We love our table! Here is a picture of how my husband finished ours. Now for the seating…..
Love the painted base, it looks so good! Can you give any tips on what you used or how you painted it? Thanks.
Here’s a pic of how my husband finished ours.
Thanks for the wonderful plans! Love how it turned out!
I’m curious how much you all spent on wood, so far I am up to $160 just on wood, Not including any of the screws.
Lumber cost me about $120 (all select pine) there’s a Kreg Screw Kit for $24 on Amazon and at Home Depot that has all the 1/4 screws and HD screws you will need, just need to get a $7 container of Coarse 2 1/2″ screws from the home store.
So that’s $151. I had the Kreg Jig and HD already, not to mention the clamps and things but if you go to buy that you can spend from $75-$150 for the jigs themselves.. Another $20 per clamp and you’ll need more than 1 and a 6″ for sure!
if you have the tools and just need wood and screws like I did, $151 was my total (plus tax) haha!
Lumber prices vary by location. We try to give an estimate but the best way to estimate your cost is to look up the supplies online. Hope this helps!
Hi, first off, LOVE this site. I have already built one of your coffee tables and the wheeled bookshelf, and really appreciate all the cool info you guys share!
Next, I’m thinking of building this table. But I have one question: based on the design with a “center” base, how stable is the table itself? I have a 2 yr old that likes to cling/climb on things, and I was wondering if the table could at all tip over on its side if a 30+ pound kid hung on one of its long edges.
Just a safety question (might be completely overblown, but just had to ask =) )
Thanks!!
When I built the table there’s VERY little away when you weigh one side, if your at all nervous about this you can add 2-4″ (or more) on the base legs and just make it wider, that’s where your support is coming from anyways! Just remember that if doing this you’ll have it bothering feet that much more!
Hi There! My husband and I are currently building this table… I was just curious to see if you took the sander to distress the top of the table, too? It’s a bit hard to tell in the pictures. Thanks!!
I was wondering about this too!
We are wanting to make this table and benches into a 10 foot table. Does anyone have plans and a list of materials that they’ve used to build a table that big?
Did you ever build this as 10 feet? Wanting to do the same thing.
Ready to start this project!! Are the diagonal pieces on the legs more for aesthetics (can they be removed) or are they really adding structural support? Beautiful work by the way!
We love our table!!! Thanks Shanty2Chic for the idea and plans…Buffet is up next!!!
Looks amazing! Can you share what stain you used? Did you use a conditioner before hand?
Thanks!
Thanks! I used Minwax Wood Finish English Chestnut 233 and several coats of Minwax Polyurethane Clear Satin. I did not use a conditioner. We were very happy with the way it turned out!
I’m working in a smaller space, but I love this table. Can you tell me the dimensions of this guy so that I can work with my hubby to shorten it to our needs?
It is 7′ by 35″ 🙂
Love the table–wondering to get the top even and smooth did you send the top through a plainer? Or how did you achieve that smooth top surface?
Can anyone give advice, pictures or better explanation on how to attach table top to legs?
Hello, I have a question about the quality of wood you suggest using. Where I live in CA, there isn’t very great quality wood, and most places it ends up warping. Where did you get yours? Do you think it is imperative to get wood that will not warp? We have a Lowe’s but the quality is usually pretty poor. The other option is to order online but then we are probably looking in the area of $1,000 to do that, so I am told. Your thoughts would be welcome.
I really want to build this table with my husband, but we need a 10 person table and I don’t know what size to do, or if these plans can be made to work for a table that size? Can anyone help me?
Thanks so much!
Might be a stupid question, but what did you use for the feet at the bottom for the table? We are about to assemble the legs.BTW love this table and all of you projects!
Not stupid! At the end of the 1×6 boards, you will see 3.5×3.5 pieces to cut from them to make the foot pads. If you have scrap 1×4 you could use that too. Hope this helps 🙂
Can anyone help me with this table design? I’m using the Kreg HD screws and the 4×4’s still wobble. Anyone else have that problem?
It sounds like you might need to drill more shallow holes….
How do I drill more shallow holes? What should the length of the bit for the HD Jig be? First time I did 5 1/2″ and this time I did a 3 1/2″. (it barely went into the 4×4 this last time) Do I need to connect the HD jig to my master kreg jig? First DIY project and I seem to be retarded.
Just finished and it turned out great. Has anyone made this without the middle 2×4 in the stack of 3 on top of legs? My final height came to ~31″, but a normal dining table is supposed to be more like 29.5″. Was thinking I might try pulling that piece out.
Happy to hear! The dining table that I modeled this after is set at 31″ tall so that was the reason for this height.
I think I actually removed the top 2×4. Built a year ago, still love it.
We pulled out the middle 2x4s of the stack after putting the table together. We are much happier with the height. I’m tall and 31″ table felt strange.
How is that possible when it shows in the plans to cut the legs at 35 1/2″ tall?
The runner is 35 1/5″ long that goes between the legs. There is one cut at 35 1/2″ and the legs are 21 3/4.
Followed the plans exactly and rechecked our measurements 3 times. Table turned out so tall that we’re going to have to get barstools. Pretty disappointed. Is 35 1/2″ correct for the leg height measurement??
You must have done something different. My table measures 31″ tall and it is by the plans, exactly. Someone in the comments below built theirs and it measured 33″ and they found their error.
I lowered mine as well. I took off the top boards on the two legs to bring it down a couple inches. Still stable after a year.
Shanty2Chic, So I know a few people have asked this question already, but I have yet to find an answer. Are there any substitions for the Kreg HD Jig? Furthermore, can you use the Kreg HD screws with the Kreg 4 or 5 jigs?
Also, if anyone had any success with alternative methods I’d love to hear them.
Thanks in advance.
-Steph 😉
Hey,
I think I’ve answered this in the comments but you really need to get the HD…. It’s only $35 and you will use it lots! Hope this helps!
So I finally got around to building our table…
Do you have chairs around this table? Do you find them difficult to manage? Thanks!
I have bought the 1-1/4″ pocket screws and 2-1/2″ pocket screws, and then it says I need 18 Kreg HD screws, but does not specify a length? Is there something I’m missing about these “Kreg HD” screws?
The HD screws are 2 1/2″ long. They are thicker than the regular Kreg screws.
Can you use something other than the kreg HD screws I cannot find them in stores
Hi Hazel, I wouldn’t recommend that. Amazon does sell them!
Hi Shanty2Shic-
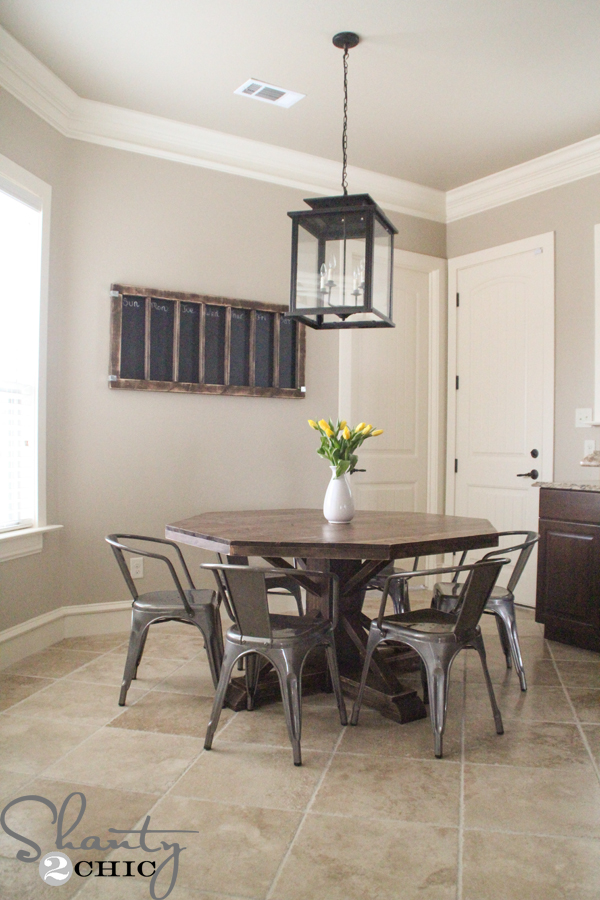
Love the table…we are going to make it for sure once our kitchen remodel is complete…thanks for the plans. We are going for a similar look in terms of flooring and I wondered if you’d be willing to share the flooring that you used in the dining room (first picture)?? Thanks!
-Karly
What do you say were the alterations to make the table 6′? Also, did you sand just the edges or surfaces as well?
I would like to make this table approximately 6 feet long instead of 8 can I just modify the top and keep the same measurements for the base?
Can someone email the directions for the table please? The link seems to be dead now. [email protected]
The link isn’t dead. It’s the big image that says click to print.
When I click that it opens a new page with a black x. When I click the link for the bench that works just fine. Thank you for your help
I’m having trouble find the Kreg HD Screws, is there a specific size? Also, what size on the Brad nails and width on the wood screws? Newby so just wanna make sure I get the right stuff to build it
Thanks for the plans! I’m hoping to start this project this weekend. If I’m looking to shorten the length by 8 to 12 inches, can I simply adjust the plank top, side trim and stretcher length accordingly and leave the rest of the plans as is?
Yes! It’s an easy mod!
Hubby finished the Restoration Hardware Inspired table today. It is beautiful. However, it is measuring rather tall at 33 inches. We are now trying to figure out what to do about chairs as the standard 18-19 inches chairs may be a bit low. Is anyone else’s measuring tall? Regardless, it is a beautiful and I am so glad we didn’t spend $2K on this look/design. Thank you Shanty 2 Chic!
Mine measures 31″ so you may have altered the plans a bit.
We found our error… well, I think it will still look pretty cool with counter top 24 inch chairs. We are building the bench this weekend… making it a wee bit taller. (Thanks for replying)
We are looking to make this counter height. Aside from making the 4×4’s 6 inches taller and adjusting the 2×4 length, are there any other recommendations?
Robert, What stain / brand did you use? Love your table.
On your parts list you call for 16 Kreg hd screws for the 4×4’s. But I don’t see any size or length requirements.
This may be a stupid question, but what is the best way to make the top detachable so we can fit it through our narrow doorway when we move eventually? Can I just screw it on without glue and unscrew it and screw it back later without ruining the screw holes? Or should I use bolts instead, and, if so, how would you recommend substituting bolts? Thanks so much for any advice you have on this!
We’re in the middle of building this table, and one of the major problems we’re having is with small spaces between the boards – horizontally where the boards aren’t perfectly square, or vertically where the saw cut just a tiny bit too short. Did this happen to you at all? How do you keep it from happening? How do you handle it if it does?
Arianne, I ran into the same issue when I was building mine. Wood boards are never perfectly square, so there’s bound to be some imperfections along the way. I tried rearranging the order of the boards so that one warped board would just “hug” another board that was warped similarly. Eventually, if you just get the boards that are warped the worst to the ends, then you can more easily wrap the trim boards around the curves since you have a little more play in those boards from them being flipped vertically.
As far as boards being cut too short, I would just try to stack the boards, clamp them, and cut them all at the same time so they’re the same length.
These plans worked great! Here’s my implementation of the table. The only thing I changed was using premium 1×6 pine boards for the top so that there were fewer knots (ended up costing about $70 extra in lumber). Also, I used premium 1×4 boards for the trim around the top so that it’d match (they don’t carry premium boards in a 2×4 size at Lowe’s or Home Depot). Also, I had a tough time finding untreated 4×4 posts because my local Lowe’s and Home Depot don’t keep them in stock. Luckily, an 84 Lumber outside of town had a few in stock.
I love this table and want make sure it will fit in our dining room. What do the dimensions of the table end up being? And what is the distance between the floor and the bottom of the table top? Thanks!
Found your site and my wife fell in love with this table. Decided to go ahead and make it. Extremely happy with the way it turned out. Thanks so much for the easy to follow plans!
Do you remember what stain you used? Love the color!
My husband and I will be building our table in about a month or so…I was wondering (and sorry if it’s mentioned above or in other comments), but what kind of wood filler do you use? Every one I saw on homedepot.com had reviews that said they would NOT take stain…even if the packaging stated it was “stainable” Thanks!
Hi Whitney,
I use either 3M or Elmer’s stainable but it doesn’t take the stain the same way. The places you will need to fill in this table are not noticeable at all so those should be fine. Hope this helps!
anyone ever made a smaller table like 72″x42″ ?? help and if i would like to move the bottom beam to the middle how would i go about doing that ??
Thank you for the awesome plans! My first time making something like this and your breakdown really made it possible. Thank you
Jose. Great job. Nice smooth lines and looks solid. Absolutely love your stain job! Artists’ work.
Thanks brother, I actually torched it. I wanted to really darken the sides and transition to the natural color in the center.
I love your table also. Can you please provide any tips on the torching process?
Well since this was my first time, I’m sure there is better advise out there but I will tell you what I did. I had initially made the table too long for my space so I had cut off about 10″ off one end of the table top. I then used that piece as my practice piece. I learned that it was easier for me to start further away at first to get a feel for how quickly the wood would darken. I started on the outside and would work my way in towards the center board (not wanting to torch the center). I would do a light darken pass from end to center and then repeat, coming up shorter then the last pass with each new pass. Because of the wood species, (common pine) there were definitely parts that darkened quicker than others so instead of going over it again with the big torch, I used a smaller handheld torch to touch up those spots.
Biggest thing I can tell you is use a practice piece and play with distance, torch settings, and have a smaller torch to touch up. Wire brush lightly and sand after your done. Again, Im just a novice. Good Luck!!
Great Thank you, it’s really cool look. I appreciate the advice.
Hi, my husband and father are building me this design for Mother’s Day but seem to have come to a small problem. They are screwing the top boards for the top of the table together and one board has started to split at the end. I can actually see through the split. They don’t think it’s a huge issue but I wanted to see if there was anything we could do to it to make sure our table doesn’t break in half one day lol. I would hate for them to go through all the trouble and then the table breaks in half.
Thanks for your help!
Going to start this table project soon! 🙂
Is it possible to make the table 8 feet long? By doing so, would there be any issues with the legs? Thanks!
How is step 10 done?? I’m confused on how to use the kreg jig on the legs to attach them to the table top??
I am having the same problem. Did you figure it out?
You don’t have to use the pocket holes. I just drove wood screws from the bottom of the legs into the table top.
How long of screws did you use? Will this table be able to be moved and assembled again without decreasing its sturdiness when it comes to assembling the top to the legs? I would imagine screwing it back in the same hole after reassemble would cause it to not be a tight/sturdy.
If I am planning to use 2×12’s instead of 1×6’s for the table top, do you think I could utilize the Kreg HD for all pocket holes to avoid buying another Kreg jig?
I believe the HD is for anything 2″ and up (which is really 1 1/2″).
I would try connecting a couple pieces of scrap first to see.
Just wanted to say thank you for shearing the plans for the table I love it here a pic of my table just have one layer of poly so far waiting to dry to put 2 more layers on
nice change up with the center beam. looks great
Can you please share how you stained this table? I love the dark base.
Thank you Nicole. The legs are painted black and destressed on the edges the top is stain with dark walnut and 3 coats of wipe on polyurethane
Did you poly the whole table? Or just the table top? Also, did you sand in between layers? Lastly, did you sand after the final layer?
Thanks!!
This is the last step I have to finish and I’m all done!
just went today and bought all the wood to make the table. Was wondering if anyone had a cut list for the legs of the table thank you
they’re on the PDF file attached to this site
How long should this project take to do?
depends on how much time you have lol. It took me a couple months just doing a little bit here are there. You can easily do it in a weekend if you don’t have any interruptions
Finally completed & delivered. The customer and I are really happy with the final result. Put 4 coats of Cabot “midnight” stain/sealer & 3 coats of rustoleum matte polyurethane.
Thank you for Sharing this Design !
It’s beautiful and I LOVE the finish! Thank you for sharing 🙂
What are the final dimensions of this finished table? Height, length, and width?
Could a Kreg Mini work for the 1×6’s?
I think the mini would work for the 1x6s. Much cheaper than the full jig too.
Starting this project next week! I would love to know an alternative to using the Kig HD, I just bought the smaller one to help keep down on cost but I read a comment that the smaller one wouldnt work on the 4×4. Any advice would be helpful!! Thanks 🙂
can I use the Kreg mini for the 4x4s ? I have had to purchase many tools for this project anyways so if I can save a few $$ I would rather get the cheaper one.
This is the one I am referring to:
http://www.amazon.com/Kreg-MKJKIT-Mini-Jig-Kit/dp/B00065WPP2/ref=sr_1_5?ie=UTF8&qid=1423710632&sr=8-5&keywords=kreg+jig
Thanks!
Hey Jeremy,
Unfortunately you need the HD for the 4×4’s…
Ok thanks. One more question: What if I take the slide out of my K4 ? Can I just clamp that to the 4×4 and do it that way?
Thanks again.
We haven’t tried that. I would try it on some scrap pieces first! Worth a shot 🙂
Jeremy how did that turn out for you? Im in the same predicament! Those things are pricey!
Well the short answer: it’s easier to buy the other jig.
Long answer: I messed around with a scrap 4×4 block for about 30 minutes and was able to get the k4 jig block in a spot where the screw came through to an ok spot, but not to the center of the joint, which is what kreg suggests is the best placement. However, the hole wasn’t deep enough because the jig has to be so high on the wood. So after drilling the hole, I had to take the jig off and manually drill even further until I got deep enough to where I thought was good. It’s all trial and error and there’s no real exact way to know how deep is good enough. But the drill bit is surprisingly more fragile than I thought and I broke on me when I was doing manual drilling – just snapped right in half.
So after about a full hour of messing around with it and breaking my boy, I had enough and ordered the other jig. I did some test holes with the new jig and it gets the hole close to the center of the joint, but not 100% there. It looked close to what I was able to get with my trial and error method. The good thing about the jig is that it came with HD screws and a bigger drill bit to accommodate them.
If you want to try with the k4 jig, go ahead. But I would recommend getting the other jig as well. That way you’ll be able to use the HD screws (the k4 jig hole isn’t big enough for the HD screw drill bit). And you’ll save a lot of time without having to trial and error it. And you won’t curse nearly as much lol. Good luck!
I’ve been checking with Home Depot and Lowes and I have not been able to find 4x4x8′ Pine or whitewood posts. I’ve only been able to find Cedar, Fir or Pressure Treated. Would you recommend using cedar or fir for this or is there somewhere else I should look? I’m going to go to a local lumber store and check there but I have not been able to yet.
I looked in my whole area and finally found a lowe’s that had it. It was the only lowe’s in the area that even carried it. You may have to call all the stores in your area or go to an actual lumber yard.
I have called every lumber/home improvement store within 50 miles of me and no one has access to untreated 4×4 pine!
Home Depot has untreated Douglas Fir 4×4, which is superior to the red pine 4×4 commonly found pressure-treated, as it is much less likely to twist when drying. Fir is second only to yellow pine in strength among easily-available softwoods, and is a whole lot lighter and easier to work with. I’ve found the fir 4x4s to be dry and straight every time I’ve bought them, and surprisingly inexpensive too. Cedar is nice to work with and smells good, but it’s too soft for furniture unless you’re really skilled at joinery. Oh, yeah, one other thing: watch out for splinters when working with fir.
Anyone know how to attach the top to the legs? I’m actually making the fancy x table but that one didn’t specify how to attach the top the the legs either
The top attaches to the legs via pocket screws.
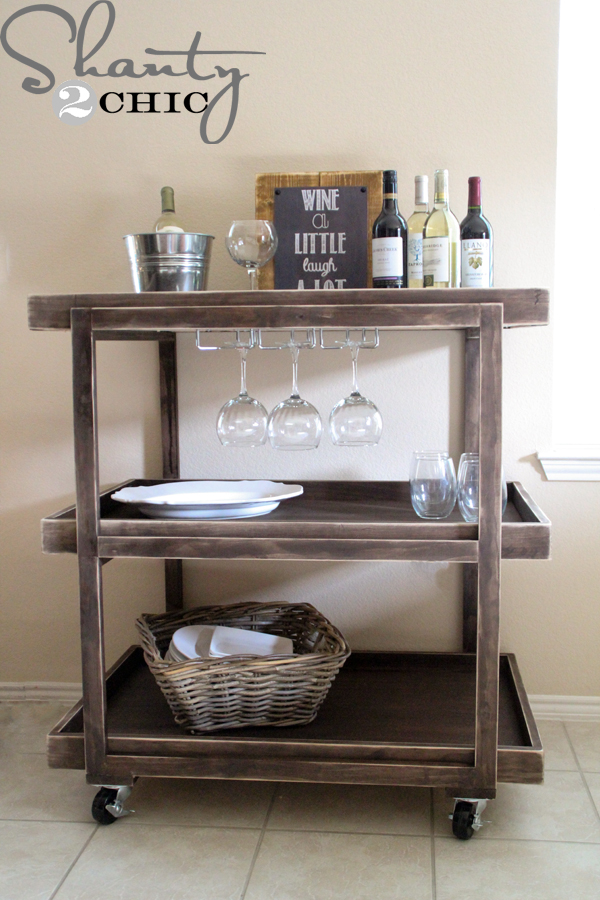
gonna have to give this a try this winter. also, i saw a matching wine rack in one of the pics…where are the plans for that?
I love this table and have been eyeing it up for some time on your site! Beautiful. I am curious to know how chairs fit in? Does it comfortably fit 2 chairs in the middle between the legs or is it tight?
Thanks! Two should fit comfortably. I have a bench in each side with chairs on the end. Bench plans are linked at the top of the post!
When i completed building the table, the table top has some flex to it in the corners when you put some weight on it which pushes the other corners up/down. how did you/can you remove the flex? i used a nail gun for practically everything.
Hi John,
I don’t have that issue with mind. I used pocket holes and glue. Maybe this is what is causing it? Did you use glue?
Love this table, had my husband build it. Here’s the problem with it though. Unless you are planning on building the benches to go with it, it’s an impractical table. With a regular chair, it is difficult to get in and out because the X-cross beams block free movement of your legs. Also, it is difficult to space regular chairs under the X-cross beams as is shown in one of the pictures below. Wish I had known this before and that someone had mentioned this issue. Do not want to have a “picnic table” sitting in our dining room, so sadly, I think this table will end up outside after my husband builds the benches. Just wanted to give an honest heads-up to anyone considering this build.
Hi there! My husband & I just built this but have not yet attached the top to the legs. I can’t seem to find in the directions how to drill the pocket holes when attaching the top– it’s very vague. Any help would be great appreciated!
I skipped the Kreg PH and simply drilled two holes from each end top piece 6 in total and used Gold 2 Inch screws. Worked like a charm
Hello, Quick question… the HD Pocket Holes in the vertical 4×4 legs, do you leave them open since Kreg doesn’t make plugs that big or do you have a tip for hiding them? Thanks
They will be pretty well hidden with the angle pieces but I also filled them with wood filler!
We just finished our table and are in love with it! Thank you for providing the plans 🙂
beautiful! nice job
I’m having trouble find the Kreg HD Screws, is there a specific size? Also, what size on the Brad nails and width on the wood screws? Newby so just wanna make sure I get the right stuff
Here are my pics. Went 8′. Noticing my top planks are pulling away from the 2×4 frame. Must not have been completely dry. Will likely need to fill in a bit with wood filler once it settles. Luckily my finish is already a bit “distressed” (not on purpose). Very happy with the results though.
How big is the final product of this table? I am looking for a table that is 3×6 and am hoping that this is the approximate size of this table?
The exact size of this table is W: 3′ 5 1/2″ x L: 7′ 3″ H: 2′ 7 1/4″. This is according to the plans. Hope this helped. 🙂
Would this table be okay painted?
Yes 🙂 just make sure to put a poly on it!
Could I use untreated Douglas Fir for the 4x4s? It’s the only untreated 4x4s I can find at HD…
the stain may not take the same. for some reason untreated pine 4x4s are really hard to find! I had to call around for a while before I found some and they weren’t in the best shape — looked decent after a good sanding with 60 grit sandpaper though
What are the dimensions of the finished table?
I don’t know why but I thought I pulled the plans from Ana’s website and it was your website… :0 haha However I wanted to say thank you for the plans and inspiration. I finally finished my table.
Thanks Robert! These are not Ana’s plans they are ours 🙂
Hi Robert! Lovely table… could you share what you did differently? The ends of the table appear to have a board going perpendicular… was this to extend the length or just a bit of a personal twist?
Hey Jarmar 🙂 Well there are a few things I did differently. Instead of using 1×6’s I used 2×6’s because I wanted my table top to be a bit more solid. Just my personal preference really. As you can see the table top is seamless, I ripped down an 1/8” on both sides of the 2×6’s so when I put them together they would be seamless and not have that rounded edge in-between each board. I did the same thing with the 2×4’s that go around the table. When it was all together I came back with a router and gave it that rounded edge all the way around. So… I have a small dining area and we needed the table 5’ not 7’ 3” which is what the plans call for. However my girlfriend said hey can we make it bigger because its smaller than I thought. :0 < “ME” Thats where I ended up adding the 2×6’s that you see running perpendicular to make it almost a foot longer. If you need help with anything let me know 🙂 Thank you Jarmar.
I Love the finish on your version also. I’ve been wanting to build this table and seeing yours I think I’m actually going to attempt it! Could you share in more detail how you modified your plans?
Beautiful
I Love the finish on your version also. I’ve been wanting to build this table and seeing yours I think I’m actually going to attempt it! Could you share in more detail how you modified your plans?
Beautiful
What I can not figure out is where the “angled braces” are screwed from or to? It is not noted in the plans and in the pictures you do not see any screws. Not sure what I am missing?
Drill from the bottom of the 2×6 part of the pedestal legs into the bottom of the table with 2″ wood screws.
maybe I should have been more specific.. here is an updated image indicating where I am not clear
Oh shoot! Sorry about that. I actually used my nailer and wood glue here but if you don’t have a nailer, you drill from the top of the angled piece into the leg at an angle (towards the ground). Then just apply wood filler to cover the screw hole. Does this help?
Thank you for the suggestions and update. Others must have figured out a way but that maybe helpful to add to the plans for others who choose to take on the project. I was just scratching my head for a bit. Thanks again!
So sorry! I’ll make a quick edit. Thank you!!
Robert,
I am going to be making this table at a length of 6′ so it should be pretty similar to yours, with the exception of the perpendicular boards on the ends.
I have 2 questions: 1) What is the length of the main 4×4 that runs between the legs on the floor?
2) What are the lengths of the 4x4s on the ends of the legs (the ones that run the same direction as the 4×4 from question 1)?
Thanks so much!
Jeremy,
Hey so the middle 4×4 is 21 3/4″ and the ends are still 14 3/4″ from the original plans. I kept it that way so when I built the benches my tables legs would be off set, so therefore I could push my benches in. Some people I guess had a problem with the benches lining exactly up with the tables legs. I always look over things before I start building, just like “measure twice cut once”. haha Good luck and if you have anymore questions, ask away!
Awesome, thanks so much; I really appreciate it!
I have finished the table and am going to start on the bench.
Seeing as our tables are the same size, my bench will have to be smaller than the plans on this site.
How long was your bench?
Thanks,
Jeremy
Hey Robert,
Where did you find 4x4s that were pine and not treated wood?
Thanks,
Eric
Hey Eric, so what I did was get two 2×4’s since true untreated 4×4 are hard to find in my area. I ripped an 1/8″ off the edges on my 2×4 to get rid of the round over and glued the two together to make a 4×4. However it’s also not a true 4×4 but it worked for me. So in the end it was a 3 1/4″X3″ (aka 4×4) haha. If you need any additional help or tips. You can reach me at [email protected]. I would be more than happy to help. Knowledge is free. Cheers. Rob
Hey Robert,
I tried zooming your picture. Did you use pocket holes
To attach the vertical 4x4sto the base?
Thanks,
Jeremy
beautiful table! I like the idea of ripping down 1/8 on the 2x6s to give it a smooth surface on top. well done!
Hello Robert,
Great Job! Really like the finish you chose. Do you remember the name of the finish?
Thank you for posting
What type poly did you use?
Shawn, I just used minwax semi gloss poly and used about 8 layers. Sanding inbetween each layer.
What stain did you use for this table Robert? It’s beautiful!
I plan on doing this table like you have it as well. it looks amazing side note, you dont have the plans for the side table behind it? do it?
Hey Robert,
Nice work here! Quick question regarding the 1/8th” rip on either side of your 2x6s. Did you find that the table wasn’t’t wide enough then? Did you compensate at all for that loss being that the plan doesn’t call for that? Doing the math the table would only be 39 1/4 wide then?
Thanks!
So I’m looking at trying this build but the only problem I see is where do you get the 4x4s all the lumber places here only sell treated 4x4s. This is in Arkansas.
I had the same problem. I live in Richmond, VA. I could have went to the mill but there was no way I was paying tons of money for something that will not affect my overall look using 2×4’s. I actually used 2×6’s, glued it together and then clamped them. The next day after it was done drying, I ripped it down using my table saw. I wanted my edges to be seamless which is why I went that route. I didn’t want to put to two 2×4’s together and have that groove in in-between. However one side was the actual width of a 4×4 and the other was 3”. I made it work though and it came out great. I posted a photo earlier if you want to see the look of it. Cheers and have fun with your new project.
Great tip, Robert!!!
Thanks for this comment Robert! I’ve been trying to figure out how I will make this work without 4x4s as they are unavailable in my area as well. I think this is what I’ll end up doing.
Can the bevel cuts on the 4×4’s be made with a 10in compound saw?
No, a 12″ is needed for that.
Thanks!
Any word on Ryobi releasing a 12″ anytime in the near future!?
Not sure about that but we use the Ridgid 12″ sliding compound miter saw for jobs like this and love them 🙂
Can use a 10″ if you flip the 4×4 to finish the cut.
Yes, you can flip to cut the 4×4 with a 10″ blade.
I live in NJ, and could only find untreated 2×4 and 4×4 in Douglas Fir. I was able to find a place to custom mill the pine into 2×4, and they glued it to make 4×4. It tripled the cost of wood for me, but it was worth it. You could glue 1x4s together if you are careful.
Why didn’t you just go with Douglas Fir? Is Douglas Fir not recommended for table applications?
Good question. I am by no means an expert, but I read that Doug Fir does not take stain as well as Pine. I considered making the top pine (1x4s), but the 2×4 border would show, and could look discolored, and I was not planning on distressing it. In hindsight, I probably would have tried it, and saved the money. I would have certainly tried it on the 4x4s as they receive the light differently anyhow. Certainly welcome others advice on using Doug Fir.
What type of nail gun do you use to build a table?
We would use the 16 gauge nailer and wood glue if you choose to build with a nailer. Hope this helps 🙂
Hello,
What were the foot pads dimensions?
Thanks!
Hey Justin,
The foot pads are the width of the 4×4 so 3.5″ x 3.5″.
Thanks, and about how thick??
1x 🙂 just use 1×4 and cut them at 3.5″
Did I read that comment correctly? It only took you one weekend? All the cuts? all the drilling pocket holes and then screws, putting it all together, all the sanding and staining? all in one weekend?? Really??? How many of you were there?
Just me:) one weekend and in between baseball games 😉
amazing!
Thank you Glynnis 😉
the costs you list – does that cover sandpaper, paint brushes etc. or is that just wood?
Just the wood 🙂
Do you have a lot of experience. I really want to make this table and the benches. I can build furniture that has directions and it is more assembly. Should I walk away?!
I’m about to start on this project this weekend, I’ve bought the wood and am ready to go! I was wondering about potentially mitering the corners of the frame around the top, similar to how you did the outdoor table on sawhorses. Since you can’t use the jig right on the corners, is your only option to just reinforce it all the way around with the top panels? Thank you so much for all you do!
I am doing it this way right now. I used pocket screws all the way around like the plans suggest. In the mitered corners I use wood glue and a nailer (2″ brad nails) to keep the joint together. Only time will tell if the joints come apart or not lol
Do the pocket holes allow for contraction and expansion of the table top?
Not really… If you need to do that, then I would assemble the table top differently. I have planked all of my tables (indoor) this way and haven’t had any issues though. Hope this helps! Also, we build with white wood boards which do not swell and warp as much as other species.
I just started this project this evening and I’m very excited! I know everyone works at their own pace but I was curious how long it took you from first cut to stain? Thanks
Awesome!!! I would say to plan on a weekend worth of work 🙂
Hi. I finished the table would like to send pic if its allowed. Thanks
Working on benches now!
Wow!!!! We love it Vanessa!!!! Thank you for sharing 🙂
Certainly going to try this. I am going to keep it at 96″, do you think I can leave the base is? I imagine it should be enough to support the longer top.
Yes Michael! I think that would be plenty! If you are concerned, you could add a few inches to the base!
are there any plans available for the light fixture above the table?
Hi Lina,
There is a link to the light fixture at the end of the post. I purchased it 🙂
So, I just finished this project. First off, thanks for the plans and pics, there’s no way I could have done this on my own. It’s looks gorgeous (if I do say so myself). The only issue is that it’s a bit tall. Mine is coming out at 32.5″, and that feels pretty high with the chairs we have. How high did yours come out?
Hi John!
Just measured and mine is 31″ high…. Wonder what you did different?
OK, thanks. I have no idea what I could have done differently. Regardless, at this point, I’m just going to remove the 3rd layer from the top of each base component. That will drop me down to 30 3/4″, which should feel much more normal, and really shouldn’t affect the aesthetic. Thanks again for all the help.
Great idea!!! Send us some pics of it 🙂
Ok, so now I’m officially done and I couldn’t be happier. I’ll try to attach some pics below. Aside from height difference which wasn’t planned, I did two other things differently. First I used poplar instead of pine. Second, I used a solid stain and didn’t attempt to distress the wood. Hope you like it! Thanks again!
PS Ignore the rest of the room, this was step one for putting together a dining room.
Way to go John!!! Love the finish on it!!!! 🙂 thanks so much for sharing!
Hi John, looks great. Mine as well came out tall, so I will also remove that top layer on the base. Just curious, what did you use for the poly topcoat? Is that semi-gloss?
So I was just attaching the 1×6’s together and the screw end popped through the top side of the wood. I thought I had all the adjustments set on the kreg jig. Could I have just tightened the screw in too much? It isn’t that noticeable so I may just still use the board.
Also, does anyone have a method for attaching the 4×4’s without using the kreg hd?
Hey Steve! That stinks!! I have done that a couple of times and I either drilled the pocket hole too deep or put my screw in at a weird angle. I would try backing off the depth a bit. Hope this helps!
Thanks I’ll try it!
but the light fixture above the table w/ the candles… did you make that?? I love it!
thank you! I purchased it from Ballard! There’s a link at the end of this post 🙂
I have a desk that is all done minus the seal…
I cannot decide between satin or matte finish!
Do you have any pros and cons to either?
And Ive never used rustoleums satin poly… is it shiny?
The minwax satin was way more shiny than Id thought it would be for “satin”
Awesome!!! We prefer matte but there isn’t a huge difference between the two. You won’t see a sheen at all on the matte…
Anyway you could give me the plans for this table but for a 6ft table? I want to build this table for my breakfast nook and 96 inches is too long for my space. Thanks!
Hey I love the design but I was wanting to use 2X12’s instead of 1X6’s on the top, do you think the legs can adequately support nearly doubling the weight?? Thanks
Hi Andrew. I would think so but I haven’t personally tried it!
Why not glue the table top along with the pocket screws? It would seem like the wood would shrink and cause cracks in between the places where the screws are over time.
You can do that if you would like 🙂
What are the finished dimensions of this table?
Hi, can you tells what kind of floors are in your house? I love them!
Thank you Brooke! I shared a link to the flooring at the end of this post 🙂
How do you clamp down the pocket hole joints in the MIDDLE of the table? The clamps don’t reach! Please help thanks
Hey josh! I work from one end to the other so I’m adding 1 board at a time and clamping that board… Make sense? Then it only has to reach the width of 1 board…
Yes, thanks so much, u gals are great
What are the finished dimnesions?
7 ft x 41.5″
Finished height?
Hi Guys, I absolutely love what you guys are doing here! I am having trouble finding untreated pine or whitewood 4x4x8 posts in my area. Did you find them at your local home depot? Thanks and cannot wait to get started on this project!
Keep searching. They are out there. Lowes and Home Depot stopped selling untreated 4X4’s for some unknown reason. Check your local lumber yards
We do find them at Home Depot but try a local lumber yard too!
Will the Kreg Jig K4 work for this project?
Yes!!
Great! What about for making the pocket holes in the 4x4s? This is the first time I’m using my Kreg Jig K4, but I don’t have the Kreg Jig HD and the measurements don’t look like they aren’t made for a 4×4. Thanks in advance!
I was wondering the same thing. I don’t have the Kreg Jig HD and was wondering I can use the regular Kreg jig or if there is a different way to join the 4×4’s.
You could use and make dowels
Could you explain how to use the K4 on the 4x4s? I can’t find anything on the kreg site that helps! Thanks!!
Hi Natalie,
The 4×4’s need the Kreg HD… The HD drills pocket holes in 2×4 and 4×4
Is there a way to do this project without the Kreg HD??
I can’t for the life of me figure out how you’ve added the angled bracing. Are the any better photos of this spot?
Hey! I used 1 1/4″ brad nails and wood glue but for those without a brad nailer, counter sinking screws is the best way!
Thanks!
Sorry, but I’m still not following where/how you attach the angled bracing. I downloaded the pdf of your plans and step 8 describes this part. I didn’t understand where you pre-drill? In your pictures above, I couldn’t see any screws to get an idea of where you start
I used my brad nailer and wood glue. We suggested wood screws for those that don’t own nailers but 1/4″ brad nails will work and may be easier. If you are going to use wood acres, just pre drill at an angle into the leg and foot where the joints touch. Hope this helps!
Hey ladies. Just curious, did you use poly on the entire table or just the top?
Hey there! I just poly the table top. It’s probably best to poly the entire thing with at least one coat 🙂 your table looks awesome!!!
I have a delimma…in step 10 where you drill the keg jog holes to attach the table top…I’m not quite sure how to do that since the layers are already assembled. I may be reading it wrong, and there weren’t any pics of that step:/. Any guidance would be great. Thanks so much for the wonderful plans!
Hi Casey! You can use your Kreg Jig as the plans show (just take the block out of the Kreg Jig and clamp it) or just drill 2″ wood screws from under the the longest layer into the table top (that’s what I did so I didn’t have to bring as many tools in the house) 😉 hope this helps!
Thanks for clearing that up. We’re so excited about this table:)
Awesome!!! Happy to help:) share pictures with us once you are done, please 🙂
Can I do this table 6’ long ? If I can do it smaller, do I have to do the legs smaller too ?
The table looks great! Thanks for the plans. The only question I had
is how did you securely attach the 45˚ leg supports to the actual leg
for the table? I’ve been trying to clamp the pieces to be able
to counter screw them together but the pieces keep slipping. Any advice
on how to keep the two pieces together?
That’s awesome to hear! I actually just used wood glue and nailed them with my Airstrike. It’s not as secure but once the glue dries it’s fine!
The table came out great! Curious did you use pocket holes to attach the trim?
I did! Thank you!
Simply gorgeous!!
Thanks Erin 🙂
Would the legs support this if we made the top 6’x6′? you are so talented!!
Thank you Lindsay! They should work fine! I would adjust the width though to accommodate the added width of the table top 🙂
Can you make this a 6 foot table? Would anything besides the top need modification??
Just adjust the table top and stretcher 🙂
Love the table and the cart and………. Yep going to give one of these projects a try !
Lol! Thank you Janny!!
I love how intricate these legs look, even though the build doesn’t look too complicated. I am planning to build a dining table this spring and have been admiring all your plans for a while now. Since we have 8 people in our family, and often have company, I’d like to seat about 10 at our table. Which do you think would be the best plan to make a really big table? Which leg formation is most comfortable for those sitting on the ends?
Hi Lynn! You could have 10 here with seats
At the ends. I have a parsons chair at each end and it’s great 🙂
Your table is fabulous. I love, love, love it. Wow, I am impressed.
Thank you so much!
Ashley, what did you use after you stained the table for water spills?
Thanks for the info, I don’t know if I missed it the first time around looking at your tutorial.
Lovely table btw!
Just added it! Sorry for the confusion:) thank you!
So sorry! I forgot to add that to the post 🙂
Gorgeous piece. You sure do have a lot of tables… are those all in your own house?
Thank you Lori! We both have one outside and inside and we give sell our old ones when it’s time to update 🙂
Love it! So you guys are making all your own plans now? I am always amazed to see how everything comes together – I could never do the math involved!
Thank you Cassie:)
does anyone have the plans/dimensions for this table as a 6 vs 8 person table? Our neighbors love our table and want the same but need it slightly smaller