Happy Friday guys! To keep up with all of our DIY projects, be sure to follow us on Instagram and Pinterest!
Like many of you, my kids are off of school this week for Spring Break. I am loving the break from the routine of lunches, carpool and waking up at the crack of dawn, but my building has taken a bit of a backseat this week. I decided to tackle a little project I could get done in no time with the 5 kiddos home. Here is how my new Spring wreath turned out!

How fun is that?
This is a seriously simple and inexpensive craft… Sometimes that’s the kind we need, right??
I bought everything for this project at Michael’s and spent about $15. I started with the wreath. I found this in the floral section, and this is what I used my coupon on. Michael’s always has a coupon online if you search it.
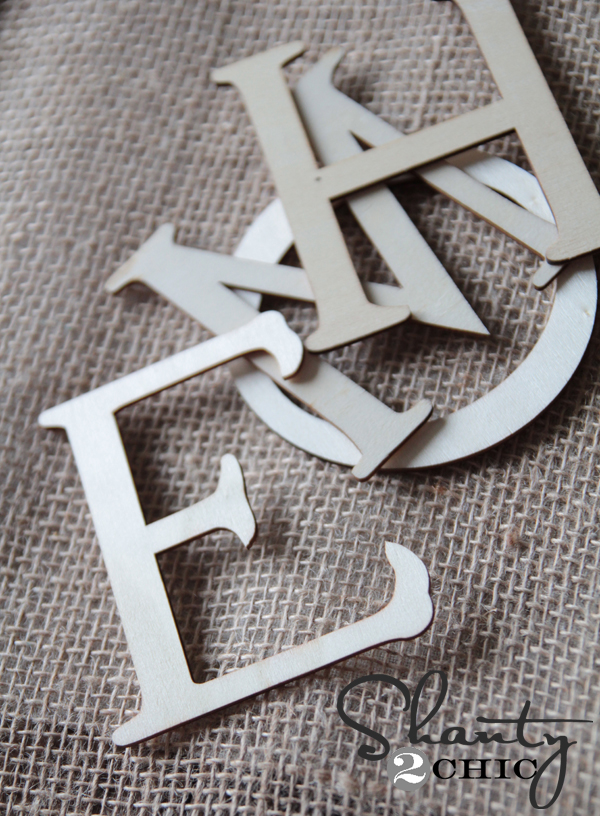
Next, I found these letters in the Spring craft section. I LOVE them. The edges looked burned, and I think the font is so perfect. They had tons of other shapes and cute designs too, and they were super cheap.
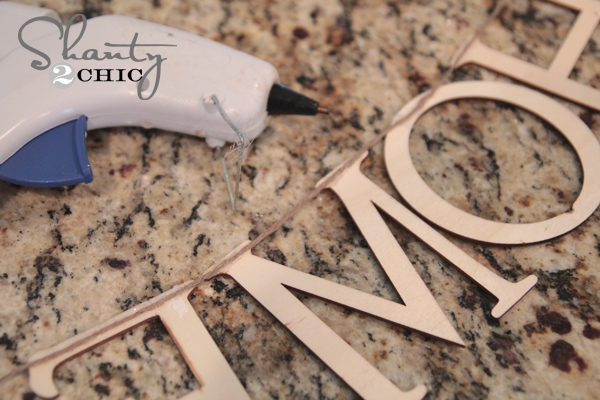
All I did was hot glue a piece of twine to the back of my letters…
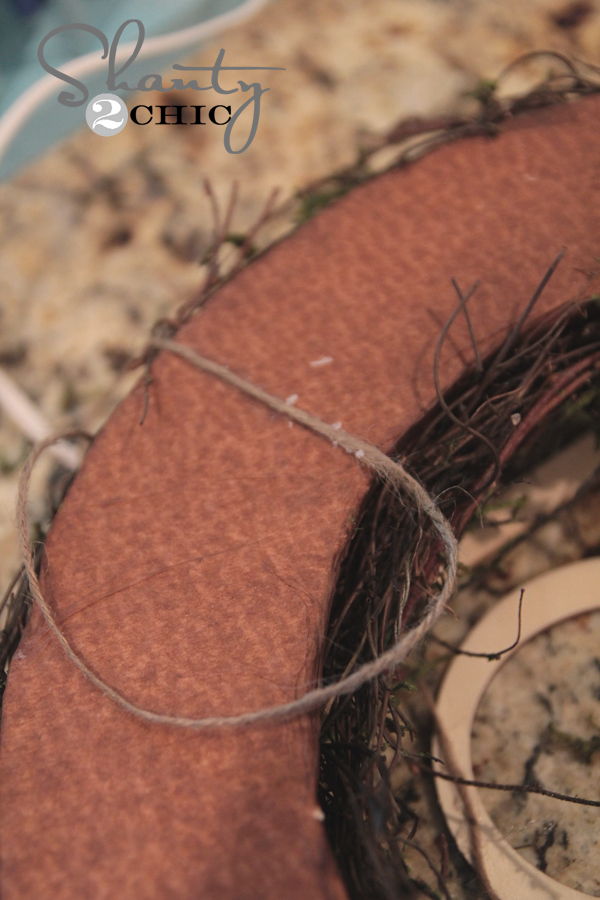
Then, I glued the twine to the back of the wreath!
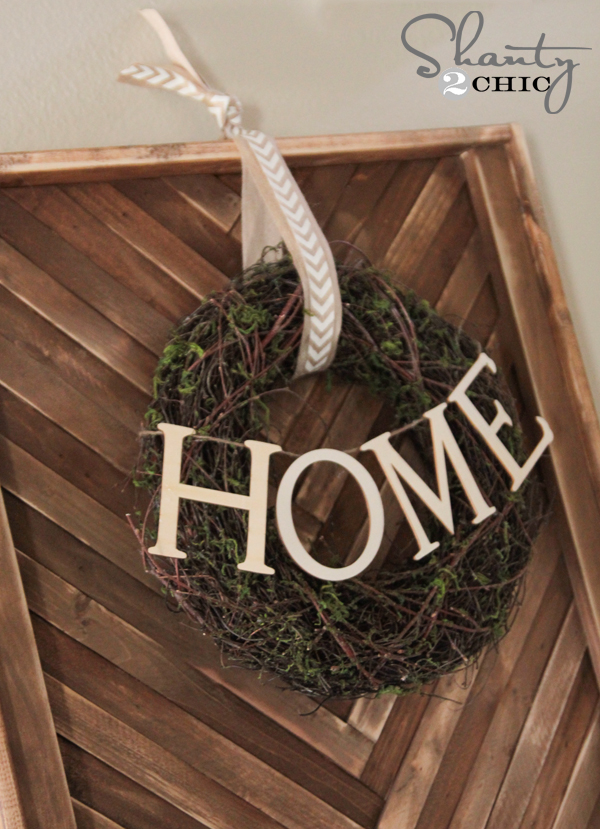
I found this ribbon in the ribbon section… Love it too!
![]()
I loved the printed one, but wanted to thicken it up again, so I layered the two to hang it.
Told you it was simple… We are done! 😉
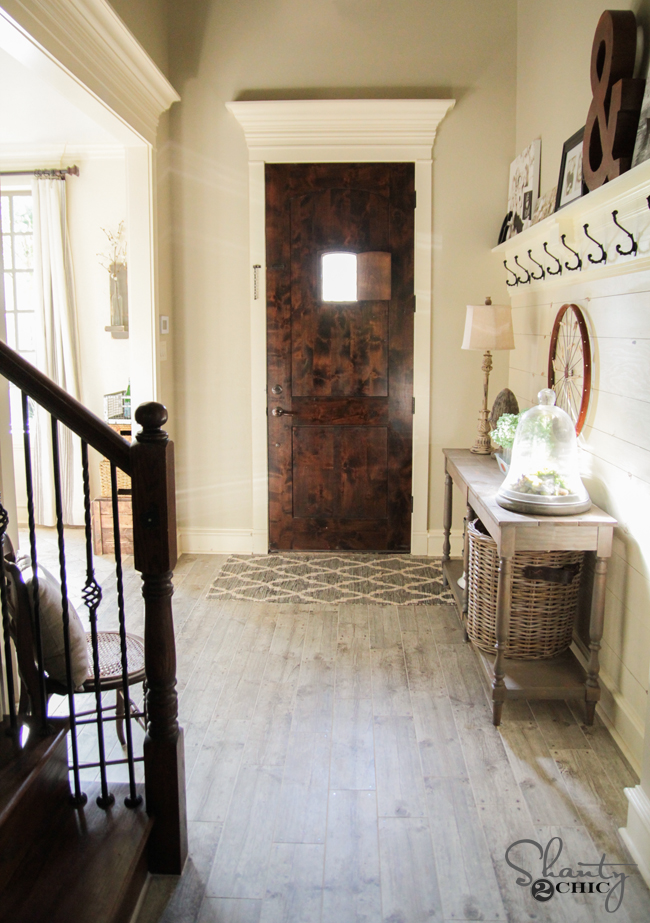
Mine is hanging from my wood shim wall art!
I just add a small finish nail to the top of the piece, and tie a knot in the ribbon. Then, just hang the knot from the nail. Pretty. Darn. Easy.
Here are a few more shots!


⭐?⭐?⭐?⭐?⭐?⭐?
I built my own using the plans at www. WoodworkPlans.info – highly recommended you check those out too. They are detailed and super easy to read and understand unlike several others I found online. The amount of plans there is mind-boggling… there’s like 16,000 plans or something like that for tons of different projects. Definitely enough to keep me busy with projects for many more years to come haha
Head on over to www. WoodworkPlans.info if you want to learn more – click the pink link above for some more plans! Best of luck on your building adventures!
⭐?⭐?⭐?⭐?⭐?⭐?
I love it! Not sure how you did this for $15 since the wreath alone was $17 WITH the 40% off coupon, but I bought it anyway, cuz I loved it 😉
A great spring project- very pretty!
Really love this one!!!
I am really into simple and this is fabulous. Love it. Hugs, Marty
Love it!
Simple,yet classy and spring like. And you could even add to it for different season/ holidays. Love the wood shim behind it and chevron ribbon. Hmm may have to visit Michaels now.
Thanks for sharing.:)
A nice wreath for 15.00. Good deal and quick!
This is sooo cute!
Spring is in the air! and the Internet…cute idea.
How cute is that! I love it. Spring is coming, I see and feel it. Love your blog! 🙂