Hey friends!
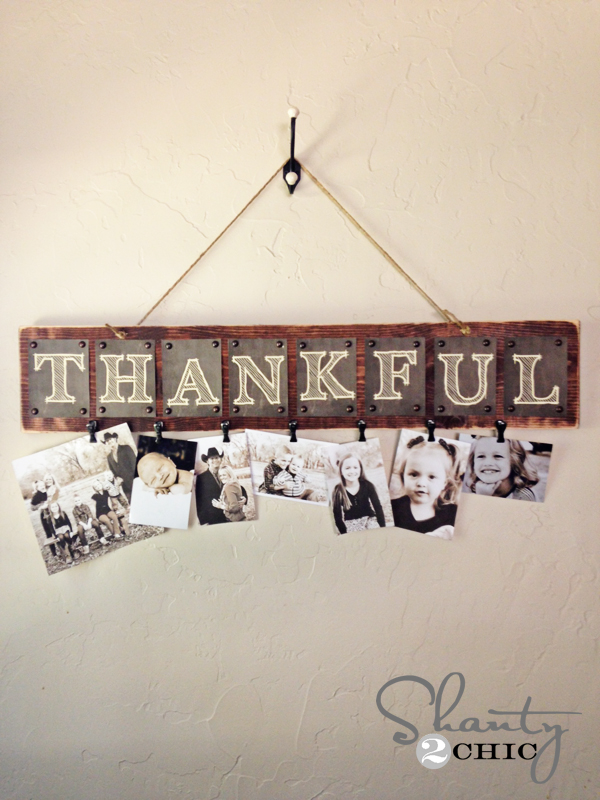
Hope you all had an awesome weekend! You don’t have to stick around here long to know my love for photos. To me, photos make the best decorations and gifts. I have a blank wall I have been looking to fill in my hallway, so I got busy making a board to display some photos! Here is how it turned out…
So fun!
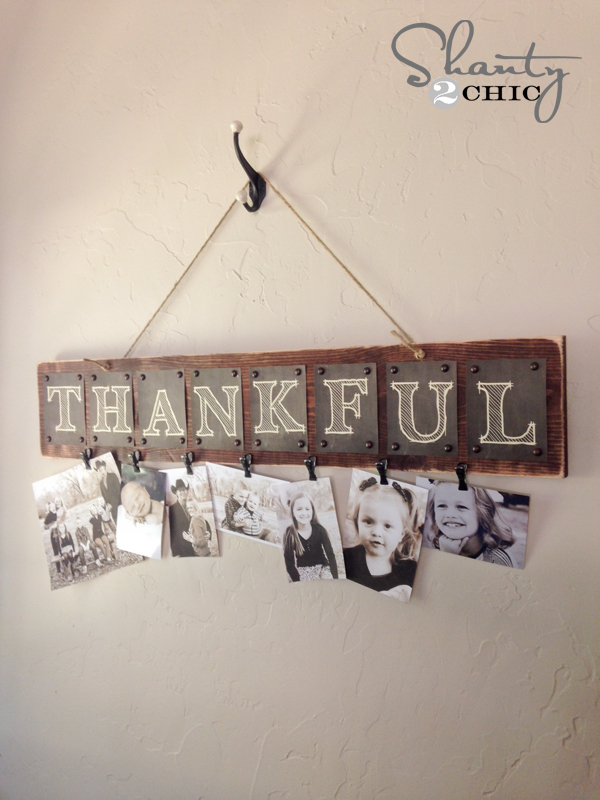
I am so thankful for my crazy family. I decided the word ‘thankful’ would be perfect for this board. My baby girl is in the middle of potty training right now… So, this can also serve as a reminder that I AM thankful for these times 😉
I have done all the hard work for you! I made all of the letters into free printables for you to print at home. You just click on each of the links below to take you to the printables. A new browser window will pop up and you can just click print from your browser bar. I printed mine on cream thin cardstock. White works great too. You can even do photo paper if you are feeling really fancy.
CLICK HERE to print letters T-N
CLICK HERE to print letters K-L
While those were printing, I started on my wood board.
I used a 1×8′ pine board from the hardware store. You can get a 6′ piece for $7 and cut it in half for 2 of these boards. CHEAP!
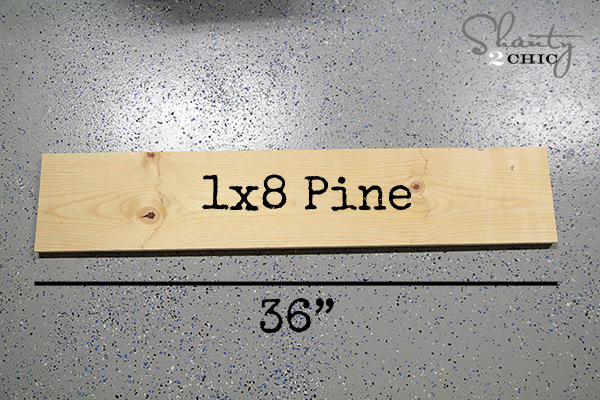
The hardware store will also cut these for you if you need them to. A simple hand saw will do the trick easy too!
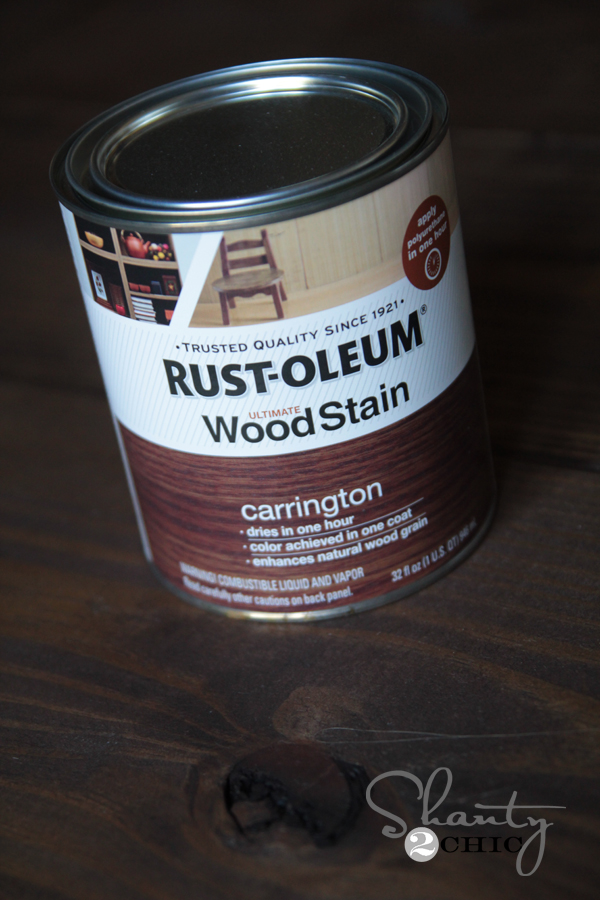
I stained the entire board with my new VERY FAVORITE stain color from Rust-Oleum. You should get used to seeing this stain, because I will be putting it on LOTS. Love it.
Rust-Oleum Carrington Stain
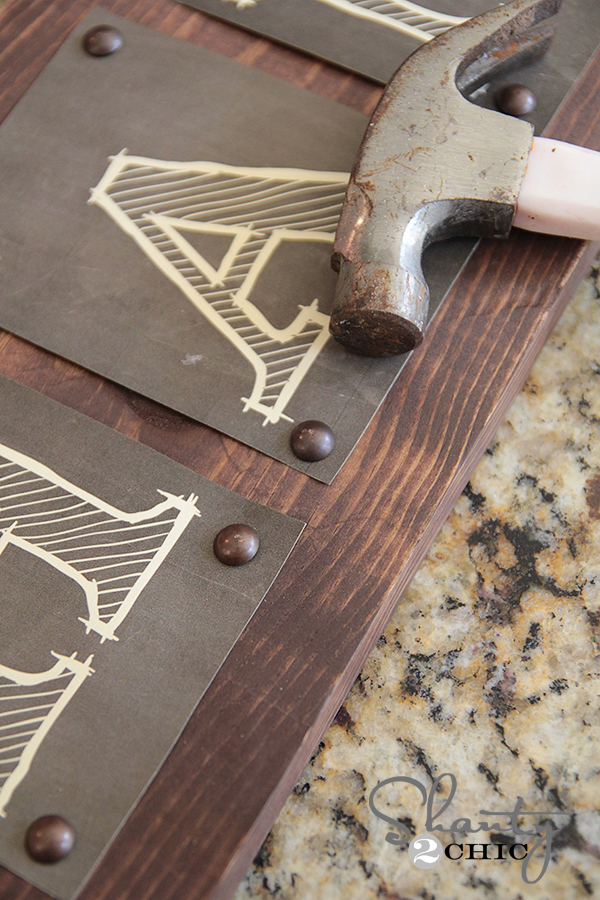
While that was drying, I cut my letters out.

After the board dried, I used bronze nail heads like these to attach the letters to the board. You can find these at the hardware store as well. I push them into the wood a bit with my hand, and use a hammer to tap the rest in.
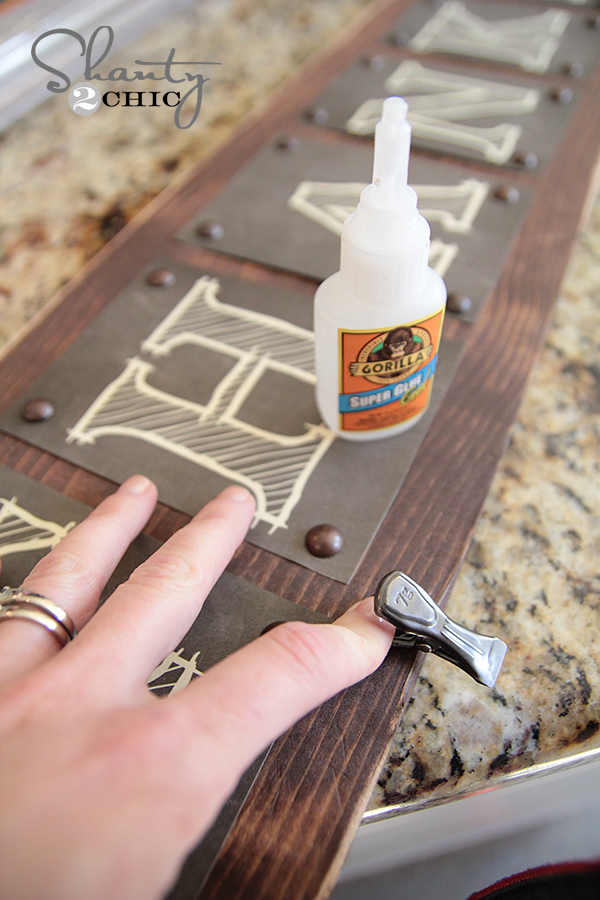
Now for the clips! I found these cuties at Michael’s.

They come with red rubber on each end, which is super cute but didn’t go with my stuff so I peeled it off of each one. Then, I used Gorilla Glue Super Glue Gel to attach each clip. You only need a small drop. And, hold the clip in place for about 30 seconds to allow it to hold.
Finally, I drilled two holes above the H and U and used thick twine from Hobby Lobby to run a knot through the front of each hole to hold it up. I used a hook on the wall to hang it from, put some pics of my cuties on it and I was done.
Simple project. Under $10.
These also make a great gift for family and friends without breaking the bank!
Here are a few more shots!
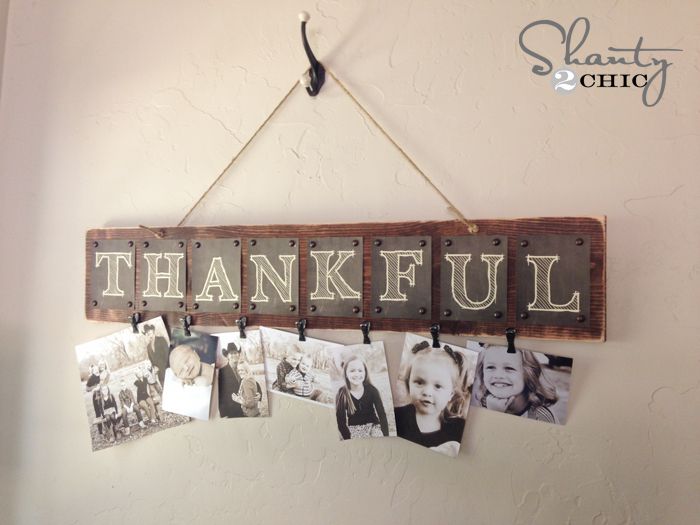
I hope you like it!
Let me know if you have any questions at all! Thanks so much for stopping by.
I would LOVE for you to share this board and pin it with your peeps!
Also stay tuned… We have a really fun announcement to make on Wednesday! Can’t wait to share it with you guys! 🙂
~Whitney


How did you transer and print out the fonts with black backround and white font color?
How do you get the black background once you download the font?
Everyone loved it!