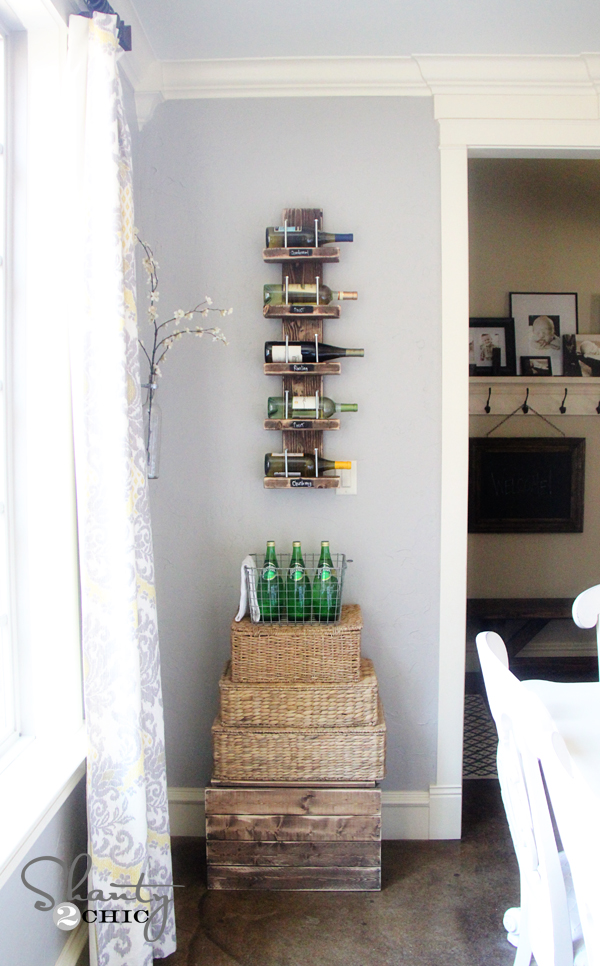
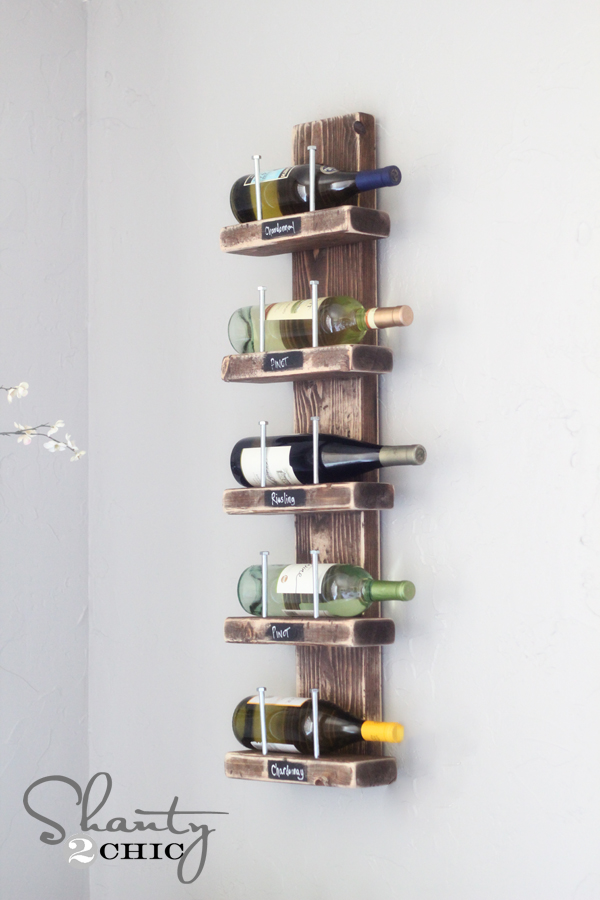
Hey guys! We love a quick and cheap project and this Wine Rack – DIY might be a Shanty Fave!

Today we will be showing you all how to make this simple rustic chic wine rack for under $15. Can’t beat that!
Here are the supplies you will need for this project…
1 – 2×6 cut at 38″
5 – 2×4 cut at 10″
10 – 5/16 x 4 1/2″ hex bolts (we found ours on the hardware aisle for $.38 a piece)
10 – 2 1/2″ wood screws
wood glue
finishing supplies
Now let’s get started!
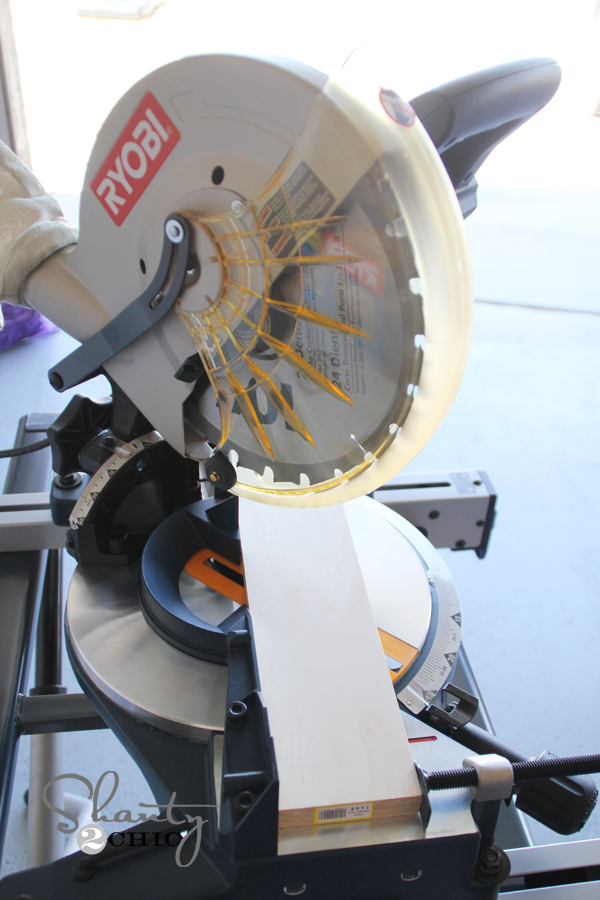
We used our miter saw to make all the cuts. This saw makes it simple and quick! We had them done in no time!
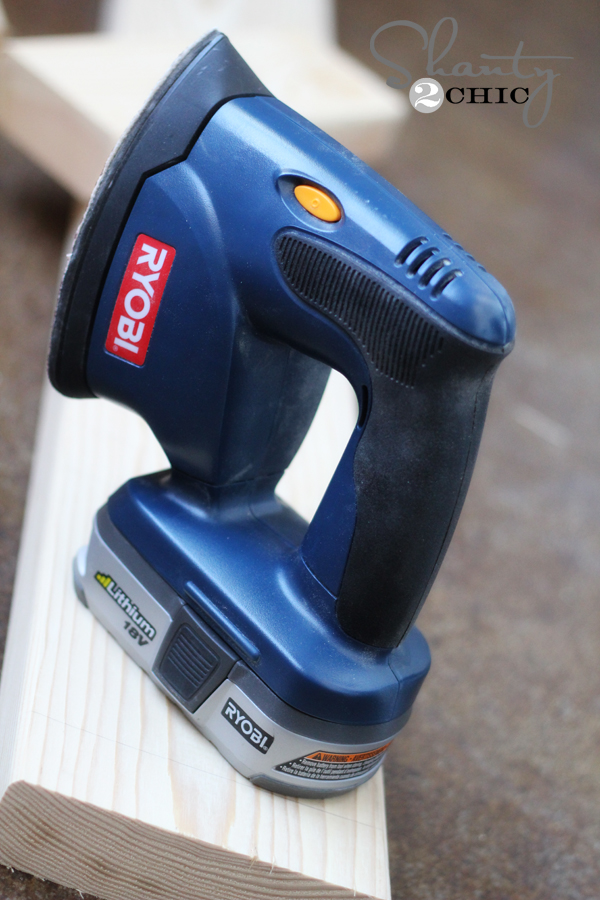
Before attaching all of our pieces, we like to sand all of our corners and edges down a bit with my corner cat sander. We love the look it gives the finished piece! We use it all the time and it’s perfect for this job.
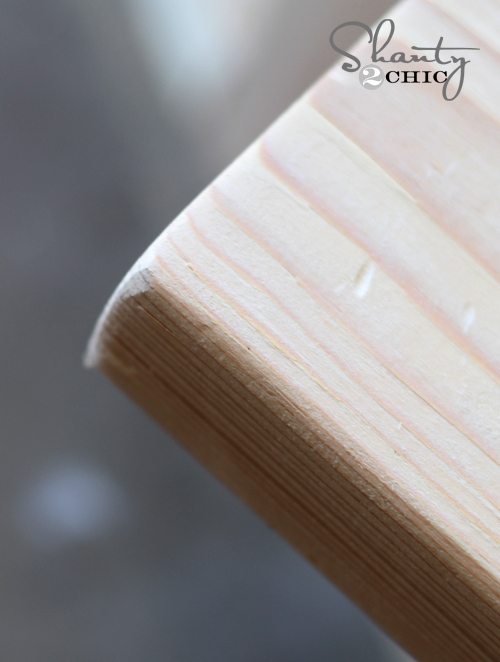
This is what the edges look like after we finished sanding.
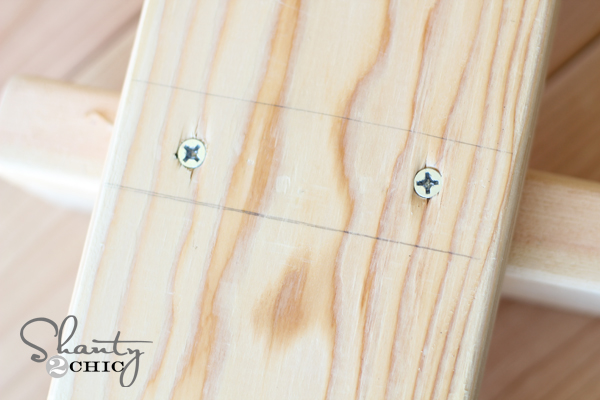
We started by marking our 2×6 board. Then we lined up our 2×4 piece every 6″ and marked lines on the bottom and top of the 2×4. We did this to both sides of the 2×6 board.

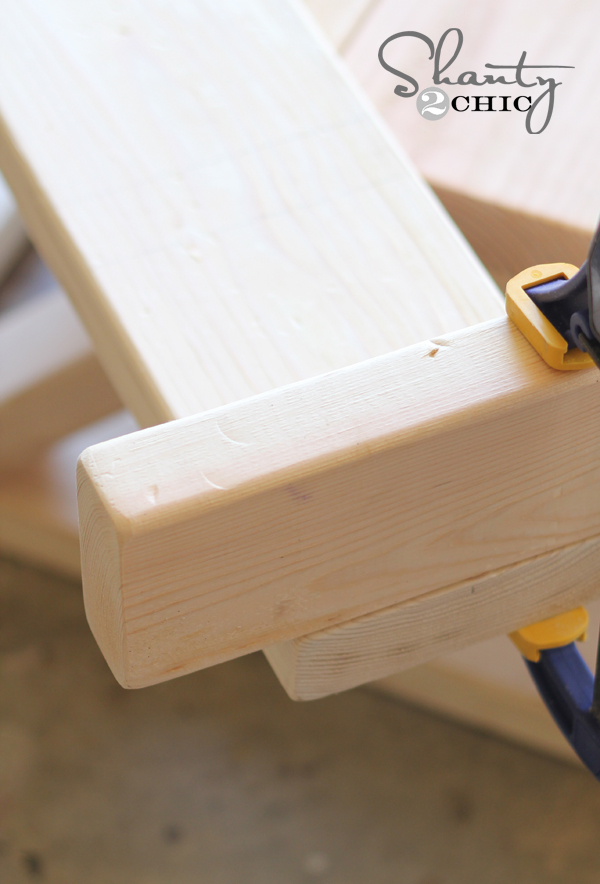
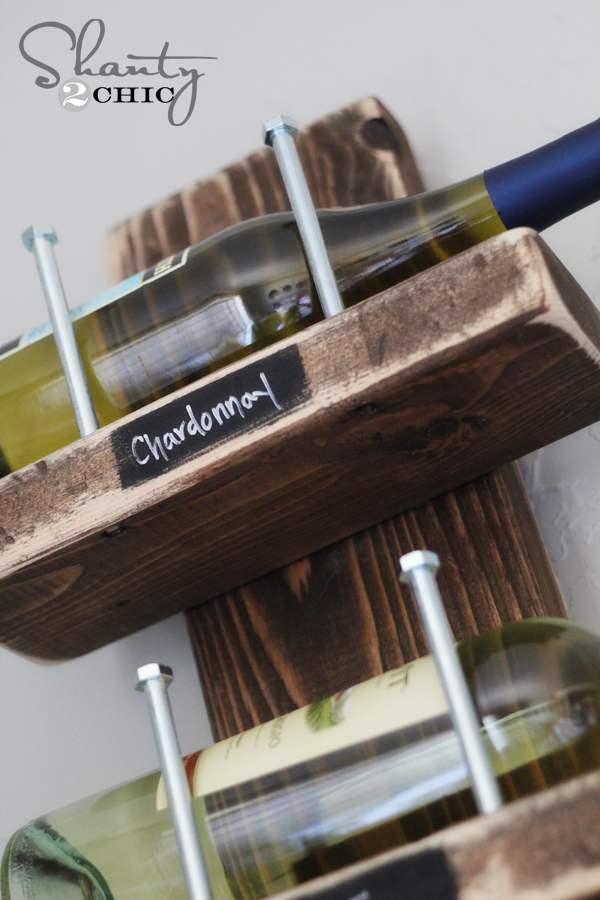
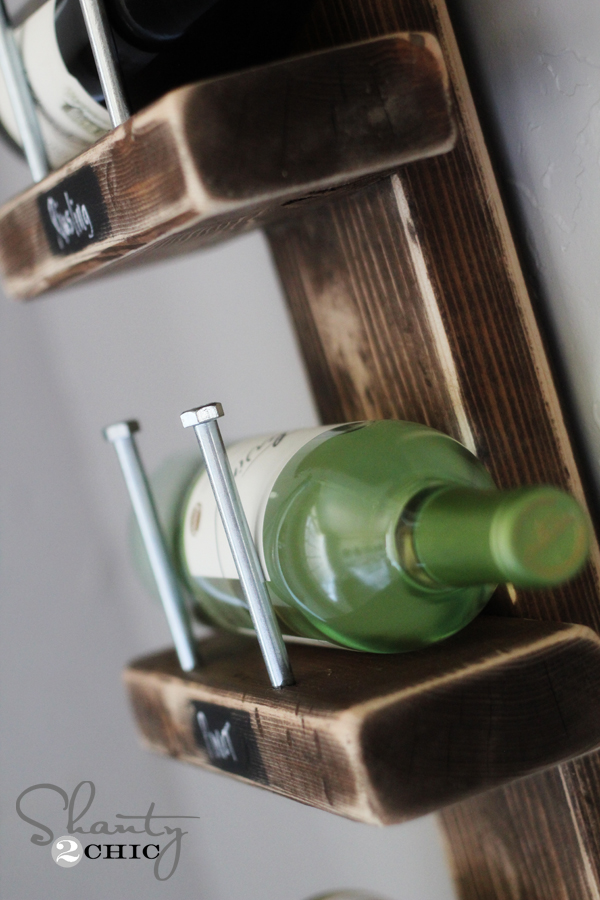
Before attaching our 2×4’s to our 2×6, we put 2 holes in the top and front of each 10″ piece. You want them really close to the front. Ours are about 1/4″ from the edge.
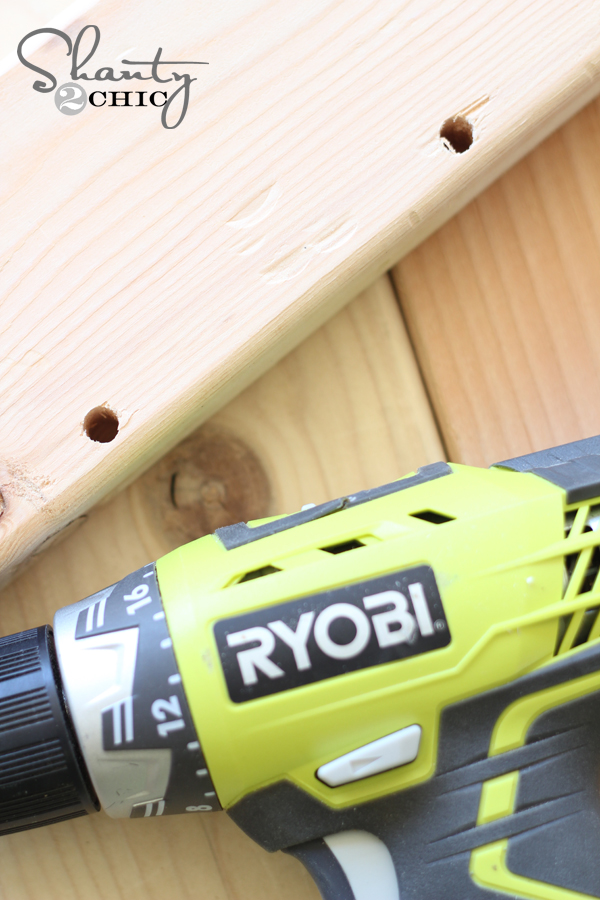
We used our cordless drill for this part! This is hands down our favorite drill we have ever used! It has so many cool features that set it apart from others, and it’s lightweight.
Next, we added a line of Gorilla wood glue onto our 2×4 pieces and clamped them to the 2×6 where we made our marks. Easy!
We used our drill to pre-drill 2 small holes where each 2×4 piece would sit.
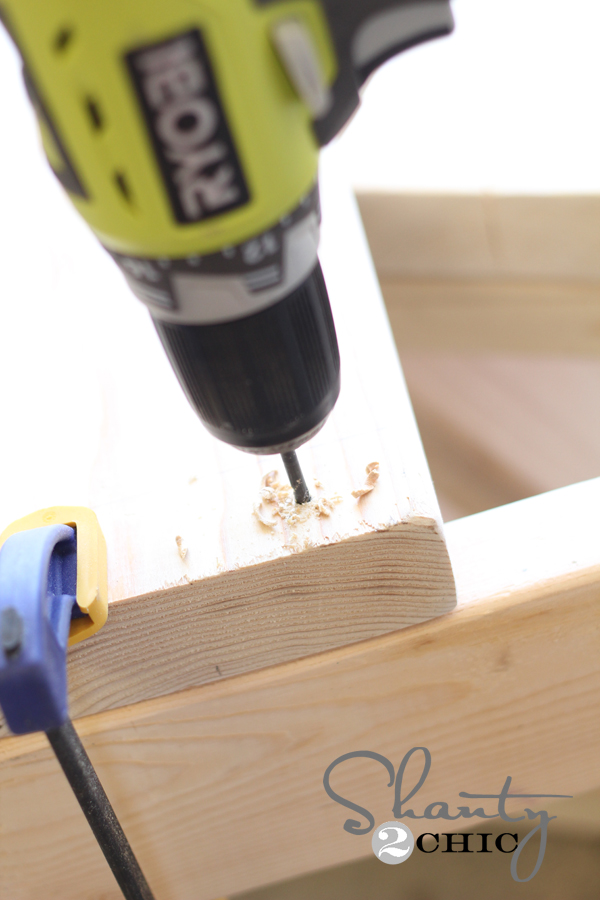
Now we used our drill to insert our wood screws through those holes. This is what the back of the 2×6 looks like where each 2×4 sits.
After we had all of our boards attached, we gave the whole piece a coat of our favorite…
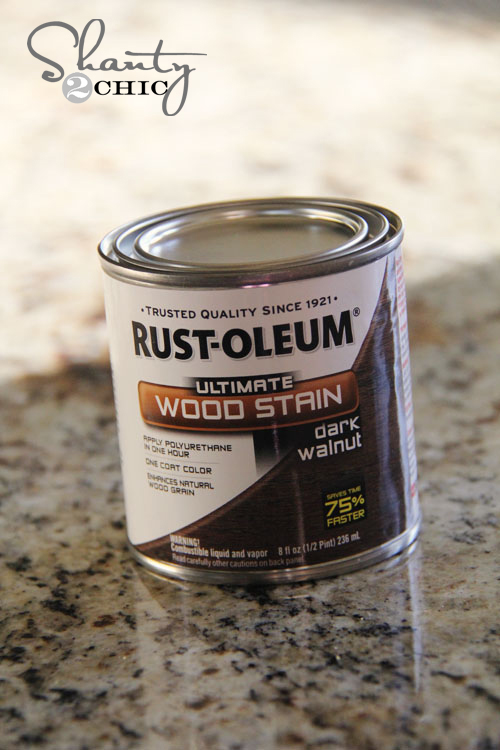
We use Dark Walnut Stain.
After it dried we went back over the edges and corners again with our Corner Cat to give it a worn finish. Love it!
We decided to ‘shanty’ it up a bit by adding a small label on the front of each board using chalkboard spray paint. We just taped the area off with blue tape and spray painted the chalkboard paint on. Totally optional!
Our final step was adding our hex screws. Just insert 1 into each of the holes and you are set!
Make sure to use anchors on the wall if you can’t attach yours to a stud.
Here is ours all finished up!
Hope you love this wine rack as much as we do! Ash and I had so much fun working on this one together!
Thanks so much for stopping by! We hope you guys have an awesome weekend! Make sure to share your Shanty inspired creations with us over on our Facebook page! We love seeing and sharing them!


this is great my dad owns a pub and this will be perfect as we have a lot of wine drinkers ????
I have Some Concept Problem But After Reading Your Post My concept Got Crystal Clear. Thanks For Sharing The post”Love What You Do And Do What You Love! ” .. It was full of note worthy . I like reading Post On your website because it goes Excellence And With a charismatic.
This is really nice post. This post has really impress me through its quality writing. In this article i watch some new writing style which is really nice. So thanks for sharing such a awesome post.
Looks very nice…do you have plans without all of the pictures? I know what my Ryobi tools look like 🙂
Finished this a couple weeks ago… Wanted to fill it up with wine
before I posted a pic. I made one for a friend also. Thanks for the
plans!
One of my favorite projects! Thanks for the idea!!
Would the Kreg tool work for this as well?
The Kreg pocket hole joinery method is not a great choice for this, even though you could do it. Screwing from the back is easier and, IMHO, gives the stronger joint because the screw will penetrate the 2×4 shelf further than you can penetrate the 2×6 with a pocket hole screw. The pocket hole method in this situation offers no benefit while taking a lot more time to execute (compared to the very simple “drill and screw” from the backside). Save it for when it is the better and/or the easier of the available options. That’s my 2-cents.
Nice easy project. I did it all with one 2x6x8′. I ripped the 10″ pieces to 4″ to accommodate wider bottles.
Snow day #2 project! Thanks girls for all these great projects!
Just finished mine today. I had the same issue as some other people in that when I put the bolts in 1/4 inch from the corner with 5/16 bolts, its too tight. So I ended up getting some large nails (5 inch ones) that are probably closer to 1/4 inch and using those instead. It actually works pretty well because the nails move in the hole I created a little, but are deep enough they will never come out, so the move forward for larger bottles.
I just made my wine rack and am hanging it using a french cleat.