Hey guys!
I wanted to show you guys the next step in my dining room overhaul. I spent the last few days revamping the dining room furniture. Here is how I did my table…
You guys remember the before??

The top of the table was stained wood but it had a red cast to it that I was a bit “over”. And, I was ready to brighten her legs up too!

I did lightly sand the top of the table. There are a few scratches on it and I thought better safe than sorry!
I used a 120 grit sandpaper to lightly go over the top. I sanded just a bit harder over my scratches.

During this process I also found some lovelies that my sweet kids left for me….

I found this primer back when I was repainting my laundry room cabinets and fell in LOVE. It has never let me down and seems to stick to just about anything. I only used one coat on the top of the table. I decided to not put any on the legs because they were already painted.

Primed and ready…

I applied both my primer and paint using the same roller. I swear by these things, and I promise once you use them you will not go back. They are Whizz Roller Systems.

I get mine at Lowe’s and they come with a small 4″ roller. Love them.
The paint color I went with is a Dutch Boy color called Clam Island. I didn’t love the name of the color but it matched my spray paint perfect 😉 I will get to that in my next post! I put on 2 coats of paint to both the table top and legs. I did have to use a brush on the legs.

Now I was ready to distress. I went back and forth over this. I wasn’t sure I wanted it distressed but finally decided to lightly go for it. I figured that with 5 kids running around the table may get scratched a time or two. The distressing will just make it all blend, right??
I used a 120 grit sanding block to lightly sand the edges and the details on the legs.

Finally I put two coats of Polycrylic on the top. I love the durability of this stuff! I use it on all my painted furniture. I like that it is water based so it doesn’t stink too bad and you can work inside. I also like that it doesn’t yellow like polyurethane.

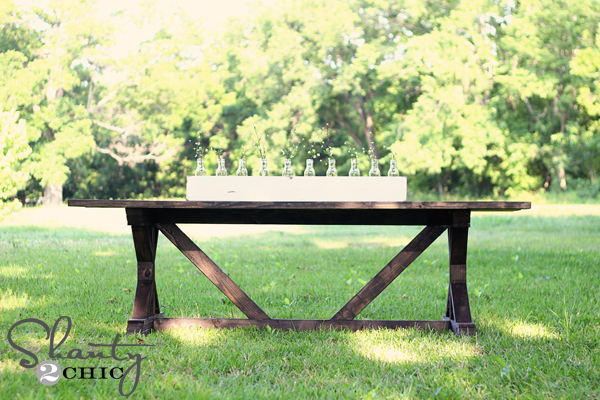
That was it! I was done… With the table. The chairs were a different story, and I will share that later. For now… Here are the results. I still have stuff to add to the walls and a few other things. It’s getting there though!


Thanks for stopping by guys! Let me know if you have any questions!
Here are a few of my other dining room revamp posts!


wow! it is just beautiful! you did a great job!
I love it! You just seem to sand things perfectly! I am so loving that accent under your window too! Gorgeous!
Gorgeous! Love those curtains as well:)
Your dining room table looks fantastic. Very frenchee!
hugs
Sissie
Awesome table. Love the idea. I hope to find a table this nice for my new craft room being built now.
The power of paint. Never fails. Great job.
looks fabulous! LOVE the new chair fabric and especially LOVE the curtains!!!
It’s beautiful!
LOVE the fabric on your chairs… You didn’t mention them, did you redo them or did they come with that fabric! Looks so beautiful!
Beautifully done! What a great project! It looks great. The end result is amazing, so bright and pretty.
Love the table, love the curtains, and love the molding under your window!!!! I think I need your dining room in MY HOUSE! 🙂
I’m loving the change.
It’s absolutely fabulously gorgeous!!!
Jo-Anna
NIIIICE!! I’m hoping to do mine in black. Hope it turns out as nice as yours did!
beautifully done!!!