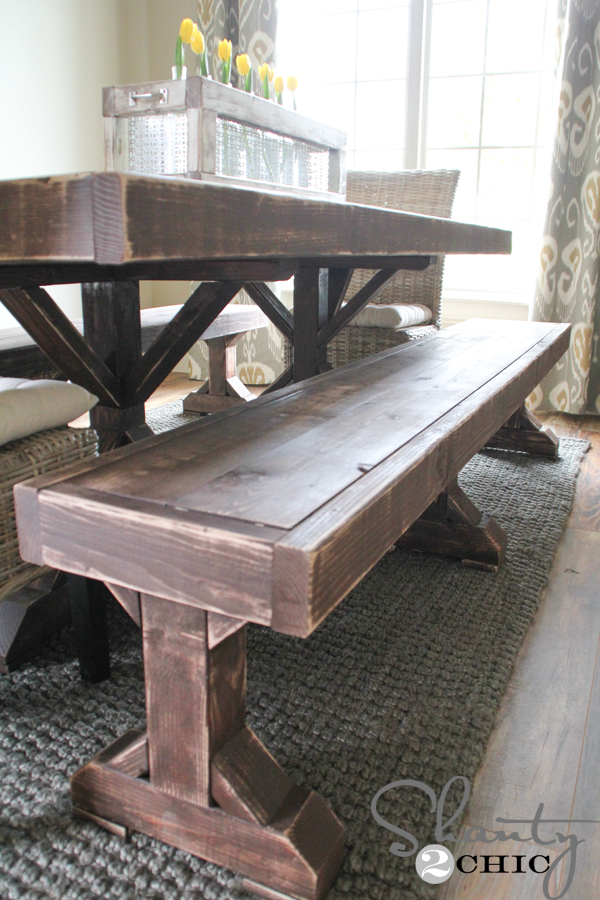
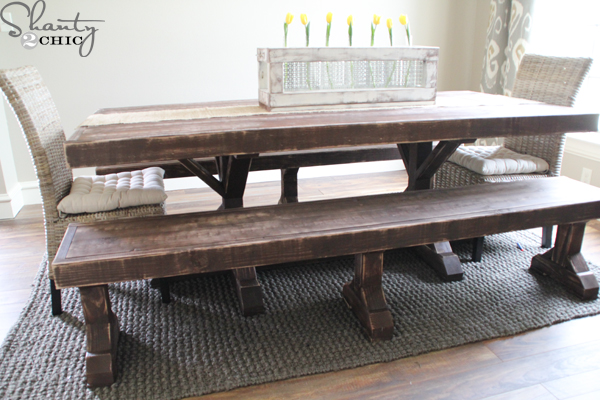
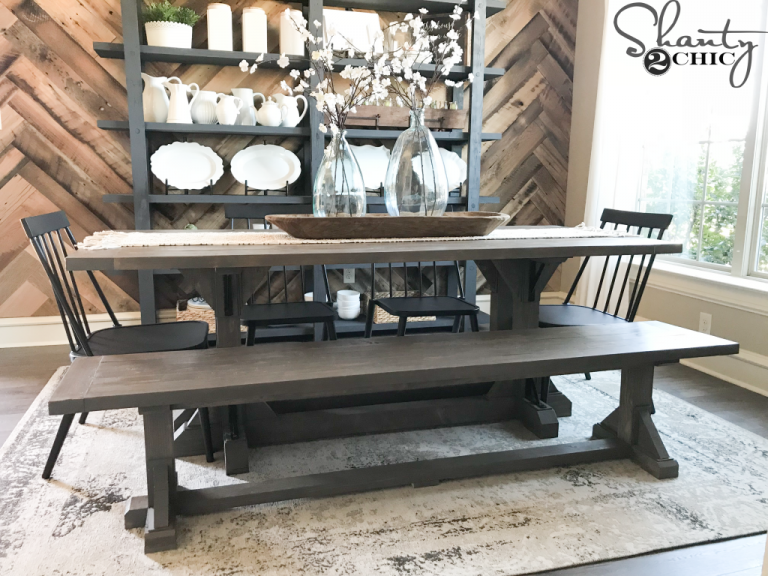
Hey guys!! I’m back to share the new DIY benches that I built for my new dining table!
 If you missed the Restoration Hardware Dining Table that I built for $110 you can see that HERE!
The benches are just a small piece of the massive amount of furniture that I’m building for our new home but each room is starting to fill up 🙂 They are very easy and I was able to build 2 for about $70 making my entire dining set about $180!!
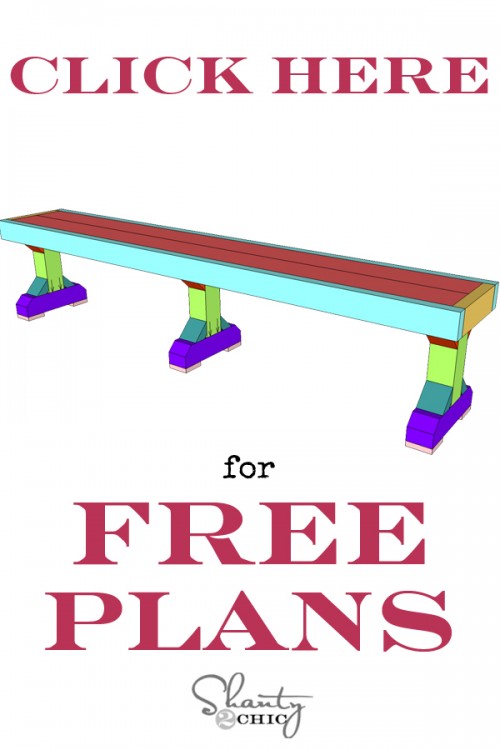
As always, we have the FREE Printable Plans available for you HERE or you can click the image below 🙂
 And, of course, I’m sharing my how-to steps to help!
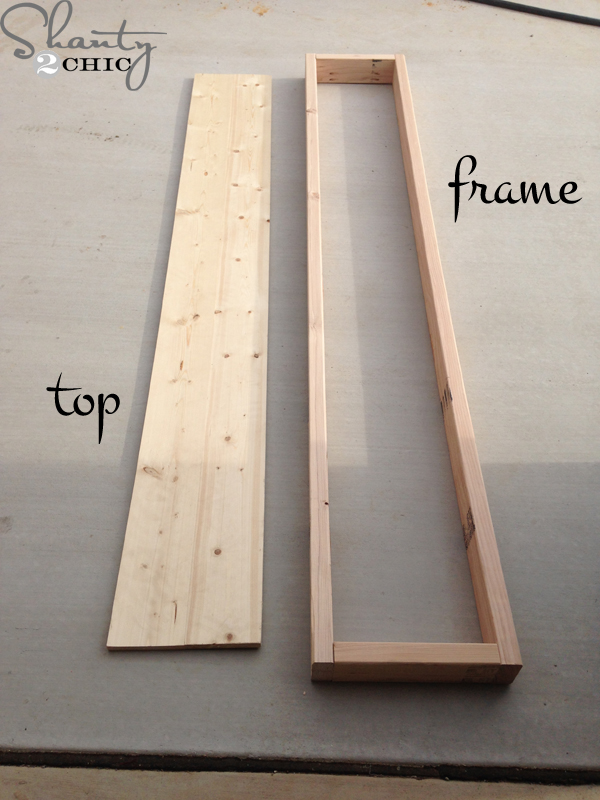 I started making the top of the benches first. This part is very easy!
 Bench tops – done 🙂 Now time for the legs.
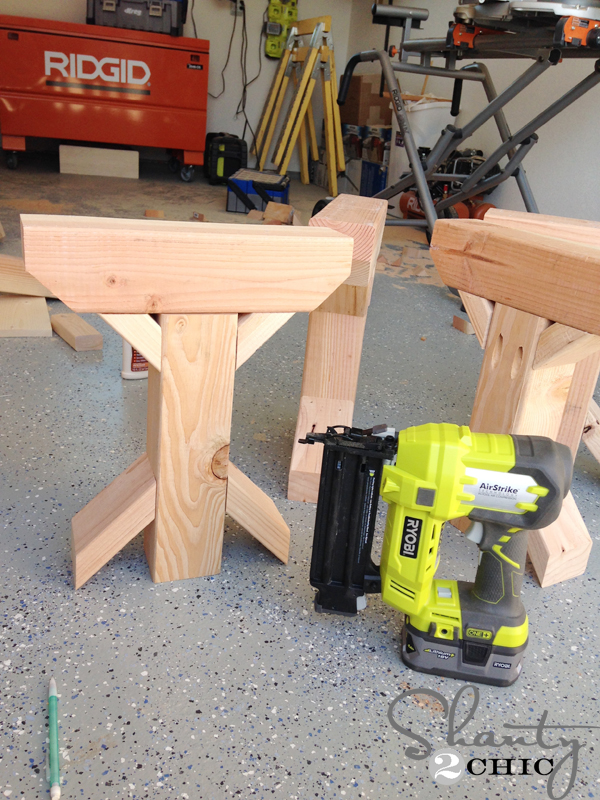
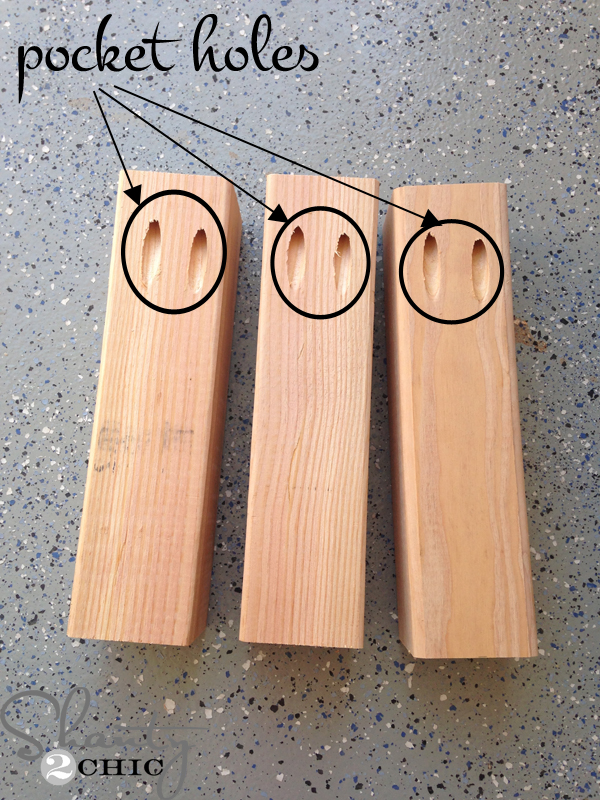 I cut the legs and drilled pocket holes in to them.
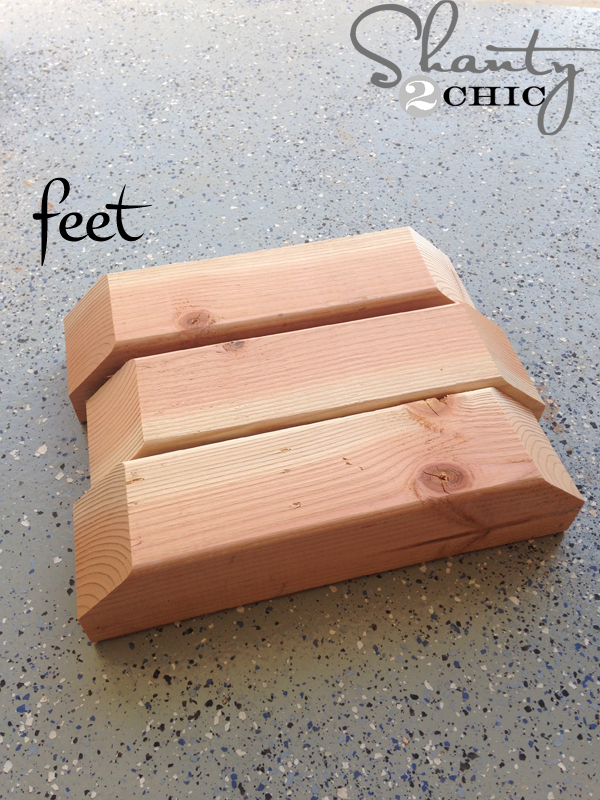 Then, I cut the feet. Don’t let the angles scare you. If you haven’t cut angles, these are easy 🙂 You just cut a 45 degree angle on half of each end.
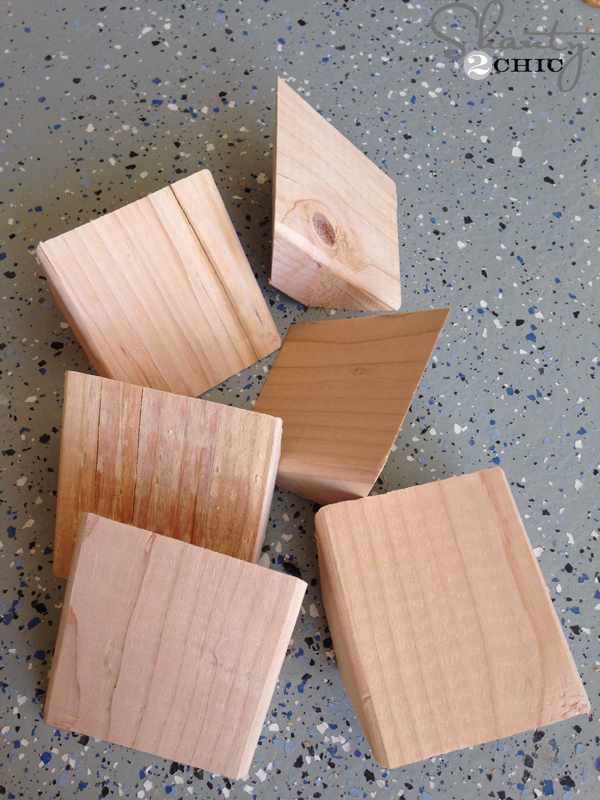
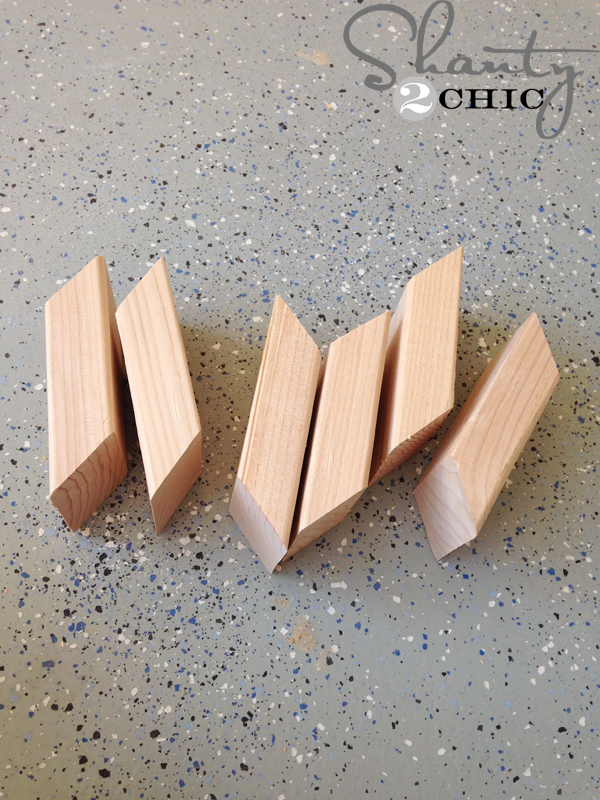 Here are all of my little angle pieces that give the benches so much character!
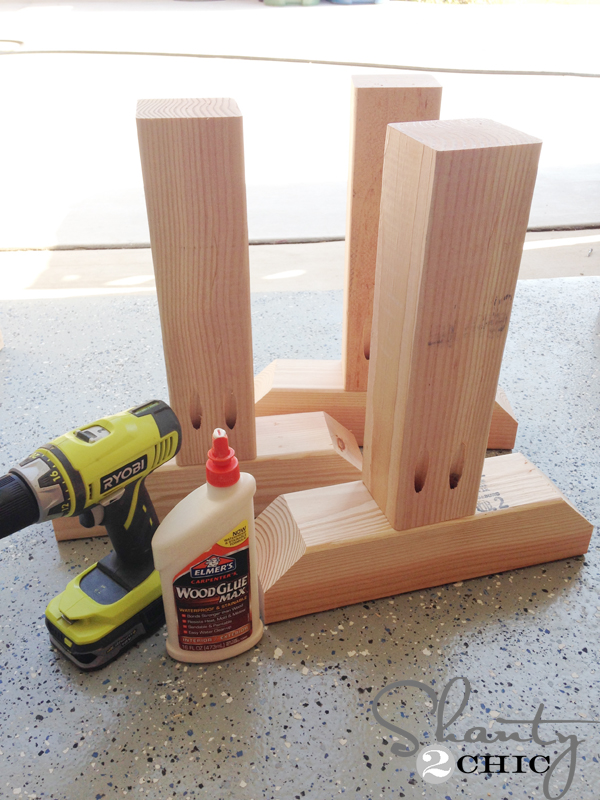 I attached the legs to the feet with wood glue and Kreg pocket screws.
 I attached the small angle pieces first with wood glue and my brad nailer. If you don’t have a nailer, you can use finishing nails or drill pilot holes for wood screws.
 Then, I flipped them upside down and attached the longer angle pieces the same way
 And added the foot pads with wood glue and my nailer.
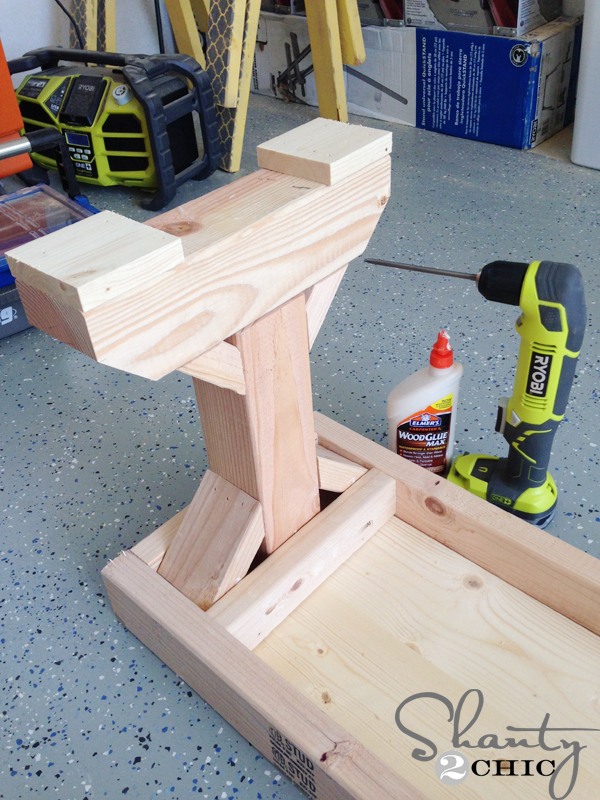 After all of the legs were assembled, I attached them to the bottom of the bench tops with wood glue and pocket hole screws. I used my right angle drill to attach the braces to the frame.
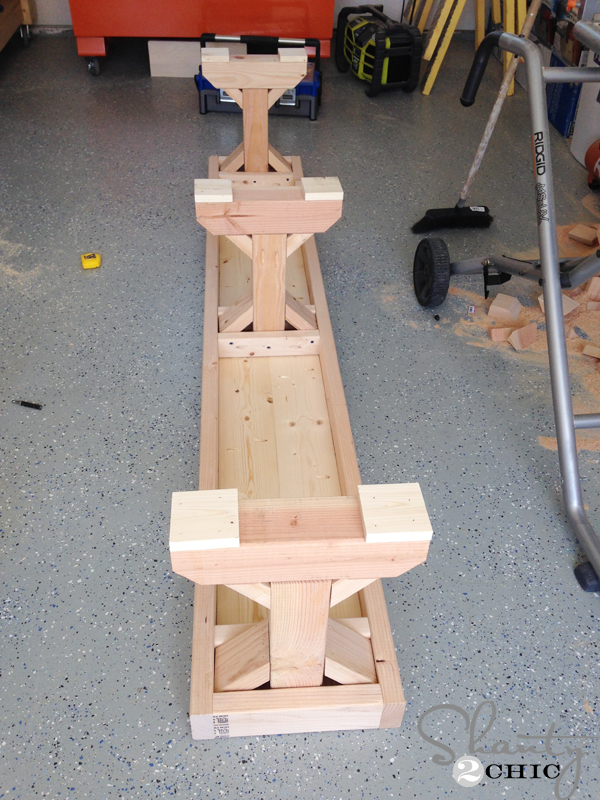 That’s it! Time to finish!
 I stained both benches with one coat of Carrington stain to match my table.
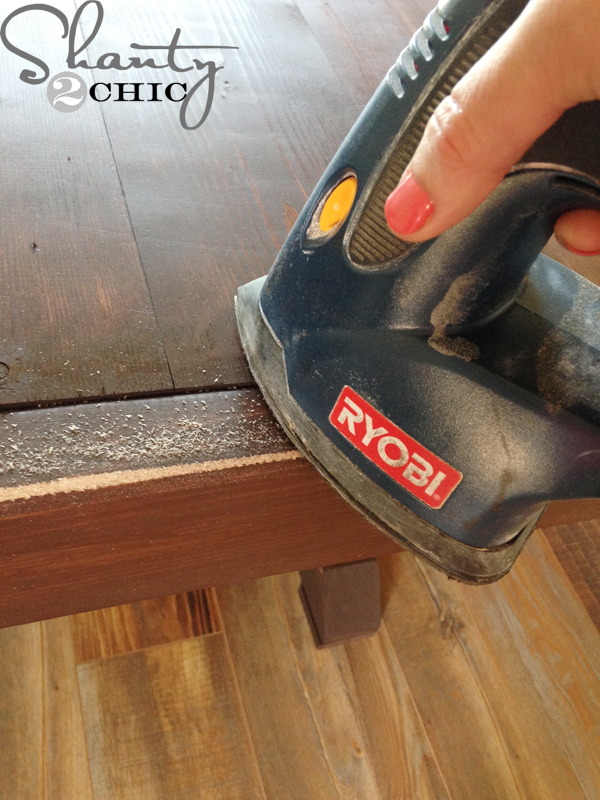 When the stain was dry, I used my favorite sander to distress the benches, all over.
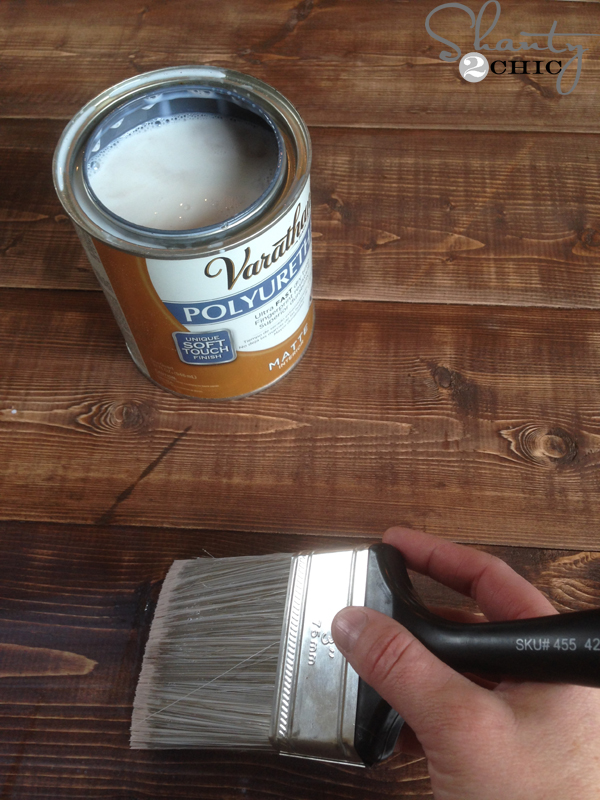 I wiped the dust with a wet cloth and applied 2 coats of polyurethane (paying special attention to the tops because my kiddos will be eating here).
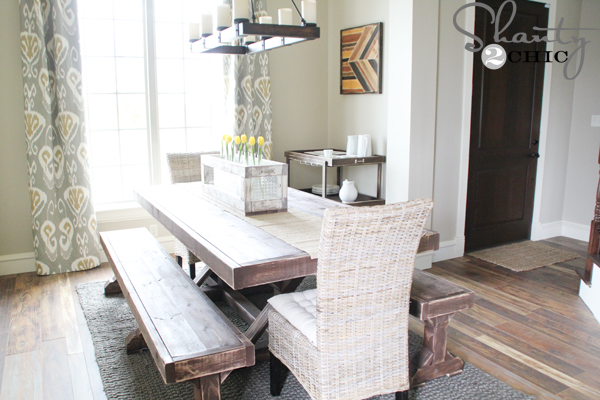
 That was it 🙂 One reason we love DIY is because it frees up our budget to spend more on accessories! I found the rug at World Market for about $150 for a 6×9 (Charcoal Basket Weave Jute Rug) and I found those awesome wicker chairs at Pier 1 for $99 each 🙂
Loving how my dining room is coming along! I still have several more projects planned for this room but I am going to step away and move to another room for now 🙂 I’ll be back soon too share!
Thanks so much for stopping by and building these DIY benches with me!
~Ashley
Like anything else you see in this room? You can click the links below to get the info 🙂

Shanty2Chic, I know a few people have asked this question already, but I haven’t found an answer yet. Are there any substitions for the Kreg HD Jig?
Also, can you use the Kreg HD screws with the Kreg 4 or 5? Thanks in advance. If anyone has had any luck using any alternative methods I’d love to hear them.
Thanks in advance. ; )
I would like to say any pocket hole jig should work. The “Kreg HD” is just the one they used. I am using the “Kreg Tool R3 Pocket Hole System” and i know my Father uses a completely different brand than Kreg for his pocket holes. Hope this helps.
The HD jig is for 3.5″ thick boards.
how much space (height wise) is there between the floor and the underside of the bench? Can I fit baskets for storage under the bench?
Yes you can. They are about 18 3/4″ tall. Clearance under the bench frame is about 16 1/2″.
I built the bench and assembled it upside done as suggested in the plans. Then when I turned it over to my surprise it was a bit off balance and wobbly. Have you faced this? Would you have any suggestions To fix a wobbly bench?
I would look into shimming. But instead of shimming on the bottom (like we do with napkins at a restaurant table) you could instead shim where the legs meet the bottom side of the bench this way it is “un-seen”.
I also had one of the outside legs that was a little wobbly. So I squeezed in some wood glue, in the stubborn gap along the frame and next to the 4×4, and stuck in a shim. I used a perfectly sized scrap from squaring off a 2×4 then used a razor knife to score the wood so that it would snap off where I wanted it. It worked beautifully. No more wobble.
I love your plans, built two of your workbenches already, and getting ready to take on this table and bench. Do you have any advice on how to assemble the top frame while using mitered corners instead of the standard butt joint you are using with the pocket jig?
I juts finished the table and now I’m working on the benches. I changed the length of the table to fit our space. Its 74 1/2. I think I will make the benches to a total length of 55″ to accommodate larger chairs on the end. Im wondering if I will should still have the 3 legs on them or if I could get away with 2 legs. Any input would be great.
anyone know how i would go about making just a 63″ long bench ??
You could follow the plans that are above but just cut the length of the boards down to size. (So instead of having a 96″ board you could cut it down to 63″)
Love the table and benches. What is the length?
About 100 inches. Just over 8 feet long
Hey thanks for the plans for the table and benches. They were easy to follow. I made this table 8′ to accommodate 4 on each side but I think with children 5 be fine. Because of the extra length I had to add extra support braces on each base. It stabilizes the middle and I think goes with the style just fine. I also raised the stretcher about a foot and down sized it to 2×4 mainly for vacuuming but it’s a good foot rest too. As for the height issue I read in previous post, I eliminated the 3/4″ blocks and used 1/4″ tight knit carpet as blocks. It slides nicely and protects floor. I also changed stains thought it was too dark and didn’t distressed wood either. It was time consuming, not sure how anyone could do all the sanding needed and stain/poly in one weekend but more power to ya if ya did. The Kreg jig was amazing and can’t wait to use it again. One last thing, the cost of this project should be doubled because the projected cost I believe does not include screws, glue, sand paper, stain, poly so budget accordingly. Thanks shanty 2 chic!
Hello! Great table! Where did you buy your curtains?
Hey ladies! My boyfriend and I are taking on the table and benches, can’t wait! I really want to add a back to the bench and did see an upholstered bench on Ana’s site. I am trying to figure out how to incorporate these two designs because I want the bases to match the table. Do you have any suggestions on the best way to accomplish this?
Do you build first and sand after? In most of the pics I’ve seen in your projects it appears like you sand later.
Thanks!
How hard is it to deal with crumbs getting in the cracks of the table? Is there a way to have that not happen?
How about a table clothe Kate
Hi, i love your work, thank you for your tutos 😉
I’m from France i follow you since a while, i wrote on my blog a post about your work, i hope you can see it.
Khaoula
Hey girls, can I ask what you use for your 4×4’s? I can only find treated wood or cedar in my area for 4×4’s. Do you use pine? Where do you find yours. I’ve been searching…..any help would be great!
Hi Susan,
We get untreated pine 4×4’s at Home Depot but we are hearing they aren’t available everywhere. Have you tried a local lumber yard?
Yes I went to ProBuild because my Home Depot (Florida) doesn’t carry them. ProBuild has cedar (don’t want to spend that much) and it will take 4-6 weeks to special order pine. Guess I’ll see if I can finagle an order with Home Depot 🙂
Thanks!
Your projects are awesome! I have that same rug in a different color, but I found that it sheds terribly and loses of lot of dirt and natural fibers. I finally decided to take it out, but every time I pass it by in the garage I want to bring it back in because I love it! I’m curious to know if you find the same thing.
Hey there! Thank you:) I have only had this one for about a month but I have the smaller sizes in the natural jute color and haven’t had a problem. I do vacuum them pretty regularly though so maybe that’s why??? Hope this helps 🙂
Where did you purchase this rug from and curious on the size? My husband just built me this table and I love it! Thanks for your awesome plans!