Hey guys! First off, I am sorry it took so long to get these plans to you. It took me a while to find enough pieces to make them full and fancy – and that is not an inexpensive assignment either. I took my time to find good deals on pieces and have been collecting over the last month or so. BUT, I’m finally done and so excited to show you 🙂
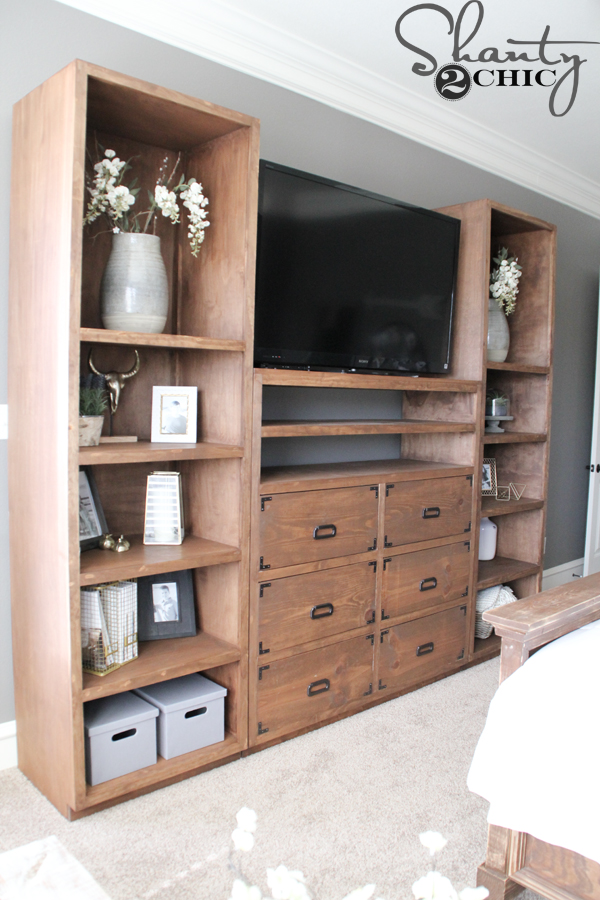
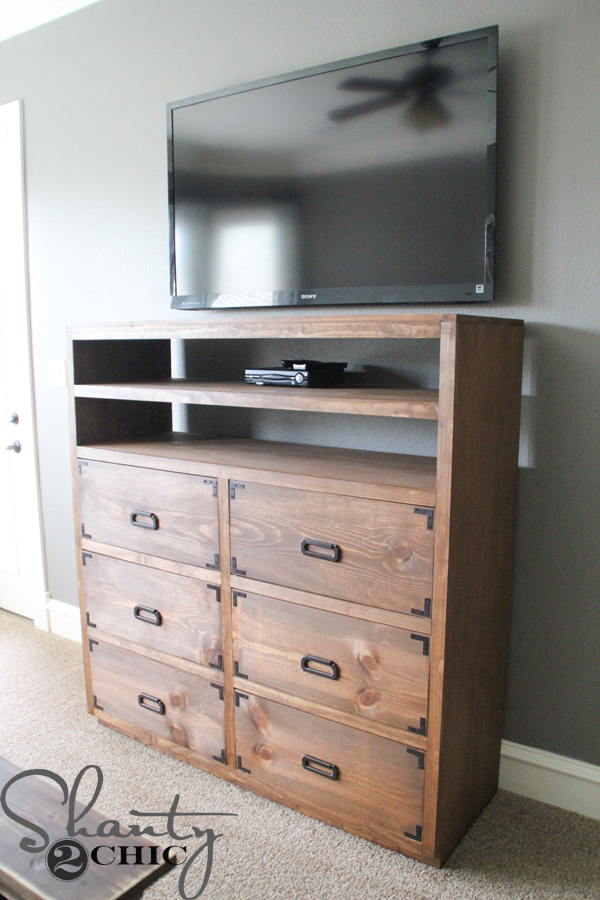
Check it out 🙂 I still have the bridge and doors to add to the piece but I think it does just fine by itself for now! You can find the plans for the dresser (piece under the TV) HERE.
As always, friends, we have the FREE printable plans for you, as well as the how-to tutorial, for you to follow along with! Just click HERE or the image below to print the plans.

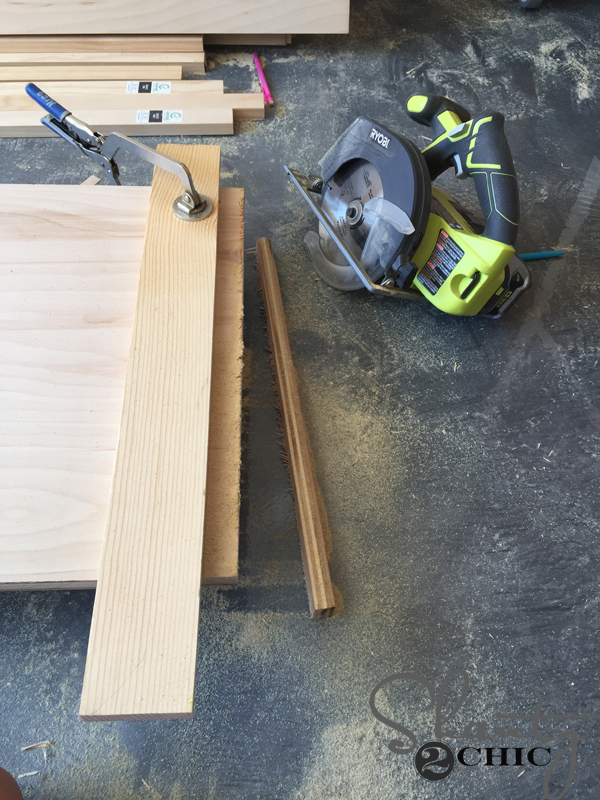
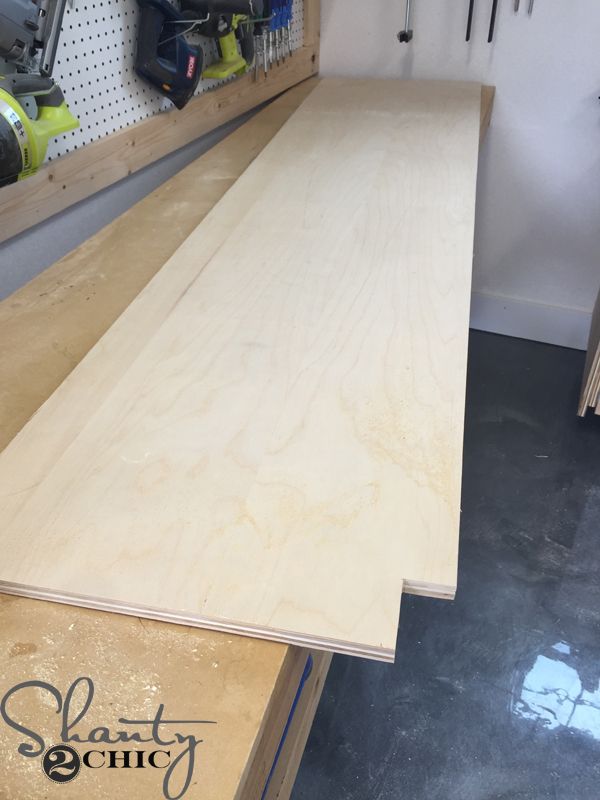
To start, I had my Purebond Plywood ripped at Home Depot (according to the plans). If you want to know more about why we only build with Purebond brand Plywood, you can learn more about that HERE. Once I had the panels ripped and brought them home, I used my circular saw to cross-cut the side panels. This is a great way to cut plywood, if you don’t have a table saw. Just clamp a scrap board down as a guide for your circular saw.
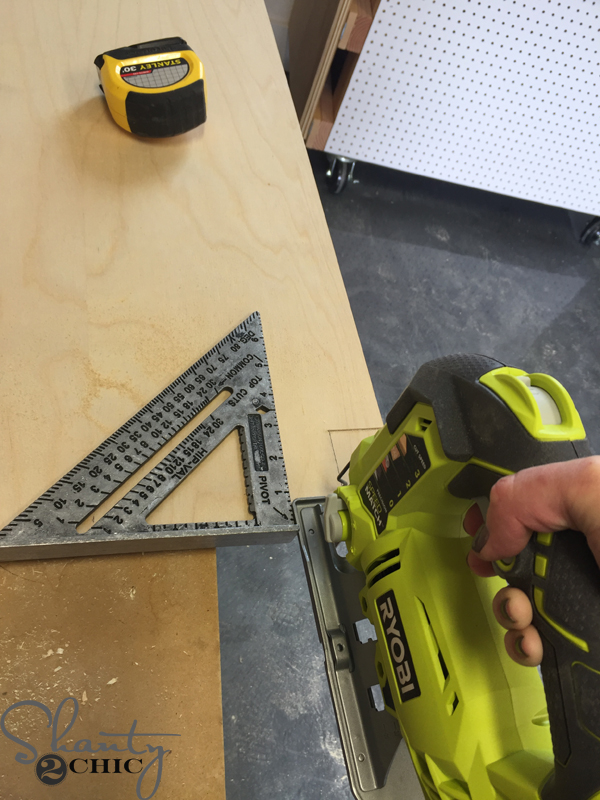
Next, I used a speed square (you can find one HERE) and my Ryobi 18 Volt Jigsaw to cut the notches, for the toe kick, out of each panel.
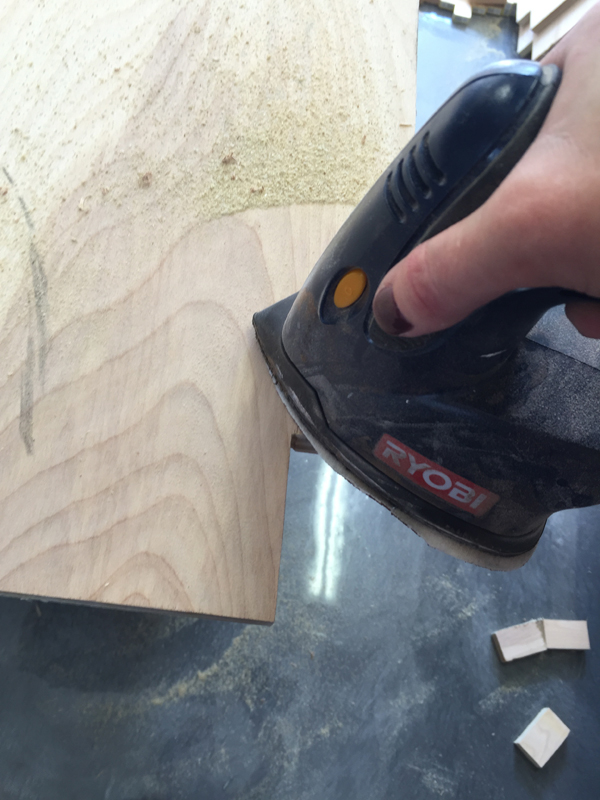
If you have rough edges you can snap over them to smooth them out. I used my Corner Cat sander for this part.
Here is a side panel with the corner notched out.
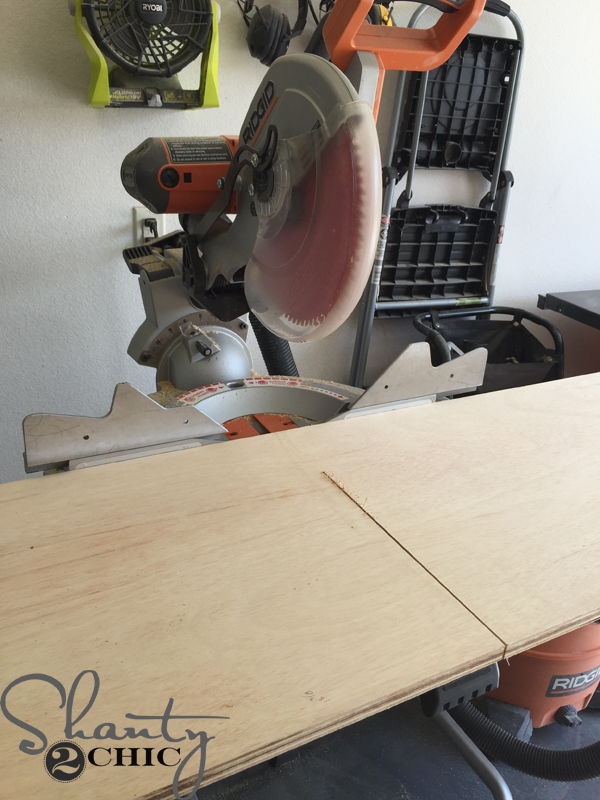
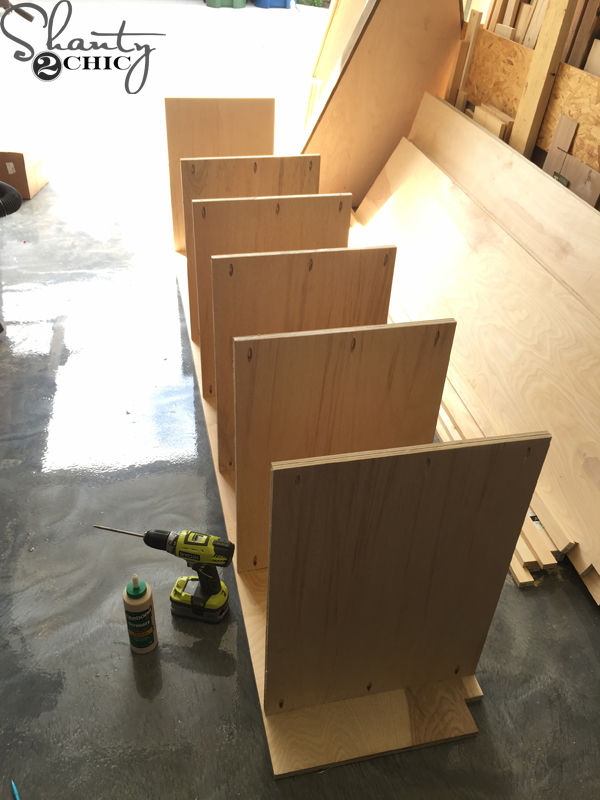
Next, I cut all of the shelf pieces. I used my miter saw for this part. You can use the circular saw with the scrap board guide, like I did on the panels, or you can cut as far as your miter saw will let you, then flip the board over and finish the cut.
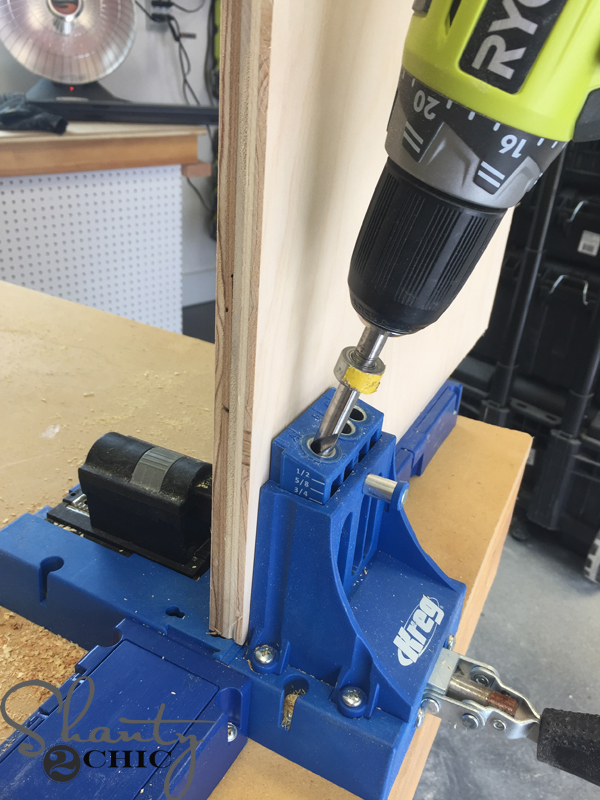
Once the shelf pieces were cut, I drilled 3/4″ pocket holes, with my Kreg Jig K5 (model HERE) into each board. Refer to the plans for the pocket hole placement. It doesn’t have to be exact, we just eyeball the locations.
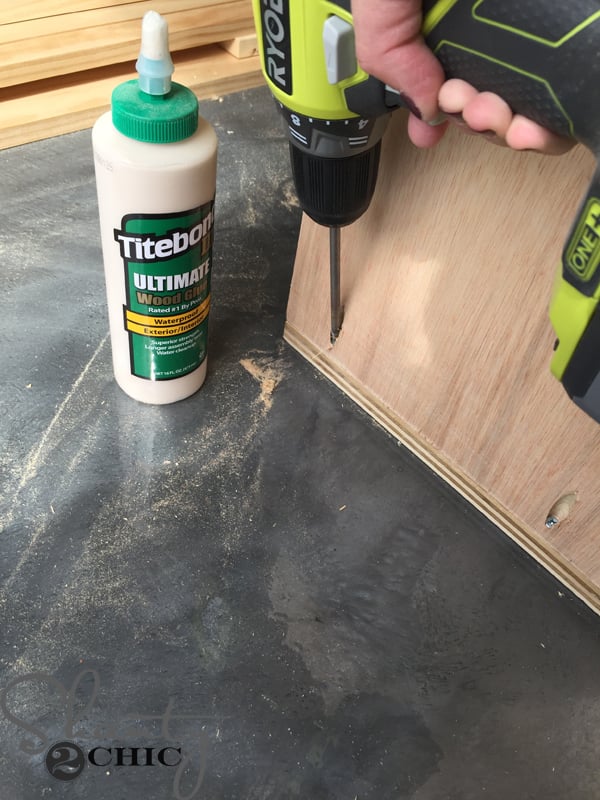
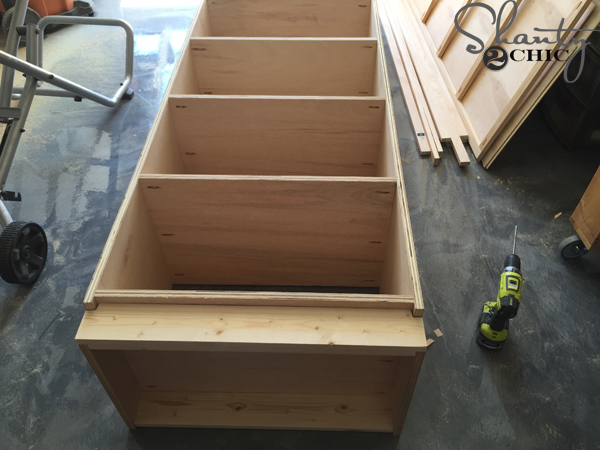
Now it’s time to attach the shelves. I started with the top shelf and worked my way down the panel. I attached the shelf pieces with 1 1/4″ pocket hole screws and Titebond wood glue. *Note – be sure to flush the front of the shelf piece with the front of the side panel, leaving a 1/4″ space on the back side of the panel. This is inset so the back panel will fit inside the side panels and be invisible from a side view. Also, make sure the toe kick notch is at the front of the cabinet.*
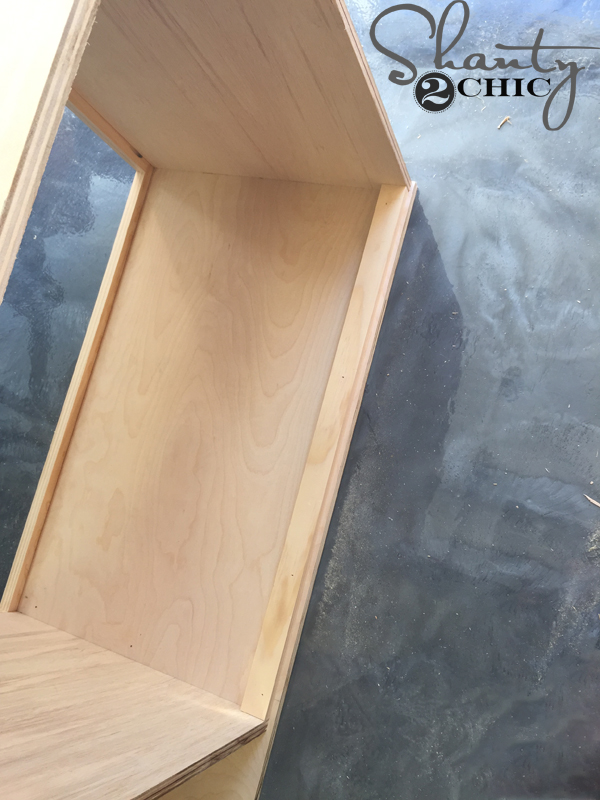
Here is the cabinet with the shelf pieces attached to one side panel.
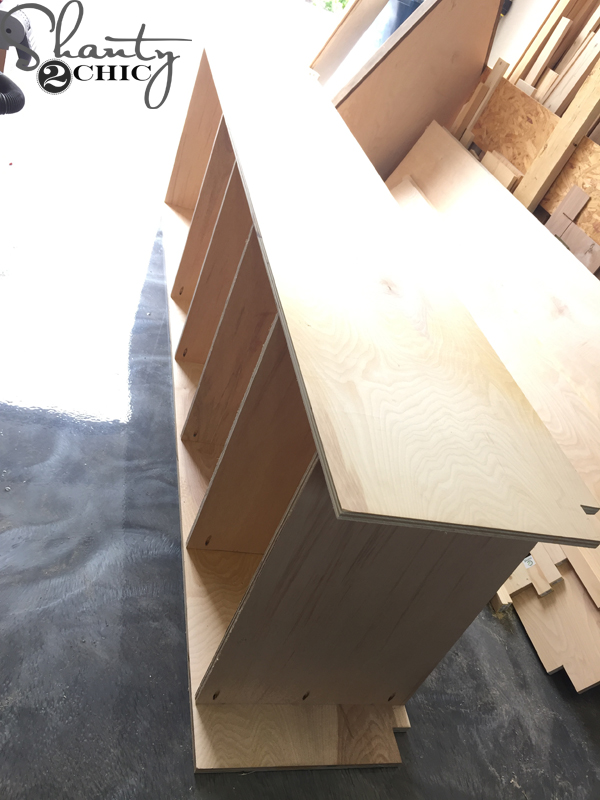
I attached the second side panel the same way.
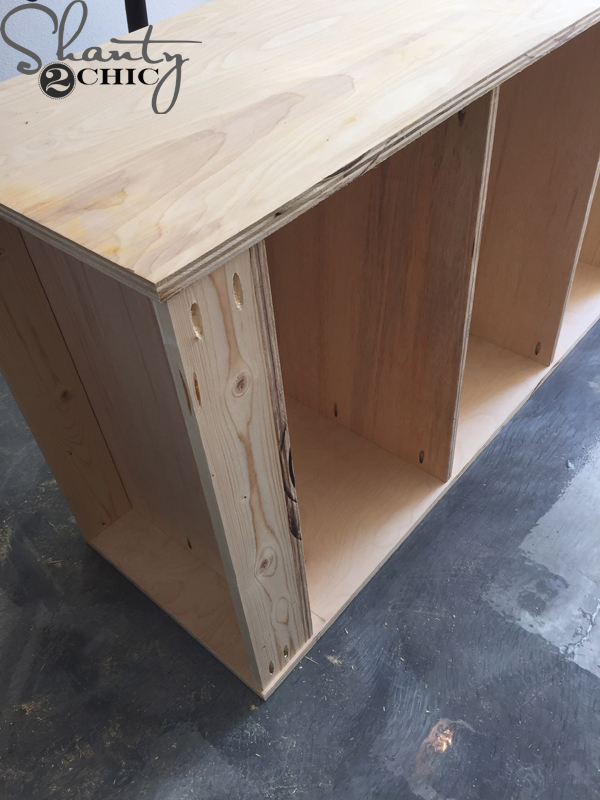
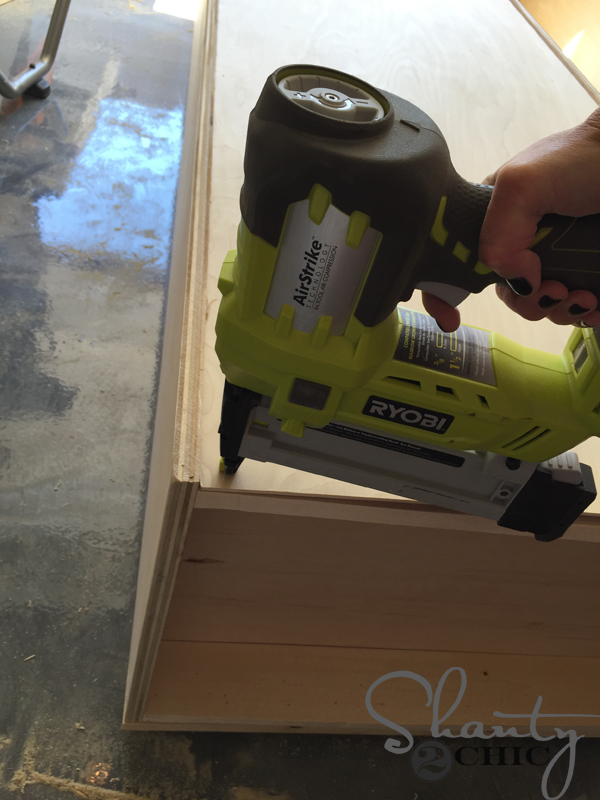
Attach the bottom supports on the front and back of the cabinet. Here is a picture of the back of the cabinet.
Here is a picture of the front of the cabinet.
Now for the cover of the toe kick. I made my marks to notch out the top corners.
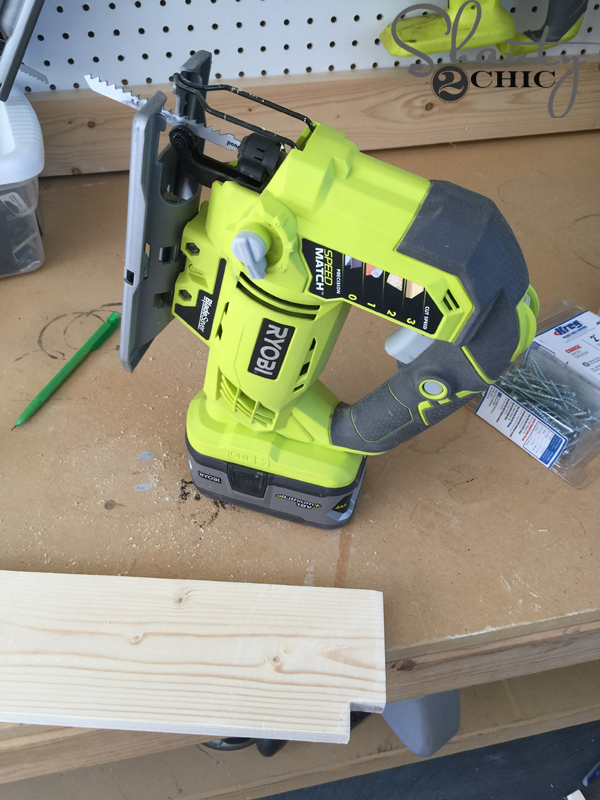
Then, I used my jigsaw and clamped the piece to my work bench to cut the notches.
I fit it in place and attached it to the cabinet with wood glue and 1 1/4″ brad nails.
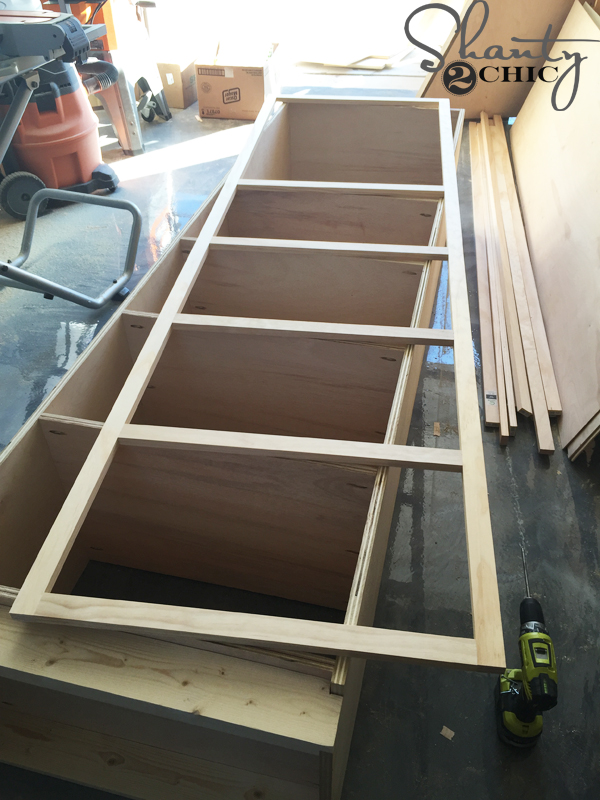
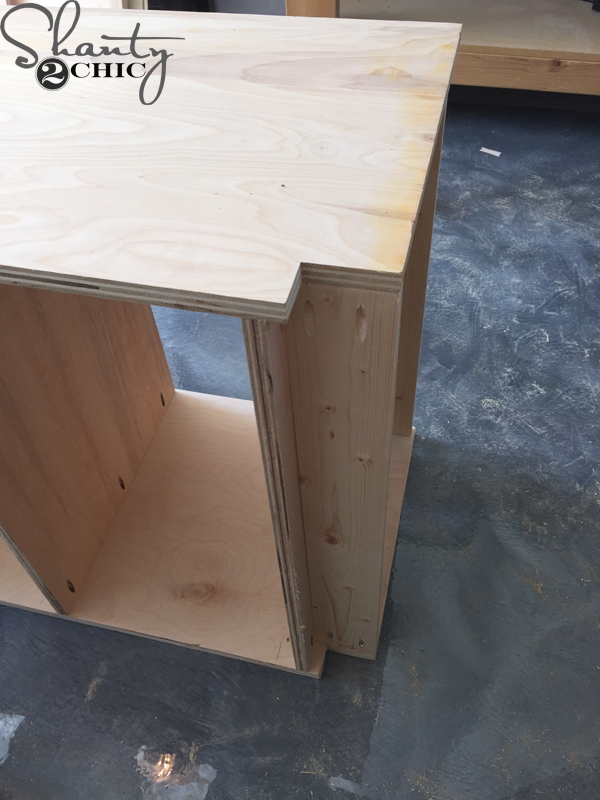
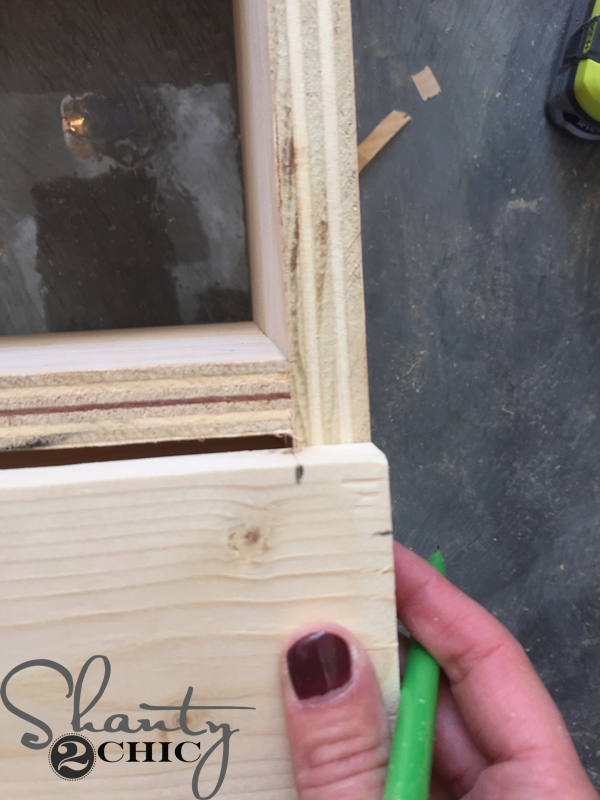
Now for the face frame. I built the face frame according to the plans. Make sure to measure exactly where your shelves sit so that the face frame will be flush with the shelves.
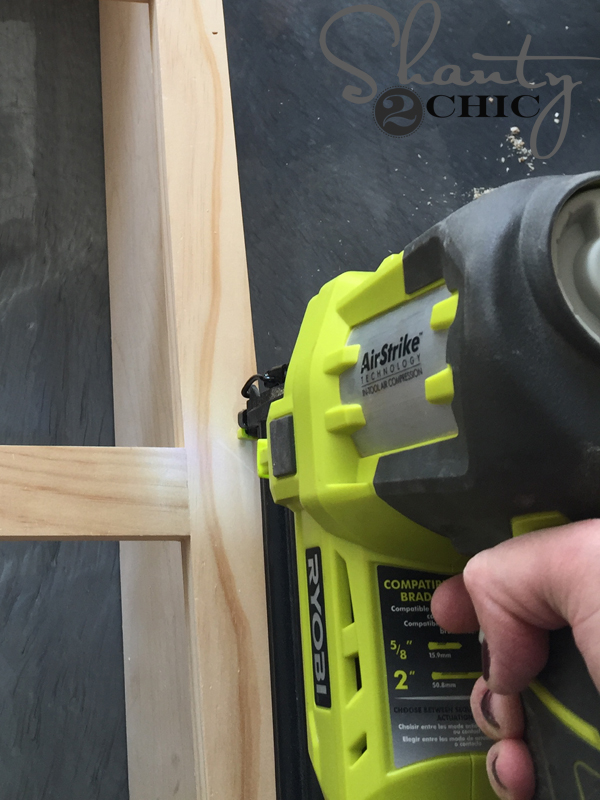
I used my 18 gauge brad nailer with 1 1/4″ nails and wood glue to attach the face frame to the cabinet. If you don’t have a brad nailer you can use a hammer and finish nails.

Looking good 🙂
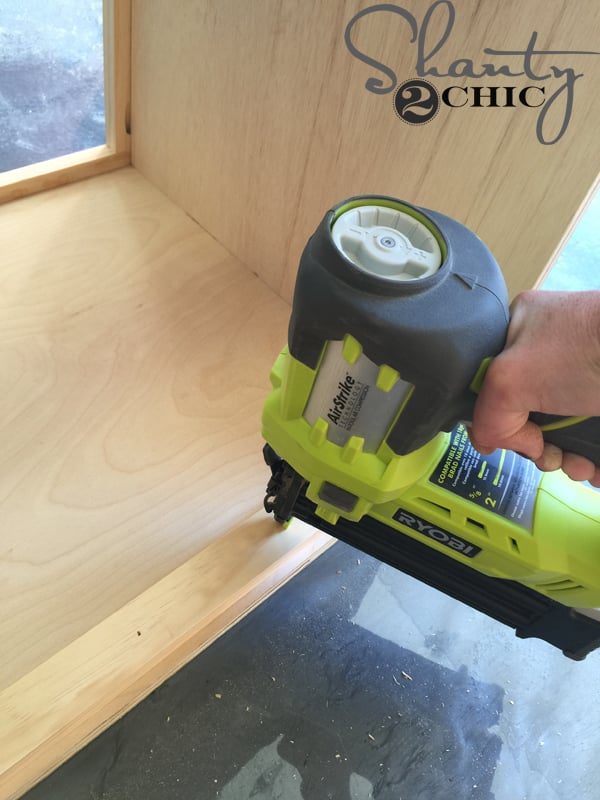
I attached the cleats to the inside of the cabinet with my brad nailer and wood glue.
These will give a place to attach the back panel.
And, speaking of back panel, I attached mine once the cleats were installed. I used wood glue and my 18 gauge stapler and 3/4″ staples. If you don’t have a stapler, you can use a brad nailer or simply finish nails and a hammer. I like to use staple when I attach 1/4″ pieces because it holds the boards together better while the glue dries.
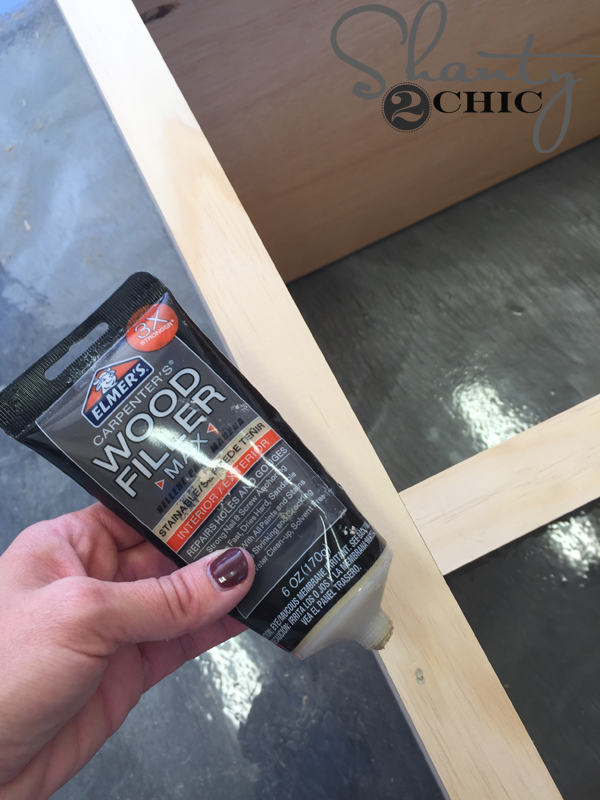
Now for the finish. I filled all of my nail holes with wood filler, let it dry and sanded the spots down with 220-grit sand paper.
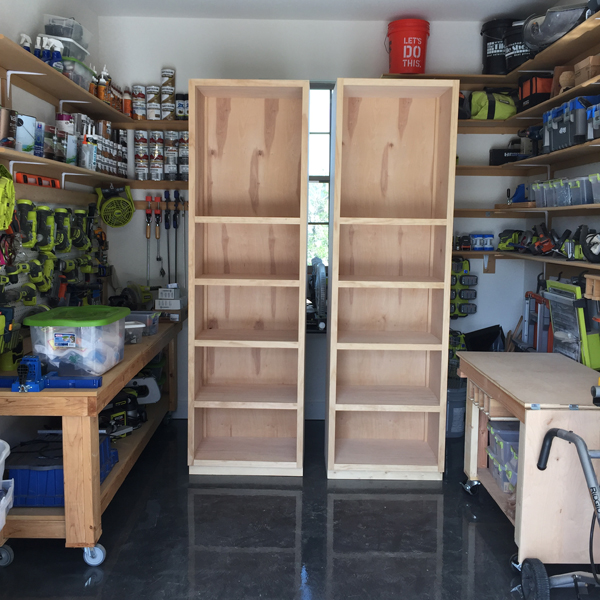
Now, they are ready for stain 🙂
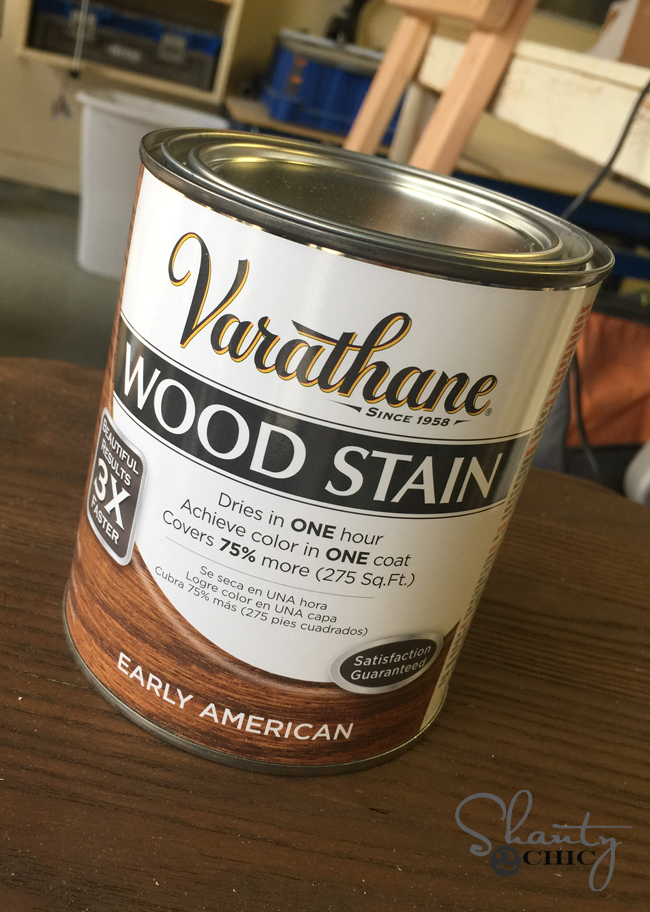
I used one-coat of Varathane Early American stain to cover the piece. I just wipe the stain on with a clean cloth, let the stain sit for about 5 minutes, then I wipe the stain to blend it evenly over the piece. You don’t want to wipe the stain off, just blend it. I chose not to add a poly to the piece. I do for table tops and other piece that will see lots of “traffic” but these towers won’t…so I was DONE!
The hardest part was moving these big guys into the house – thank you wonderful hubby 😉
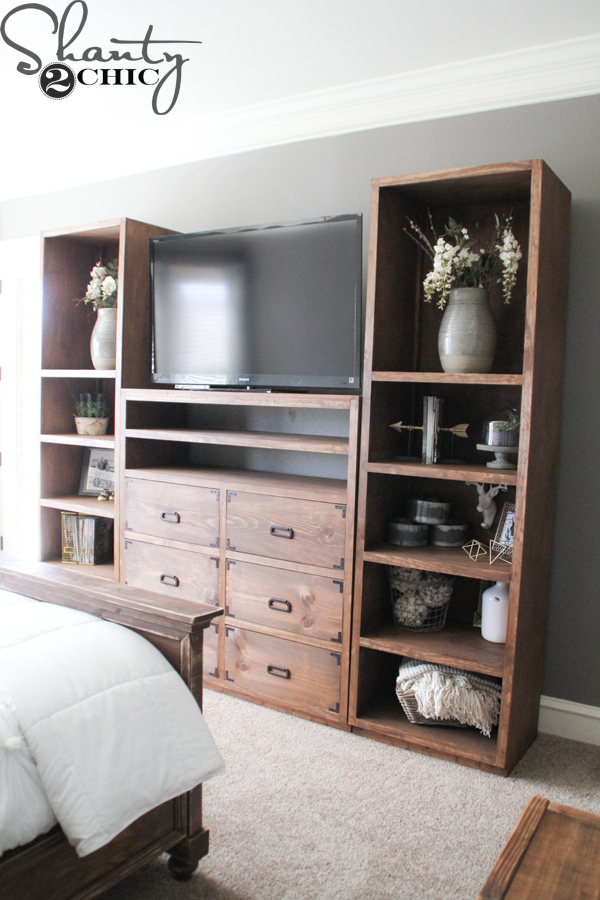
I had so much fun dressing them up 🙂

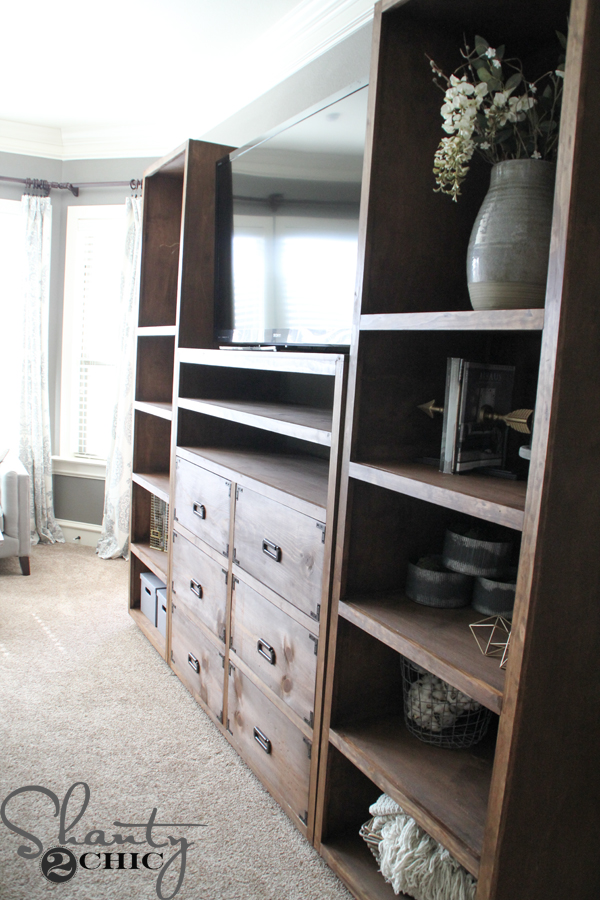
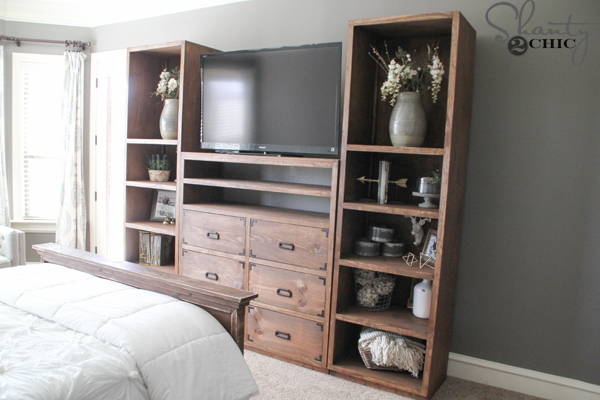
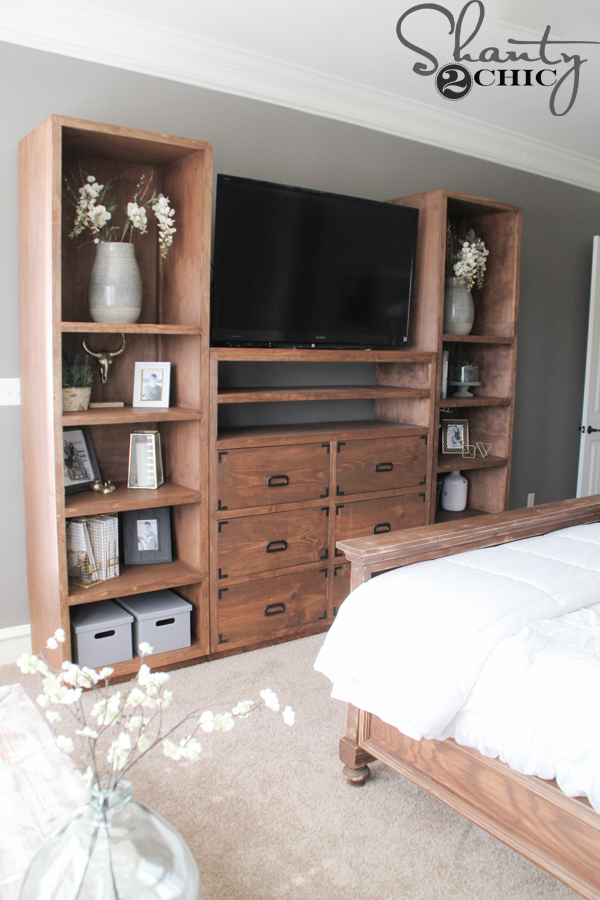
I can’t wait to build the bridge and barn doors for this guy – but for now I am so, so happy with it as-is!
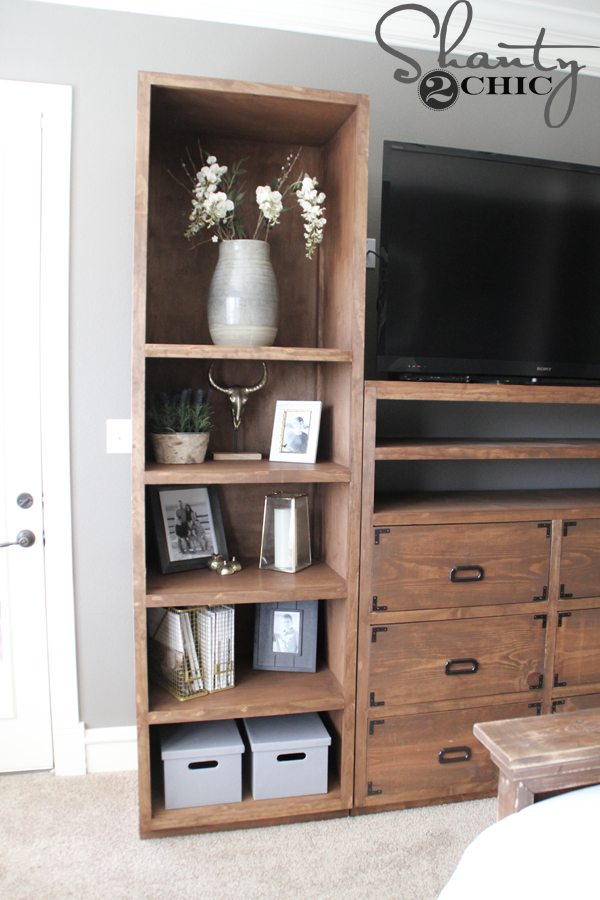
Here’s a run down of the items on the shelves:
Vases at the top – Target
Stems for the vases – Hobby Lobby
Gold Steer Head – Target
Lavender arrangement – Save On Crafts
Gold Lantern – Target
Small Gold Paper Weights – Target
Magazine Holders – Target
Canvas Storage Boxes – Target
Cloche – Save On Crafts
Succulent in Cloche – Target
Galvanized canisters – Save On Crafts
Arrow Book Ends – HomeGoods
Deer Head Hook – Hobby Lobby
Gold Geometric Shapes – Target
White Vase – Save On Crafts
Metal Basket and Cotton Balls – Save On Crafts
Basket with Blanket – At Home
That should cover it 🙂 I did build everything in my room too! Here are the piece and you can click the image for the free plans for each piece!

Happy Building!!!


just wondering if you re getting any outside orders.
What was your overall height and width for this? I love it so much!
These are amazing! I am planning on making the book cases this weekend and the rest as time allows.
However, I wanted to have adjustable shelving. If I follow your directions but use the Kreg shelf pin jig to make the shelves adjustable, in your opinion, would these shelves hold in the plywood? Or should I use thicker plywood? Im concerned they would be too heavy?
What would you estimate the woman hours would be for a relatively inexperienced (but quick learner) to complete one of these? Thanks! 🙂
Does anyone know where the Varathane and/or Rustoleum stains went to at both Home Depot and Lowes? Went there this weekend and they don’t have them anymore 🙁
Home Depot carries it still. They have moved it in my store so I would as an employee!
I’m in Eastern Washington and my neither of the Big Boxes carry it here anymore either. I’m hoping it’s only temporary because the only place I can get it now is online. Boo…
As always, a beautiful job. One question, though: where are the barn doors?
Thank you! I still have to build them. I’m sharing the pieces as I build them 😉
Beautiful job!
Thank you so much! They’re beautiful! This set is on the list for my media room!