We are back with the next episode of our sisters Shanty House Crash series! Last week, we added height to her cabinets and this week, we are showing you How to Make Builder Grade Cabinets Look Custom!
Come see how we gave her cabinets a custom upgrade in a few minutes! Just click the Play Button below to watch!
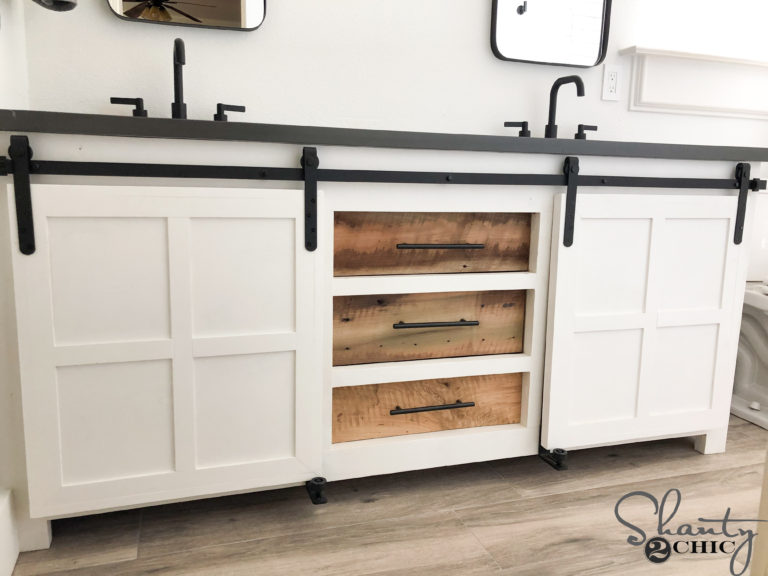
Builder Grade Cabinets
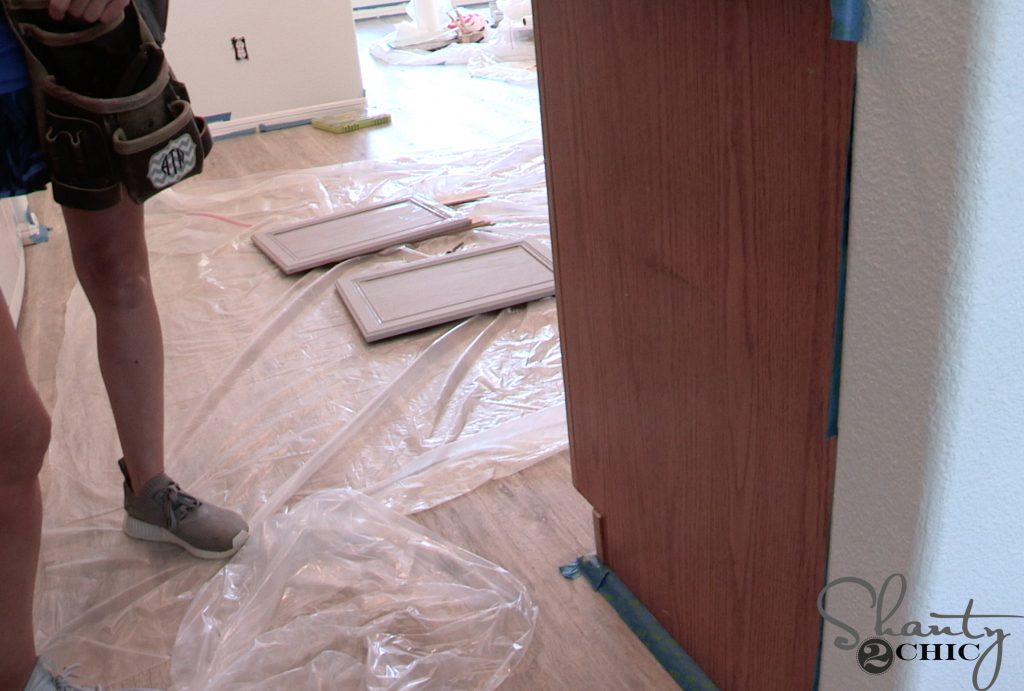
Most builder-grade cabinets have a blank space at the end (if they aren’t between walls). While this isn’t horrible, it’s not the custom look we are going for. So, we came up with a quick, cheap and easy solution!
Supplies
How to Make Builder Grade Cabinets Look Custom
1. Cut and Glue the Craft Boards
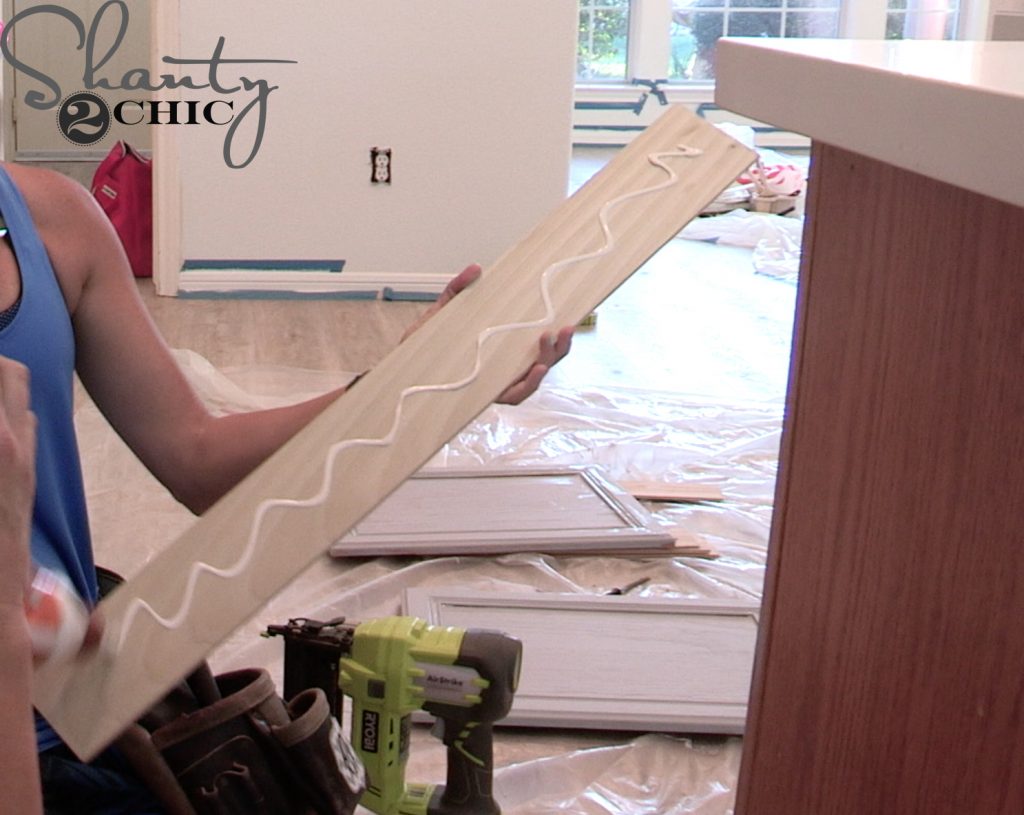
Once we cut the frame pieces to size, we applied wood glue to the back of the craft boards.
2. Attach the Craft Boards to the Cabinet

We attached the craft boards with 5/8″ pin nails.
3. Toe Kick
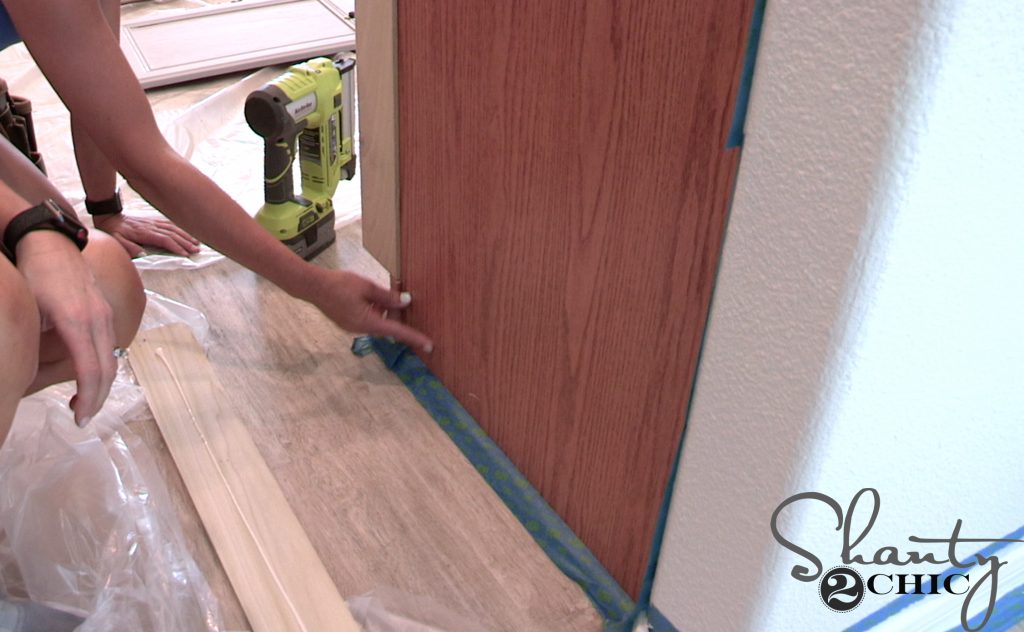
This cabinet has a toe kick so there is extra space on the bottom. We cut another 4″ piece to fit.
4. Diagonal Pieces
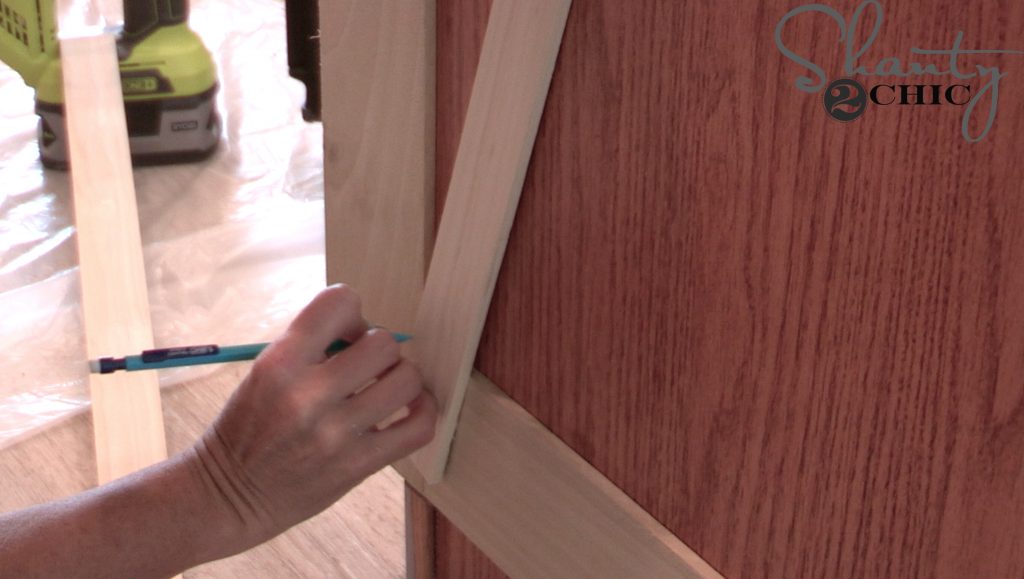
You can do any design on the sides. We decided to play off of the vent hood cover and do a barn door trim design. The easiest way to get the best fit is to hold the pieces up, mark where they should be cut and line up the miter saw to cut right on the mark.
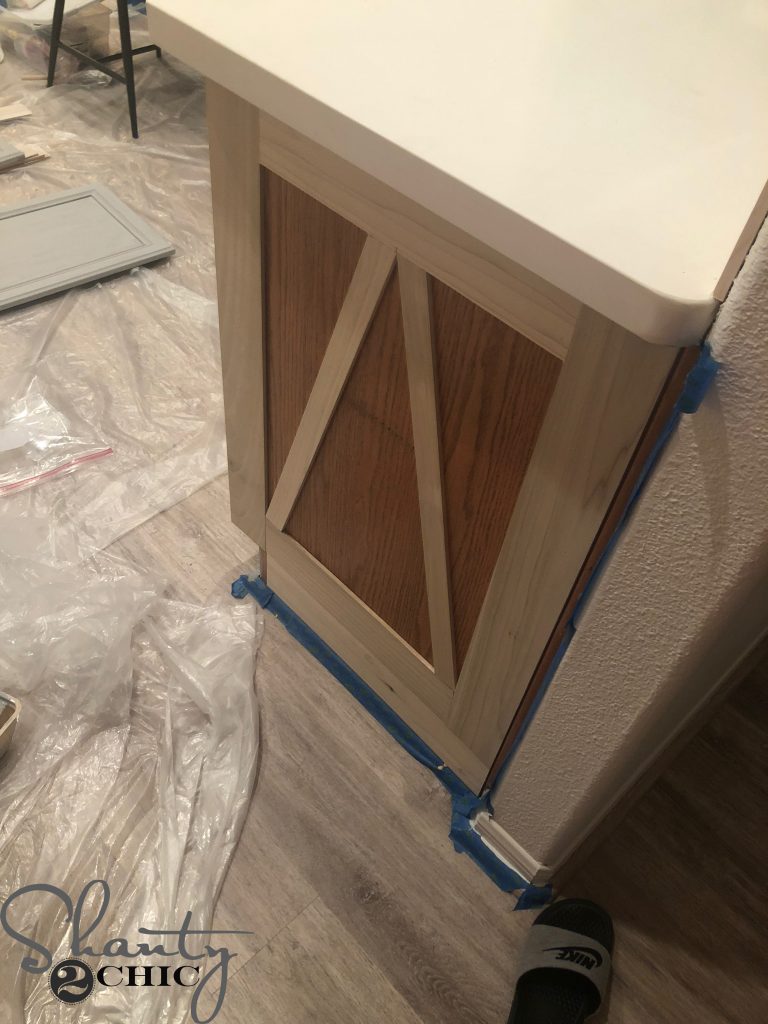
5. Wood Filler
Once the hobby boards were attached, we filled the cracks with wood filler. You can find our favorite wood filler HERE!
6. Paint
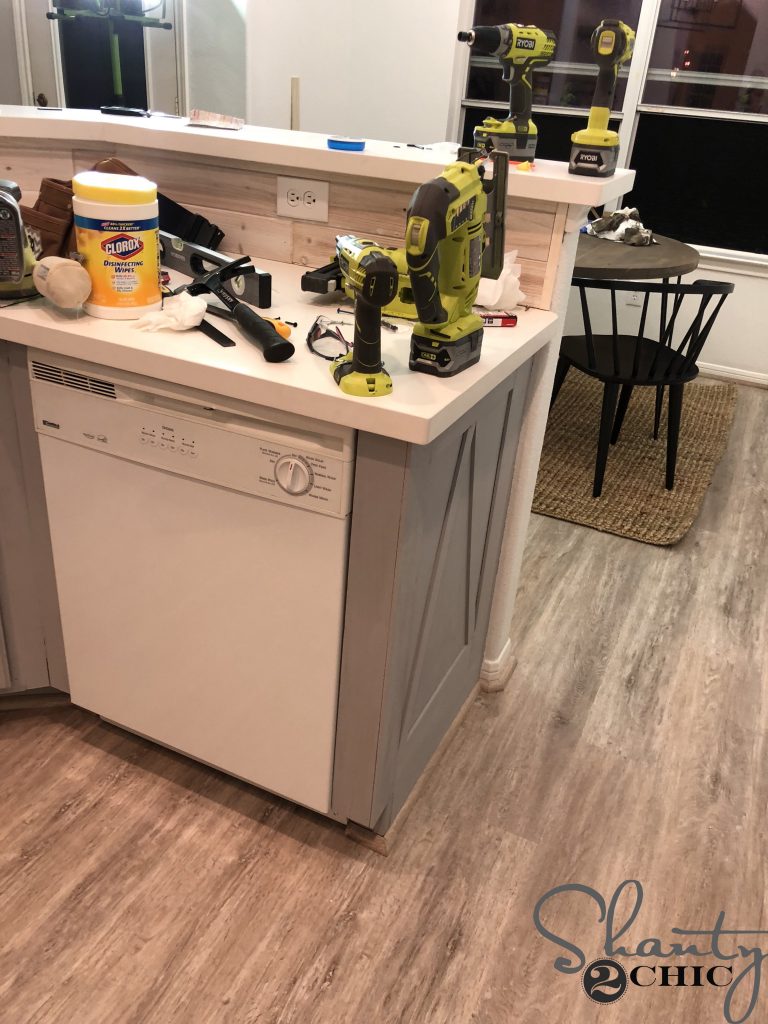
We gave the cabinets 3 coats of paint. You can find the paint we used HERE.
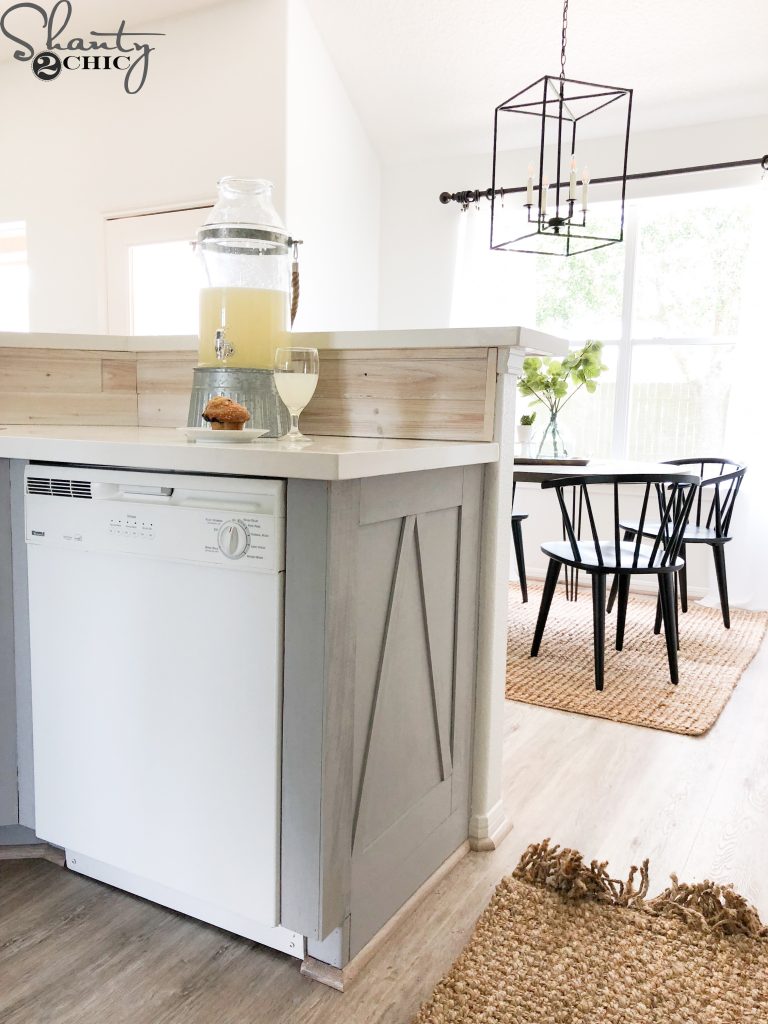
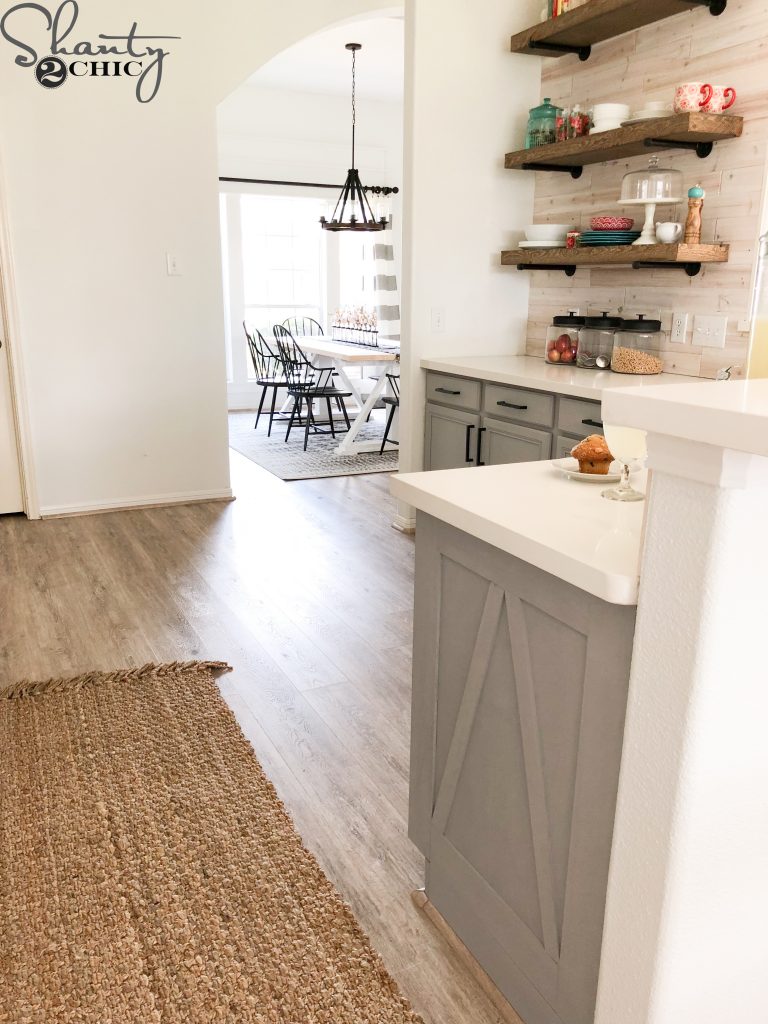
That was it! Such a custom impact for very little time and money!
Linking to all the Builder Grade Cabinets sources below!
Items on Pipe Shelves:
Make sure to subscribe to our Youtube Channel (HERE) so you don’t miss the rest of the episodes in this Shanty House Crash series! Here’s what’s coming up!
Farmhouse Dining Table – Free plans and how-to video live, now!
DIY Driftwood Backsplash – Free plans and how-to video live, now!
How to Add Height to Kitchen Cabinets – Free Plans and how-to video live, now!
Custom Cabinet Trim Hack – Free Plans and how-to video live, now!
How We Paint Cabinets –Free Plans and how-to video live, now!
How to Frame and Cover a Crescent Window – Free Plans and how-to video live, now!
DIY Round Kitchen Table – Free plans and how-to video live, now!
DIY Pipe Shelves – Free plans and how-to video live, now!
DIY Barn Door for Pantry – Free plans and how-to video live, now!


It’s time to upgrade your blade! Picture frames are one of the most common trades that use a miter saw. Miter saw blades are an important part of any miter saw. There are many different types and sizes of blades, so it can be tough to decide which is the best blade for your needs.
Nice. This guide is well explained. I easily get all the steps. Thanks for sharing it.
thank you so muck
The best guide, I tried and the result is awesome Really without this article it won’t be possible
Thank you! It looks easy enough that even I, as a novice can make it work. I’ve been wanting to try to alter the look of my kitchen cabinets, and this is a perfect idea.
Thanks for sharing this guys. I would love to share this post with my friends.
Thanks for an easy guide for making BUILDER GRADE CABINETS LOOK CUSTOM.
wounderful work with tools good to see awesome
Thanks for the detailed information about this. I would love to see more such awesome blog posts from you. Keep up the Good Work!
Thank you so much. Loved your way of explaination.
This Builder-Grade Cabinet is looking awesome
Wonderful work and execution are awesome.
What color gray paint did you use? When I click the link it gives a bunch and one gray is not available.
use wipe on polyurethane like Minwax. I used it on a table and benches I made from my daughter using plans from this website. they turned out AWESOME!
I have the Shanty 2 Chic farmhouse table and matching benches but they need to be sealed.
I cannot tell if a finish is on them but if you touch them with greasy fingers they leave spots that will not wash off. Can anyone tell me what I need to do to protect them from future stains? Do I need to sand, re-stain and then seal or is there something I can rub on the current finish as a protector.
use wipe on polyurethane like Minwax. I used it on a table and benches I made from my daughter using plans from this website. they turned out AWESOME!