We are back again with the third part of our sisters Shanty House Crash series! This project is all about How to Make Cabinets Taller! We are taking Leasha’s builder grade cabinets and adding height! This was a cheap and great alternative to buying completely new cabinets and/or cabinet doors! With just a few sheets of hardwood plywood, a few boards, a few tools and some elbow grease, we not only added height to her cabinets, we completely updated the style of her kitchen! Just click the Play Button below to watch the entire process!
How about that?! Such a huge difference for so little money!
Keep in mind that this set of plans was designed specifically for Leasha’s cabinets. Make sure to adjust the measurements and supplies to fit your own cabinet design. This set is a great reference to make your modifications, as her cabinets are a standard size.

Here’s a bit of the step-by-step process, as well! You can get the FREE Printable Plans at the end of this post!
Step 1 – Remove the Trim and Add New Trim
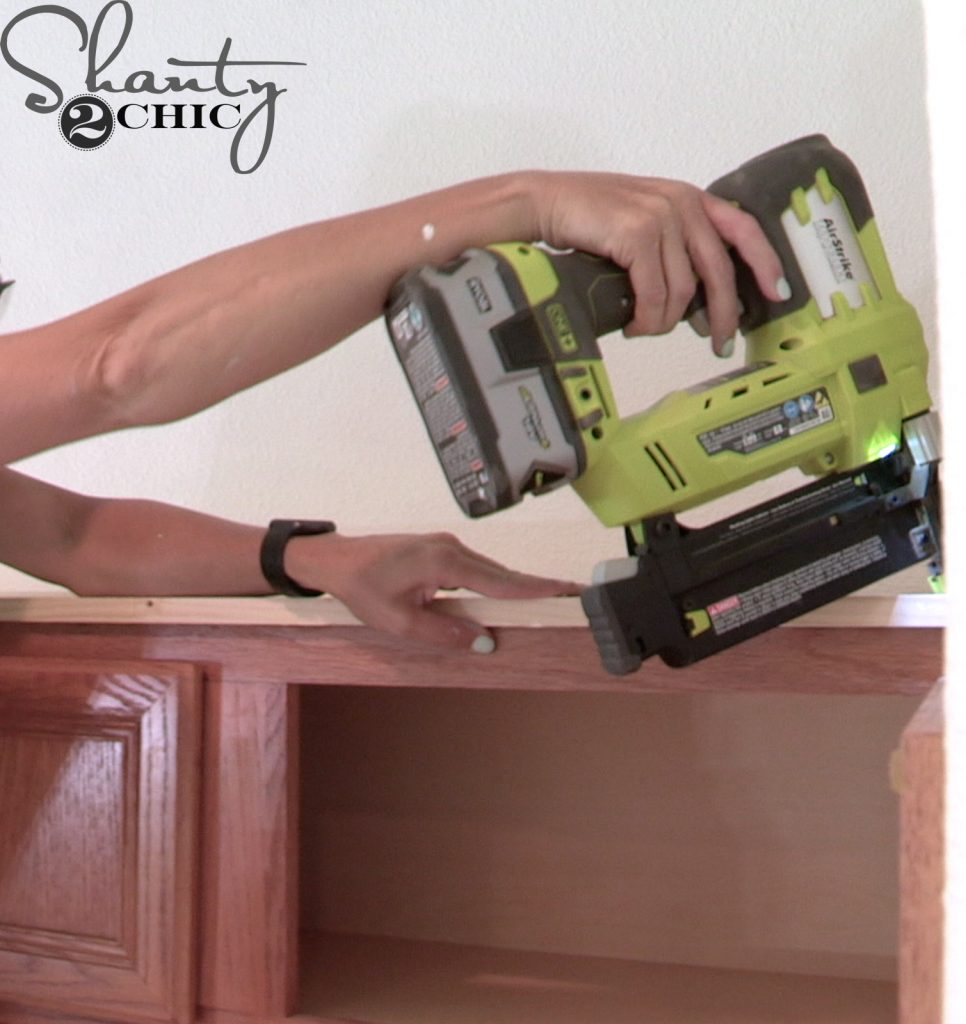
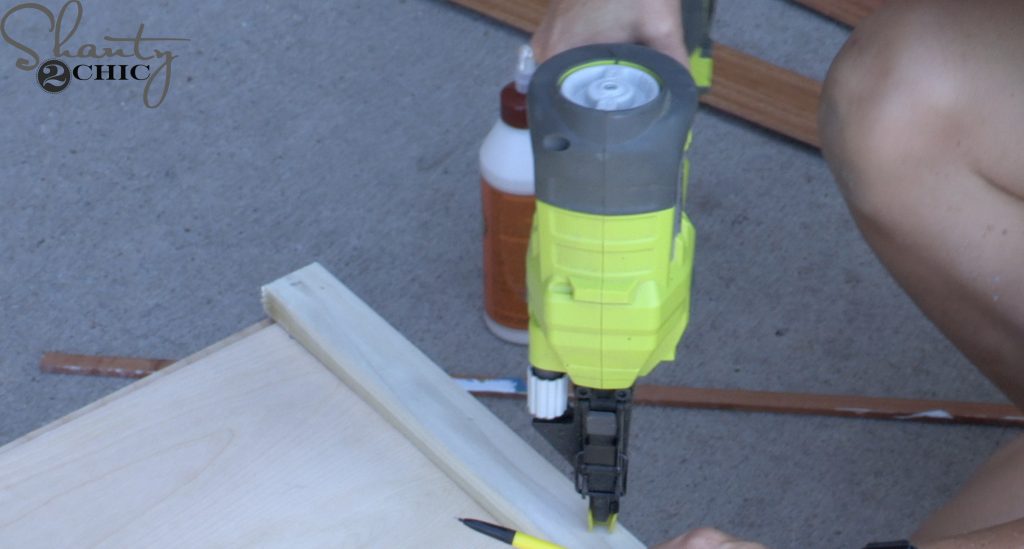
The first step was to remove the crown trim from the cabinets. Next, we cut the edge-glued pine to size and attached it to the top of the cabinets with 1 1/4″ brad nails and wood glue. We used our Ryobi 18-gauge Brad Nailer to attach.
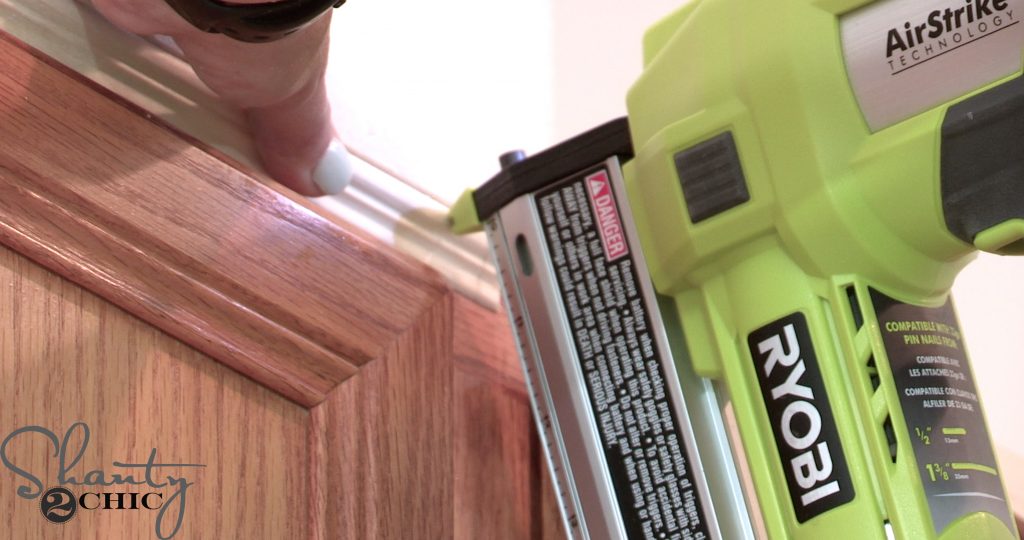
Once the base piece was installed, we added a small stick of trim to the front of the cabinets. This was to cover up where we took the original crown piece off. The size of trim that you use will depend on how much space you have between the cabinet doors and the base piece.
Step 2 – Build the Hood Cabinet
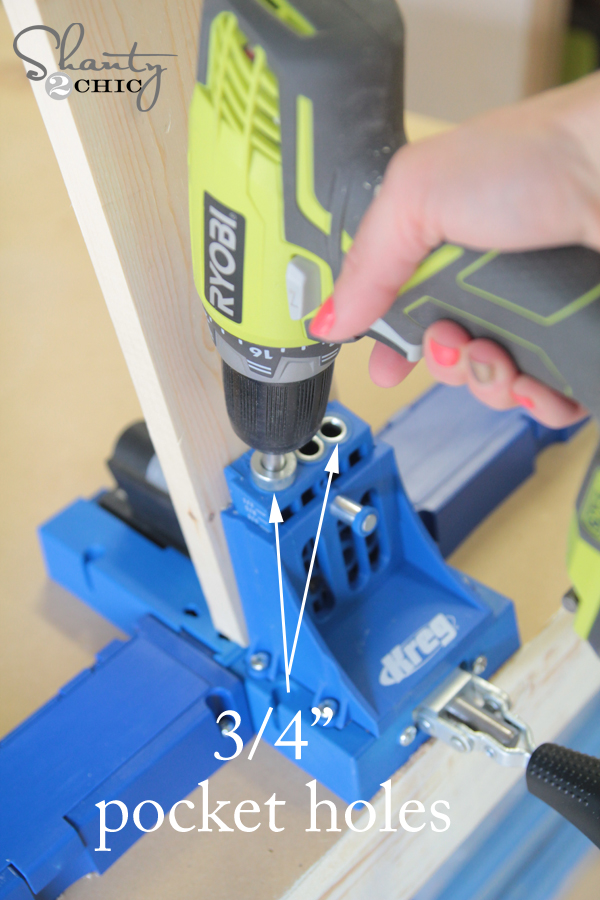
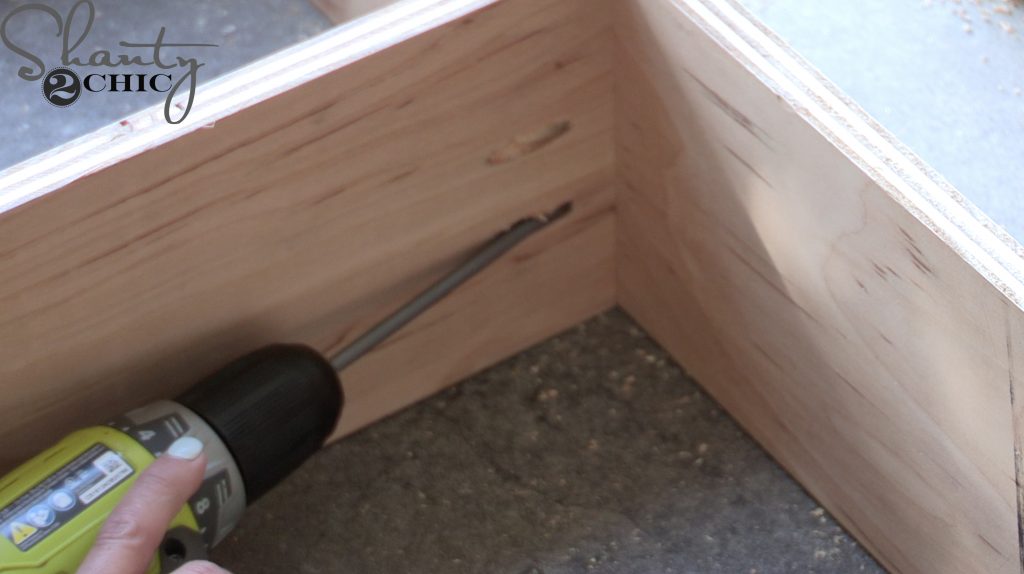
With the base piece and trim attached, we began to build the middle box that we will call the “hood cabinet”. We cut the hood boards to size and drilled 3/4″ pocket holes into the ends of each support piece and the bottom end of each side piece. You can find our favorite model of Kreg Jig HERE!
Then, we attached the supports to the front of the side pieces with 1 1/4″ pocket hole screws and wood glue. Make sure to refer to the plans for the placement of the support pieces. This box will cover the existing hood vent that has been drywalled over. If you kitchen does not have this, you can put supports on the back side of the hood cabinets, as well.
Once the hood was assembled, we cut a piece of 1/4″ hardwood plywood to size. We attached it to the supports with wood glue and 3/4″ staples, using our Ryobi 18-gauge stapler.
Next, we cut the hood face frame pieces to size and attached them the front of the hood with 1 1/4″ pocket hole screws and wood glue.

We brought the hood cabinet inside, slid it into place and attached it to the base piece with 1 1/4″ pocket hole screws and wood glue.
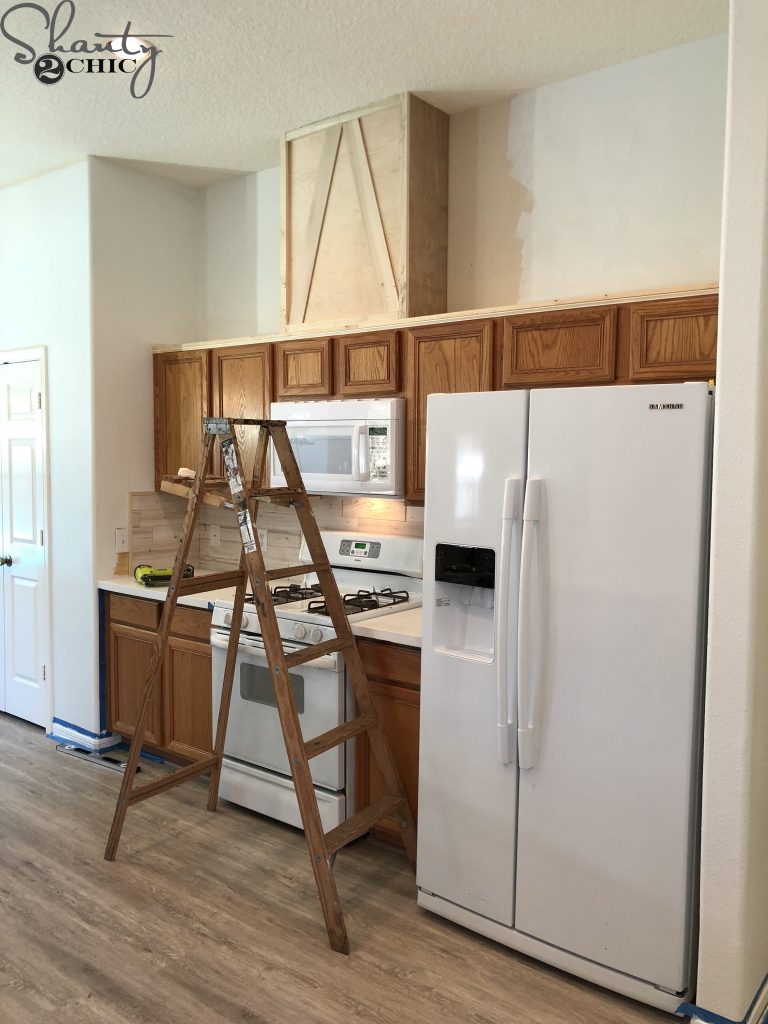
Hood Cabinet – DONE!
Step 3 – Build the Cabinet Shelf Boxes
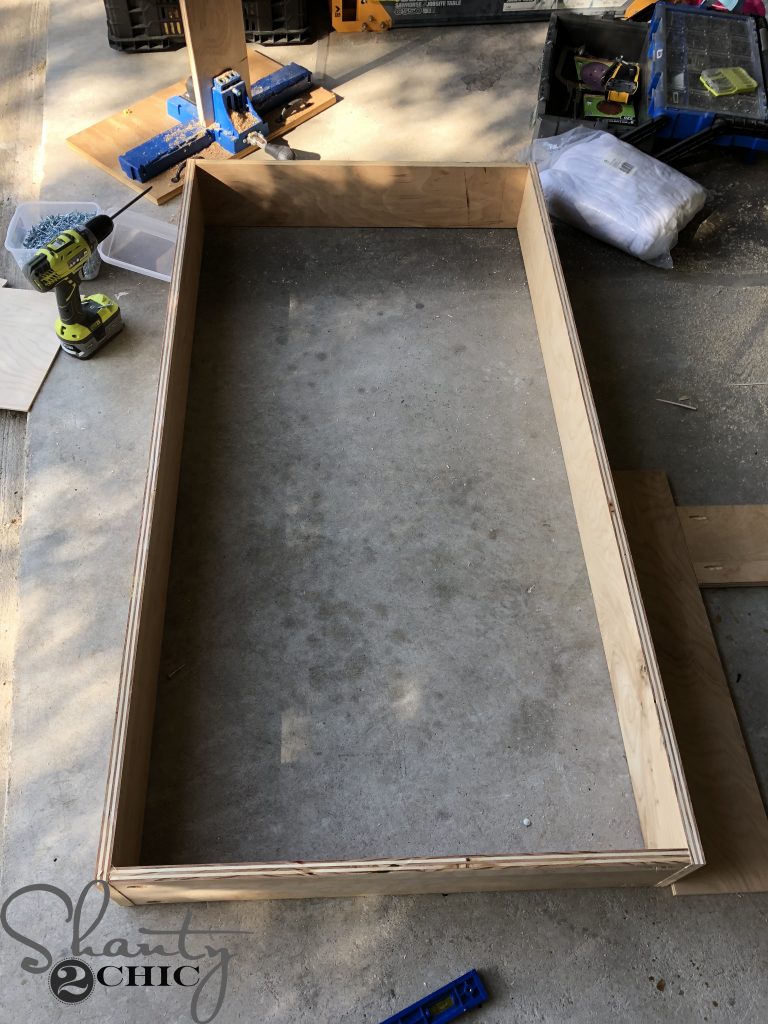
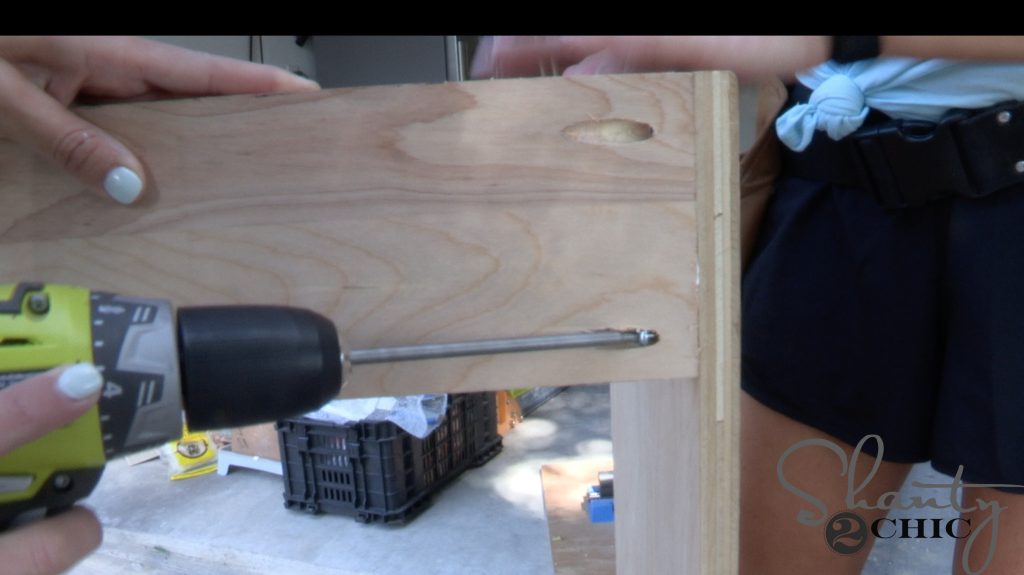
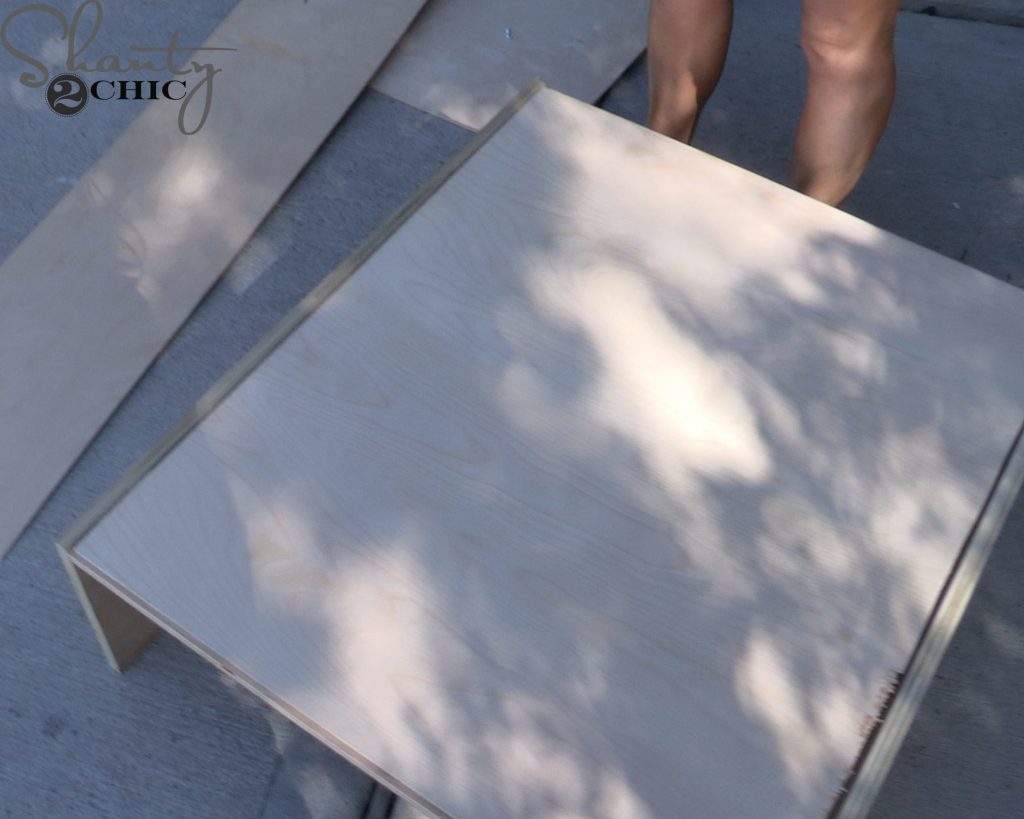
We moved onto the cabinet shelf boxes. These are both constructed the same way but one is longer than the other. We cut the open cabinet pieces to size and drilled 3/4″ pocket holes into the ends of each shelf piece and the bottom ends of each side piece.
We attached the shelf pieces to the side pieces with 1 1/4″ pocket hole screws and wood glue. The pocket holes should face down on the bottom piece and up on the top piece. Make sure the pocket holes on the side pieces face in!

We brought the cabinet boxes inside and slid them into place before attaching the face from pieces. We attached the face frame pieces with 1 1/4″ pocket hole screws and wood glue.
Step 4 – Sand & Paint
Once all of three boxes were installed, we filled all of our holes with wood filler (find our favorite wood filler HERE), gave it a good sanding and a couple of coats of paint!
You can find the paint that we used to paint the cabinets HERE!
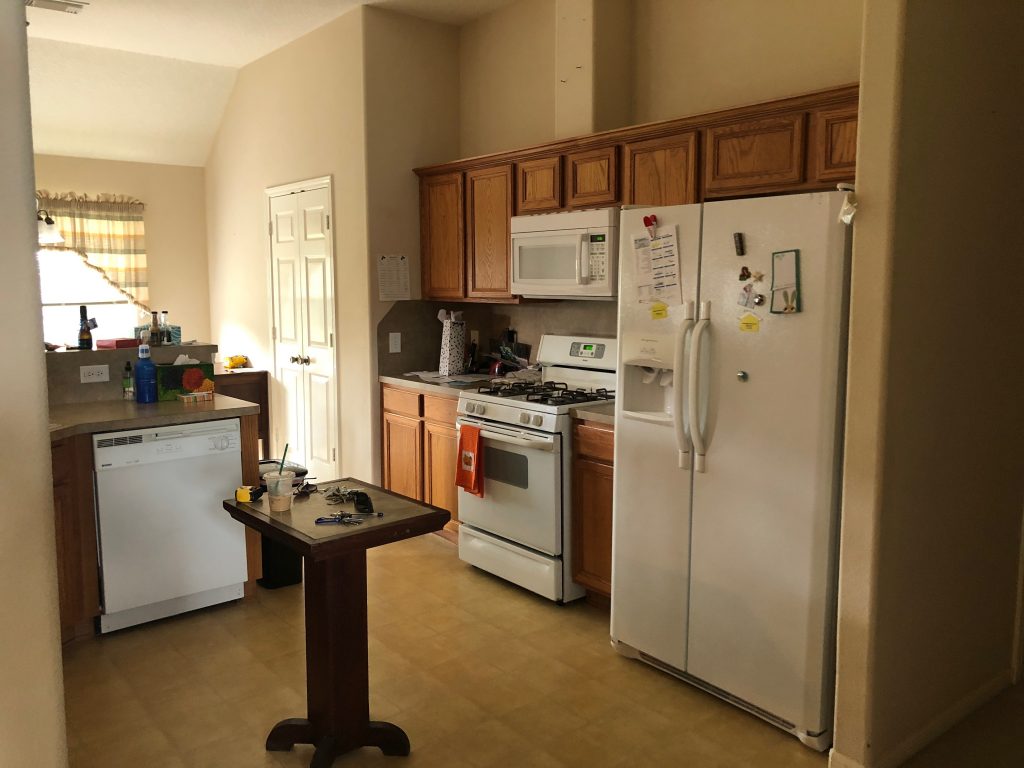
Now for the before:
And the after!
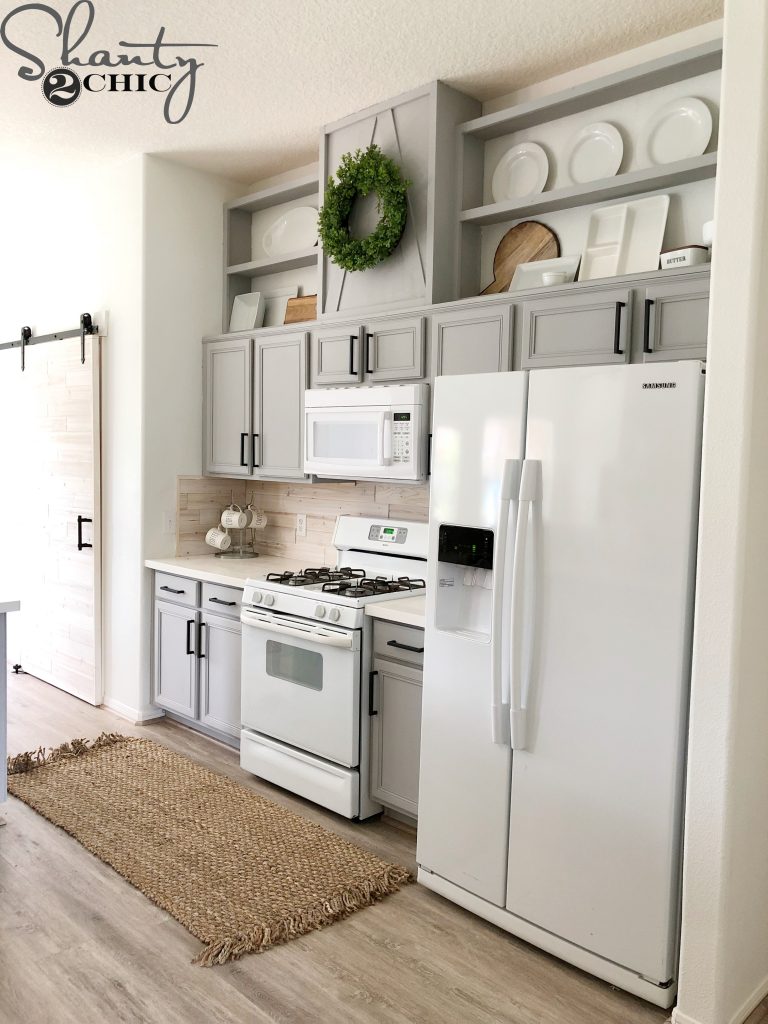
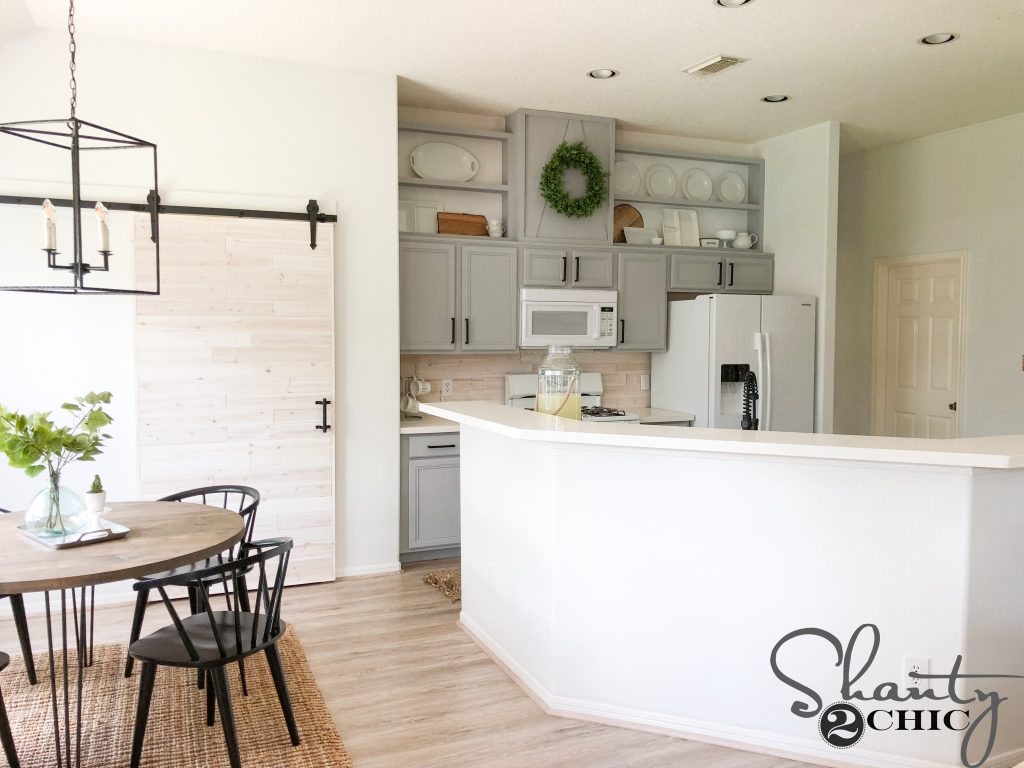
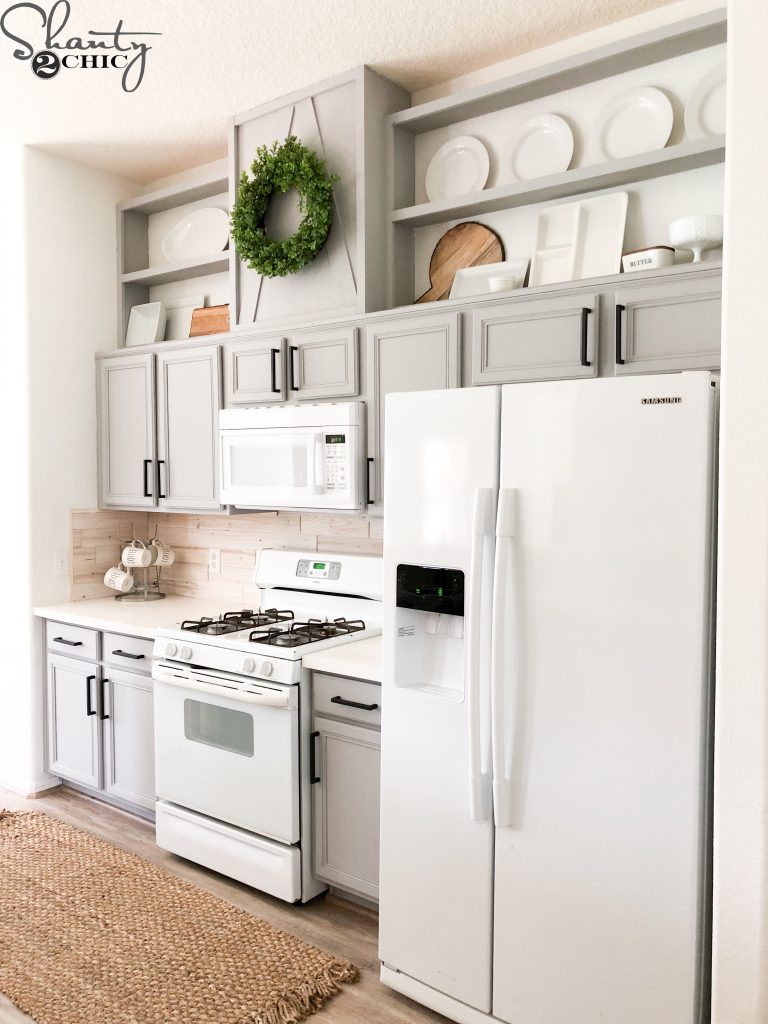
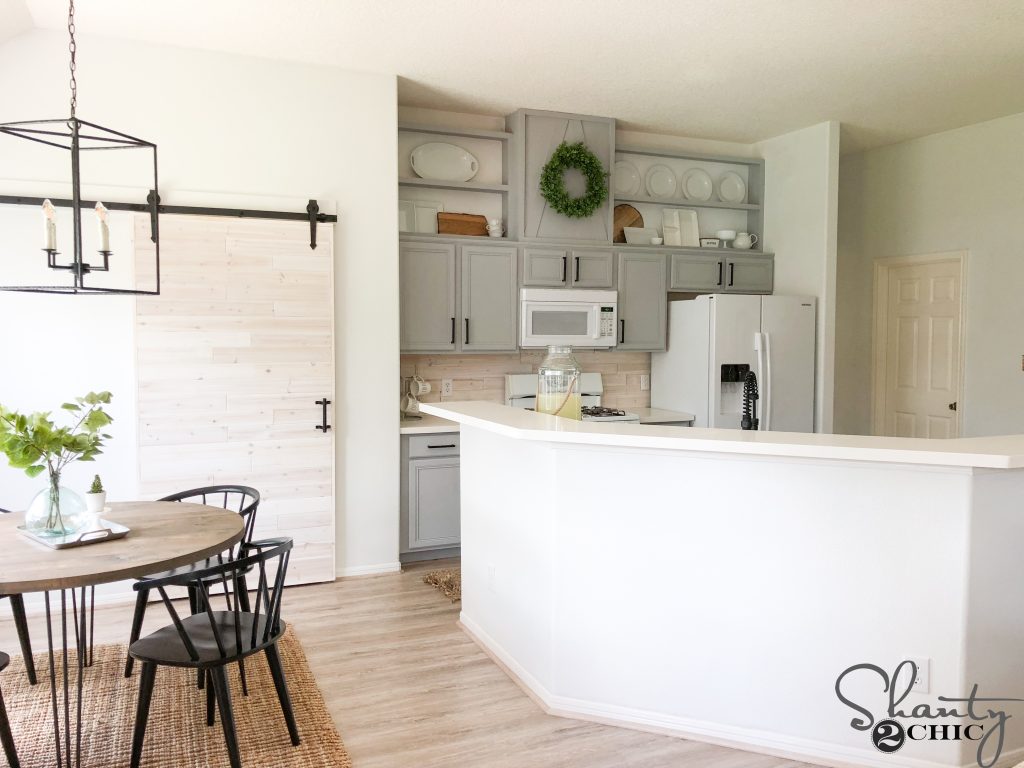
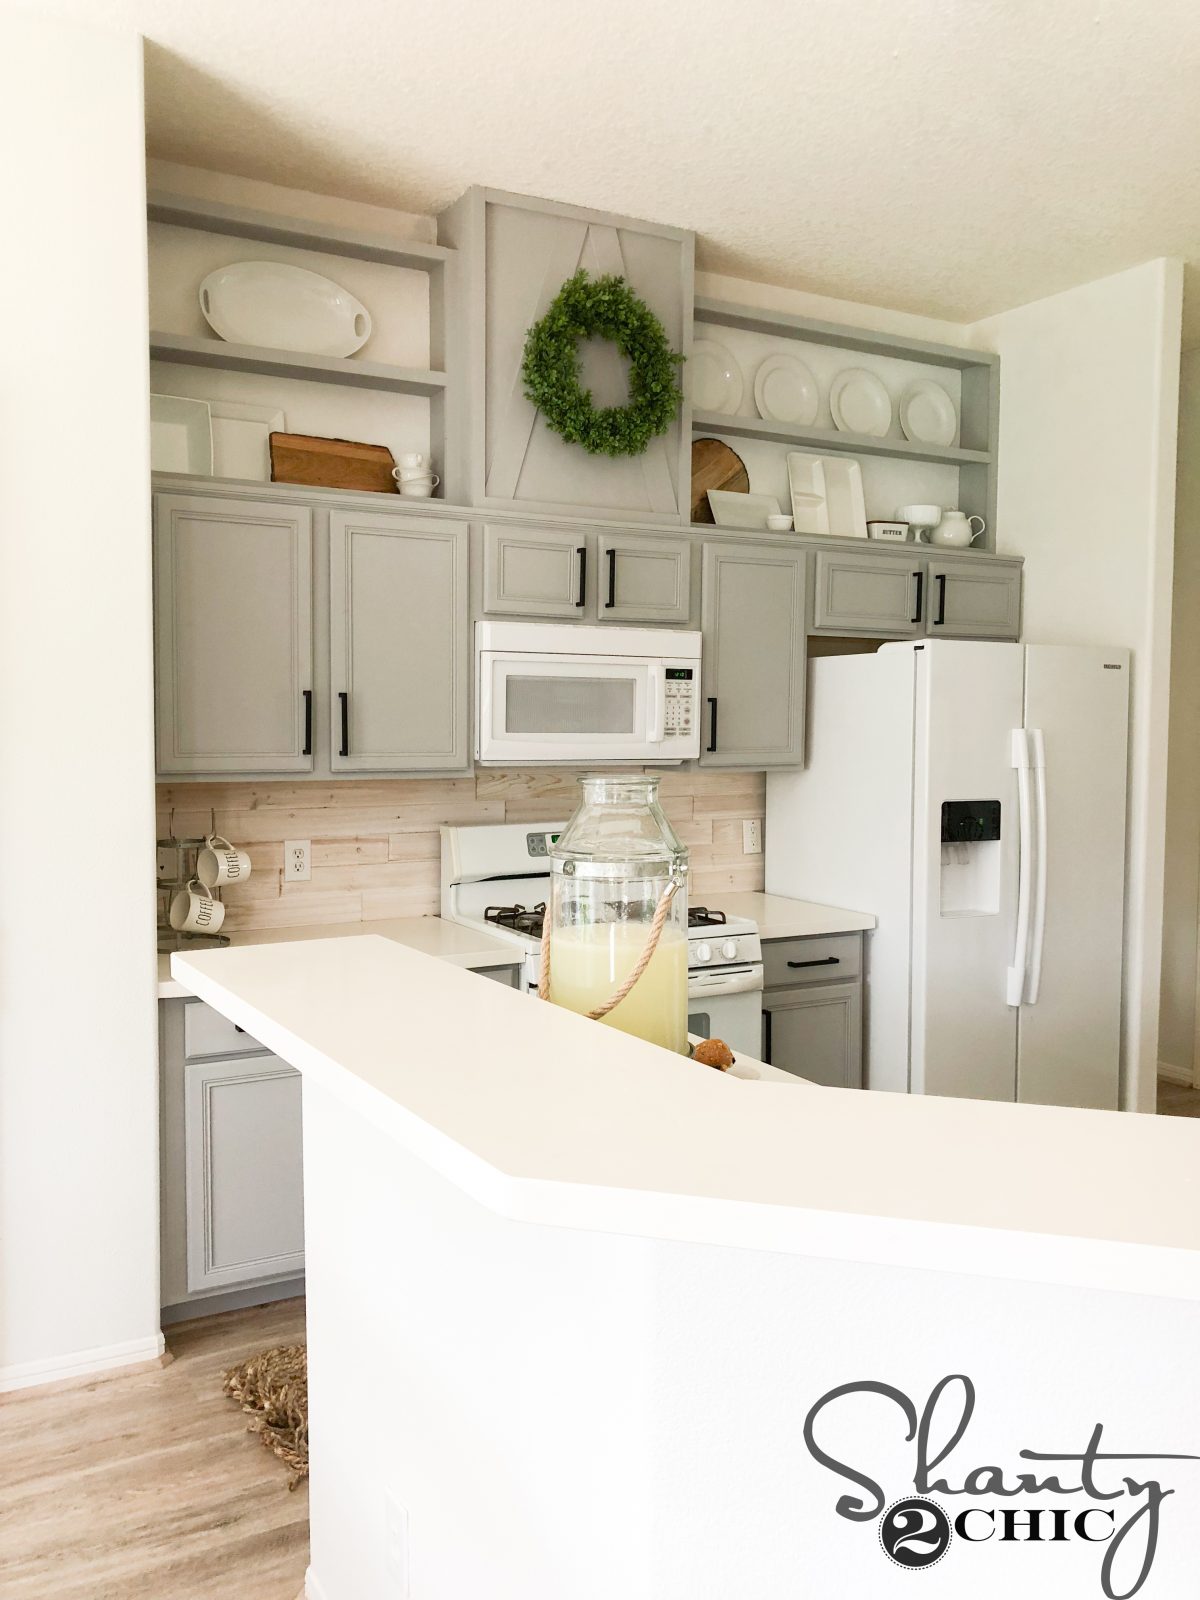
Love this DIY project so much! Getting rid of that 3 foot blank space of wall, adding storage and adding height to her cabinets, all in one! This was a super inexpensive project and an easy DIY for anyone!
Linking to all the sources below!
Flooring
Make sure to download the FREE printable plans HERE!
Make sure to subscribe to our Youtube Channel HERE so you don’t miss any of our how-to videos! You can see the rest of this #shantyhousecrash below!
- Farmhouse Dining Table – Free plans and how-to video live, now!
- DIY Driftwood Backsplash – Free plans and how-to video live, now!
- How to Add Height to Kitchen Cabinets – Free Plans and how-to video live, now!
- Custom Cabinet Trim Hack – Free Plans and how-to video live, now!
- How we Paint Cabinets – Free Plans and how-to video live, now!
- How to Frame and Cover a Crescent Window – Free Plans and how-to video live, now!
- DIY Round Kitchen Table – Free plans and how-to video live, now!
- DIY Pipe Shelves – Free plans and how-to video live, now!
- DIY Barn Door for Pantry – Free Plans and how-to video live, now!


Looks amazing! Just curious though, was there a reason you didn’t go all the way to the ceiling with the shelving boxes? Love the transformation. I bet your sister is thrilled!
I’m thinking that’s the spice rack ?
Great way to make use of the space you have. I love this post! It shows a good use of initiative and it looks incredible. Take care, Jamie.
Great work and space utilised very well.
Could you do a tutorial on just painting builder grade cabinets. Love the look and it seems like you did little to no sanding on the side piece you added to them. I cant stand ours and we would love them painted but the process for the press wood seems crazy difficult. If you have found a magical answer please share. Thank you in advance.
what color is the paint on cabinets
How do you not have paint brush strokes on the cabinets?
OMG this is the most brilliant use of this dead space I have ever seen!! Bravo to you! got here from Centsational Girl!
What paint color is this. The link isn’t working.
????????
Use the plans at www. WoodworkPlans.info for this project like I did – highly recommended you check those out too. They are detailed and super easy to read and understand unlike several others I found online. The amount of plans there is mind-boggling… there’s like 16,000 plans or something like that for tons of different projects. Definitely enough to keep me busy with projects for many more years to come haha
????????
Clicking on the cabinet paint color but it doesn’t show which gray color you used
none of the hyperlinks work. Was interested in link to the table. thank you!
Do you have a seperate post for painting the cabinetry? If not, what products were used, what color is the paint?
HI, what is the color of the paint? the HERE link is not working. Thanks
What kind of wood filler do ya’ll use? The hyperlink is not working for me 🙁
Once all of three boxes were installed, we filled all of our holes with wood filler (find our favorite wood filler HERE), gave it a good sanding and a couple of coats of paint!
The before picture look pretty spot on to my currant kitchen and I can’t wait to get my hands on it! Are the countertops the same in the before and after pictures? They look so much lighter, wondering if they are different or if the cabinet paint color just lightens them?
Also please forgive my spelling errors 😐 Apparently I can’t talk on the phone and type at the same time.
In like the look of what you did above the range. Do you think it would look good putting that above the fridge instead of the range?