Learn how to cut a perfect wood circle with a trim router and circle guide for this easy DIY door hanger. Clean results every time with no guesswork.
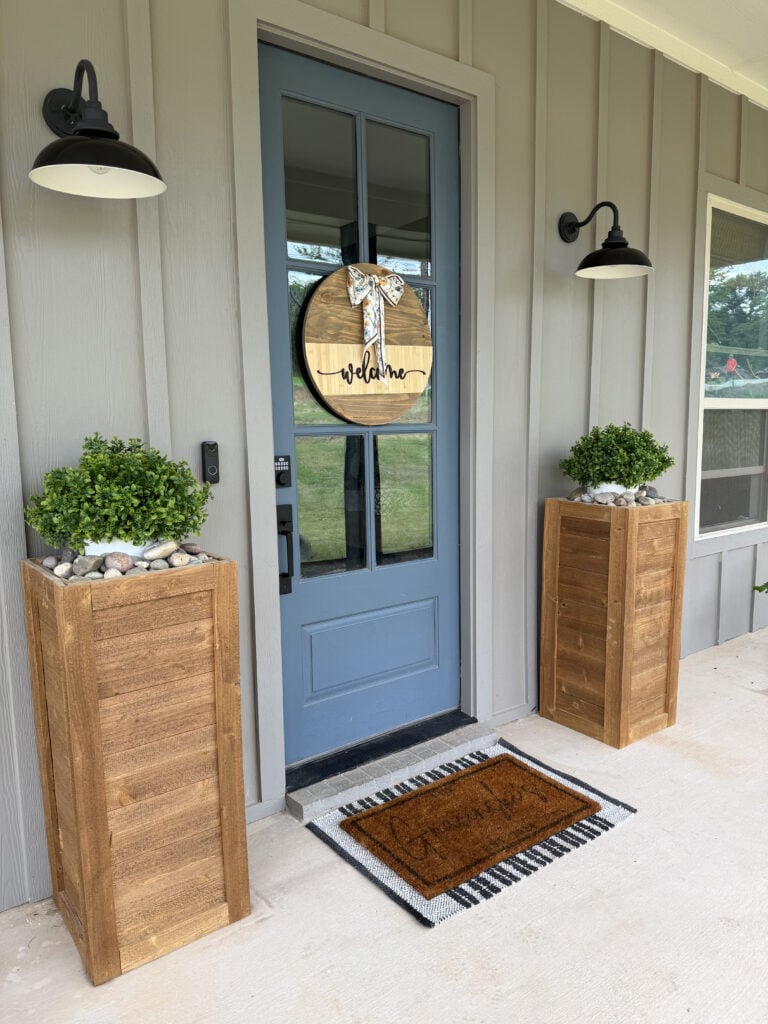
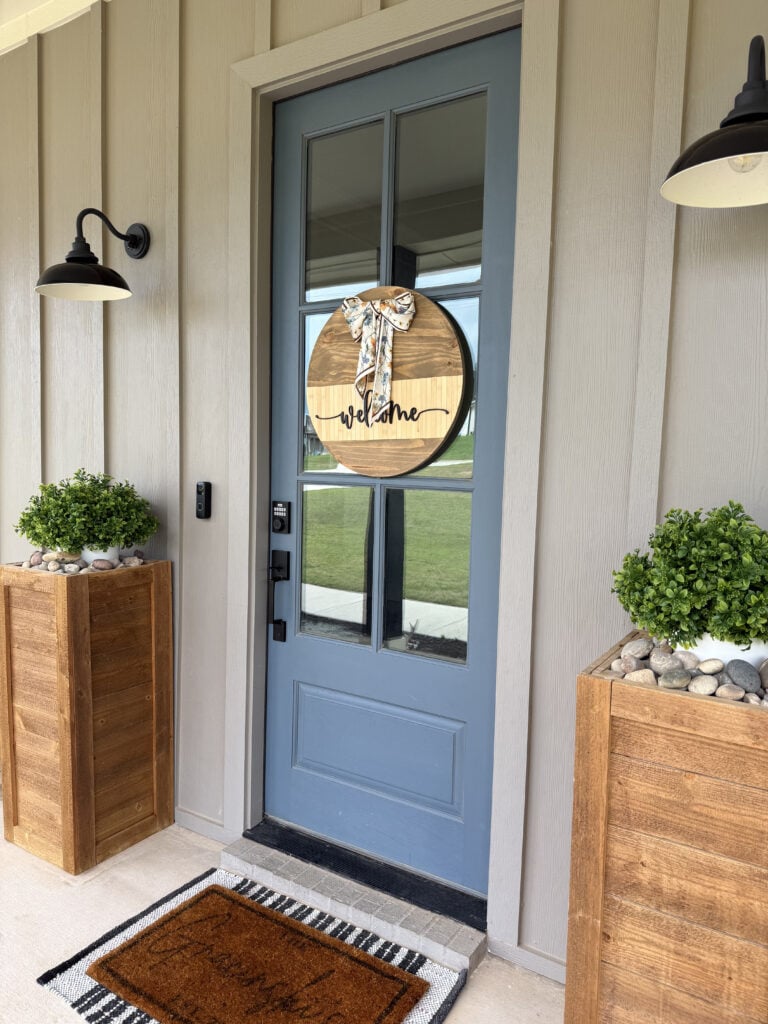
I’ve been wanting a simple, clean door hanger for my front door that I could switch out seasonally, and this one turned out exactly how I pictured it. It’s minimal, has a little texture, and was honestly so easy to customize.
The best part is I cut the entire circle using a trim router and circle guide. No complicated jigs and no fighting with a jigsaw trying to stay on a line.
If you’ve ever tried to cut a circle and it didn’t turn out quite right, this setup makes it so much easier and way less intimidating, even for bigger projects.
Watch me make this DIY Door Hanger from start to finish on our Instagram!
Table of Contents
Why Use a Trim Router to Cut a Circle?
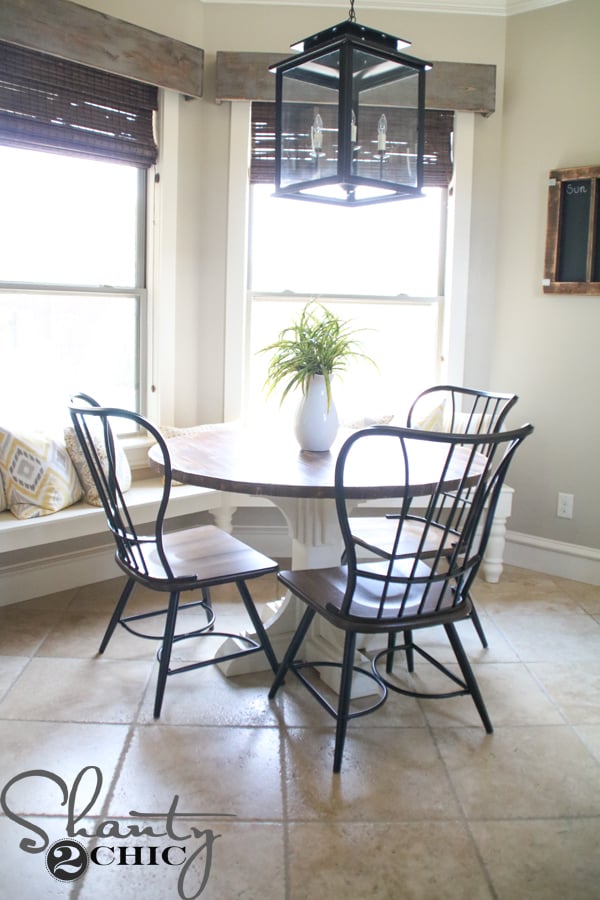
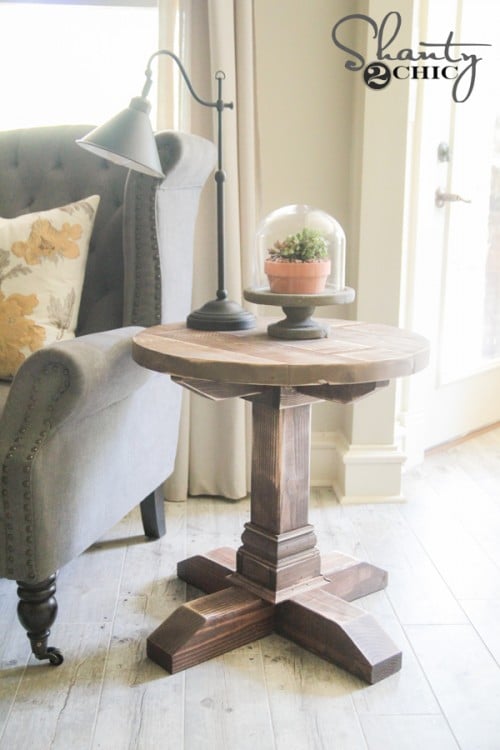
I’ve cut a lot of circles over the years for round table builds, from small end tables all the way up to dining tables. Before this, I was always making my own circle jig, and honestly, the setup and measuring felt like a whole project before I even got to start cutting.
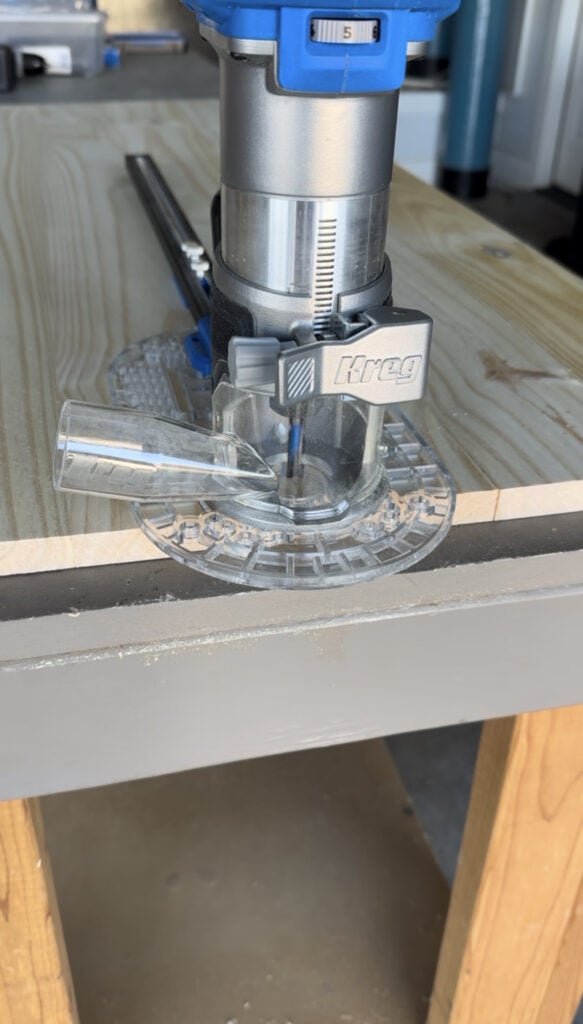
Using the Kreg 20V Ionic Drive 1/4″ Trim Router Kit with the Kreg Trim Router Circle Guide completely changed that for me.
The router itself is compact and lightweight, so it’s easy to control, especially when you’re following a curve. The depth adjustment is smooth, which makes it easy to dial in each pass, and swapping out bits is quick so you’re not slowing down.
The circle guide is what really makes this feel simple. You set your diameter, drop the pivot pin into your center point, and you’re ready to go. No math, no building your own jig, and no second guessing your measurements.
I also like the handle placement because it gives you a steady grip while you’re cutting, so it feels controlled the whole time instead of awkward. Setup is quick, and once you start, it just glides and keeps everything perfectly round. It cuts a perfect circle every time, which takes all the guesswork out of it.
And the best part is this isn’t just for small projects. It can cut circles up to 52″, so it works for everything from a simple door hanger like this to full-size coffee tables and dining tables. It makes those bigger builds feel a lot more doable.
Tools and Materials Needed
Tools
- Kreg Trim Router
- Kreg Trim Router Circle Guide
- Kreg Random Orbit Sander
- Kreg 20V Ionic Drive Drill
- Kreg Project Blocks (optional)
- Stapler
- Scissors
Materials
- 3/4″x24″x48″ Project Panel
- “Welcome” lettering (I cut mine with my Glowforge but you can find them in craft stores or Amazon)
- Scrap Pole Wrap
- Wood Glue
- Wood Filler
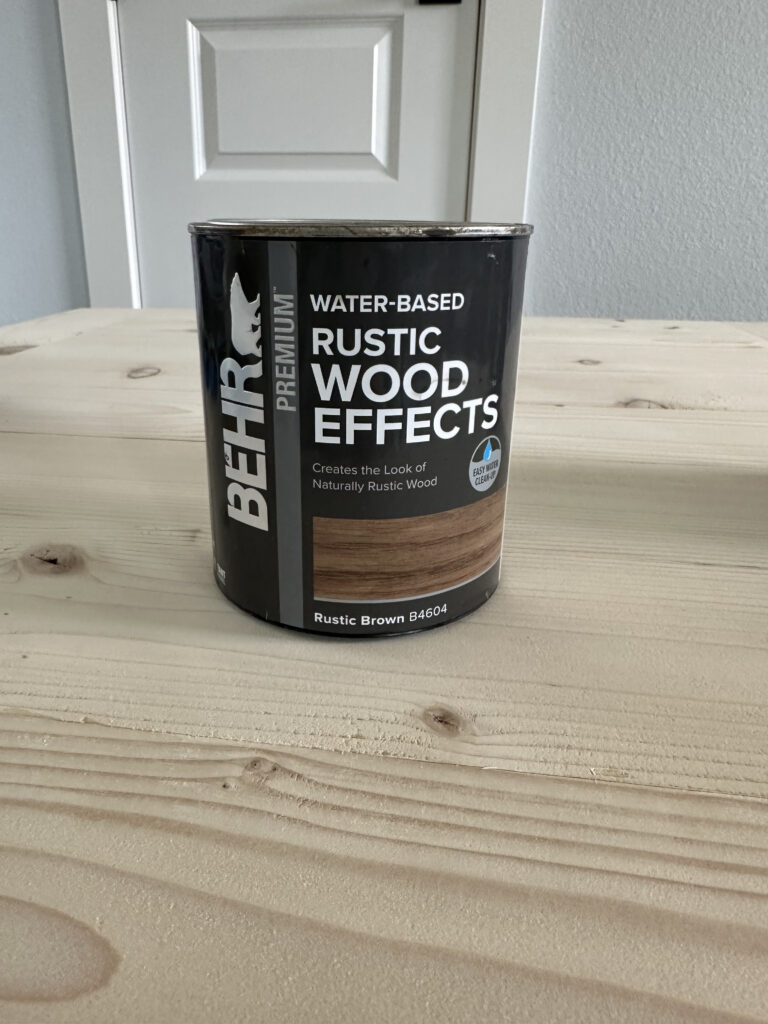
- Stain (I used Behr Rustic Brown)
- Spray Paint
- Decorative Scarf
- Sawtooth Hangers
How to Make a DIY Door Hanger
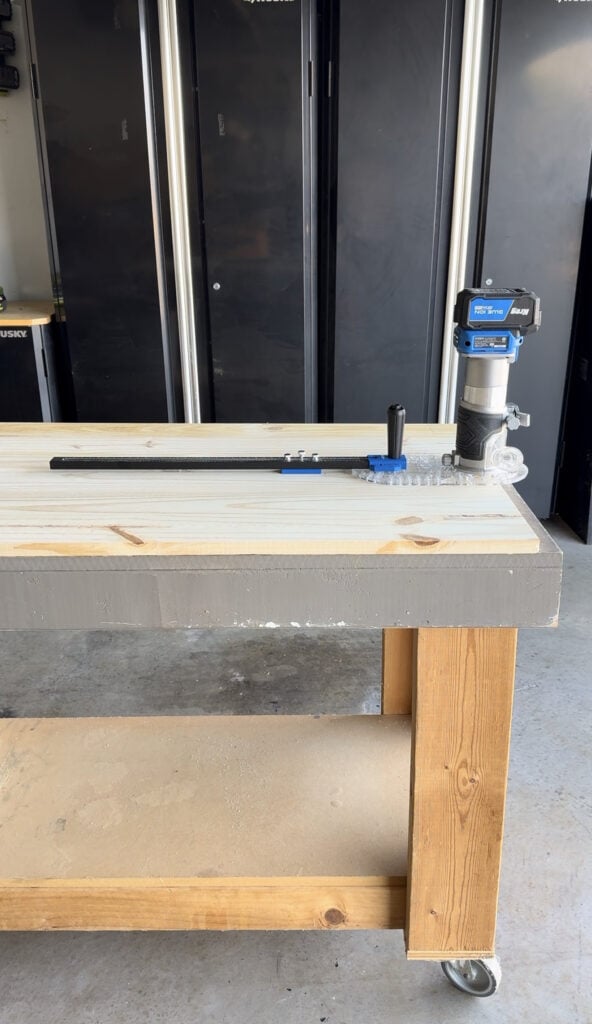
For this project, I used my Kreg 20V Ionic Drive 1/4″ Trim Router Kit paired with the Kreg Trim Router Circle Guide, and it really takes the guesswork out of cutting circles.

The router is lightweight and easy to control, which makes a big difference when you’re following a curve. It has a soft start so it doesn’t jerk when you turn it on, and the variable speed lets you adjust based on the material.

I also love the depth adjustment because you can dial in each pass instead of guessing. Since you’re cutting in passes, you can work through thicker material without forcing the cut.
The circle guide attaches right to the router and turns it into a circle-cutting tool. You set your diameter, drop the pin into your pivot hole, and it keeps everything perfectly round as you cut. It can handle circles from small projects like this all the way up to 52″, so it’s not just for door hangers.
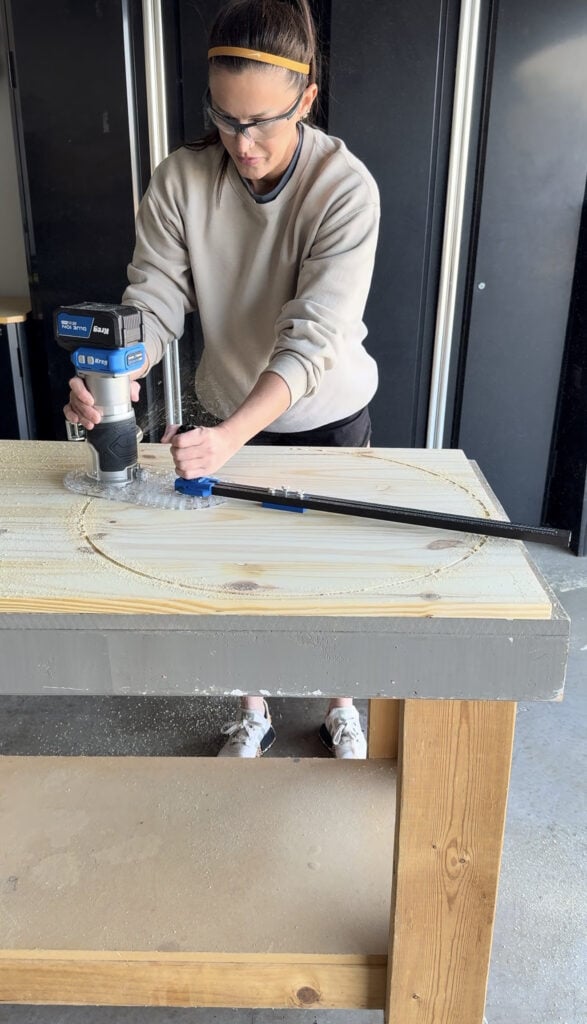
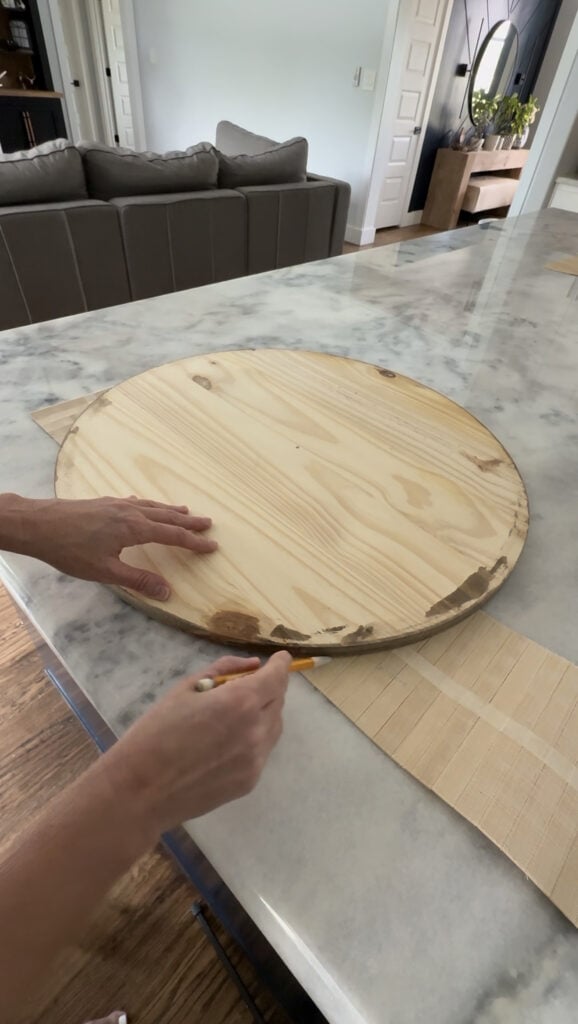
Step 1: Cut a 22″ Wood Circle
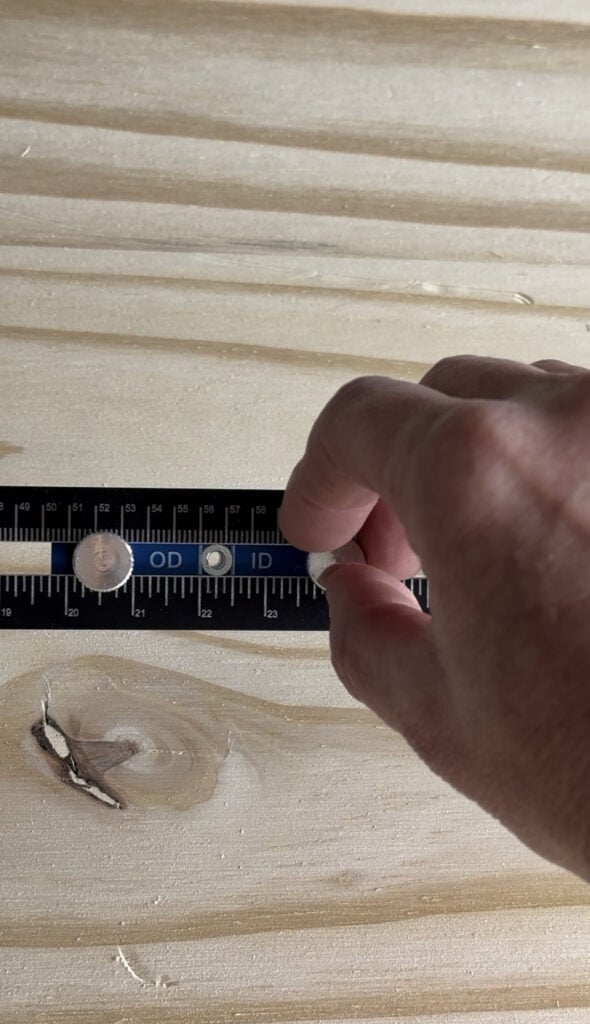
Start by setting your project panel on your work surface and adjusting your circle guide to a 22″ diameter. Once that’s set, you’re ready to go.
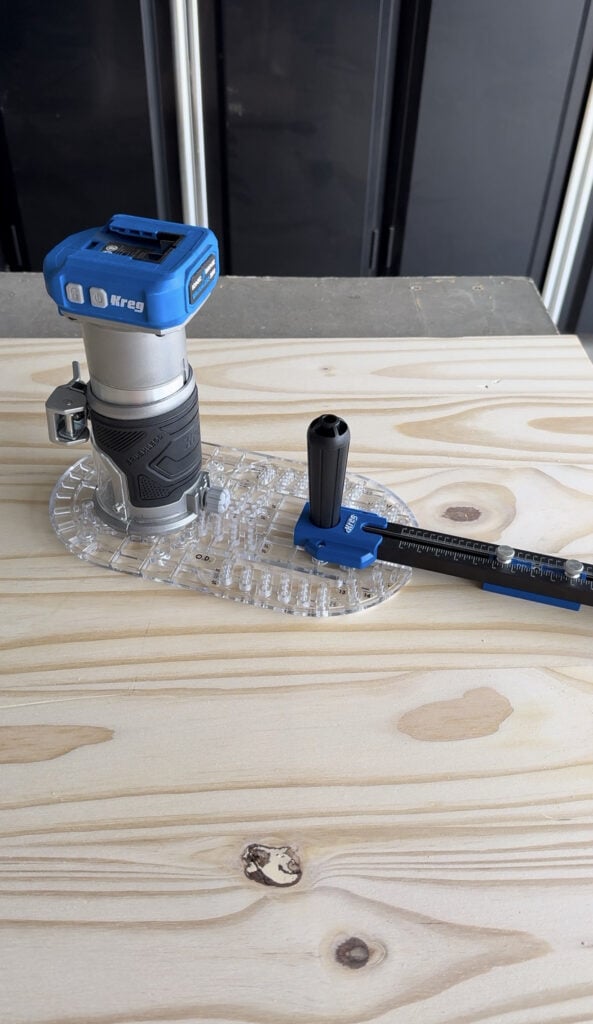
Next, drill a small pivot hole in the exact center of your board. This is where the circle guide pin will sit and act as your anchor point while you cut.
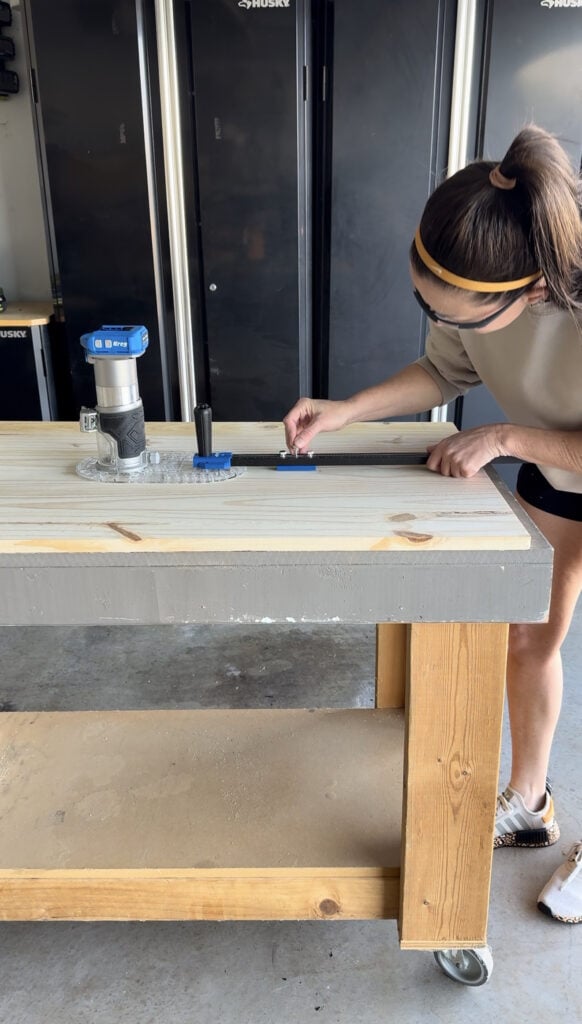
Place the guide pin into the hole and attach the guide arm to your router.
Before you start cutting, set your router bit depth to 1/4″. I always cut circles in multiple passes instead of trying to go all the way through at once. It gives you more control and keeps the edge clean.
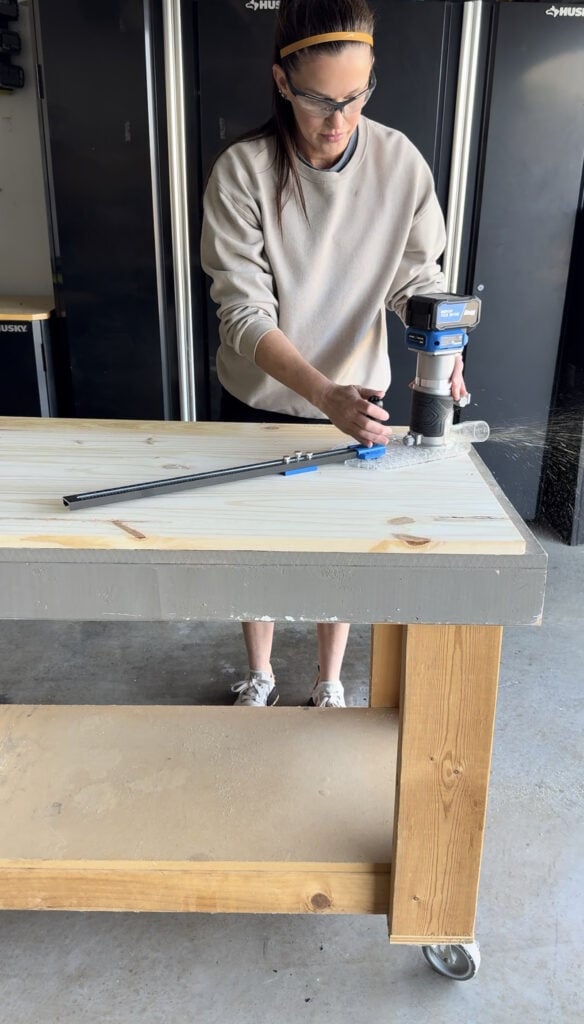
With your first pass set, guide the router slowly around the circle. The guide does the work here, so you don’t have to force anything. Just keep a steady pace and let it follow the path.
After the first pass, lower the bit another 1/4″ and repeat the process. At this point you’ll be about halfway through the board.
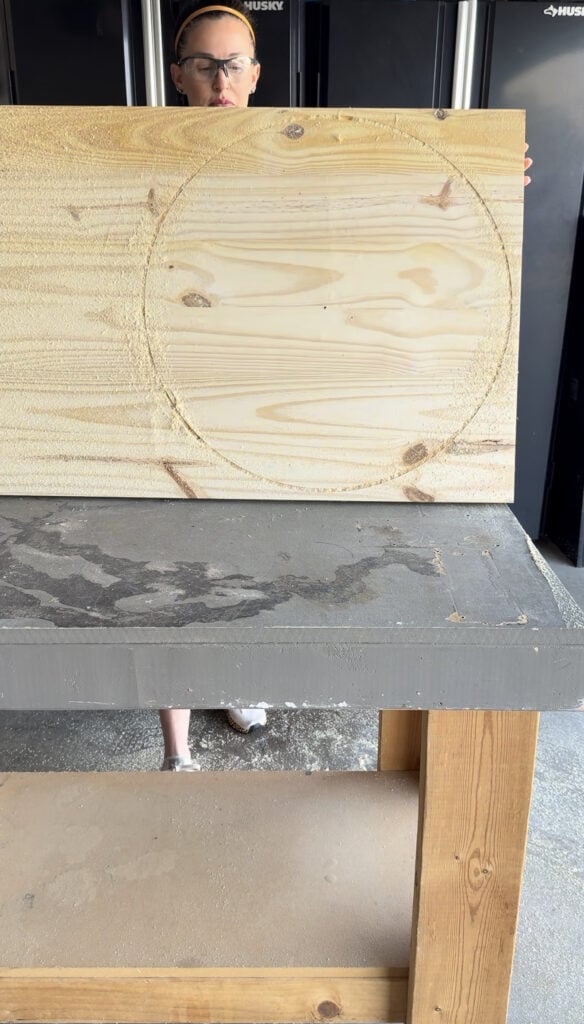
To finish the cut, flip your board over and place the guide pin back into the same pivot hole.
Reattach the guide arm and make your final pass until the circle is fully cut out.
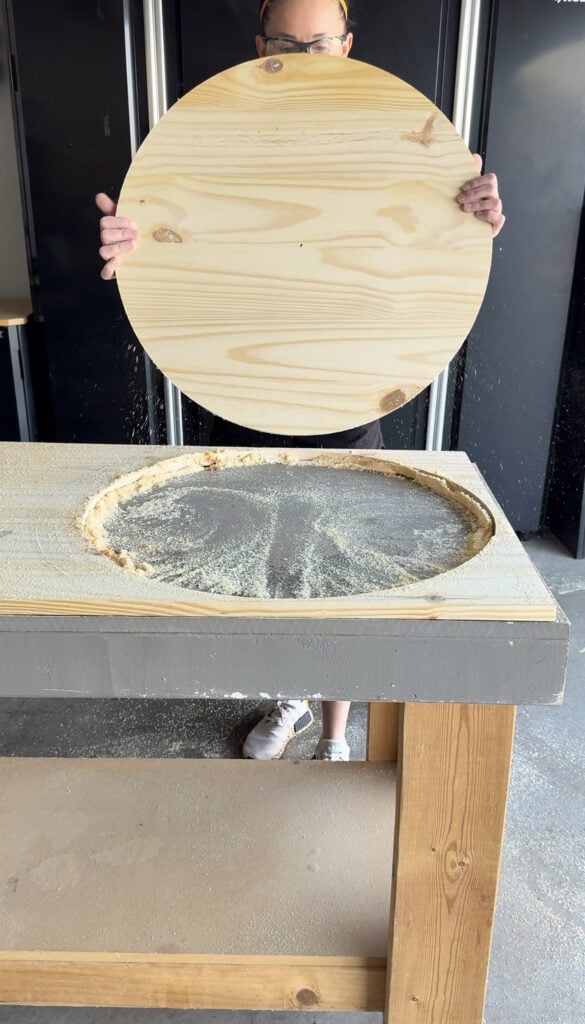
Flipping the board for that last pass helps prevent tear-out and gives you a clean edge on both sides.
Step 2: Fill and Sand the Circle
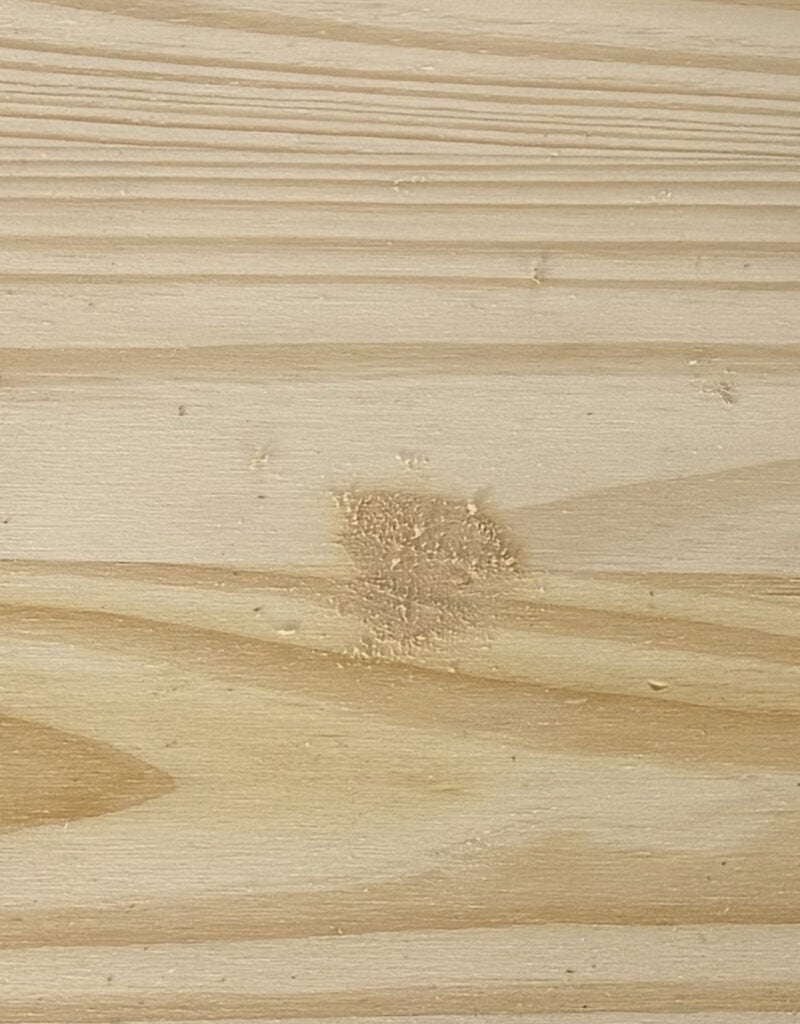
Once your circle is cut, fill the pivot hole with wood filler and let it dry.
Set the circle up on project blocks to lift it off your work surface, then sand the entire piece smooth. I LOVE my Kreg Project Blocks and use them for every project when I’m finishing! They’re super affordable and a must-have for your shop!
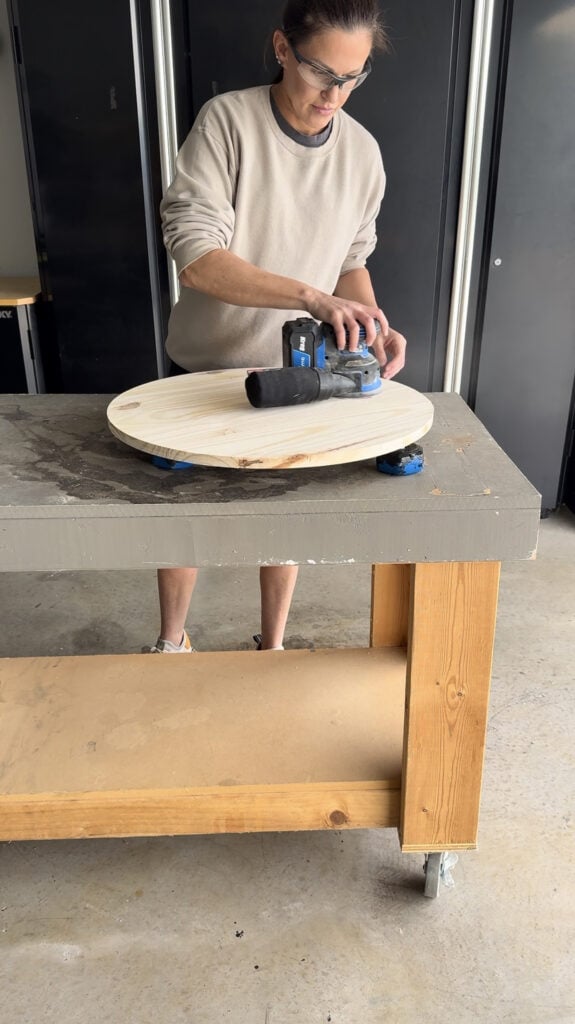
To sand the whole circle down, I used my new Kreg 20V Ionic Drive Random Orbit Sander. I love how lightweight this sander is, it’s become a quick favorite! I used an 80-grit sand pad followed by a 120-grit. This step makes a big difference in how your finish looks, so it’s worth taking your time here.
Step 3: Stain the Wood and Paint the Lettering
Apply one coat of stain to the circle and let it dry completely.
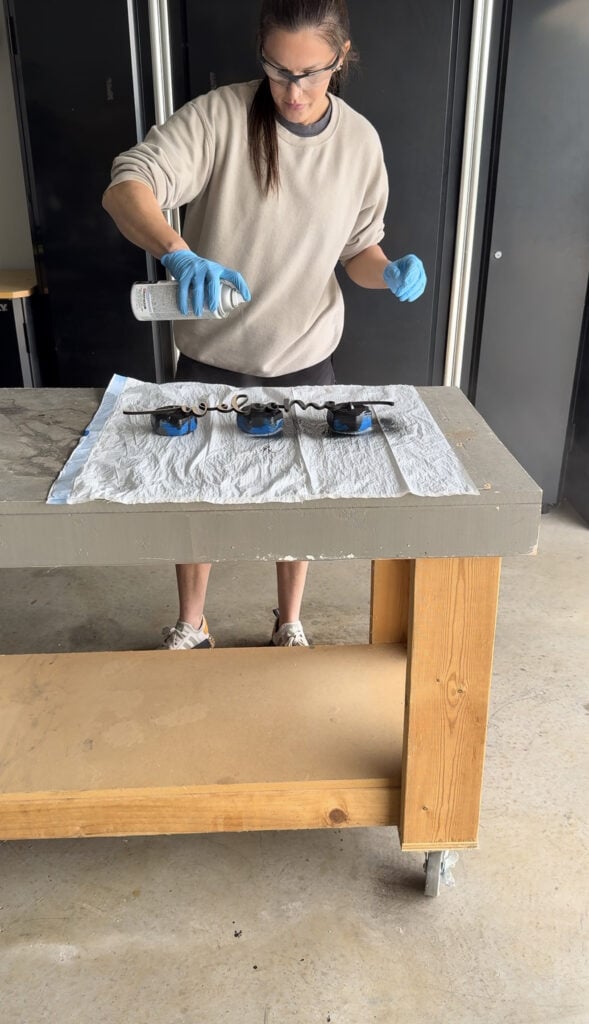
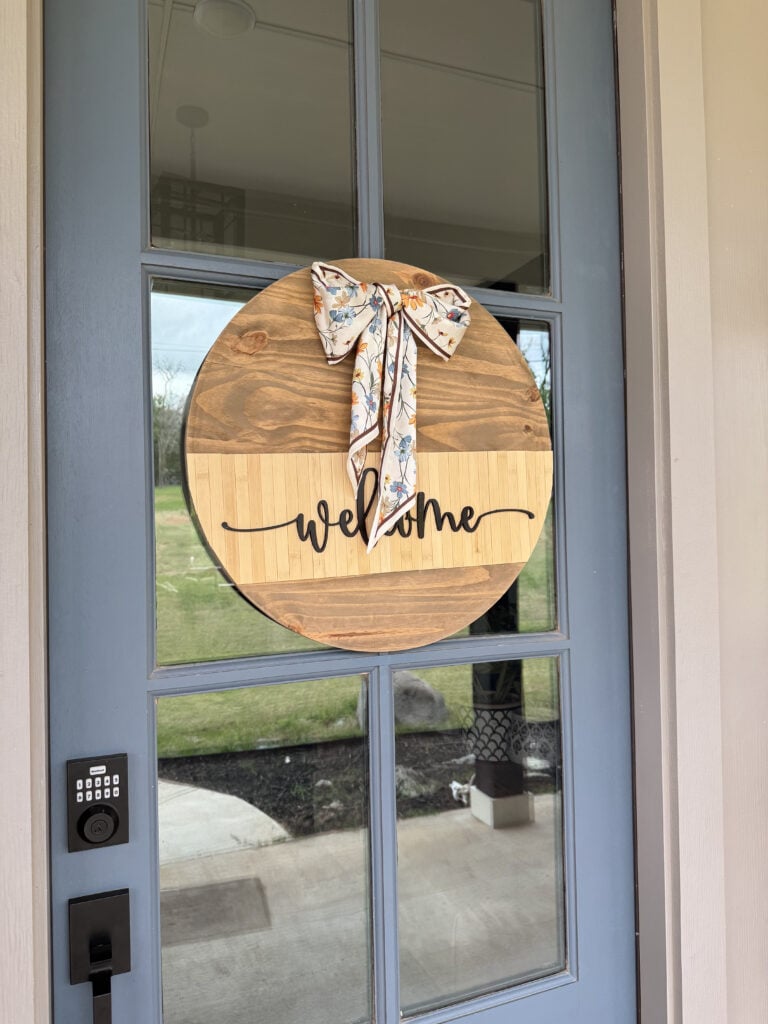
While that’s drying, paint your lettering piece. I cut my “Welcome” sign from 1/8″ MDF (I used my Glowforge but you can find something similar at a craft store already cut) and spray painted it black. This is where you can really customize the look depending on your style.
Step 4: Add Texture to the Bottom Half
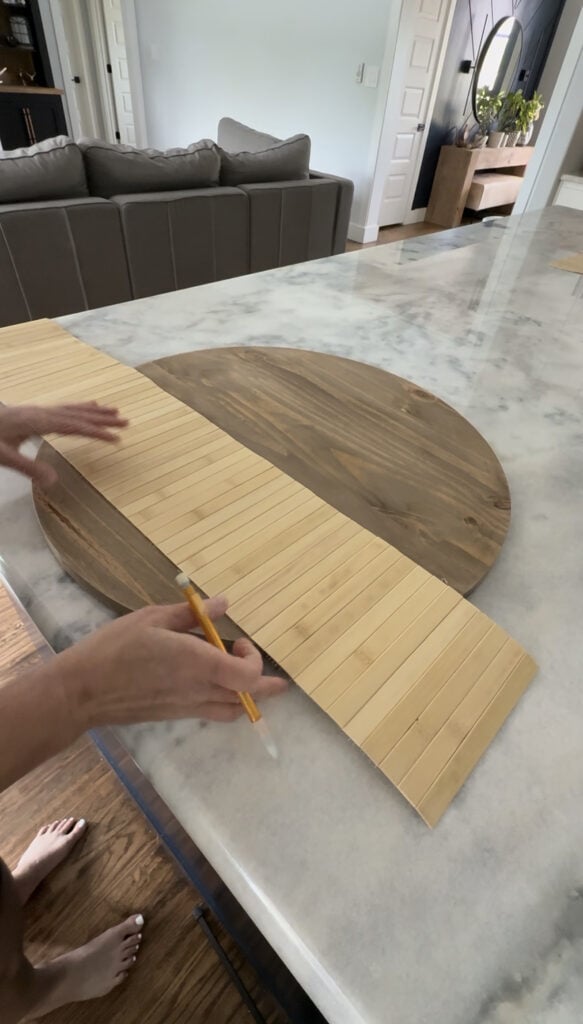
To add some texture without painting, I used a scrap piece of pole wrap from our Modern Square Coffee Table build.
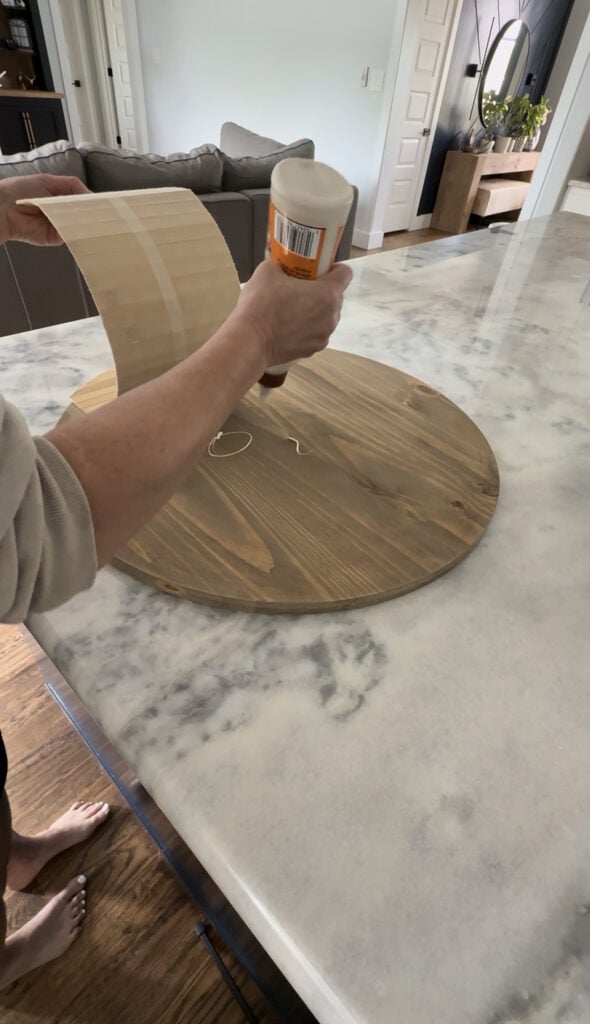
I traced the shape onto the bottom portion of the circle, cut it out with scissors, and glued it into place.

It adds just enough detail without making it feel busy.
Step 5: Attach the Design
Once everything is dry, glue your lettering onto the front of the circle.
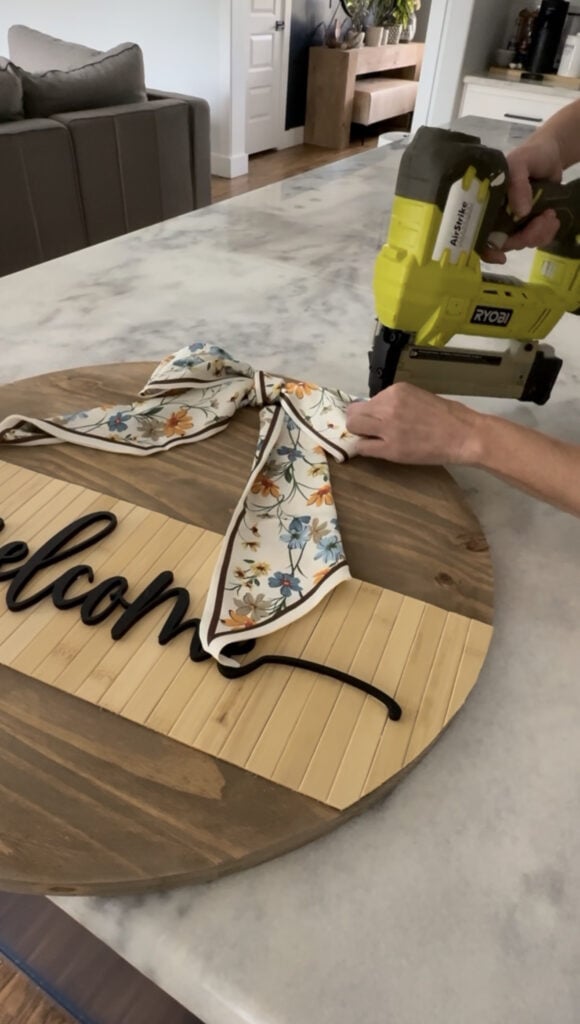
Then create a simple bow using a ribbon or scarf and staple it to the top of the door hanger.
Step 6: Add Hangers and Display

Attach two sawtooth hangers to the back of the circle.
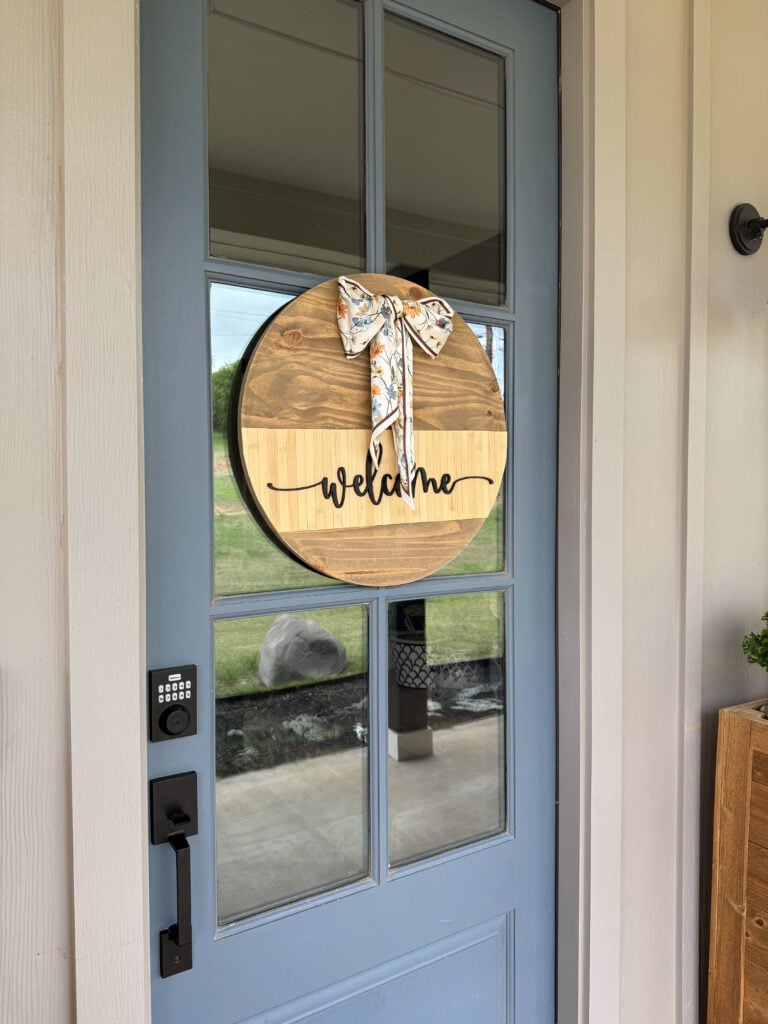
To hang it, I used suction cup wreath hangers on my glass door. It’s an easy way to display it without adding any permanent hardware.
- Free plans for the Tall Porch Planters
Tips for Cutting a Perfect Circle with a Router
- Let the router do the work and don’t rush it
- Cut in multiple shallow passes instead of one deep cut
- Make sure your pivot hole is centered
- Flip your board for the final pass
- Use project blocks or support underneath your piece
Easy Ways to Customize Your Door Hanger
One of my favorite things about this project is how easy it is to switch it up.
You can change the wording, swap out the bow, paint instead of stain, or add different textures depending on the season.
Once you have the circle cut, the rest is completely customizable.
That’s It
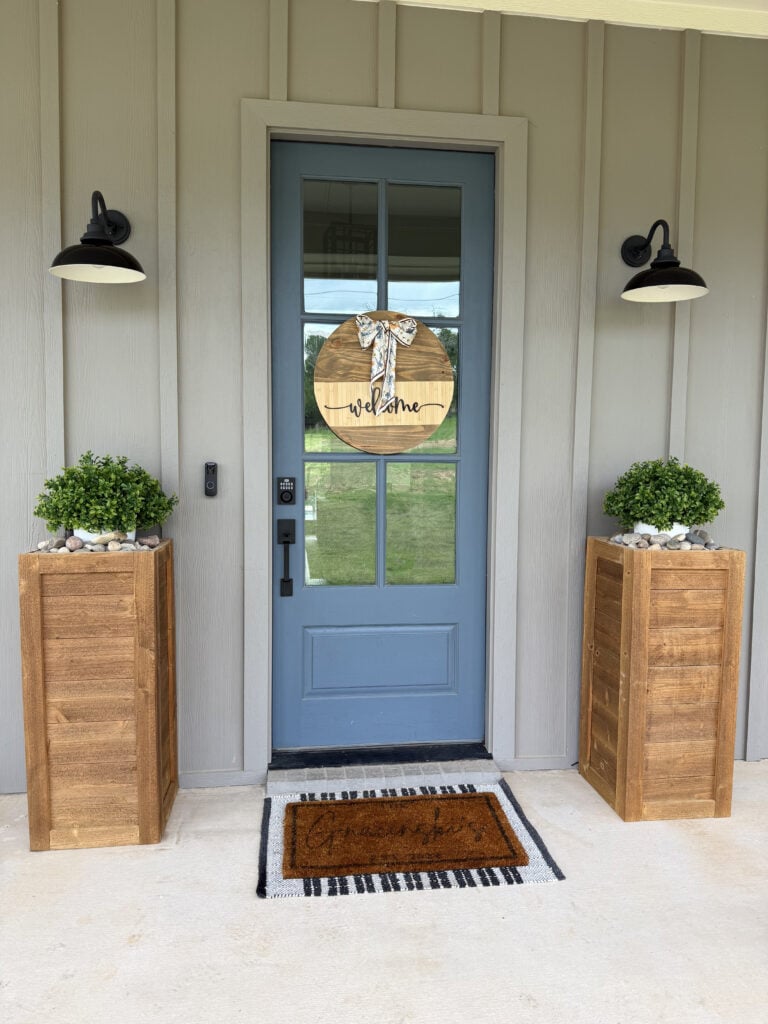
I love how simple and clean this door hanger turned out. It adds just enough curb appeal without being over the top, and it was really easy to put together.
Using a trim router and circle guide makes cutting a perfect wood circle quick and accurate, and it opens the door for so many other projects too. If you’ve avoided round builds before, this makes it a whole lot easier.
This same method works for larger builds too. I’ve used it for round coffee tables and dining tables, and it makes the process so much easier.
Here are a few of our round table builds you can check out for ideas and free plans.

Cutting a perfect circle doesn’t have to be complicated. This trim router and circle guide combo makes it simple every time.
Happy Building!


Haven’t commented in ages but this deserves one. Amazing article. Take care. https://aksaraysohbet.com/
Nice work on this one. It’s clear a lot of thought went into this. Keep them coming! — yaşam rehberi https://https://internetantalya.com/antalya-escort/kumluca/
Superb post. It’s clear a lot of thought went into this. Will definitely check back for updates. — visit site https://https://istanbulinformer.com/i-stanbul-escort/cekmekoy/
You turned what’s usually a dry topic into something readable. Rare to see such a balanced take. Thanks again. Izmirni rehber: https://izmirni.com/
This is an excellent DIY tutorial! The instructions are clear, well-structured, and make cutting a perfect wooden circle with a trim router much less intimidating. The detailed guidance and helpful visuals make this project accessible for both beginners and experienced woodworking enthusiasts.
Projects like these also reinforce the importance of using quality wood materials and the right tools to achieve clean, professional results. Those interested in exploring a wide range of plywood, boards, laminates, and other woodworking materials can find valuable resources at https://www.plywoodbazar.com before starting their next DIY project.
Thank you for sharing such a practical and inspiring woodworking guide—it’s sure to encourage more people to try building their own home décor.
You nailed the nuances here. Not many folks dig into this level of detail. Really appreciate the effort.
Already sharing this with a couple of friends. Appreciate you putting the time into this. Thanks again.
I’ve read a few posts on this, but yours stands out as well researched. Stay awesome.
This is a very creative and practical tutorial. Cutting a clean wood circle can be challenging, so it’s great to see the process explained so clearly with a trim router. The finished door hanger is a great example of how simple woodworking techniques can create personalized décor pieces with a professional look. It’s always interesting to follow projects like this alongside broader home décor and material trends here: https://plywoodbazar.com/ A helpful and inspiring DIY guide.
Every spin of the reel is a lesson in probability and risk management for those who take their gaming seriously. By exploring https://xn—–6kcckd0aibbcbol0bqf7ac5bb.xn--80asehdb/ a player can learn about the 95.79 percent return and the mystery jackpot system that defines this fruit classic.
Thoroughly enjoyed reading this. Very comprehensive coverage. Will definitely be following your blog.
I’ve been researching this topic and your article provided great insights.
I’ve been researching this topic and your article provided great insights. Keep creating great content like this.
Very well explained, bookmarked for future reference.
Interesting perspective on this subject. Thanks for sharing! Bookmarked your site for future reference.