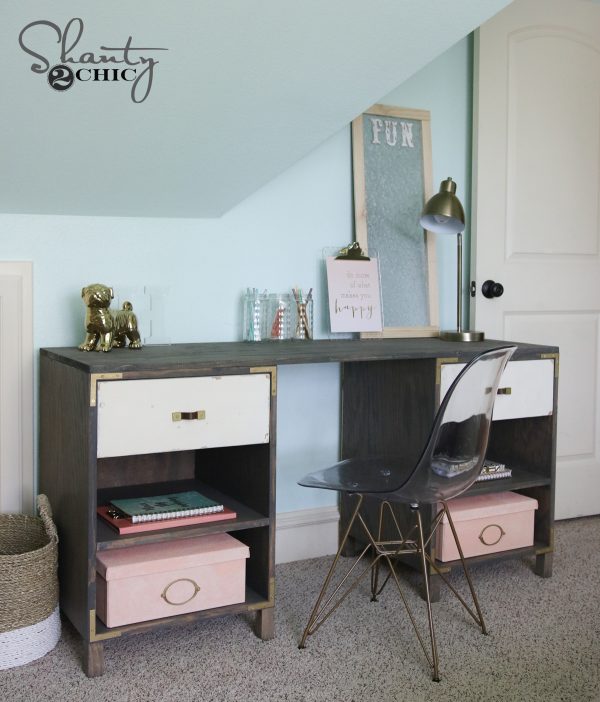
Looking for the perfect farmhouse-style crib that’s safe, stylish, and budget-friendly? This DIY Farmhouse Crib is designed with a low-profile build (perfect for shorter moms and dads), customizable height, and a beautiful rustic finish that looks straight out of a designer catalog.
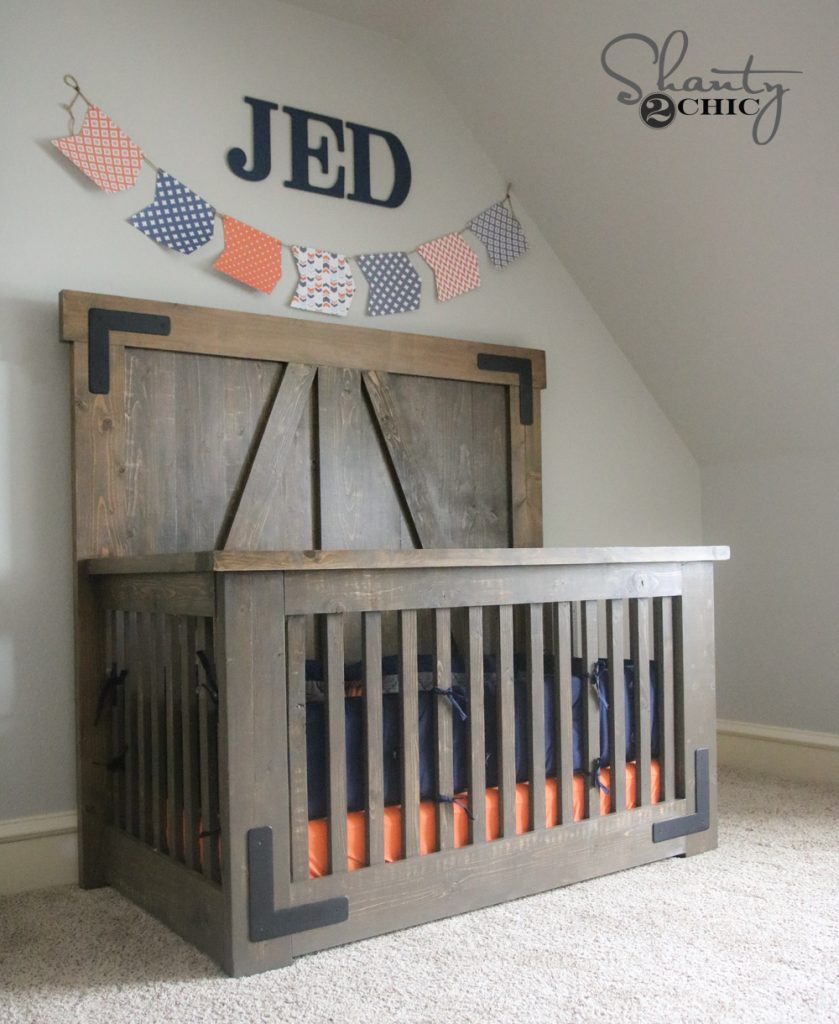
Table of Contents
Read This Before You Build This Crib
- Skill level: Intermediate (comfortable with basic power tools)
- Tools required: Drill, Miter Saw, Kreg Jig, Table Saw (optional)
- Approximate build time: 1–3 days
- Cost at time of build: Under $300
- What I’d do differently today: See notes below
- Who this project is (and isn’t) for: This project is ideal for people that want a custom-looking crib at a fraction of the cost. This project is not for people who do not prefer to DIY.
Would I Build This the Same Way Today?
This project was completed in 2017. If I were building it today, I would keep the design and approach the exact way it is!
Materials, tools, and personal preferences evolve, but the core structure and approach of this build still hold up well. I would probably lighten up the stain a bit to give it a more modern look but this guy held up through my son’s toddler years and was a solid piece when I handed it down to a friend. It was definitely a labor of love building it while pregnant.
Best part? You can build it yourself for under $300 with our FREE crib plans!
Why You’ll Love This Crib
Parent-friendly height – no more stretching or straining.
Budget build – farmhouse style without the expensive price tag.
Easy to customize – want it taller? Just adjust the legs and panels.
Rustic charm – the barn door trim gives it that farmhouse feel.
Step-by-Step DIY Crib Tutorial
Download the Plans
Start by grabbing your free printable crib plans with detailed diagrams and cut lists.
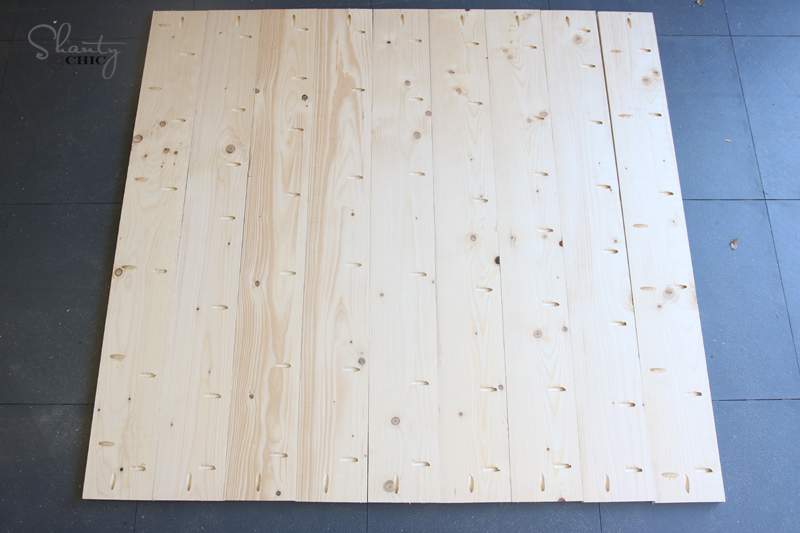
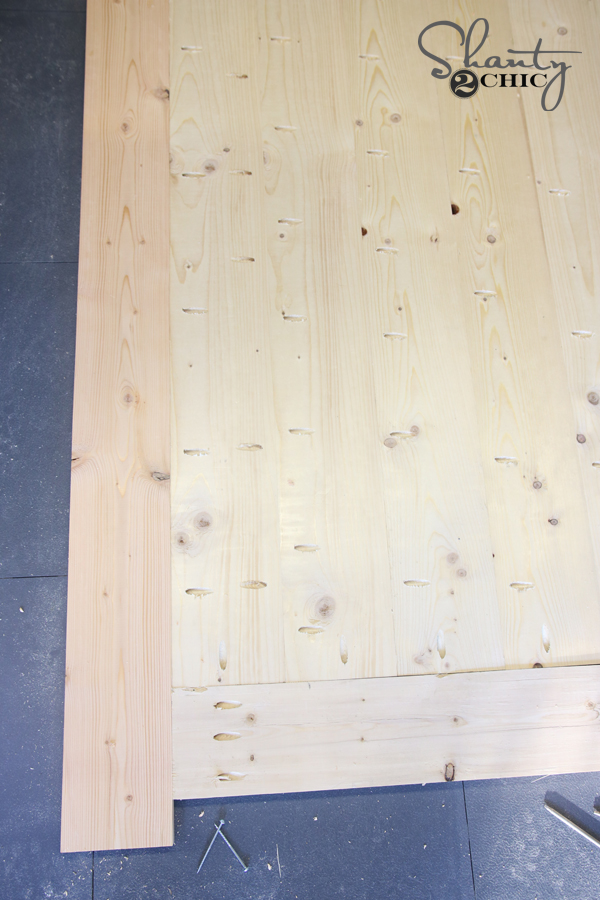
Build the Headboard (Back Panel)
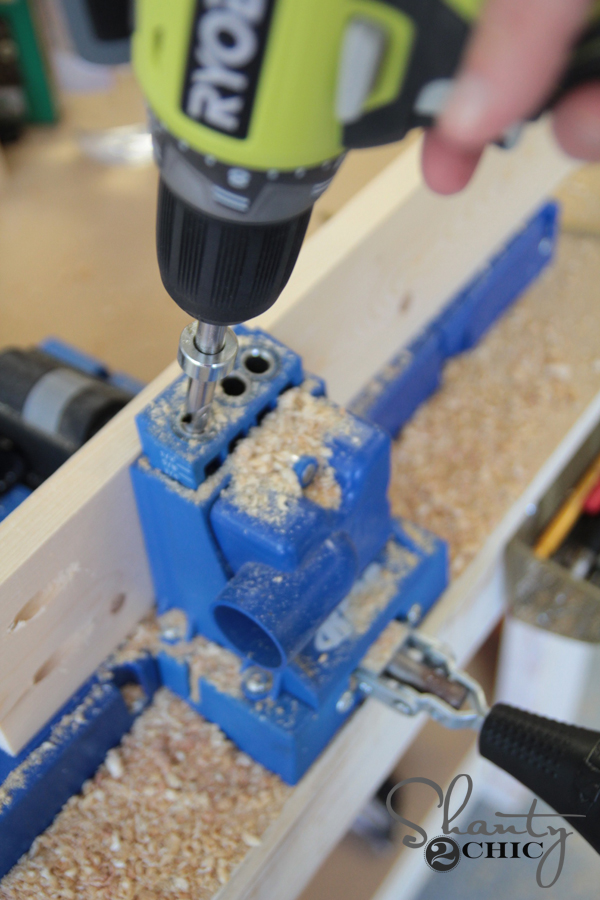
Use 1×6 boards joined with a Kreg Jig
- Frame with 2×6 and 2×4 boards (rip them down for a cleaner look)

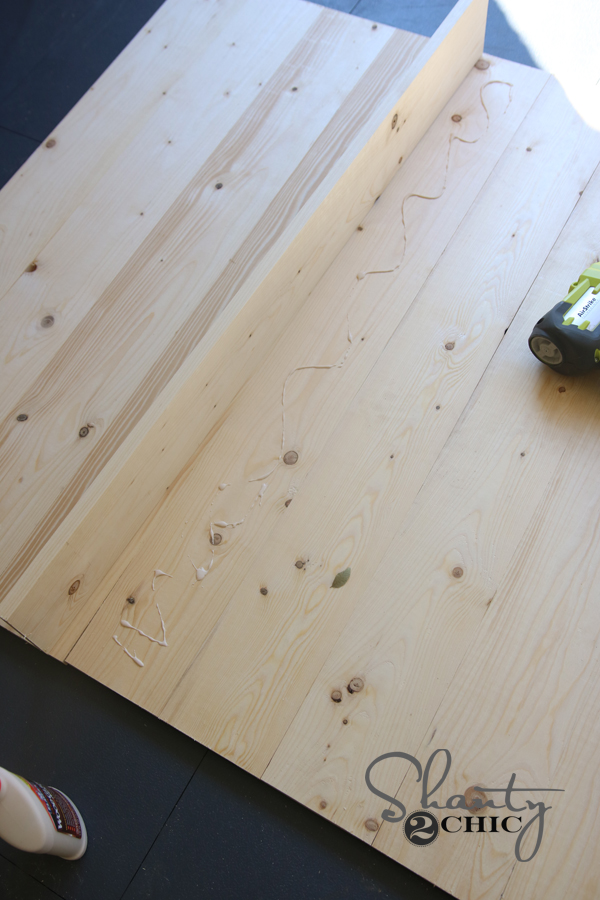
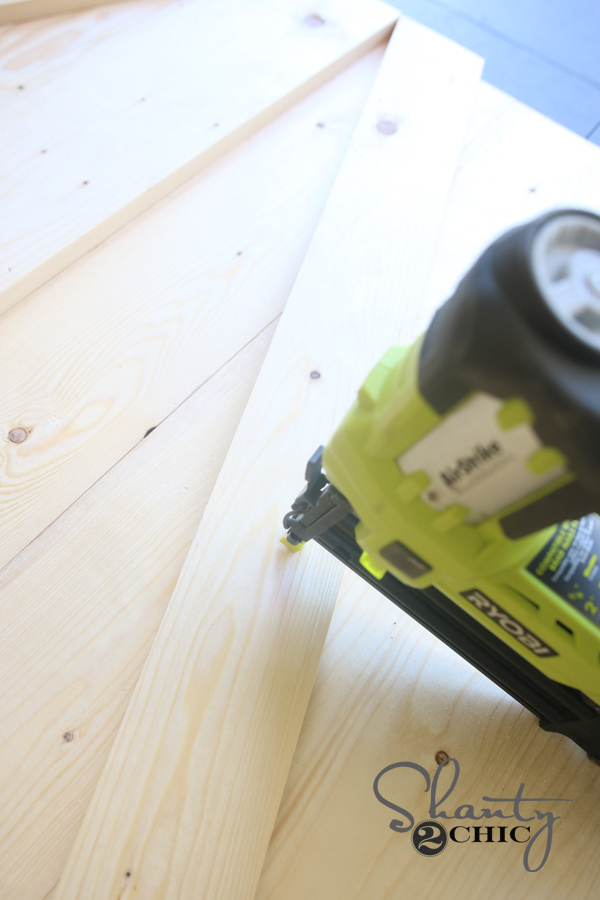
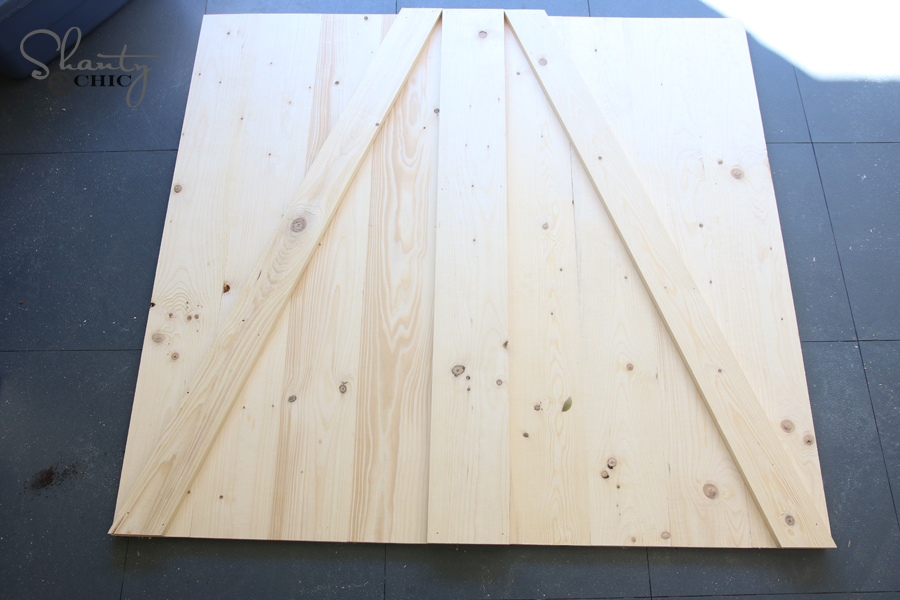
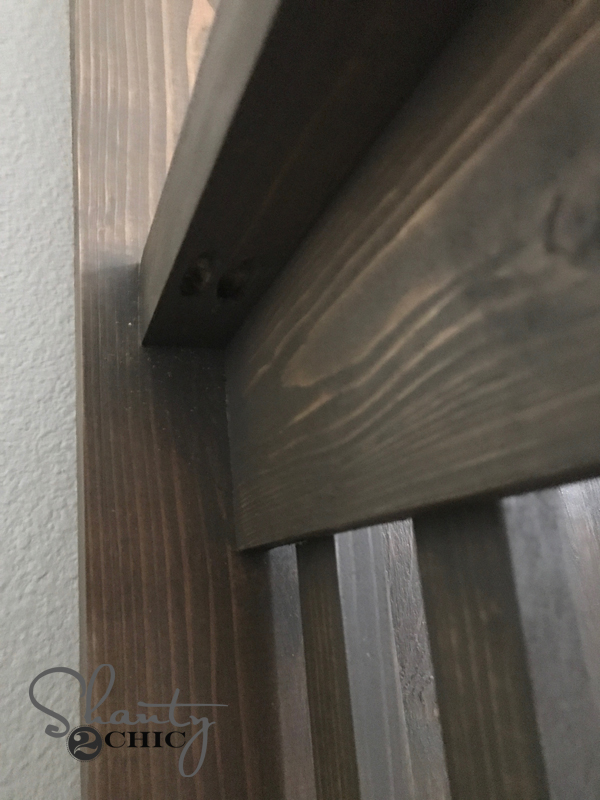
Add the Barn Door Trim
Glue + finish nails = instant farmhouse vibes.
If you’re planning another bed build and want a larger-scale example, our DIY platform bed plans walk through similar measurement and structural decisions for a different mattress size.
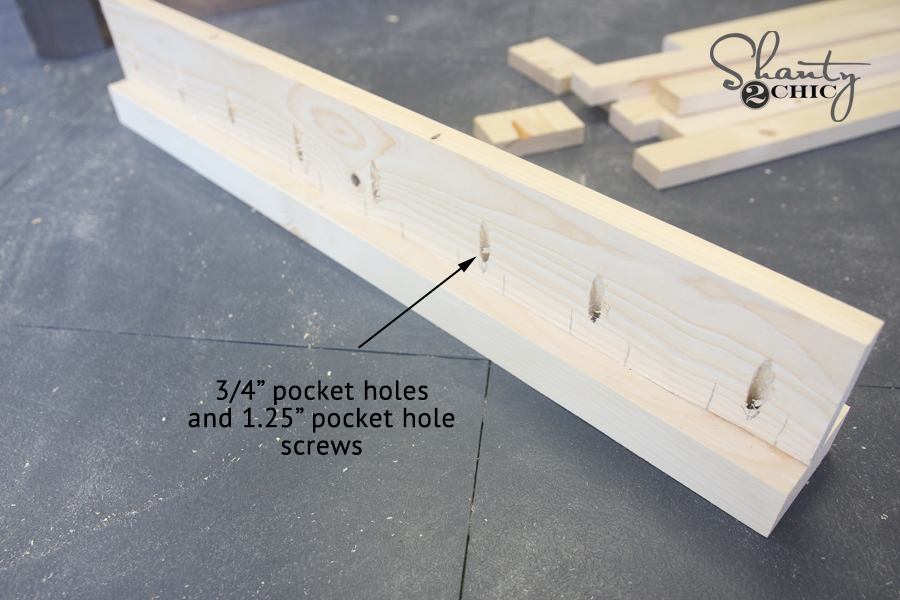
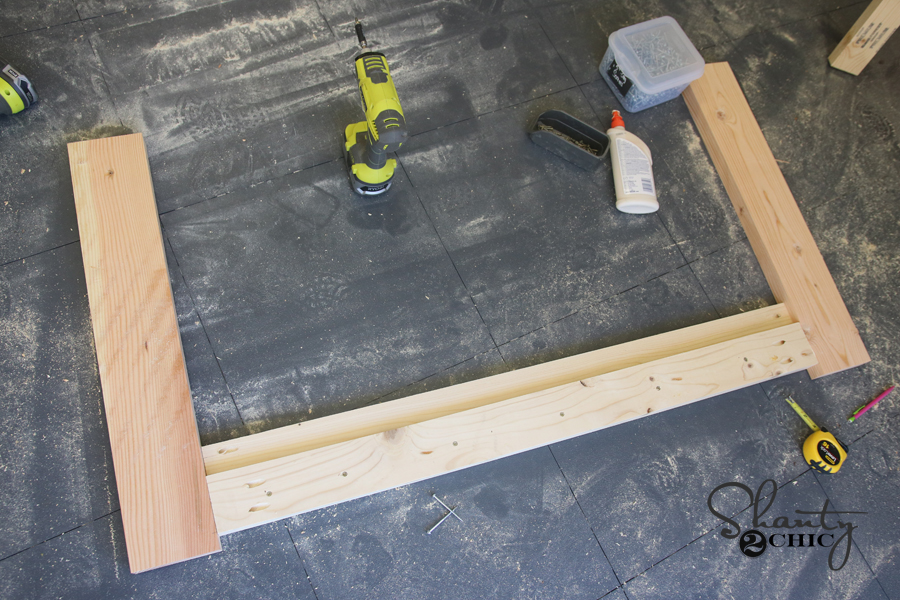
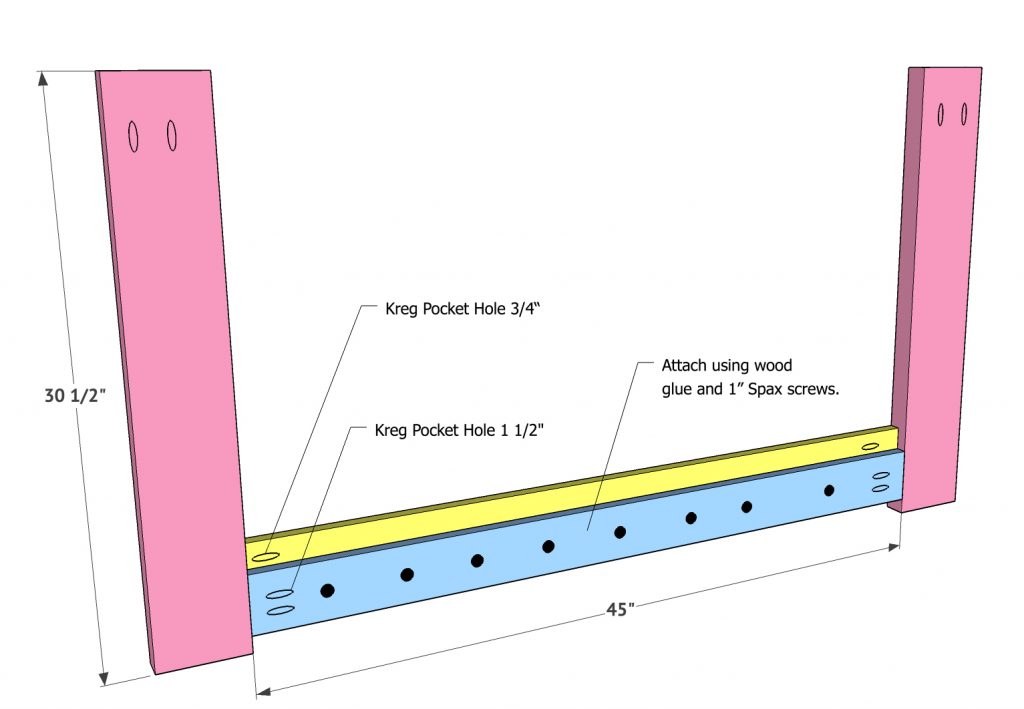
4️⃣ Build the Side Panels
Drill 3/4″ pocket holes.
Attach slats with wood glue + finish nails.


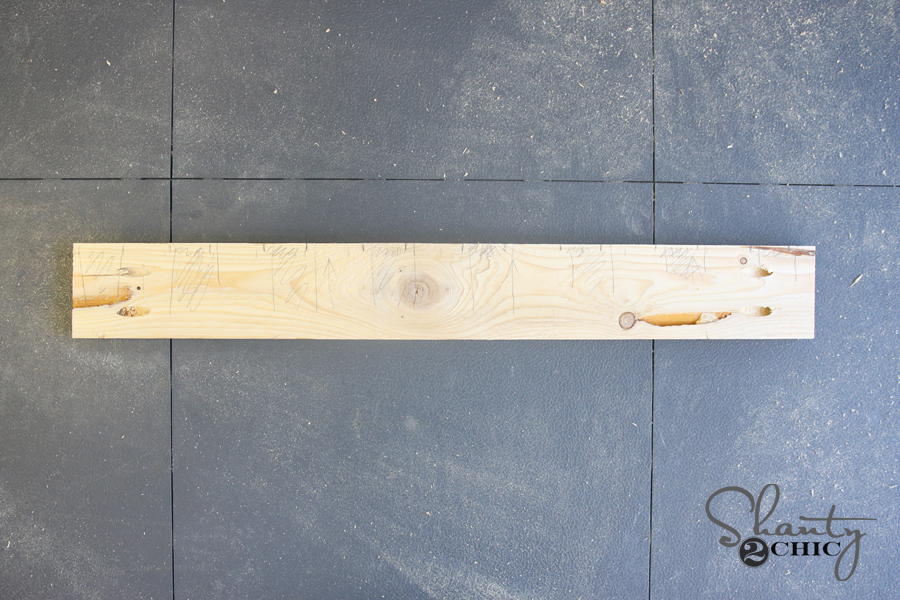
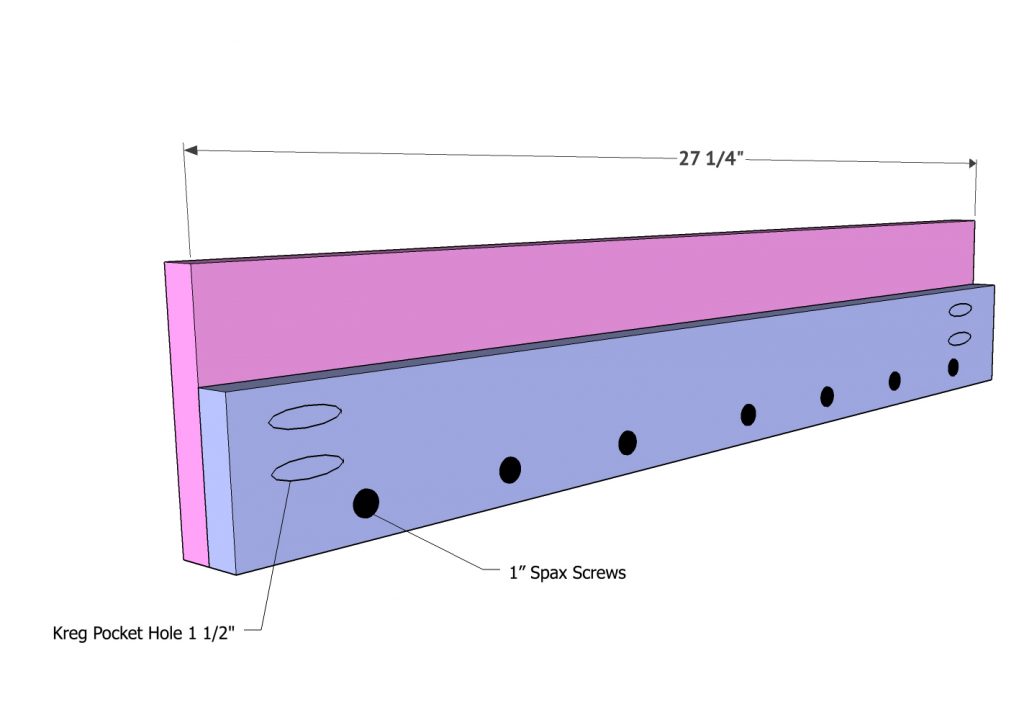
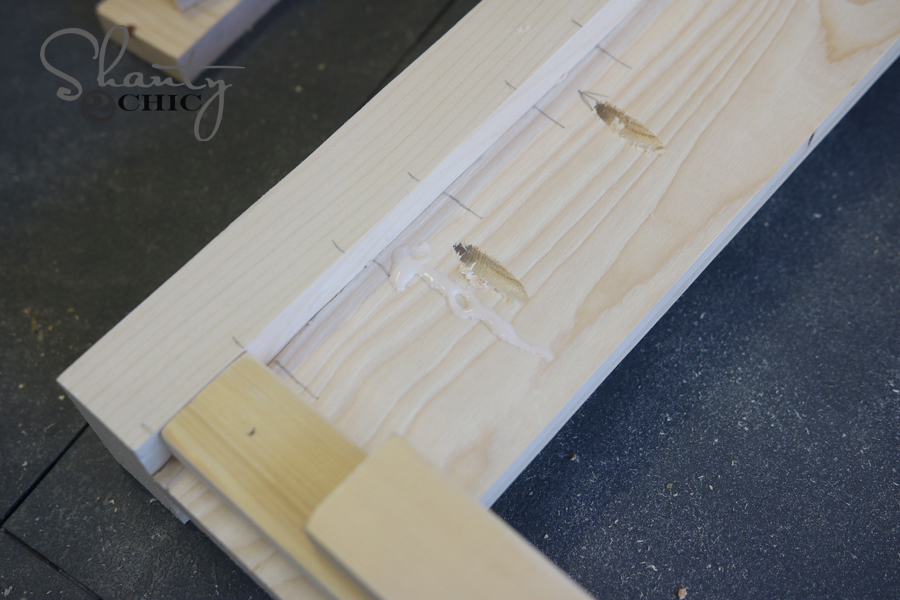
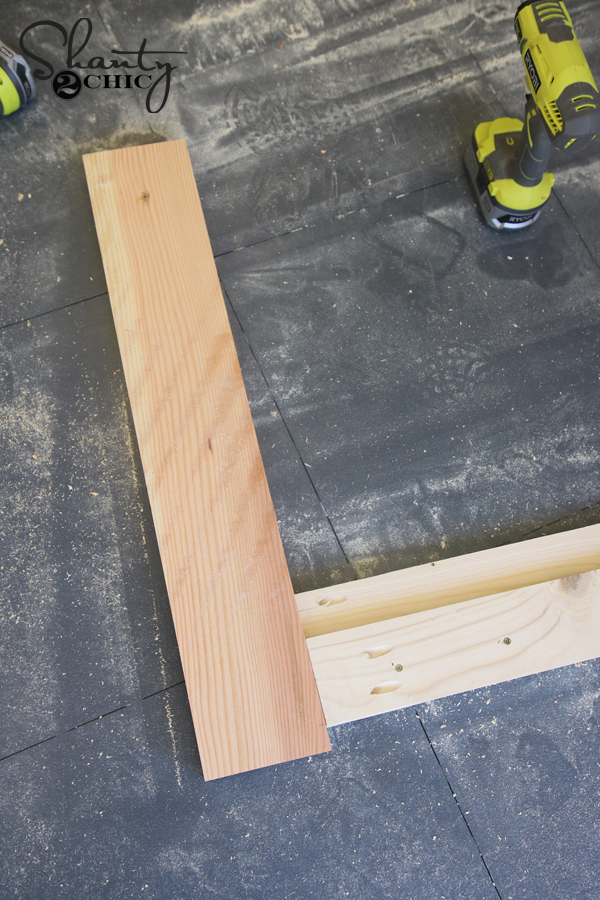
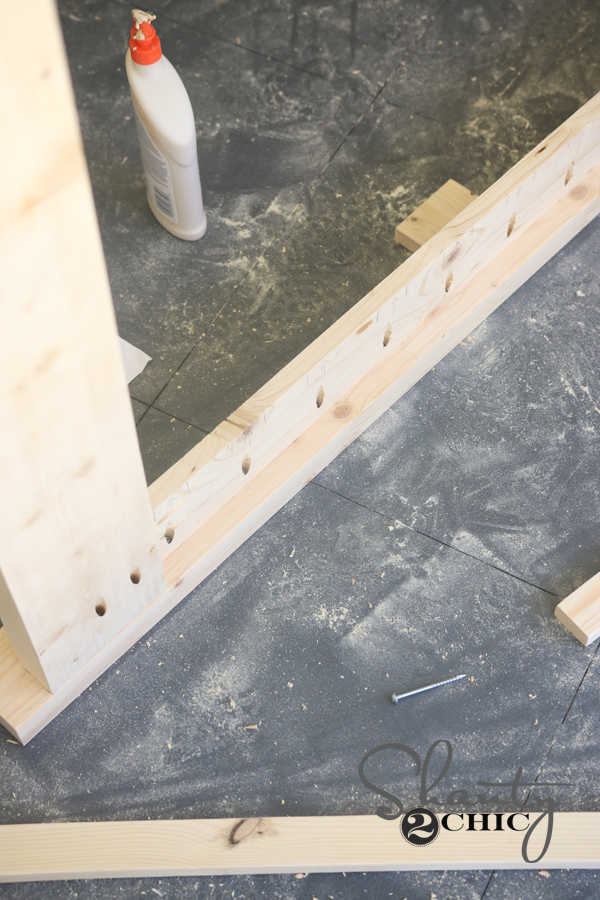
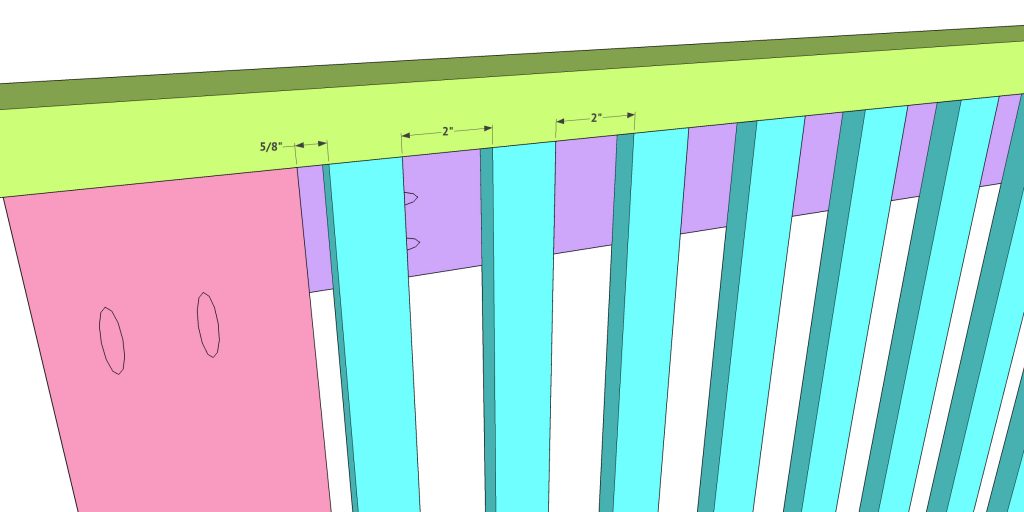
Here is the bottom board. I have also marked here where my slats will line up just to help me line them up straight when I nail them in.
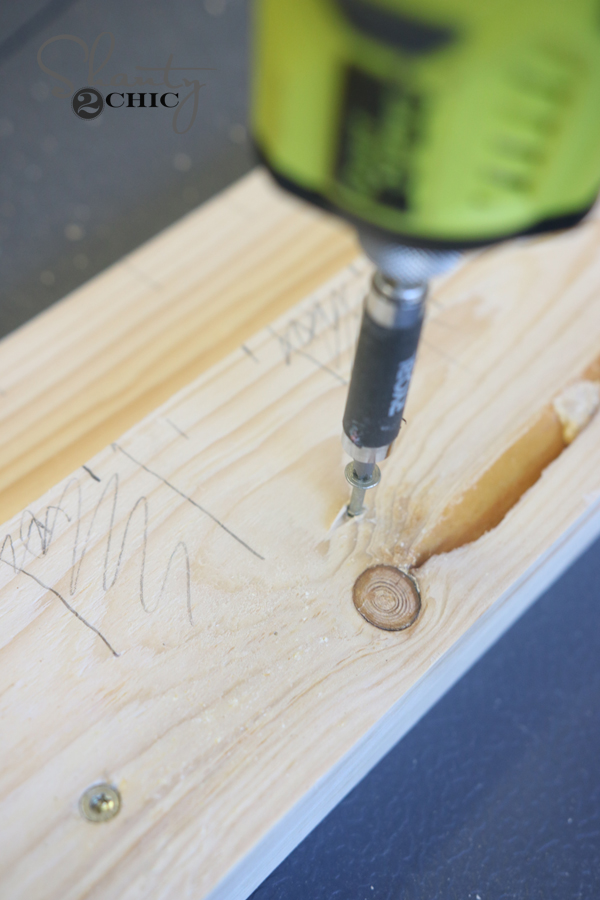
I attached this board to the outside bottom trim piece using wood glue and 1″ Spax screws.
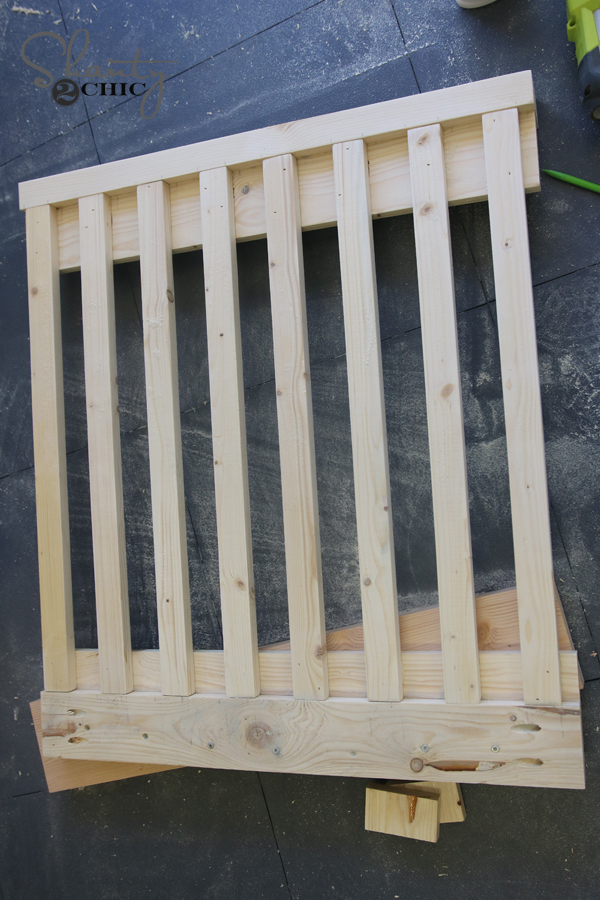
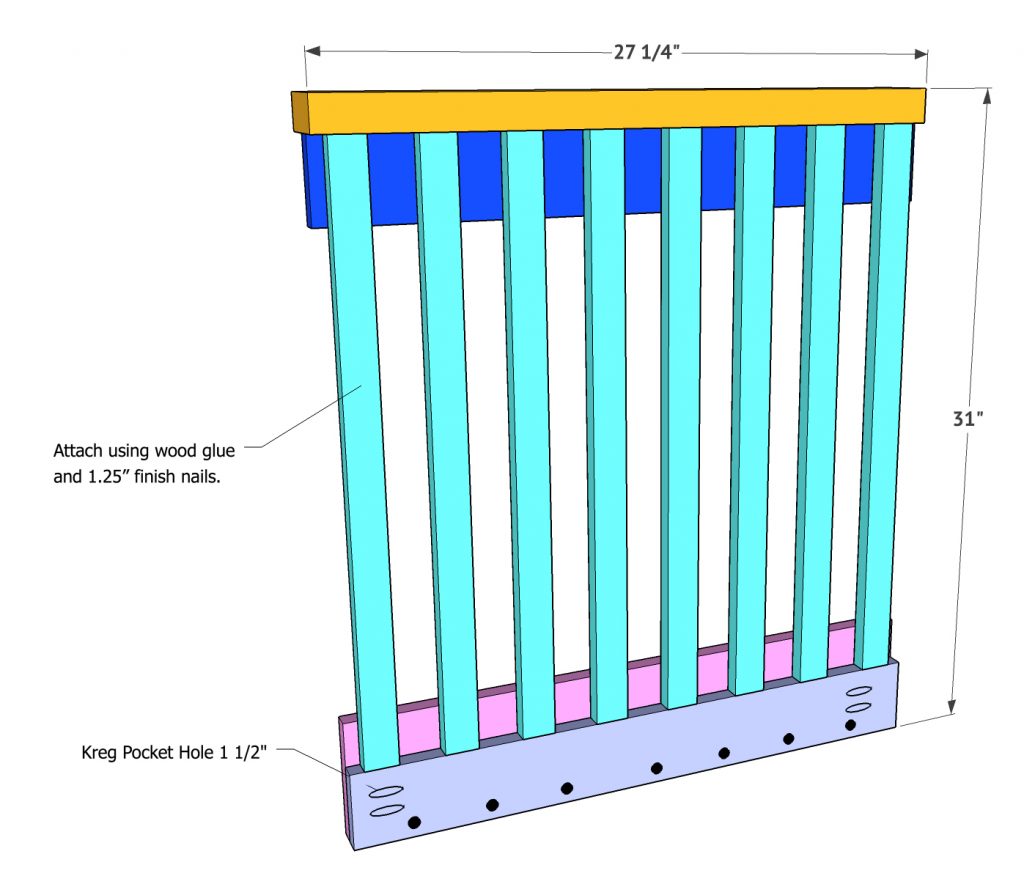
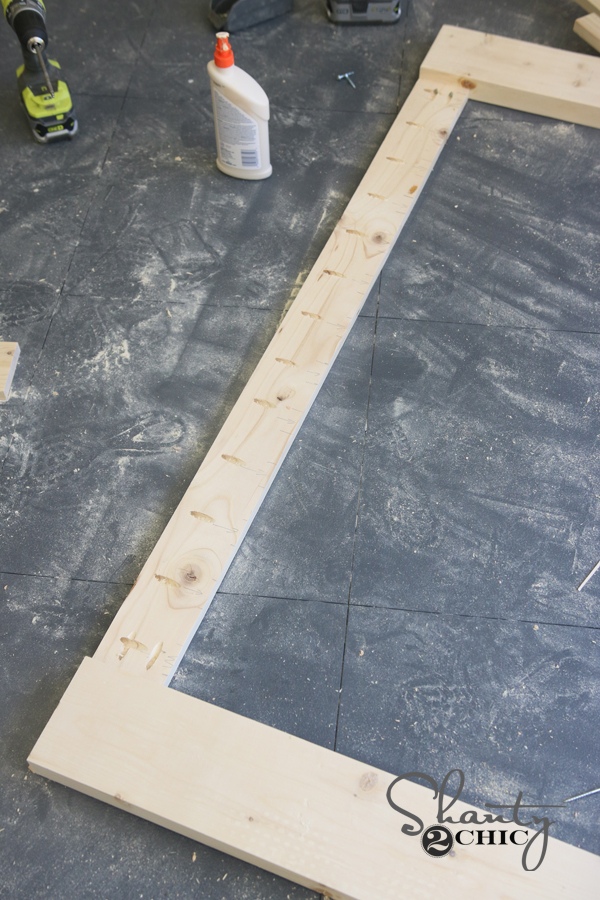
Now I attached both of these pieces I created using the crib slats. These are 1×2 boards that I nailed in place using wood glue and 1.25″ finish nails. See how the pocket holes are getting covered up!
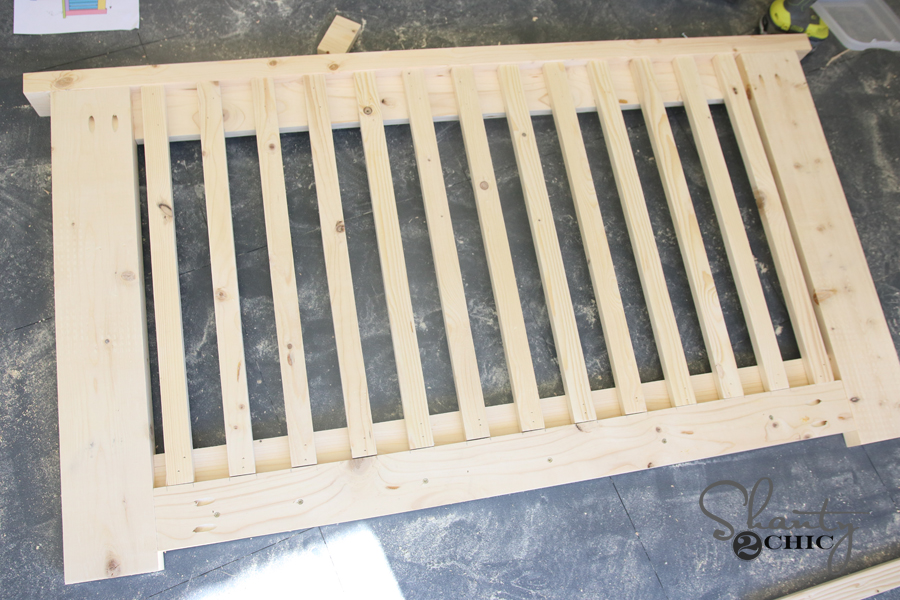
Here is one side finished up! You will need to make 2 of these…
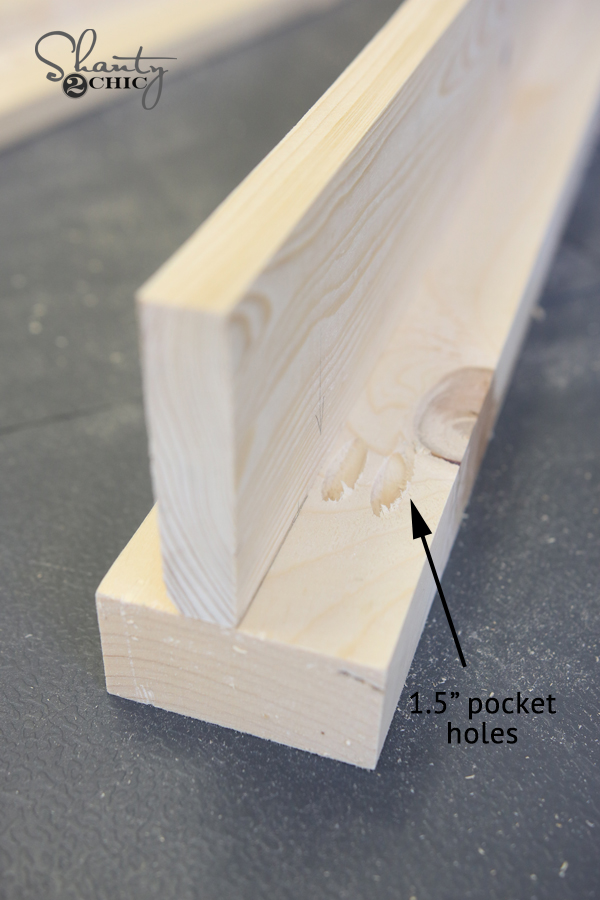
5️⃣ Front Panel Time
Build your frame with pocket-hole screws.
Add evenly spaced slats (double-check spacing before nailing).
I built this basically the same as the sides but it will also have the frames. I built the bottom of the front by attaching the two boards like I did the sides, and then I attached the front legs to the bottom boards using pocket hole screws.
I built this basically the same as the sides but it will also have the frames. I built the bottom of the front by attaching the two boards like I did the sides, and then I attached the front legs to the bottom boards using pocket hole screws.
Next I made my pocket holes in my top board. Again watch your spacing on this part so that they will be covered!
I attached the top board using 1.25″ pocket hole screws into the top of each leg.
Next, I lined up that whole frame on top of the top front rail piece and attached it using wood glue and 1.25″ pocket hole screws.
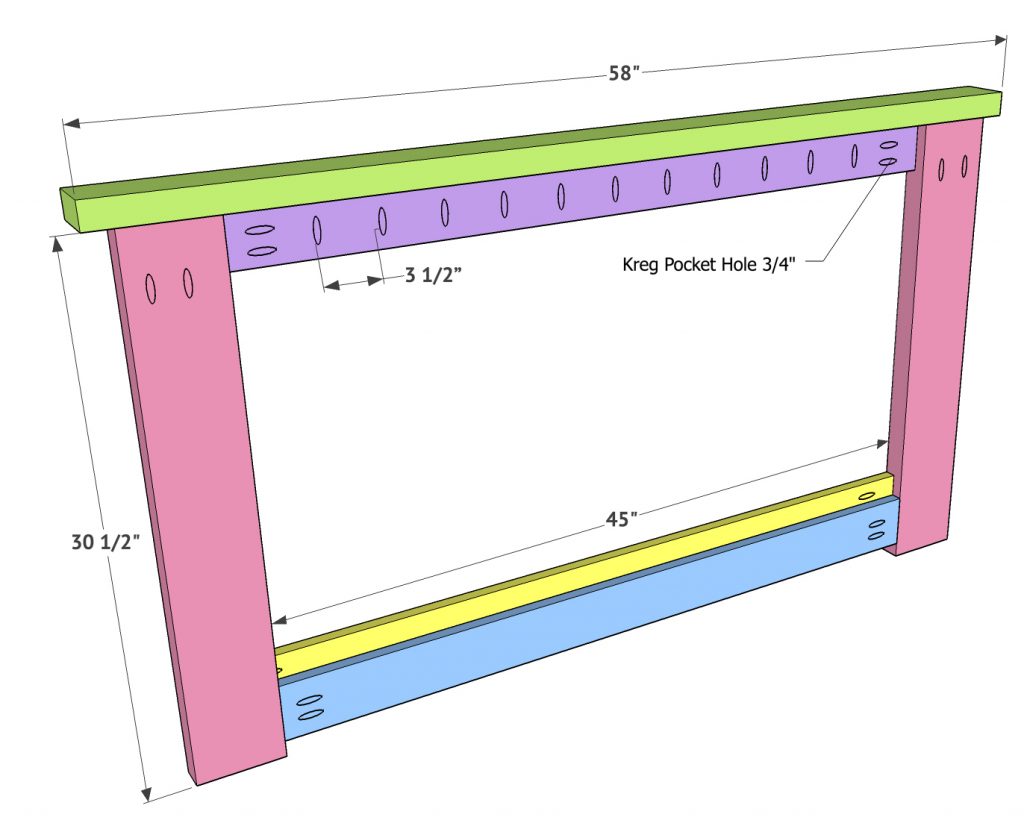
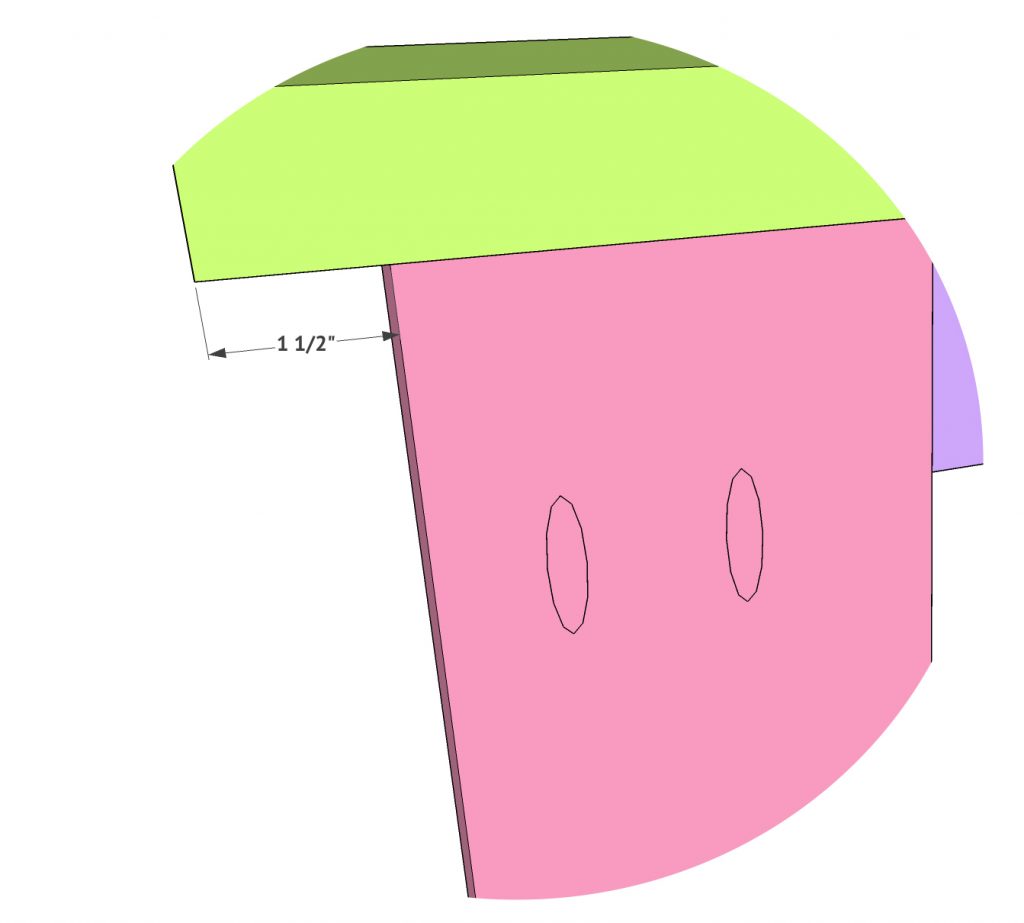
The top rail will have a 1.5″ overhang on each side….
Next I added my front slats using wood glue and 1.25″ finish nails. Watch your spacing on this part!
Time for the mattress. I attached cleats to the front and the back of the crib using 2″ Spax screws.
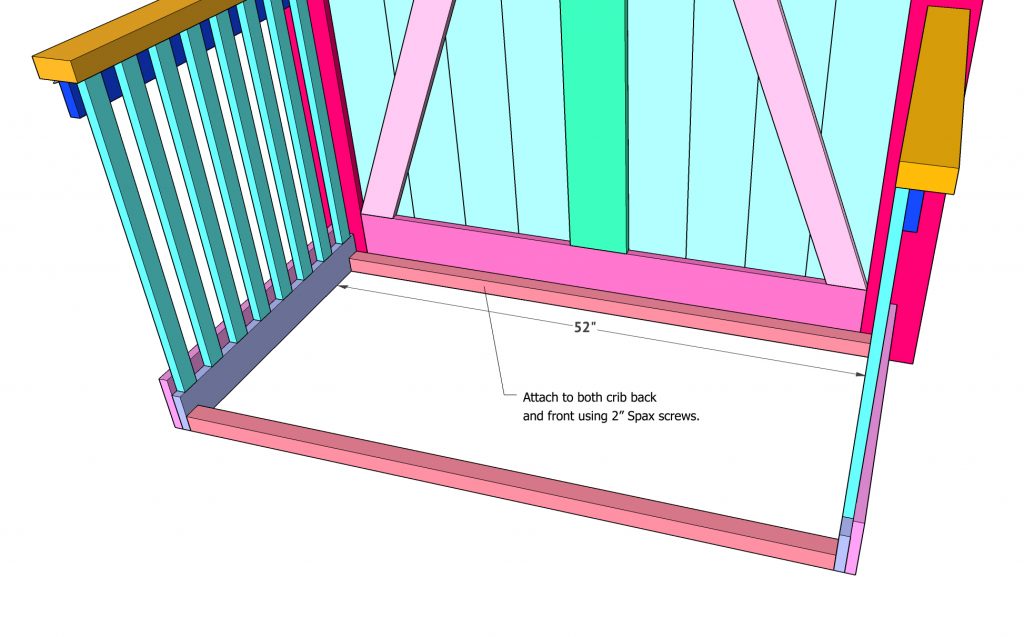
6️⃣ Mattress Support
Install cleats with 2″ Spax screws.
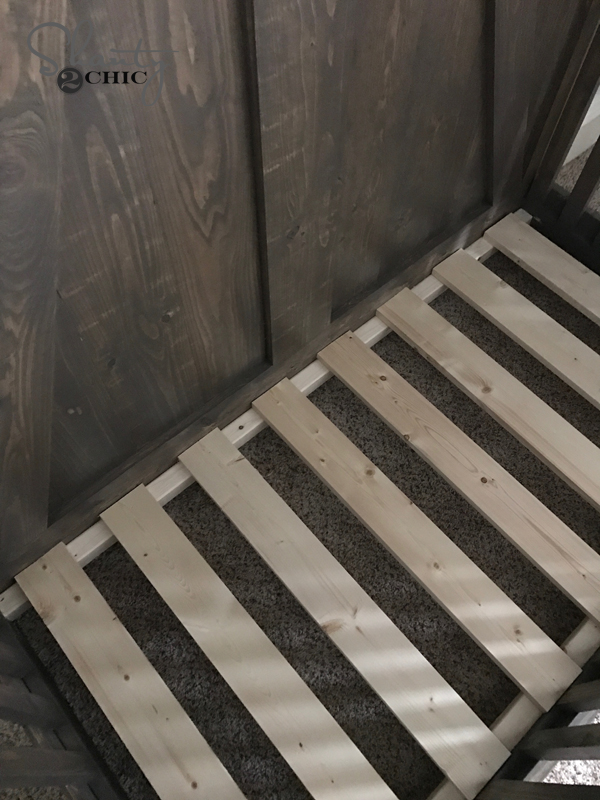
Lay 1×4 boards across for the mattress base.

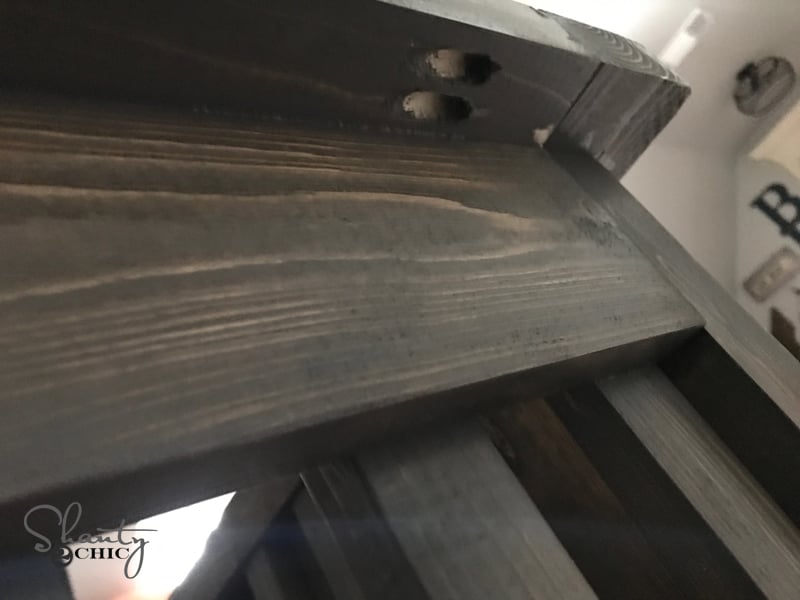
You can see where the pocket holes are attaching the sides to the front and back…
7️⃣ Stain + Protect
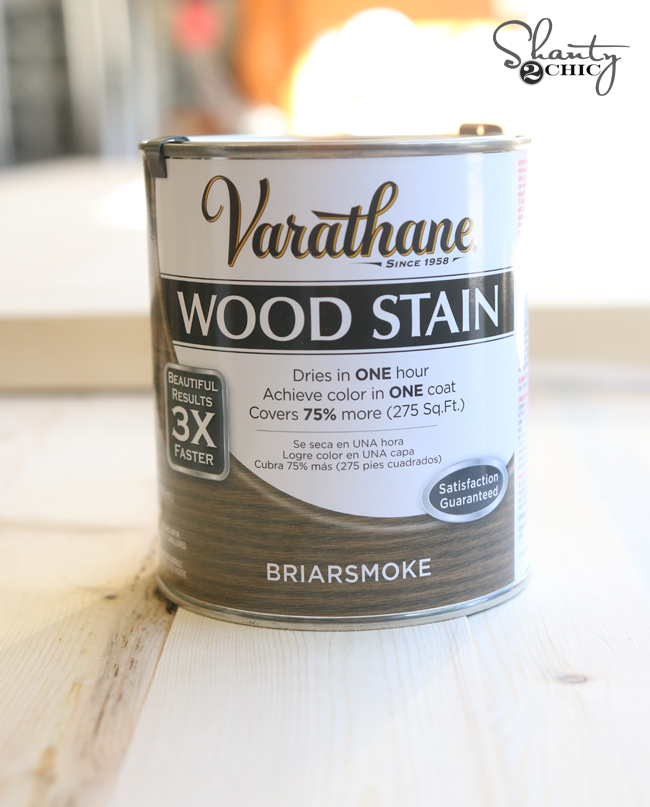
After I finished building the crib, my amazing stepdad was kind enough to offer to stain this to keep me from having to do it. I gladly took him up on his offer! I chose to use Briarsmoke by Varathane and I am so pleased with the results.
Speaking of stain… Did y’all catch our latest YouTube video on how to stain wood? Here it is!
He also sprayed the entire crib with a polyurethane after the stain dried.
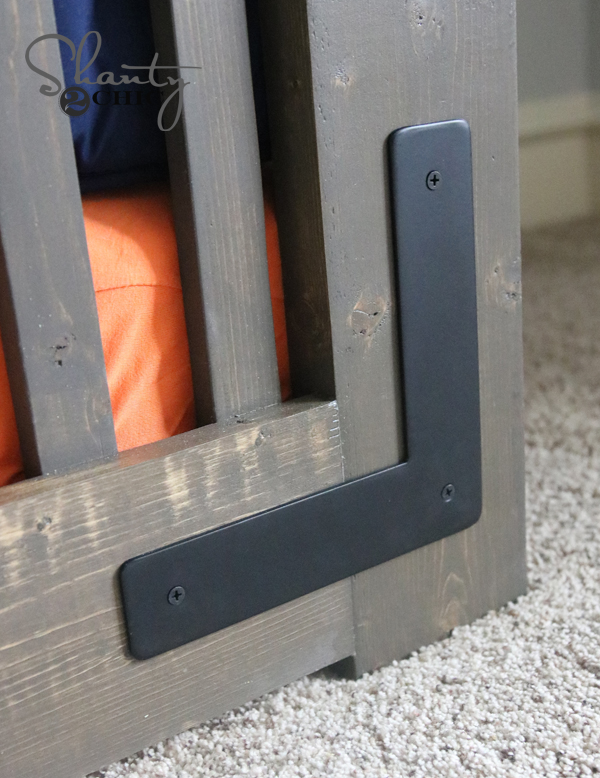
8️⃣ Hardware Details
For a custom touch, add farmhouse hardware (we used Wayne Works 🤎).
Now let’s talk about that hardware… I die. Love it so much. I told our good friend Tyler of Wayne Works what I had in mind and he did not disappoint. He even rounded the edges just a bit giving them a softer look. He’s selling them guys! You can get them HERE!
📥 Get the Free Plans
We’ve made it simple! Click below to grab your FREE printable crib plans with step-by-step diagrams, cut lists, and material breakdowns.
➡️ Download the Free Farmhouse Crib Plans
🛠 Pro Builder Tips
Sand everything smooth 🪵➡️🧸 (baby fingers find splinters fast!).
Always test your crib mattress fit before final assembly.
Want a convertible crib? Builders have added hardware to make the front removable.
Save your arms! Use a quality orbital sander with a dust attachment.
❤️ Final Thoughts
This crib isn’t just furniture—it’s a keepsake you’ll treasure for years 💕. Building your own crib means saving money, customizing it to your style, and creating something truly special for your little one.
You’ll probably need a baby gate soon! We have the perfect set of free plans to build your own! Check out our DIY Baby Gate plans!
Frequently Asked Questions
How much does it cost to build this project?
This crib cost under $300 to build. Prices vary by region and this was 8 years ago but it should be similar in price today.
Is this project beginner friendly?
I would say this is an intermediate build. There are a lot of steps but still a great project for a beginner to attempt!
Can the dimensions be adjusted?
You can definitely adjust the dimensions but keep the length and width to accommodate a standard crib mattress. You can make it shorter or taller on the back headboard!
What tools are absolutely required?
You’ll need a miter saw, table saw, drill and a Kreg Jig to complete this project. The majority of our projects use these four basic tools and we highly recommend them if you are wanting to get into furniture building and DIY.
Would you still recommend this approach today?
I would definitely recommend this approach today but I would probably build it earlier in my pregnancy lol.
Have you seen our DIY Sandbox? Our kids LOVE this little guy, perfect for days at home to keep the kids occupied and it’s a very simple build!
Ready to get started? Download the free plans and start building today!

DIY Farmhouse Crib (Free Plans)
Tools
- Miter Saw
- – Pocket-hole jig (Kreg)
- – Drill/driver
- Brad Nailer
- – Orbital sander + dust collection
- – Clamps, tape measure, square
Supply List
- – 1×6 boards headboard/back panel
- – 2×6 boards trim; rip to ~5″
- – 2×4 boards frame; rip to ~3″
- – 1×4 boards mattress support slats
- – 1×2 boards side/front slats
- – Pocket-hole screws 1¼″ and 2″
- – 2″ brad nails & wood glue
- – 2″ structural screws e.g., Spax for cleats
- – Stain e.g., Varathane Briarsmoke & polyurethane
- – Optional decorative hardware
Instructions
- Instructions:
- Download & review plans — Grab the free printable plans and study the cut list, layout, and pocket-hole locations.
- Build the headboard — Join 1×6s with pocket holes; frame with ripped 2×6 (≈5″) and 2×4 (≈3″).

- Add barn-door trim — Glue and brad-nail the trim pattern for that farmhouse look.

- Assemble side panels — Drill 3/4″ pocket holes; glue and screw frames; attach 1×2 slats with consistent spacing.

- Build the front panel — Construct the lower front frame using pocket holes; add evenly spaced 1×2 slats.

- Install mattress supports — Fasten cleats to side panels with 2″ structural screws; lay 1×4 slats across to form the platform.

- Finish — Sand smooth; stain (Briarsmoke recommended) and seal with polyurethane. Let finishes fully cure.
- Optional hardware — Add decorative hardware. Dry-fit panels, confirm mattress fit, then assemble in the nursery.


Good morning Ladies
I find you 2 ladies are very talented and smart along with being extremely beautiful.
I know if I was your parent I would be so very proud of what you have accomplished with this web site and what you have and will build.
Please keep it coming and stay safe.
Your friend from Canada
We are making this beautiful crib, and are trying to make it so the cradle board / mattress support is adjustable to different heights based on the age of the baby.
Did you do this also?
When we were trying to figure out how to adjust it up, we noticed there will be a gap between the mattress and the back board, with the design of the Vs on the wood (which we love).
Is there a way to get around this? Or can we just not have an adjustable crib?
Any help is appreciated.
How can this crib be turned into a bed once your little one out grows it?
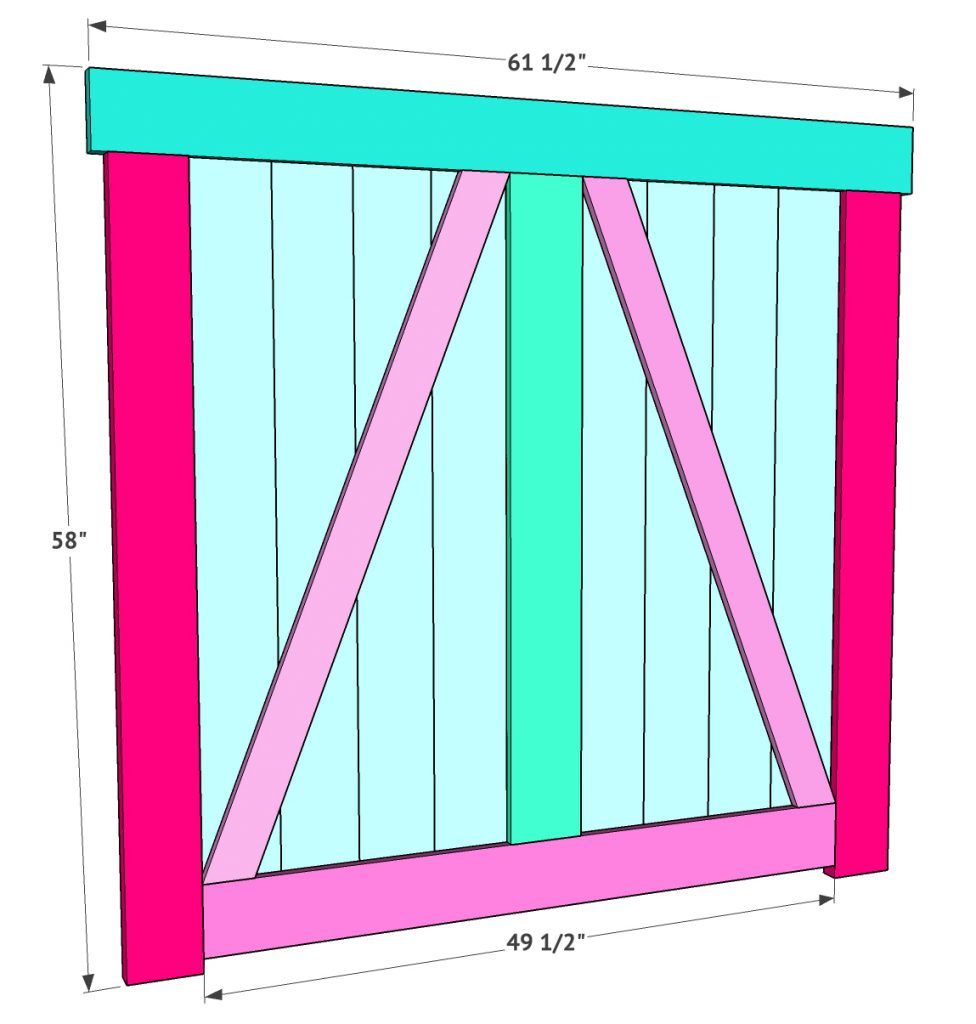
Hi, I am building the crib for a good friend. I want to trim all the 1×6 boards to 5 inches, however, according to your measurements, with 9 boards it’s 45 inches, but your plans show a 49.5 inch measurement finished size How do I reconcile the difference?
Do you have a materials list for this build?
Is there a cut list anywhere?
I am currently constructing a crib based off of your design and plans. It’s in the finishing stages and needing to be stained. I am very excited and thankful for your helpful instructions.
The crib is finished. My final size is 52×27.25 for those who are worried over a 1/4″, I actually prefer the snug fit of the foam mattress. It’s foam, so it compressed to fit the area of the crib. It feels like there is no room for a baby to slip between the mattress and the walls of the crib.
A standard foam crib mattress will fit. If I had to do it again I would add 1/2 inch on length and width just to give a little more room.
anyone find a replacement decorative corner strap? The link above is sold out.
Thanks, TB
I built this crib and it doesn’t fit a standard mattress. I built it assuming it would fit because that makes sense… it’s about an inch too small in both directions for a standard size if you want a little wiggle room for sheets. Now I’m screwed and will be building something completely different – without pocket holes splitting my wood. Adjust your plan.
I ran into the same problem wish I would have read comments before >:(
Can you now verify the dimensions of the final result? I’m about to begin building this and I believe it’s going to be 52″x27.25″. Is that accurate? I too want to make sure I have a mattress that will fit before putting all the work in. Thanks!
Did anyone ever figure out the mattress size?
No, but crib mattress definitely doesnt fit..
A standard crib mattress we purchased at target fit the crib I made with no issues.
Do you have plans for this crib? Can it also be turned into a bed?
Is this adjustable? I ask because it does not look like it. How to you put a newborn in this?
I’m also curious how to make this adjustable.
my son is almost two now, but when he was tiny we just stacked another crib mattress in there to raise it up
For those inquiring about making it adjustable. You can buy a metal insert and put hooks in the corner of the crib to change the height at you and Babys convenience. Our Uncle Chuck built my sons first crib. This is how he did it. No issues whatsoever. We only ever adjusted it once, but he put multiple steps for us. It was great!
Do you have a picture of your metal inserts and hooks you used?
Same, I am wondering if you have pictures of the metal inserts and hooks?
Where did you buy the metal insert? I’m having trouble finding one.
Anybody have an thoughts on using aerosol polyurethane in a can vs brushing it on or even spraying it with a spray gun?
I’m looking for the easiest way possible that will still yield great results.
They both yield beautiful results of you do it right. The trick is to sand between coats. I usually sand with 400 grit or so between coats. Just enough to knock down any dust particles/any other blemishes from the previous coat
HI how many pieces of each size of wood are needed?
Where can you get the metal hooks and inserts is a picture available of them
How was the conversion for you? Whay modifications did you finish with and what possibility is there to have this crib design grow with child? (3 in 1 crib)
I looked everywhere for an answer to this but couldn’t find one. So I converted my sons crib to a toddler bed myself. I removed the entire front, left the side rails and back. Added a large piece of wood to the bottom of the front to stabilize. Works perfect and looks so cute!!! It doesn’t have a rail, to keep them from rolling off, but I needed a quick fix as my child was overly ready for a toddler bed, so I added a little bumper that goes under his mattress. Works and looks adorable! Then when he’s grown out of that, I plan on converting it to a bed, using the back as the backboard to the bed.