DIY Full-Length Mirror on a Budget – Easy Beginner Woodworking Project
Looking to upgrade your space without breaking the bank? This DIY full-length mirror is stylish, affordable, and beginner-friendly — and we’re sharing the free plans and full tutorial to help you build your own!
Table of Contents
Why I Built These Mirrors
I’ve been wanting to add mirrors to my dining room for a while, and the idea finally clicked while working on my DIY jewelry cabinet. The frameless beveled mirror I used there was the perfect size — so I grabbed a few more and got to work!
Here’s how my DIY wall mirrors turned out:
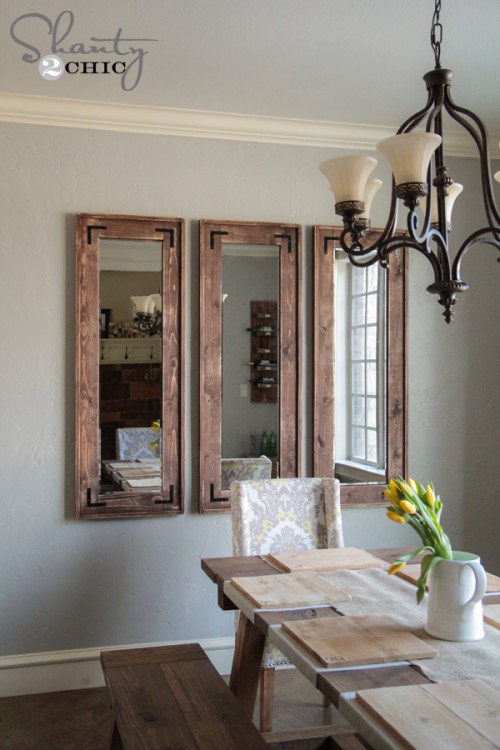
Cute, right? Even better — each one cost me less than $40 to make. 🙌 This project is simple enough for beginners and makes a great Kreg Jig starter project!
Supply List for 3 DIY Full-Length Mirrors
- (6) 1×4×6 whitewood or pine boards
- (6) 1×2×8 whitewood or pine boards
- (1) ¼” plywood sheet cut into three 16″ × 55″ pieces
- (3) Frameless beveled door mirrors from Target ($14.99 each)
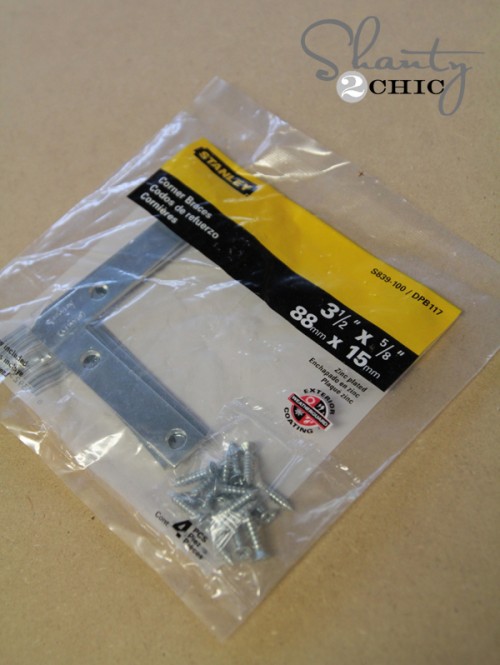
- Corner brackets (decorative)
- Wood glue
- 1¼” pocket hole screws
- ¾” staples
- Mirror adhesive
- Optional: D-rings for wall hanging, drywall anchors
Step-by-Step Tutorial
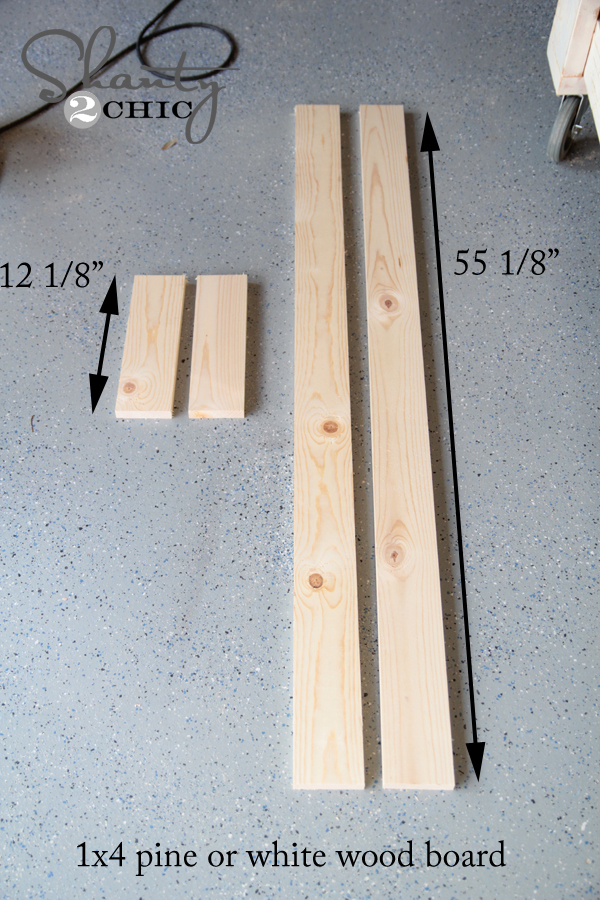
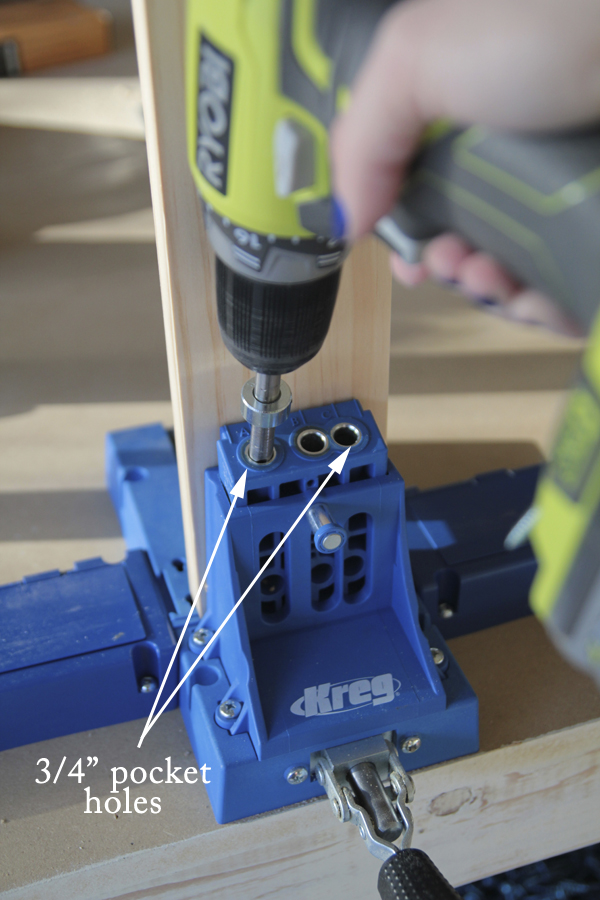
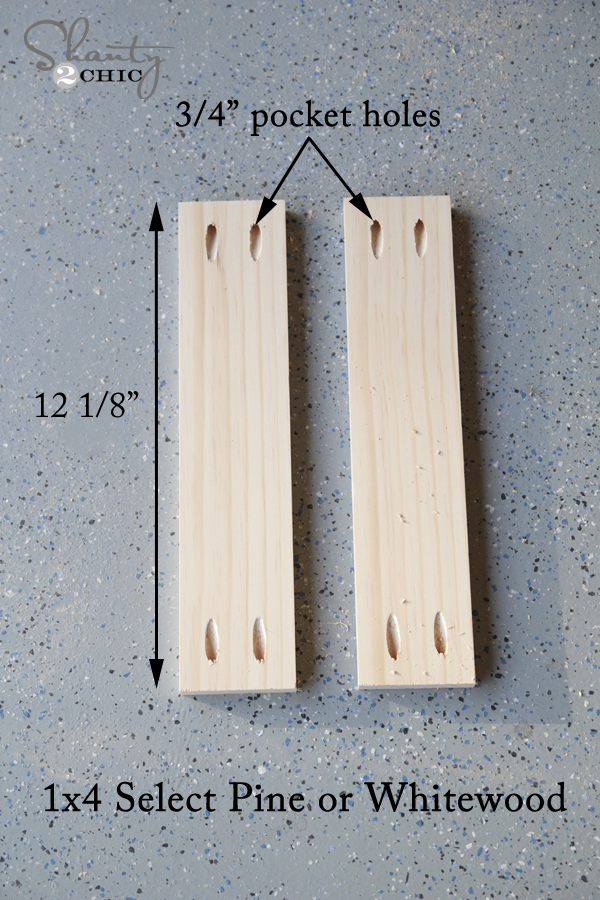
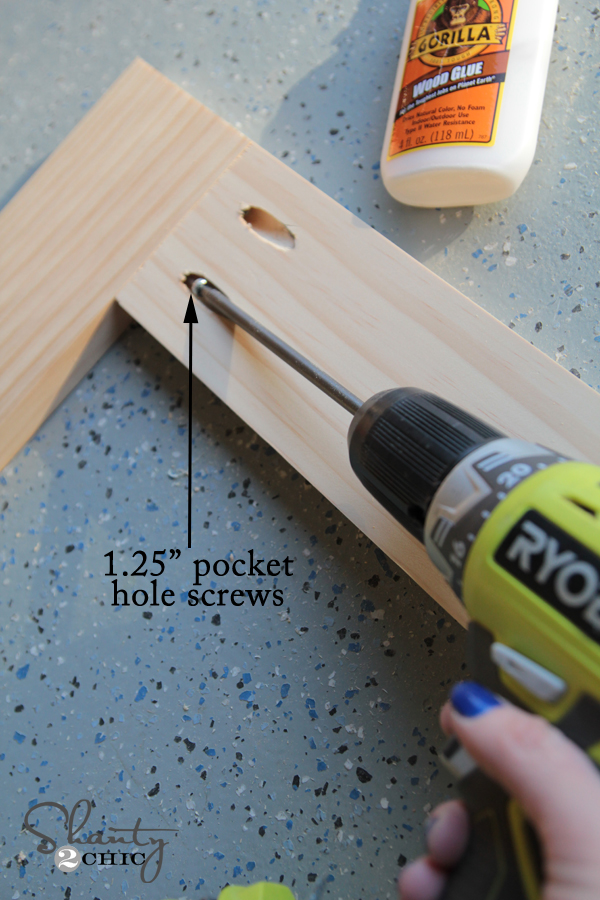
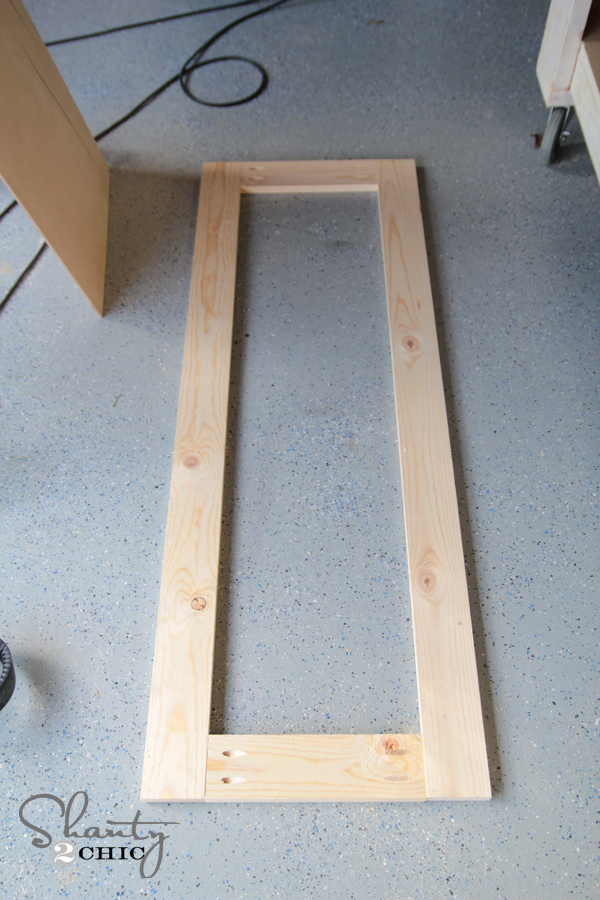
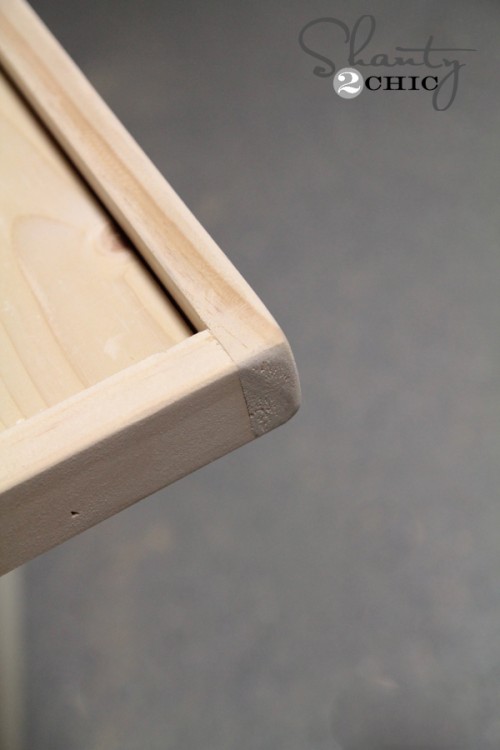
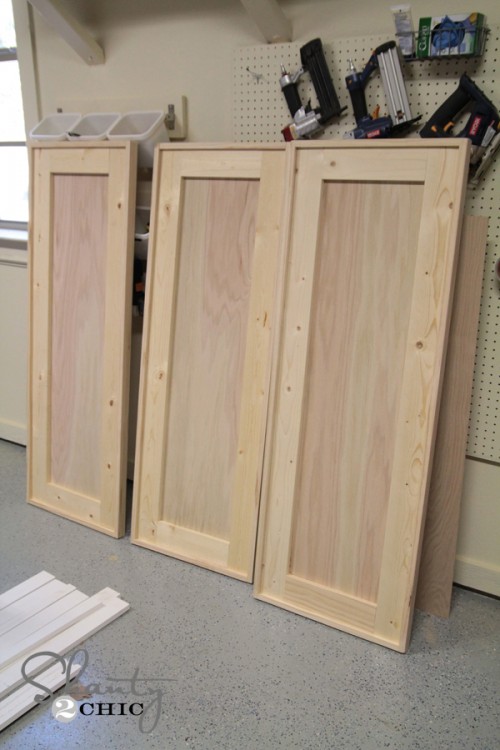
1. Build the Mirror Frames
Use the 1×4 boards to build the main frame. Each mirror frame needs:
- (2) long vertical pieces
- (2) shorter horizontal pieces
I cut everything with my miter saw and used a Kreg Jig to drill pocket holes in the shorter boards. (I love the Kreg K5 model — worth every penny!)
Then I used 1¼” screws to attach the frame together. Easy!
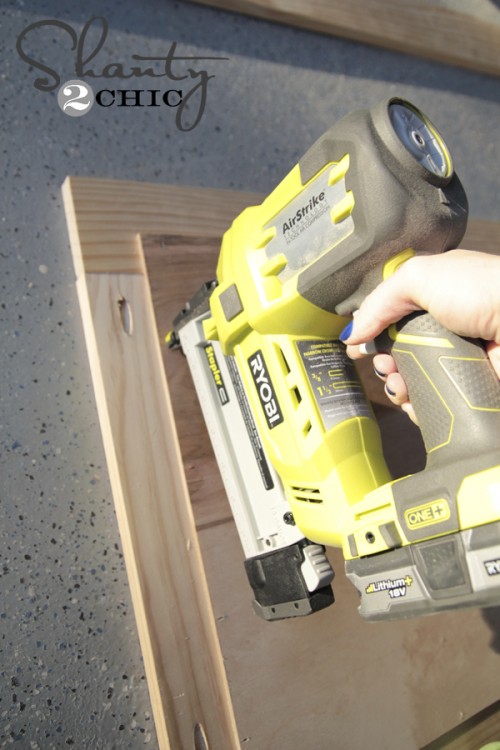
2. Add the Plywood Backing
Next, I glued ¼” plywood onto the back of each frame. Home Depot cut my plywood to size — 16″ × 55″ — so I could get all three pieces from one sheet.
I attached the backing with my Ryobi AirStrike Stapler (yes, cordless and amazing!) using ¾” staples.

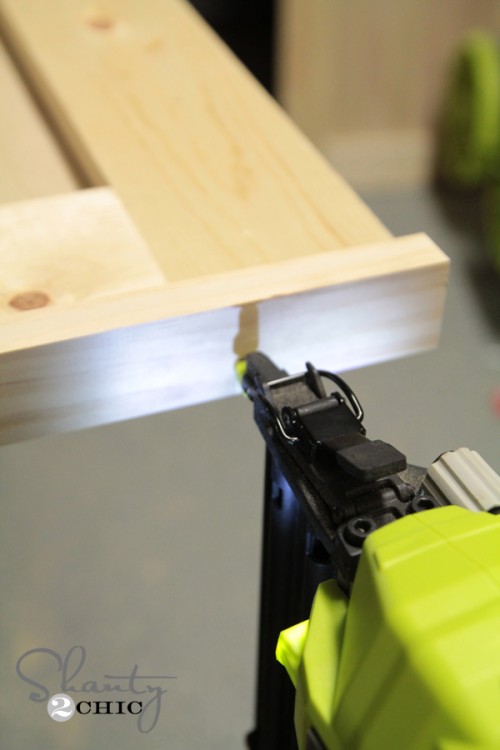
3. Add the Trim
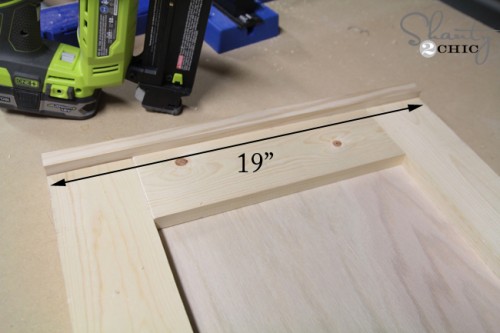
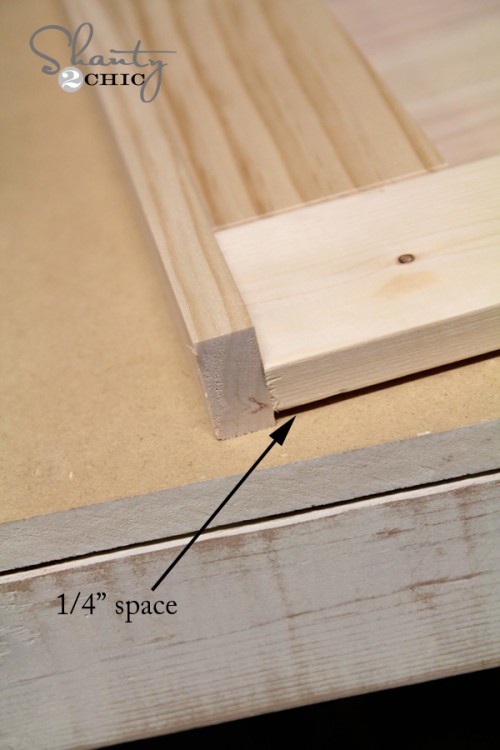
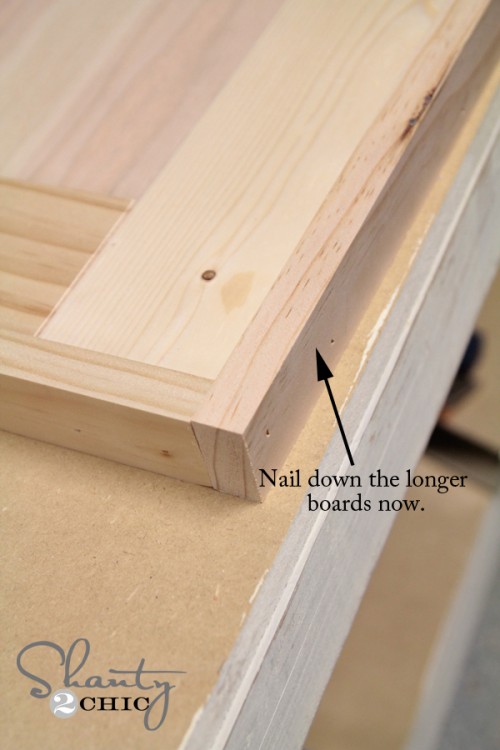
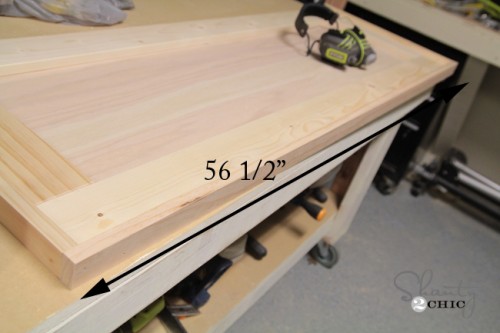
Time to make it pretty! I used the 1×2 boards to frame the front:
- Top and bottom pieces: 19″
- Side pieces: 56½”
I glued and nailed the top and bottom trim pieces first, then added the sides. Align the trim flush with the back edge of the plywood — this helps the mirror hang neatly on the wall.
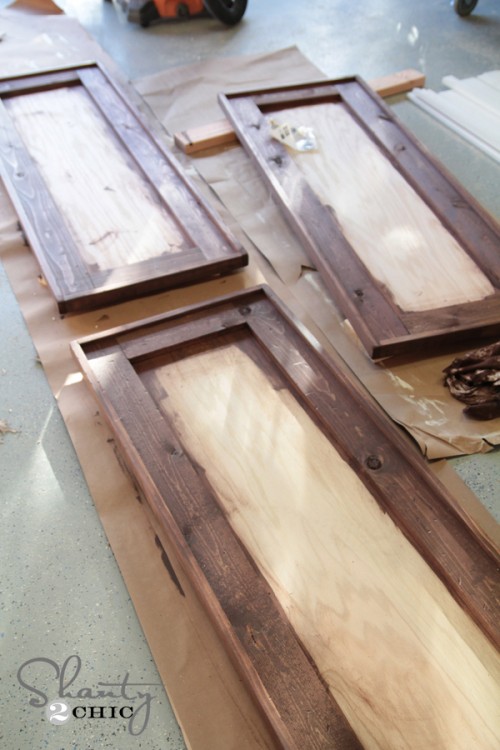
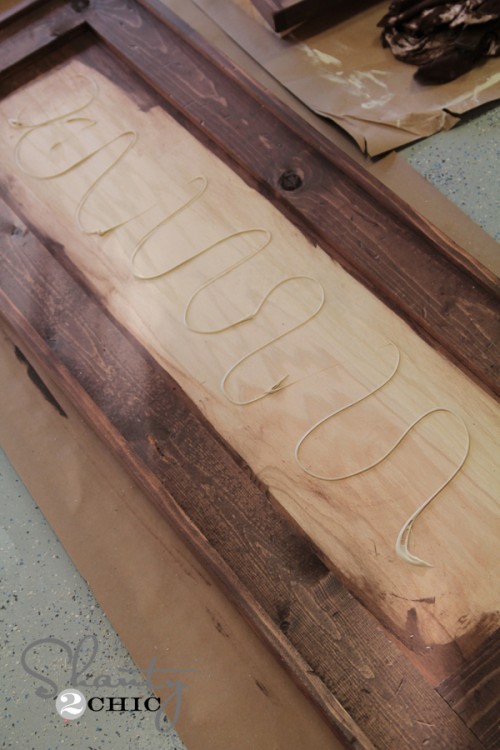
4. Distress and Stain the Frame
I gave each frame a rustic look by sanding the corners and adding dings with a hammer. Then I stained them using Varathane’s Carrington — a rich, warm brown that dries in under an hour and only needs one coat. Love it!
5. Attach the Mirror
I used mirror adhesive (sold in caulk-style tubes at Home Depot) and ran a continuous bead along the back of the frame. Then I pressed the mirror onto it and let it set.
Note: The mirrors I used were from Target. If yours are a different size, just adjust your cuts to fit!
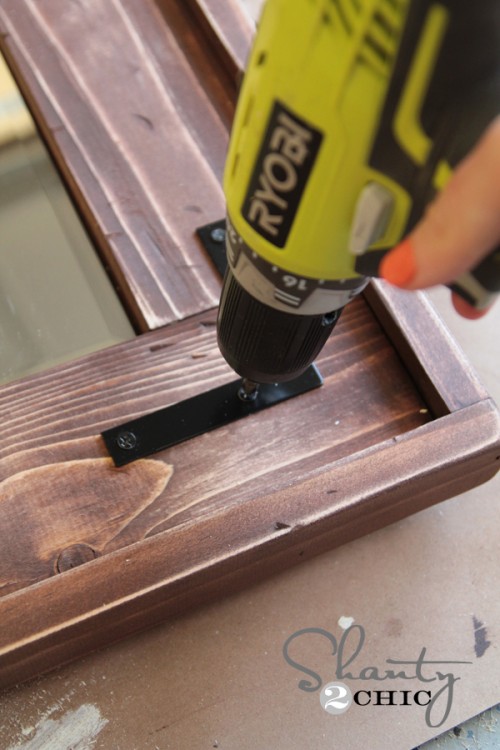
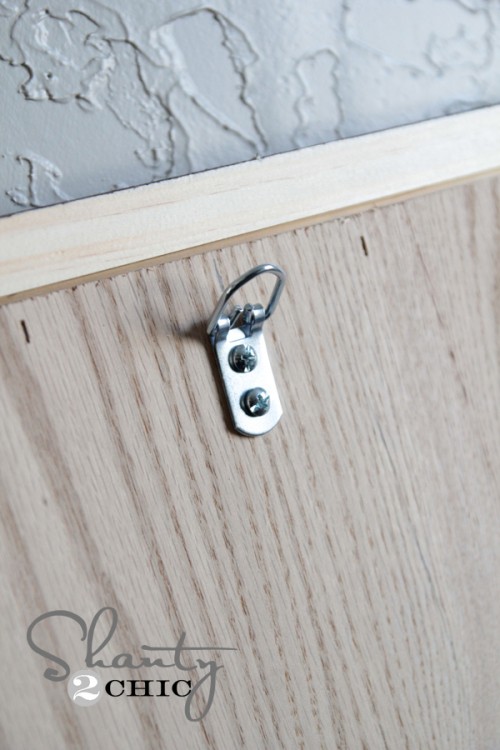
6. Add Hardware for a Custom Touch
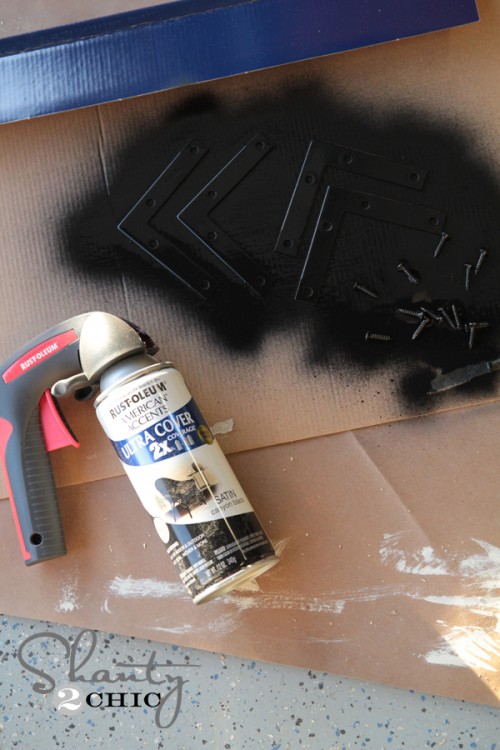
I wanted to give the mirrors a little industrial flair, so I spray-painted some metal corner brackets with Rust-Oleum Canyon Black and attached them to each corner.
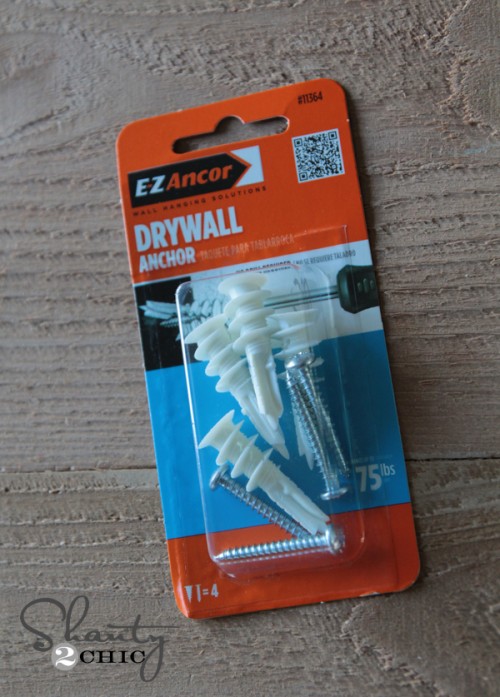
7. Hang Your Mirrors
For hanging, I used self-drilling drywall anchors (my go-to!). They’re super easy to install and hold strong.
I attached heavy-duty D-rings to the backs of the mirrors and hung them directly on screws in the wall.

Finished Look
And here they are — my new favorite feature in the dining room!
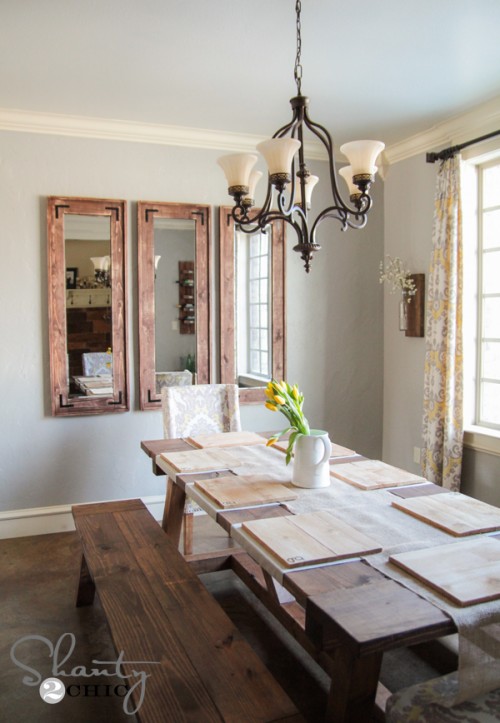
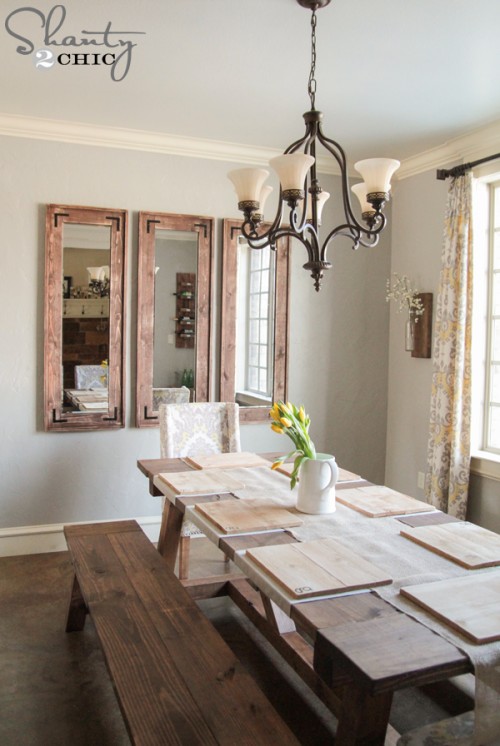
These DIY rustic full-length mirrors make such a big impact when you walk into the room. They’re budget-friendly, customizable, and surprisingly easy to make. I hope you love them as much as I do!
Pin & Share This Project!
If you enjoyed this tutorial, I’d love for you to share it or pin it to save for later! And if you try it out, tag me so I can see your version!
Other Projects in This Room
- DIY Sideboard and Hutch – Inspired by Restoration Hardware
- DIY Dining Table
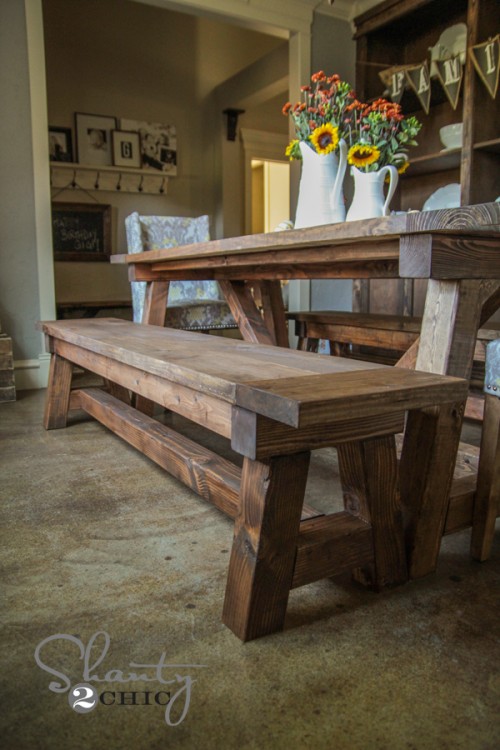
- Dining Bench Build
- DIY Wall Panels
Let me know in the comments if you have any questions, or just want to say hi. Happy building!

Restoration Hardware inspired Sideboard and Hutch


Last week my spouse stated she likes a replicate striking at the empty area withinside the dwelling room, she stated the replicate she likes does not have a body and I had been searching out approaches to dangle it at the wall. I discovered a reasonably easy and cheaper manner to apply sturdy double-sided tape, including Fix Pro Extreme Mounting Tape. All you want is a fabric and a few adhesives.
Thank you for this useful article, hope to see more articles like this in the future.
For hottest news you have to pay a quick visit world-wide-web and on the web I found
this web site as a finest web site for most up-to-date updates.
I love, love, and did I say love this project. Looks fabulous. Thanks for sharing
What size nails did you use?
Are you going to post any printable plans for this project?
I know your post is a few years old now but still wondering if a question can be asked…
How did you so evenly hang your mirrors?? There must be some kind of advice for that, hopefully!
Love these wall mirrors. Would like to make them. where are the plans to print out for the mirrors? Best regards
Were you able to get printable plans?
What’s the spray thing you have on top of the spray paint can?
What is the size of the mirror? for these plans?
What nail gun do you recommend to attach the frame pieces? Also what nail type and length should I use?
For this project I used Ryobi’s 18G brad nail gun with 1.25″ brad nails…. Hope that helps!
What is your ceiling height in this room? I have 8′ ceilings….my concern when I measure it our on the wall is the bottom part of the mirrors will be below the top of my table line…
Love these mirrors, thinking of making them for my wife. Quick question ,did you use any kind of wood conditioner for your project?
did you already tell us what the wall color used…
it’s a perfect blue/grey!!
Love these!!! Pinning for future reference!
Made these with a few modifications for our needs! Love em. Bought 12×12 stock mirrors from Lowe’s and framed him according to these plans.
Would love to post a few pictures, but can’t figure out how…guess I’m better with a drill than a computer lol