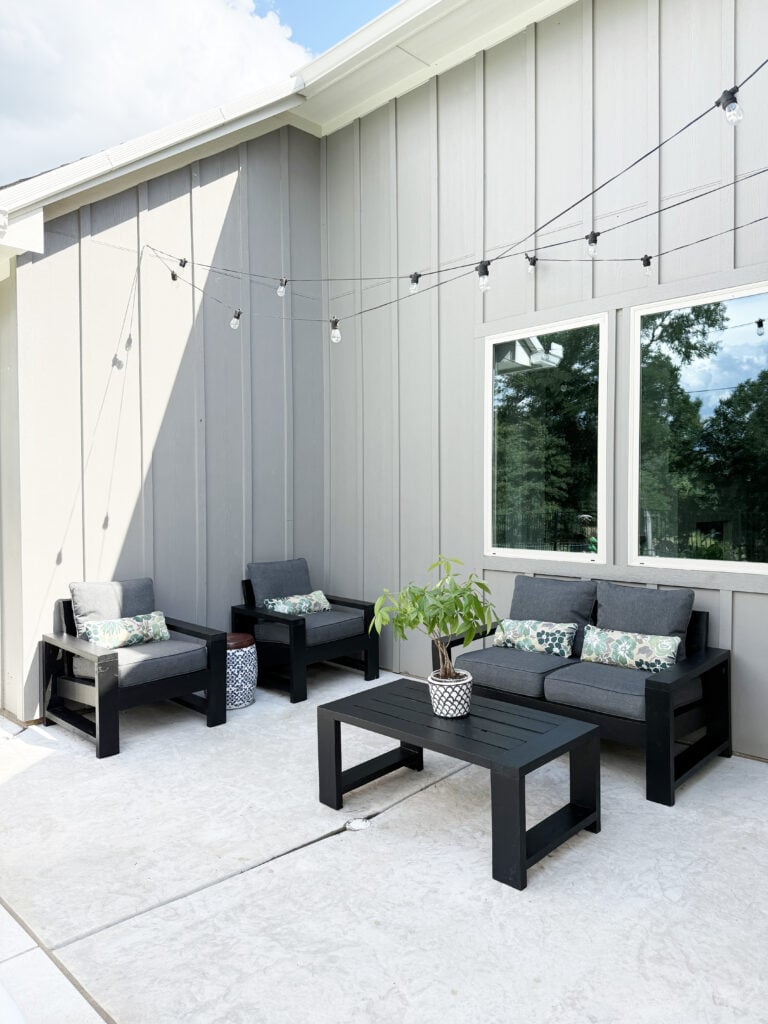
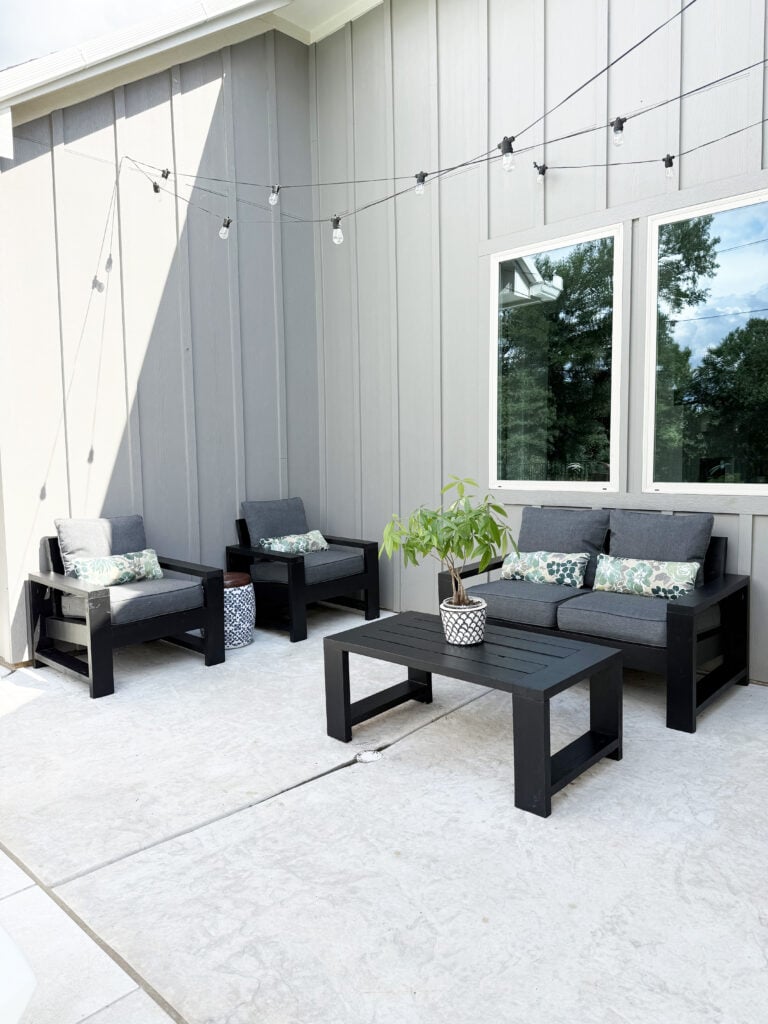
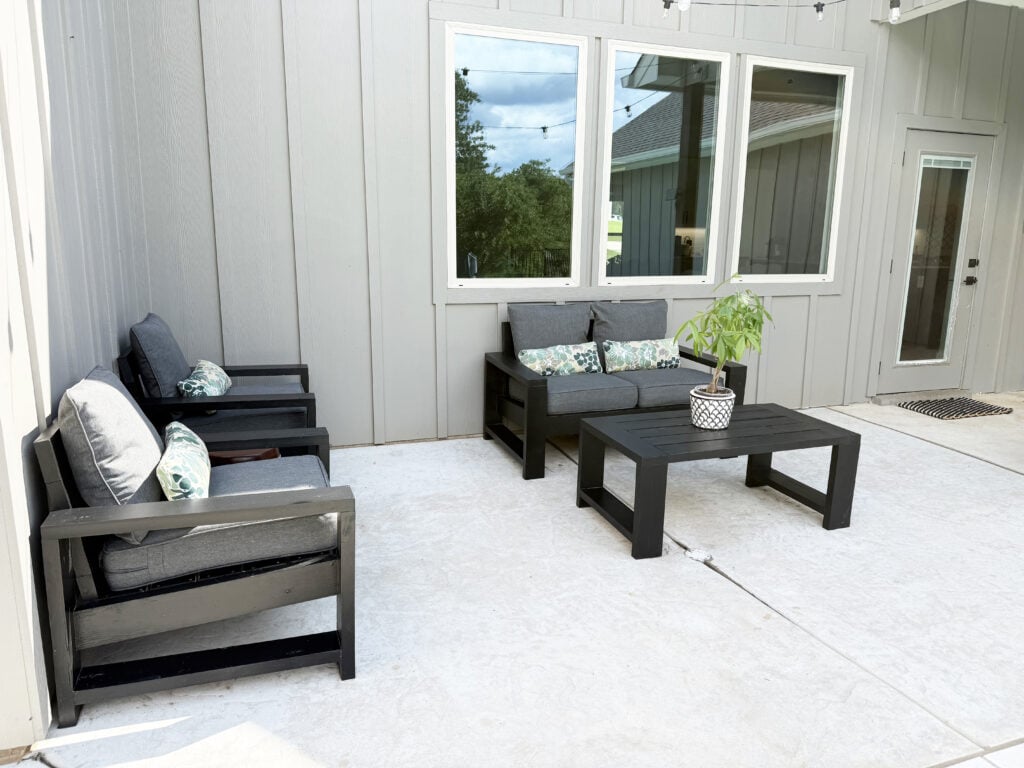
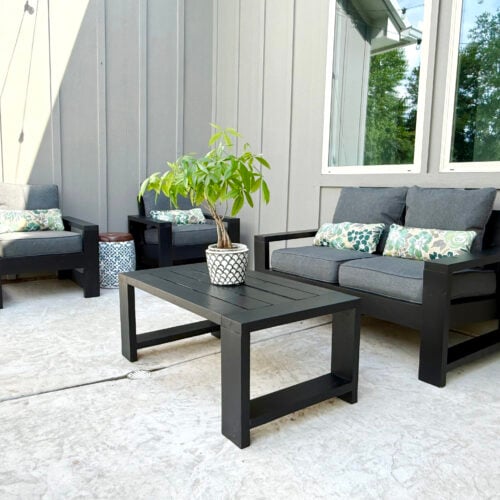
I’m so excited to share this DIY outdoor coffee table with you guys because it is one of those projects that looks like it took way more lumber, time, and money than it actually did.
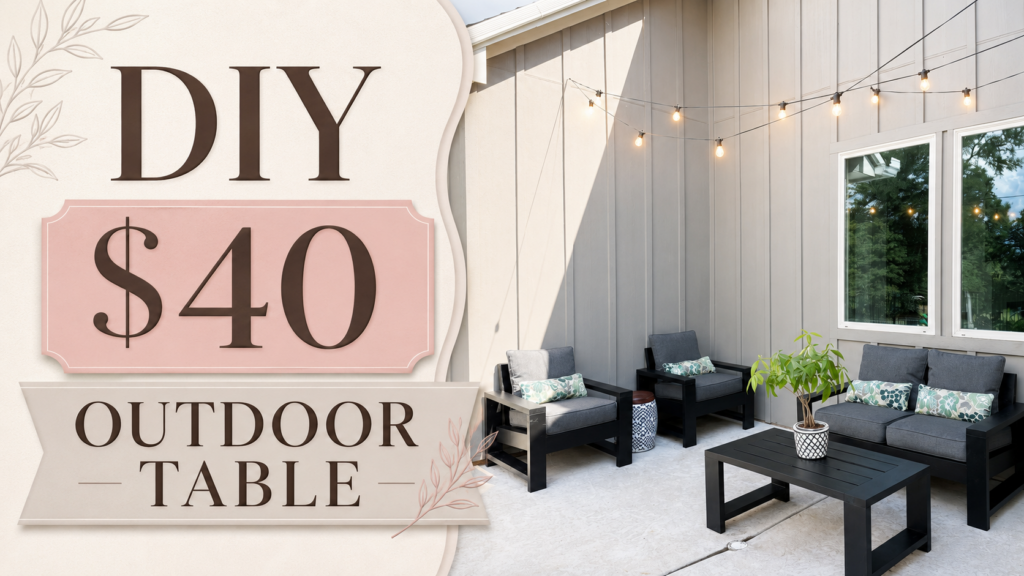
We built this entire coffee table with only four 2×6 boards, and the lumber cost was under $40. It is a simple, sturdy build that makes the perfect match for the DIY outdoor chairs and couch I built for my patio.
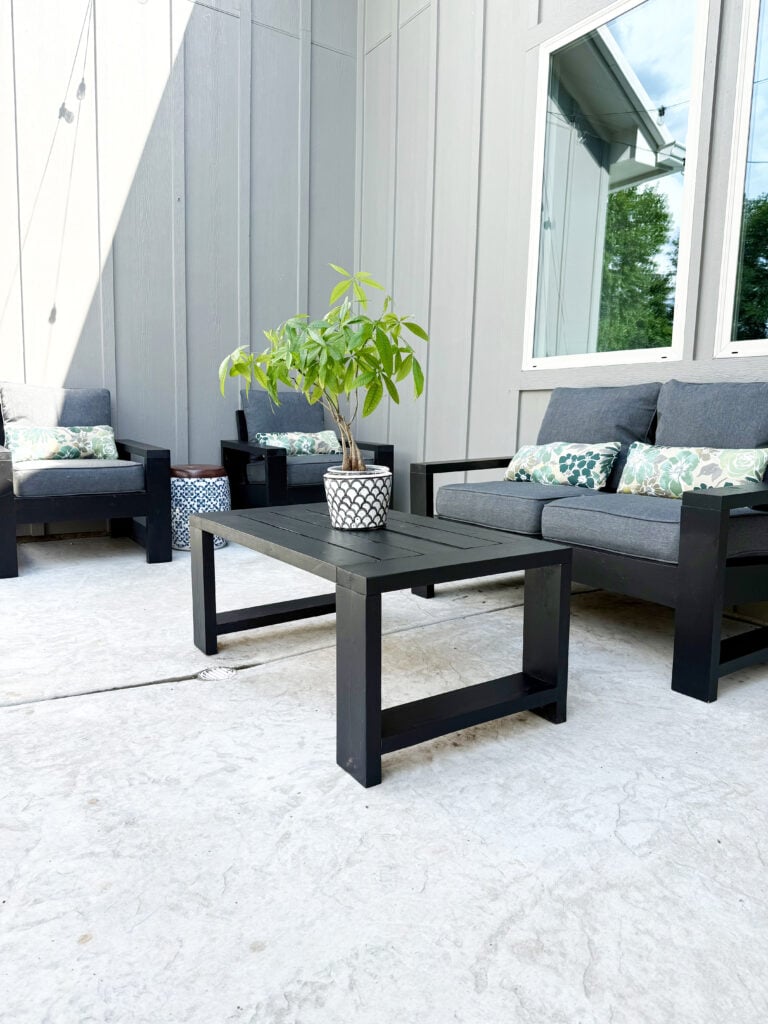
The best part is that by building the whole patio set myself, I was able to save so much money on the frames and splurge on nice outdoor cushions. The couch was about $60 in lumber, each chair was about $50 in lumber, and this coffee table was under $40. That makes the entire DIY patio set around $200 in lumber.
That is a huge win for a full outdoor furniture set.
Table of Contents
DIY Outdoor Coffee Table
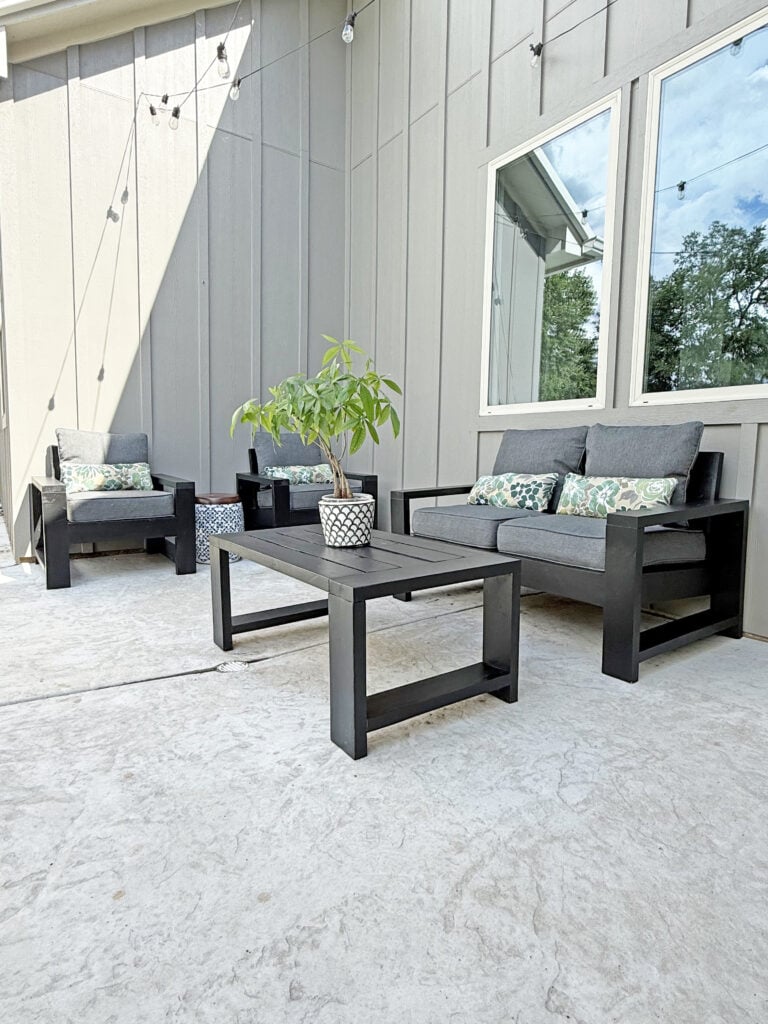
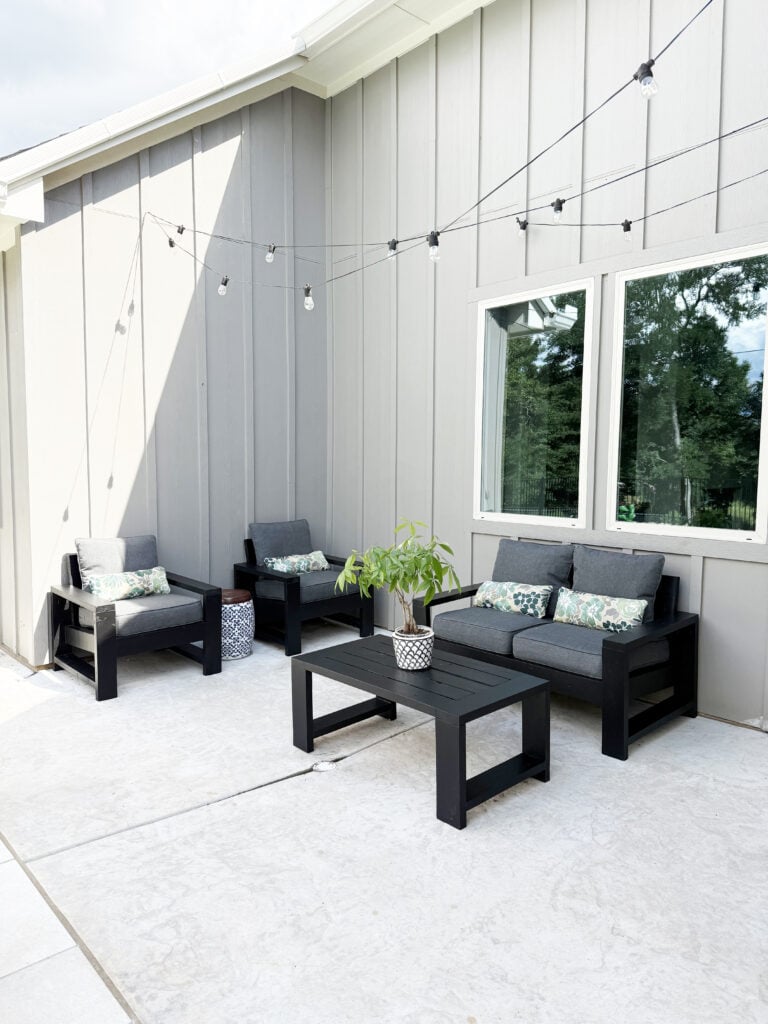
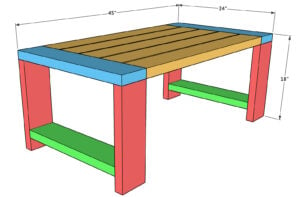
This coffee table is designed with a planked top, chunky 2×6 legs, and breadboard ends to give it a clean, sturdy, outdoor look. It is simple enough for a beginner build, but it is also solid enough to hold up outside with the rest of my outdoor furniture.
I used pocket hole joinery for this project, which makes the build quick, strong, and easy to assemble.
Click here to grab the free printable plans for the full cut list and measurements!Watch Whitney and I build it – just click the play button below!
Tools and Materials Needed
Tools
- Kreg 20V Ionic Drive™ Drill
- Kreg Pocket Hole Jig
- Kreg Project Blocks (optional)
- Miter Saw
- Kreg 20V Ionic Drive™ 5″ Random Orbit Sander
- Tape Measure
- Paint Brush or Sprayer
Materials
- 4 – 2×6 boards
- 2 1/2″ pocket hole screws
- Wood Glue
- Wood Filler
- Interior/exterior cabinet and furniture paint (you can have it tinted any color I used Tricorn Black)
How to Build a DIY Outdoor Coffee Table
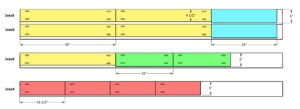
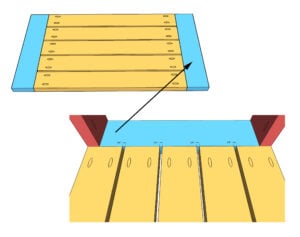
Step 1: Step 1: Attach the Planked Top Boards to the Breadboards
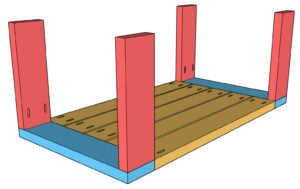
Start by cutting the planked top boards and breadboard pieces to size.
We used one of our favorite Kreg Jig’s, the 720Pro, to drill 1 1/2″ pocket holes at both ends of each planked board.
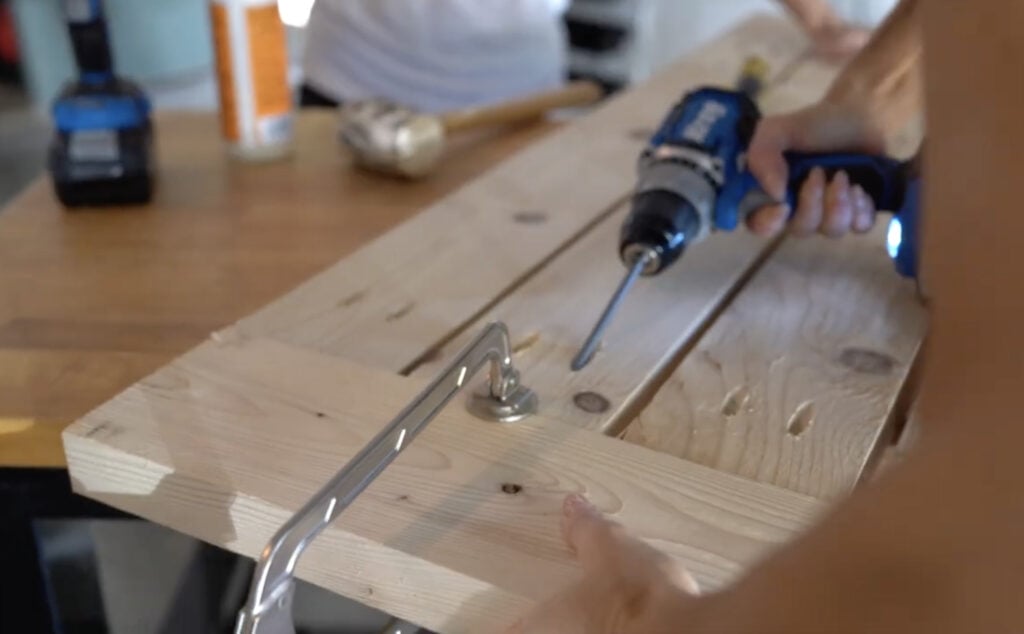
Attach the planks to the breadboard pieces using 2 1/2″ pocket hole screws and wood glue.
- You can find the Kreg 720Pro here.
- You can find the Kreg 20V Ionic Drive™ Drill here.
Step 2: Attach the Legs
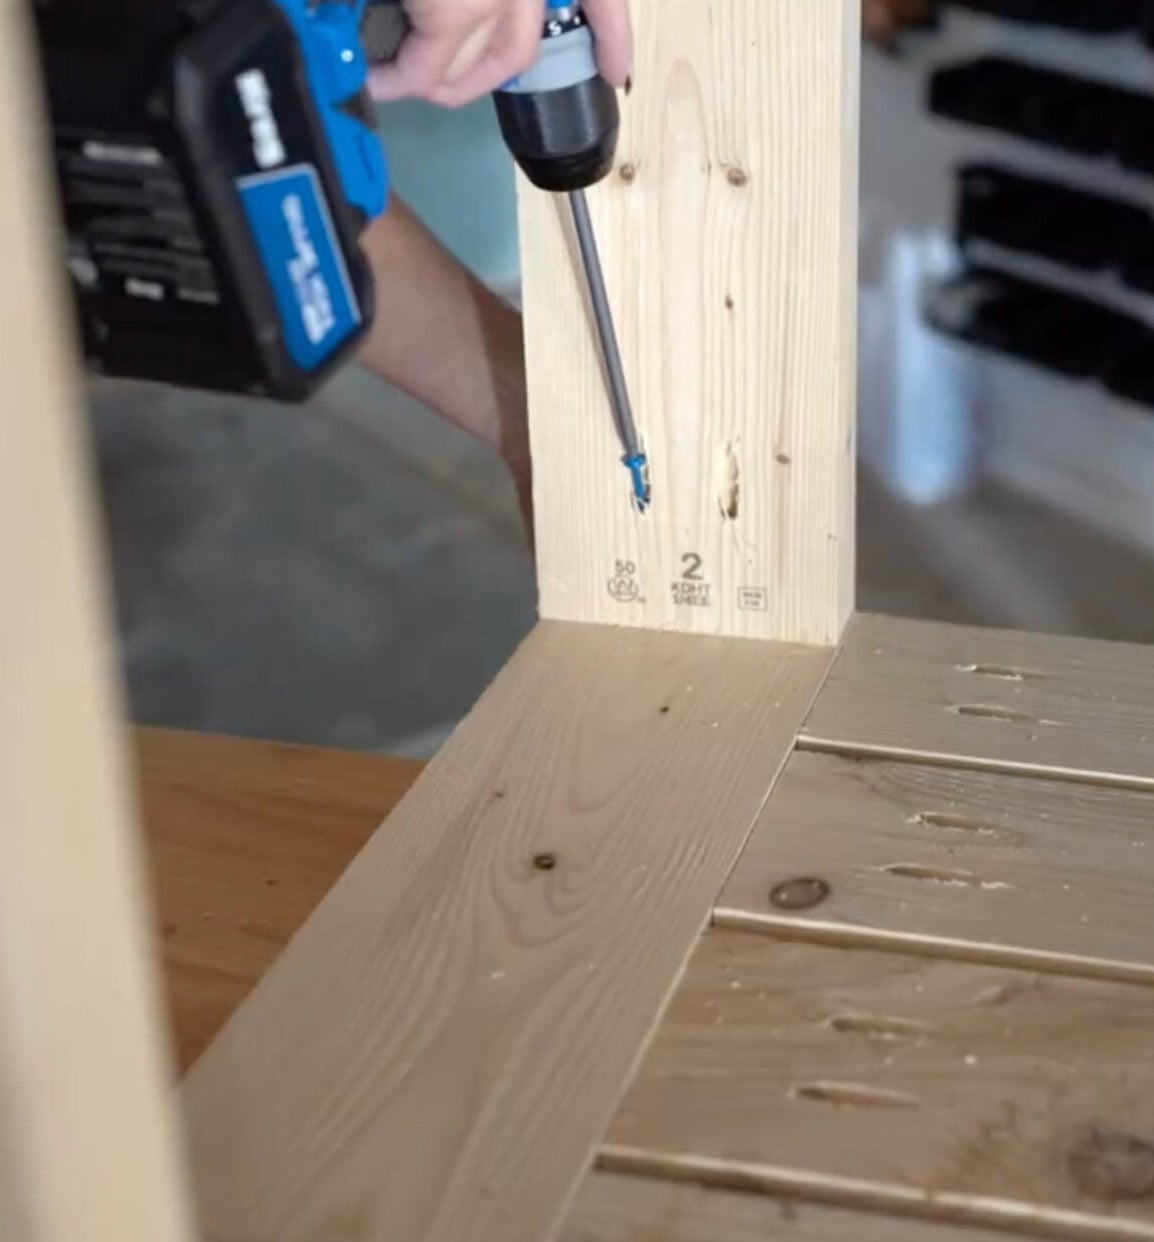
Next, cut the leg pieces to size and drill 1 1/2″ pocket holes on one end of each leg piece. Attach the legs to the breadboard pieces using 2 1/2″ pocket hole screws and wood glue.
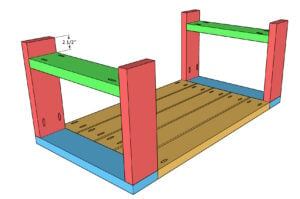
Step 3: Attach the Runners
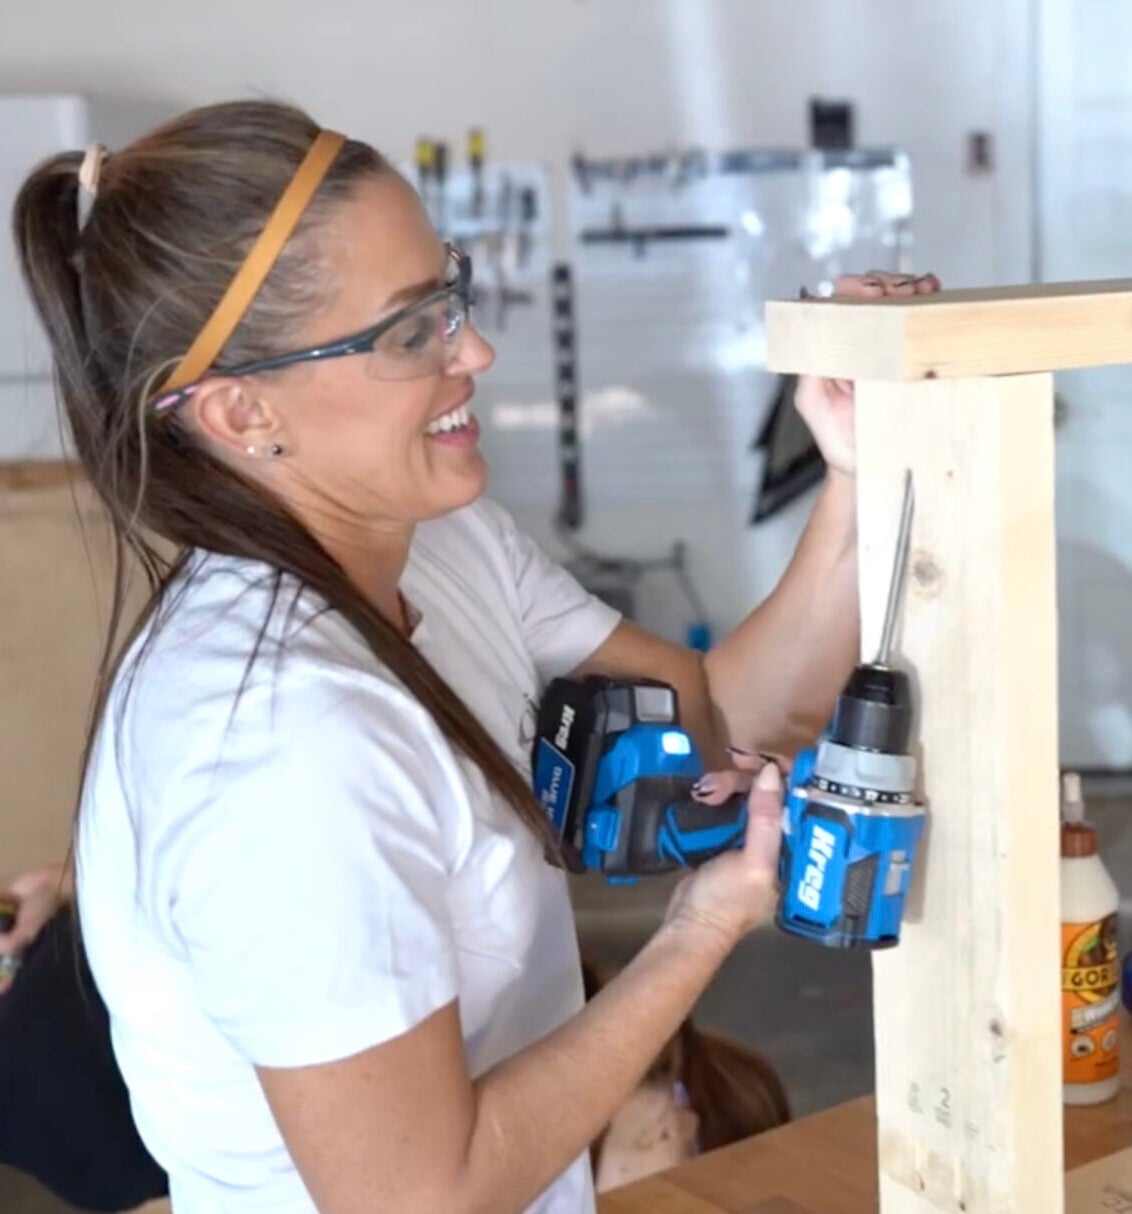
Next, cut the runners to size and drill 1 1/2″ pocket holes at both ends of each runner. Attach the runners between the legs using 2 1/2″ pocket hole screws and wood glue. I attached mine 2 1/2″ from the bottom of each leg. These runners help tie the two leg assemblies together and make the coffee table feel really strong and stable.
Once the runners are attached, the main build is done.
Step 4: Fill the Exposed Pocket Holes
After the table is assembled, fill any exposed pocket holes with wood filler.
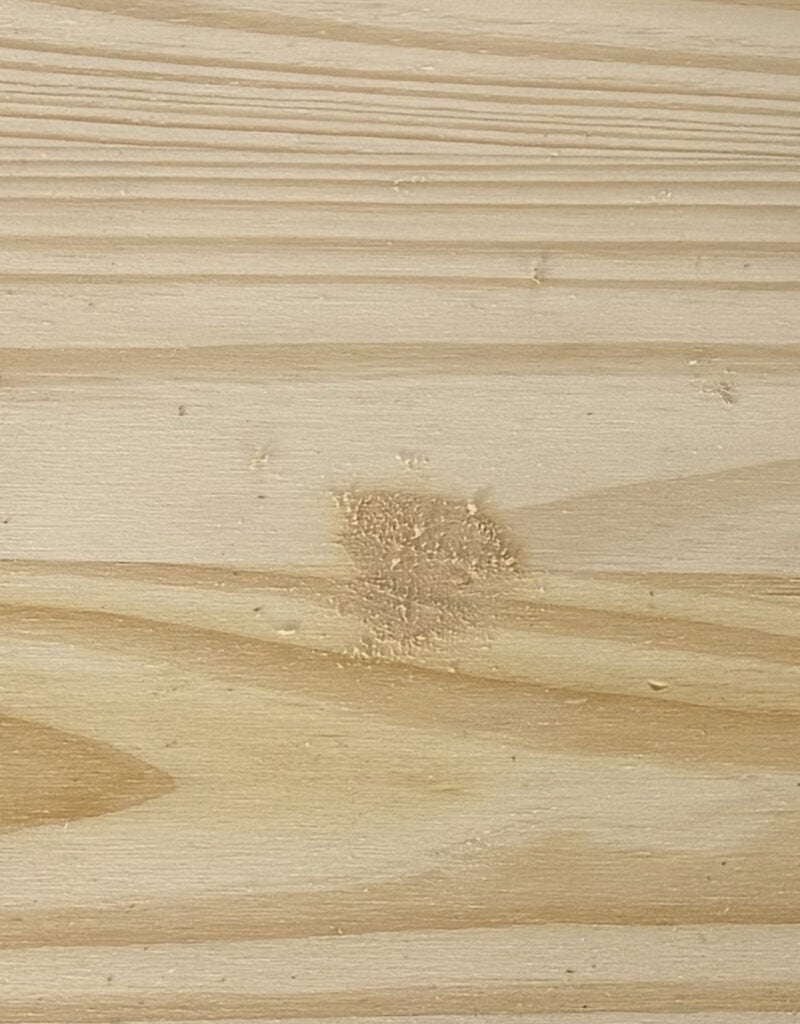
Let the wood filler dry completely, then sand those areas smooth before painting.
Step 5: Sand the Coffee Table
Now it is time to sand the whole table down.
I used my Kreg 20V Ionic Drive™ 5″ Random Orbit Sander for this step. I started with an 80 grit sanding pad, then followed with 120 grit and finished with 220 grit.
This gives the coffee table a smooth finish and gets it ready for paint.
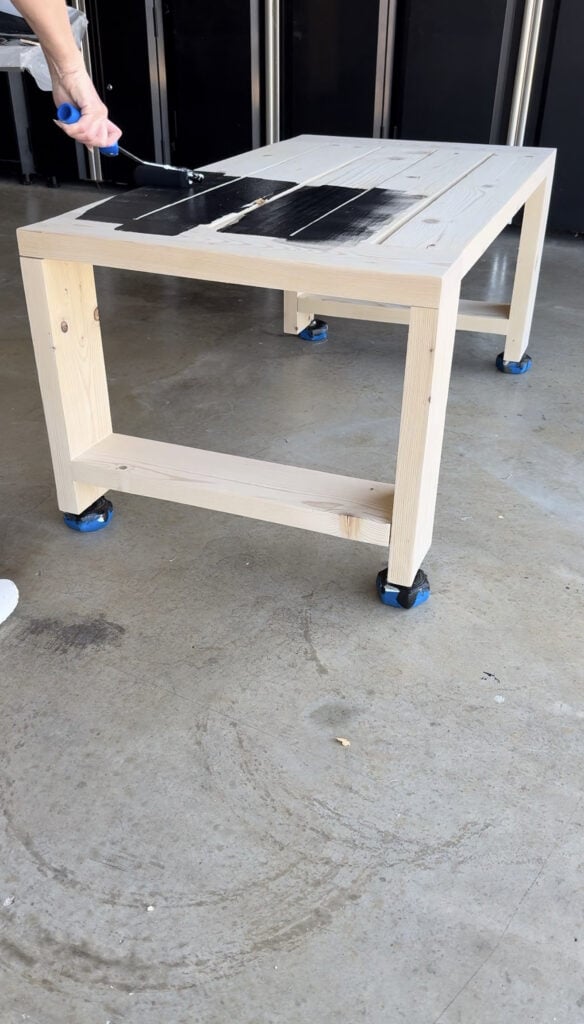
Step 6: Paint the Coffee Table
For the finish, I painted the entire coffee table with my favorite Sherwin Williams cabinet and furniture paint tinted to Tricorn Black.
I love using this paint on my outdoor builds because it is interior/exterior, holds up so well outside, and I do not have to add a separate outdoor sealant over it.
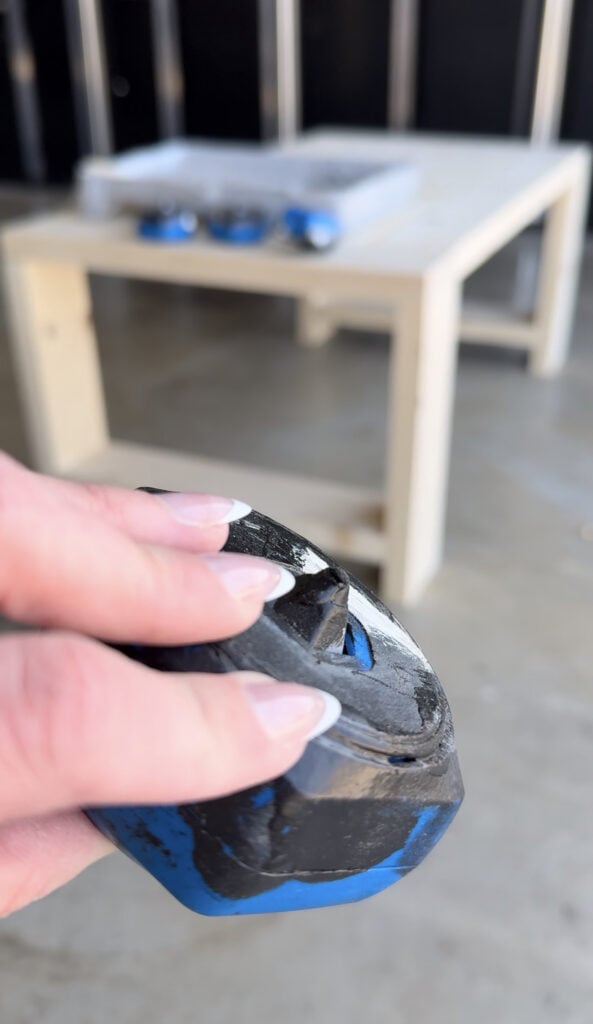
I used my Kreg Project Blocks to prop the coffee table up off the ground while I painted. They make it so much easier to get around the bottom edges and keep the project lifted while the paint dries.
DIY Outdoor Furniture Set
I designed this coffee table to match the outdoor chairs and couch I built for my patio.
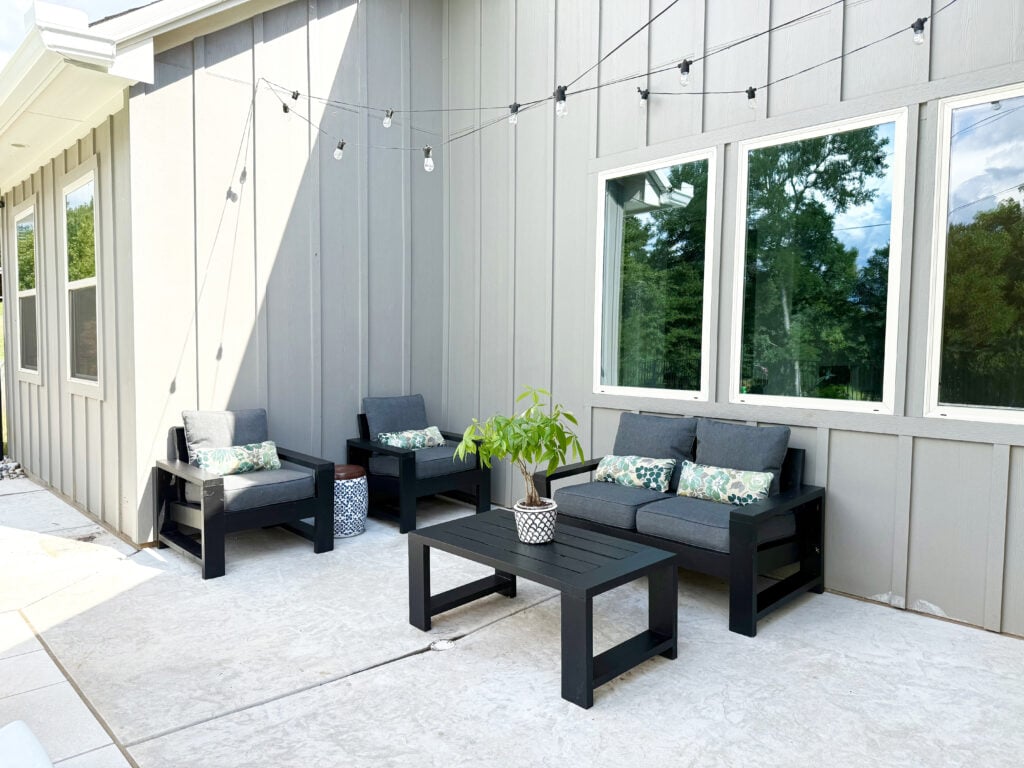
The couch was about $60 in lumber, each chair was about $50 in lumber, and this coffee table was under $40 in lumber. That means I built two chairs, one couch, and one coffee table for around $200 in lumber.
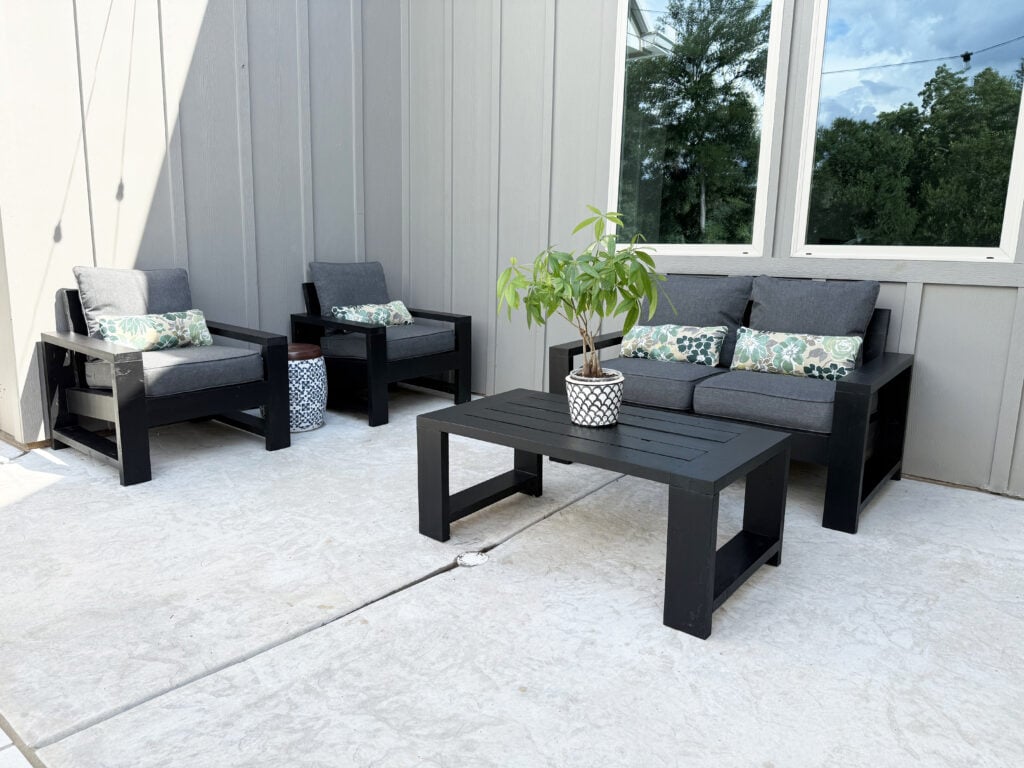
Because I saved so much by building the frames myself, I was able to spend a little more on really nice outdoor cushions.
This whole set is DIY, budget-friendly, and so sturdy.
Final Thoughts
This DIY outdoor coffee table is such a great beginner-friendly outdoor furniture build. It only takes four 2×6 boards, it is inexpensive to build, and it is the perfect size to pair with outdoor chairs or a couch – or both.
I love that it matches the rest of my DIY patio furniture, and I love even more that the whole set looks high-end without the high-end price tag.
Be sure to check out the free printable plans below for the full cut list, supply list, and step-by-step instructions.
Happy Building!
More DIY Outdoor Furniture Plans


DIY Outdoor Table for $40
Tools
- Drill
- Miter Saw
- Kreg Jig
- Sander
- Kreg Project Blocks
- Tape Measure
- Paint Roller
Supplies
- 4 2x6x8 Framing Lumber
- 2 1/2" Pocket Hole Screws
- Wood Glue
- Wood Filler
- Sanding Pads (80, 120 and 220-grit)
- Interior/exterior cabinet and furniture paint
Instructions
- Cut List

Attach the Planked Top Boards to the Breadboards
- Start by cutting the planked top boards and breadboard pieces to size. Drill 1 1/2″ pocket holes at both ends of each planked board. Attach the planks to the breadboard pieces using 2 1/2″ pocket hole screws and wood glue.

Attach the Legs
- Next, cut the leg pieces to size. Drill 1 1/2″ pocket holes on one end of each leg piece. Attach the legs to the breadboard pieces using 2 1/2″ pocket hole screws and wood glue.

Attach the Runners
- Next, cut the runners to size and drill 1 1/2″ pocket holes at both ends of each runner. Attach the runners between the legs using 2 1/2″ pocket hole screws and wood glue. I attached mine 2 1/2″ from the bottom of each leg.

The Finish
- Fill any exposed pocket holes, sand the entire coffee table down and add an outdoor finish!Make it your own and be sure to share your builds on social media and use #shanty2chic so we can share them too!Happy Building!


What a fantastic DIY project! The step-by-step instructions and detailed visuals make this outdoor coffee table build approachable for both beginners and experienced DIY enthusiasts. It’s always inspiring to see how thoughtful design and quality materials can come together to create something both beautiful and functional.
Projects like these also highlight the importance of choosing durable wood and reliable hardware to ensure long-lasting results, especially for outdoor furniture. Those looking to explore a wider range of plywood, panels, laminates, and other interior materials can also find useful resources at **https://www.plywoodbazar.com** before starting their next project.
Thank you for sharing such a creative and practical DIY guide—it’s sure to inspire many woodworking enthusiasts.