Hey guys!
I’m so excited to share my latest building project with you! I was stalking Restoration Hardware’s Baby and Kid site when I came across their Kenwood Nightstand. I fell in LOVE and immediately enlisted the help of my good friend Ana to make me some plans! These were super easy to hack, I mean build!
You can get the plans for these great nightstands HERE on Ana’s site.
Here are a few progress pictures and tips from my build…

I used my Kreg Jig® to help me build these tables. This tool makes your furniture so professional and sturdy. It also makes it so much easier to build.
Here are my table sides…

You can see the ones on the right are the backside of the frame. This is where your pocket holes are and they won’t be seen. The ones on your left show you the front of the sides.
For the “planks” I had originally intended on using plank paneling in a 4×8′ sheet. My Lowe’s only carried this in MDF and I knew I wanted to stain. I did find these though.

They are planks that easily click together and made my job SO EASY. I would highly recommend using them if you are trying to get the same look I have. They were $10 a package and I needed one package per table.
This is what the backside of the sides looked like with my planks nailed in.

And on the other side they look like this…

I used one 2×4′ sheet of 3/4″ plywood for the bases of the tables. I only needed one to do both tables.
You add your pocket holes to the bottom of the base to attach your sides easily and clean.


I used my nailer to attach my top planks. So easy. I also like to take an 80 grit sanding block to all my edges and round them a bit. I think it gives it a real custom “I didn’t make this in my garage” look 😉


I always use Gorilla Wood Glue for all of my building projects. It is super easy to work with and holds like a champ.
This is the frame of my door.
BIG TIP!
Make sure to measure your opening once you have your tables built. If you are a bit off on your measurements, your door will end up not fitting clean and pretty. Just measure your opening and make your door frame 1/4″ smaller than your door. It will save you lots of deconstructing time… Trust me 😉

I attached my planks to the door the same way I did my sides.
Here it is ready for stain!

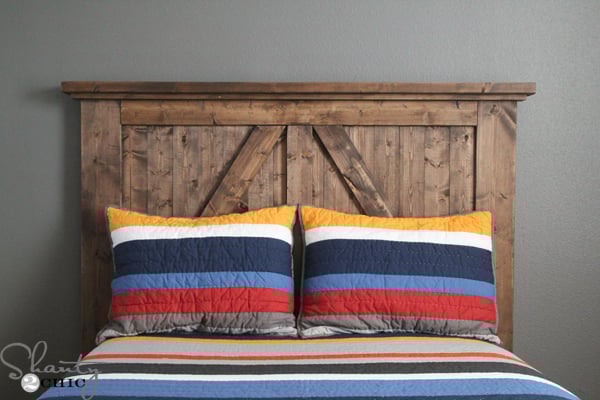
I used the same stain on the tables that I did for his bed. You can get it at Lowe’s in LOTS of colors.
Rust-Oleum Ultimate Wood Stain in Dark Walnut

You guys will LOVE this stuff. It literally dries in an hour! My kind of stain!
This is the hardware I used. I found all of this at Lowe’s. I couldn’t find 2″ strap hinges in black but a little Rust-Oleum Painter’s Touch spray paint in black took care of that!


Want to see them all finished???


Now let’s talk numbers!
You can buy these bad boys on RHBaby and Kids for $398 A PIECE. Ouch.
Or…..
You can build them yourself! I paid under $120 for BOTH of them! Yah… I think I like them even more now 😉
Hope you like them too! If you did, I would love for you to Pin and Share the heck out of them below 🙂 I would appreciate it! OH… And just wait until you see Ashley’s project tomorrow. It might just be one of my favs!
Remember you can see the easy to follow and amazing plans on Ana’s site HERE!
Here are some other projects I have done for his room…
Pottery Barn Inspired Memo Board
~Whitney

Hi, I’m sorry if I am truly overlooking this, but can you please indicate which dimension of board you used for which step and part? For example, I can'[t tell from the pictures, or from Ana’s plans, if the frames are using 1x2s or 1x3s, and I can’t tell if the bottom piece is a 1×3 or 1×4. Also, what does the inside of the door look like? How did you finish the bottom of the panels on the inside of the door? Thanks so much
Where did you get the light? I love it