Follow our step-by-step tutorial to build this easy DIY Rustic Modern nightstand using only a few tools, giving you rustic modern bedside table for any bedroom!
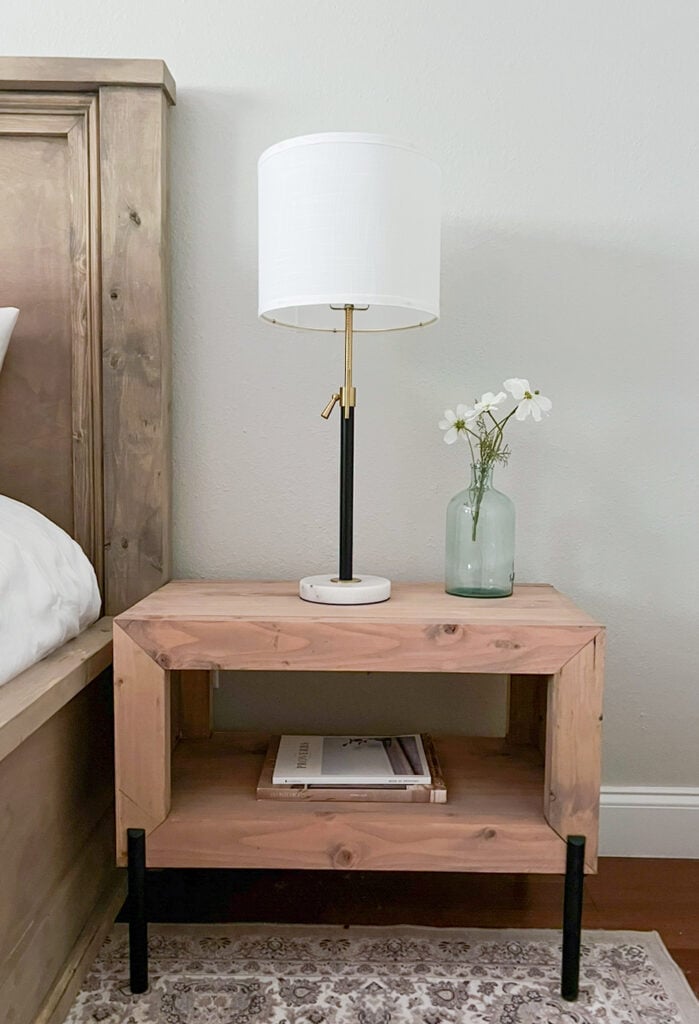
I love how this nightstand turned out. This also makes a great side or accent table. Be sure to download and print the FREE Plans at the bottom of this post!
Table of Contents
DIY Video Tutorial
Lumber for the Nightstand
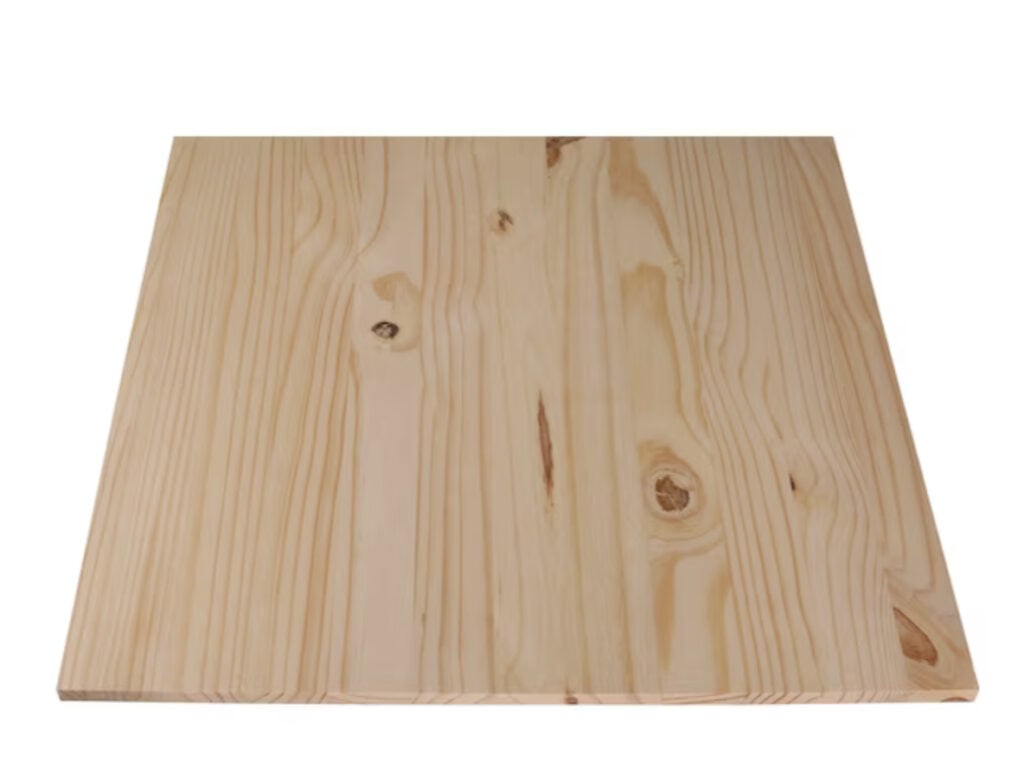
The frames of this table are made with 2×4 framing lumber that we ripped down to 2.5″ wide each. The top, sides and base of the table are created with laminated pine project panels. These pine boards are typically found on the same aisle as dimensional lumber and are often placed with other table tops and wrapped in plastic. I typically purchase mine from Lowe’s. You can see the pine boards I used here. They come in a variety of sizes which is great so you don’t have too much scrap. We also love the way they stain. I purchased 16″ x 48″ panels and ripped them to 14″ wide and cut the rest to size.
Kreg Jig
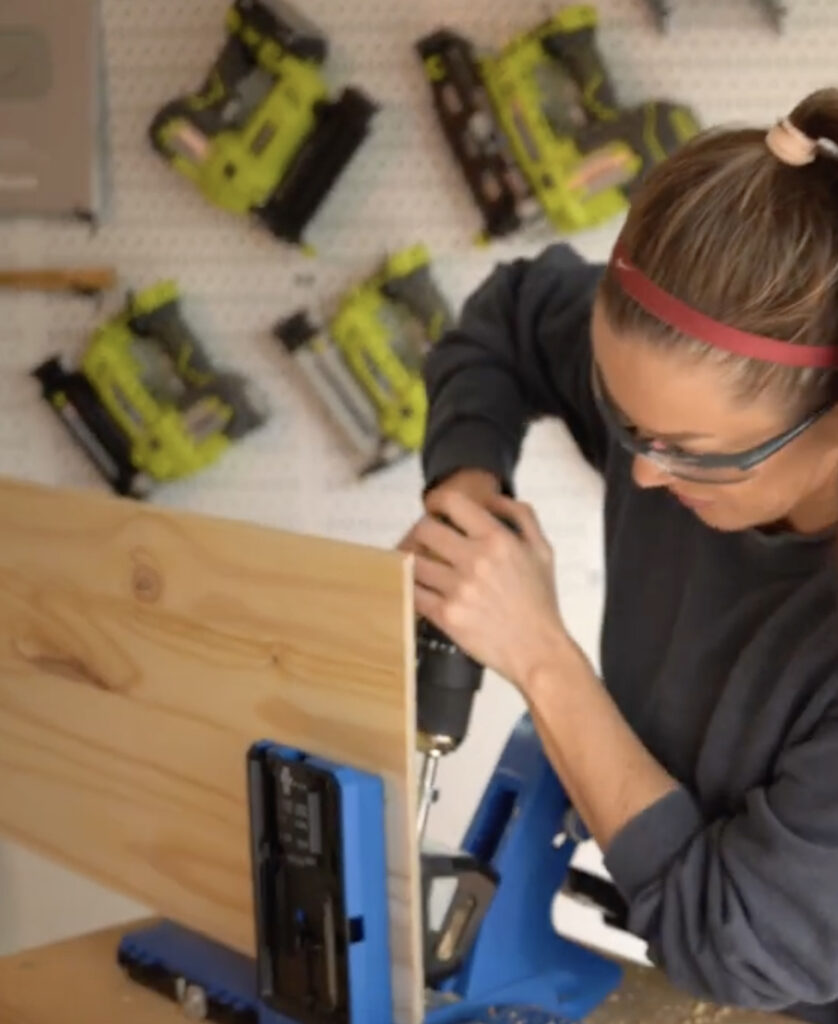
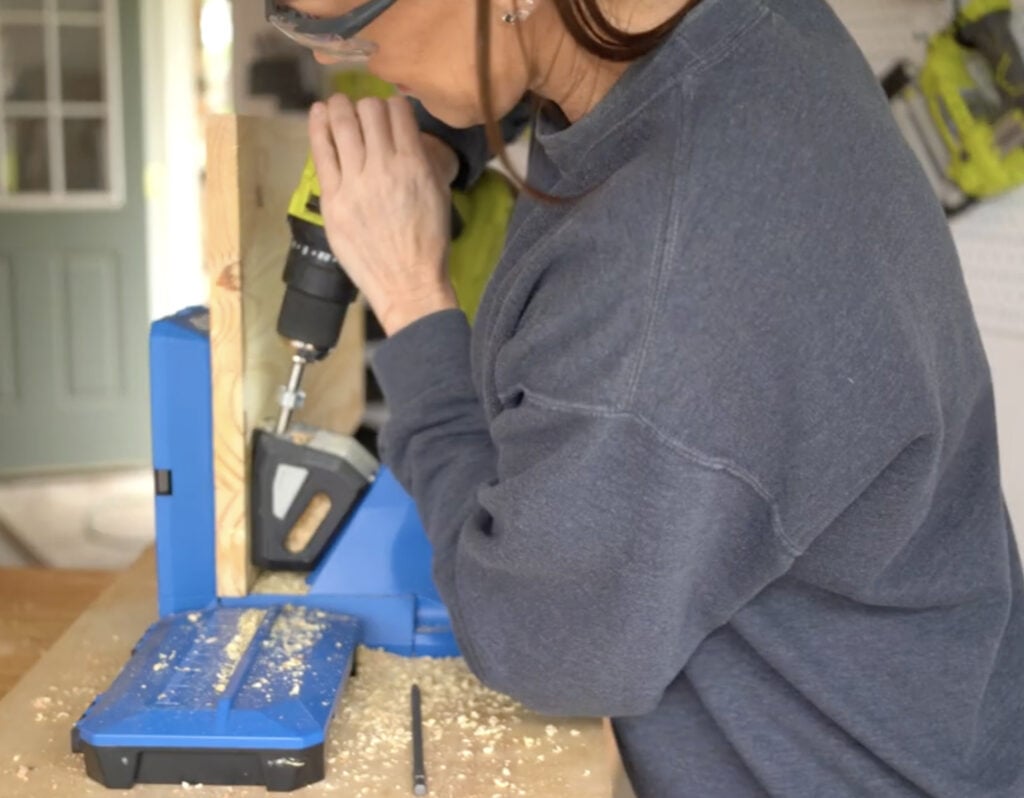
One question we get asked consistently is… “What is a Kreg Jig?” A Kreg Jig is a pocket hole jig that helps create pocket holes, allowing you to build with super strong joints. It makes joining two boards faster and gives you stronger and cleaner joints than countersinking a wood screw. We discovered them shortly after we started building furniture and it was a HUGE game changer for our furniture building! We were so impressed with how user-friendly they are and the strong joints it gave our builds! For this DIY Twin Platform Bed, I used my Kreg Jig 720 PRO and I LOVE IT! You guys will love it too… definitely worth the upgrade for those of you that already own a different model. You can see it the Kreg 720 Pro here on Amazon! You can also check out our How to Use a Kreg Jig video on how to use it!
720PRO MODEL

The Kreg Jig 720Pro is hands-down our favorite pocket hole jig! The Automaxx dual Clamp self-adjusts to your material thickness making it so fast and efficient for furniture building! It has built-in material support wings on the docking station for large panels like plywood, tons of storage features and includes a clamp to hold it in place to your workbench. Some additional accessories are a dust port with a vacuum adaptor, 160 pocket hole screws, It also folds up compact so it’s perfect for small shops.
WHAT’S INCLUDED WITH THE 720PRO?
- Easy-Set Drill Bit
- 3″ #2 Driver Bit
- 6″ #2 Driver Bit
- Easy-Set Drill Bit Collar
- Material Thickness Gauge
- Dust Collection Vacuum Adapter
- Kreg Docking Station with Material Support Wings
- Kreg Pocket-Hole JigClamp
- 1 Downloadable Plan
- 160 Kreg Pocket-Hole Screws
Check out our video about the 720 pro!
Ripping the boards
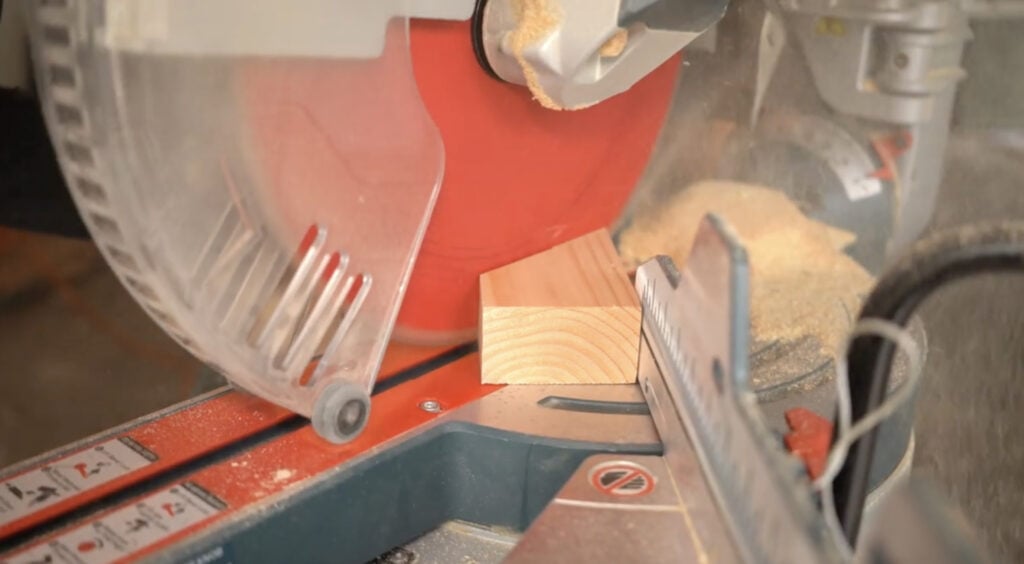
Before adding any pocket holes, I ripped my 2×4 boards down to 3″ wide each. I like to make my cross cuts first with my miter saw, and then rip those smaller cuts with the table saw. We use our table saw to rip the round edges off of the framing boards we build with. This is an optional step but we like to do it to make the pieces of furniture look more expensive and not built with framing lumber. It really helps on a build like this table. Ripping them down gives the stacked boards a solid clean look, like it’s one piece. You can watch our How to Rip boards video to see how we rip our boards!
Step 1
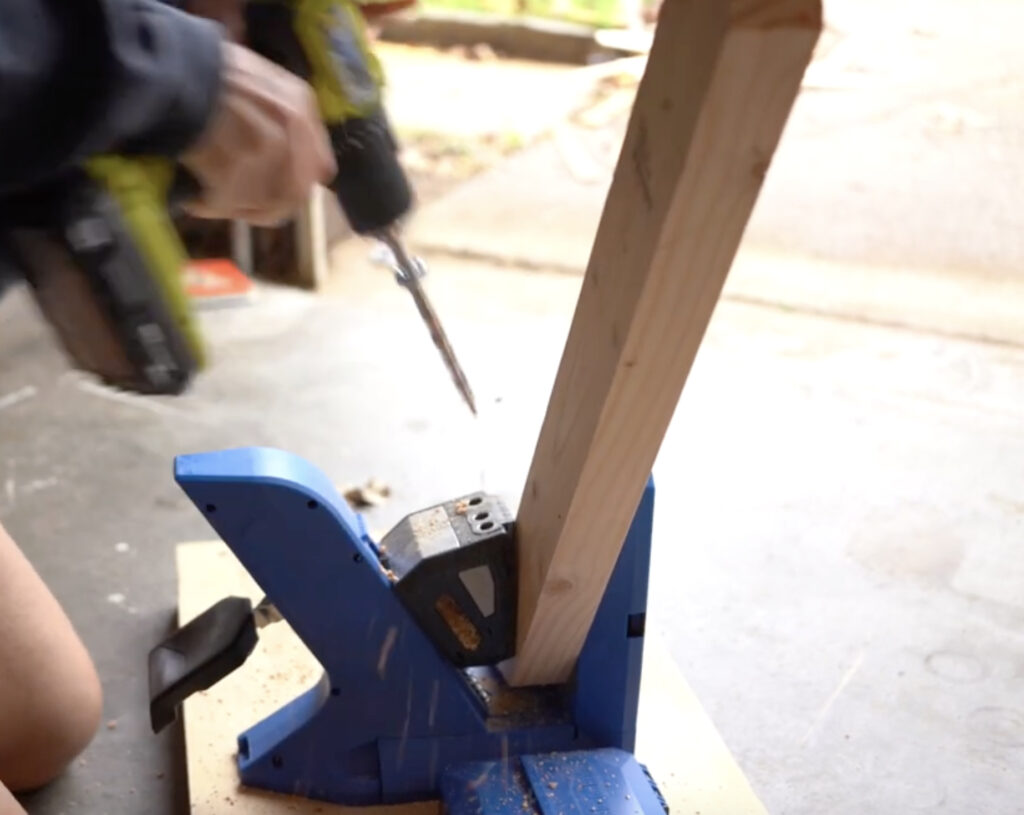
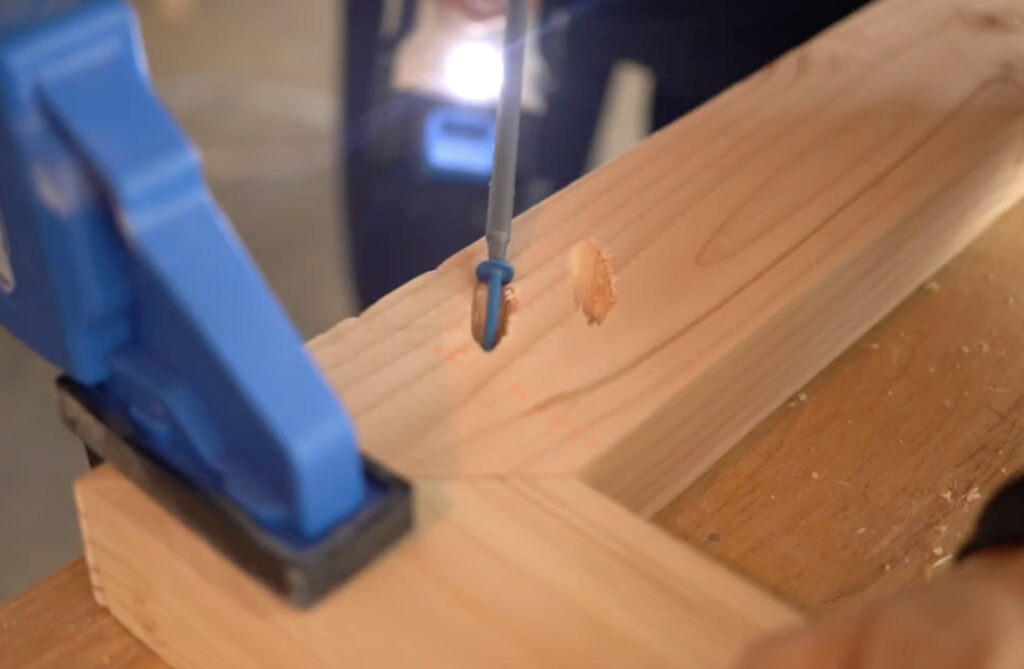
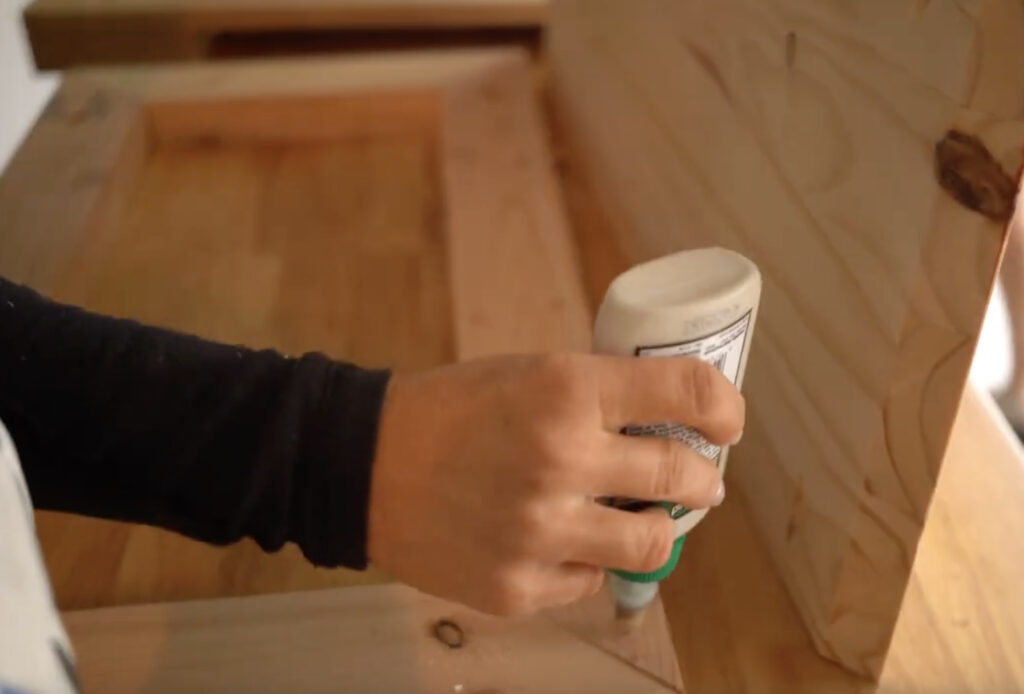
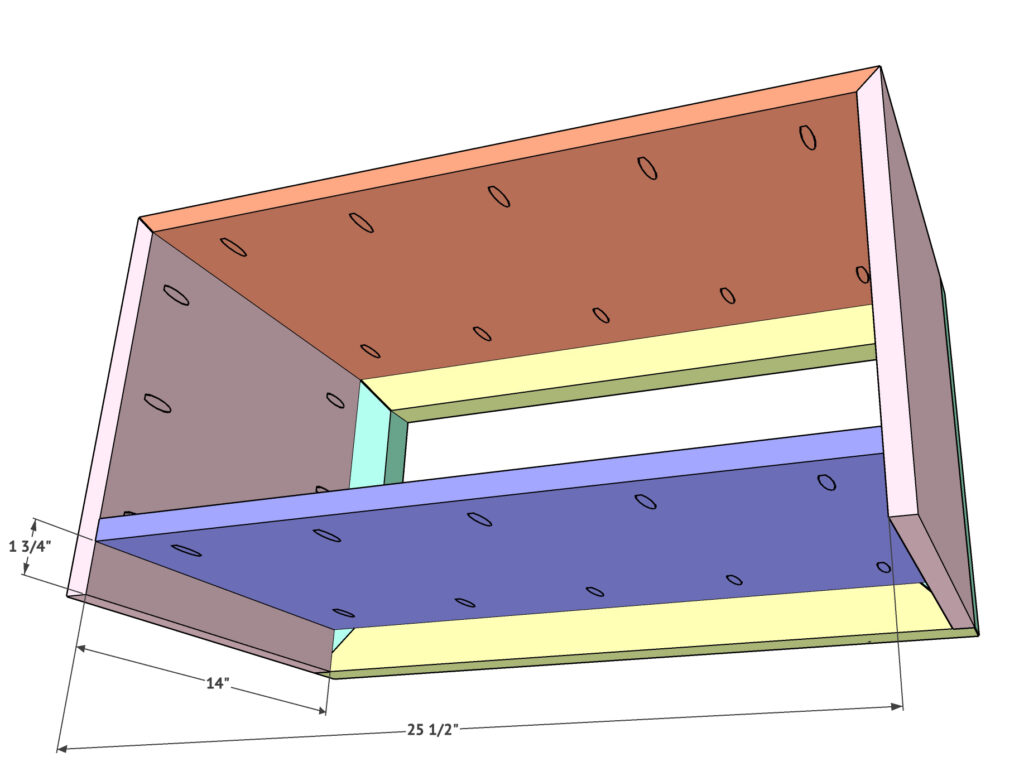
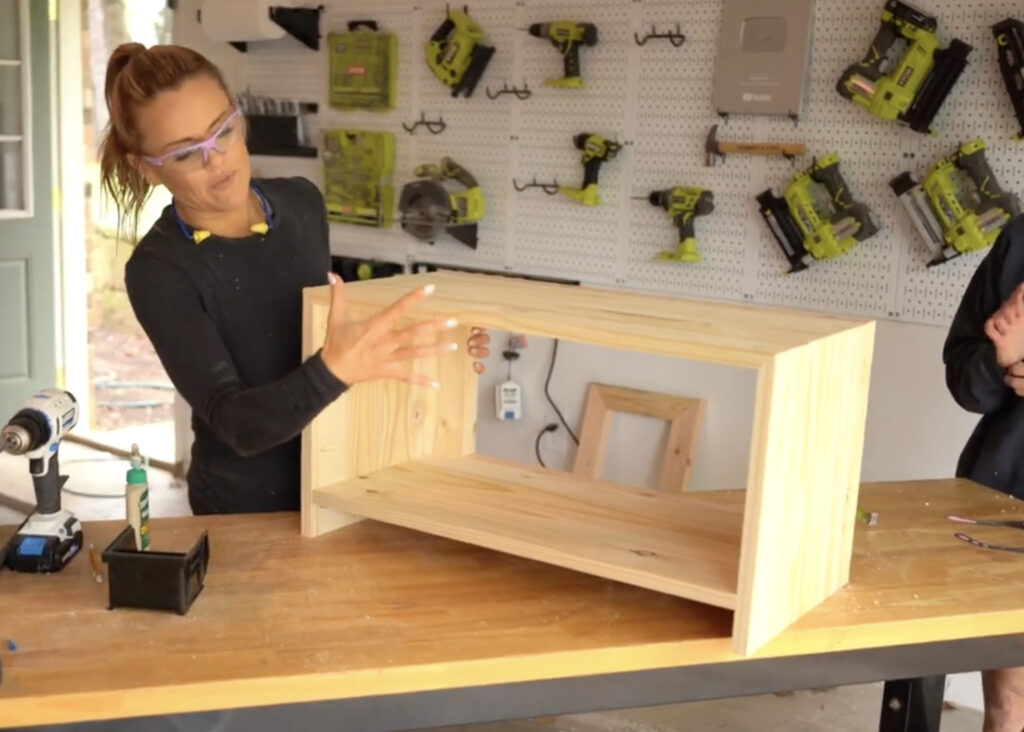
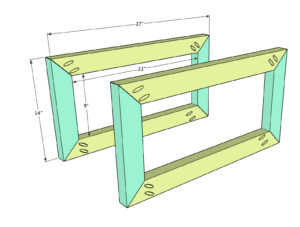
Create the frames first. These are made from 2×4 boards that I ripped to 2.5″ wide each on the table saw. You will create 2 identical frames, one for the front and one for the back. Each piece will be cut at a 45º angle on each end. Add 1.5″ pocket holes using your Kreg Jig to the ends of each of the shorter frame pieces. You will do these also at a 45º angle. Attach the pieces to create 2 rectangle frames using wood glue and 2.5″ pocket hole screws.

Step 2
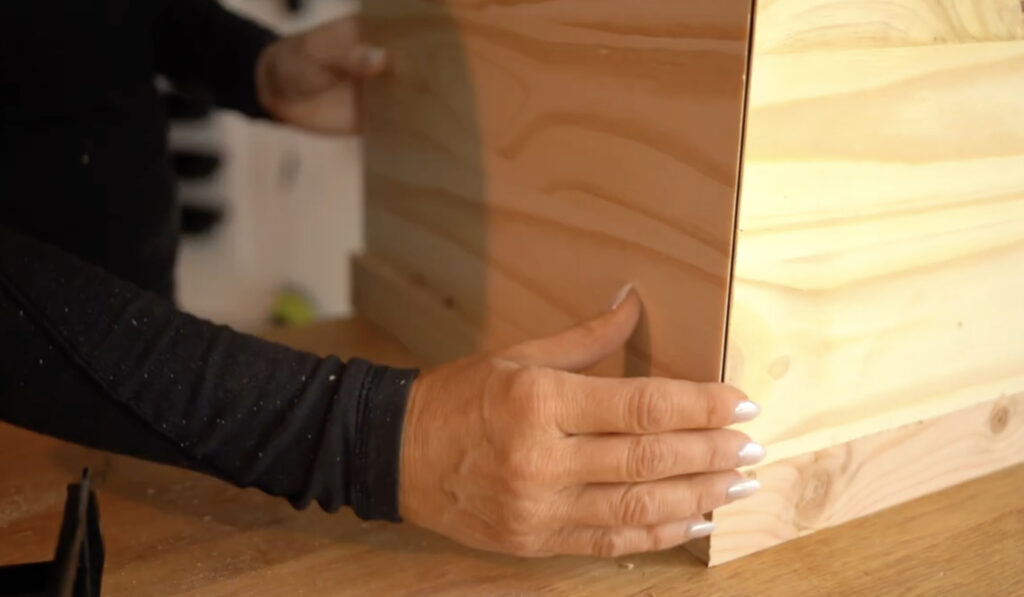
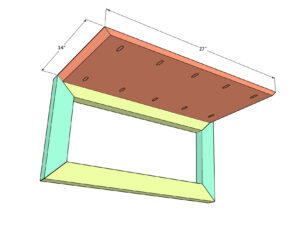
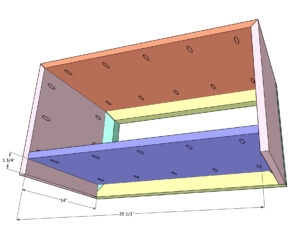
Next, attach the top of the table to the front frame. Add 3/4″ pocket holes down both long ends of this board. Attach the board to the frame using wood glue and 1.25″ pocket hole screws. The top of the table top shelf will line up flush with the top of the frame piece. The top of the table is cut at 45 degree angles on each end that line up flush with the edges of the frame.

Step 3
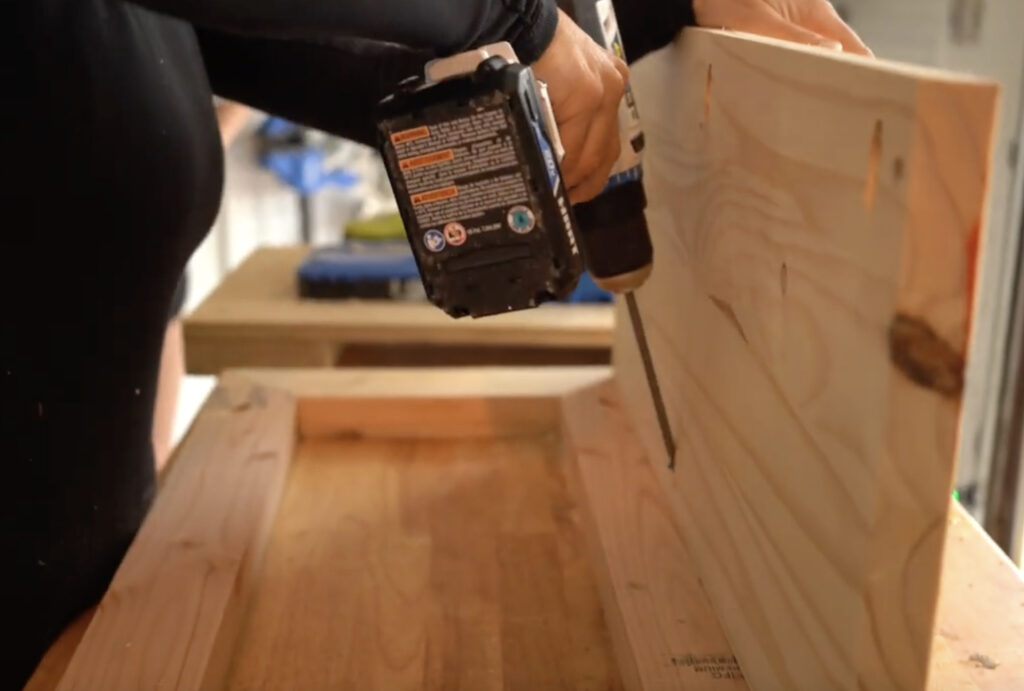
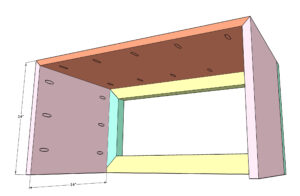
Attach the sides of the table next. These are also laminated pine boards. The base of each of these boards will be a straight cut at the bottoms and the top of each board will be cut at a 45° angle. Add 3/4” pocket holes at the top of each of these boards just below the angle cut as well as down both long sides. Attach the sides to the base with 1 1/4” pocket hole screws through the base side boards and into the frame pieces.The side will be flush with the outside edge of the frame. Repeat this on the opposite side.

Step 4
Next, attach the bottom board to the front frame. The bottom shelf board is made from one of the project panels. Add 3/4″ pocket holes down both short and long ends of this board. Attach the board to the frame using wood glue and 1.25″ pocket hole screws. The top of the bottom shelf will line up flush with the top of the bottom frame piece.
Step 5
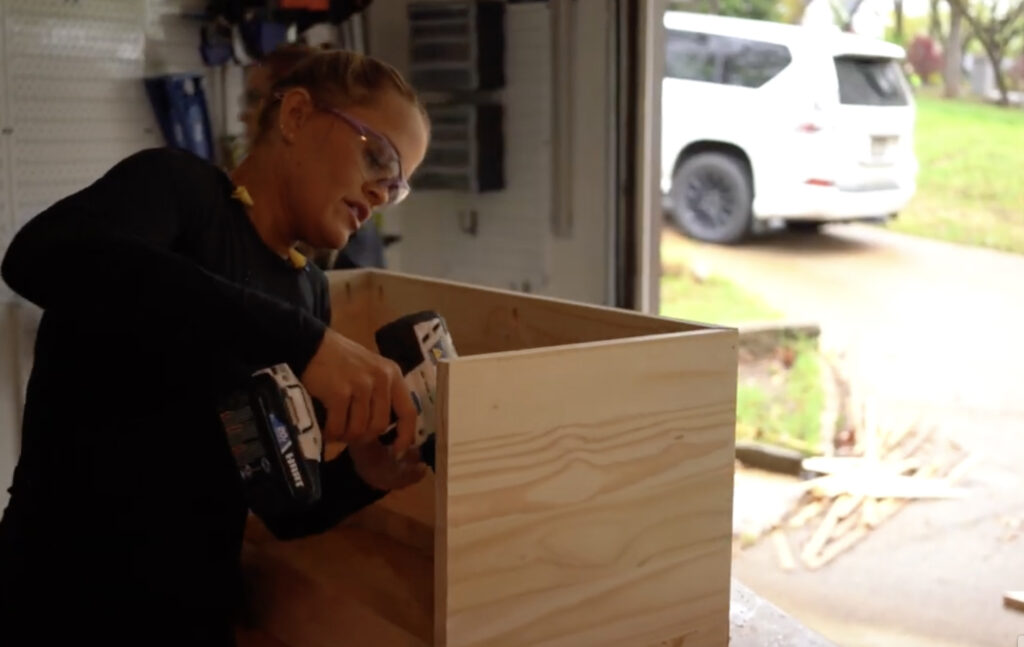
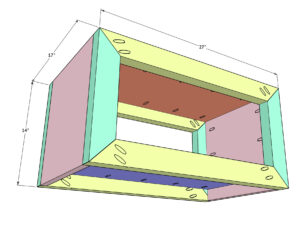
The final step is attaching the second face frame to the table. You want your pocket holes from the frame facing back on this step. You will attach the second face frame the same way you did the front face frame through the pocket holes on all of the project panels and into the front of the back face frame. Use wood glue, and pocket hole screws to attach.


Hardware
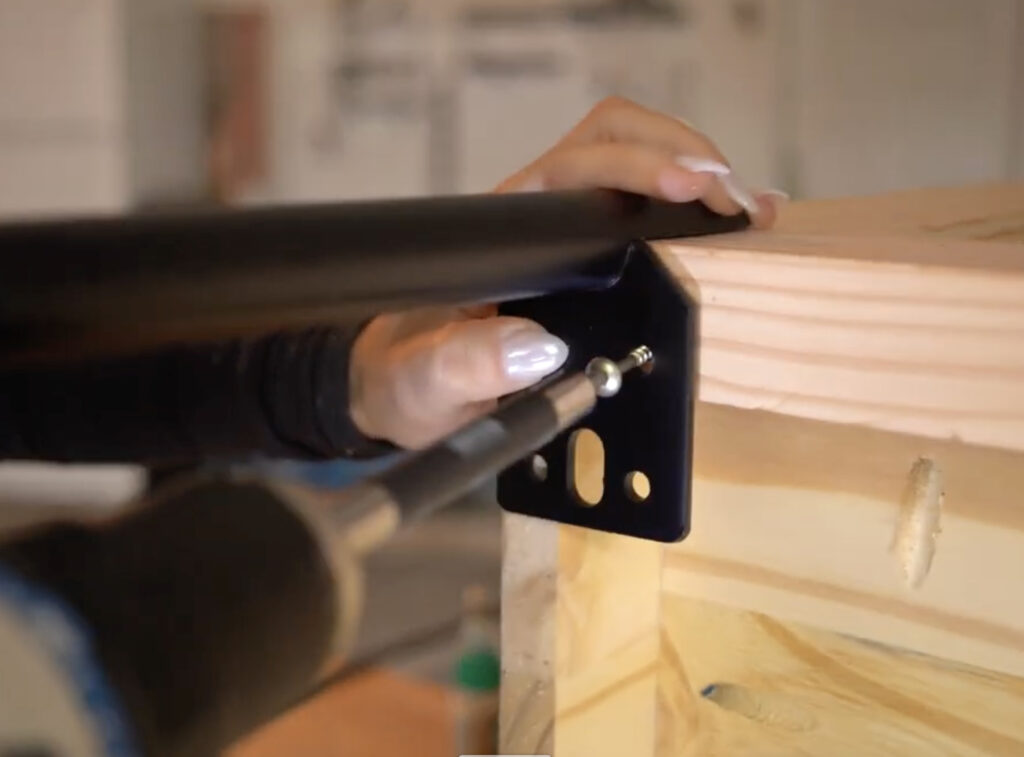
At this point, I was ready to add my feet. I found the cutest metal feet on Amazon that I love so much! You can find the metal feet I used on Amazon! I just attach them to the base of the console table. I did this before staining because I knew the stain would not harm the feet.

Staining the Table
I decided to create my own stain color by mixing three different stains. This is a really fun way to give you an even more custom look and it’s super simple! You can check out my reel on how I created this color!
I used three different Varathane stain colors to create this. I started with an empty tub from the hardware store. These are super inexpensive. You can also use any empty container you have at home! I mixed two parts of Natural stain, one part of Golden Oak, and a splash of Weathered Gray. This gave me the perfect finish that I was looking for. You just put all of that into the bucket and stir it up just a bit and you’re ready to go!
Make sure to sand all the surfaces with medium and fine sandpaper to get an even, beautiful finish. I like to use my Ryobi Corner Cat for this! An orbital sander also works great!
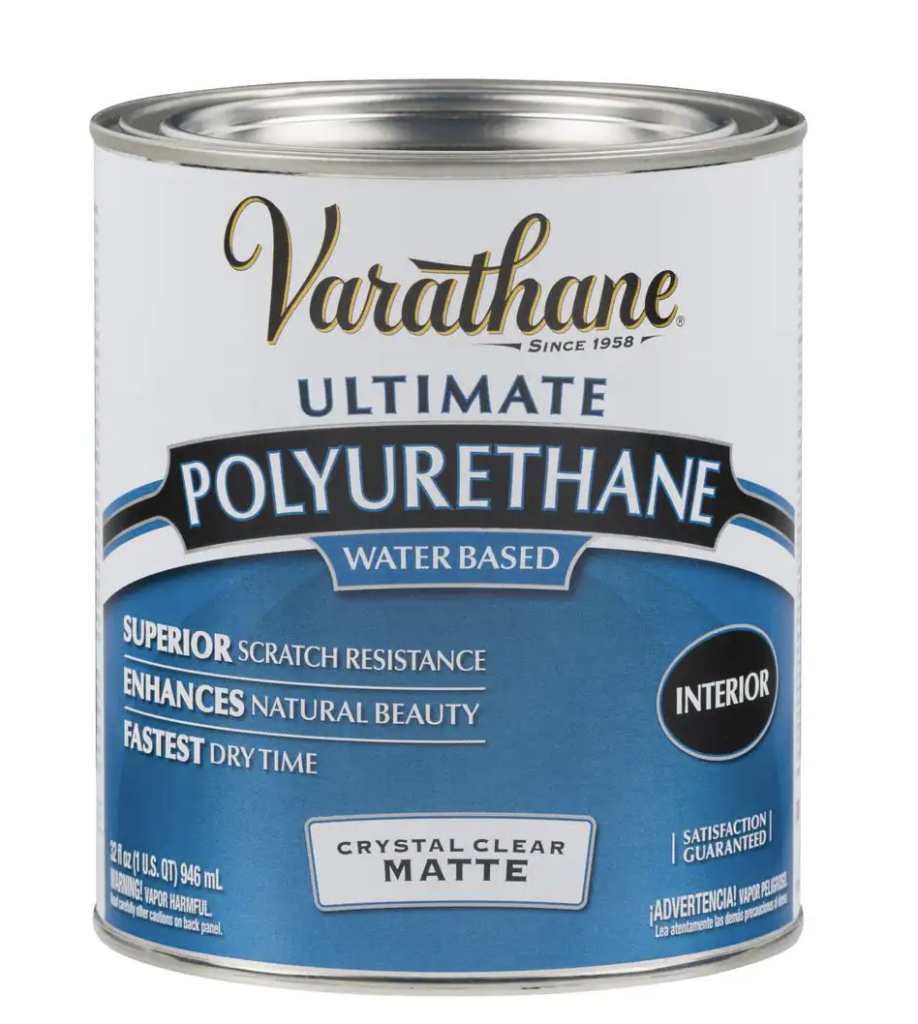
I often get asked what protective coat I like to use on top. My favorite polyurethane is this one!
Free Plans!
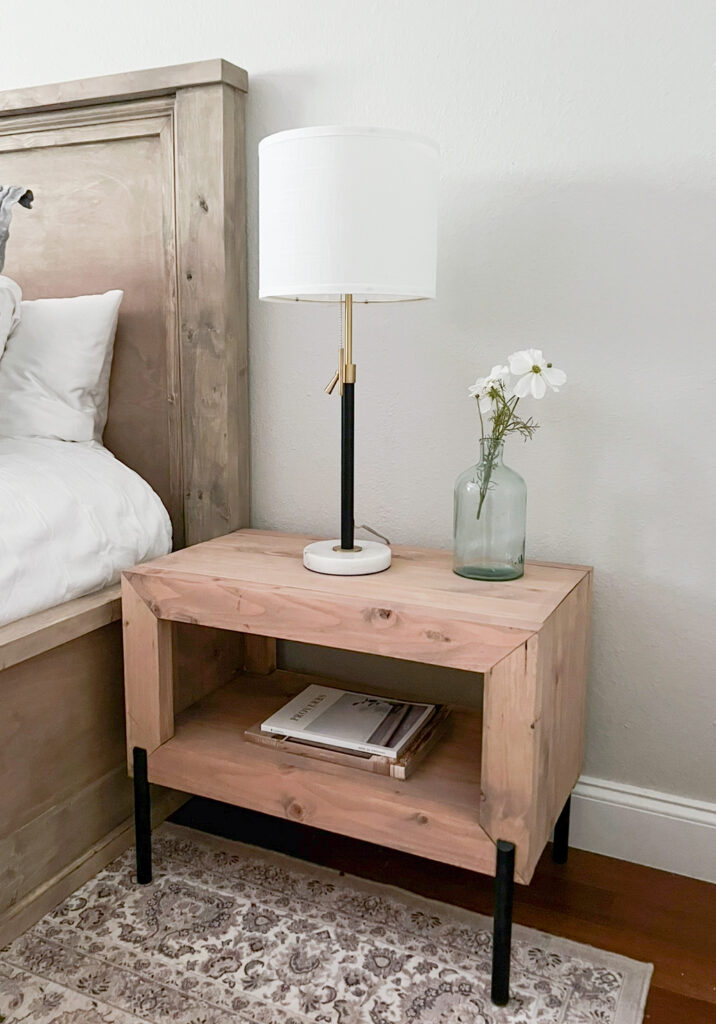
I love how my new nightstands turned out! I love the storage and it’s cute with a basket or books inside and a cute lamp up top!
Make sure to download and print the free plans with dimensions below!
DIY Rustic Modern Nightstand
Instructions
- Create the frames first. These are made from 2×4 boards that I ripped to 2.5" wide each on the table saw. You will create 2 identical frames, one for the front and one for the back. Each piece will be cut at a 45º angle on each end. Add 1.5" pocket holes using your Kreg Jig to the ends of each of the shorter frame pieces. You will do these also at a 45º angle. Attach the pieces to create 2 rectangle frames using wood glue and 2.5" pocket hole screws.

- Next, attach the top of the table to the front frame. Add 3/4" pocket holes down both long ends of this board. Attach the board to the frame using wood glue and 1.25" pocket hole screws. The top of the table top shelf will line up flush with the top of the frame piece. The top of the table is cut at 45 degree angles on each end that line up flush with the edges of the frame.

- Attach the sides of the table next. These are also laminated pine boards. The base of each of these boards will be a straight cut at the bottoms and the top of each board will be cut at a 45° angle. Add 3/4” pocket holes at the top of each of these boards just below the angle cut as well as down both long sides. Attach the sides to the base with 1 1/4” pocket hole screws through the base side boards and into the frame pieces.The side will be flush with the outside edge of the frame. Repeat this on the opposite side.

- Next, attach the bottom board to the front frame. The bottom shelf board is made from one of the project panels. Add 3/4" pocket holes down both short and long ends of this board. Attach the board to the frame using wood glue and 1.25" pocket hole screws. The top of the bottom shelf will line up flush with the top of the bottom frame piece.
- The final step is attaching the second face frame to the table. You want your pocket holes from the frame facing back on this step. You will attach the second face frame the same way you did the front face frame through the pocket holes on all of the project panels and into the front of the back face frame. Use wood glue, and pocket hole screws to attach.

Check out some of our past DIY Nightstand Plans!