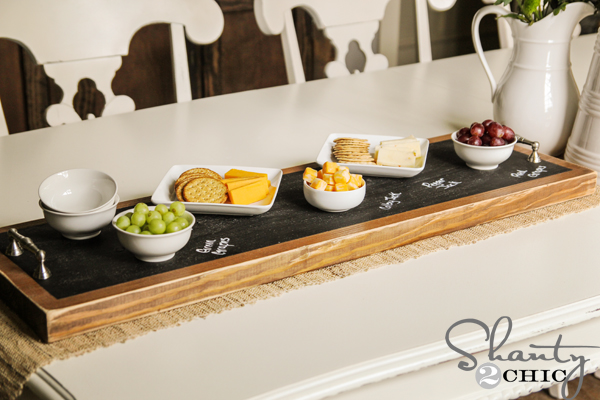
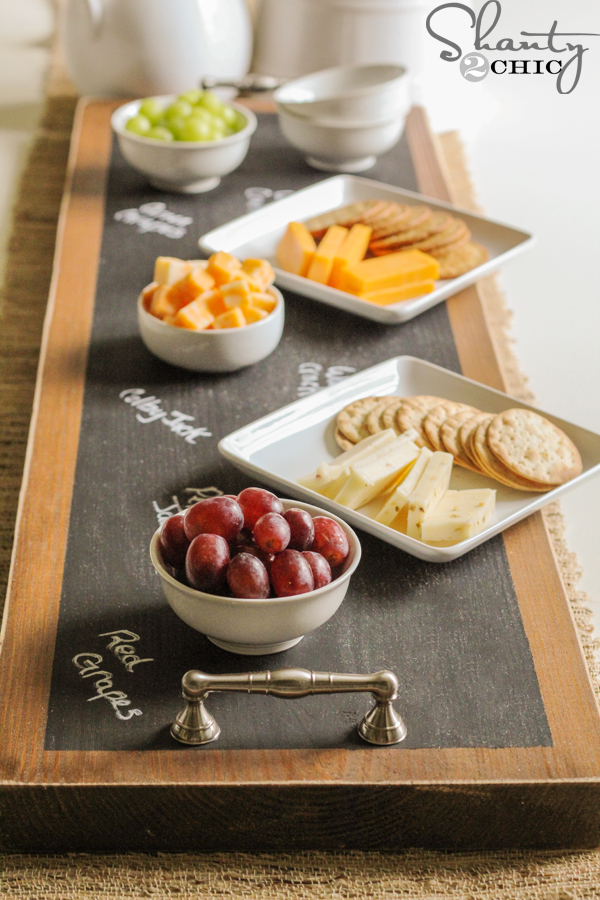
Hey guys! It’s almost summer and all I can think about is how excited I am to have friends and family over for cook-outs! I love fun and easy ways to dress-up any plain ‘ol get-together and I’m so excited to show you what I’ve come up with this week! A Chalkboard Serving Tray!
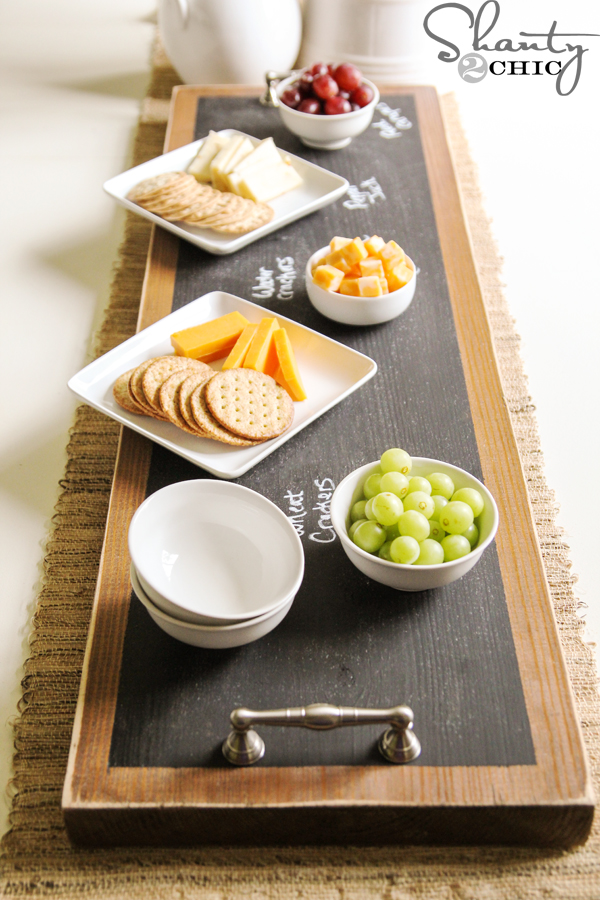 It was so fun, so easy and it’s just so darn cute! Here’s how you can make your own!
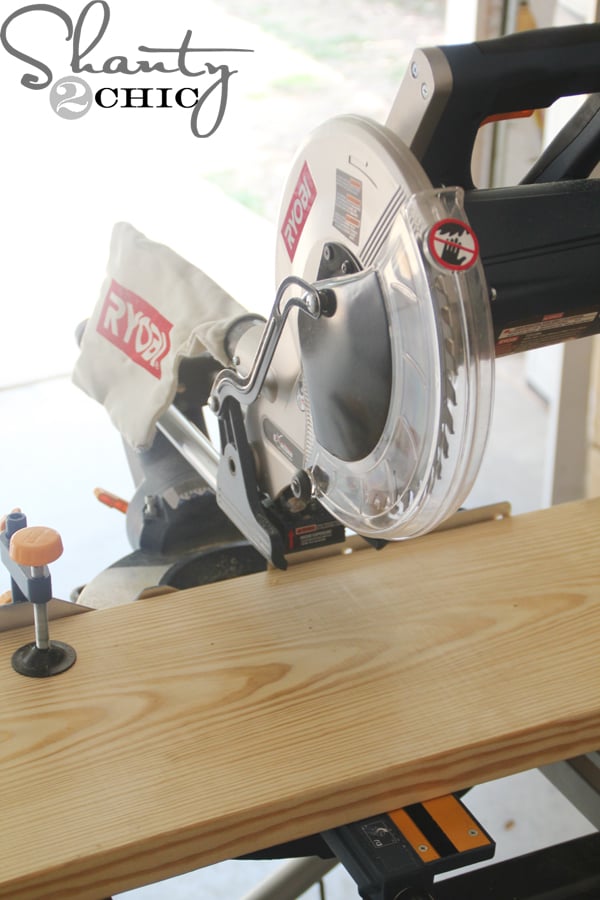 I purchased a 2×12 @8ft. board. It was about $13 and I was able to make 3 trays! I used my 10″ sliding compound miter saw to cut these. If you don’t have a saw, you can have your hardware store make these cuts for you! If you would like to learn our tips for how to use a saw check out our video!
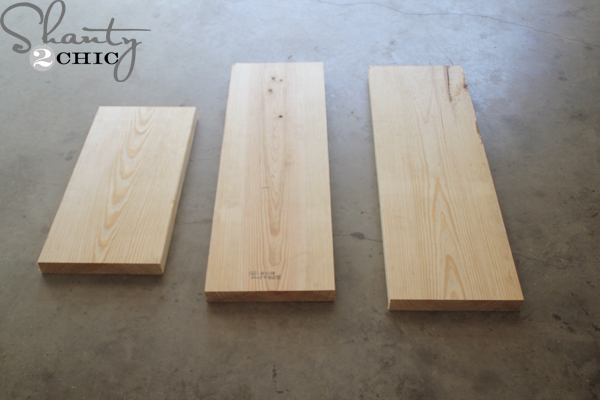 I cut one board @ 2ft. and 2 boards @ 3 ft. You can make them any size you prefer but keep in mind that if they are much longer than 3 ft., they will be difficult to move around;)
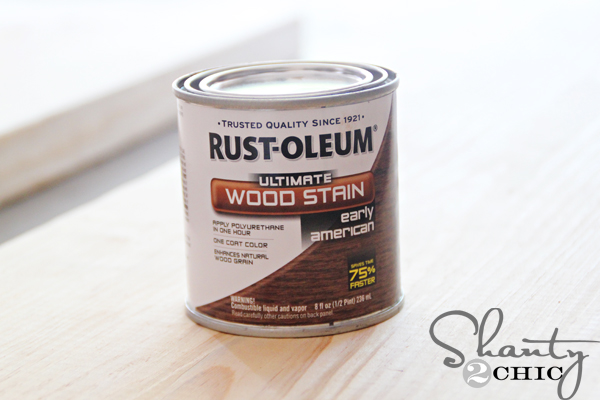 I went with my favorite stain color (at the moment) Early American!
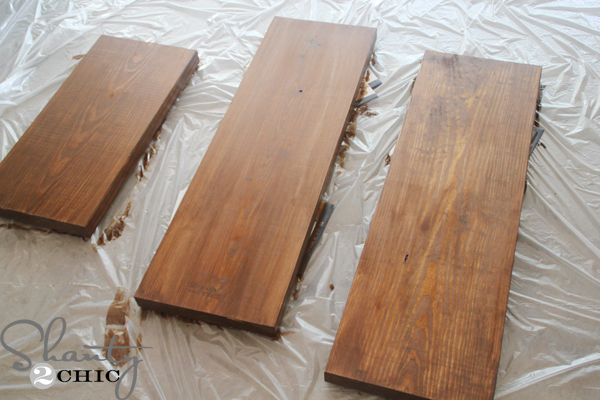 Using a foam brush, I wiped one-coat of stain on the tops and sides of the boards. Just wait 5-10 minutes and wipe the stain away with a clean cloth.
 Next, tape off the edges with painters tape. I used 1 1/2″ tape and put it about 3/4″ around the board. I also covered the sides to protect them from over-spray!
 Now just spray away! I sprayed 2-coats of Chalkboard Spray Paint. This stuff ROCKS!!!
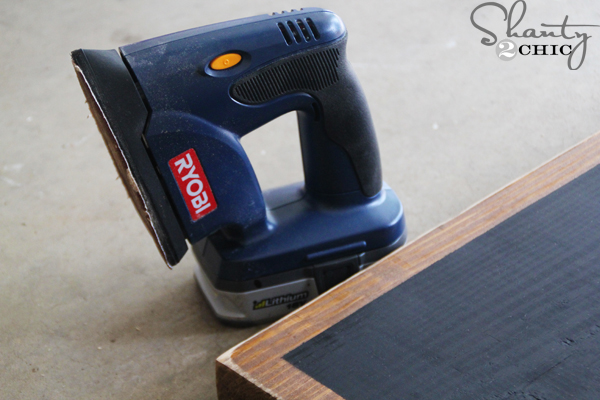 After the paint dried, I used my Corner Cat to distress all of the edges. This is my FAVORITE sander that I have ever owned! I like the edges pretty distressed but just eyeball it to your preference:)
 Now for the pulls! I purchased these cuties for about $5 but you can get pulls way cheaper if you are trying to keep the cost down. I just LOVED these;) So, here’s the shocker! I used this AWESOME Gorilla Glue Super Glue GEL to attach them! That’s right, it’s a gel! It is clear like super glue but it is very thick and it’s super strong! (using a 2x board, it is difficult to find knob screws that will fit so this super glue gel was the perfect solution!)
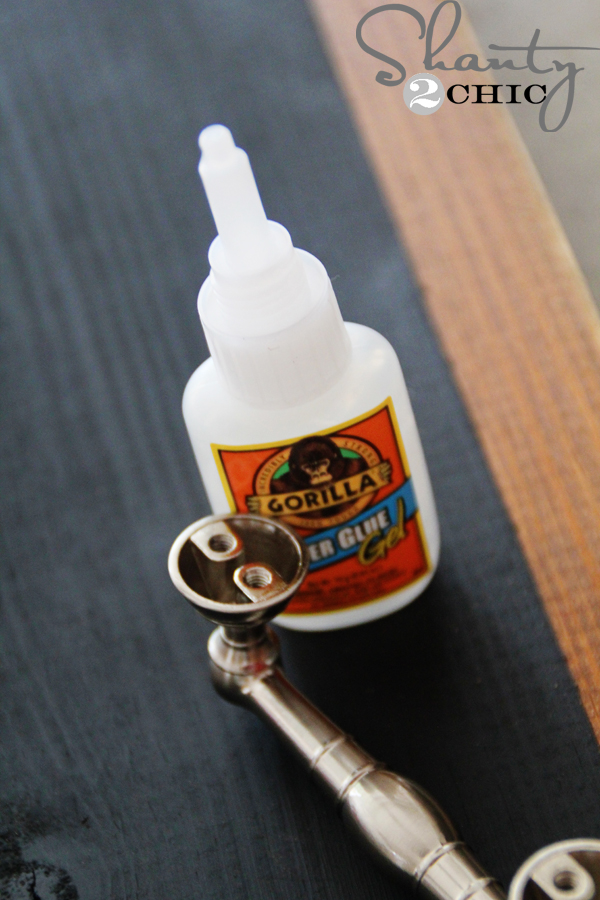 I just applied a generous amount to the bottoms of the pulls
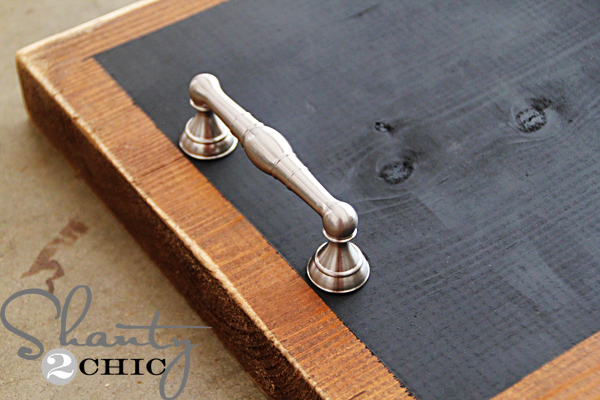 and flipped them over and placed them on each end of the board. I’m not exaggerating when I say this glue is awesome! I have carried this big board, with bowls and food on it, all around and I’ve even carried it by one handle! They don’t budge! If you can’t tell I’m slightly impressed;)
That was it!
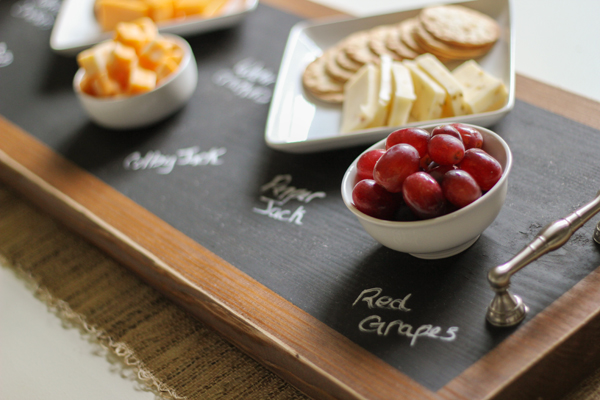
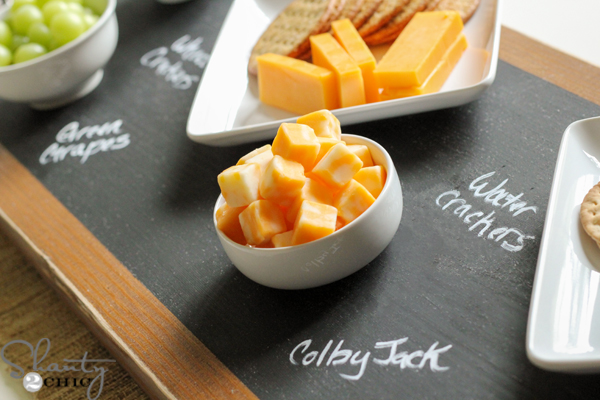

I’m lovin’ it!! With the $5 pulls, I was able to make 2 – 3ft. trays and 1 – 2ft. tray for about $15 each! We get questions about what kind of chalk pens we use on our chalkboard projects so I added a link to the ones we use below!
If you love my Chalkboard Serving Tray, I would love your pins!
Thanks for stopping by!
~Ashley

i love your idea !! im definetelly gonna try it ! whats the difference between using chalkboard paint and chalkboard spray? is one better that the other? thank you so much !!
Hi Ana!
Either works great 🙂
thank you !! ill try it asap
Really love this. I used part of a dirty, old plank of pine that we had hanging around the garage. I cleaned it up and made the tray. I decided not to put in the chalkboard section (chalkboard paint is not easy to get where I live), and to screw in the handles in from underneath. I also used felt pads underneath, which also covered the screw holes. We already had the wood and stain at home, so the only cost for me on this were the handles, which cost 4 Euro.
I plan to make another using the remainder of the pine plank.
Thanks for the tutorial.
Hello, I made this yesterday and I love it. I’ve waited 6 years to find something to use my drawer handles with and this was perfect! Any suggestions on what kind of chalk to use that comes off easy? In the photo I’m attaching I had to wet a towel and scub off the chalk.
Love this! I used your tutorial to make a tray as a shower gift for a friend. I made a few modifications (screwed the handles in and added felt feet to the bottom) and it turned out fabulous!
where did you buy the handle pulls??
Good question – I’m pretty sure I bought them at Menards!
I’ve made four so far – they r great! The glue suggested didn’t work so well so my husband drilled holes on flip side for screws! Perfect!
That’s great Cheryl! That surprises me about the glue. I still hold mine by one handle and they work great. Make sure you shake the glue well and it should come out very thick;) I’d love to see pictures!!
I made this today!
Awesome Alison!!
Thanks!!! They are super easy and adorable!!!
Thanks again;)
I have made about 5 of these as gifts. Some I put the chalkboard paint on and a couple I did not. They have been a huge hit and could not be any easier to make. Thank you!
Love it! Thank you for sharing Tammie! Send us pictures if you have them:)
Here is one from my parents 50th Wedding Anniversary this summer. They were a huge hit!
Sooo cute! Thank you Tammie:))
I love this tray! Do you know if it’s safe to place food directly onto the chalkboard surface? Thanks!
Hi! I checked out the chalk pens and it says they will be permanent on chalkboard paint, and there is a note that results on chalkboard paint may vary. Did it come off ok? I love the trays and want to make some for gifts and include a pen, but I want to be sure it won’t be permanent! Thanks so much!
Ours work fine! I would test I first to make sure though!! Thanks:)
Hi! I love this idea and can’t wait to make this for a wedding gift. For some reason the link to your preferred chalk pens is alluding me! Can you share again as I would like to purchase them to accompany them? Thanks so much!!
Made one this morning!! love it!! I Also made the fathers day handprint thing I hung a picture on the clip instead of the paper came out real cute! Love all your ideas!!
that’s such a good idea, i’m going to have to try that! I’m the type of person who gets pretty intimidated at a hardware store but this looks really easy – i’ll check out your other stuff too!
What a gorgeous idea! I love how it turned out!
this is sooooo cute, i love it! ya’ll come up with some of the cutest, most simple projects
Very cool. Does the chalkboard marker rub of easily??? I got one (not the same as yours) & it is pretty much impossible to rub/wipe/scrub off. Anyways love the idea!
Thank you:)). Ours does! You have to wet it and scrub a bit but it does come off:)
Oh good, will have to invest in the same on then. Thanx for the speedy reply 😉