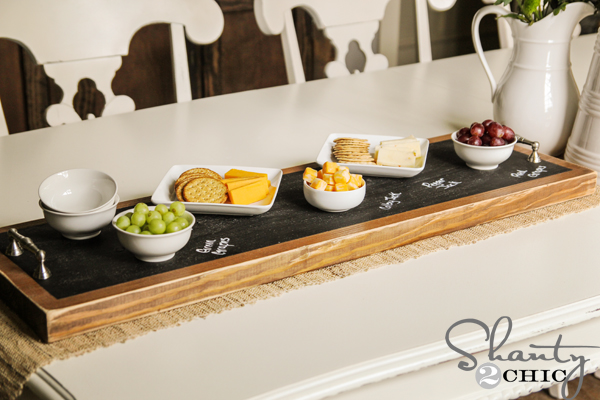
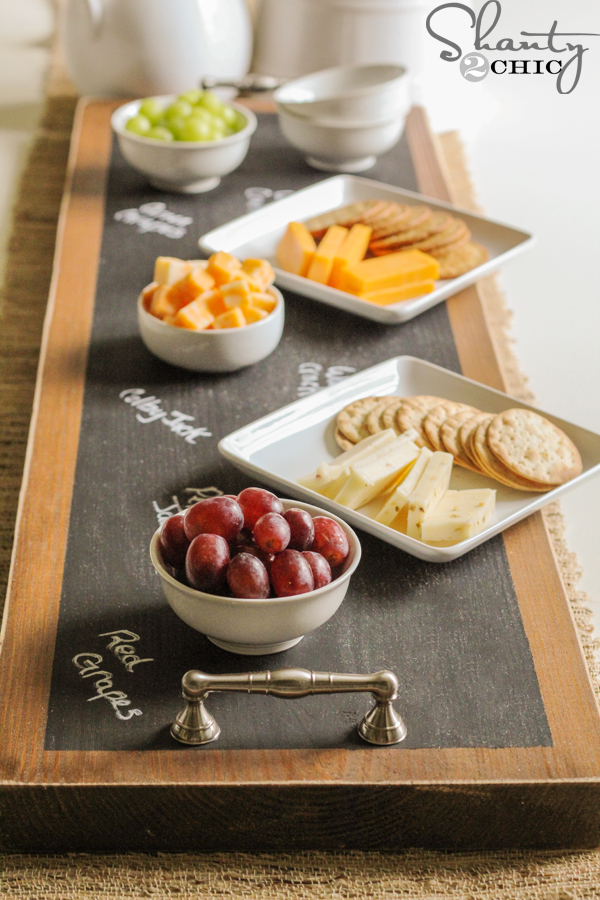
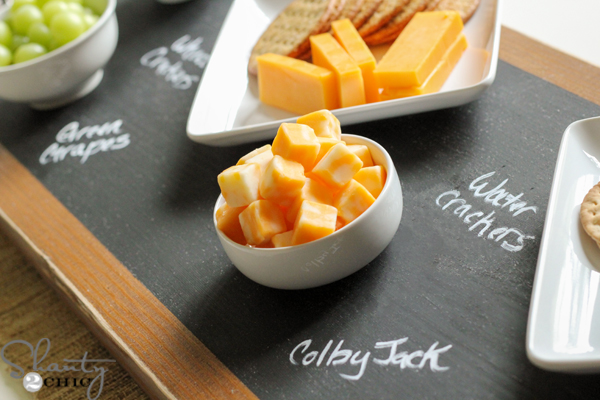
Hey guys! It’s almost summer and all I can think about is how excited I am to have friends and family over for cook-outs! I love fun and easy ways to dress-up any plain ‘ol get-together and I’m so excited to show you what I’ve come up with this week! A Chalkboard Serving Tray!
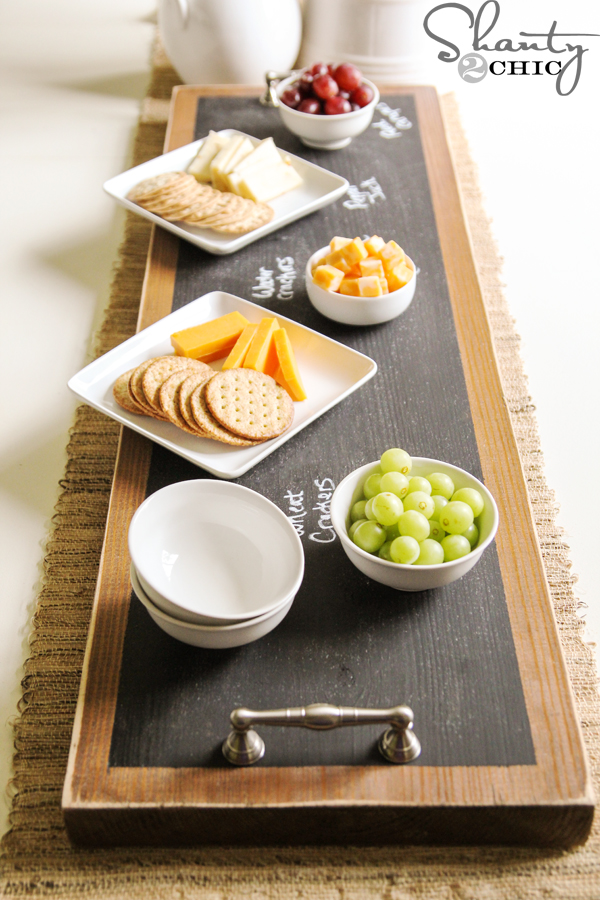 It was so fun, so easy and it’s just so darn cute! Here’s how you can make your own!
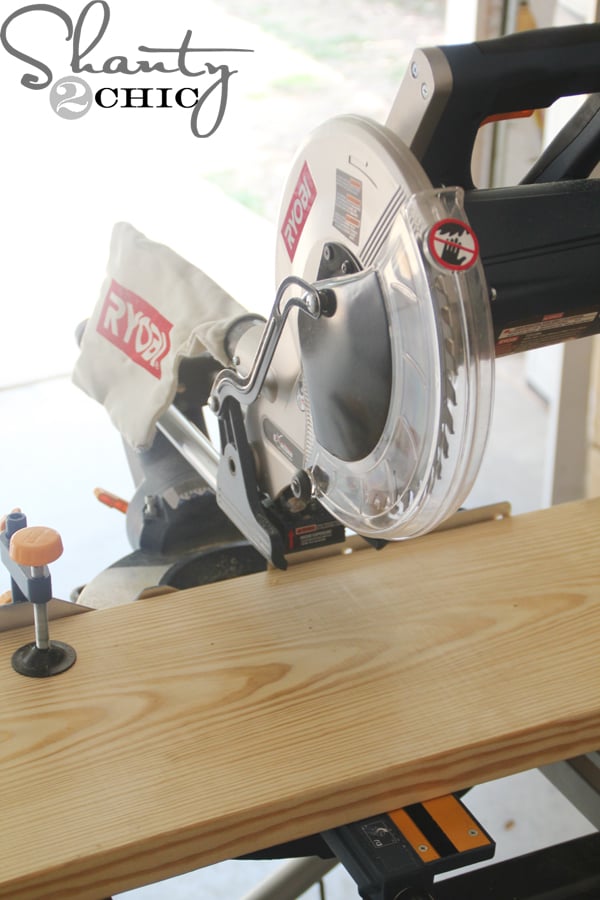 I purchased a 2×12 @8ft. board. It was about $13 and I was able to make 3 trays! I used my 10″ sliding compound miter saw to cut these. If you don’t have a saw, you can have your hardware store make these cuts for you! If you would like to learn our tips for how to use a saw check out our video!
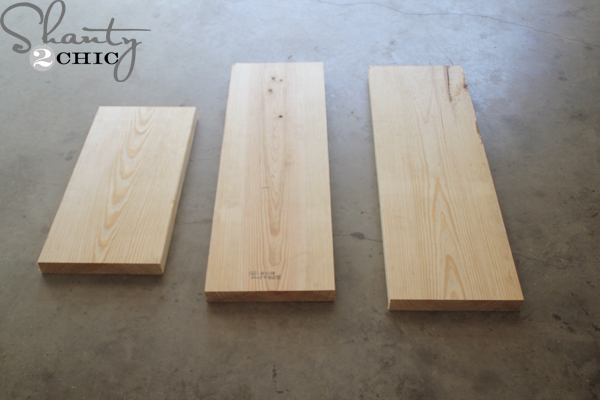 I cut one board @ 2ft. and 2 boards @ 3 ft. You can make them any size you prefer but keep in mind that if they are much longer than 3 ft., they will be difficult to move around;)
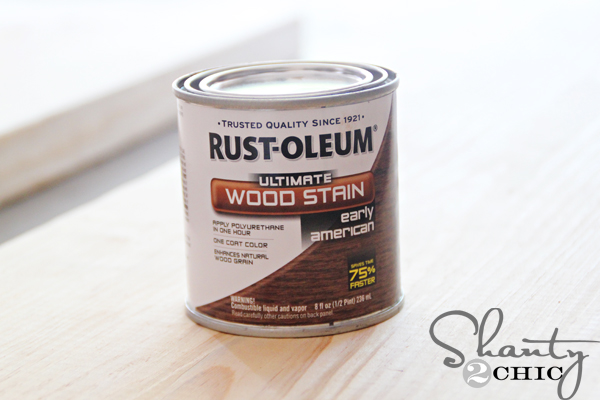 I went with my favorite stain color (at the moment) Early American!
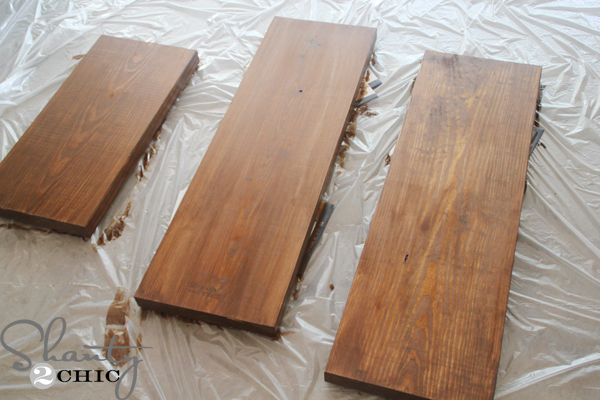 Using a foam brush, I wiped one-coat of stain on the tops and sides of the boards. Just wait 5-10 minutes and wipe the stain away with a clean cloth.
 Next, tape off the edges with painters tape. I used 1 1/2″ tape and put it about 3/4″ around the board. I also covered the sides to protect them from over-spray!
 Now just spray away! I sprayed 2-coats of Chalkboard Spray Paint. This stuff ROCKS!!!
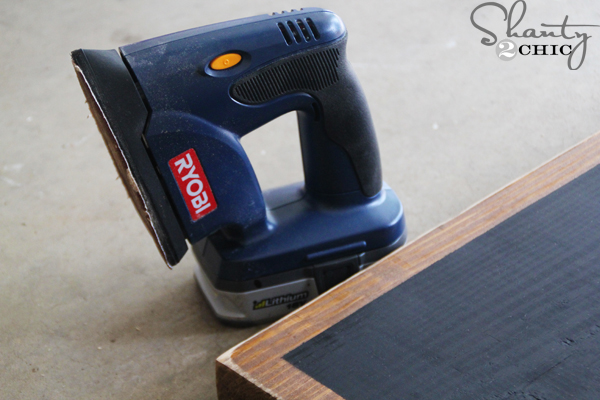 After the paint dried, I used my Corner Cat to distress all of the edges. This is my FAVORITE sander that I have ever owned! I like the edges pretty distressed but just eyeball it to your preference:)
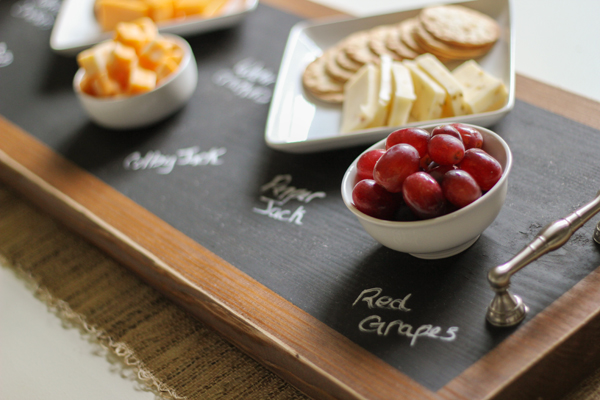
 Now for the pulls! I purchased these cuties for about $5 but you can get pulls way cheaper if you are trying to keep the cost down. I just LOVED these;) So, here’s the shocker! I used this AWESOME Gorilla Glue Super Glue GEL to attach them! That’s right, it’s a gel! It is clear like super glue but it is very thick and it’s super strong! (using a 2x board, it is difficult to find knob screws that will fit so this super glue gel was the perfect solution!)
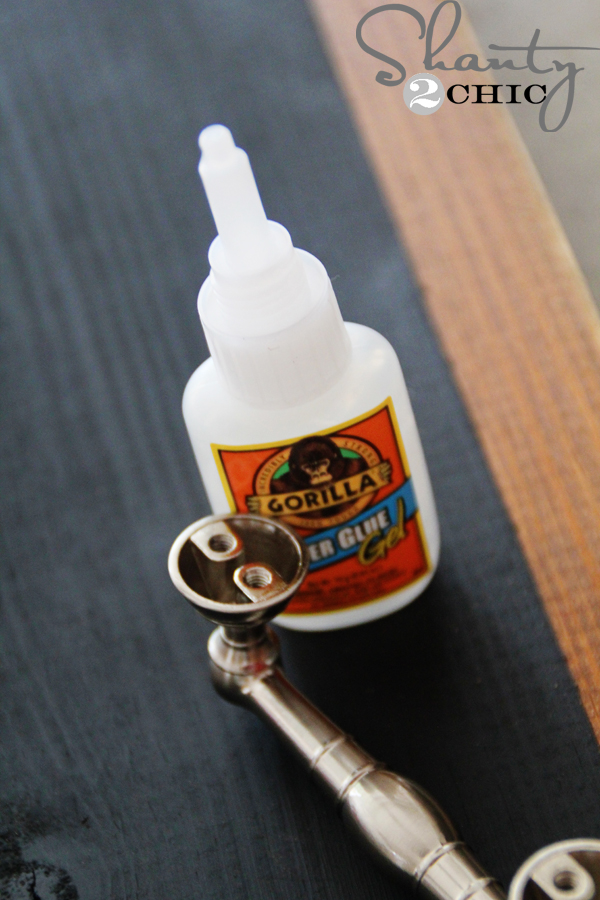 I just applied a generous amount to the bottoms of the pulls
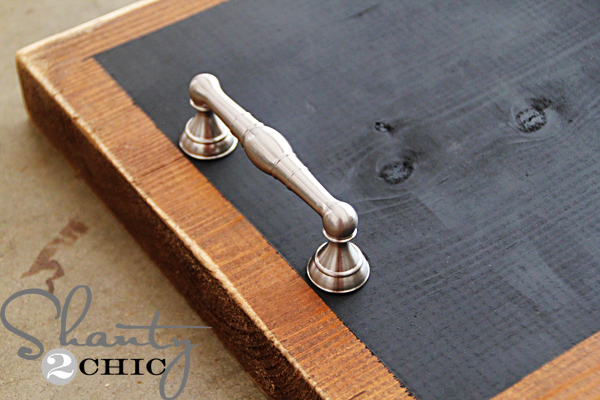 and flipped them over and placed them on each end of the board. I’m not exaggerating when I say this glue is awesome! I have carried this big board, with bowls and food on it, all around and I’ve even carried it by one handle! They don’t budge! If you can’t tell I’m slightly impressed;)
That was it!

I’m lovin’ it!! With the $5 pulls, I was able to make 2 – 3ft. trays and 1 – 2ft. tray for about $15 each! We get questions about what kind of chalk pens we use on our chalkboard projects so I added a link to the ones we use below!
If you love my Chalkboard Serving Tray, I would love your pins!
Thanks for stopping by!
~Ashley


I love this idea, and plans to diy one fir our family. Thanks for sharing, and stay safe
What is the link to chalkboard pen you used?! These are adorable!!
What kind of painters tape did you use? The stuff I had at home does not stick at all.
HELP? I decided last minute that I would make approximately, um, 6 of these for Christmas gifts. Oops. Not last minute at all. My question is…. do you seal the stain at all? I”m about to put the first coat of stain on… and was going to do a few coats. Should I poly it before chalkboard paint?
We didn’t use a sealer on these!
Are the stain and chalkboard paint food safe if I wanted to put cheese and meat directly on the board or should it go into small serving dishes then placed on the board.
Did you ever find out the answer to this?
Hi do not see the link for chalkboard pens. Please share. Thx.
I made these at 18 inches and they are perfect! I also used dock cleats as handles and it gave it such rustic look.