Woohoo! It’s Friday! My kids survived their first week back to school and I got a ton of things done.
So pumped to share my latest Pottery Barn knockoff with you guys today!
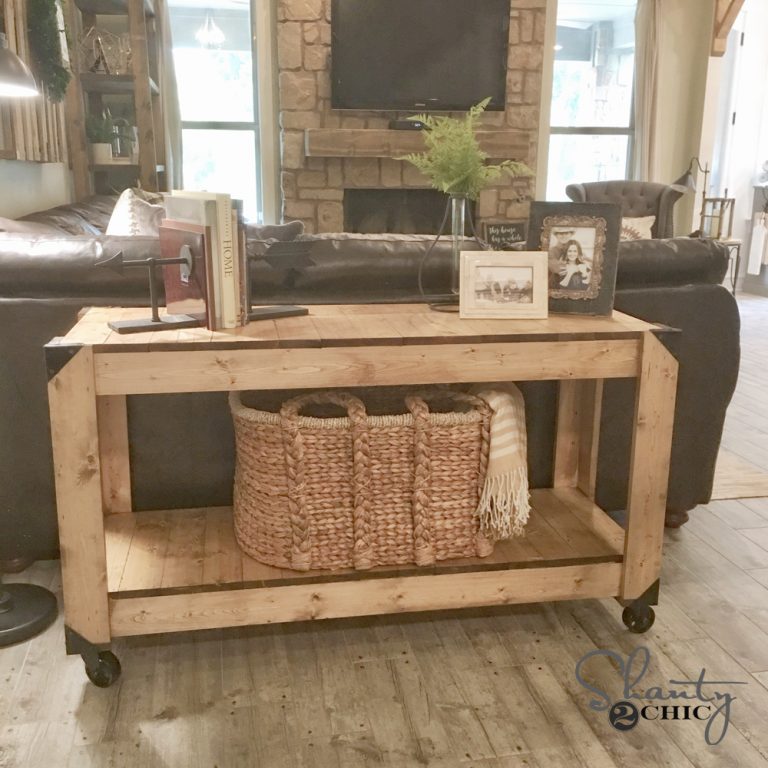
Check out my $85 Kitchen Island!
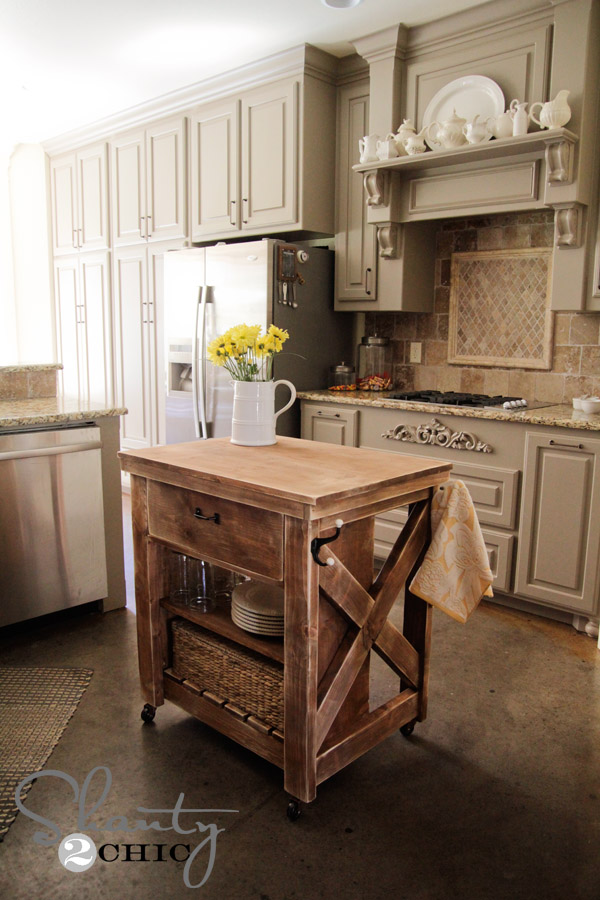

Isn’t it pretty?! I think it adds so much to my kitchen and breaks it up a bit. I have always wanted an island, but opted to not have one for space reasons when I built the house. By creating one myself, I now have the option of using it, or rolling it into the garage if I feel like it will be in the way. LOVE the versatility!
I am going to share some of my tips an tricks with you here, and be sure to check out the full set of free plans over with my sweet friend Ana White! We teamed up to design this one together, and she has provided you guys with some great plans as always!
First tip…
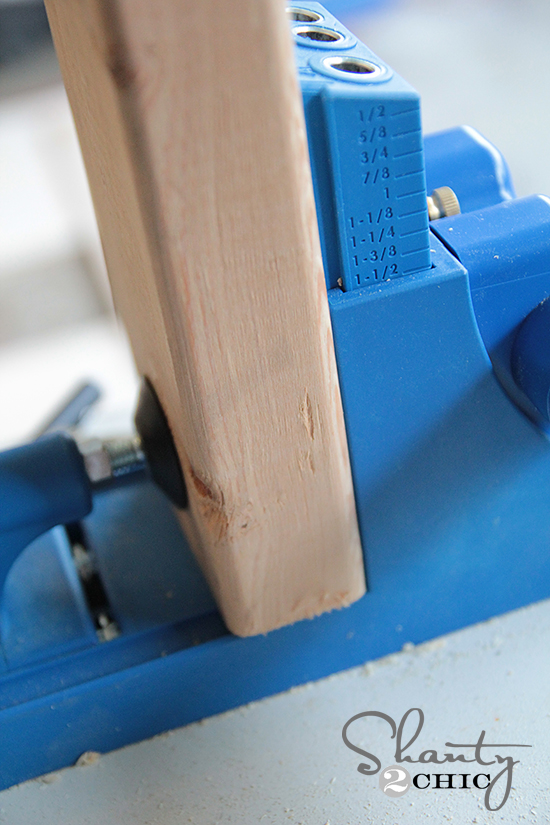
I would not tackle this build without a Kreg Jig![]() !
!
Guys… We have been telling you for YEARS. It is time to invest! It really is such a cheap tool for all the greatness it brings to your projects. And for those of you that still have yours hiding in it’s box… It’s time to dust it off and get busy! HERE![]()
is the model that Ash and I currently use!
Ash and I shared a quick video on the Kreg Jig HERE. We really tried to explain what the heck it is and how we use it… In basic terms 😉
So for the majority of this build, I used 1.5″ pocket holes and 2.5″ pocket hole screws.
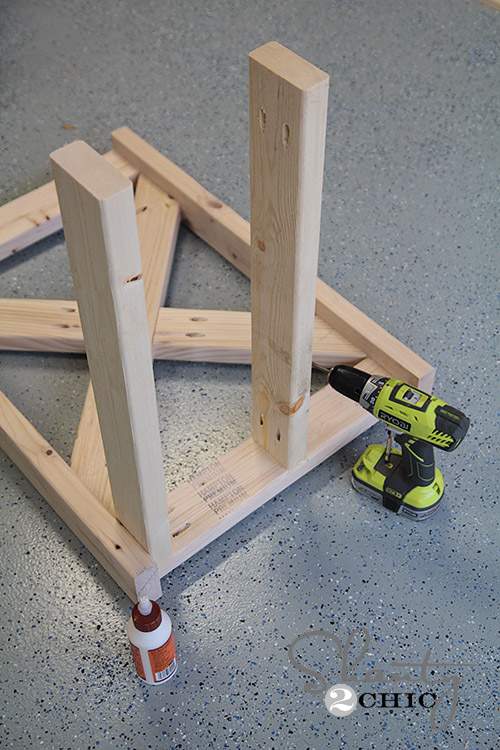
Here is where I put all of my pocket holes for the ‘X’ Legs…
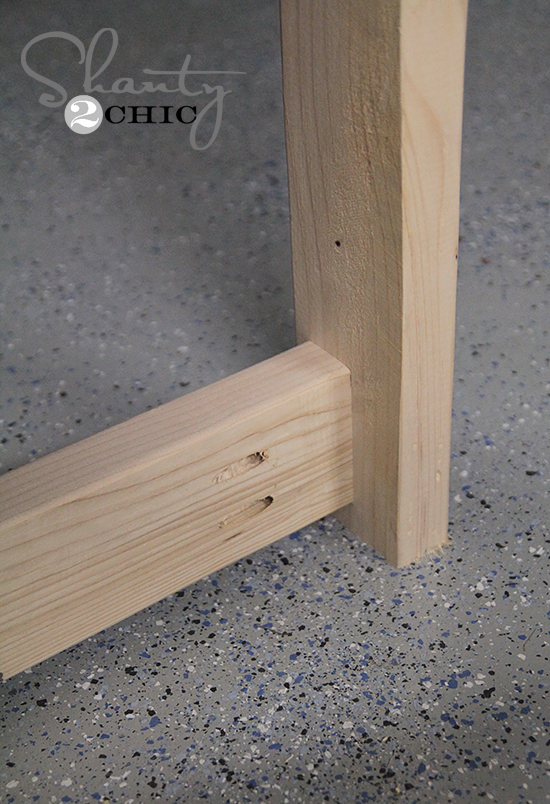
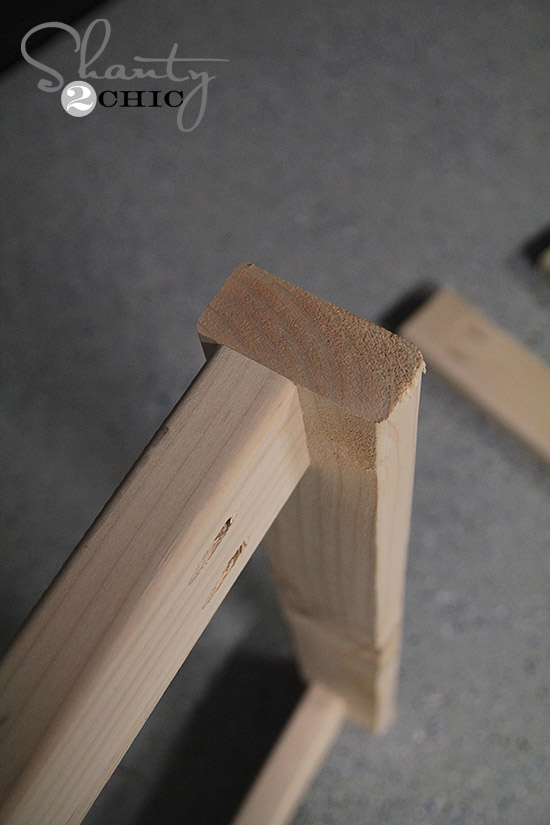
Now for the X legs I placed the wood at this angle to get the pocket holes that would attach to the frame…

And this is a terrible shot, but I totally forgot to take a picture of the X alone… Dang it. I hate when I mess up like that. But, you can see in the background where all of the pocket holes go!
My sides were a bit tricky because my 1×12 was so not straight. I was so annoyed by it… If I could have done it again, I would have bought Purebond Plywood and have them rip it down to a 1×12… It would have been much easier to work with and perfect for this project!
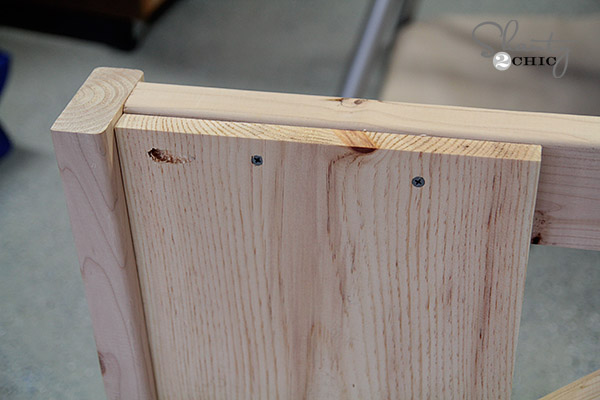
THis is how I attached the 1×12. I used one pocket hole on the side of the top like this. This is a 3/4″ pocket hole, and 1.5″ pocket hole screw. I also used 2 wood screws at the top into the side piece as you can see.
And the bottom…
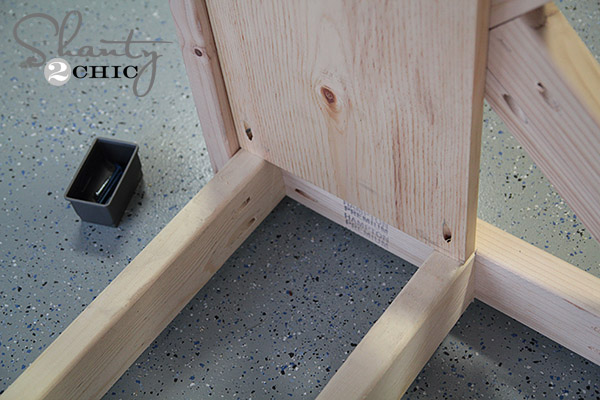
These are 3/4″ pocket holes, but I used 2 1/2″ pocket hole screws into those 2×4 bases.
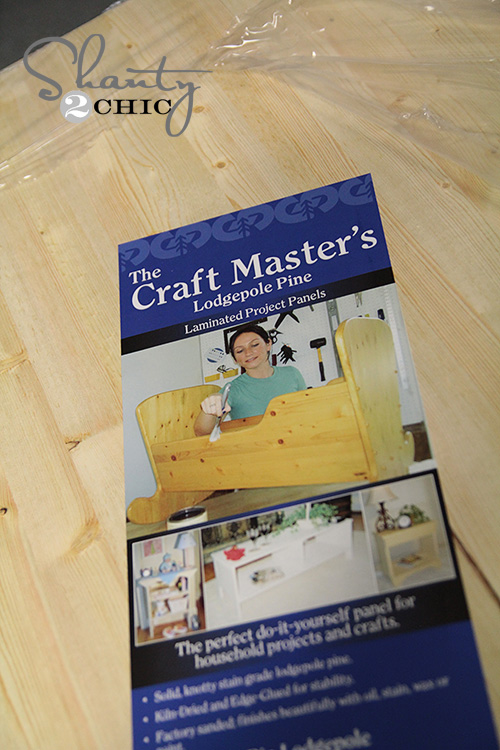
This is the project panel I used on the top. I found this at Lowe’s, but they did not have the exact size I needed. I did have to use my saw to cut off 4″ from the 24″ side.
To attach the base pieces I used my Ryobi AirStrike battery nailer. I LOVE this thing. Coolest tool in my garage at the moment…
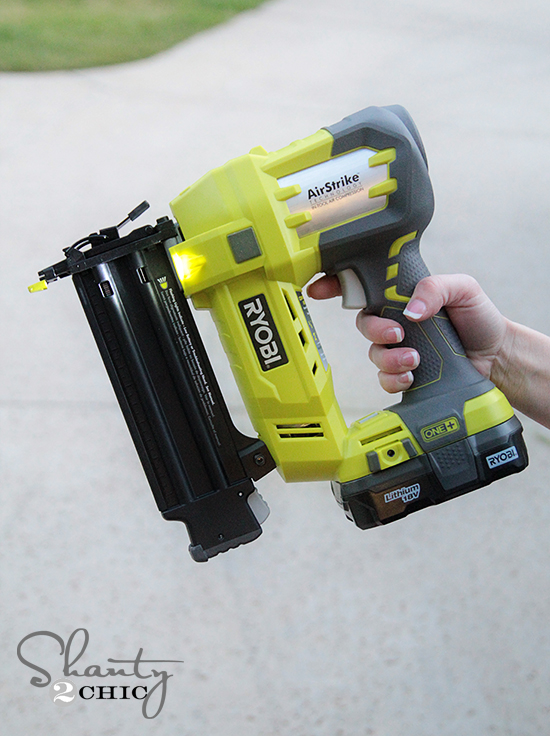
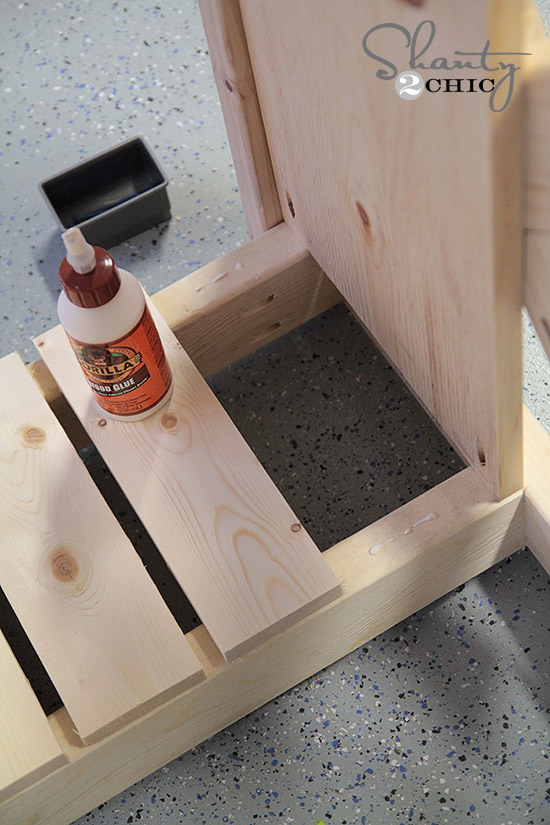
I just ran some Gorilla Wood Glue under each piece and nailed it down… Easy!
For my finish I used one of my very favorite methods!
I used Rust-Oleum Ultimate Wood Stain in Early American.

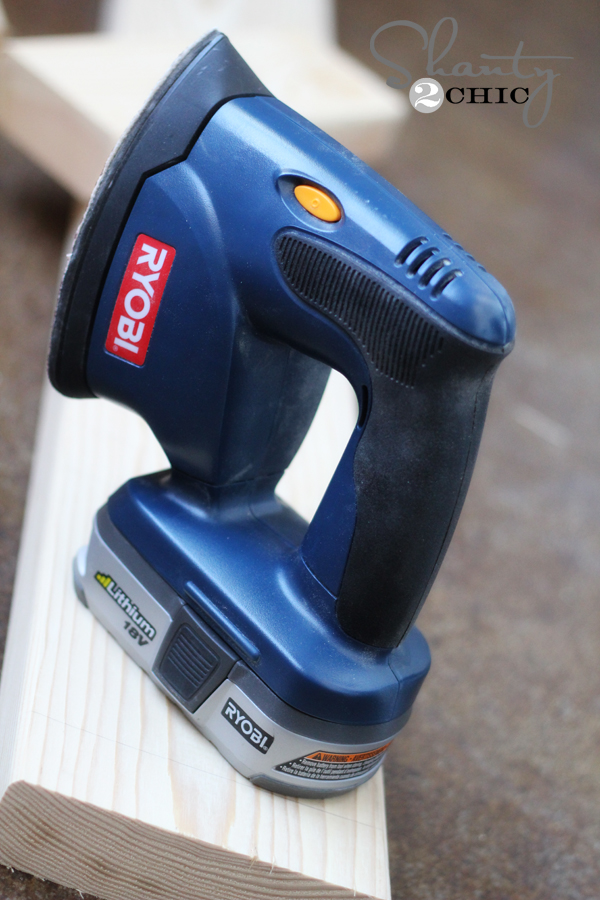
Once it was totally dry, I just used one of my favorite tools to sand it down. This part is SO easy. Actually it’t almost therapeutic with the Corner Cat. Add this tool to your list guys… It shares the same powerful 18V Lith-Ion battery that our drill uses and weighs very little. I use this on every wood project I do now… Love. I sanded some areas more than others to give it a worn and unfinished look.
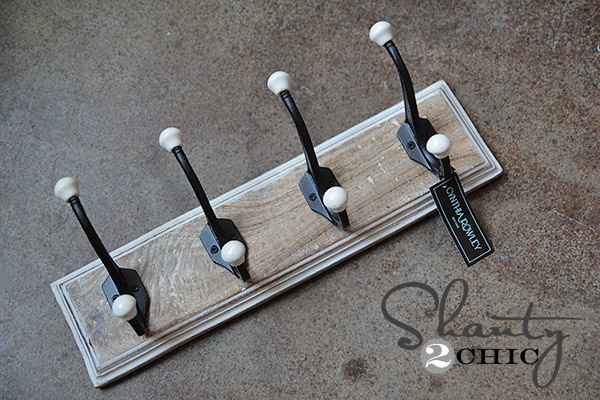
For my hardware I used these great hooks I found on a board at HomeGoods. I paid $15 for the board which had 4 hooks on it… LOVE! I just unscrewed them and put them on the island!
I used 4 casters I found at Lowe’s on the base. I would recommend locking casters on your cart if you have kiddos like mine and don’t want this baby being used as a vehicle around your home 😉 Just a tip!
Here are a few more shots!
Hope you LOVE it as much as I do!
Remember to check out the full set of plans over at Ana White’s amazing site! Let me know if you have any questions at all!
I would LOVE for you to share and PIN this with your peeps below!
Thanks again!
~Whitney


Love the kitchen island. But I have another question… what is the paint color that your kitchen cabinets are painted?
Can you make me one? I will pay you?
Hi – I am building this and the 27 5/8 piece for the long piece of the X isn’t right – is that 27 5/8? When I cut mine I’m almost 3-3 1/2 short. I tripled check all the other measurements according to the plans and I’m right on :). Where am I wrong?
Thanks in advance –
I’m in the same boat as you. I also triple checked all the measurements and everything else is bang on except the long X pieces. I thought I was going crazy as no one else has mentioned it.
I am in the process of making this island. I am confused as to how to use the kreg jig on the 45 degree angle cuts in the cross supports. I couldn’t find a video on you tube to help me. Do you have a video?
What are the exact dimensions of your butcherblock? Looks great. I have a 18 x 27″ piece of leftover granite that I was looking to use. This looks like it might work!
I am really looking forward to doing this in my new kitchen. I had a hard time finding this stain (Early American by Rust-Oleum) in my area so I ordered it online. It came in last week and it’s no where near the right color. It is the exact color and brand on the outside of the can as pictured above. I wonder if the manufacturer changed it. I’m really bummed. Any ideas? Thanks!
wow…. Really loved it. I am trying to do one for my small kitchen. Have watched a lot of videos. Love this the best. Very nice job. We ladies rock. lol.
I like the Kreg jig explanation too. I just love this tool. I use it for everything. 🙂
Could you make this from pallets? I see a lot of 2×4’s and wondering we could cut cost there in order to buy some of the tools needed.
Not recommended. Pallets are not food safe, and they can actually be dangerous if used as a food surface.
What did you use for the top?
I absolutely love this! Quick question- do you finish this with a satin or matte polyurethane, or just leave it as is after staining it? Thanks so much!
What grit sand paper do you use when your distressing? And did you put any sort of clear coat over the whole thing after staining and distressing?
It’s beautiful and I’m actually starting mine tomorrow morning. Still unsure on my finish though. Haha can’t decide if I want to stain and distress or paint and distress! Thanks for the beautiful inspiration!
2 things, do you find things fall off the shelf? Would you recommend putting a little lip on the inside edge of that shelf? And also, could this top be used as a butcher block?
I’m thinking about building this island. I’m wondering if the drawer slides in and out nicely, or if maybe I should consider buying some metal hardware to ensure it is easy to use and glides nicely?
I love this. Is it bad that I stain things so much, that I can name the color of the stain before I actually read the blog??!!!!
LOVE this project, your cabinets and floors are fantastic (is that concrete, it’s fantastic!!) xo