Happy Wednesday!
I hope you are all having a great week! Today I am here to share the 7-can stackable canned food organizers. I will also be sharing my tips and tricks in the pantry and letting you know where I found all of my storage goodies! For those of you that waited 6 months for this post… Bless you! As I mentioned in my DIY Spice Rack post, Ash and I are on a mission to use our love of wood and DIY to create solutions for our kitchens and our homes that help things run more smoothly and efficiently.
Several months ago I tackled my pantry. It is one of the best “kitchen” decisions I have ever made! With a family of 7, we always keep a large variety of canned foods. What did I come up with?? These are individual canned food organizers thats store your cans, and rotate the cans to allow you to use the older dates first. Rather than making 1 single rack, I opted to make them individual so you can make as few or as many as you need for your canned food stash! Here is how they turned out…
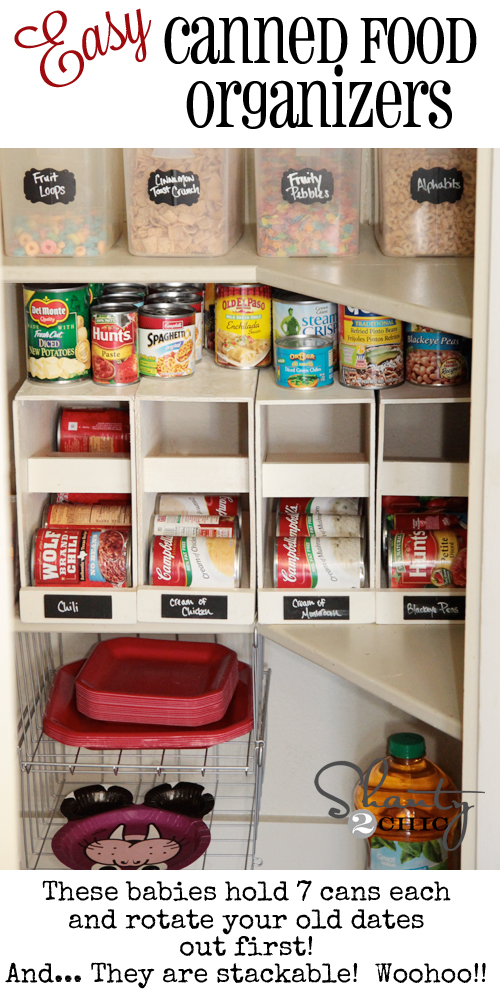
You can stack them on top of each other, or use the top piece as a shelf like I did here!
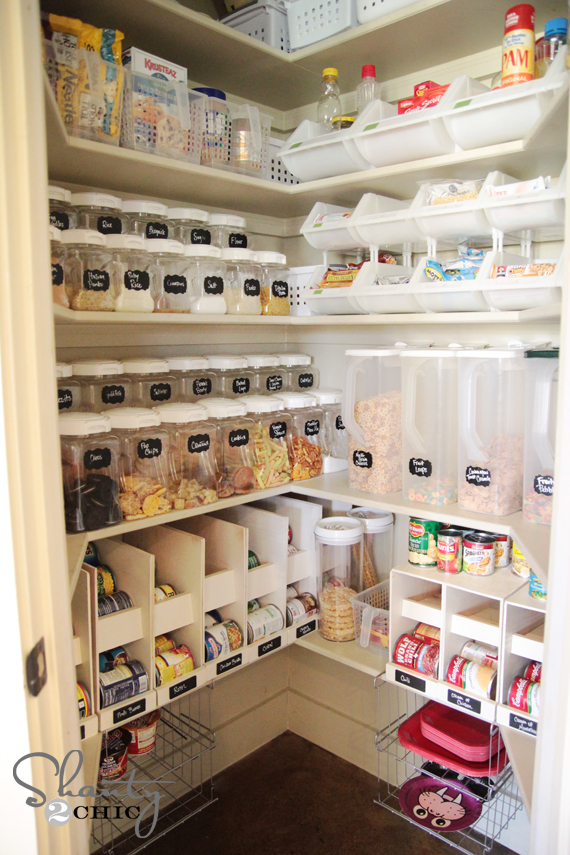
And here they are in a bigger shot…
Organizing my pantry hasn’t solved this though…
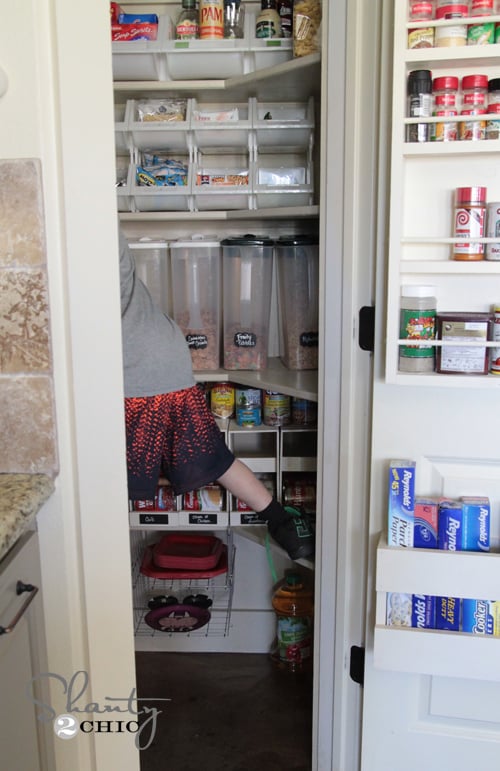
(No, he couldn’t wait for me to finish the photos) 🙂 Does this look familiar to anyone else??
Now… Let’s organize our cans!
Supplies!
For each organizer I used 1/4″ hardwood plywood. I bought mine in a 4′x8′ sheet and had the guys at Home Depot cut it down into 11.5″ strips. You can also buy smaller panels like a 2′x2′ or 2′x4′ if you don’t need as many!
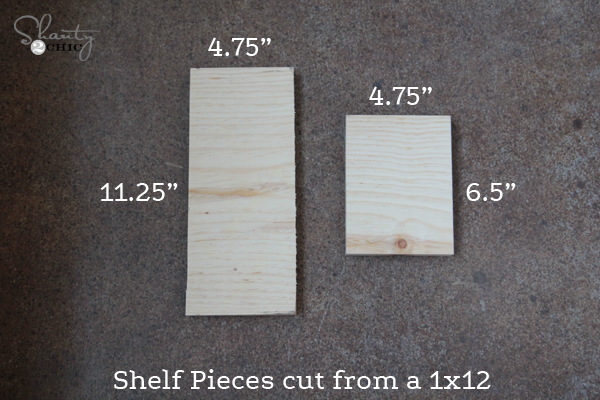
I also used a 1×12 for my shelf pieces. These also come in different lengths. I bought an 8′ board because I was making several, but you can buy a smaller one if you are not making as many.
I also use a 1/2″x2″ pine board for my bottom shelf front piece. A 4′ piece will make 8 dividers.
When you break it down, these cost under $5 a piece to make.
Cuts!
For the sides you will need 2 pieces of 1/4″ plywood cut to this…
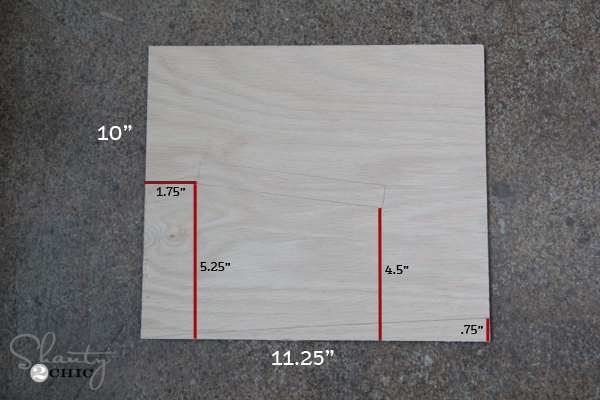
There will be a small scrap from the middle shelf piece that I will use later on a different step.
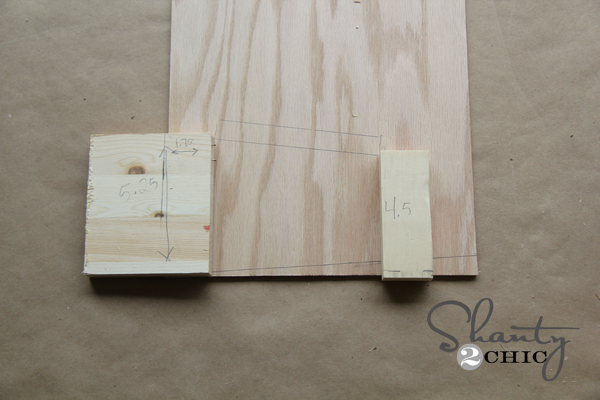
Next, I marked both of my side pieces for my shelves! Marking them with a pencil makes lining your shelf pieces up really easy, and it keeps you from having to guess where to nail from the side.
I found a really easy way to do this! I used some scrap pieces cut to the dimensions above to serve as a template for each piece. I would just lay them down, line up my middle shelf , and draw it out quick. No need to measure each time! This saves a ton of time!
Here are the cuts for my shelf pieces…
Excuse my shanty handwriting on the blocks! ![]()
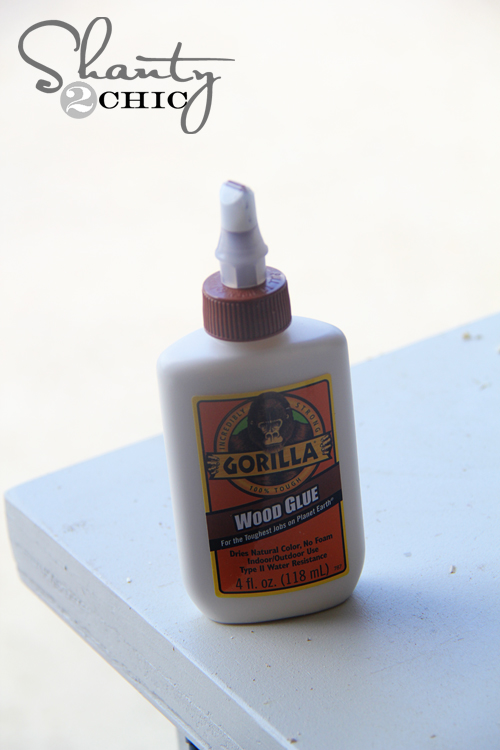
Next I used Gorilla Wood Glue and finish nails to attach my shelves like this!
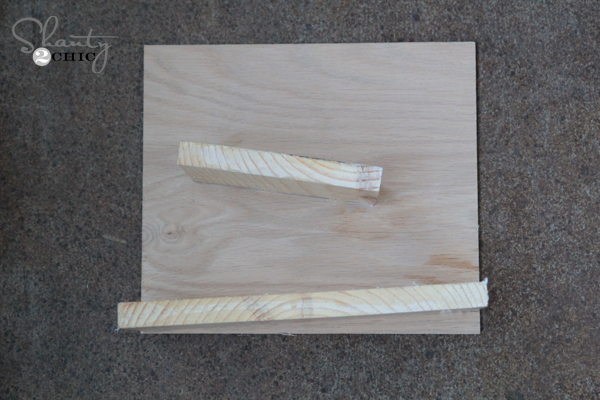
Easy! And because I drew my shelves on the other side, it makes this part simple! Just nail where the shelves are marked!
Next, I added some Gorilla Wood Glue to the shelf pieces, and attached my other side piece!


Now to finish off the front!
I used that scrap piece to cut my front piece.

This is for my middle shelf. I just added a little glue and nailed it in place!


I used a 1/2″ x 2″ pine board for my bottom shelf piece. Each one was 5.25″ long.


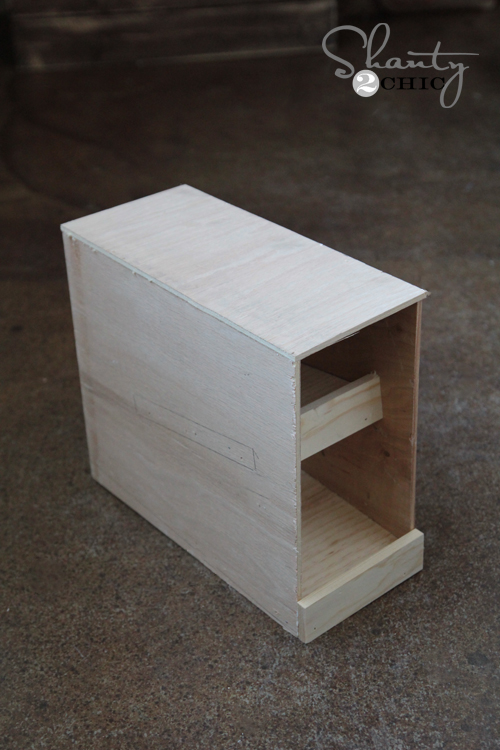
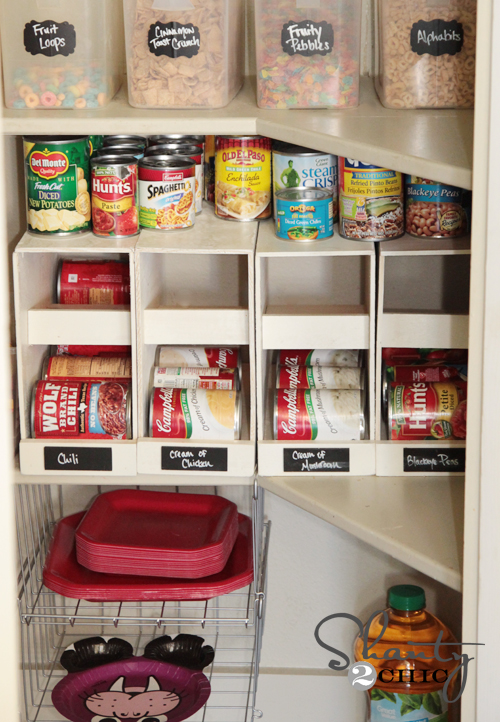
My favorite part about these babies is how they rotate my cans! You load the cans through the top, and it allows your older dates to rotate out from the bottom first! LOVE. Make sure to check out my 12 Can Organizers as well!
Now for a few more shots!
I get asked all the time where I found all of my storage goodies! Here is a list!
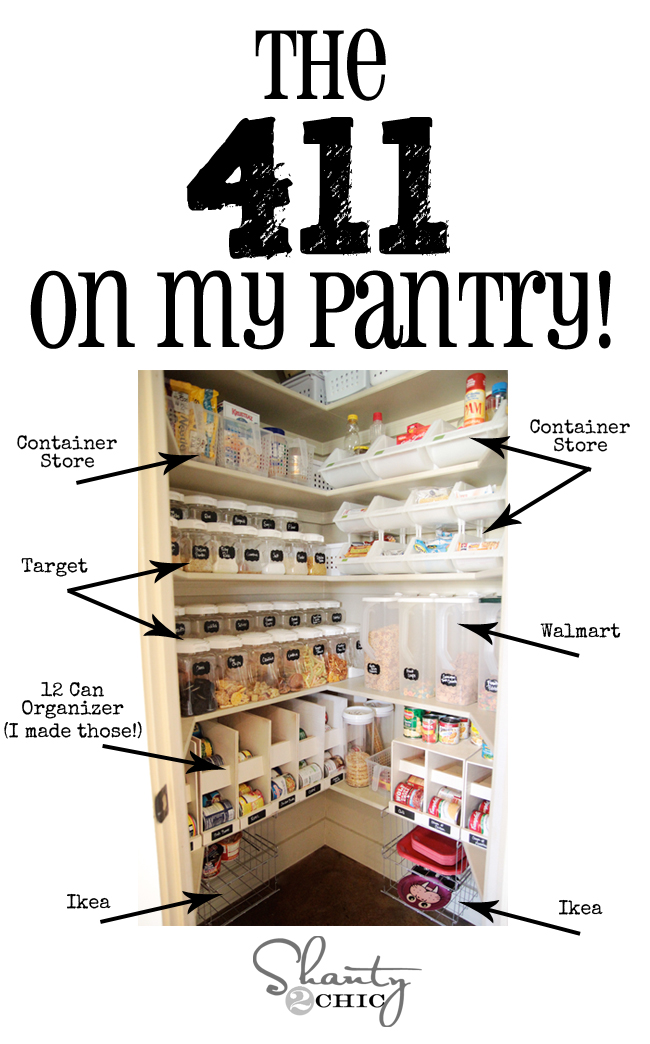
I LOVE the Snap Ware! It has been so great for my kids and keeps me from having open bags EVERYWHERE!
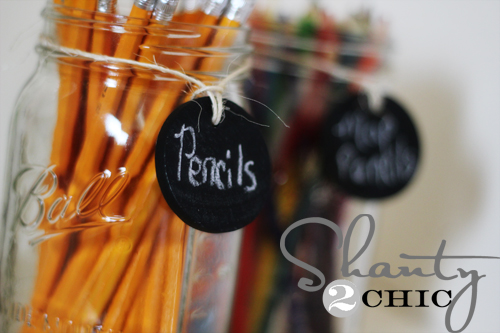
Here is a great little tip…
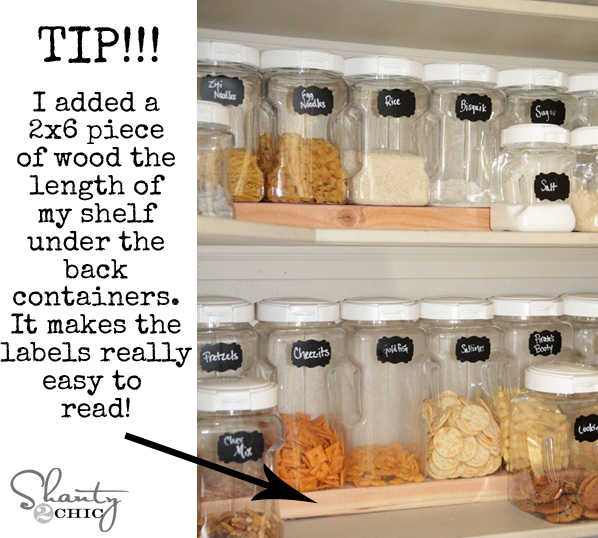
You can also see how I easily made my chalkboard labels HERE. They are wet erase… I LOVE them.
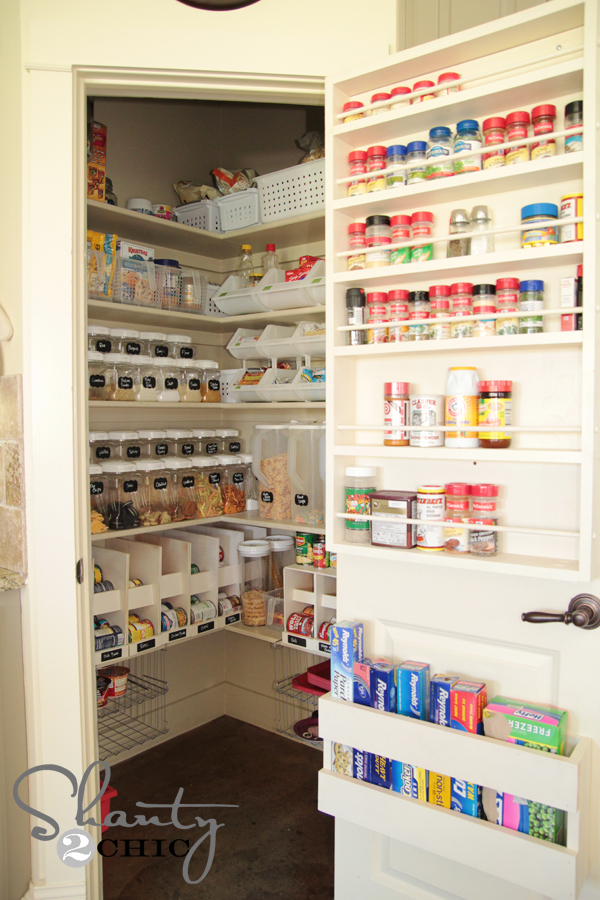
And for those of you that missed my door organizers…
The DIY Spice Rack can be found HERE!
and
The DIY Foil and Baggie Holder can be found HERE!
That’s it people! At least for now 😉
I hope it inspires you! Thanks so much for stopping by! I would love for you to share this post and pin it below!
You guys are great, and please let me know any questions you may have!
~Whitney


Your pantry is amazing! Would you mind sharing the dimensions of it? I have a very, very deep pantry and I’m constantly losing things. I’m wondering if I should take out the shelves and cut them in half – then organize using baskets etc. as you have. Very curious to know how big your pantry is (how deep is it and how wide?) just to get an idea!
You could cut the shelf in half and add that amount to your door. That way you dont loose any space for storage, but you also dont loose anything.
You mentioned your 12 can organizer, but it doesn’t have a link – would you mind sharing the link to the 12 can organizer.
Sorry, I found it in another comment. Have a great night.
can you just use those thins that hold soda cans in the fridge instead of building your own?
Noobie question…how did you cut the wood? What kind of saw? Thanks!
Impressive! I love how you customized and gathered items from all sorts of stores to make this work. Awesome job!
I just built my first one of these, and I could not fit a can through the top once the front 4″x2.75″ piece was put on. My side panels are oriented correctly, and all my ramp placements and measurements check out. Was that 4″x2.75″ piece put level with the bottom of the middle ramp, or was it placed just to fit a can? Let me know when you get a chance. Thanks, and everything else came out perfectly!
Looking at the photos, she used the same 2″ board in the middle that she used on the bottom. Made like the directions state there would be 2″ of clearance between the middle shelf end and the top. Certainly not enough for much more than tomato paste cans! If you’ve seen the 12 can holder directions, it’s mostly a copy of that which is great with no top, but not accurate for the 7 can stackable version. It also really looks like plywood for the angled shelves and not dimensional lumber… I plan to make these, but will be sure to be certain dimensions make sense before buying anything and certainly before cutting! I love the idea and the free plans, too– sometimes things just need to be proof- read by more than one person!!
Do you have the measurments for the 12 can?
https://www.shanty-2-chic.com/2012/10/pantry-ideas-diy-canned-food-storage.html
Hi, I want to make the canned goods rotation dispensers that you made. My question is this: Should I just pick the largest can size I keep in my pantry and make them all the same, or should I make different sized ones to fit the various can sizes? I checked my can sizes yesterday and found that I have like 7 different sizes!
From her photos, it’s seems she made the can despencer for her most purchased items, she has another shelf of cans probably for the odd size and cans she doesn’t use or buy often.
Can I just say that my favorite part of your pantry is the DIY spice rack – I guess I never had to take shop class in high school, because I NEVER got to make one…until now. Thanks for sharing!
This is amazing, but I must say, I would be 500lbs living in your house will all the snacks. My husband would be so jealous. Lol
And I voted!
I tried to vote for you in Reynolds contest; however, when I clicked on vote it asked me for my Facebook password. I don’t have a Facebook. So unfair 🙁 I have a Twitter, but did not ask me for that. Discriminatory!
Thank you Barb! I know… This contest is being held through facebook votes, but we do appreciate the thought 😉 You are sweet!!
Voted!
Thank you so much!!
Thank you Whitney! You totally inspired me, this was my Jan/Feb project and I could not be happier with the results. Everything is soooo easy to find and I always know what I am running out of. xo!! Sandra
Oh yeah! That makes me so happy to hear! 🙂
Going to vote now!
And this is AMAZING
Thanks so much! :)) I ordered all your amazon goodies! Loved all the products ESP the chalkboard contact paper! Brilliant and a total breeze to switch out snacks. U have made my life soooo much better.
What size are the canisters, I am finding a few sizes. thanks
Sandra, your rock! I too will take the next two months to redo my pantry. Go Shanty2Chic! Great to see women encouraging each other.
Voted! I really hope you girls when the contest! Y’all have really inspired me as well, so thank you! I still need some more beginner projects. I have made some of yours and im going to order Ana Whites book too 🙂
That’s awesome Misty!! Thanks for voting! You will love that book! And we are going to start doing some videos to help you girls get started with these tools 😉
Your way organized, labeled closet makes me feel so shameful! LOL It looks beautiful though, and I’m sure everything is really easy to find. 🙂
PS Where did you get those clear plastic containers (and those bins)? 😀 I have a few clear ones with pop-up lids from BBB but they were pretty expensive.
Haha don’t feel shameful! You should have seen the before! I promise it would make you feel better 😉