Restoration Hardware Inspired Dining Table for $110

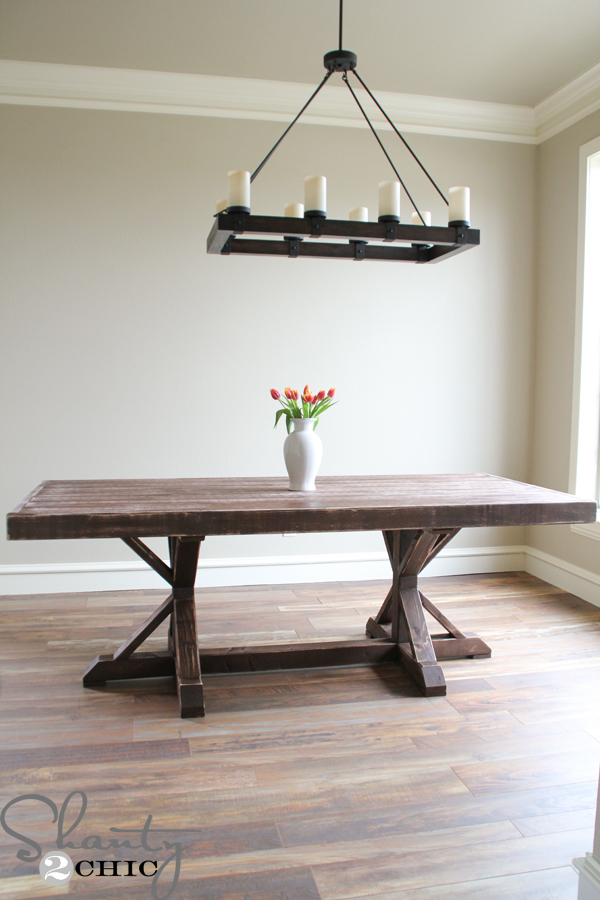
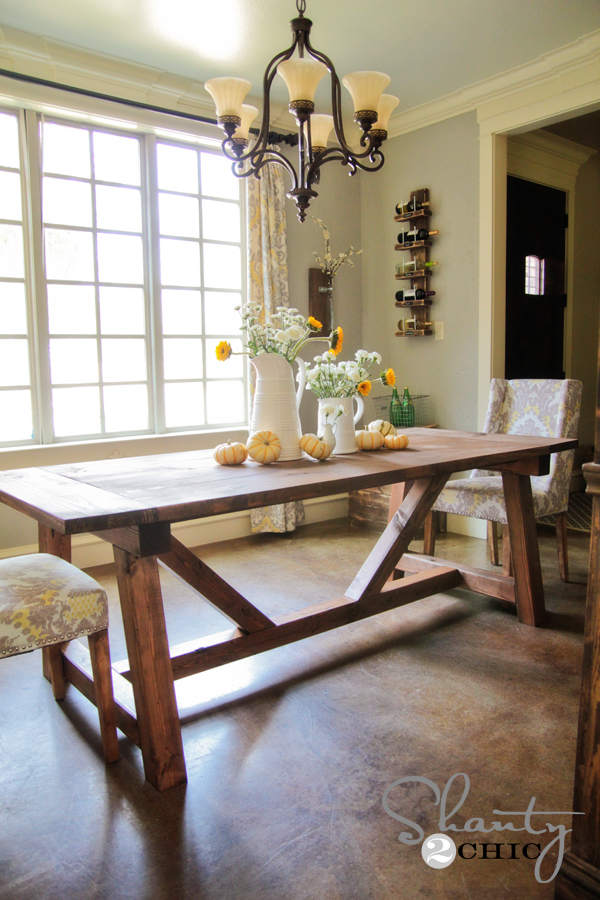
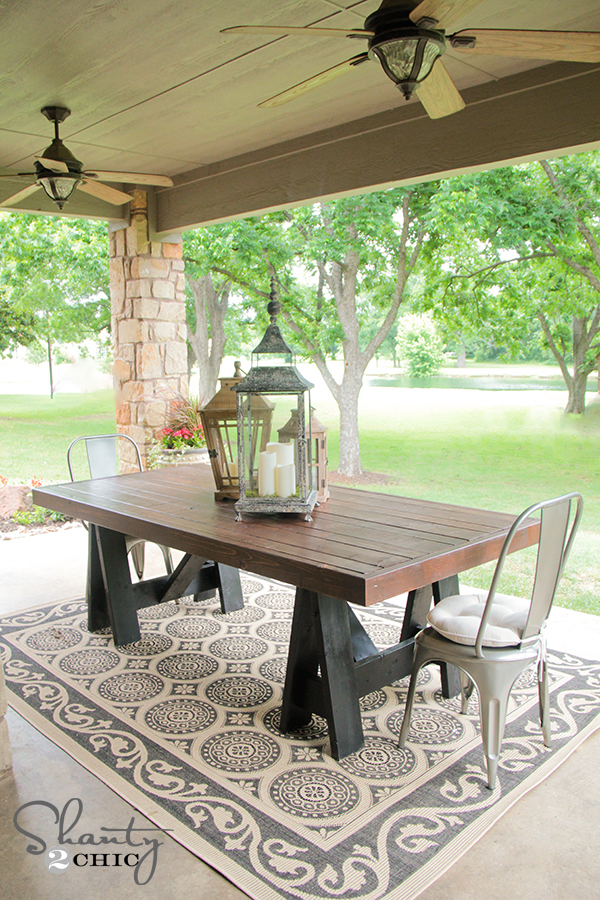
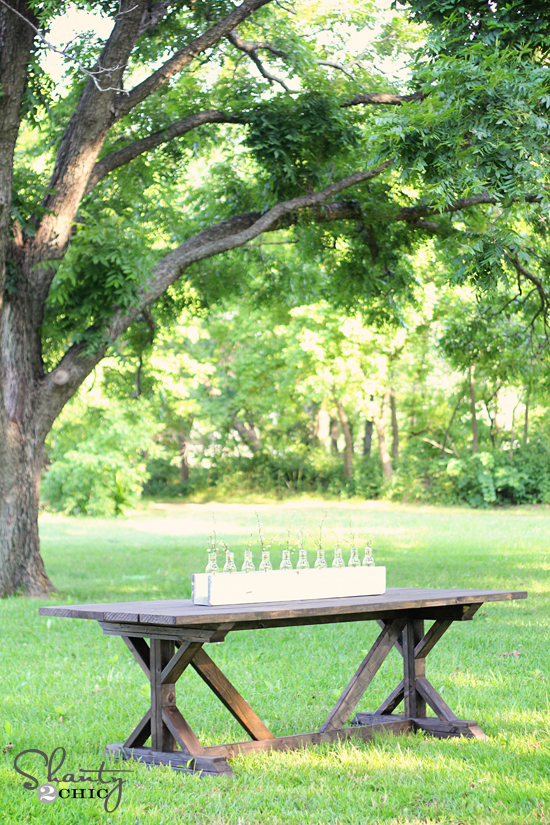
Learn how to build a farmhouse style dining table for $110 with free plans and a full tutorial. This design is inspired by Restoration Hardware and you can build this solid wood table for a fraction of the price!

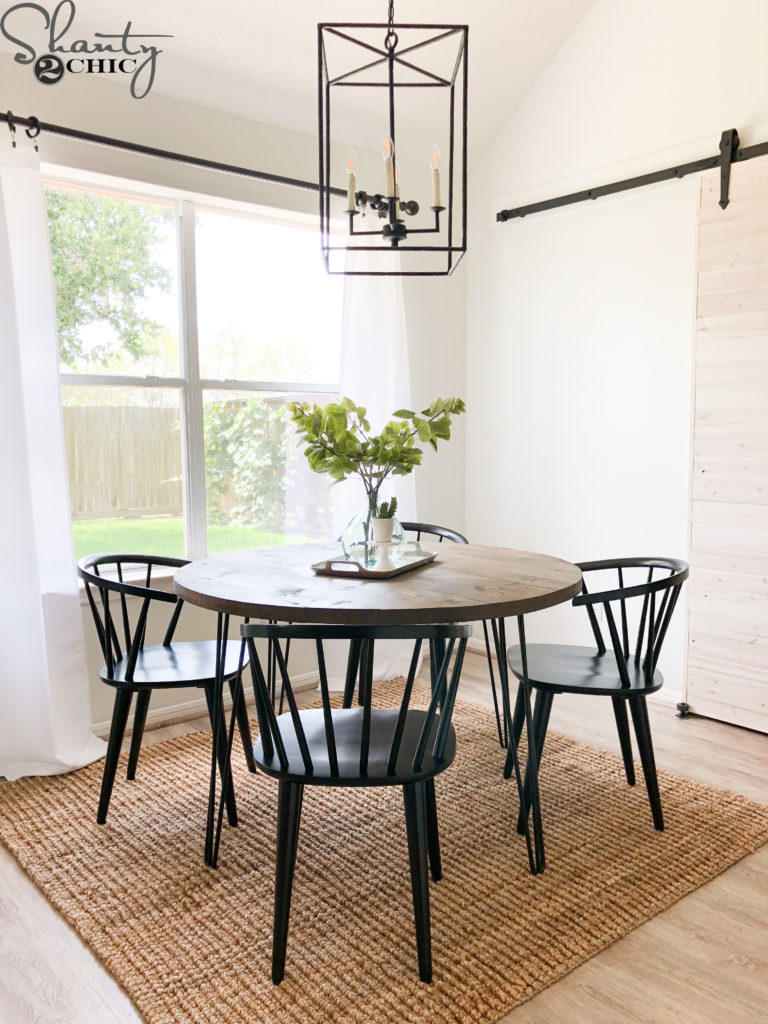
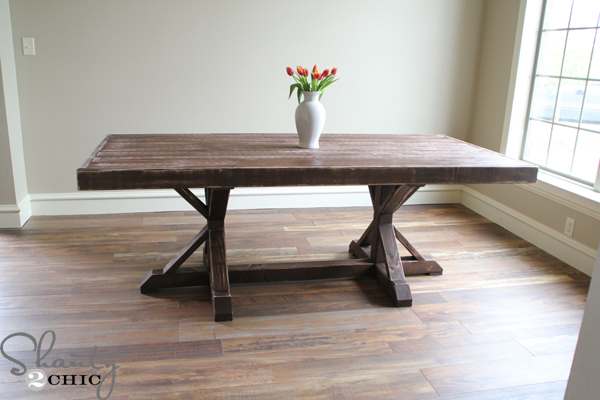
Hey there!  I’ve been moving right along trying to fill up all of the empty rooms in my new house.  This week I moved into my dining room and I have been dying to build this Restoration Hardware inspired Dining Table since I started building my new house!  You may have seen a sneak peak of this beauty on our Instagram! I love the look of a rustic dining table, like the boards came out of a 100-year-old building. Solid pine timbers never looked so good!

Make sure to follow us on Instagram and Pinterest to keep up with our most current projects!


Man I love this table!  The farmhouse table that inspired it is a Restoration Hardware Table that costs $2,205 to purchase, before tax, and I built mine for $110!  Wow, wow, wow!  I still can’t believe it!

How to Build a Farmhouse Dining Table

Supplies:

  • 7 – 1x6x8 Pine or Whitewood Boards
  • 8 – 2x4x8 Pine or Whitewood Boards
  • 2 – 4x4x8 Pine or Whitewood Posts (can laminate 2 2×4’s)
  • 1 1/4″ Pocket Hole Screws
  • 2 1/2″ Pocket Hole Screws
  • Kreg HD Screws (for 4×4’s)
  • 1 1/4″ Brad Nails
  • 2 1/2″ Wood Screws
  • Wood Glue
  • Stain and/or Paint

Tools:

  • Miter Saw
  • Drill
  • Kreg Jig
  • Brad Nailer
Restoration Hardware Inspired Dining Table
DIY Farmhouse Table

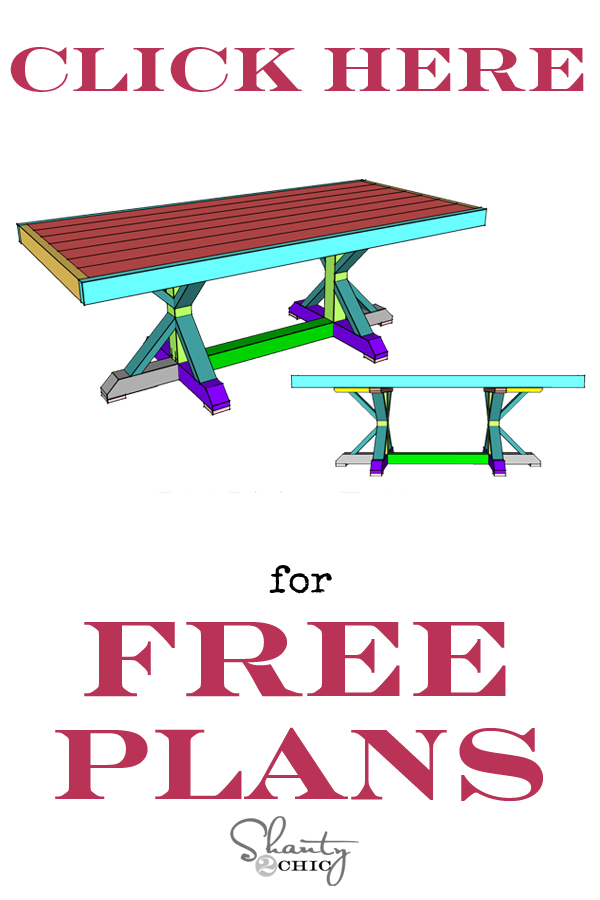
Of course, we want you all to be able to build one too so we have FREE Printable plans for you!  Just click the image below or HERE for the free Farmhouse Table Plans.

restoration-dining-table-plans
DIY Dining Table Free Plans

And, as always, I’ve provided my tutorial pictures to make it even easier for you to create your own!  I love building farmhouse tables because you get so much bang for your work and money.  They look intimidating but this one, especially, is VERY EASY to build! So, let’s build this DIY Restoration Hardware Dining Table!

Building the Table Top

planked-top
Tabletop Planks

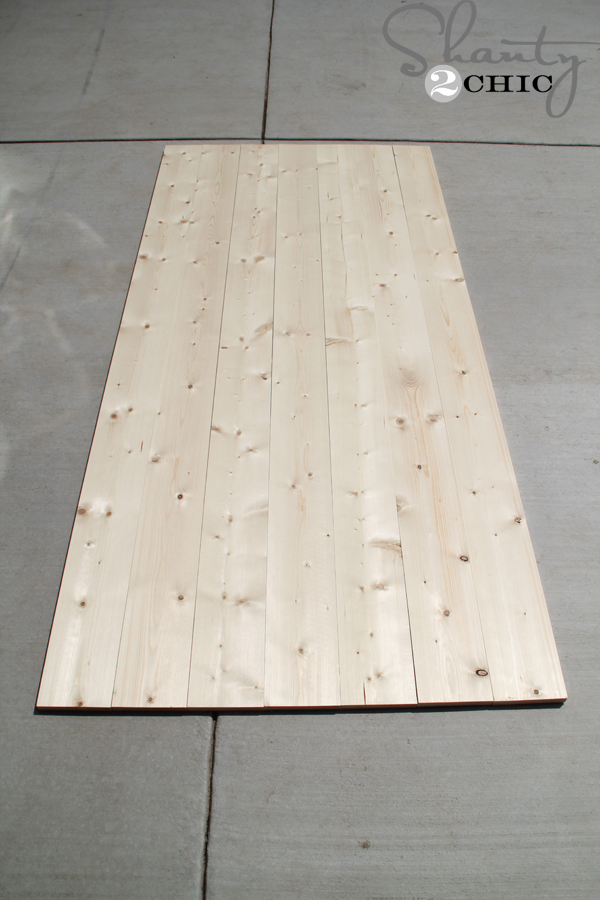
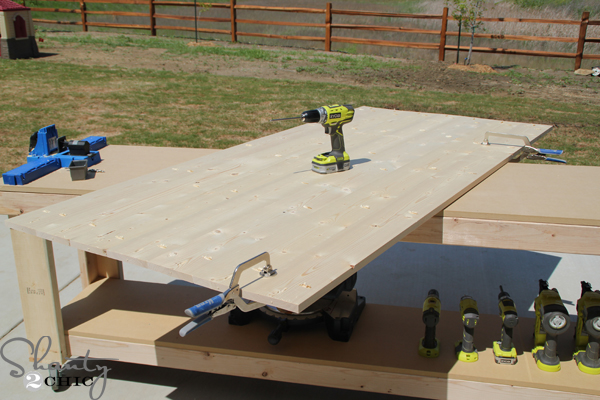
I started by attaching the tabletop planks, with the 1×6 boards, to create the planked top!

drill-pocket-holes
Drilling Pocket Holes

First, I used my Kreg Jig set at 3/4″ to drill pocket holes around the edges of the boards.

  • You can find the Kreg Jig HERE on Amazon.
attach-planks
Attaching tabletop planks

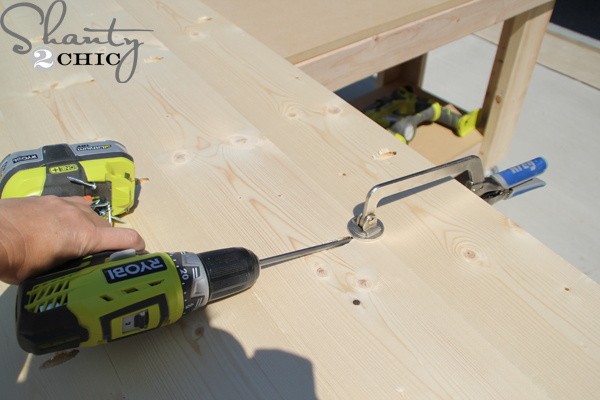
Next, I used 1 1/4″ screws to attach the boards. To create a smooth surface and to keep the top from bowing, just clamp each pocket joint as you go. We love our Kreg Face Clamp for planking table tops.

  • You can find the Kreg Jig Face Clamps HERE on Amazon.
clamp-joints
Farmhouse Tabletop

Easy enough! Time for the table top trim!

Make sure to measure and cut as you go for the trim pieces.

add-long-trim
Attaching Trim to the Table Top

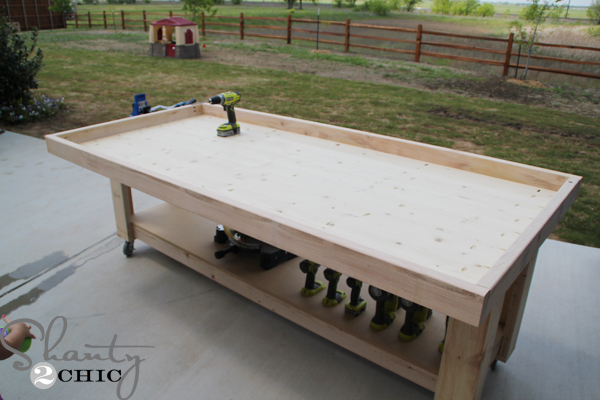
I started by cutting the long side pieces to size. Then, I attached them to the sides of the table top with 1 1/4″ pocket hole screws and wood glue.

I followed up by measuring for the width of the table top. I cut my end trim pieces to size and attached them with 1 1/4″ pocket hole screws from the end of each plank, into the trim pieces.

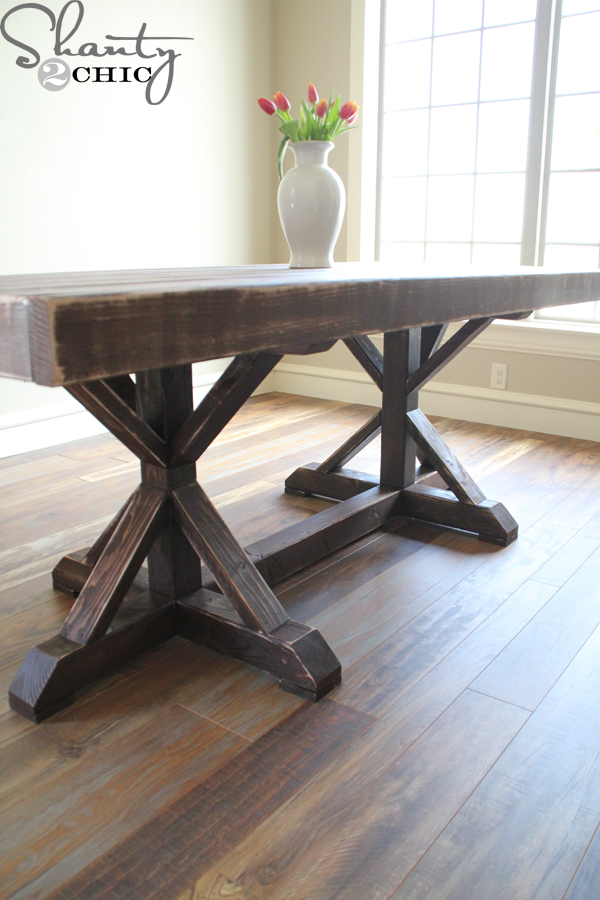
Step 2: Building the Base of the Table

miter-4x4
Miter Saw

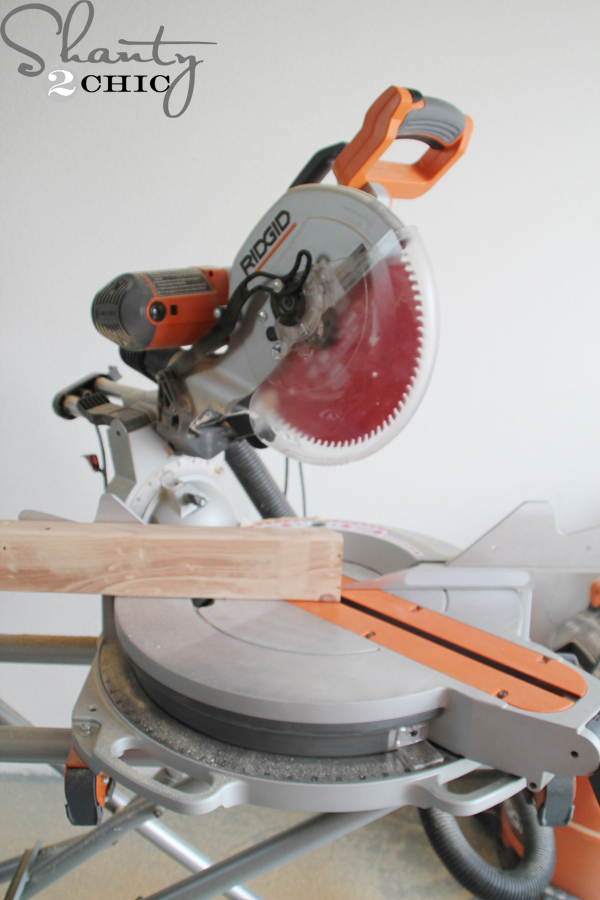
I used my Ridgid 12″ sliding compound miter saw to cut the 4×4 table base pieces.

mitered-leg
Miter cut on Farmhouse Table Feet

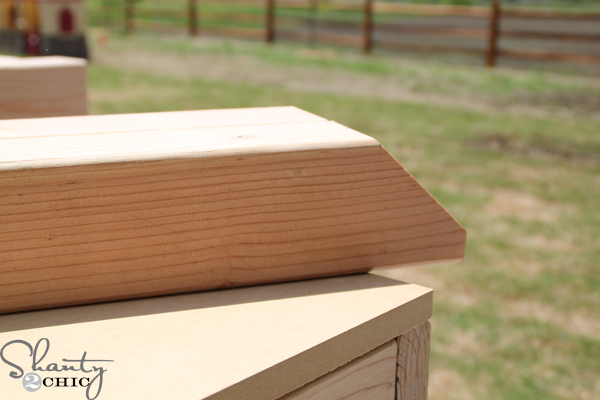
Here’s a pic of the 45 degree miter that you will need to cut for the feet.

sand-boards
Sanding Table Pieces

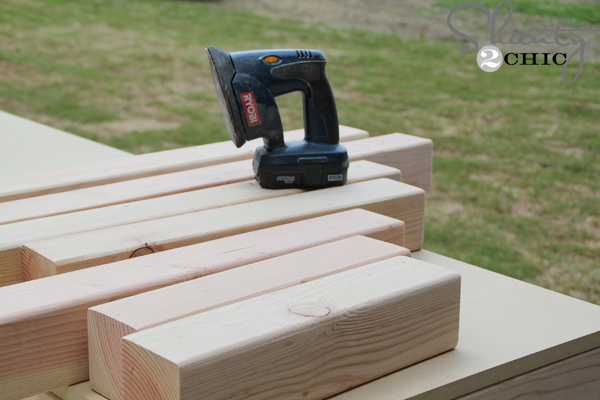
Before assembling the pieces, I gave them a good sanding with my Corner Cat sander.  I don’t always do this before assembly but the 4×4’s were dirty and pretty rough.  I used a 50-grit sanding pad for this. I used a 50-grit sanding pad for this and sanded with the grain of the boards.

Kreg-Jig-HD
Kreg HD

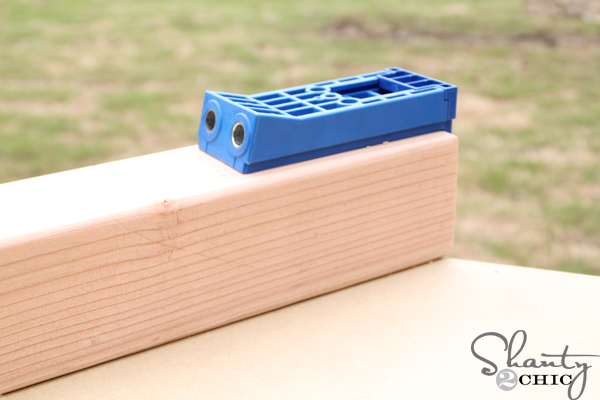
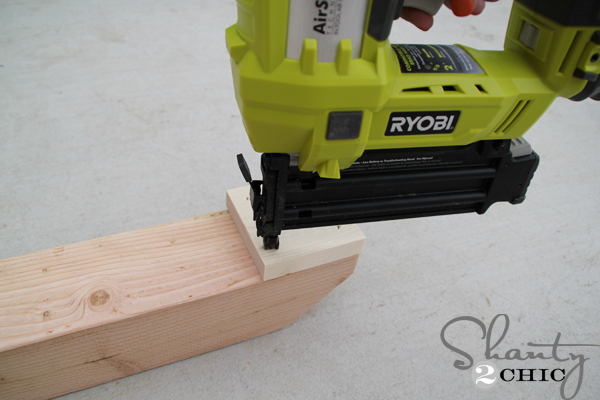
To attach the 4×4 leg pieces together , I used my Kreg HD to drill the pocket holes into the long base runner.  It’s super easy, just clamp and drill! I attached the runner to the feet with Kreg HD screws.

  • You can find the Kreg Jig HD HERE on Amazon.
base-with-stretcher
Dining Table Base

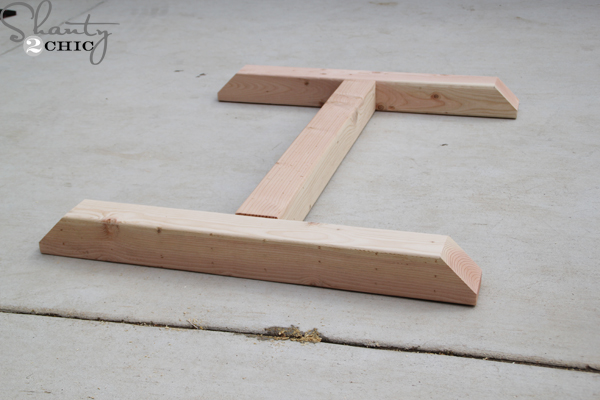
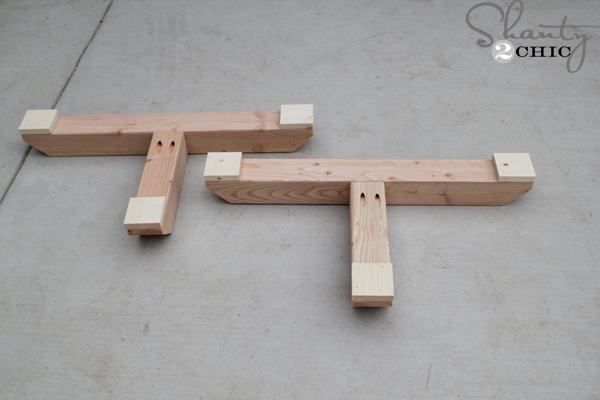
Here is the runners and the feet assembled.  Don’t use wood glue here because this is a temporary assembly just to establish the pocket hole joints. After assembled, remove the stretcher.

legs
Dining Table Feet

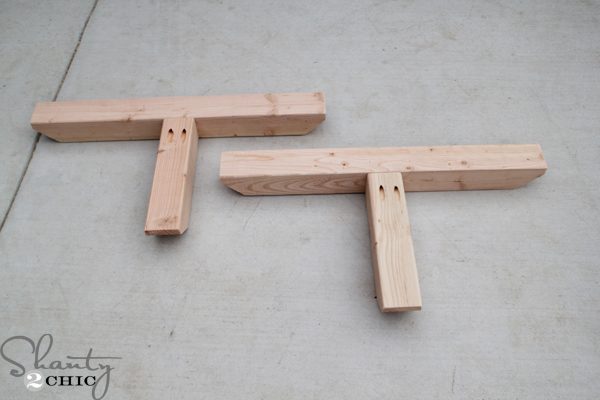
Then, attach the short feet.

add-foot-pads
Attaching the Foot Pads

With the table feet upside down, attach a foot pad to each foot.

foot-pads
Farmhouse Table Base Assemblies
legs-assembled
Dining Table Legs

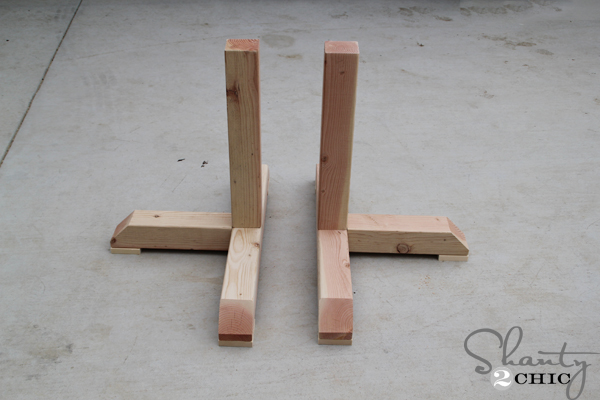
Flip the feet right-side-up and attach the table legs.

add-top-of-legs
Assembling the Farmhouse Table Base

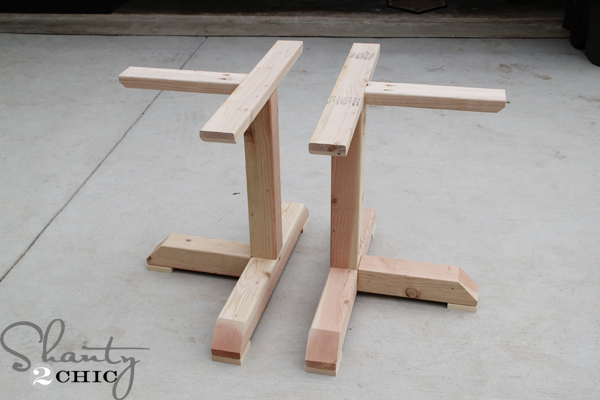
Then, start stacking the 2×4 cuts on top of the legs.  I used 2 1/2″ spax screws.  They are a bit pricey for wood screws but you don’t have to pre-drill!

stack-layers-on-legs
Farmhouse Table Legs

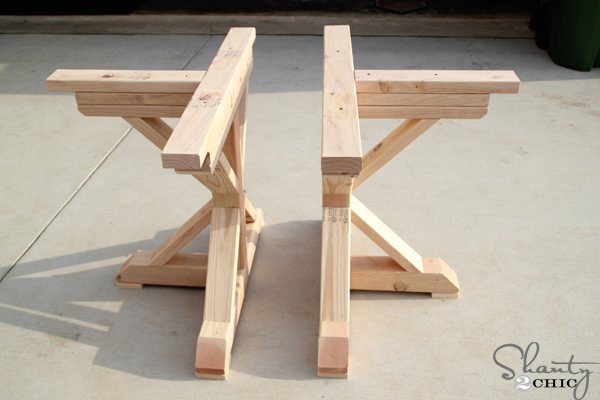
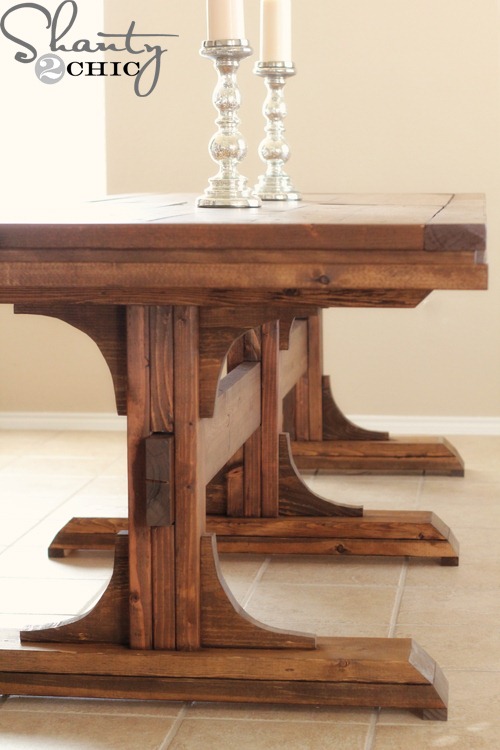
Here are the legs completely assembled and now, believe it or not, it’s time to stain! Don’t assemble the table yet, stain first!

Step 3: Staining the DIY Dining Table

Rustoleum-Carrington-Stain1
Rust-Oluem Carrington Stain

Before staining, we like to use the water-popping technique. Just use a damp cloth to wipe the entire table down and let it dry.

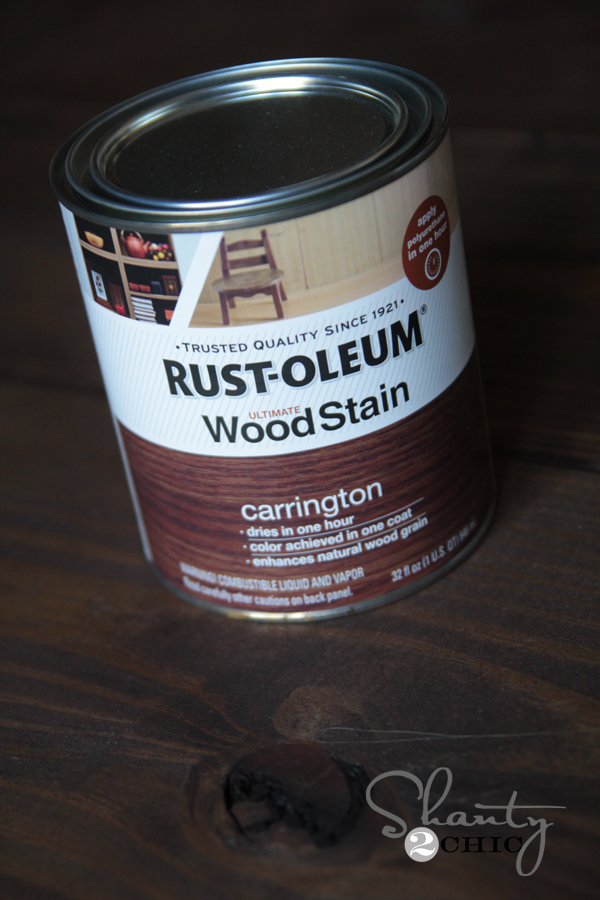
I chose Carrington by Rust-Oleum to finish the table. Just wipe on one-coat with a dry cloth, wait 5-minutes to let it sit, then wipe with another clean cloth to blend it. Make it your own with any finish you like! We love the variety of stains that Rust-oleum carries!

  • You can find Rust-oleum Stain HERE on Amazon
distress-table-edges
How to get a farmhouse finish on a table

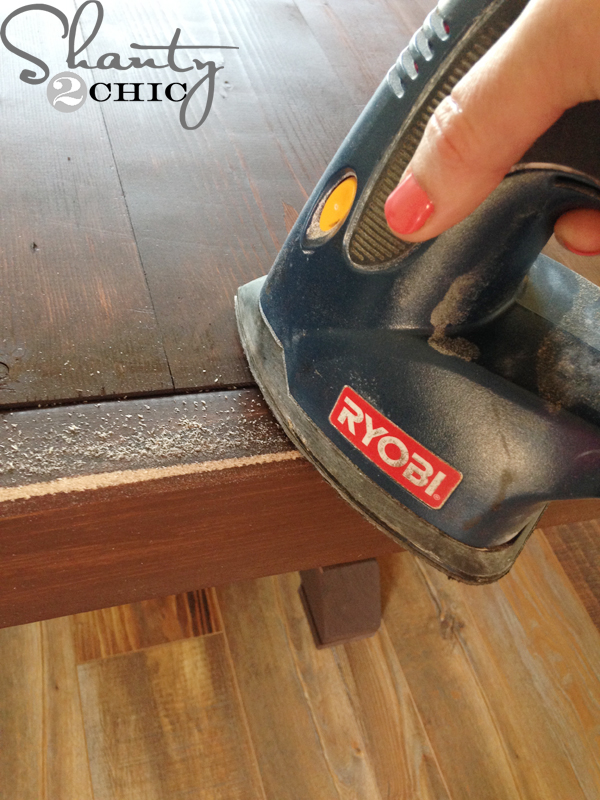
I wanted the table to look worn so I used my Ryobi Corner Cat sander to distress all over.  I used an 80-grit sanding pad for this part. (I didn’t decide to do this until the table was inside and assembled. It made a big mess so if you know you will do this, do it before you bring it inside.

poly
Polyurethane

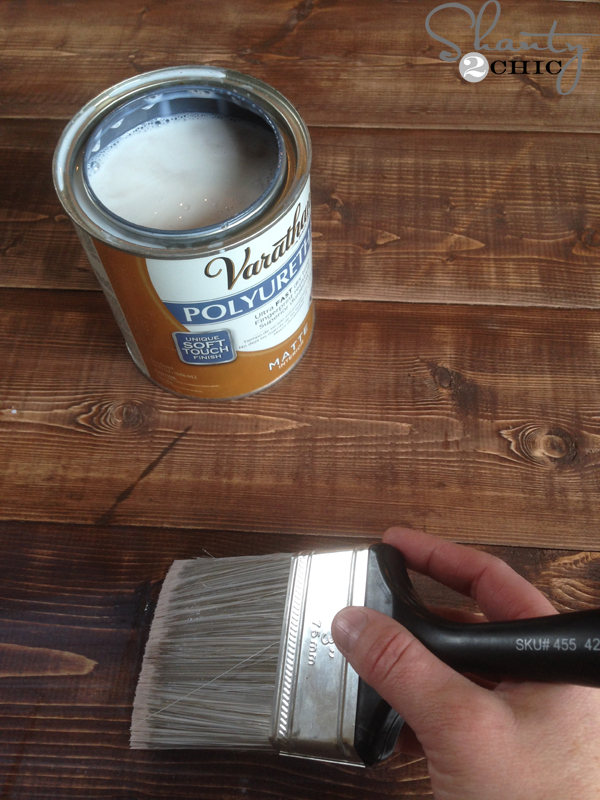
I did add 3 coats of Varathayne polyurethane to the table in, matte finish, with a bristle brush. The matte gives it a very natural finish and protects the table top from minor spills. Now the table top is more kid-friendly 😉 I would still use coasters and placemats when using the table but this finish makes clean up super easy!

  • You can find the Poly HERE on Amazon

Step 4: Attaching the Table Top to the Table Base

To attach these angle pieces we suggest screws in the plans. However, if you have a nailer, that will work great! If you choose to use wood screws, just predrill from the top of the angle piece into the leg post at an angle (bottom pieces angle down, top pieces angle up). Follow with 2″ wood screws and fill your screw holes with wood filler.

DIY-Dining-Table-Plans
DIY Farmhouse Table

LOVE it 🙂

Free-Dining-Table-Plans
How to Build a Dining Table
DIY-Dining-Table
Free Plans for a Dining Table
How-to-build-a-dining-table
How to Build a Dining Table
Restoration-Hardware-Inspired-Dining-Table
Solid Wood Dining Table Plans

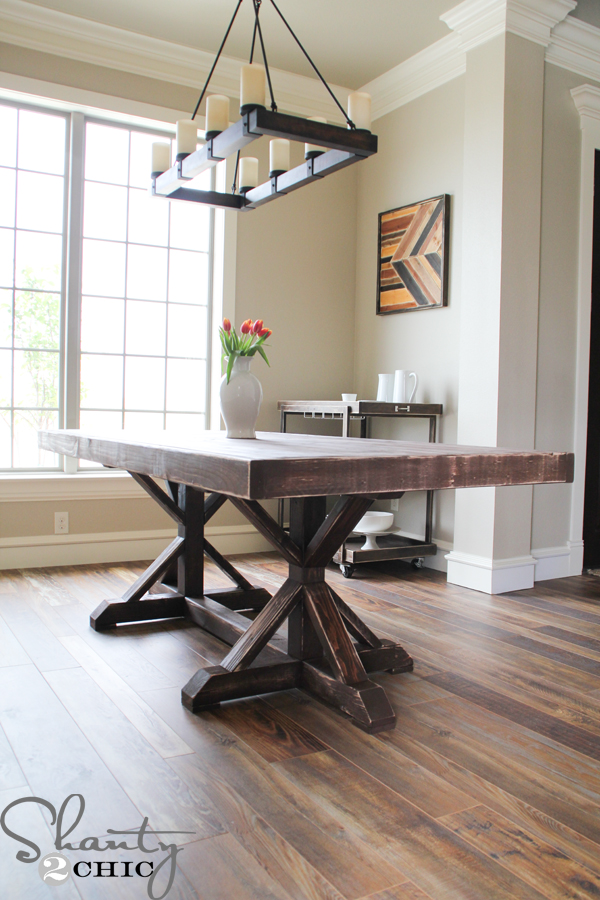
I love my new dining room table! Now I need to get busy on the benches and filling up the rest of the room!  I have to say that this is by far my favorite Farmhouse Table that I have built so far! It completely transformed my dining room and it adds the perfect touch of farmhouse style!

diy-dining-table-benches

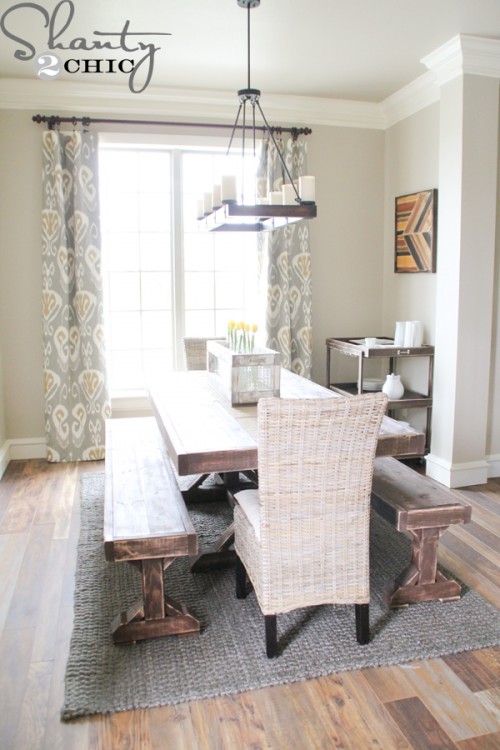
Free plans for the matching benches can be found HERE

Thanks so much for stopping by 🙂 – Ashley

Curious about some of the other things you have seen in this room? Just click the links below for more info!

diy-bar-cart-2

DIY Bar Cart

Pallet_Art

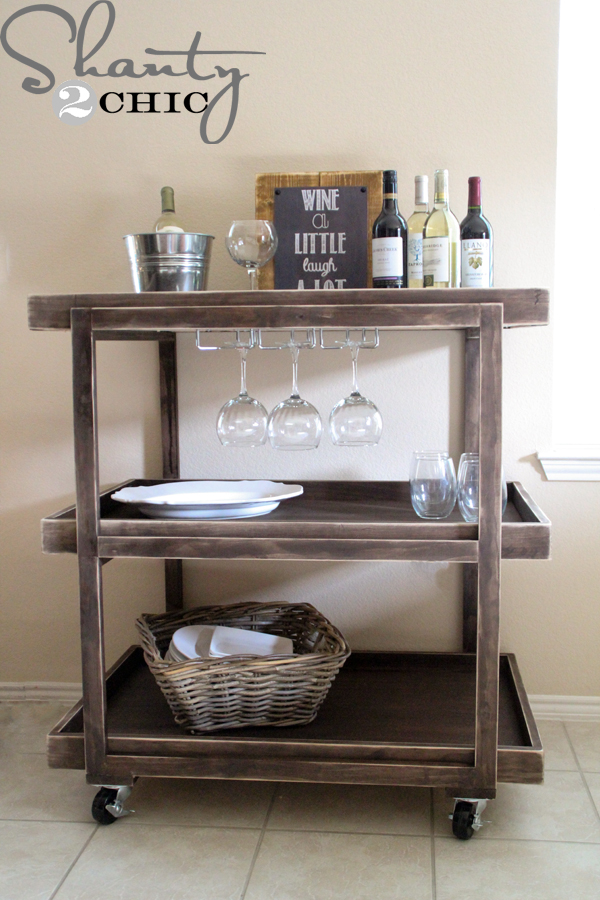
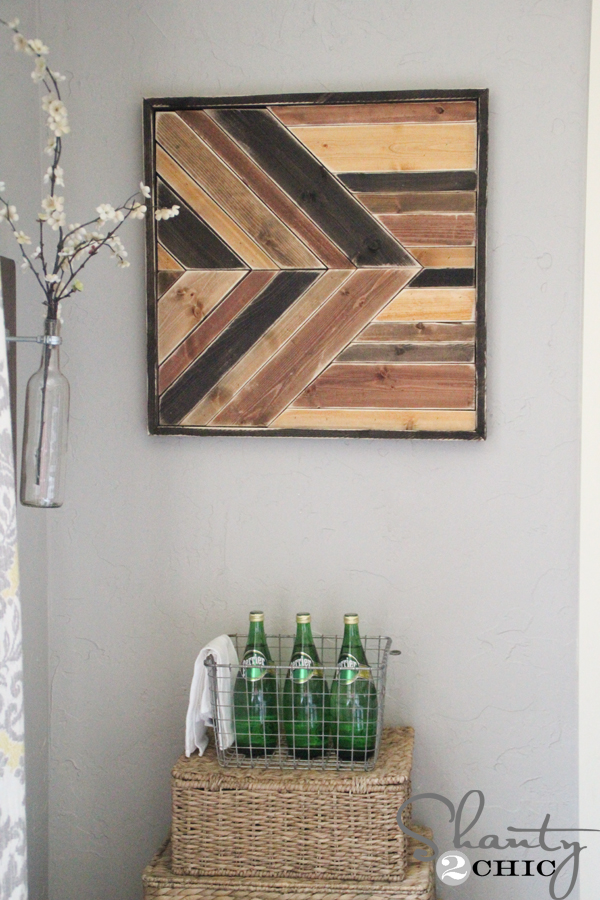
Pottery Barn Inspired Pallet Art

We have built a ton of gorgeous farmhouse tables over the years! You can click the images below for more free Dining Table Plans.

diy-round-table
DIY-Dining-Table
DIY-Table-Pottery-Barn-Inspired
diy-wooden-dining-table
table7

Looking for more styles? We have a complete list of over 25 DIY dining table plans so you can find the design that suites you best!

Ashley and Whitney Blog post signature
Become a VIP Insider
Stay up-to-date on all the new project, free plans and new products available for you!

Similar Posts

Leave a Reply

Your email address will not be published. Required fields are marked *

336 Comments

  1. On your parts list you call for 16 Kreg hd screws for the 4×4’s. But I don’t see any size or length requirements.

  2. This may be a stupid question, but what is the best way to make the top detachable so we can fit it through our narrow doorway when we move eventually? Can I just screw it on without glue and unscrew it and screw it back later without ruining the screw holes? Or should I use bolts instead, and, if so, how would you recommend substituting bolts? Thanks so much for any advice you have on this!

  3. We’re in the middle of building this table, and one of the major problems we’re having is with small spaces between the boards – horizontally where the boards aren’t perfectly square, or vertically where the saw cut just a tiny bit too short. Did this happen to you at all? How do you keep it from happening? How do you handle it if it does?

    1. Arianne, I ran into the same issue when I was building mine. Wood boards are never perfectly square, so there’s bound to be some imperfections along the way. I tried rearranging the order of the boards so that one warped board would just “hug” another board that was warped similarly. Eventually, if you just get the boards that are warped the worst to the ends, then you can more easily wrap the trim boards around the curves since you have a little more play in those boards from them being flipped vertically.

      As far as boards being cut too short, I would just try to stack the boards, clamp them, and cut them all at the same time so they’re the same length.

  4. These plans worked great! Here’s my implementation of the table. The only thing I changed was using premium 1×6 pine boards for the top so that there were fewer knots (ended up costing about $70 extra in lumber). Also, I used premium 1×4 boards for the trim around the top so that it’d match (they don’t carry premium boards in a 2×4 size at Lowe’s or Home Depot). Also, I had a tough time finding untreated 4×4 posts because my local Lowe’s and Home Depot don’t keep them in stock. Luckily, an 84 Lumber outside of town had a few in stock.

  5. I love this table and want make sure it will fit in our dining room. What do the dimensions of the table end up being? And what is the distance between the floor and the bottom of the table top? Thanks!

  6. Found your site and my wife fell in love with this table. Decided to go ahead and make it. Extremely happy with the way it turned out. Thanks so much for the easy to follow plans!

  7. My husband and I will be building our table in about a month or so…I was wondering (and sorry if it’s mentioned above or in other comments), but what kind of wood filler do you use? Every one I saw on homedepot.com had reviews that said they would NOT take stain…even if the packaging stated it was “stainable” Thanks!

    1. Hi Whitney,
      I use either 3M or Elmer’s stainable but it doesn’t take the stain the same way. The places you will need to fill in this table are not noticeable at all so those should be fine. Hope this helps!

  8. anyone ever made a smaller table like 72″x42″ ?? help and if i would like to move the bottom beam to the middle how would i go about doing that ??

  9. Thank you for the awesome plans! My first time making something like this and your breakdown really made it possible. Thank you

    1. Jose. Great job. Nice smooth lines and looks solid. Absolutely love your stain job! Artists’ work.

      1. Thanks brother, I actually torched it. I wanted to really darken the sides and transition to the natural color in the center.

          1. Well since this was my first time, I’m sure there is better advise out there but I will tell you what I did. I had initially made the table too long for my space so I had cut off about 10″ off one end of the table top. I then used that piece as my practice piece. I learned that it was easier for me to start further away at first to get a feel for how quickly the wood would darken. I started on the outside and would work my way in towards the center board (not wanting to torch the center). I would do a light darken pass from end to center and then repeat, coming up shorter then the last pass with each new pass. Because of the wood species, (common pine) there were definitely parts that darkened quicker than others so instead of going over it again with the big torch, I used a smaller handheld torch to touch up those spots.
            Biggest thing I can tell you is use a practice piece and play with distance, torch settings, and have a smaller torch to touch up. Wire brush lightly and sand after your done. Again, Im just a novice. Good Luck!!

  10. Hi, my husband and father are building me this design for Mother’s Day but seem to have come to a small problem. They are screwing the top boards for the top of the table together and one board has started to split at the end. I can actually see through the split. They don’t think it’s a huge issue but I wanted to see if there was anything we could do to it to make sure our table doesn’t break in half one day lol. I would hate for them to go through all the trouble and then the table breaks in half.
    Thanks for your help!

  11. Going to start this table project soon! 🙂
    Is it possible to make the table 8 feet long? By doing so, would there be any issues with the legs? Thanks!

  12. How is step 10 done?? I’m confused on how to use the kreg jig on the legs to attach them to the table top??

      1. You don’t have to use the pocket holes. I just drove wood screws from the bottom of the legs into the table top.

        1. How long of screws did you use? Will this table be able to be moved and assembled again without decreasing its sturdiness when it comes to assembling the top to the legs? I would imagine screwing it back in the same hole after reassemble would cause it to not be a tight/sturdy.

  13. If I am planning to use 2×12’s instead of 1×6’s for the table top, do you think I could utilize the Kreg HD for all pocket holes to avoid buying another Kreg jig?

    1. I believe the HD is for anything 2″ and up (which is really 1 1/2″).

      I would try connecting a couple pieces of scrap first to see.

  14. Just wanted to say thank you for shearing the plans for the table I love it here a pic of my table just have one layer of poly so far waiting to dry to put 2 more layers on

      1. Thank you Nicole. The legs are painted black and destressed on the edges the top is stain with dark walnut and 3 coats of wipe on polyurethane

  15. Did you poly the whole table? Or just the table top? Also, did you sand in between layers? Lastly, did you sand after the final layer?

    Thanks!!

    This is the last step I have to finish and I’m all done!