Hey friends!
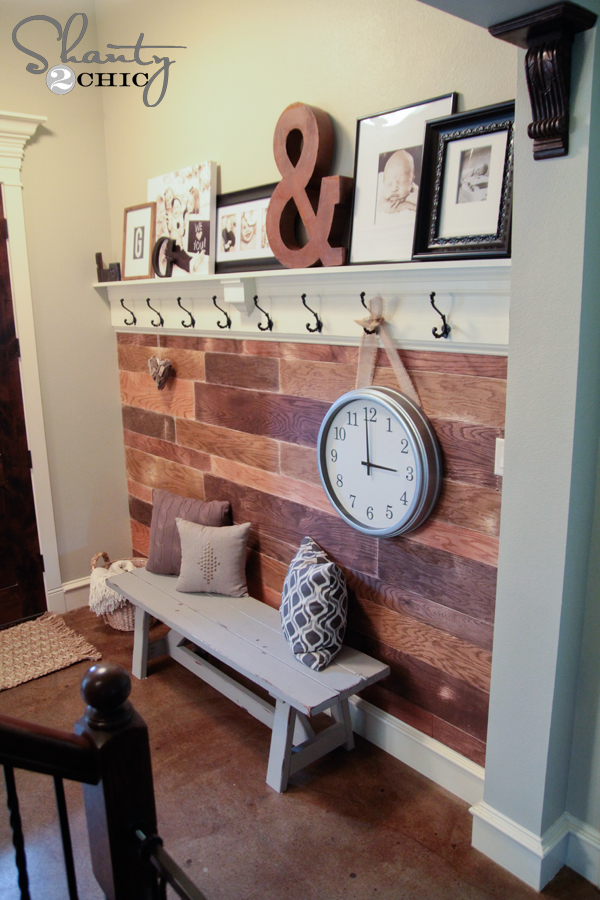
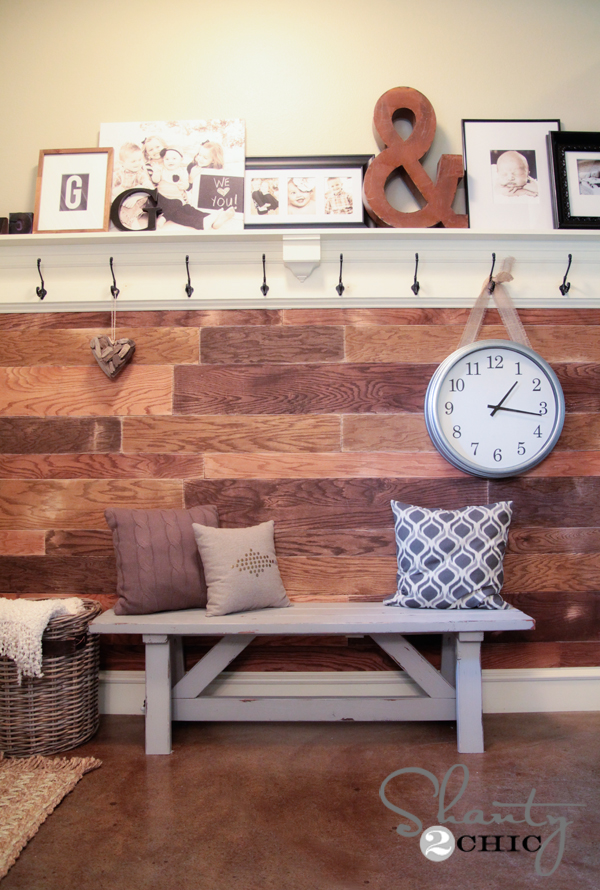
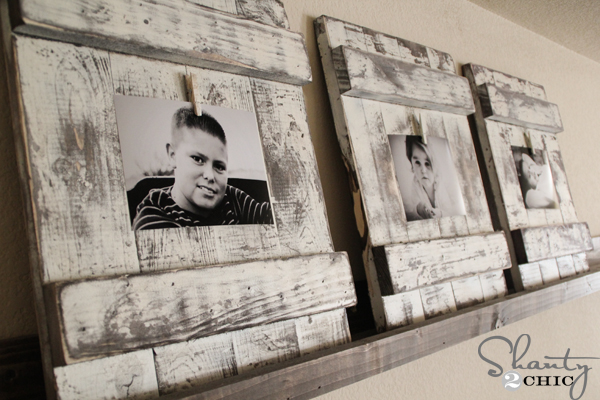
Hope you all had an awesome week! Thanks so much for all of your sweet comments and shares on my new plank wall I did in the entryway. I am really excited to share the second half of that wall with you today. This is a fun way to break up any boring wall, not just a planked one! Here is how my shelf over my plank wall turned out…
So… Let’s get started!
Here are the supplies you will need to make your own shelf. My wall is 9ft long. You can adjust your cuts and pieces to fit the size of your space.
Supplies –
1 – 2x10x10 pine board
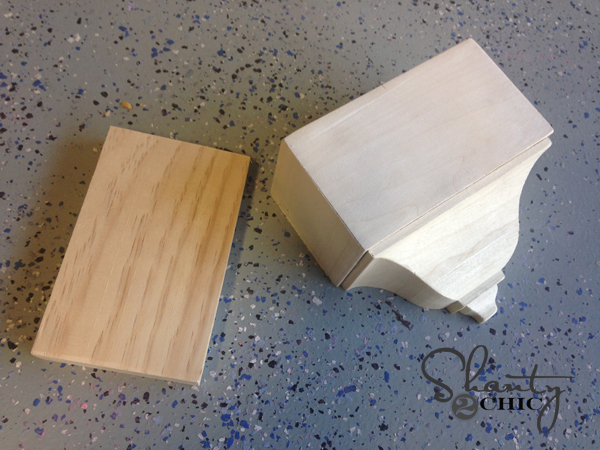
1 – crown center block (on the moulding aisle)
1 – 1x6x10 pine board
9 ft of base moulding (I looked for the cheapest 😉 )
hooks
finishing materials
safety supplies
I spent around $60 on the shelf including the cute hooks I found at Hobby Lobby.
Here we go!
First thing first… Always make sure to have your safety gear ready to go. We are always being asked what safety gear we suggest from our readers. These are staples in my shop, and I use each of them on every project.
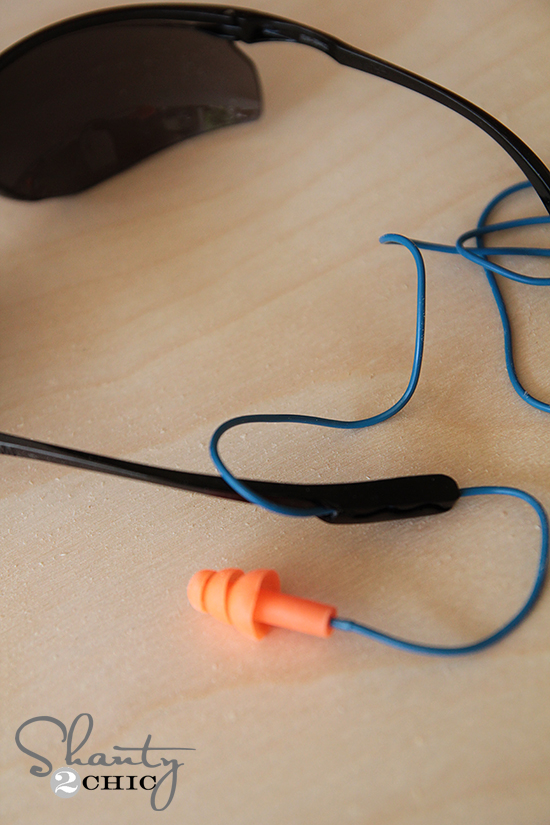
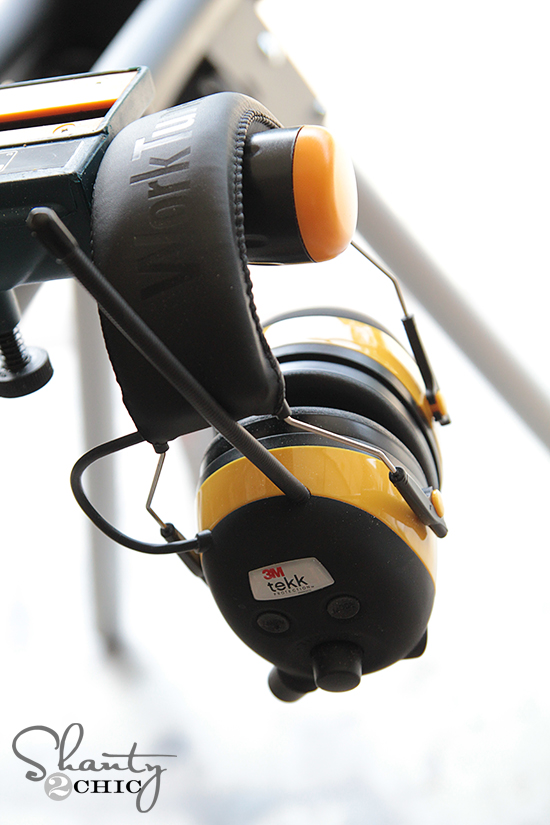

I use 3M™ Safety Products whenever I am working on my projects. Two of my favorites are the Work Tunes headset and the Holmes protective glasses. The glasses actually come with ear protection if you prefer those over a headset.
I started by attaching my crown block to a small scrap of wood cut the same width and about an inch longer. The scrap wood makes the block sit just a bit lower which will make the overall look better.

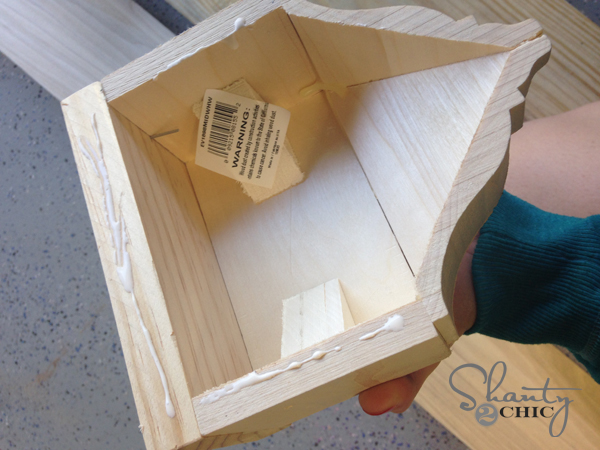
I cut my 2×10 board to length of my wall space using my miter saw. Then, I attached the crown block in the center and top of the board like this…

I just used my Ryobi AirStrike nailer and some Gorilla Wood Glue to hold it all in place… Easy!
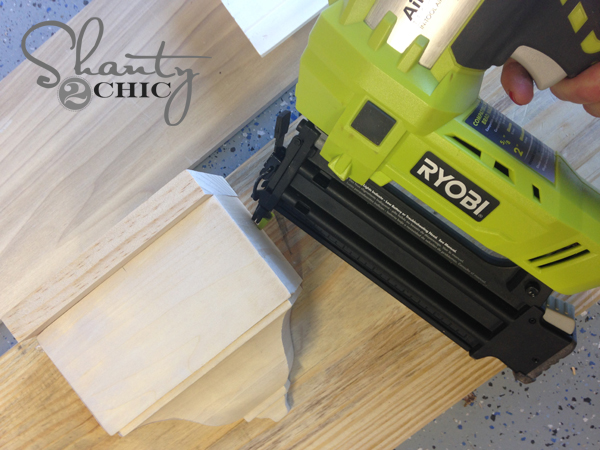
Next, I cut my 1×6 board the same length as my 2×10. I used some wood glue and my nailer to attach that board to the 2×10.
At this point, your shelf will look like this.
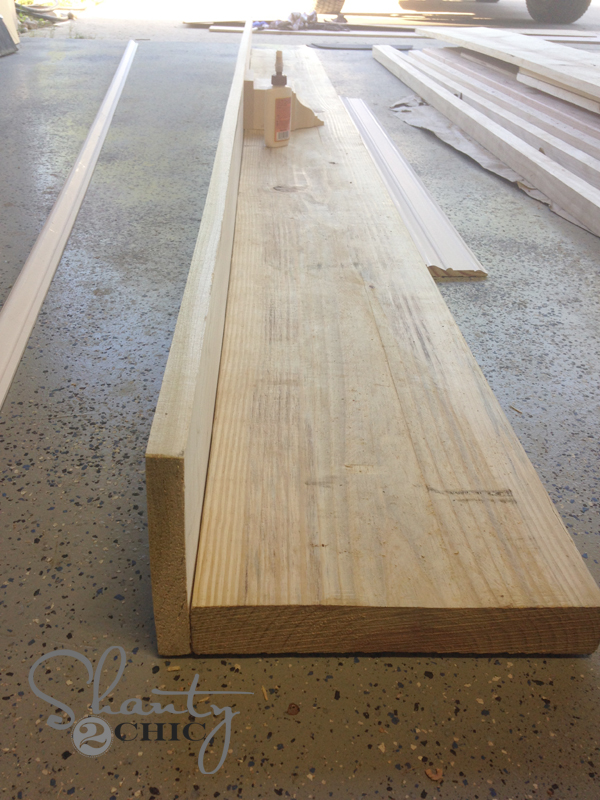
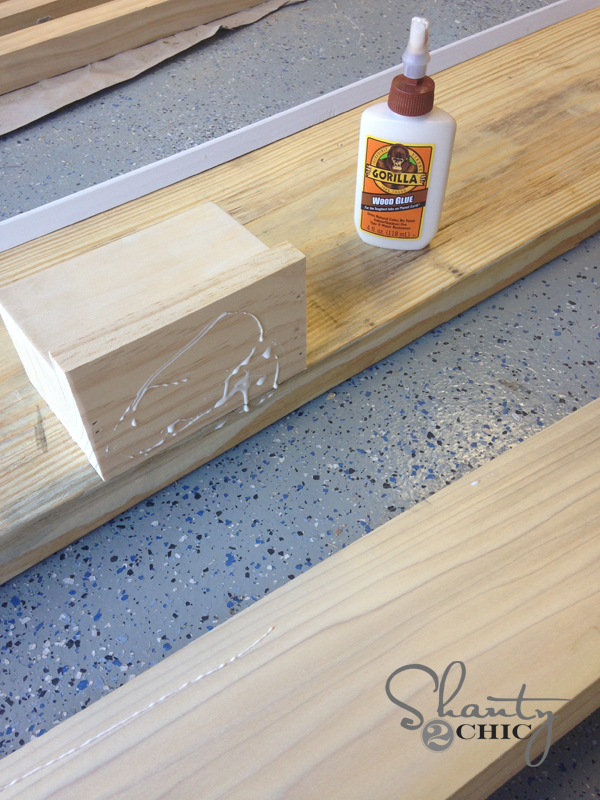
This is where your base moulding comes in! I measured each side of the shelf (should be very close to the same), and used my nailer to attach the base moulding upside down. The bottom or flat side of the base moulding will butt up to the 1×6 shelf piece. I used my 3M Wood Filler to fill the holes left from my nailer. This stuff is the bomb!

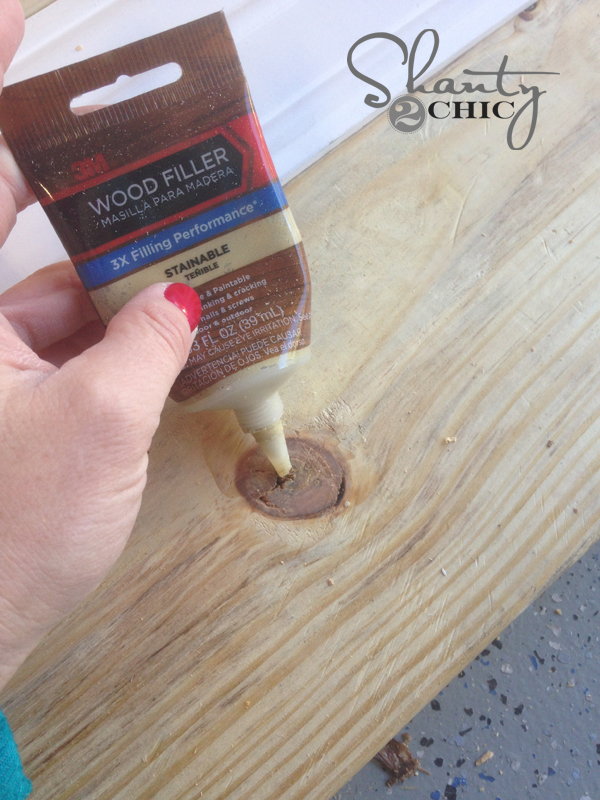
I also used it to cover the knots in my wood. When I am staining, I like for these to show. But, since this shelf is getting painted, I used the 3M Wood Filler to cover my holes. Look how easy this part is!
Just add a small dab of the wood filler to your knot or hole like this…
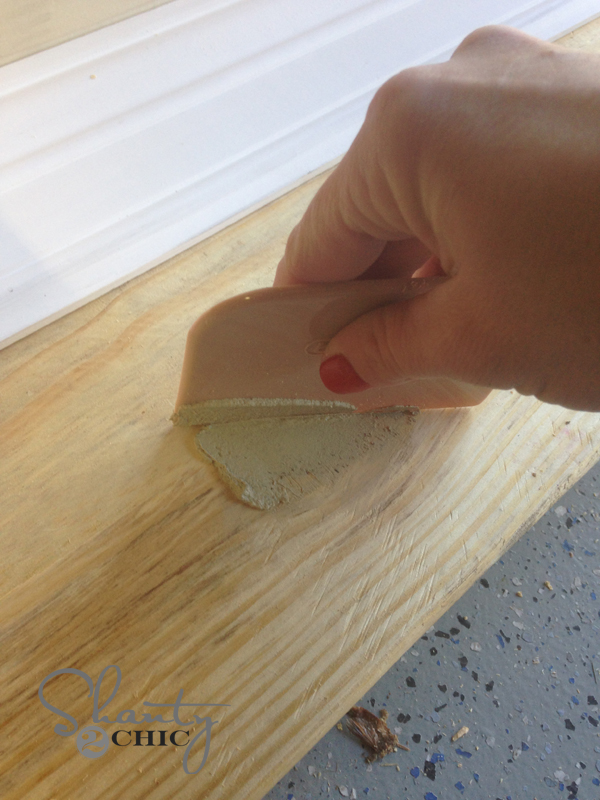
Next, use a scraper to wipe the excess off.
And there you go… No more knot!
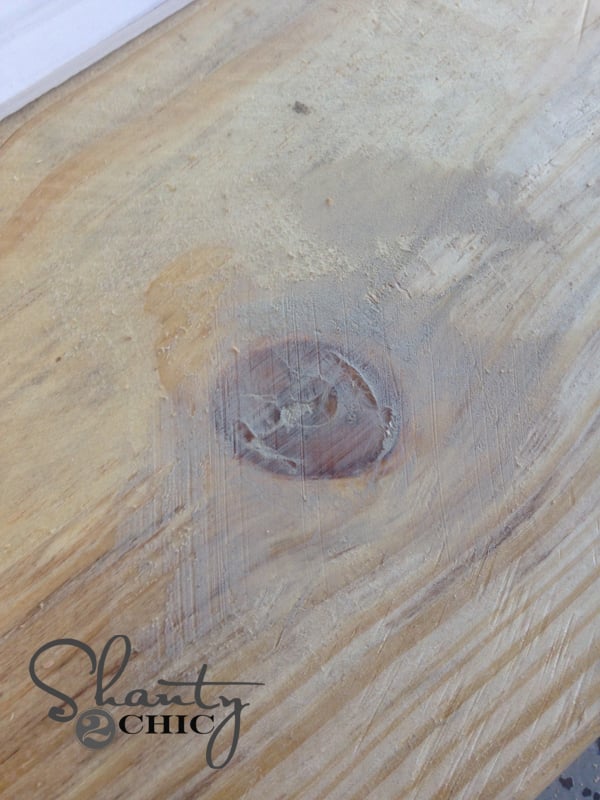
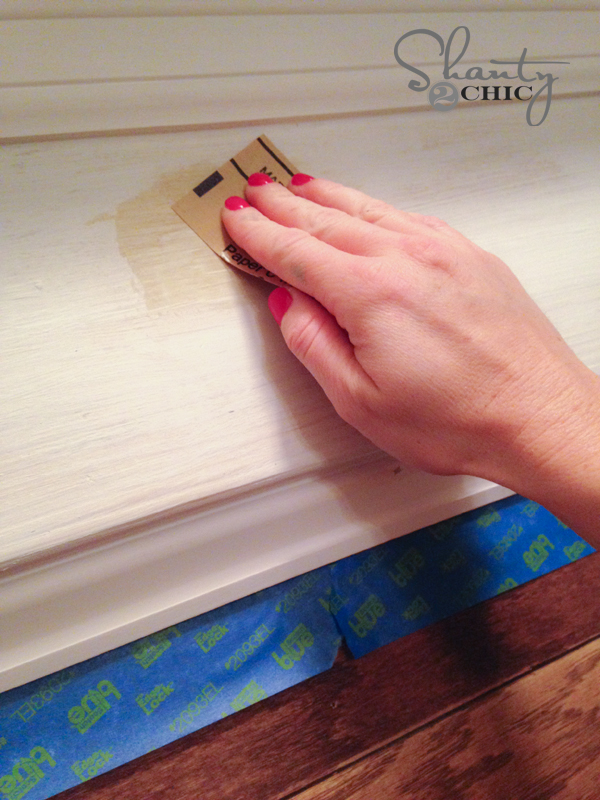
You will want to sand over the spot lightly before painting. I used 3M Advanced Abrasives sanding pads for that part. These are little and get it done quick.
After I had it all put together, I painted the whole thing with a coat of primer before attaching it to my wall.
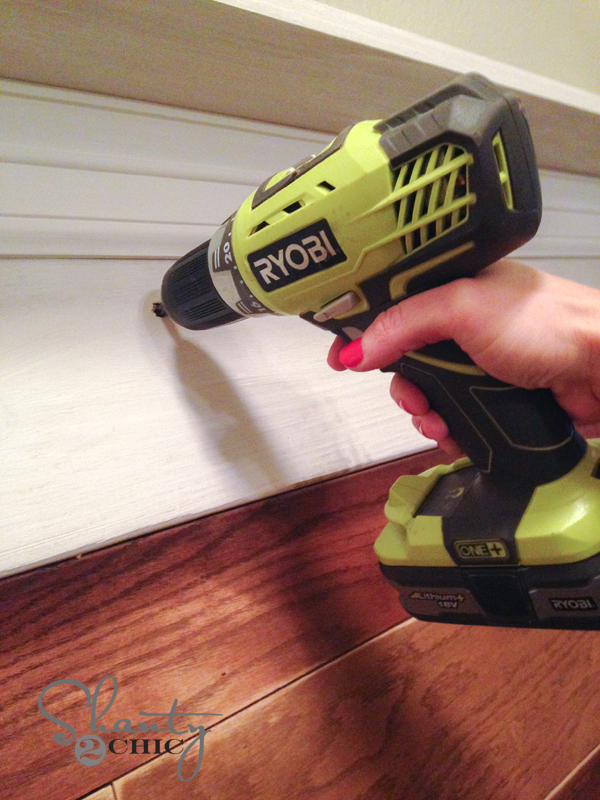
I attached my shelf by using 3 1/2″ wood screws through the shelf and into the studs of the wall. Make sure to use a stud finder to mark where your studs are, and pre-drill into your shelf to keep the wood from splitting.
I filled the holes left behind with the 3M wood filler. I used the sanding pad to buff the spots once they were dry!
My final step before adding my cute hooks was painting it! I did a small piece of decorative trim to the bottom of my shelf on top of the planks. This is totally optional. I only did it to cover the transition from the shelf to the planks.
I taped mine off using ScotchBlue™ Painter’s Tape ,and used my trim paint on the whole thing!
 ,and used my trim paint on the whole thing!
DONE! Sounds like a whole lot of steps, but I promise this baby is easy to put together!
Here are a few finished shots…

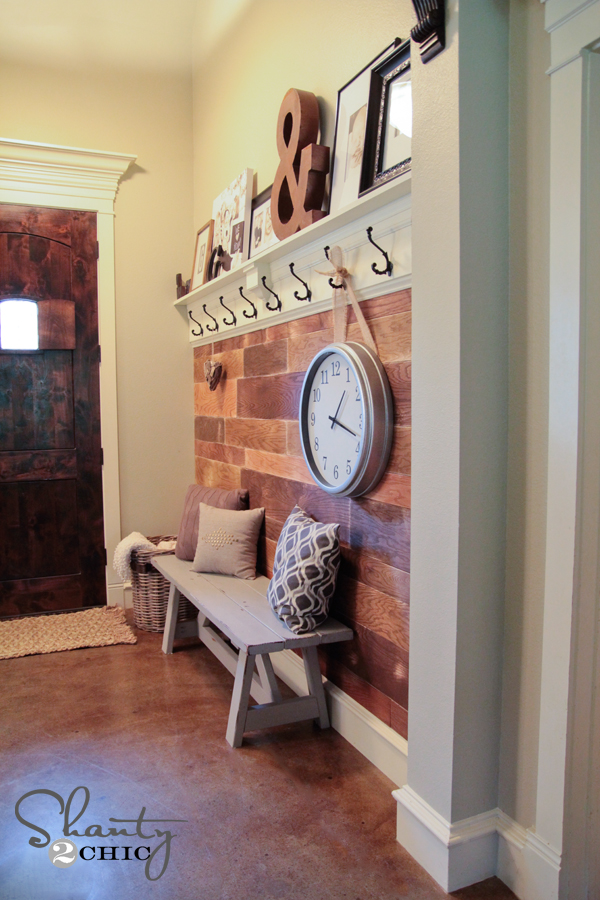
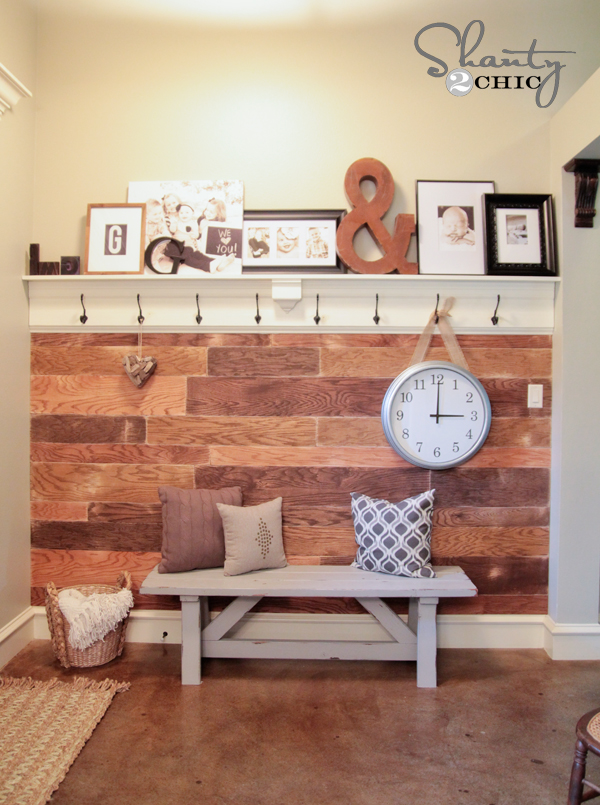

Hope you love it as much as I do!
Remember to check out the plank portion of the wall HERE!
I would love for you to share this shelf with your peeps and PIN it like crazy! 😉
You guys are great… Let me know if you have any questions at all!
Thanks!
~Whitney
This post is a collaboration with 3MDIY.com. To keep up-to-date on projects, products and sampling visit 3MDIY.com.
You can also keep up with them on all of their social networks!
3M DIY Facebook Page
3M DIY Twitter Page
3M DIY YouTube Page
Link to 3M DIY Pinterest Page


What’s up all, here every one is sharing these kinds of know-how,
thus it’s nice to read this web site, and I used to
visit this website every day.