Hey there! I just finished the last project in my dining room (for a while at least 😉 ) and I am so excited to show it to you!!
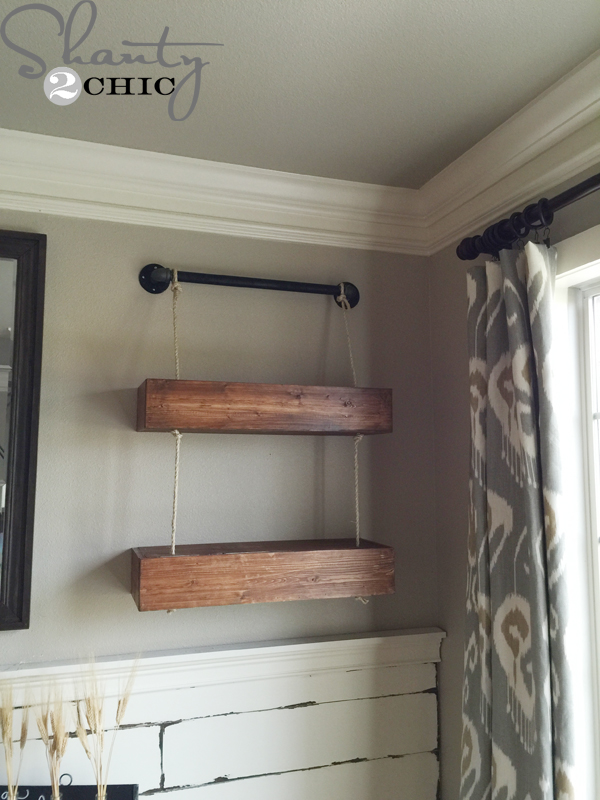
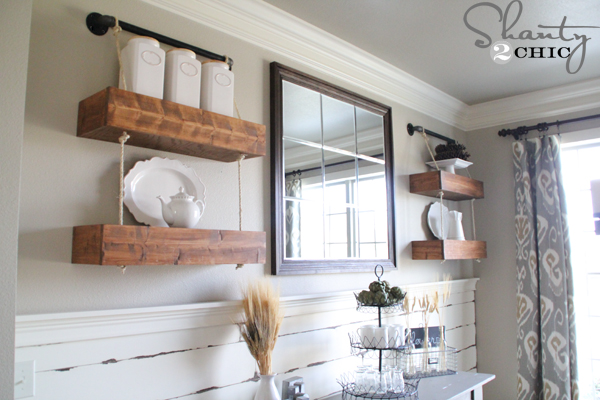
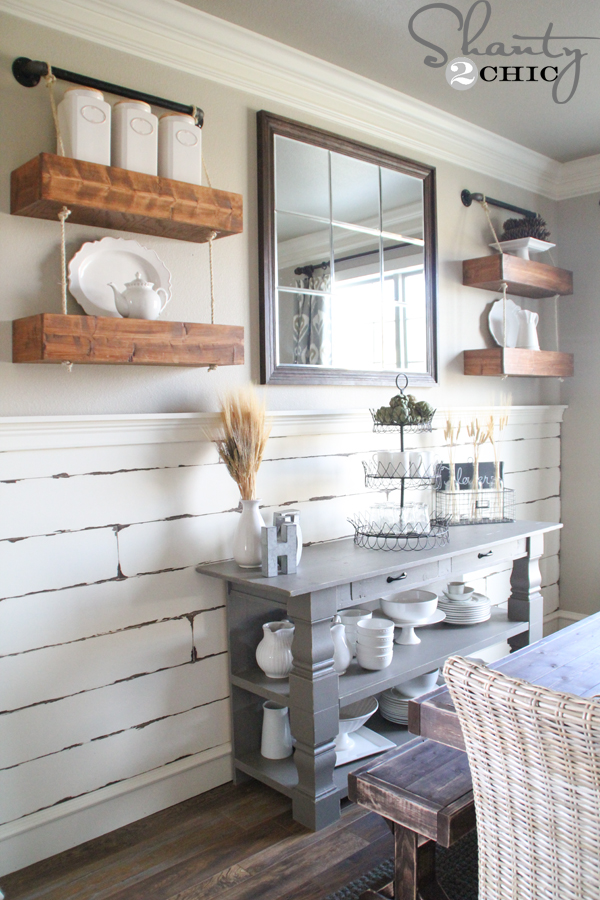 Pipe + rope + wood = OH MY!!! I created these floating shelves that appear to be hanging from metal pipes with rope! These are so easy to build and are basically a spin-off of all the easy floating shelves we have done! I think they add so much character to my dining room but they would look great anywhere and they can be modified really easy!
Check out our How to Build a Floating Shelf Video HERE!
Here’s how I created them 🙂
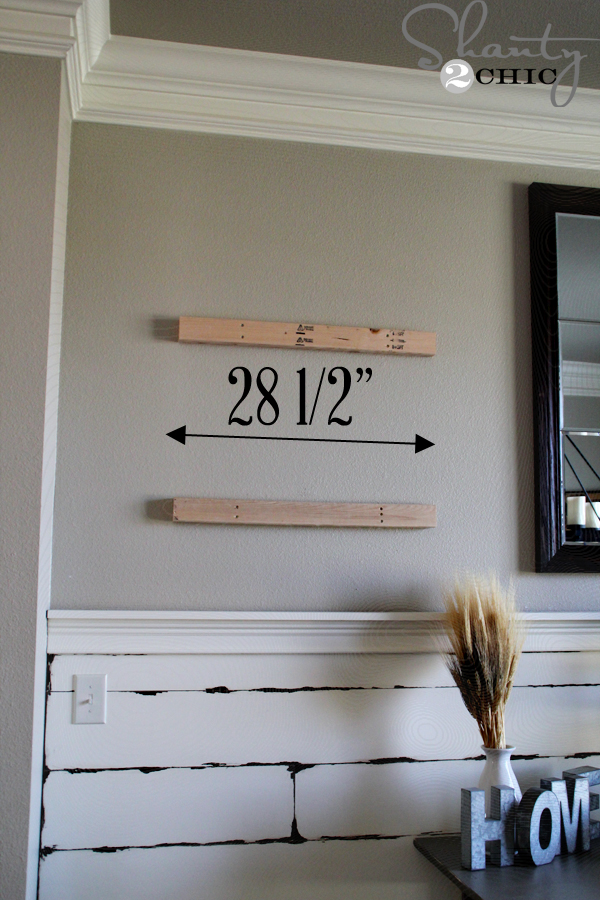
First, I used my stud finder to locate the studs behind the wall. Once the lines and studs were marked, I cut 1 2×3 at 28 1/2″ for each shelf. I used 3″ Spax screws and drilled 2 into each 2×3 where the studs were located.
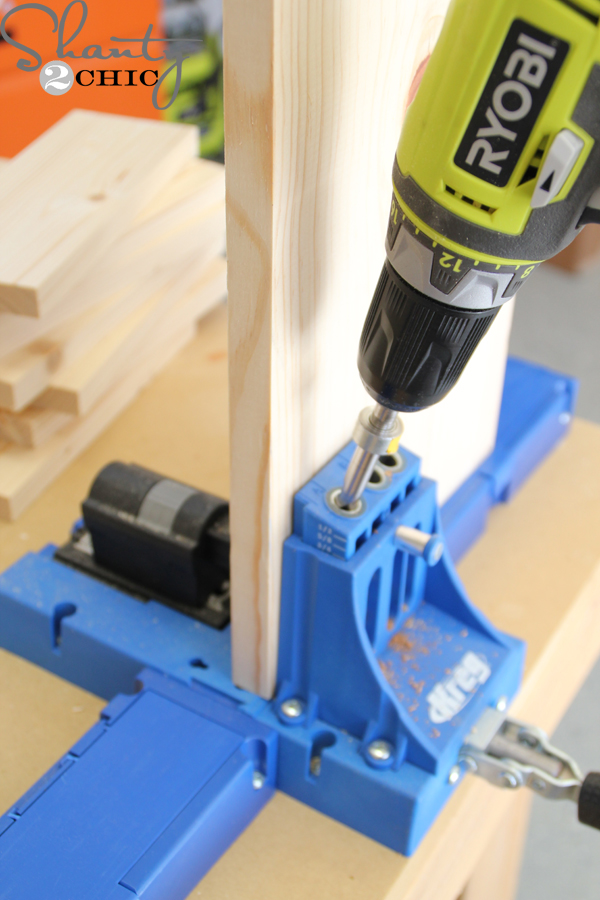
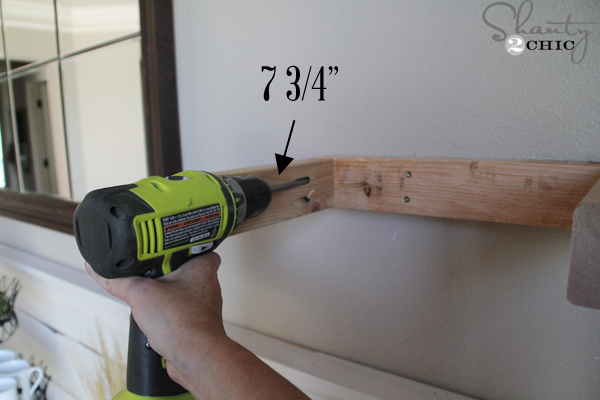 Then, I cut 3 2×3 at 7 3/4″ (per shelf). I drilled 2 pocket holes on one end of each 2×3 and attached one on each end of the long 2×3 and one in the middle with 2 1/2″ pocket hole screws and wood glue.
 Now to make them pretty 🙂
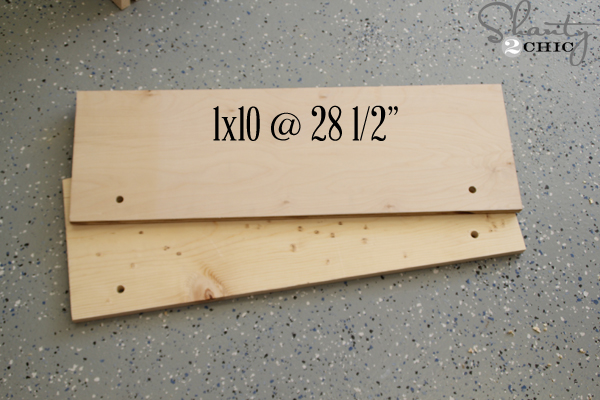 Next, I cut two 1×10 at 28 1/2″ (per shelf)
 and used a Ryobi Forstner bit to drill one hole in the bottom corners of each board. It’s easiest if you stack the two boards and drill the holes into both boards at the same time. (I used a bit that was the same thickness as my rope). I drilled my holes 3″ from the outside and 2″ from the front. You can place them anywhere just be aware of the hidden 2×3’s that will be under them as well as the pocket holes.
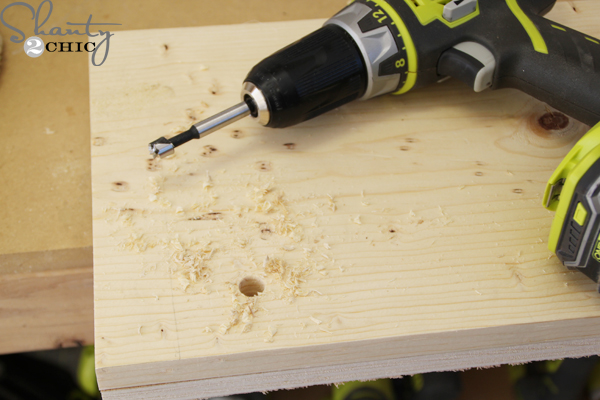
 Then, I drilled three pocket holes at each end of both 1×10 boards.
 Next, I cut two 1×6 at 9 1/2″ (per shelf)
 and attached them to the 1×10 boards, with 1 1/4″ pocket hole screws and wood glue, to create a box.
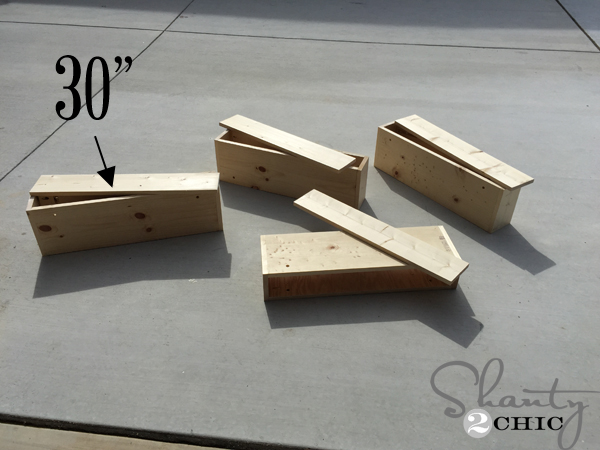 Once all of my boxes were constructed, I measured and cut 1×6 boards to create the faces to fit each box. Mine were 30″ but measure as you go for this.
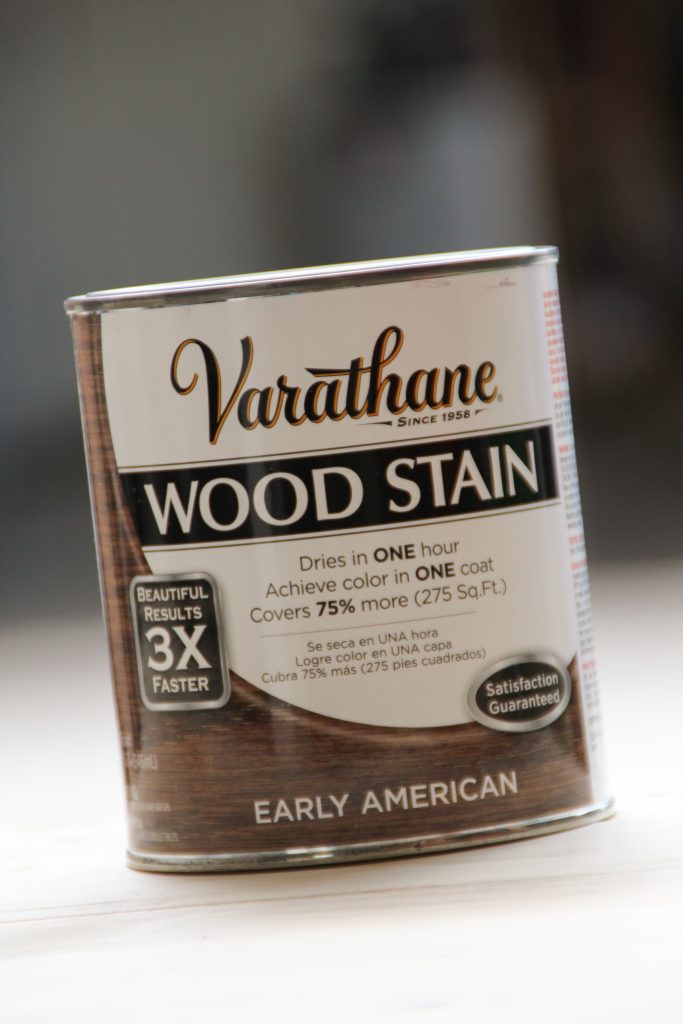 Before attaching them to the wall, I applied one coat of Varathane Early American all over the boxes and the faces. This is important because you won’t want to stain when the rope is already attached!
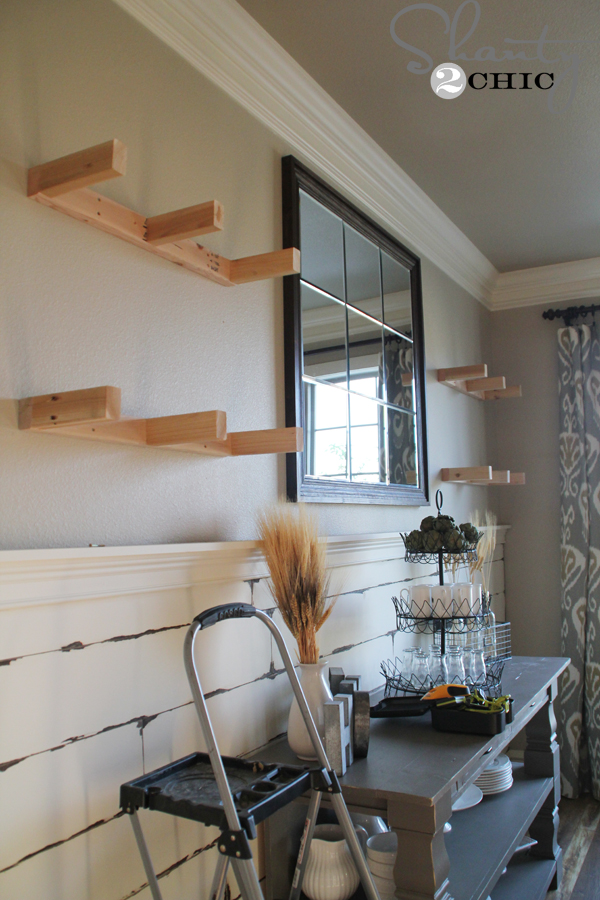
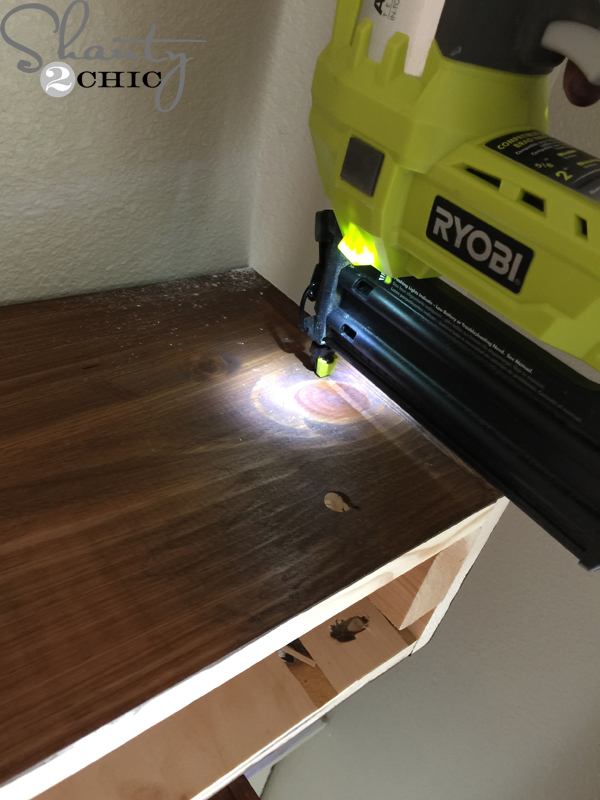 Once the stain dried, I attached each box to the 2×3’s that I attached to the studs. I used my Ryobi 18V Airstrike Nailer and put about three 1 1/4″ nails through the box into each 2×3. Make sure you center your shelves with each other before attaching them with nails.

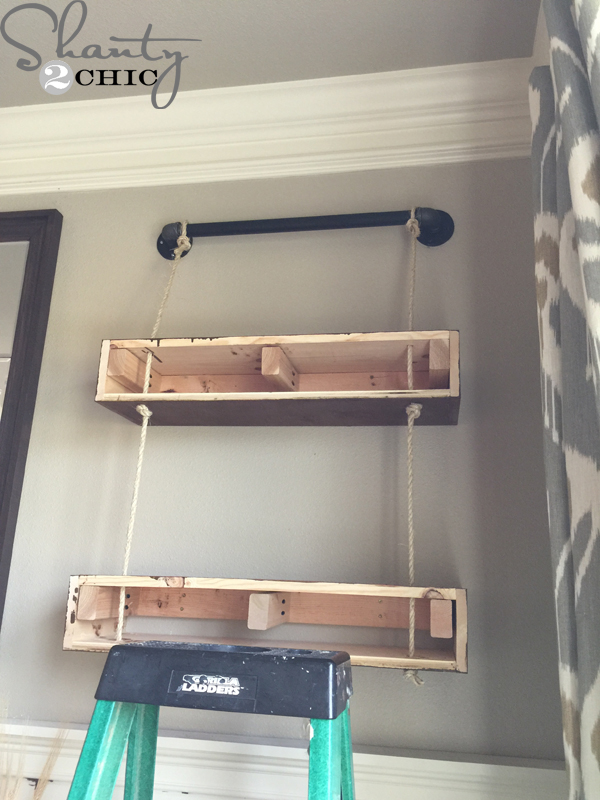
Once the shelves were attached, attached my assembled pipes to the wall. Here are links to the pipes that I purchased from Home Depot:
one – 1″x24″ pipe
two – 1″ elbow
two – flange
Before attaching them to the wall I assembled the pieces together. To attach them, I used screws and attached them on each hole on the flanges. If you don’t hit a stud, use an anchor! I was able to find one stud per flange but followed up with anchors on the remaining screws to be safe!
Now for the fun 🙂
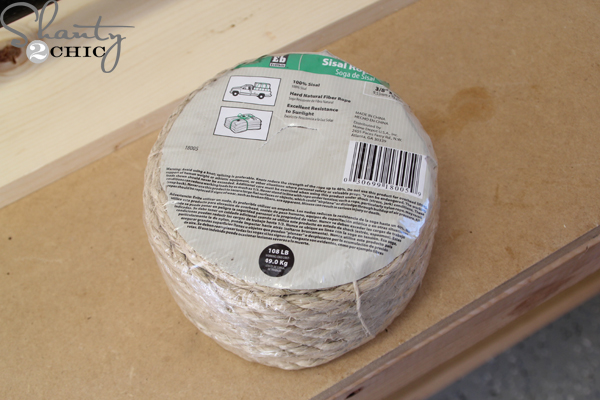 I purchased a roll of 3/8″ sisal rope at Home Depot (you won’t need the entire roll )
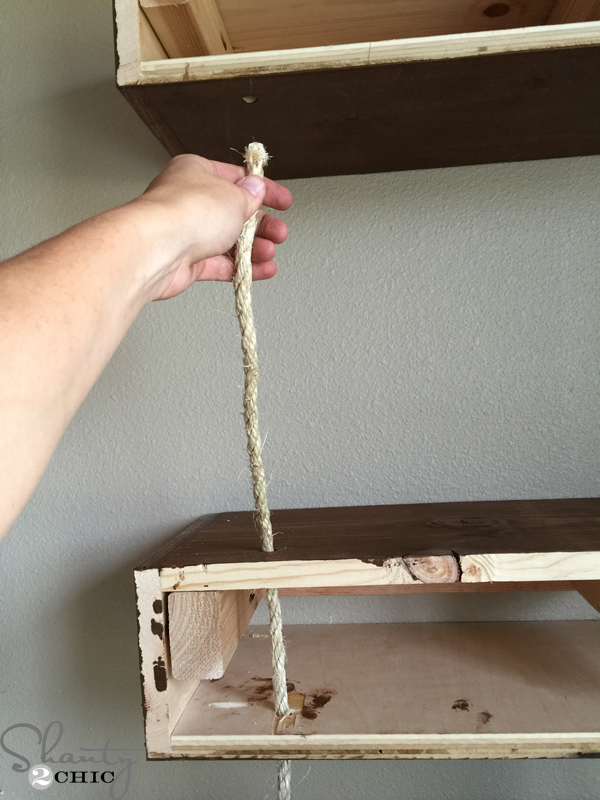 I started on the bottom shelf and ran the rope through the holes from the bottom of each shelf. I didn’t cut the rope from the roll at this point.
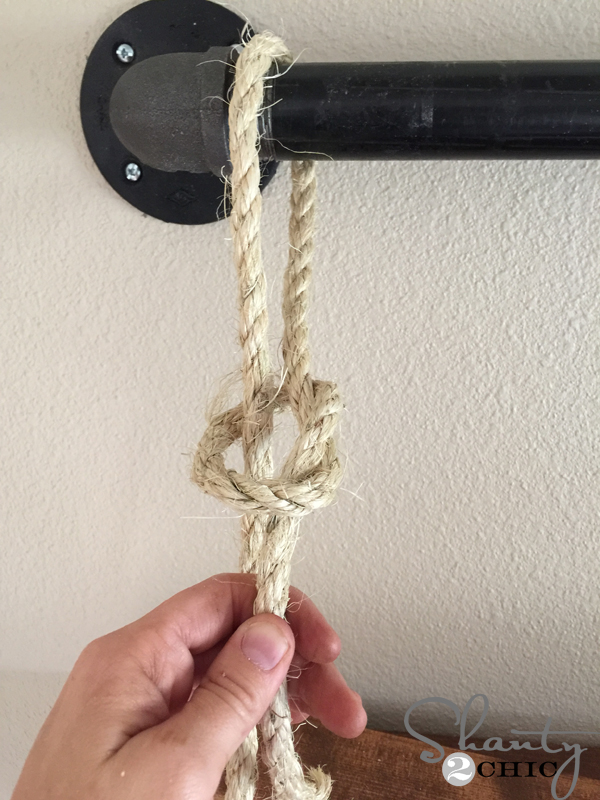 When I got to the pipe, I looped it and created a knot and slid it up. Then, I cut the rope from the roll. Make sure to give yourself plenty of slack at the bottom (maybe 12″).
 Next, pull the rope out of the bottom shelf and tie a knot under the top shelf. I did it this way to make sure that my rope was tight between the shelves.
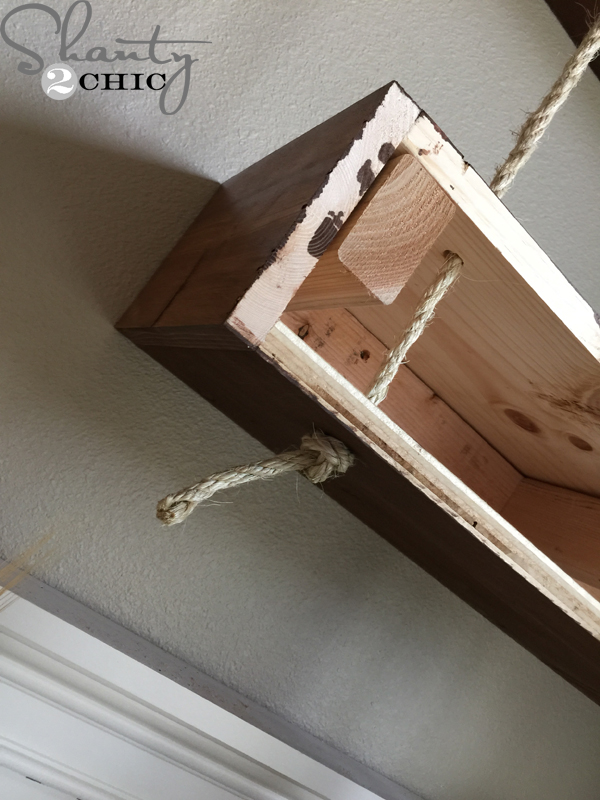 Then, run the rope back down through the bottom shelf and tie another knot under the bottom shelf. Cut away the slack.
 Follow up on the other side of the shelves and this is what it should look like at this point.
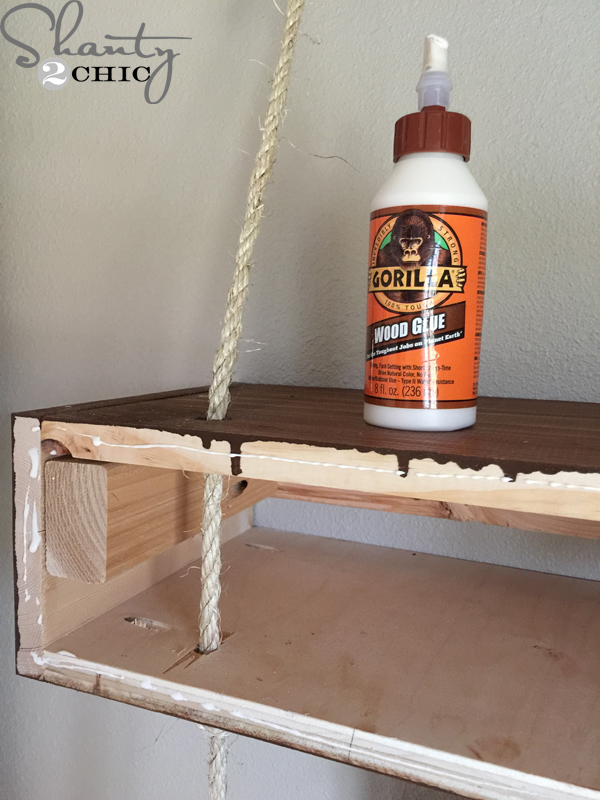 To finish them off, I ran a line of Gorilla Wood Glue on the front of each box and attached the face with my Airstrike Nailer and 1 1/4″ nails.
 Easy!!! Now to decorate them 🙂
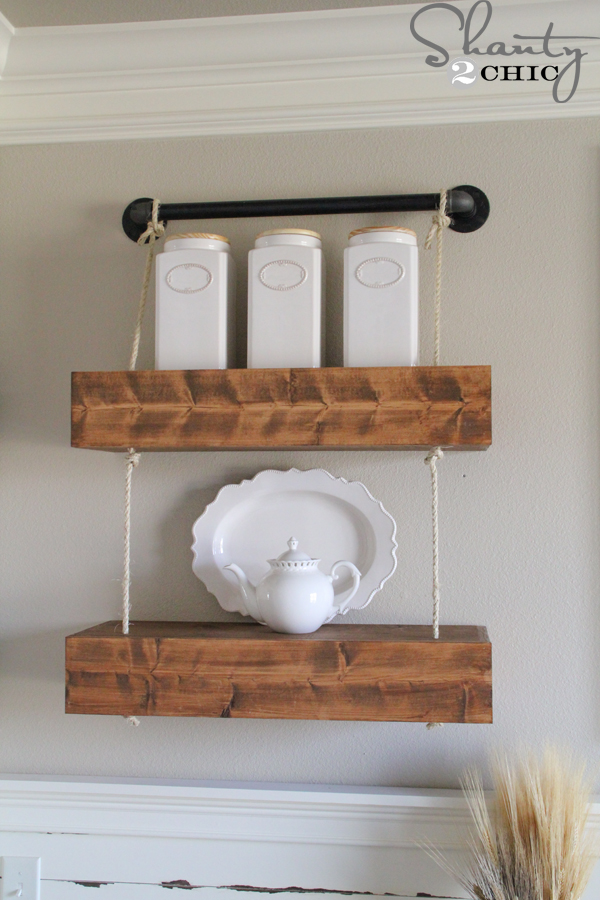 I found these white pieces at HomeGoods!
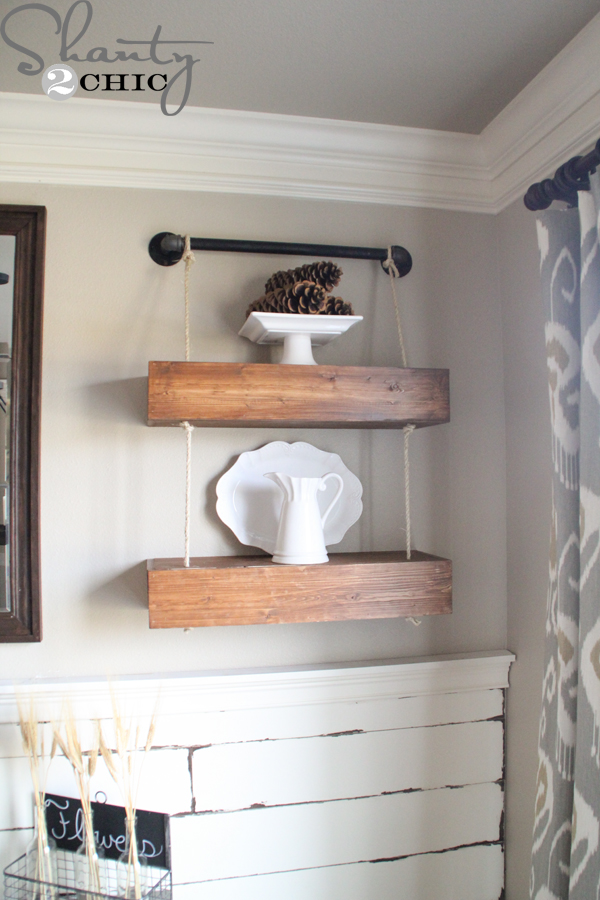 As well as these and I found the sugar cones at Hobby Lobby!
 Ahhhhh!
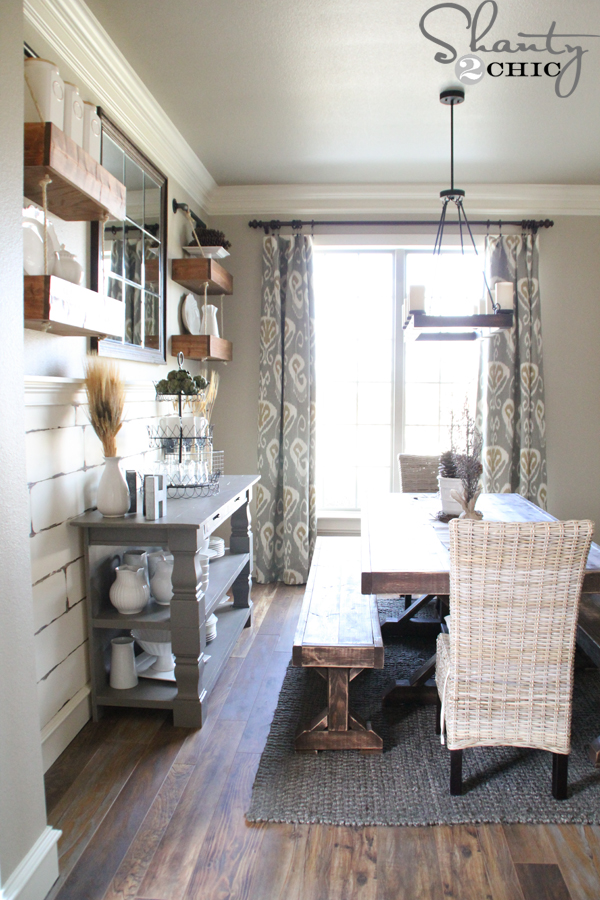
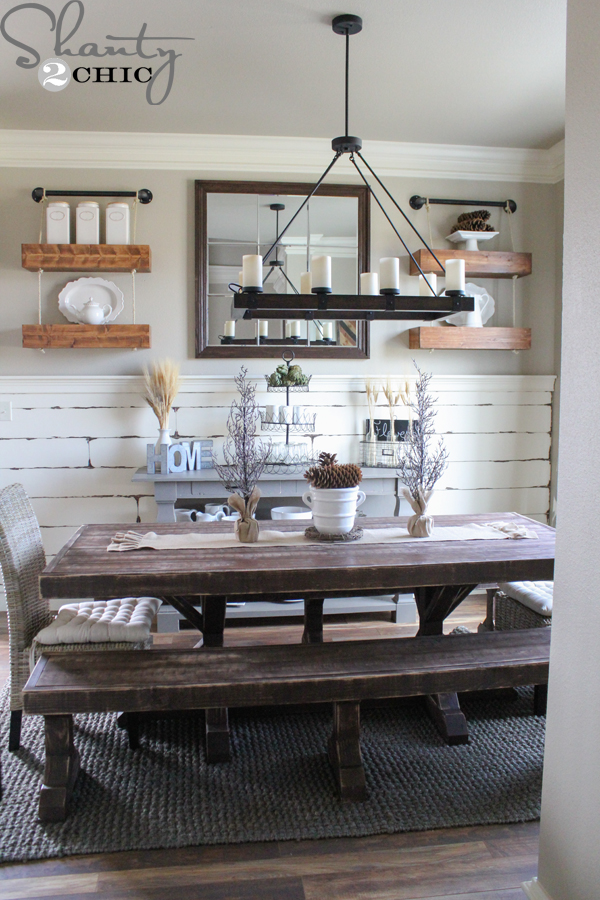
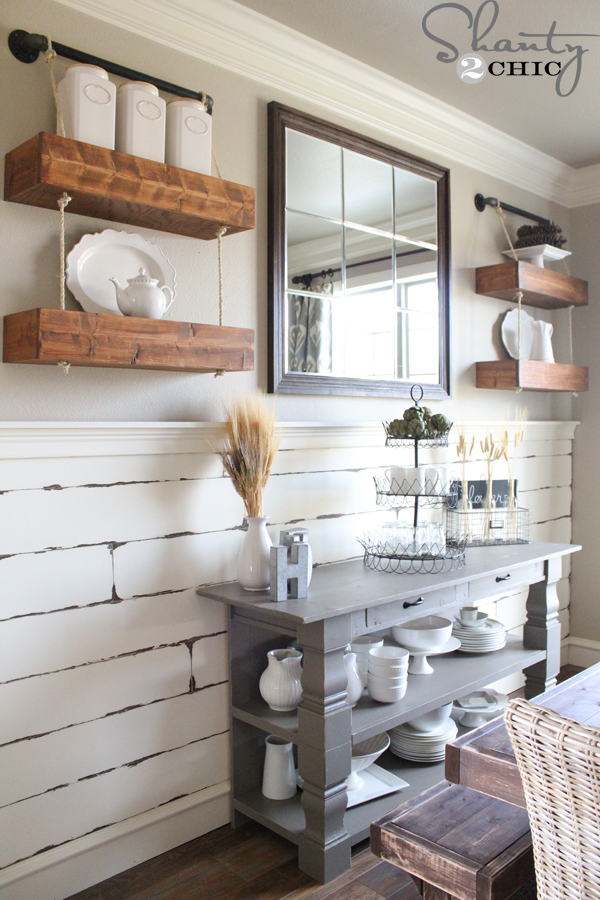
I’m totally in LOVE with my dining room and I have DIY’ed everything in it! Scroll down to the bottom of this post to find links to every piece you see in the room!
My rug is from World Market and the dining chairs are from Pier 1.
Thanks so much for stopping by!!!!
~Ashley


Do you have a materials list for the entire project? Maybe I overlooked it. Thanks!
Maybe I missed it, but do you have an approximate cost for this project? I’m hoping to build it for our living room, but it would be nice to have price idea before getting started.
About $120 for all four shelves and the pipe. The pipe is the bulk of the cost. Prices of supplies vary, regionally. If you need an exact price, I linked to the pipe materials and you can look the supplies up online at Home Depot. Hope this helps!
Thanks so much!
your house is so amazing.
These are so cool!! And I’m pretty excited to see easy tools like these using your phone… I need easy and straightforward or I’m bound to screw up, lol!
I love the ideas that I get from your site. Thank you!
Awesome post. 🙂 The new Ryobi phone tools look awesome. Thanks for sharing!
So cute
I absolutely LOVE your dining room. I’ve been looking around for ideas on a bench type kitchen table to build for ours and yours is great. Thanks for the wonderful ideas!