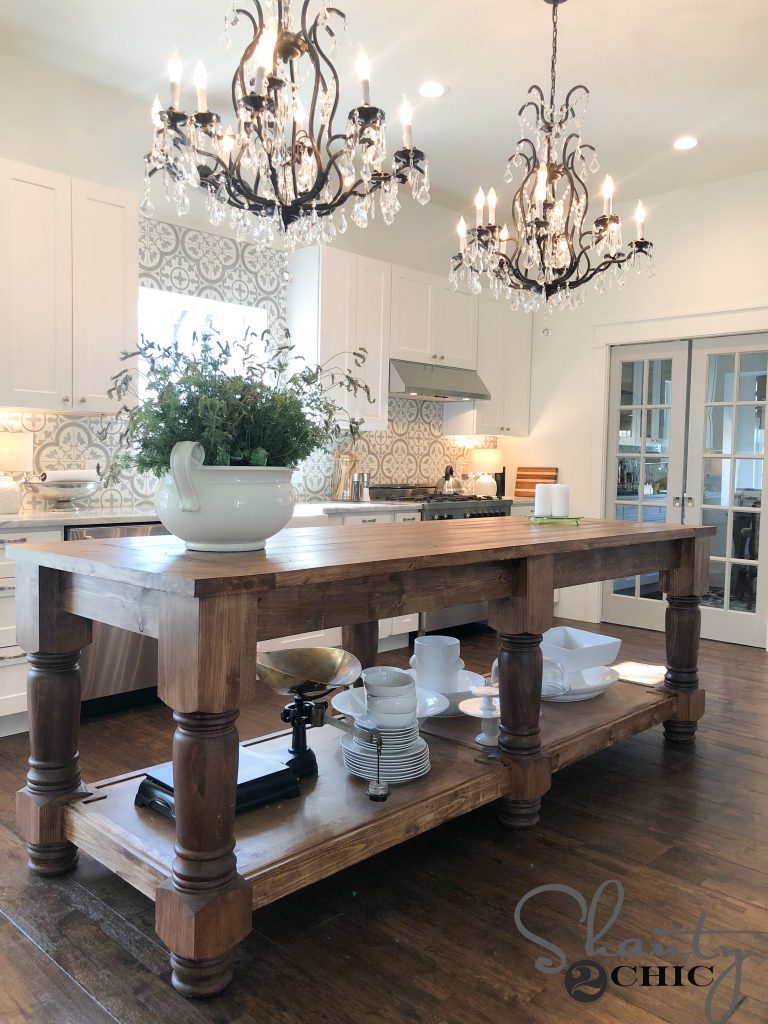
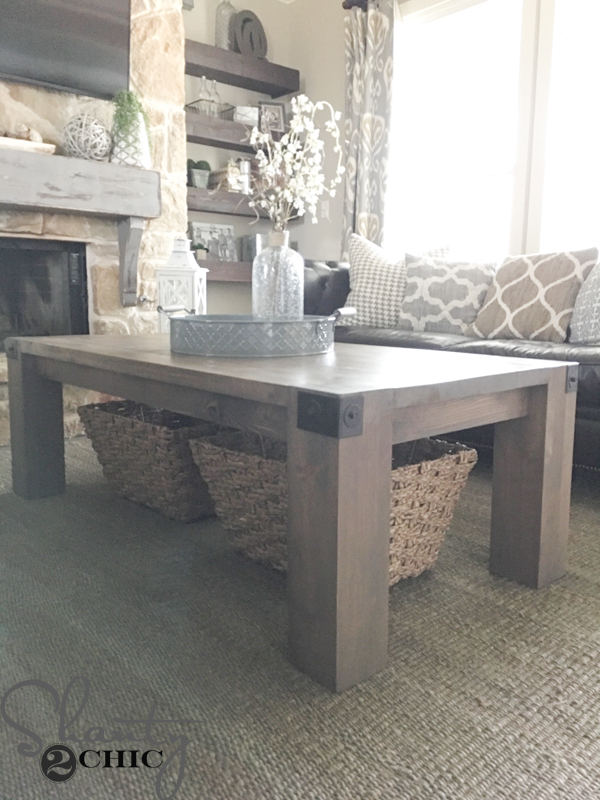
This DIY Kitchen Island might be one of our favorite builds yet! Not only is it one of our favorites, it’s also one of the largest pieces we have built together! The homeowners wanted a giant island to fill their new kitchen space. So, we got busy designing and building!
You can watch the how-to build by clicking the Play Button in the box below!
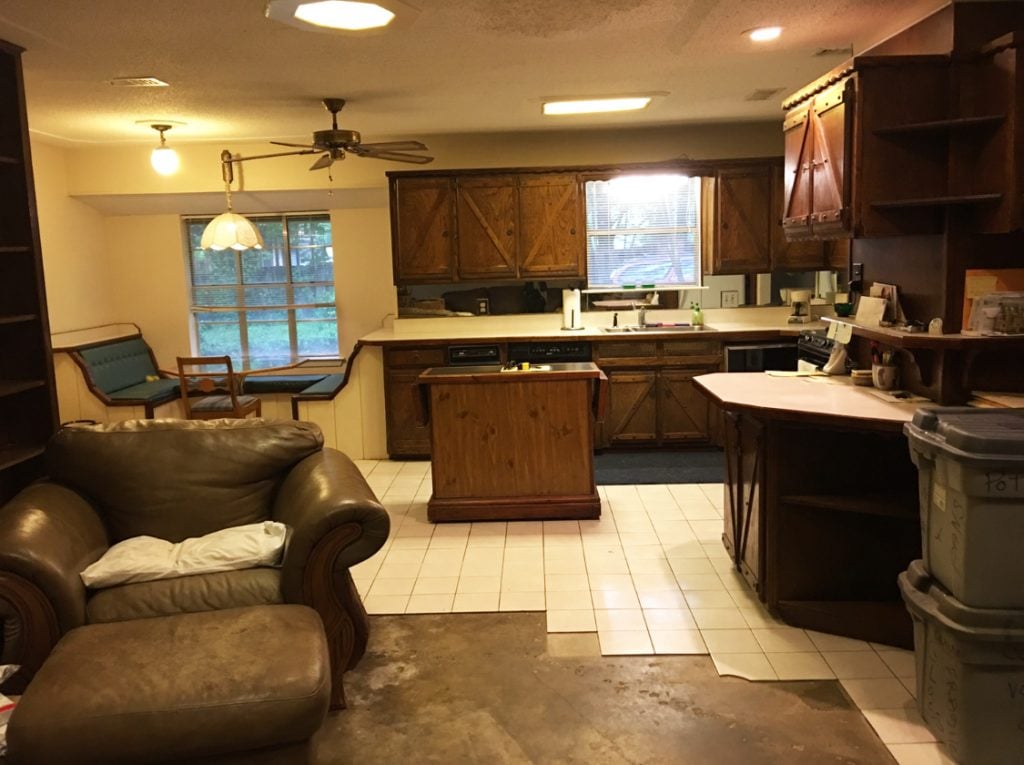
They recently purchased and renovated this 1970’s ranch style house.

DIY Kitchen Island
The transformed it into a big, beautiful, open home now that is just begging for some Shanty furniture!
That’s where we come in! We are going to fill their big, beautiful, open home with custom furniture AND we are sharing the free plans and how-to videos with all of you! So, the first order of business was tackling their kitchen! They envisioned a chunky 8.5′ kitchen island and that’s exactly what we gave them!

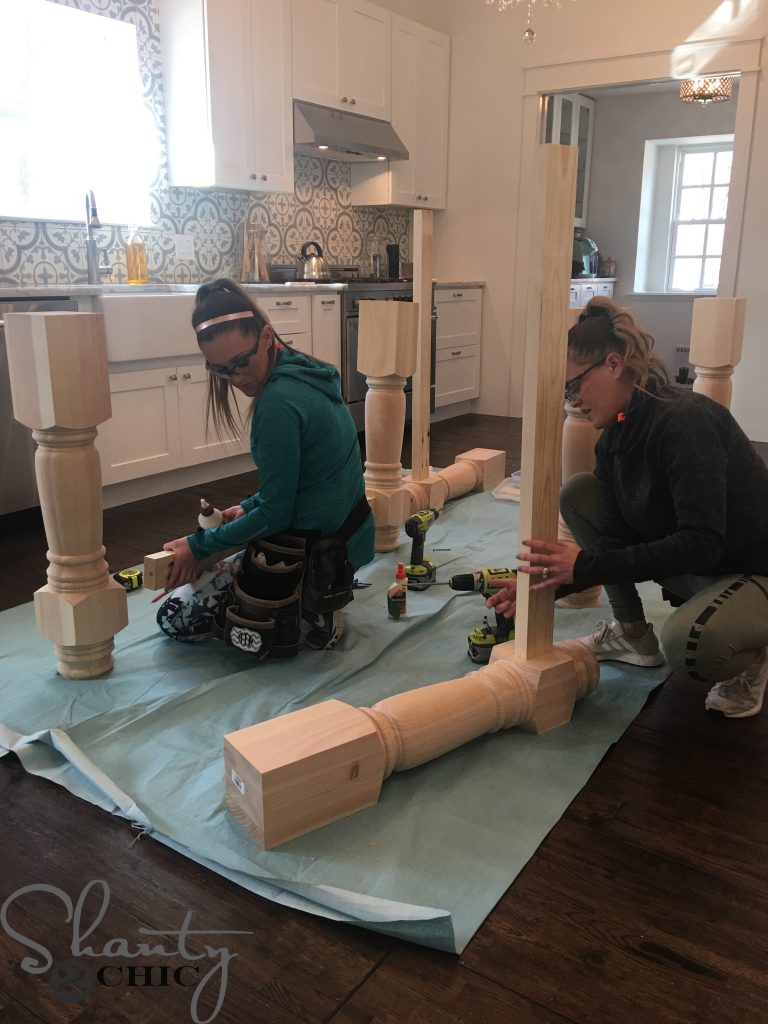
DIY Kitchen Island – The Legs
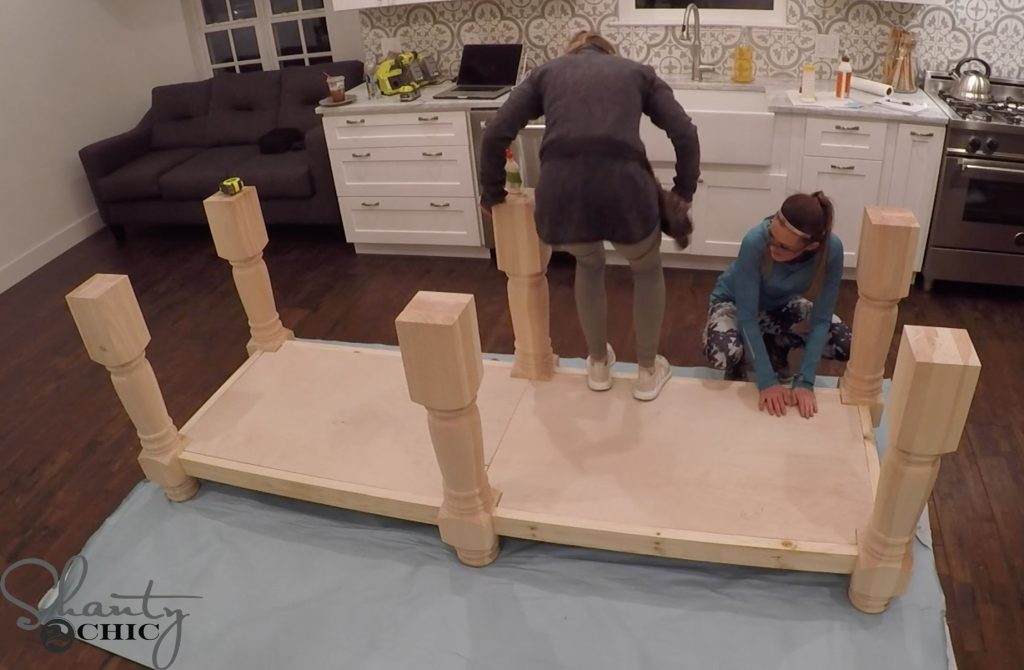
The show stopper in this island is the massive 6″ turned legs – how amazing are they?!
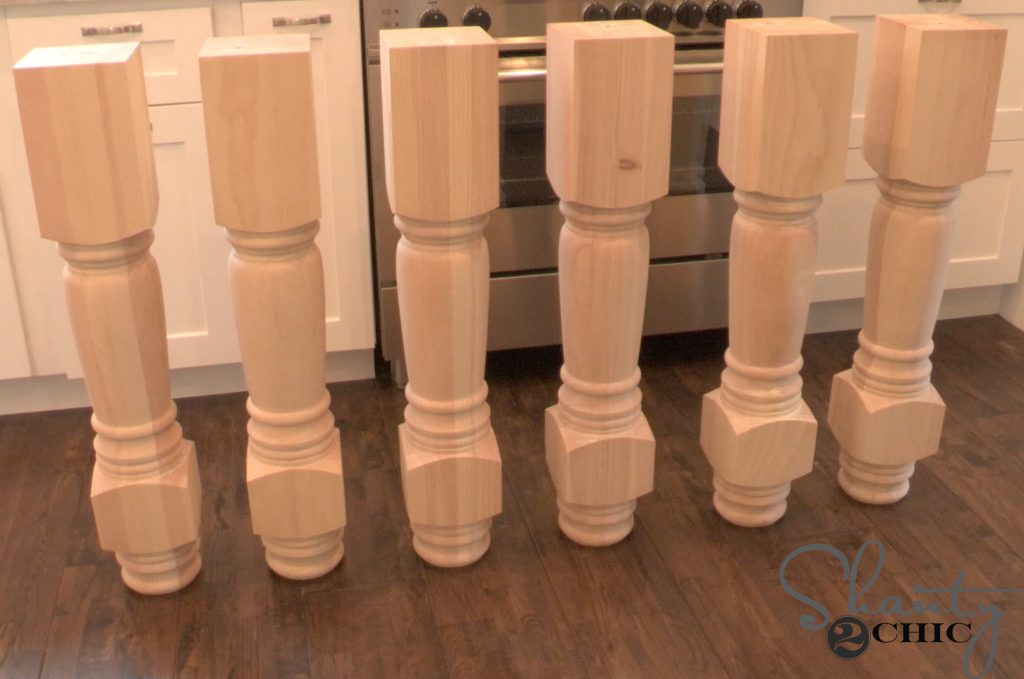
You can find them from Osborne Wood Company HERE! We used the knotty pine. This is where most of the cost comes from in this island. If you are looking to build a more budget friendly island, you can definitely use a thinner turned leg or build the island with only 4 legs. Total cost of this piece was about $1,000, which is AMAZING for a giant custom island like this one!
DIY Kitchen Island – Free Plans
Make sure to download the FREE Printable Plans HERE and follow along with us as we build it below!
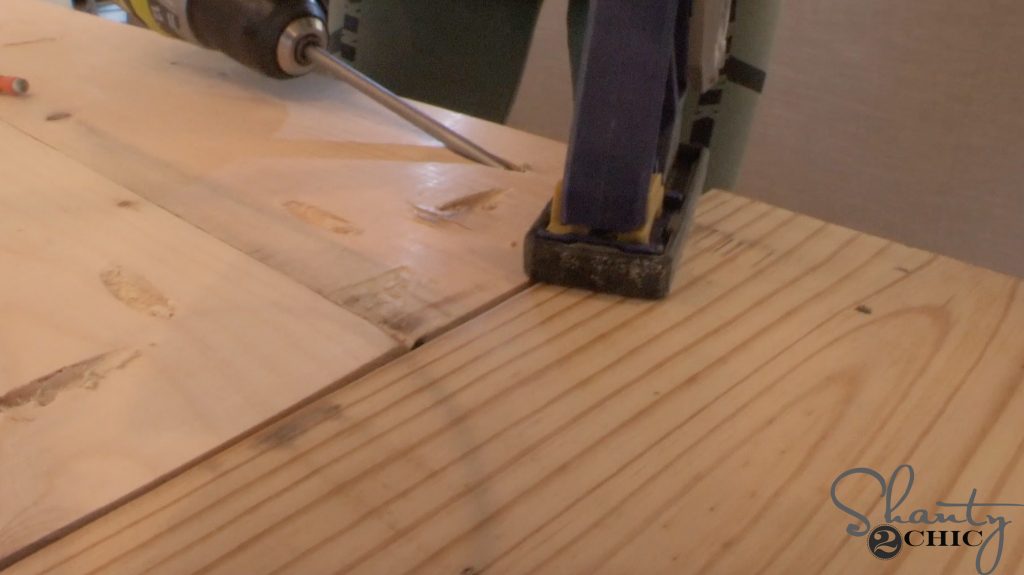
1. Making the cuts

We used our table saw to rip the rounded edges off of the planks. You can see how we do this in our how-to video HERE! Refer to the printable plans to get the exact width that we ripped each board to!
2. Drilling Pocket Holes
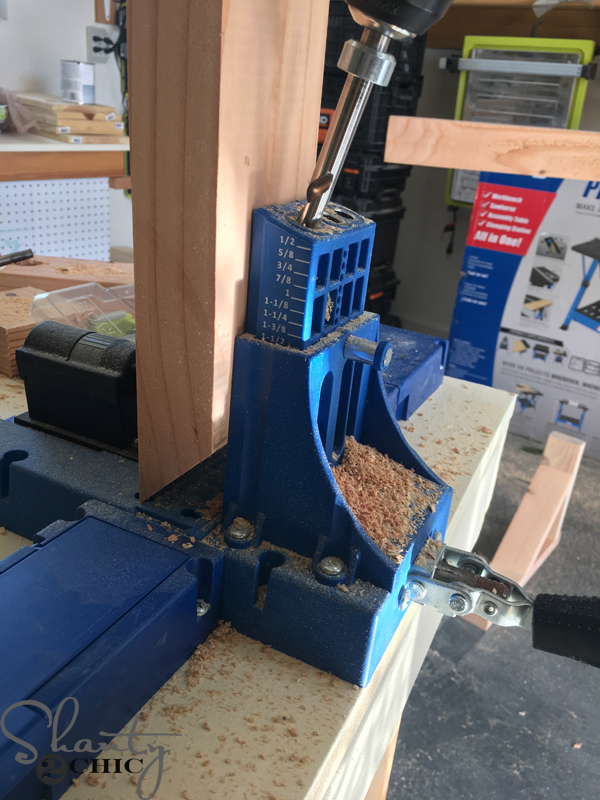
After ripping the boards, we cut the table top planks and used our Kreg Jig to drill 1 1/2″ pocket holes on both ends of every board sand on one side of 6 of the boards. You can find our favorite Kreg Jig model HERE. And, don’t forget to watch our How to Use a Kreg Jig video HERE!
3. Table Top
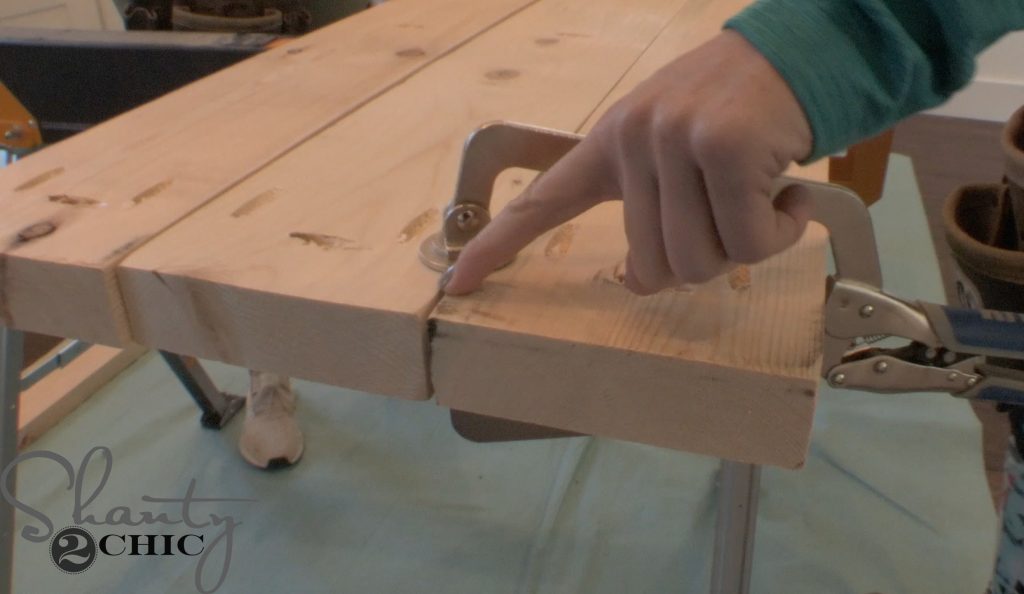
Then, we used our Kreg Face Clamp and and 2 1/2″ pocket hole screws to attach the planks together. You can find the Kreg Face Clamp HERE and our Sawhorses HERE.
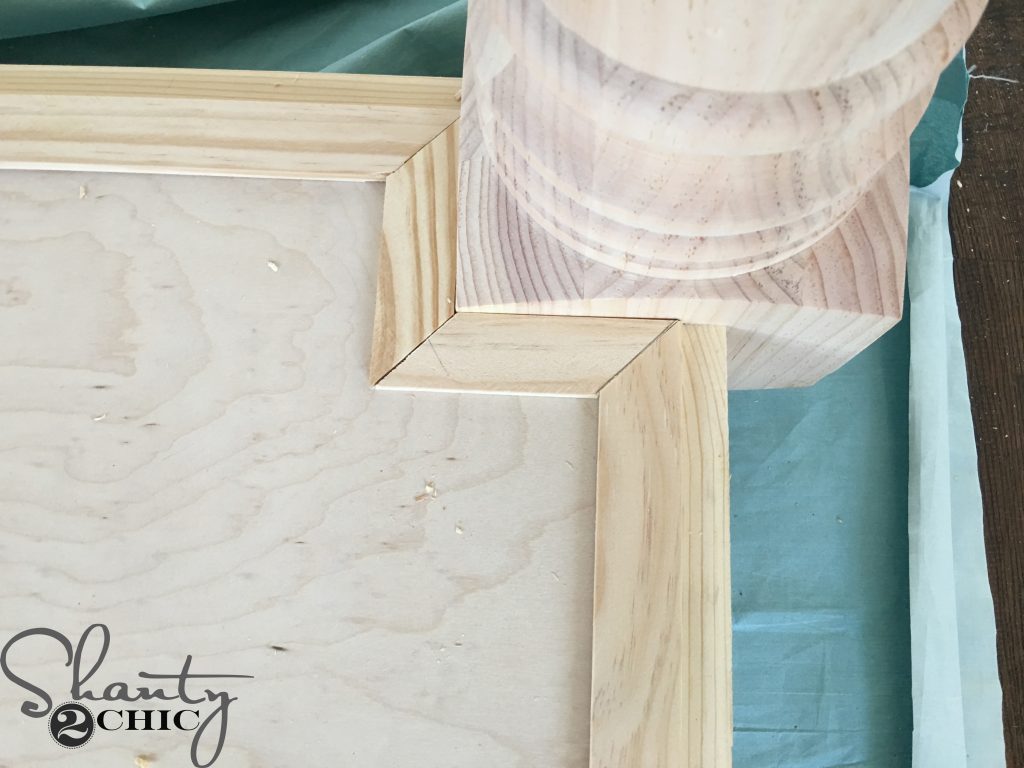
4. Bread Boards
Once the planks were attached, we measured and cut for the breadboards. We attached the breadboards to the planks with 2 1/2″ pocket hole screws.
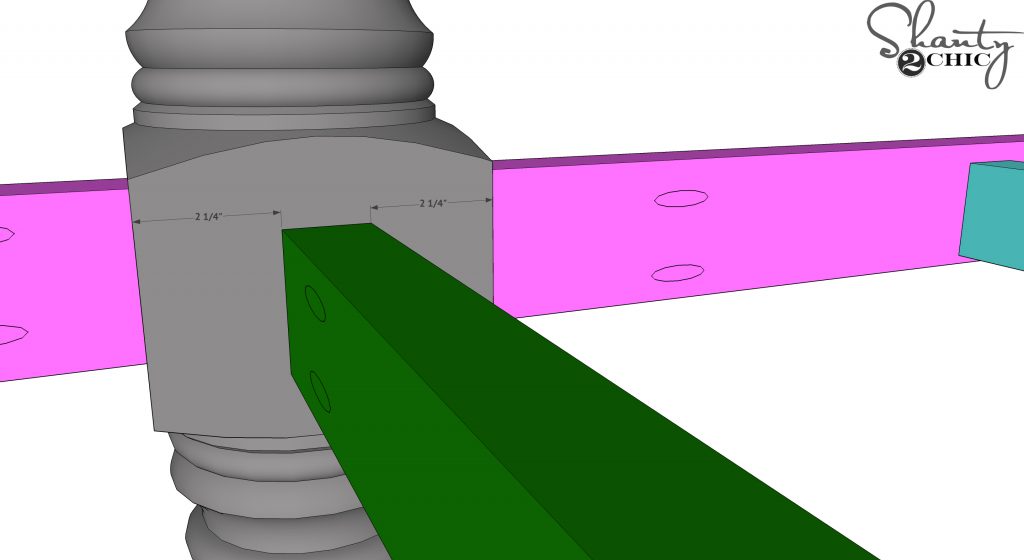
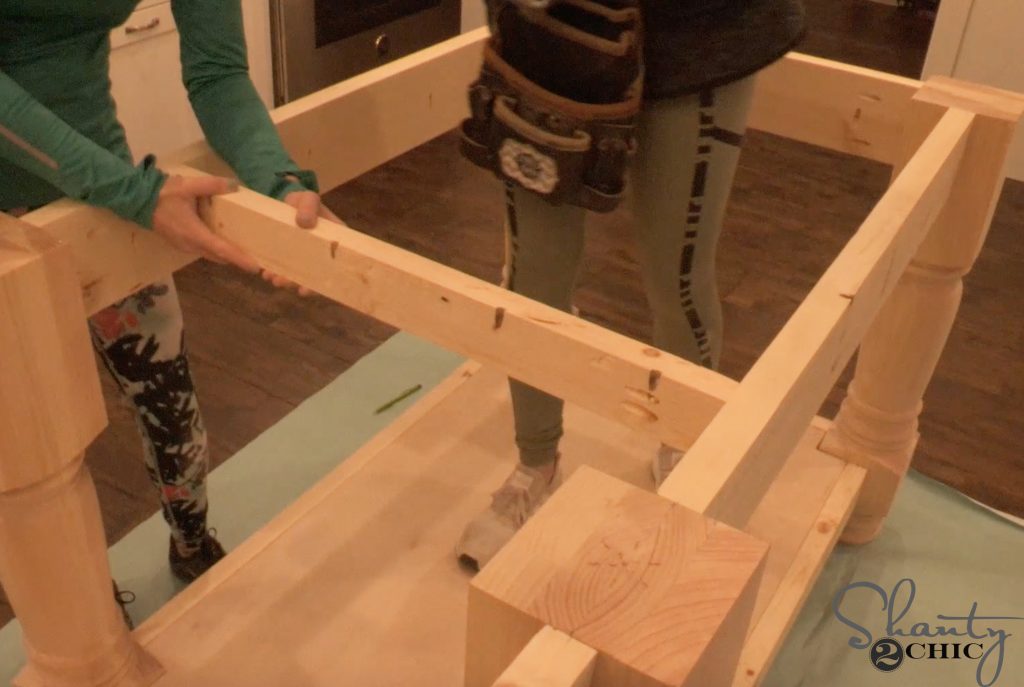
5. Bottom Apron Pieces
Next, we cut the bottom, front and back apron pieces to size and drilled 1 1/2″ pocket hole screws at both ends of each piece. We centered them on the bottom block of the legs and attached them wit 2 1/2″ pocket hole screws and wood glue.
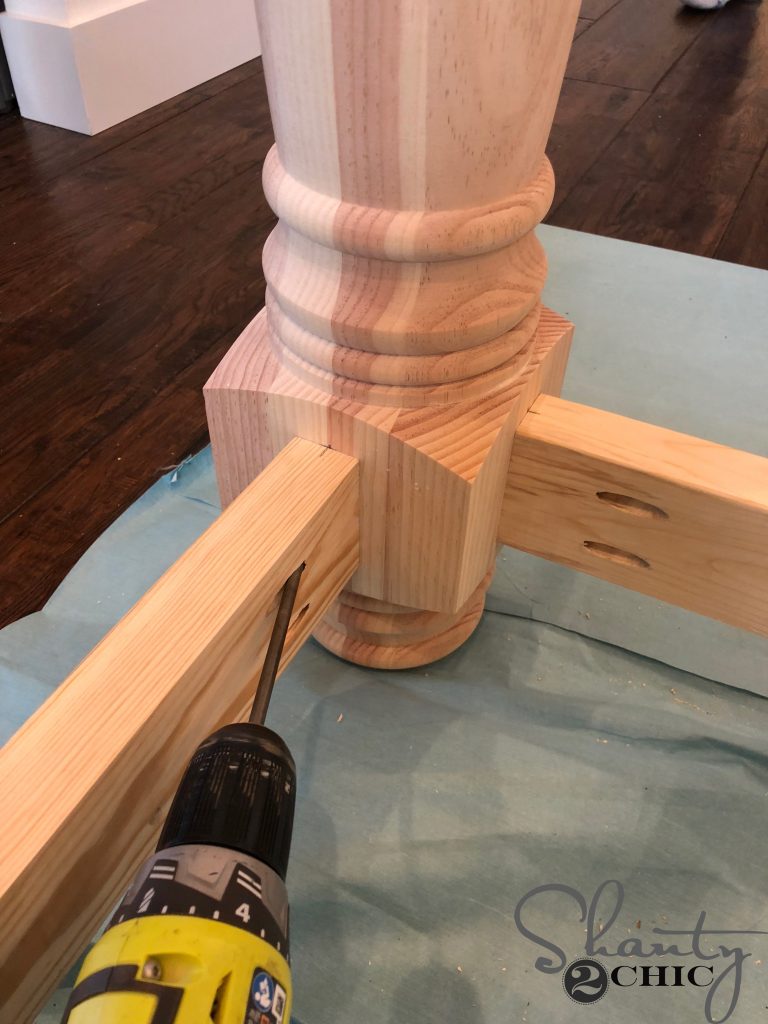
We cut the bottom side apron pieces to size and drilled 1 1/2″ pocket holes in the ends of each piece. We centered them on the bottom block of the end legs and attached them to one leg base assembly, and then the other, with 2 1/2″ pocket hole screws and wood glue.
6. Bottom Support Pieces
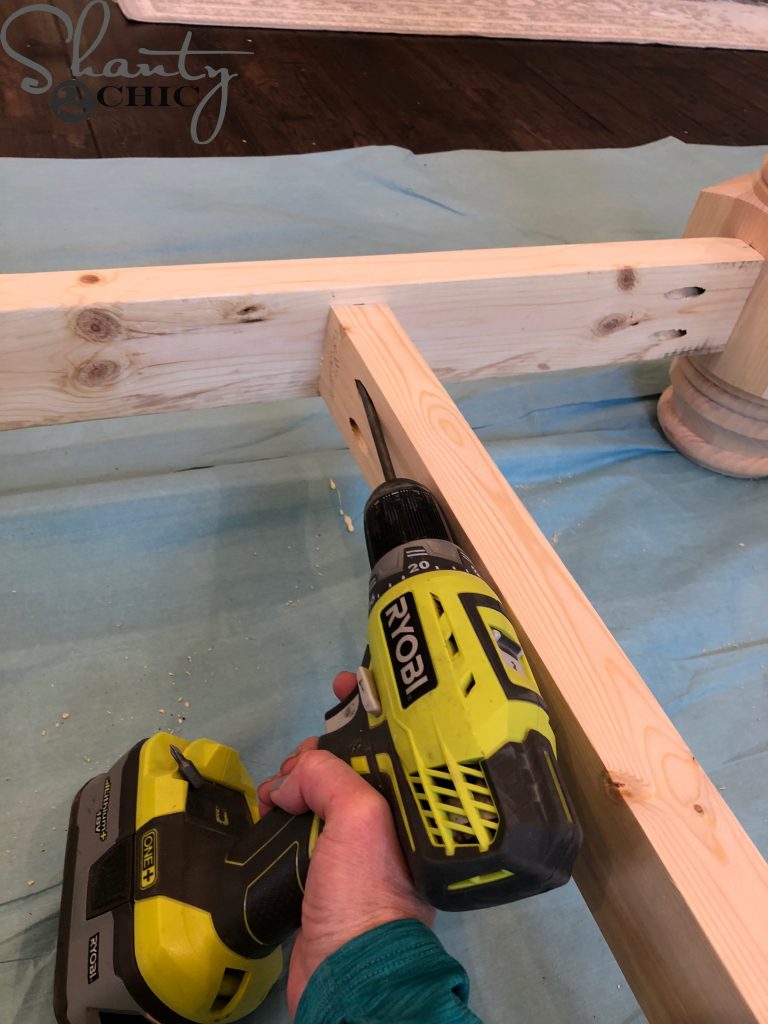
Next, we cut the bottom support pieces to size and drilled 1 1/2″ pocket holes on both ends of each piece. We spaced them out evenly and attached them to the side aprons with 2 1/2″ pocket hole screws and wood glue, 1/2″ from the top of the apron pieces.
We cut the bottom, center support to size and drilled 1 1/2″ pocket holes at each end. We centered it on the bottom blocks of the center legs and attached it with 2 1/2″ pocket hole screws and wood glue. Make sure it is level with the other support pieces.
7. Bottom Shelf
Once the bottom supports were attached, we cut the hardwood plywood shelf pieces to size and attached them to the supports and the apron pieces with 1 1/4″ brad nails and wood glue.
If you don’t want to use wood filler to fill the gaps around the leg notches, you can use 1 1/4″ lattice to cover the gaps. Just measure and cut the trim as you go. Center the trim over the seams and attach it with 5/8″ pin nails and wood glue.
8. Top Apron Pieces

Next step was to add the top apron pieces. We cut the front and back apron pieces first and drilled 1 1/2″ pocket holes on both ends of each piece. We centered them on the top block of the legs and attached them with 2 1/2″ pocket hole screws and wood glue. The top of the aprons should be flush with the top of the legs.
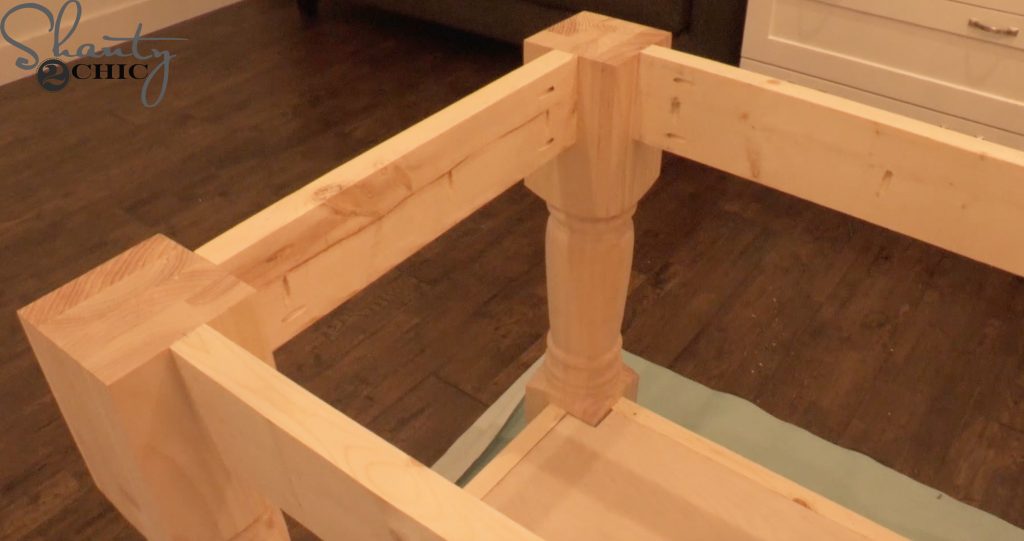
Cut the top, side apron pieces to size and drill 1 1/2″ pocket holes on both ends of each piece. Center them up on the top block of the legs, the same way as the previous step.
8. Top Support Pieces
Next, cut the top support pieces to size and drill 1 1/2″ pocket holes at both ends and one edge of each piece. Spread them out evenly and attach them to the top, from and back aprons with 2 1/2″ pocket hole screws and wood glue. The top of the supports should be flush with the top of the aprons.
9. Attach the Table Top
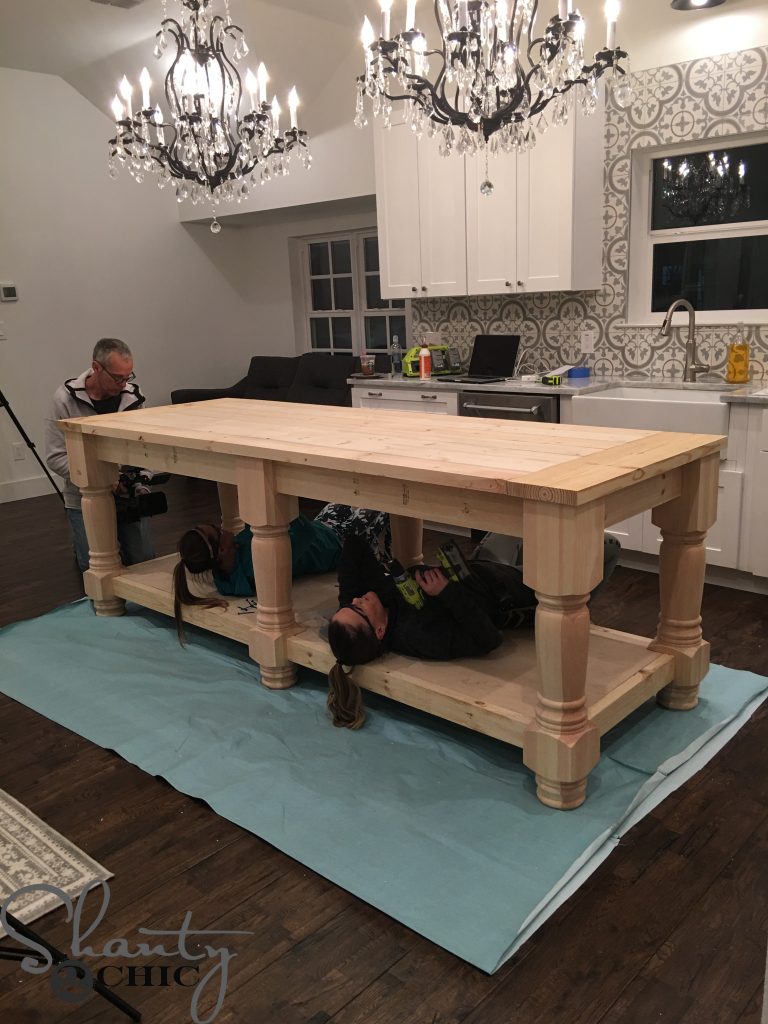
Finally, Center the planked top over the island base. Attach the top to the base with 2 1/2″ pocket hole screws, from the supports and aprons, into the bottom of the planked top. The top should overhang each leg by 3/4″.
10. Stain and Poly

The final step was to give this beast a finish! We used one coat of THIS STAIN and finished it off with 2 coats of THIS POLY!
How amazing is this?!
We can’t wait for you to see all of the other pieces that we are building for their new home! Make sure to subscribe to our Youtube channel HERE so you don’t miss anything!
More info on the items in this space:
Chandeliers: HERE
Farmhouse Sink: HERE
Stain: HERE
Polyurethane: HERE
Counter Top: Crystal Fantasy Granite
Backsplash Tile: The Tile Shop
White Dishes: AtHome
Flooring: Floor and Decor
Paint on Walls: Pure White by Sherwin Williams
Paint on Doors:
Island Legs: HERE
Thanks so much for stopping by!
Happy Building!

How is the total cost around $1,000 when the legs alone are $1,515.54 ($252.59 x 6)?
Link to poly shows out of stock and I cant tell exactly what the product is.
This is very nice. Thank you! I am going to make a smaller version of this for my daughter. I recommend using a more substantial top for such a large piece. Even for one half the size, that top is way too thin. It looks awkward as is- at first I thought the top was a base for a porcelain top. I would think 2” or larger would be more appropriate and take away that “unfinished” awkward look.
I came to see how old this was because the legs alone are $1,500. Still cost effective compared to other cabinet islands or a custom job. Looks nice!
Hi, I have a question. There are dining room table legs that I live but only come in pine. I’m worried that pine will be too soft. Any thoughts on this?
This is seriously beautiful! I am in awe.
I want to thank. you both for all the inspiration that you give with your talent. I recently remodeled my kitchen with your open shelf kitchen island in mind. My contractor added steel beams on the top to support the overhang for seating. The measurements are 52 x 104 when finished. I absolutely LOVE my island. It makes a statement as soon as you walk into the door. We simply add stools around it for family game night. It has been a major life changer in our home. Thank you for all your guidance and knowledge. I sure appreciate it. Also, my contractor now uses a Kreg Jig with no problem…..lol. I will try to add photo’s if allowed.
This is amazing! What tools or strategies do you use to make the top planks even and level with each other? Planer? Jointer? Thank you!!
What was the total cost to build the island. It’s beautiful. You ladies are amazing! In the future a total cost to make your beautiful furniture would be very helpful.
They said that the
Total cost of this piece was about $1,000, which is AMAZING for a giant custom island like this one!
It’s in the post ?
FYI, I just spent over a thousand for just the legs and shipment. Still will be less than going somwwhere.
Thanks for the great tutorial! The kitchen island looks great, who would’ve thought you can create something so beautiful from recycled old furniture. We’re about to redesign our kitchen this year, and I’ll definitely try to create something similar, it would save us a ton of money on a kitchen island.
Ok, so here’s a stupid question…did you stain the underside? Specifically the underside of the top?