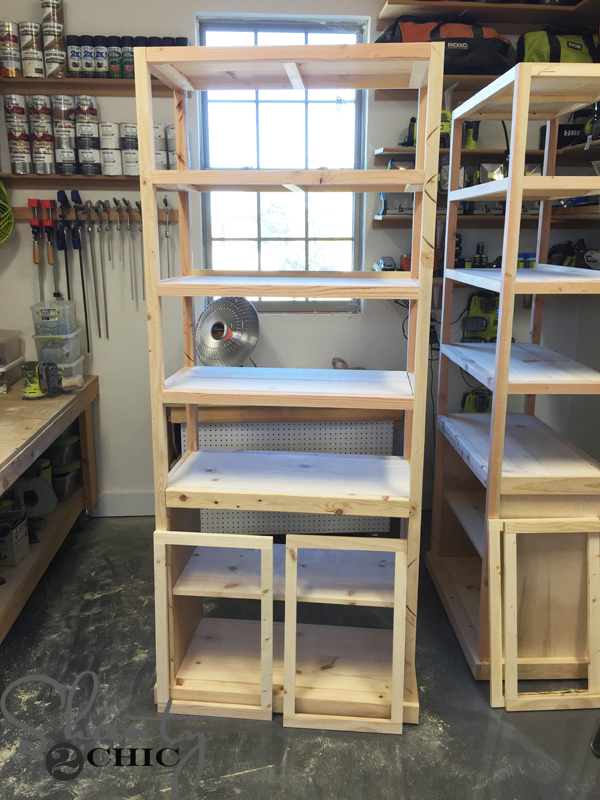
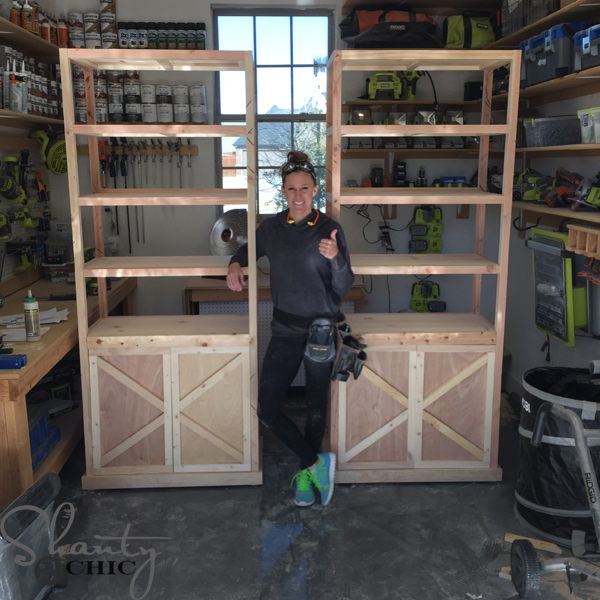
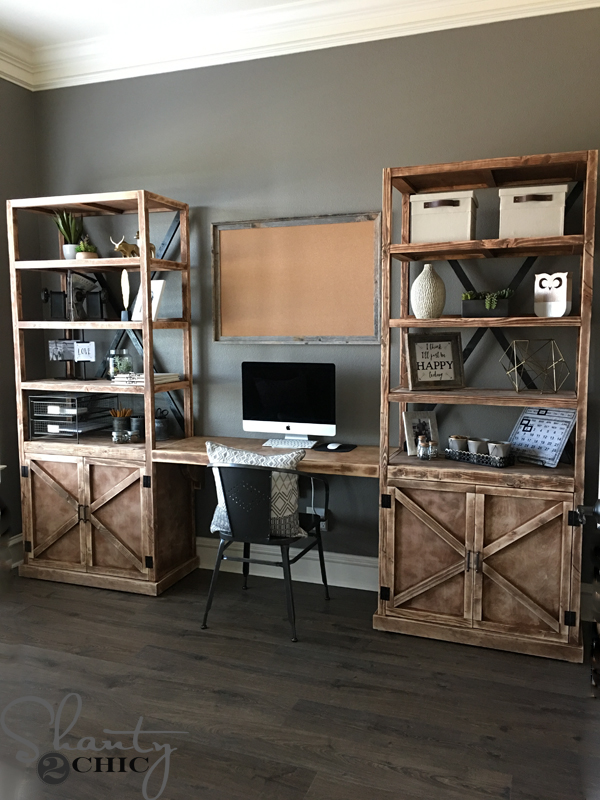
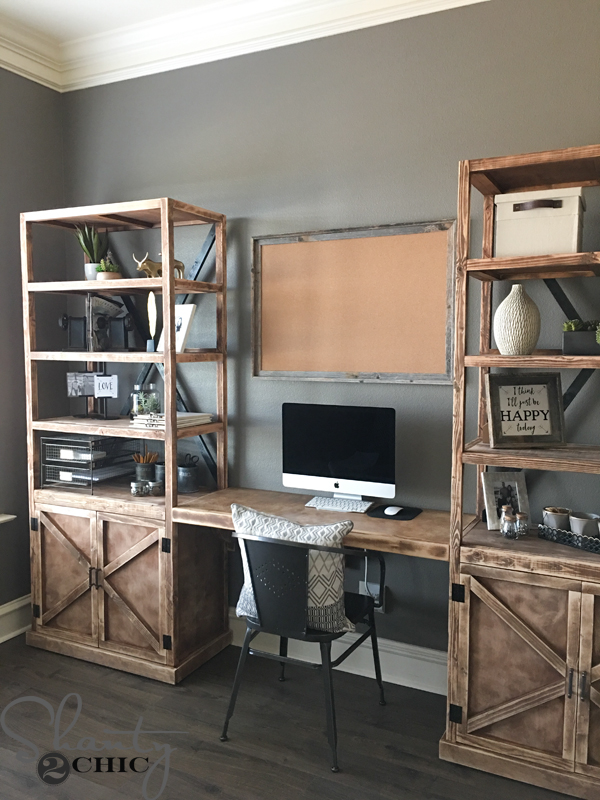
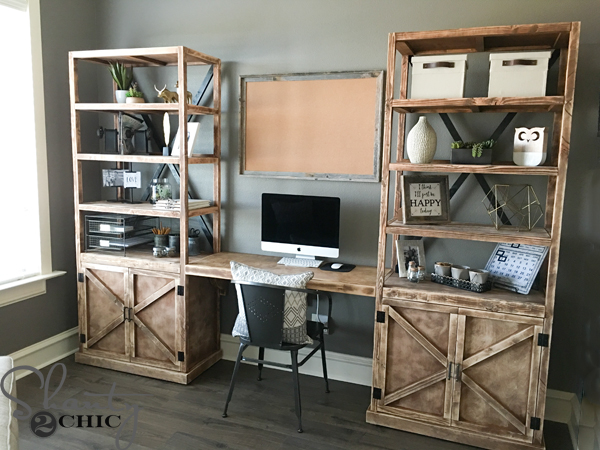
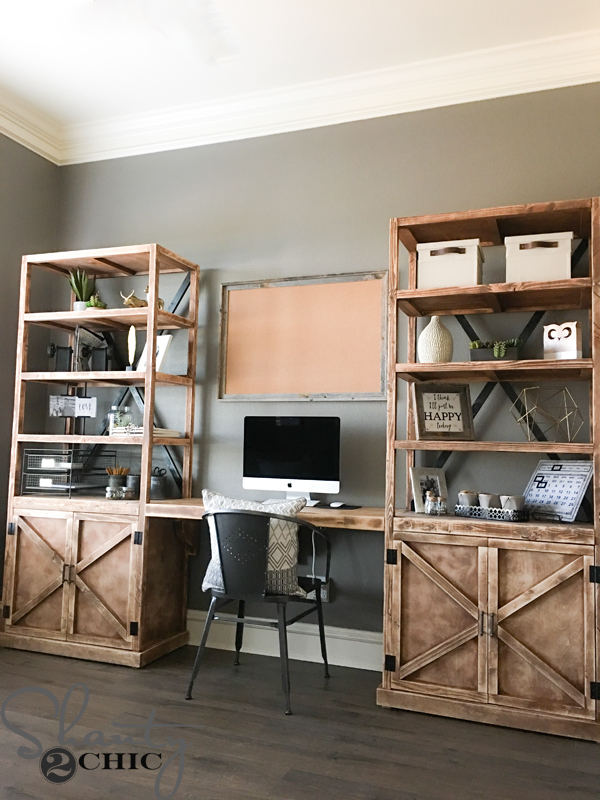
I’m so excited to show you the office towers that are part of my big DIY Office Desk System! Our office was the last room, in our new house, that I hadn’t touched and it was long overdue. I wanted to create a space that my hubs could work comfortably, a place that my kids could work in and a spot that I didn’t feel I needed to shut the doors when company was over anymore 😉 That required, open shelving (functional but attractive) and hidden storage (to hide all of the office junk).
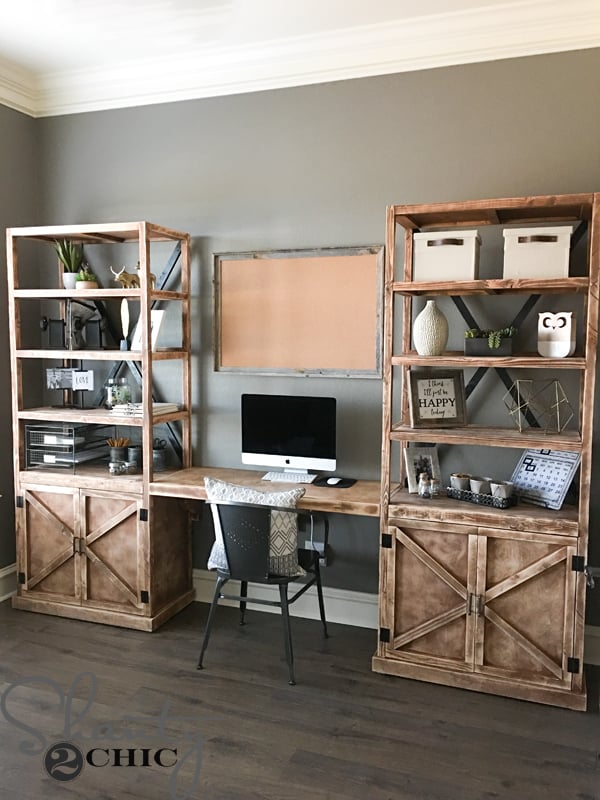
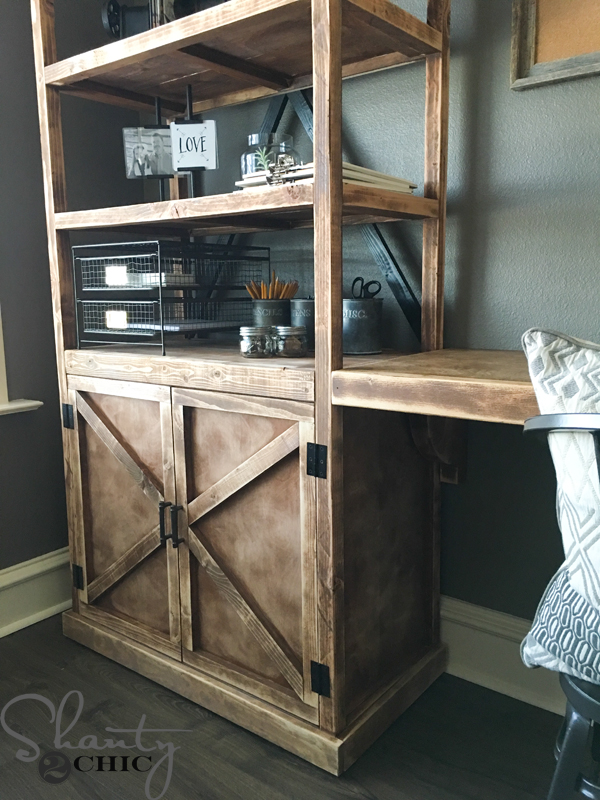
With that in mind, I got to designing and created this! I designed two towers with hidden storage for our printer, files and supplies and open storage for the pretty things. I also wanted the desk to look like it was part of shelves, like one long shelf. You can find the plans for the desk HERE!
This tutorial is for the towers. It does have quite a few steps but as always, I’m sharing the free printable plans and the step-by-step tutorial to break it all down for you. You can click HERE or the image below to print your free plans!

There are angle cuts but don’t let that scare you away, I am showing you how to easily make them AND, they don’t have to be perfect 🙂 So, let’s get started!
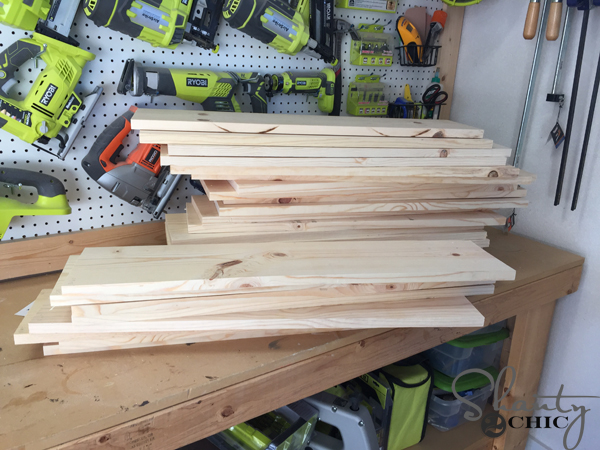
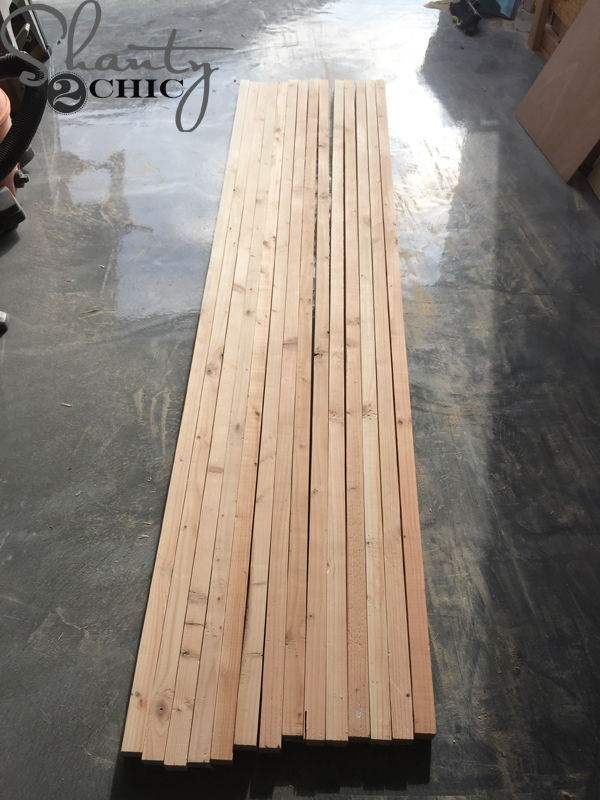
I started by cutting all of my shelf pieces.
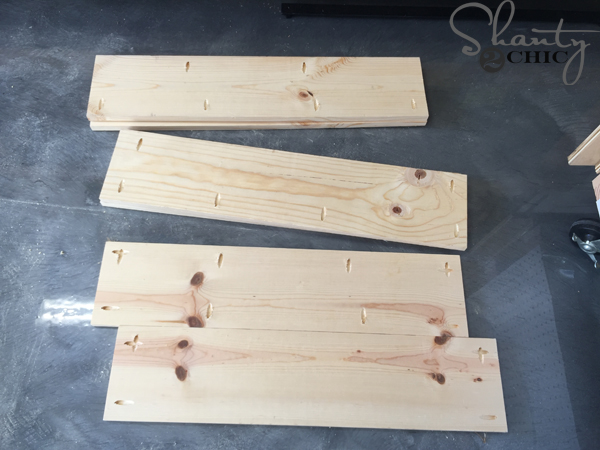
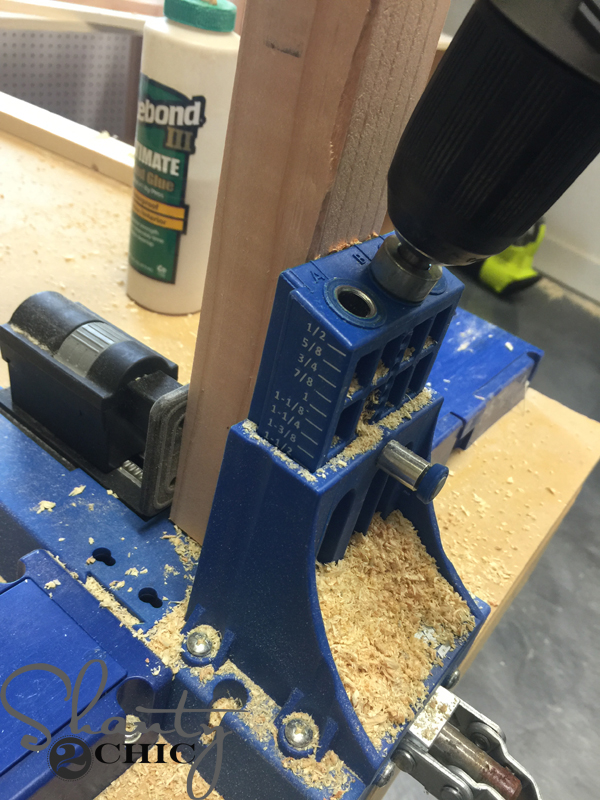
Then, I used my Kreg K5 to drill 3/4 pocket holes in the shelf pieces (refer to the plans for pocket hole placement). You can click HERE for our How to Use a Kreg Jig Video and click HERE to purchase a Kreg Jig K5 on Amazon.
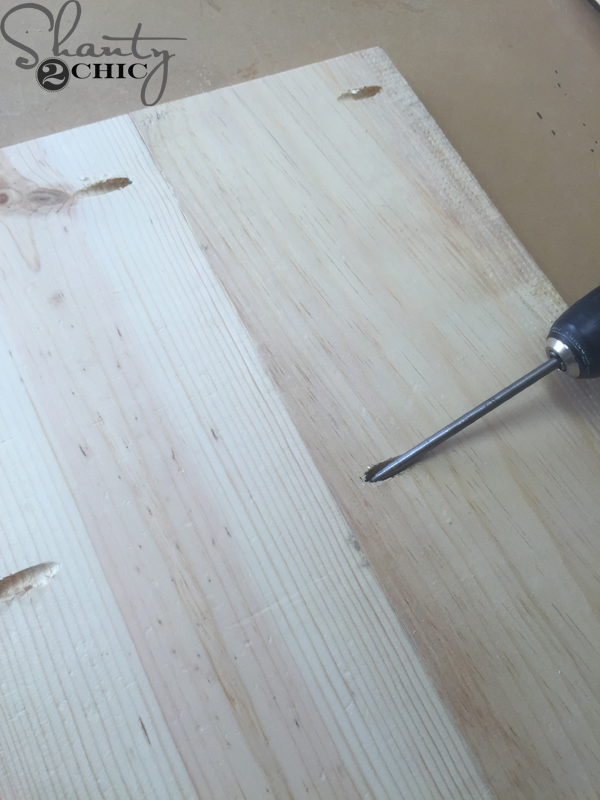
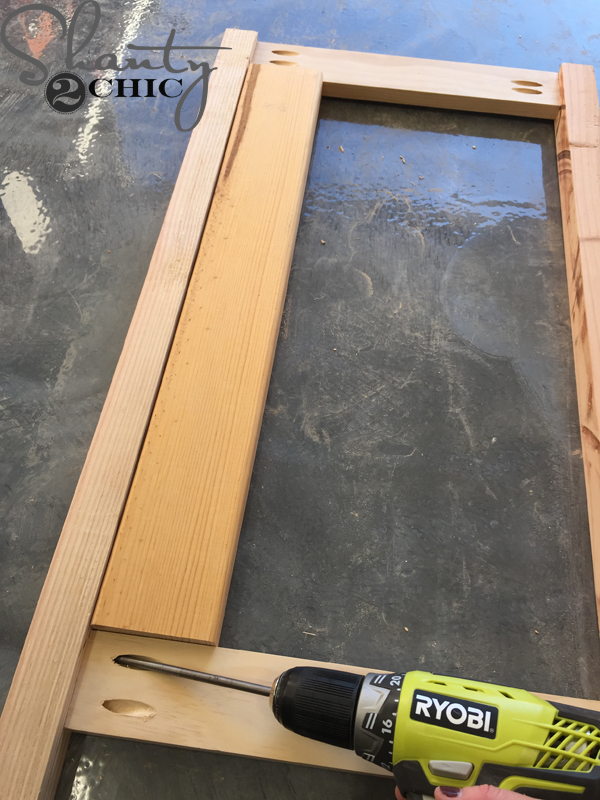
Next, I attached the shelf pieces together with 1 1/4″ pocket hole screws.

Here is one shelf piece, assembled.
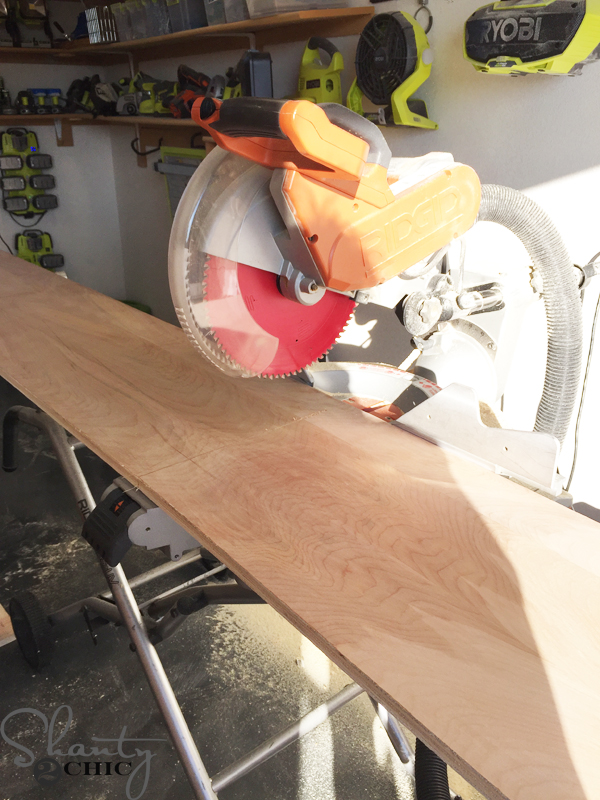
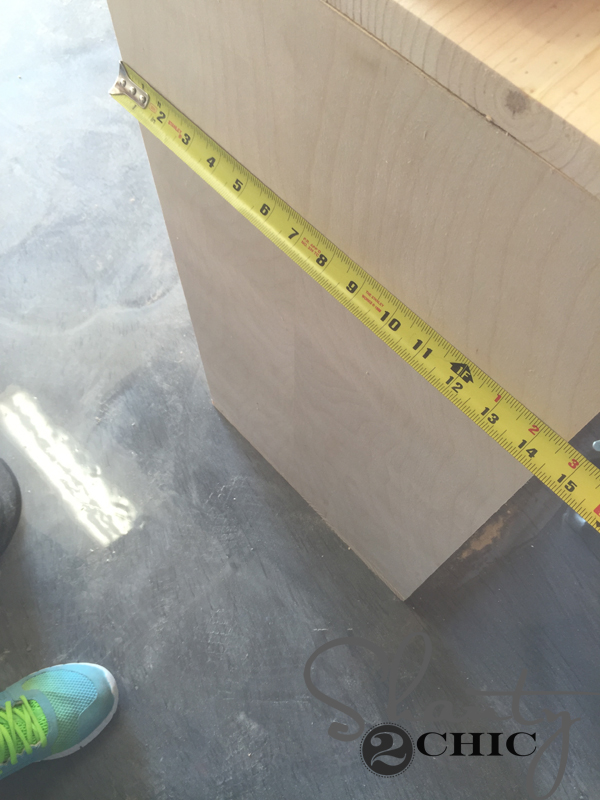
I had my big sheets of Purebond Plywood ripped at Home Depot, so that I could get them in my car. Then, I used my miter saw to cross-cut the plywood pieces to size.
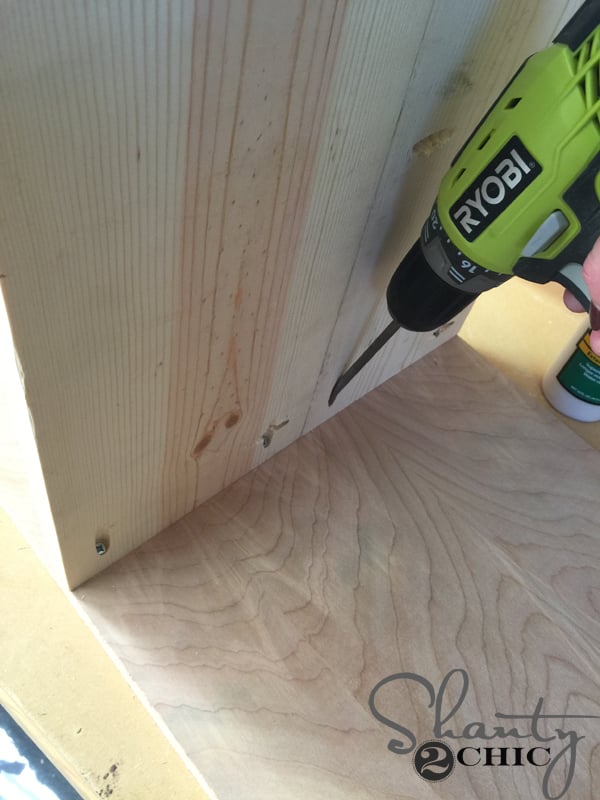
I attached the shelf pieces to the plywood side pieces with 1 1/4″ pocket hole screws (refer to the plans for the shelf placement).
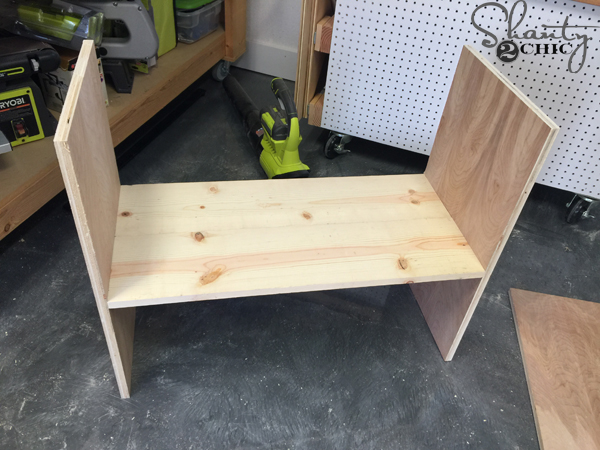
This is what your cabinet base should look like now. Two plywood sides and one shelf.
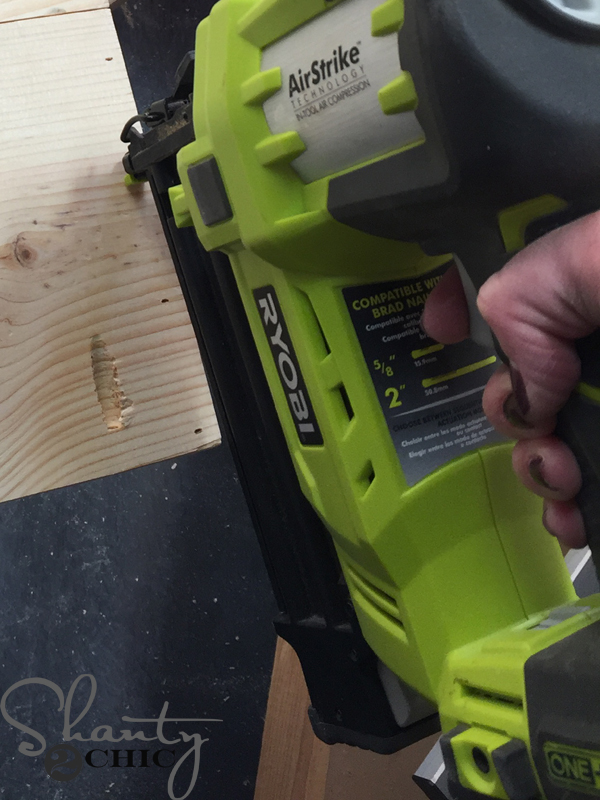
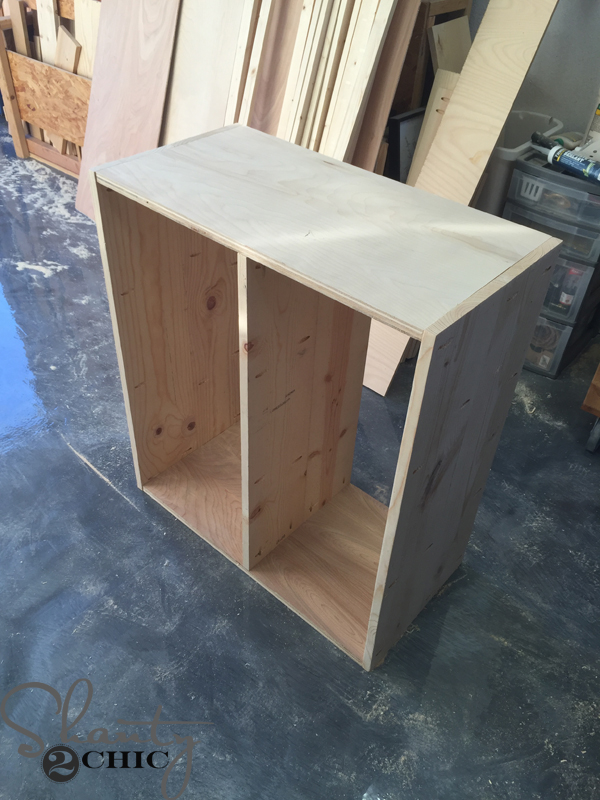
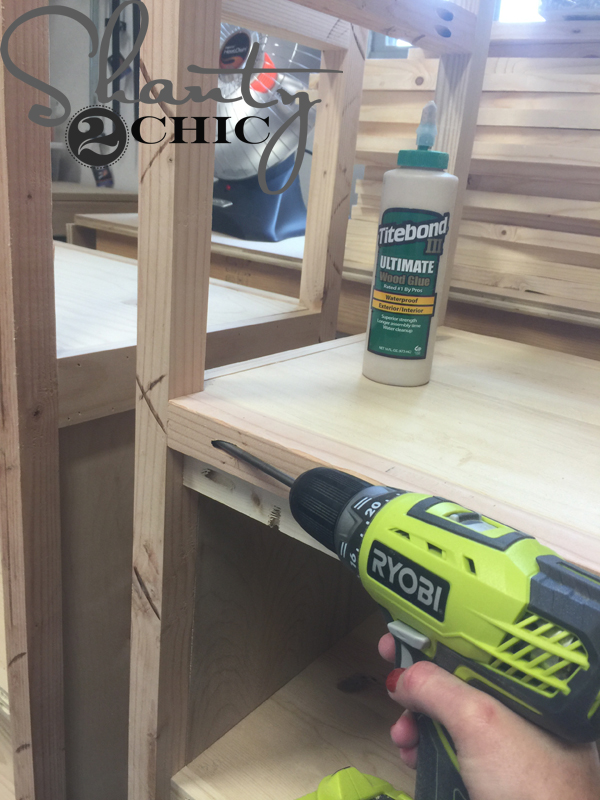
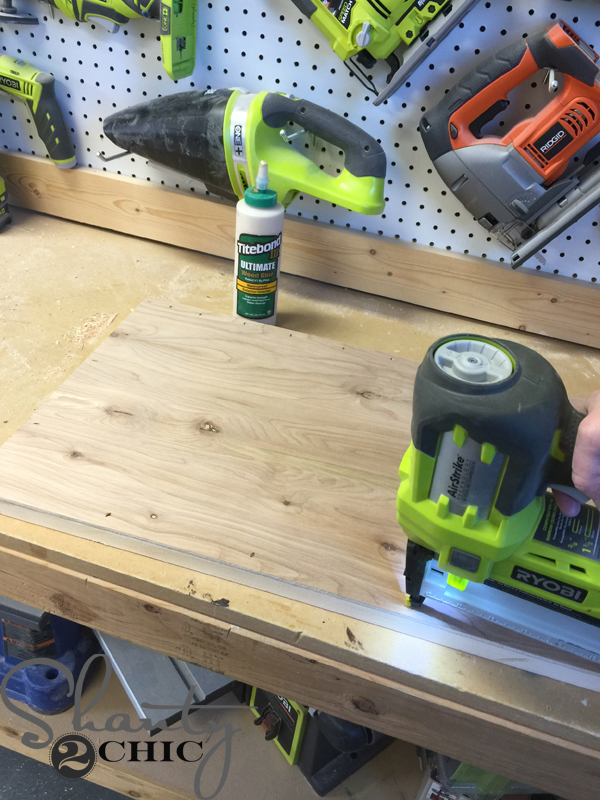
Now, attach the top and bottom pieces with wood glue and 1 1/4″ brad nails. I use my 18 gauge Ryobi Airstirke Nailer.
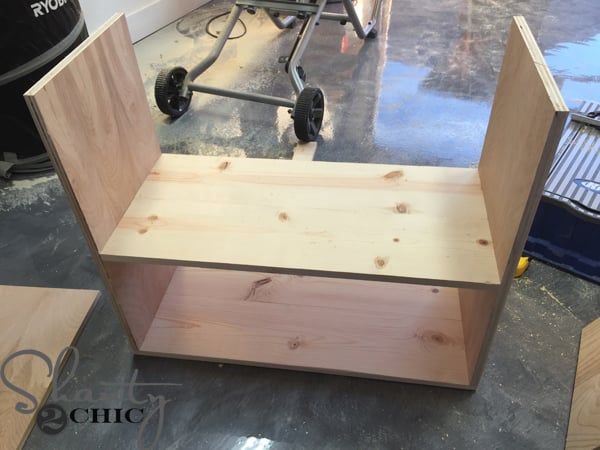
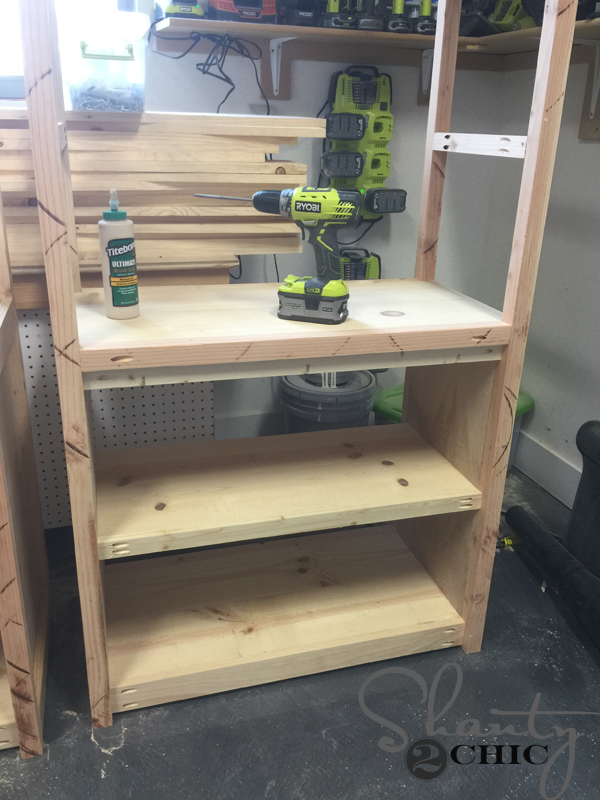
Here is the cabinet base with the bottom attached.
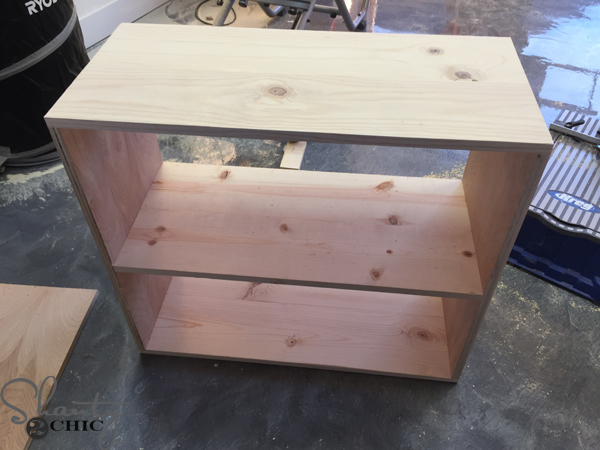
And here is the cabinet base with the top attached.
Now it’s time to build the “ladders” (the side pieces of the towers).
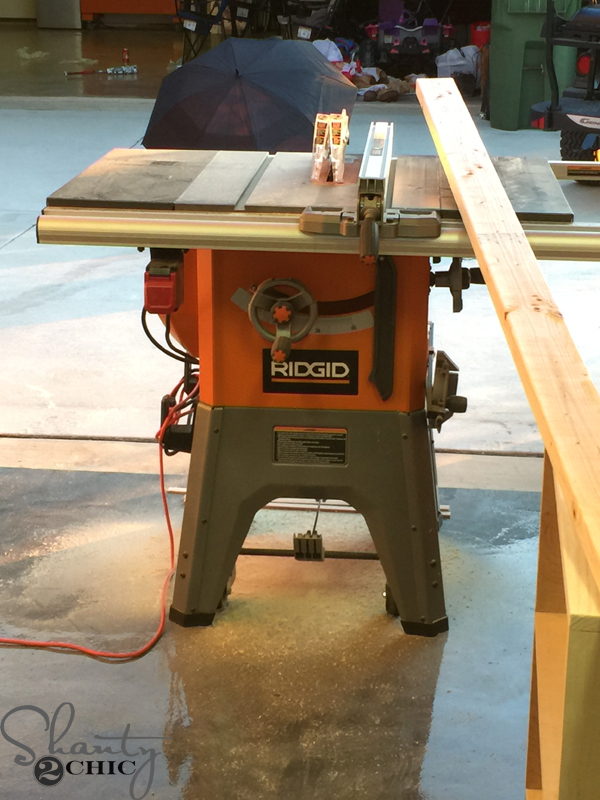
To save on lumber cost, I used my table saw to rip 2×4 boards to create 2×2’s. The select pine 2×2’s are about $8 each at my hardware store and the 2×4’s are only $3 AND I can get two 2×2’s per 2×4. I also did this for the 1×2 boards. I purchased 1×4 boards and made two 1×2’s out of each board. Total, this saved me about $150 in lumber, building two towers. You can buy a basic Ryobi table saw for about $129, so this is a great way to justify adding to your tool collection 😉
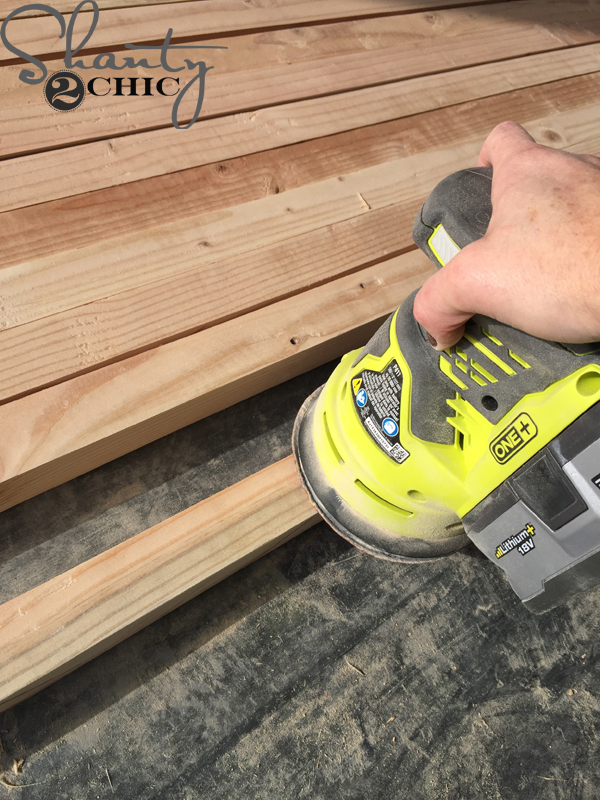
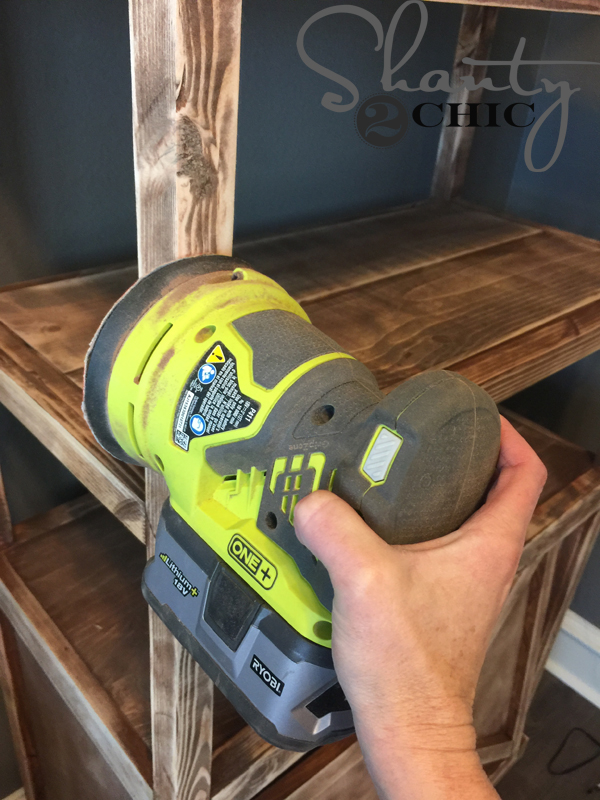
Cutting the boards down does require a little more work but in this case, it was worth the savings. I used my Ryobi 18-volt orbital sander to smooth the boards out.
And here they are, ready to use 🙂
Before you start to assemble the “ladders” measure the width of the cabinets you built and cut the horizontal rails to this length. This will make the “ladders” fit the cabinet perfectly.

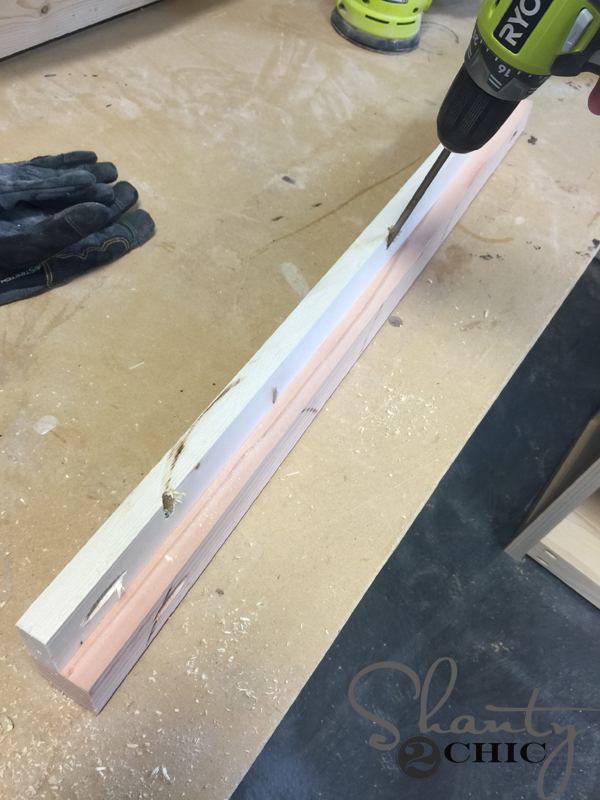
Cut the horizontal rails to that measurement and drill pocket holes according to the plans.
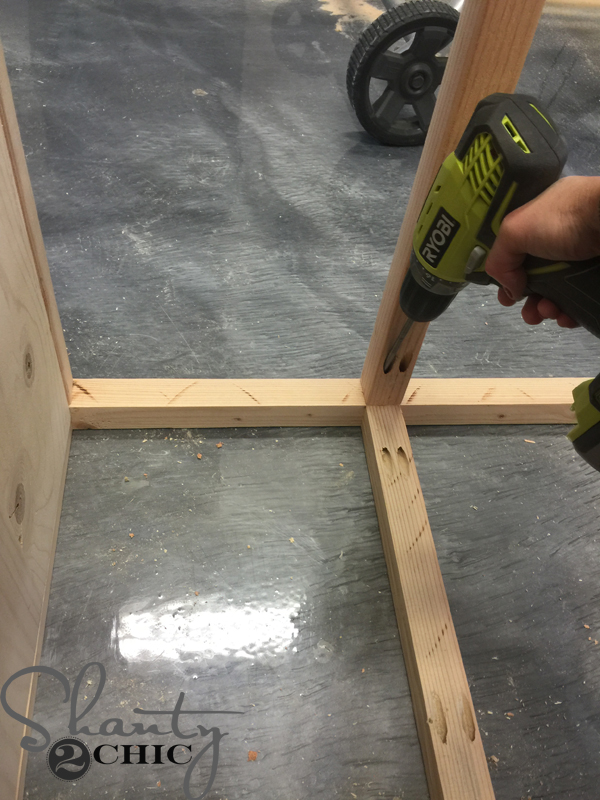
To build the “ladders” I created spacers so that both sides of the towers were exactly the same. This will make your shelves nice and level 🙂 I attached the 2×2’s to the rails with 1 1/4″ pocket hole screws and wood glue.
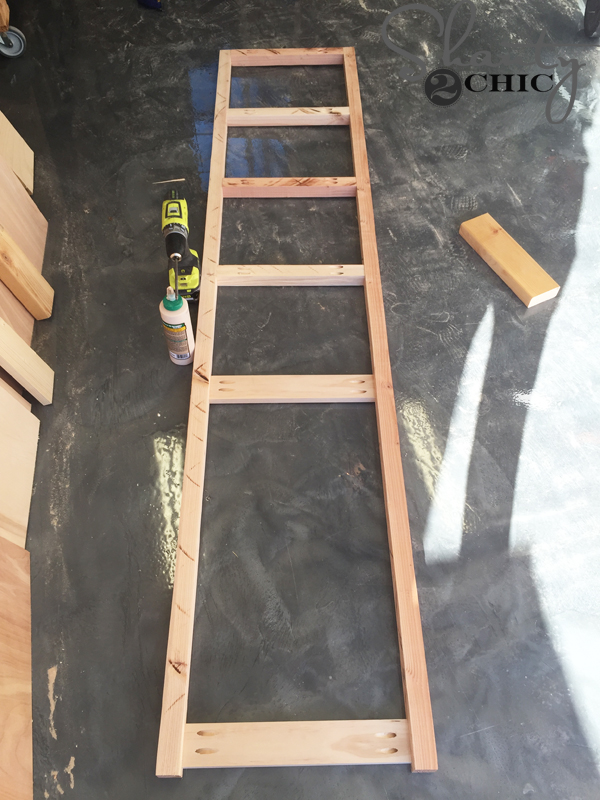
Here is one “ladder” completed.
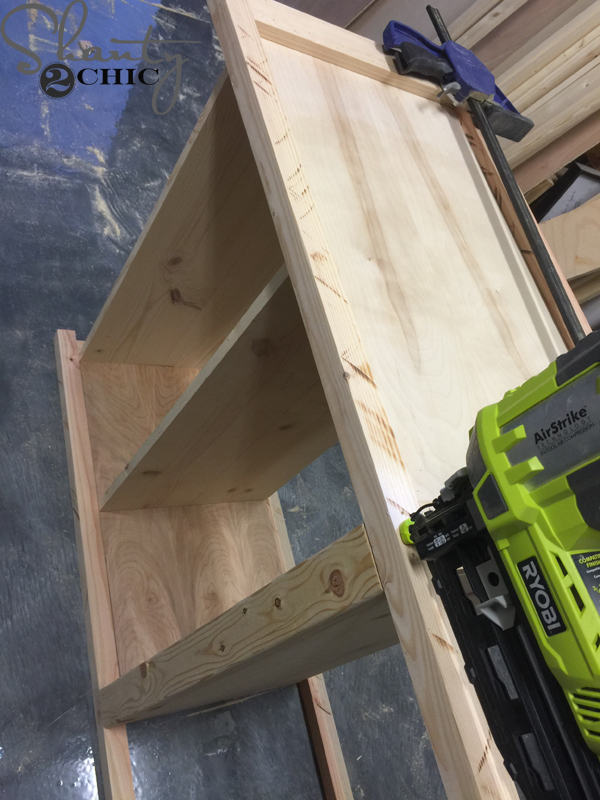
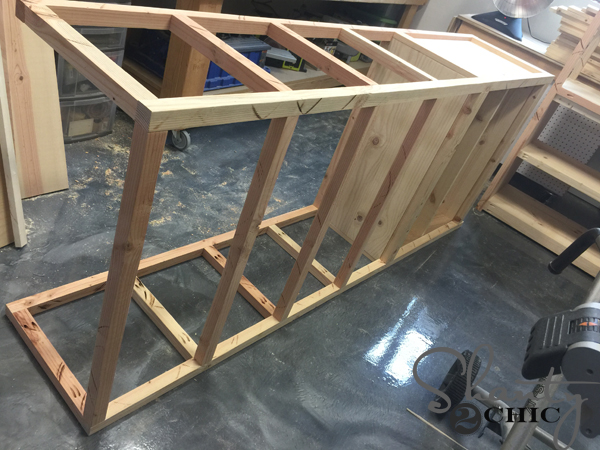
Now, flip the cabinet on its side
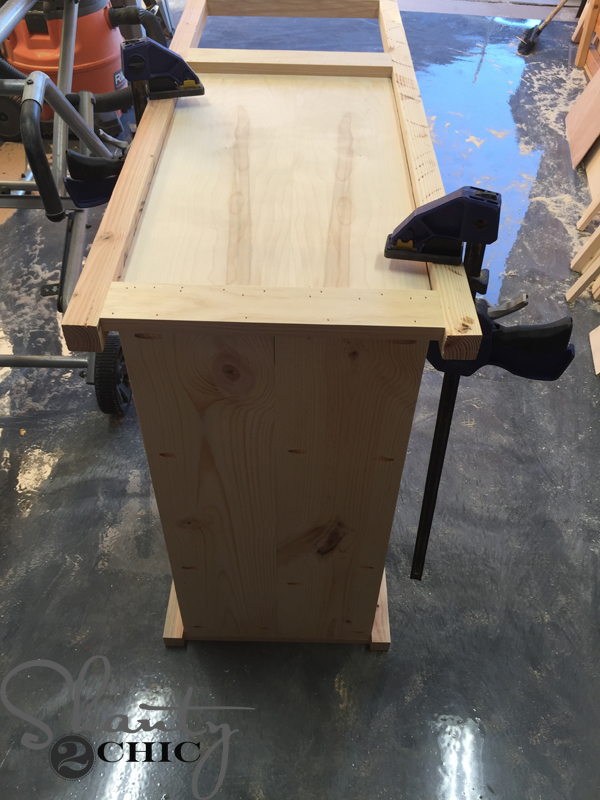
and clamp a “ladder” on top of it (refer to the plans for the correct measurements for the inset on the bottom.

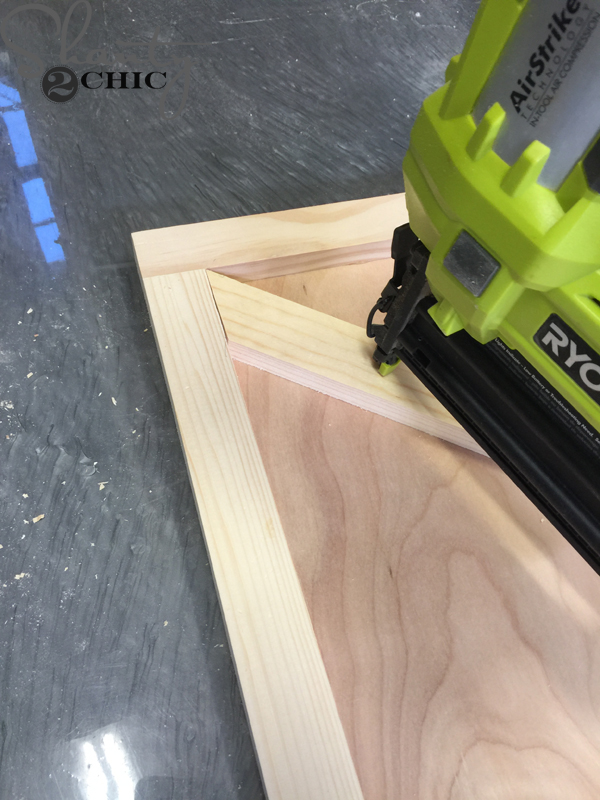
Attach the “ladder” with wood glue and 1 1/4″ brad nails.
Once the “ladders” are both attached, cut the front, 2×3 trim pieces to fit and attach them with wood glue and pocket hole screws.
Then, shoot a few 2″ brad nails into the 2×3’s from the outside 2×2 “ladder” frames, for extra support.
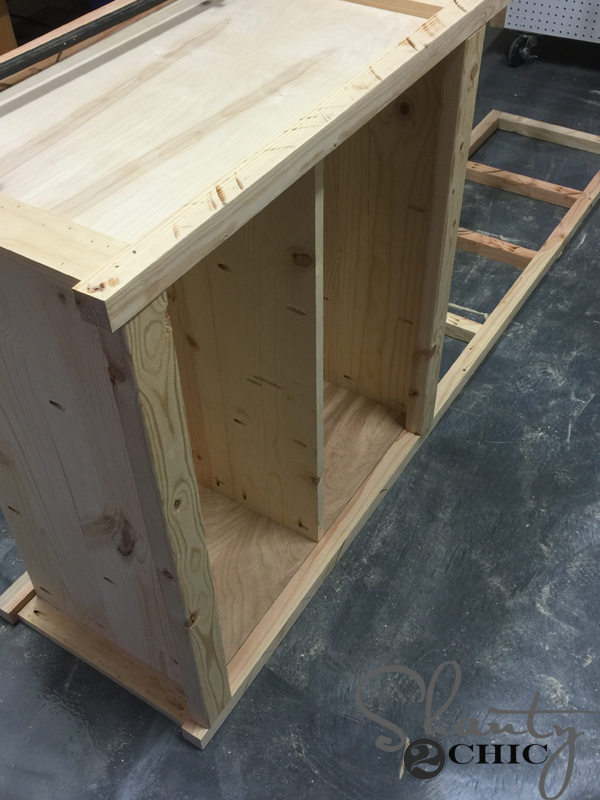
This is what it will look like at this point.
Then, attach the back trim pieces with pocket hole screws and wood glue.
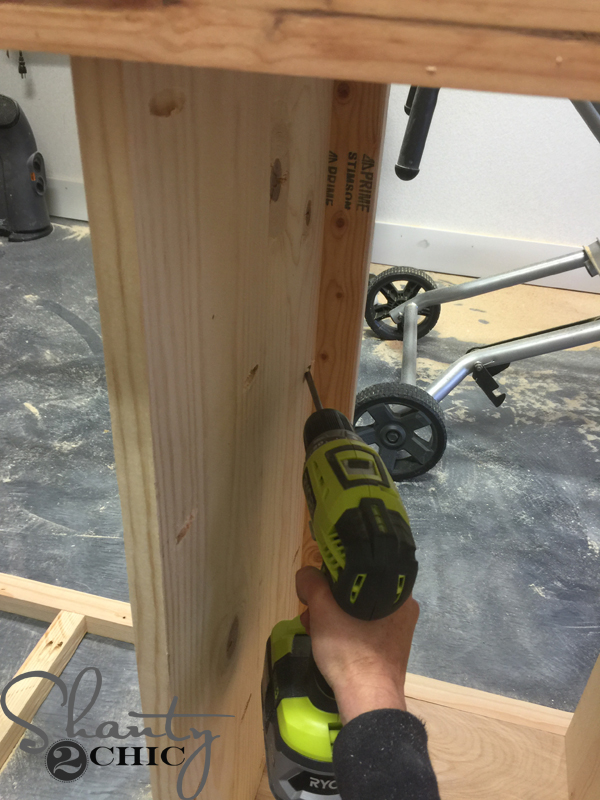
Now, build the brace for the back of the hutch with 1×2 and 2×3. This will give you a place to attach the back plywood panel to.
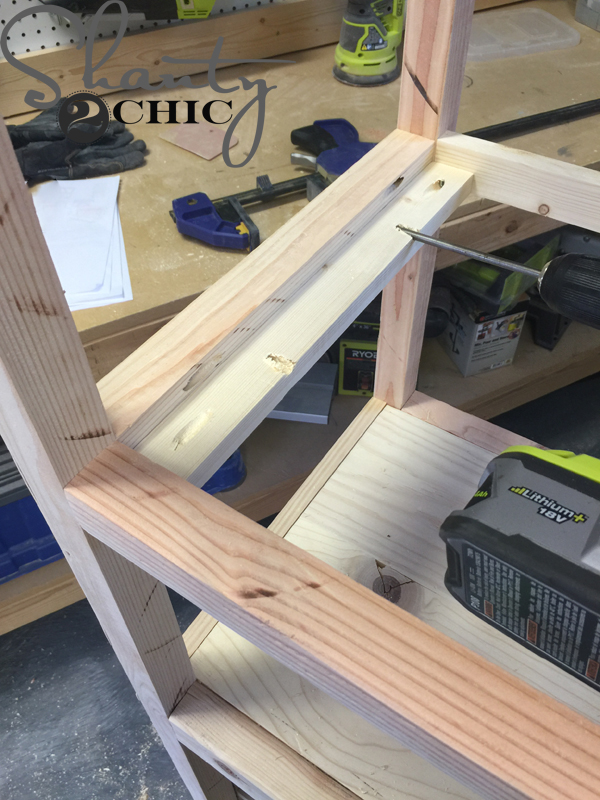
Attach the brace to the back of the cabinet with wood glue and 2 1/2″ pocket hole screws.
Here is is attached to the back of the cabinet. (At this point, you can attach your back panel with staples, if you prefer. I like to wait until the end so that I can stain the panel and then attach it. This makes it easier to stain the shelf pieces).
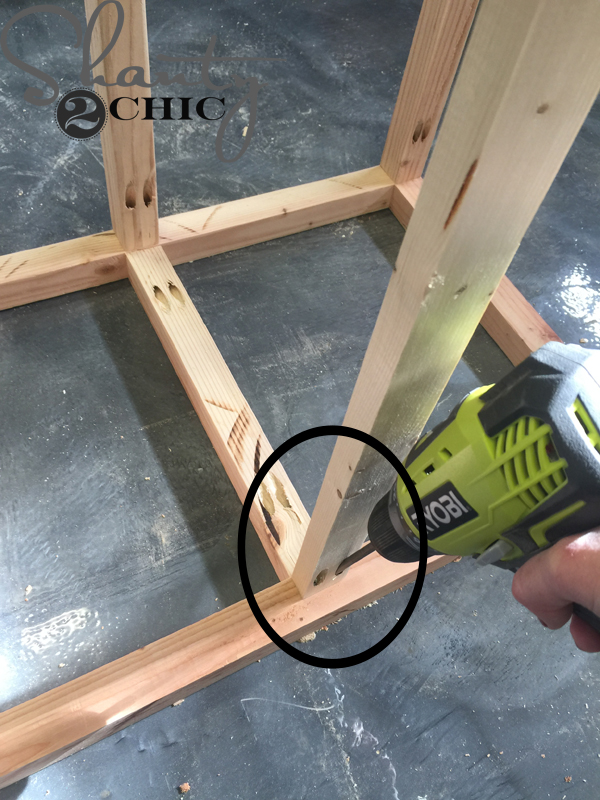
Now, you can start attaching the front horizontal pieces. Use wood glue and 2 1/2″ pocket hole screws.
Here is the tower with the front horizontal pieces attached. Now for the back pieces.
When you start attaching the back rails, make sure to take note of the inset for the 1×3 piece.
(Refer to the plans for the exact measurement on the inset).
Now for the cleats. Measure and cut the 1×2 pieces to size and drill 3/4″ pocket holes according to the plans. Attach them with 1 1/4″ pocket holes screws and wood glue. These cleats will hold the shelves that we built at the beginning!
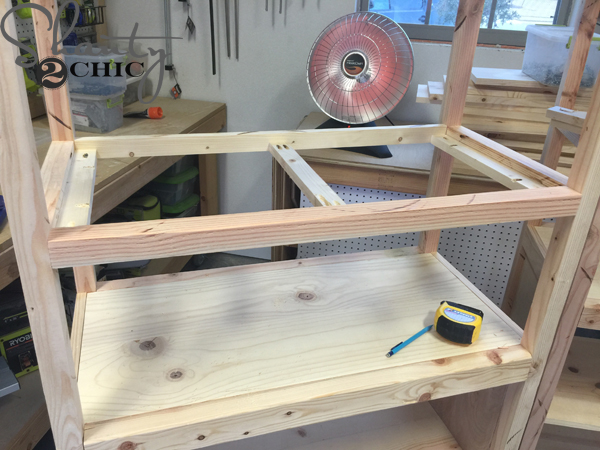
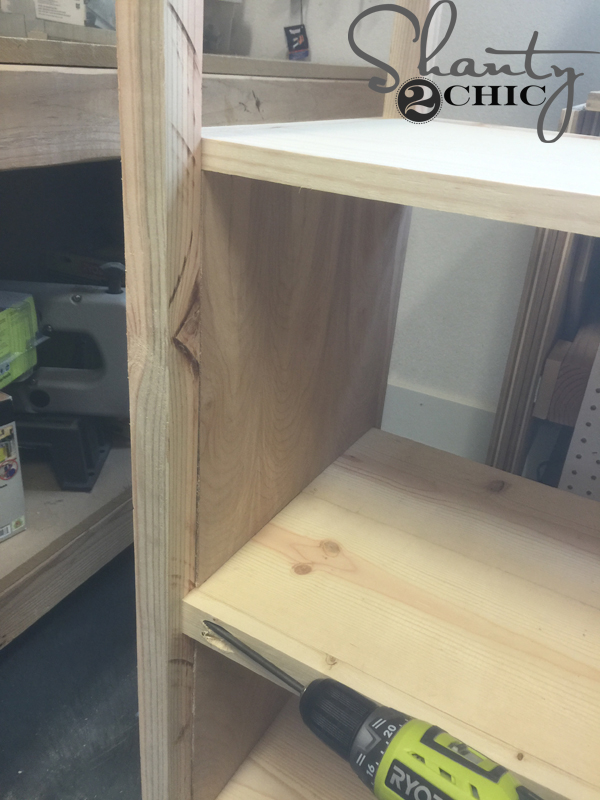
Here is one shelf with the cleats installed.
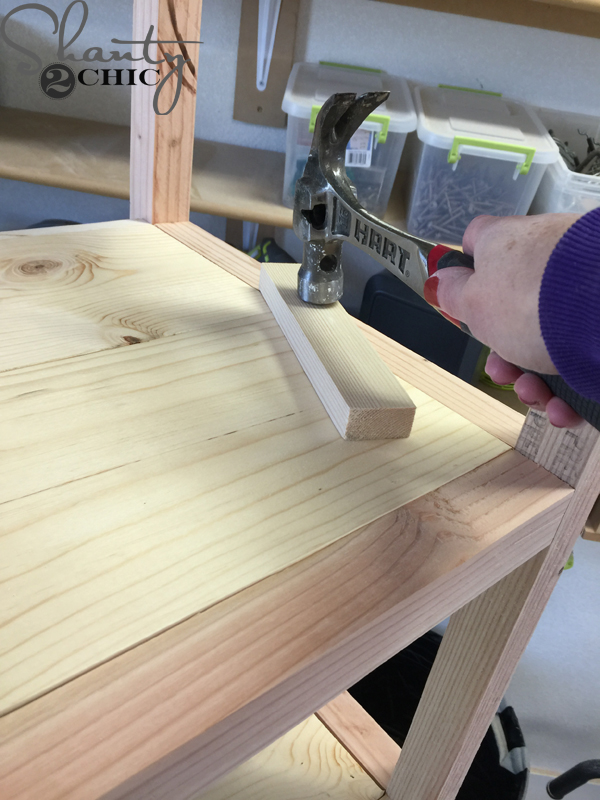
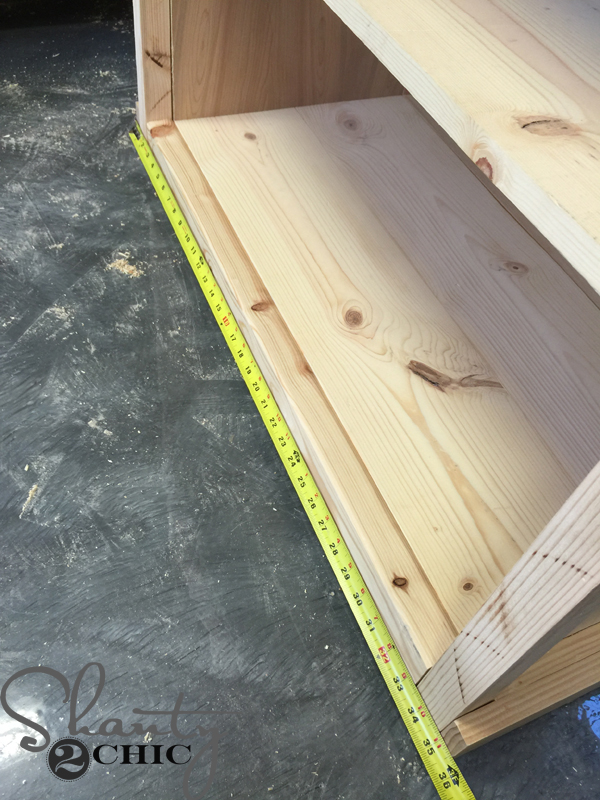
Once you have the cleats installed, begin placing the shelf pieces inside. It will probably be a snug fit so you can either use a mallet to knock them in place or, you can use a scrap piece of wood and a hammer. This will keep you from damaging the wood.
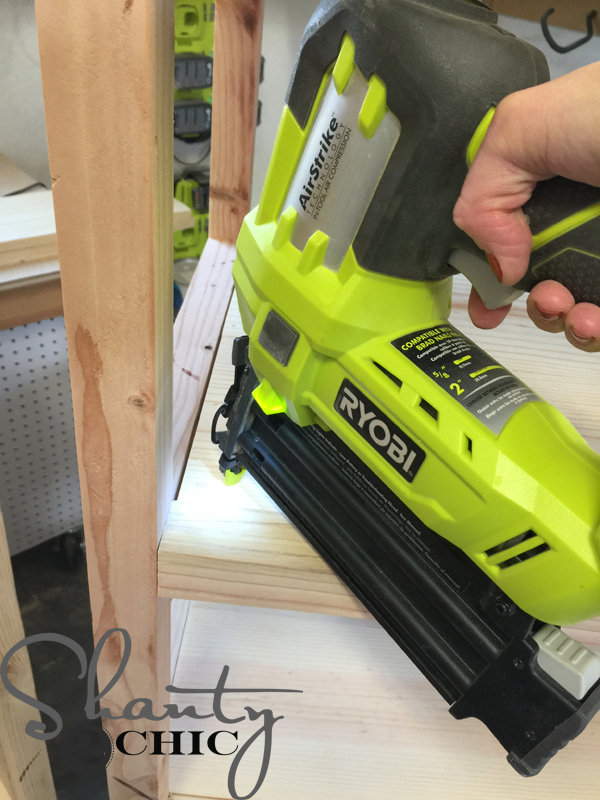
Secure the shelf to the cleats with 1 1/4″ brad nails and wood glue.
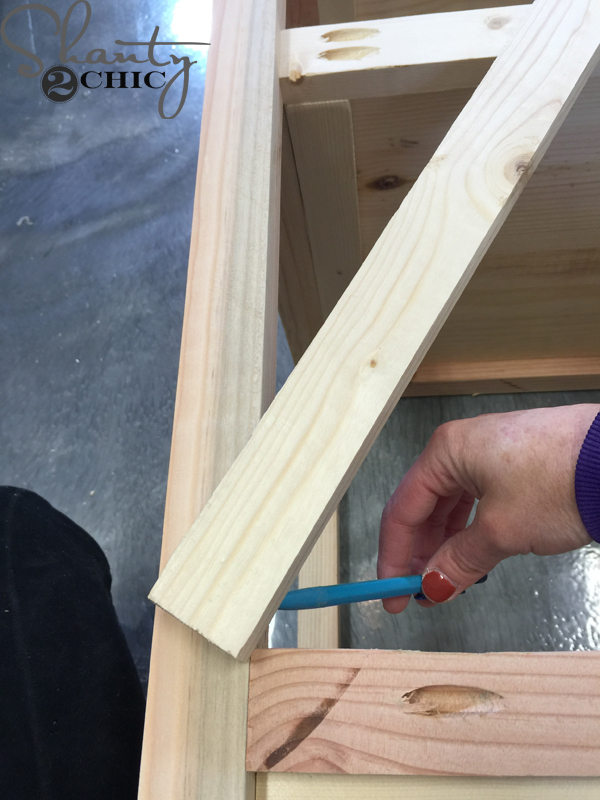
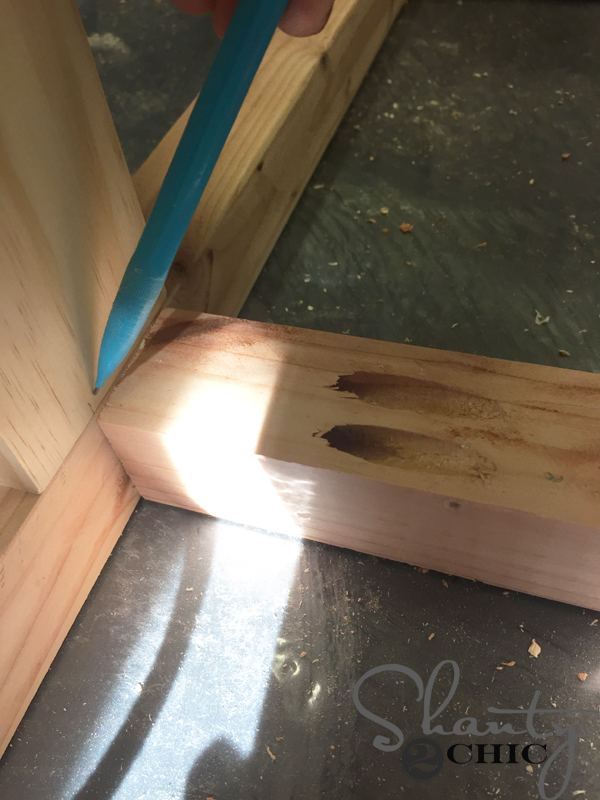
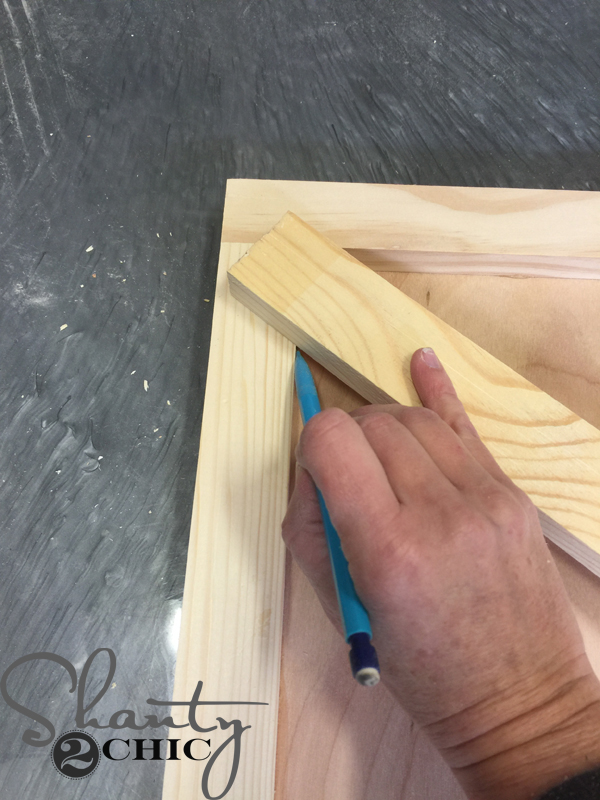
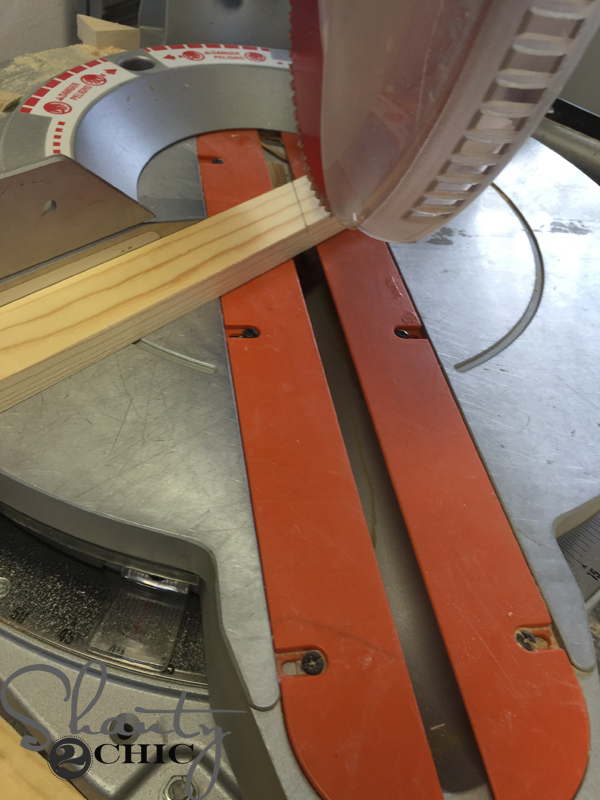
Moving on to the “x” pieces on the back. Start with one the first 1×2 piece that will stretch corner to corner. Mark a line where the 1×2 meets the 2×2 “ladder” frame.
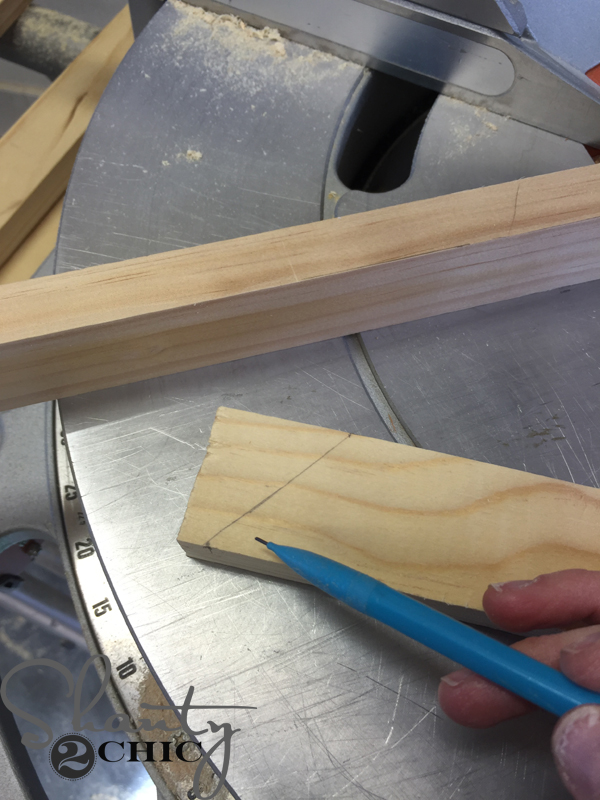
Now, just move the miter (bottom) part of your saw until it lines up with the angle you have made. This takes all of the guess work out and gives you a perfect fit 🙂
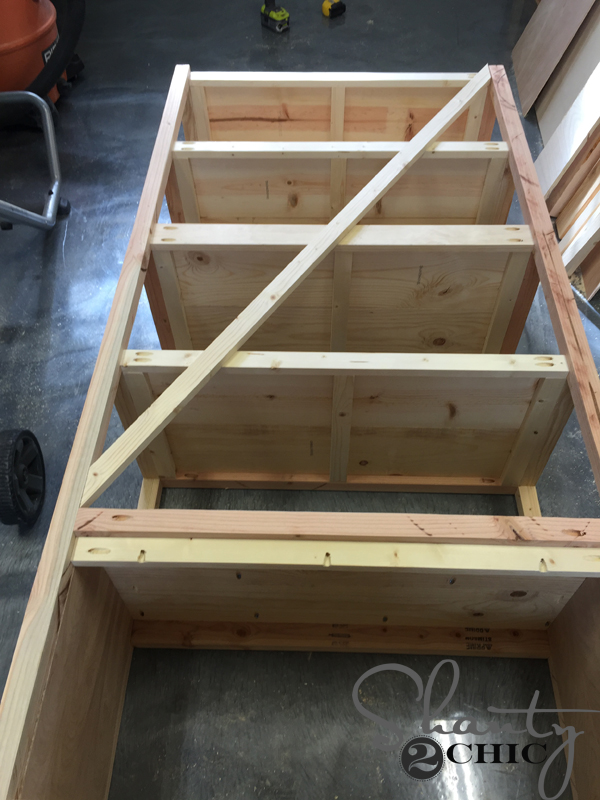
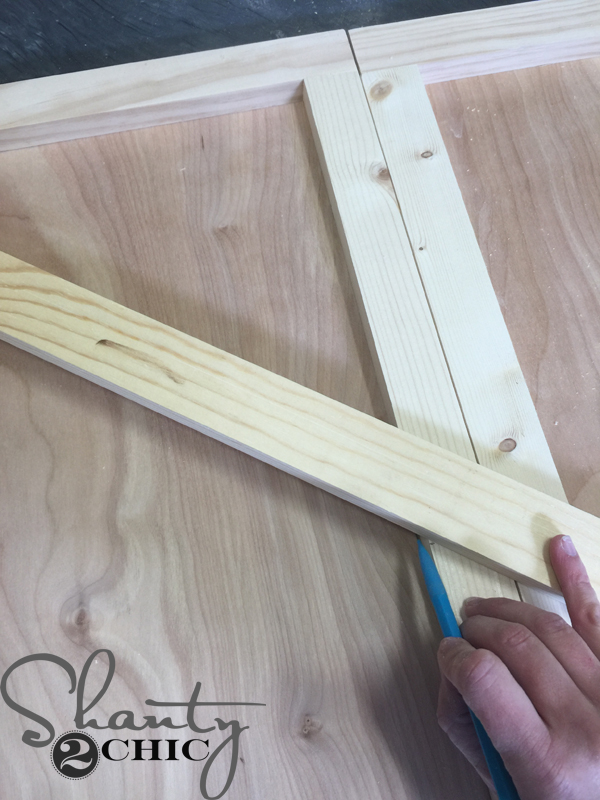
Then, lay the board down in place and mark for the top corner angle.
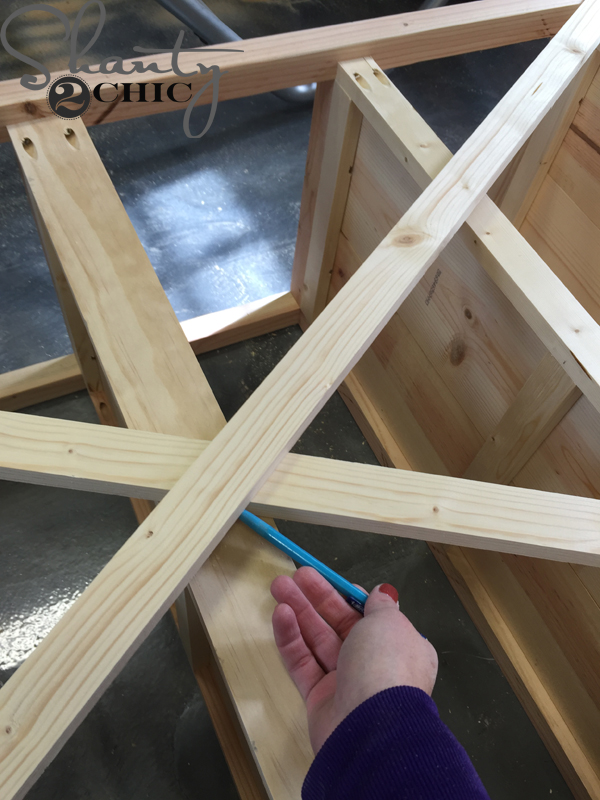
Do the same for the next to pieces.
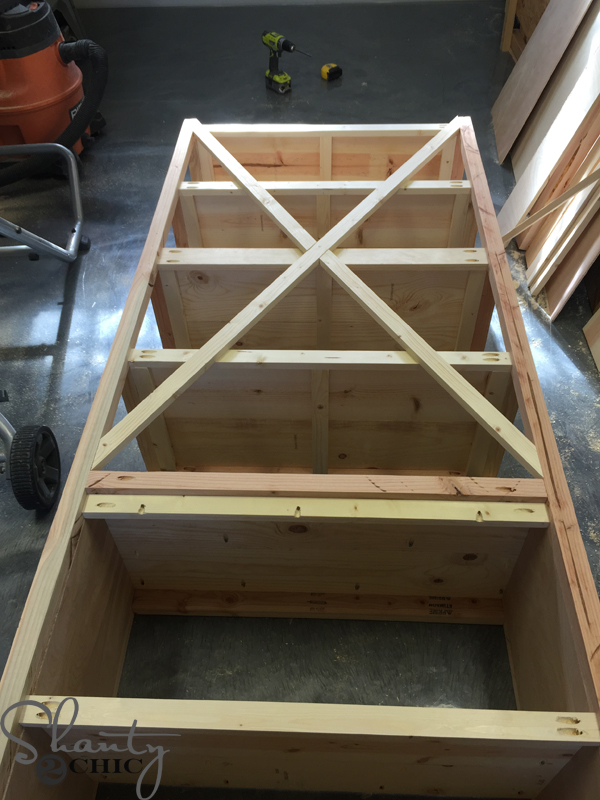
If you want to paint the “x” piece black, like I did, then do not attach these yet. Mark them with labels that you will remember where each piece goes and put them off to the side.

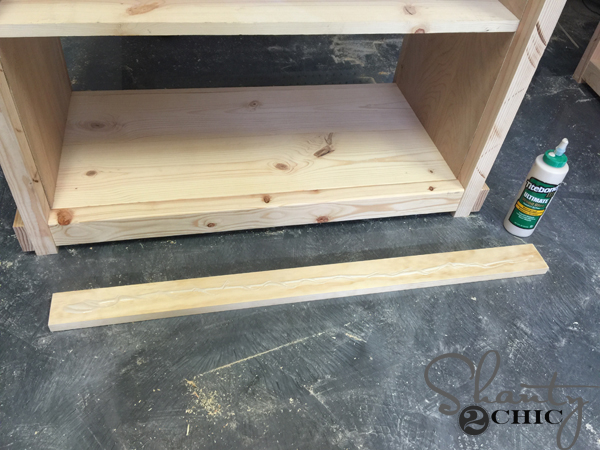
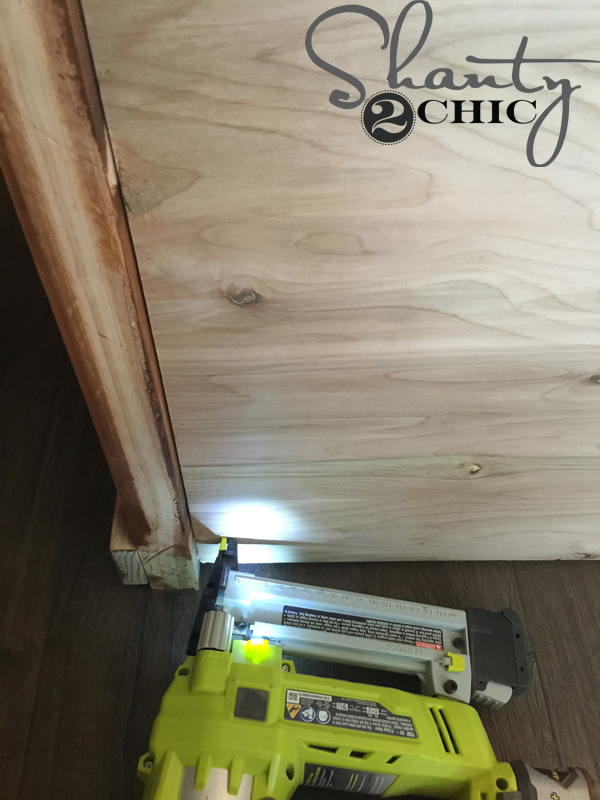
Now for the trim on the bottom! Measure and cut to fit the 1×3 trim pieces for each side of the cabinet. Attach them with wood glue and brad nails.
Once both trim pieces are attached, measure and cut to fit the front piece of trim.
Apply wood glue to the piece
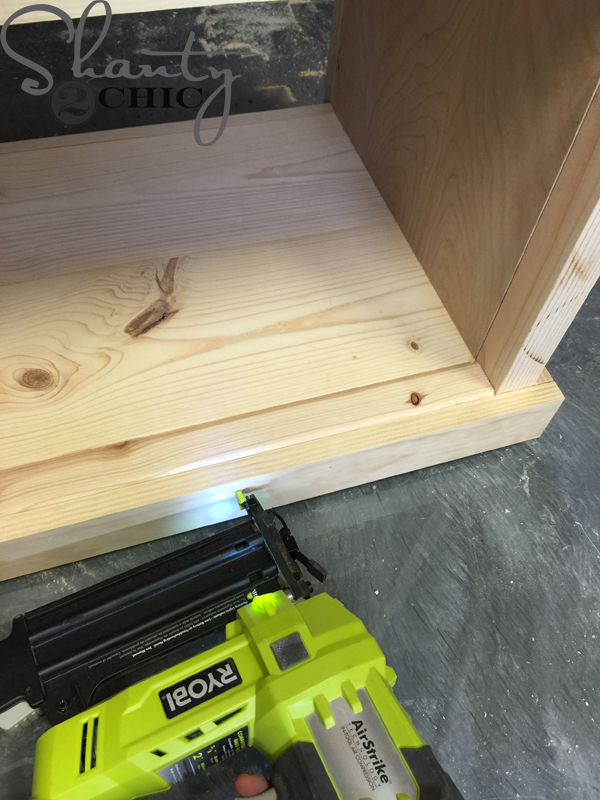
and nail it in place 🙂
Door time!!
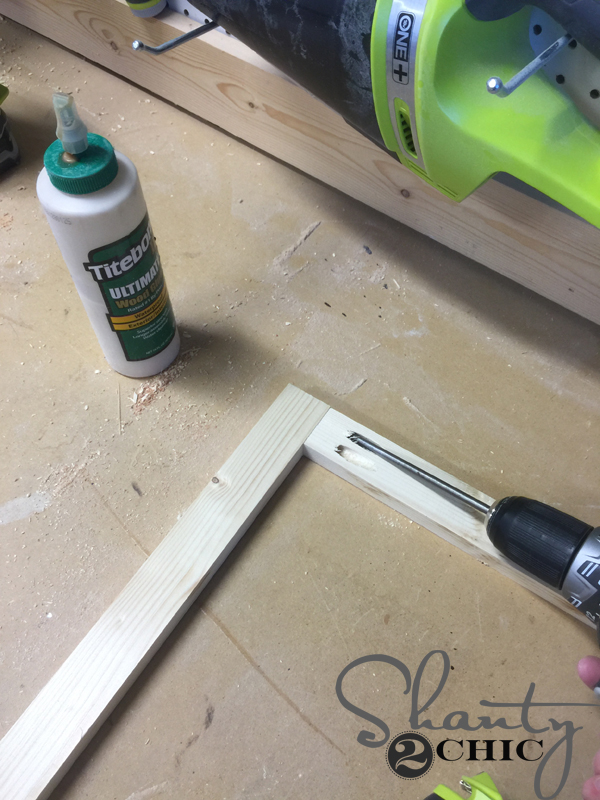
Measure and cut the pieces to build the door frame. Drill 3/4″ pocket holes, according to the plans, and connect the pieces with 1 1/4″ pocket hole screws and wood glue. **Make sure that if you plan to stain the piece, that you use the wood glue sparingly. Wood glue is not stainable and it is hard to remove it completely once it has leaked”.
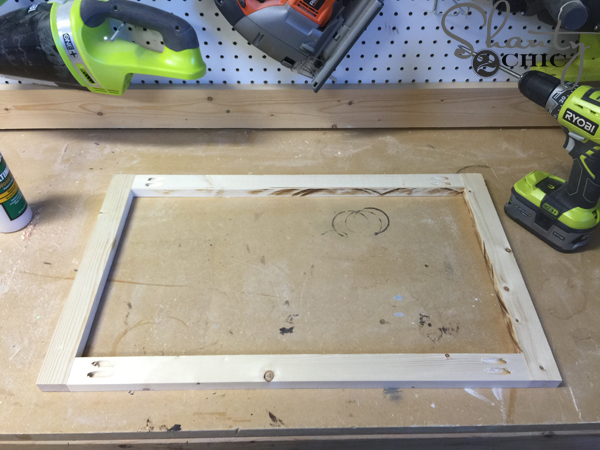
One door frame completed.
Here are the door frames for each door. Dry fit them in place to make sure they fit before you attach the 1/4″ plywood backs. It is a lot easier to make adjustments at this point than it is once the backing is on – trust 😉
Cut the 1/4″ plywood pieces to fit the door frames and attach it to the frames with wood glue and 3/4″ staples. I used my Airstrike Stapler but if you don’t have a stapler, you can use brad nails but the staples are best for attaching 1/4″ material.
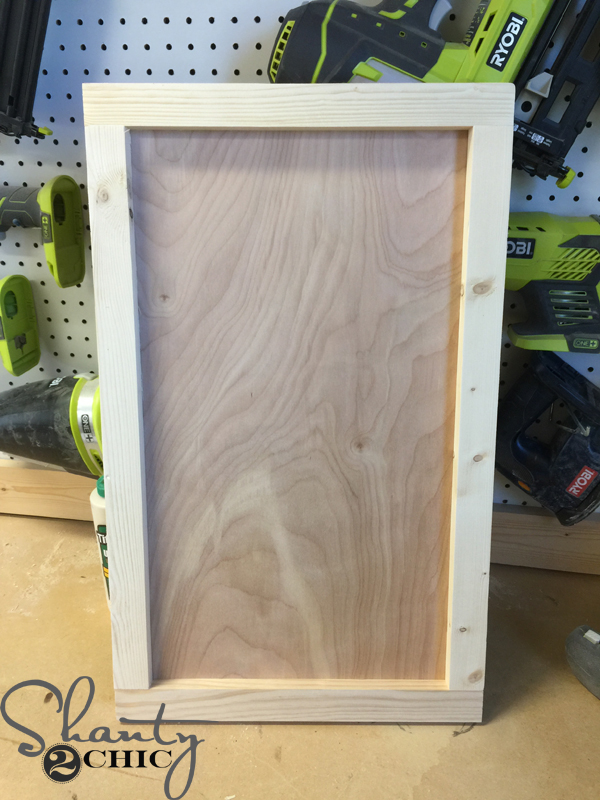
This is what the door will look like with the backing.
To cut the “x”pieces for the doors, use the same technique we used for the “x” pieces on the back. Start with the top corner and mark for your cut.
Make your first cut
then mark for the second cut.
Attach the pieces to the door with wood glue and 3/4″ staples.
Great job, now you are ready for stain 🙂
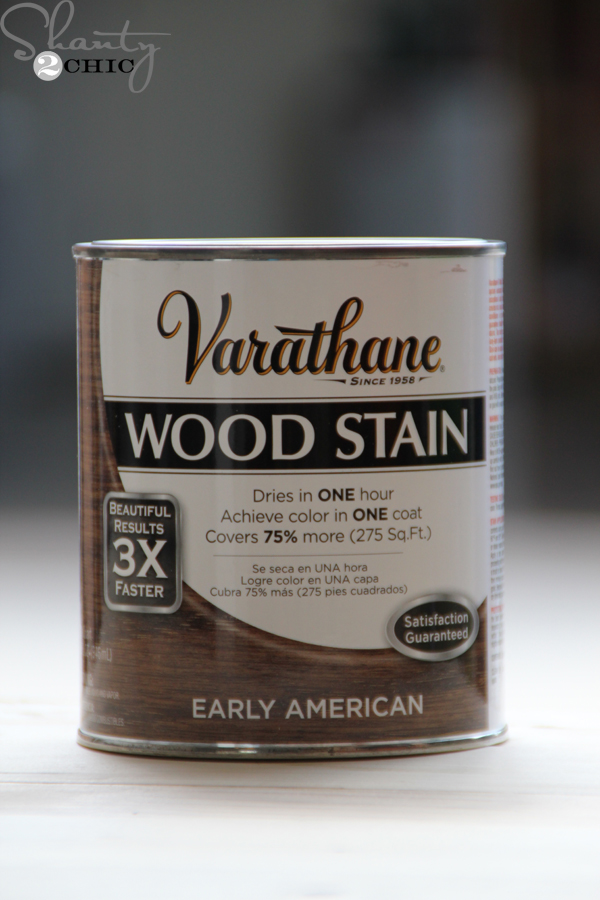
I chose Early American stain by Varathane for these guys! We love using Varathane stain because it goes on very rich and in just one coat AND it dries in one hour!!!
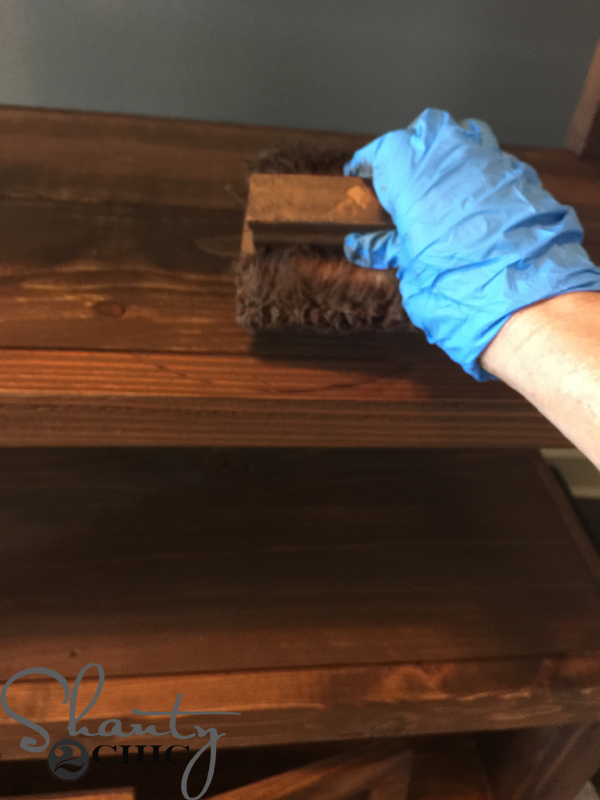
I brought them inside to stain because it was just too darn cold in my shop. I used a lambs wool applicator to apply one coat of stain over the entire piece. I love to use these applicators when I am staining large pieces. It makes it so quick and easy!
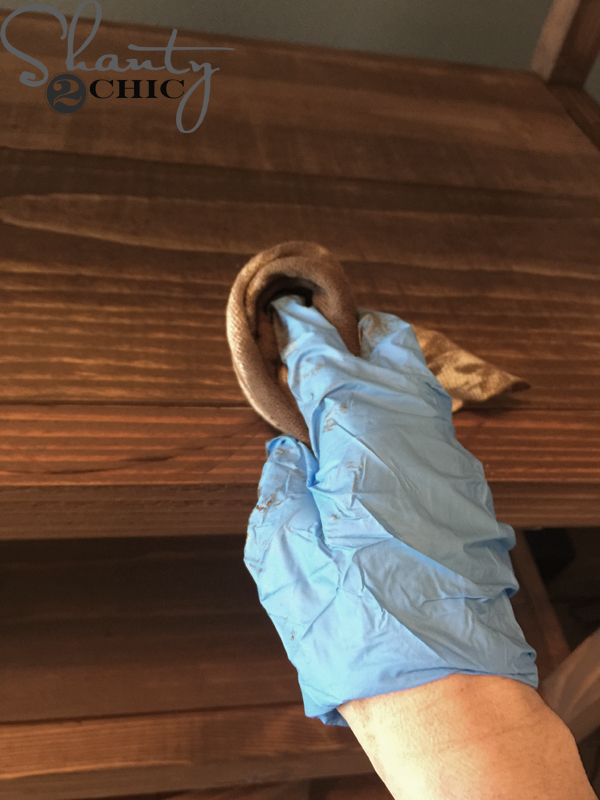
As you apply the stain, let some dry for about 5 minutes and then go back and blend the stain in with a clean cloth. So, I will stain for about 5 minutes and then go back and blend what I just stained and then move on to the next spot. You don’t want to wipe the stain away, just blend it so that it’s even.
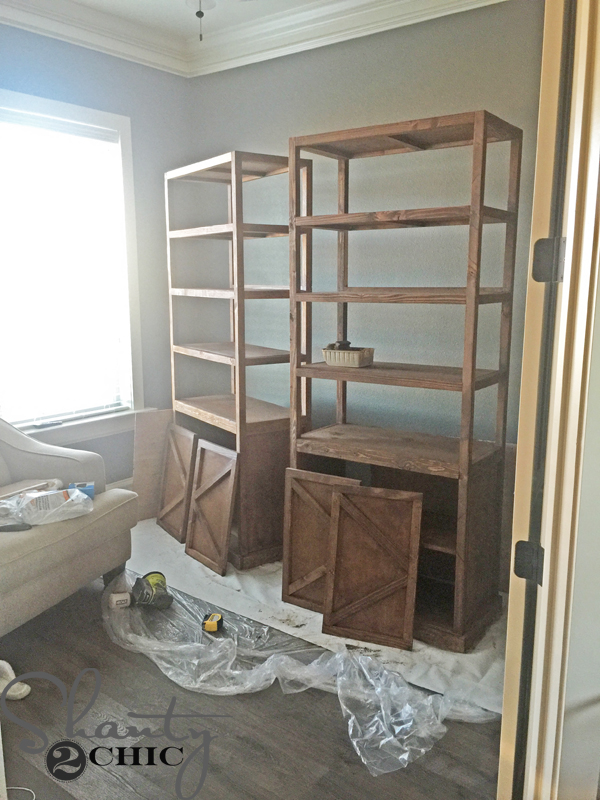
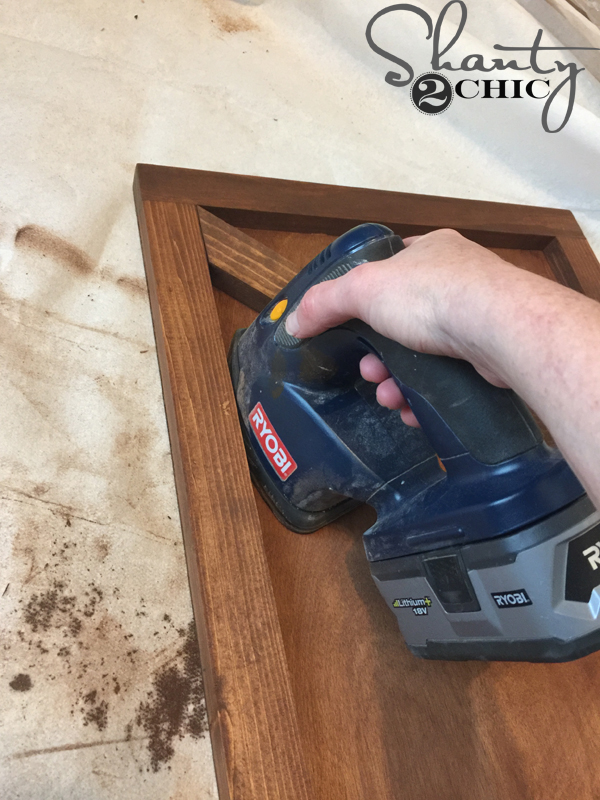
Now, just let the stain dry for about an hour then, I began the distressing!
I used my orbital sander to distress the entire tower! I love the worn look it gives this Early American Stain!
For the hard-to-reach places, I used my corner cat!

Next, I used Rust-Oleum Chalk Board spray paint to paint the “x” pieces for the back.
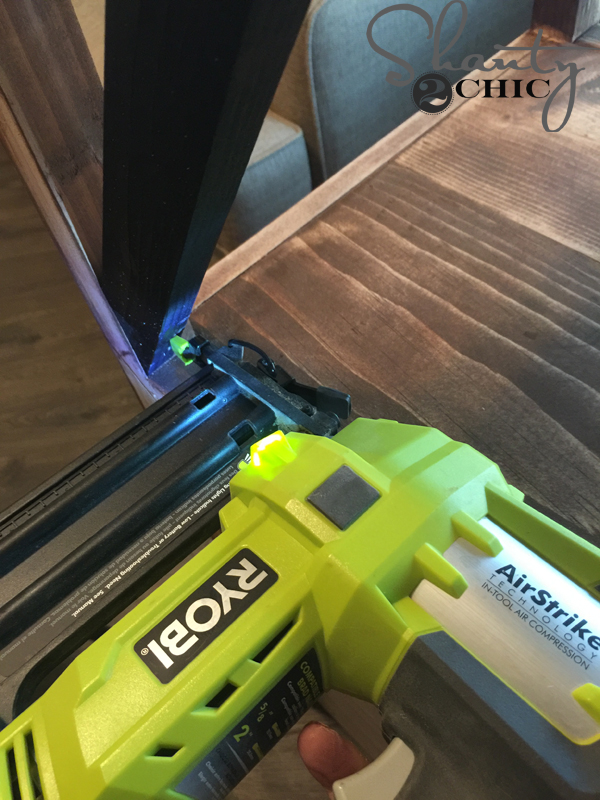
Then I attached them with my brad nailer to the back of the towers.
Last, I attached the back panel to the tower and then attached the doors with hinges!
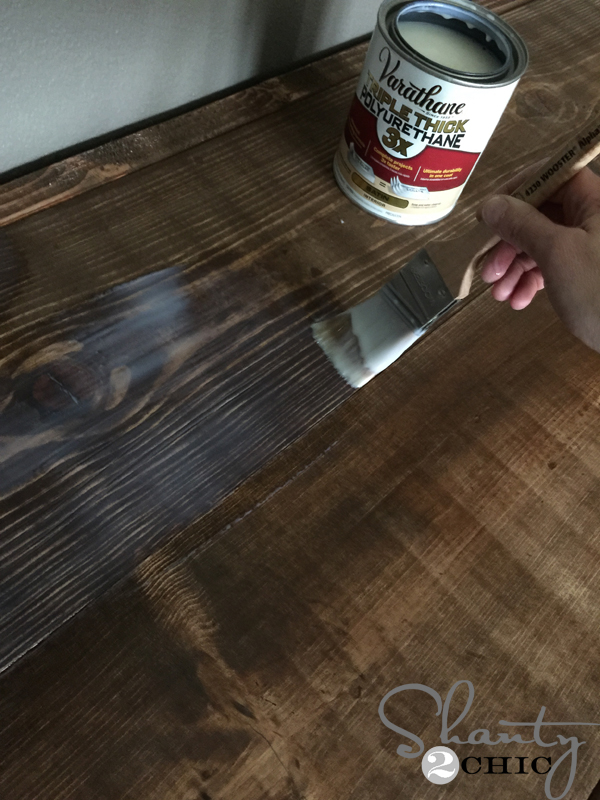
Final step – the finish! Get a damp clean cloth and wipe down all of the dust, from the distressing. Then, you are ready for the finish! I LOVE using Varathane Triple Thick Polyurethane. One coat is equal to three coats and it dries fast! I apply a thick coat on (it should look like glue) with a bristle brush. When it dries, it will be clear and smooth! I went with Satin finish.
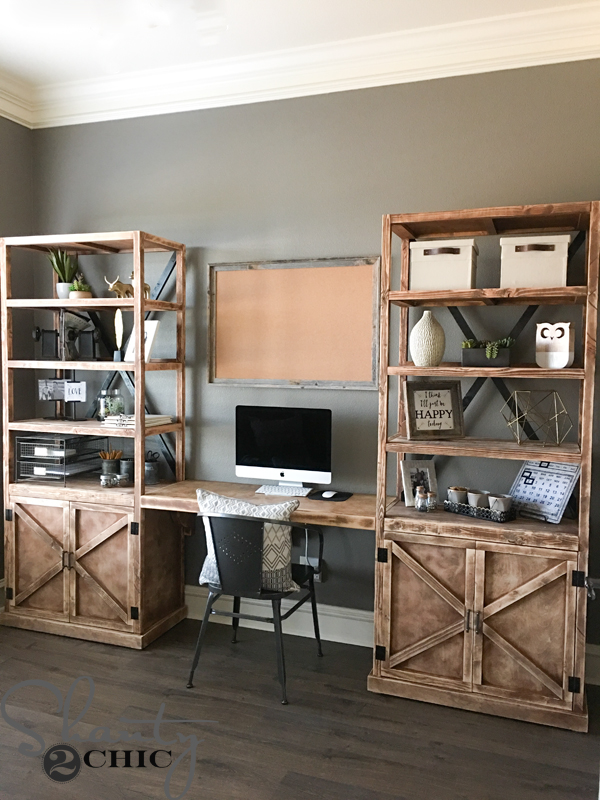
That’s it! Total for the two towers together was about $300 in lumber. If I had bought the 2×2’s and 1×2’s rather than ripping them from less expensive boards, it would have have cost me about $450 in lumber.
I’ll be back soon to share the floating desk that’s in between the towers!
Interested in where all the fun stuff is from?
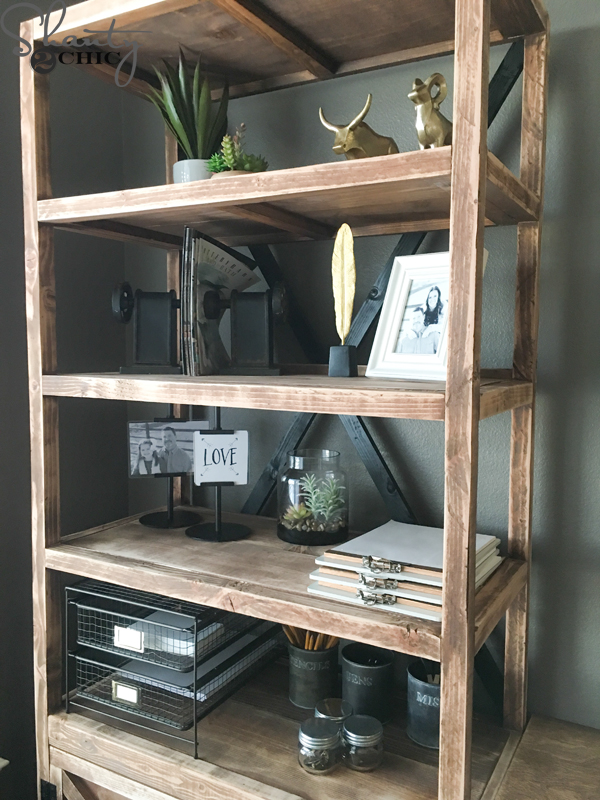
Left tower:
Top shelf: Tall plant – HomeGoods, Succulent – Target, Figurines – Target
Second shelf: Book Ends – Save On Crafts, Feather Paper Weight – Target, Frame – HomeGoods
Third Shelf: Frames – HomeGoods, Succulent – Target, Clip boards – Target
Bottom Shelf: Wire drawers – Target, Pencil and Pen tins – World Market, Glass Jars – Target
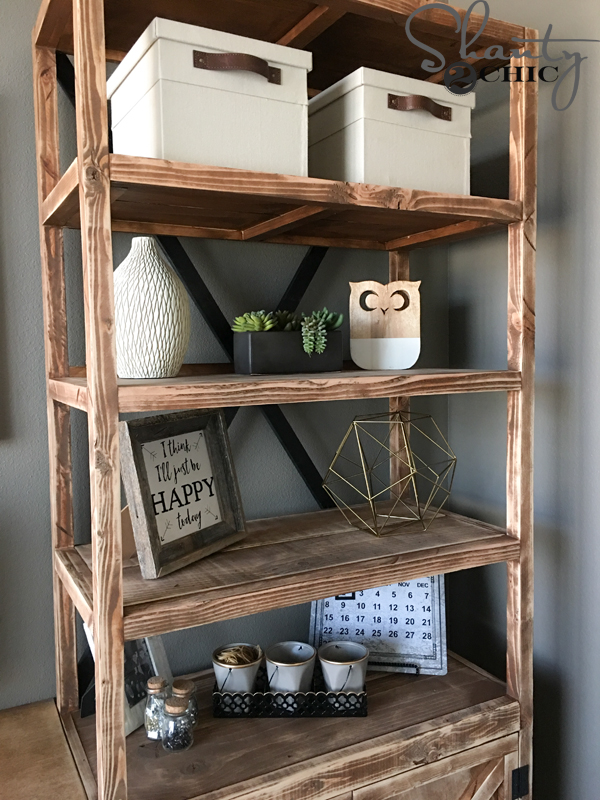
Right Tower:
Top Shelf: Bins – Target,
Second Shelf: Vase – Target, Succulent – Target, Owl – Hobby Lobby
Third Shelf: Frame – Hobby Lobby, Printable in Frame – HERE, Gold Geometric Ball – Target
Bottom Shelf: Frame – HomeGoods, Magnetic Calendar – Hobby Lobby, Metal Tray and Grey Buckets – Target
Cork Board Frame on Wall – Hobby Lobby (bought cork board and an empty frame and stapled it together)
Chair – Pier 1
Pillow – Target
Thanks so much for stopping by!
Happy Building!


Office Technology KDI is dedicated to providing cutting-edge office solutions tailored to suit your specific business needs. We offer a variety of innovative technologies and services to enhance workflow efficiency, elevate productivity, and improve the overall performance of your office. Our strength lies in customizing strategies and deploying advanced solutions to streamline office processes, creating a more efficient and productive work setting.
Love this system. I have one tower completed!
Can you tell me which hinges you used for the doors? I’ve tried two sets already and they’re not fitting. Thanks!
do these plans and materials list build 2 cabinets and shelves to go on the sides of the desk? or does the materials list only make one unit and I will have to double everything to make both?
Does anyone check this website anymore? JW, if he plans that are listed make 1 tower or does it make both towers?
If you click on the “free plans” for this, at the very end, it says “If you are feeling extra motivated don’t stop here. Build a second hutch and the desk to go between them!!” So, my guess would be that the materials listed are for just one tower. HTH
You could also just drill a wood screw from the bottom of that center board into the leg at an angle. Pre drill first or use Spax screws.
I see what you mean. I did not do that in this project. To put them on the end of the 2x board you need to have a clamp that will stretch the width of the board. Then you can take the block out of the Kreg and clamp it to the board. If you don’t have a clamp, just use a wood screw and screw from the leg in to the center board. Hope this helps!
How wide is this whole piece with desk and two towers?
This is almost exactly what I drew up for a wall in our playroom. Will definitely use this plan but will have two desk and a lower cabinet in the middle between them. Love all of your plans! Keep them coming! 🙂
The photo I tried to include in my comment didn’t come through the first time. Here is the photo I refer to in my first comment. Thanks.
Hi Kim,
Are you referring to the 2x board? If so, you can change the thickness measurement on the Kreg Jig. Have you watched our Kreg Jig How To? There is a link in this post to it. Hope this helps!
Question…I”m a beginner and making your bench coffee table as my first project. It calls for kreg jig holes in the center support board of the bench, attaching it to the legs of the bench, similar to those here on your shelf being attached,
“Then, attach the back trim pieces with pocket hole screws and wood glue.”
The board does not fit into the kreg jig for to make these holes so How do you get the holes in the width side of the board? How do you attach the kreg jig to the board and drill through the width???
thanks!
Not sure if this will help, but you can always remove the drill guide from the Kreg Jig and clamp it directly onto the board.
Thanks, I have tried but don’t know how to do so to drill into the width of the board.
When you say the “width side” of the board, are you meaning through the thickness of it? I don’t think the holes are drilled that way. In the picture you posted above, the pocket holes are drilled into the end of a trim piece.
Love this, and every other project you’ve done for us.. One question though. Quite a few of your projects that you stain, you also take the sand paper to it, for a beautiful worn look. I’ve tried waiting a couple days after I stain, to do the same thing, and I use a light coat of stain, but its not long before my sand paper is all gummed up with stain. What grain / brand of sand paper do you use, to get a little more life out of it? I have the small dewalt hand sander, and its a bit bulky. Does the sander matter? anyhow…thanks again. Its exciting to see what you gals are up to, and I look forward to all your posts.
have a great day,
Debbie.
Hey there! I always use an 80-grit sand paper and we use the red Diablo pads. We find the pads at Depot. I probably went through 2 pads when I distressed this piece. Does this help?
Thank you so much for your reply. I guess I shied away from the 80 grit because I was afraid it would end up scratching, vs sanding. I’ve been using the 120 – 180, and it dumps pretty quick. I’ll have to look up the diablo pads….I don’t think i’ve heard of them. Are they for a round or square sander? (P.S….what is your favorite sander when doing the distressing??? or does it matter? Round or square?)
thank you again!!
Diablo is sold at depot 🙂 easy to find! We usually use the corner cat sander and the orbital sander. LOVE the orbital sander for big projects like this one and the corner cat is good for small spaces.
thank you again!! I will be changing things up with my hand sander, to something that fits me a little better. You gals have a super day!!