Happy Friday guys!
Well… I got an itch a few weeks ago.
I decided it was time to finally overhaul one of the most used rooms in my home. My garage!
I have been working like crazy over the last two weeks and I am SO pleased with how it’s coming along. I feel like I have gained square footage to my home. I have found some AMAZING products along the way that I can’t wait to share with you guys.
So… First was first. I had to clean the place out before doing anything. I decided to tackle the beast first. And by beast I mean my ever growing scrap wood pile that was taking up half my garage!
Let me show you what I came up with!

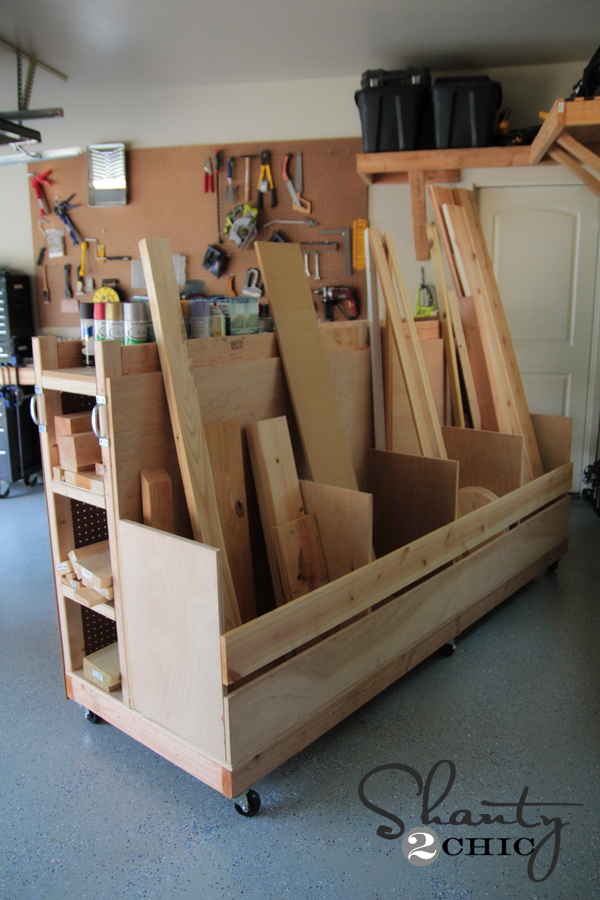
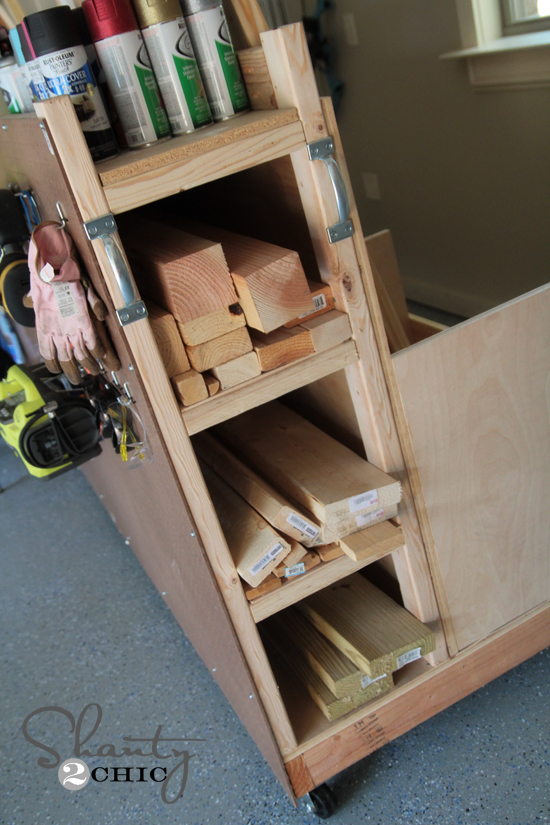
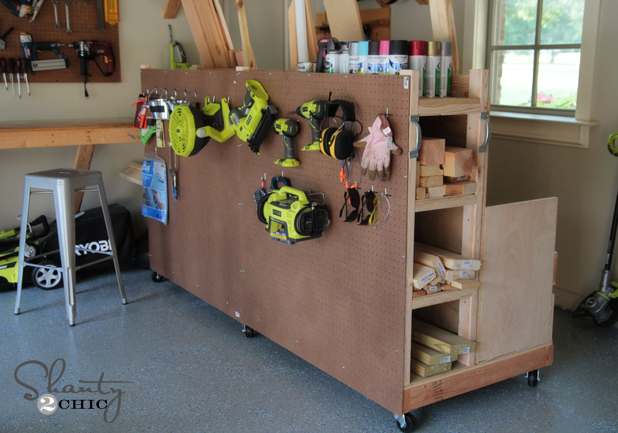
How fun is that?? It’s my Shanty Garage Storage Cart! Not even kidding… I LOVE this guy. It has storage for my scrap wood and long boards. It also has a full sheet of peg board for tools on one side and there is a great shelf on the top for my spray paint and stains. Can I get a woohoo??
You can click the button below to download the FREE printable plans! Thanks to Jay from Jay’s Custom Creation for putting all of Shanty2Chic’s original designs into printable plans for our readers! He’s too legit to quit! Check his site out… He has some great plans of his own!

Let me show you how I made it!
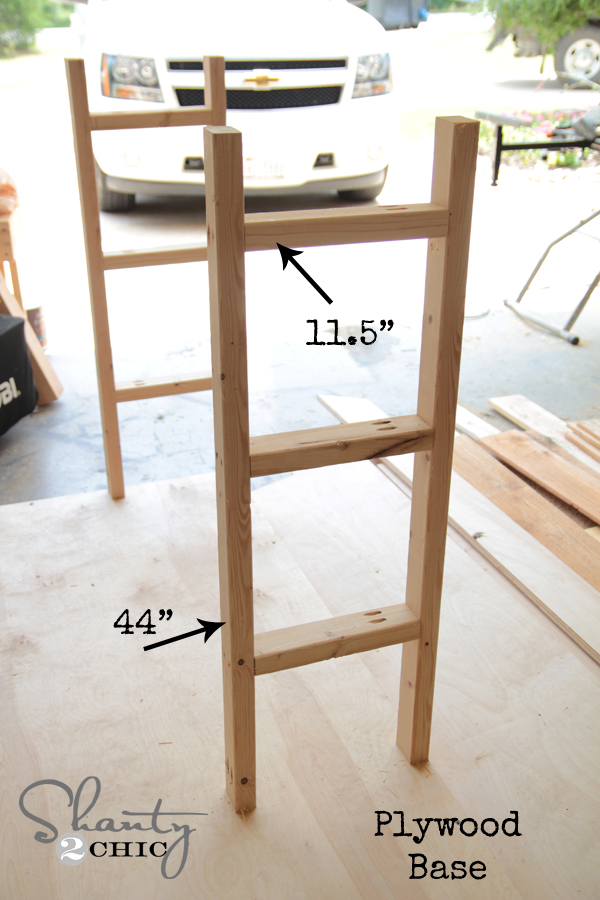
I started by creating the frame for the base. This is what it looks like. I used 2x4x8 for the whole frame.
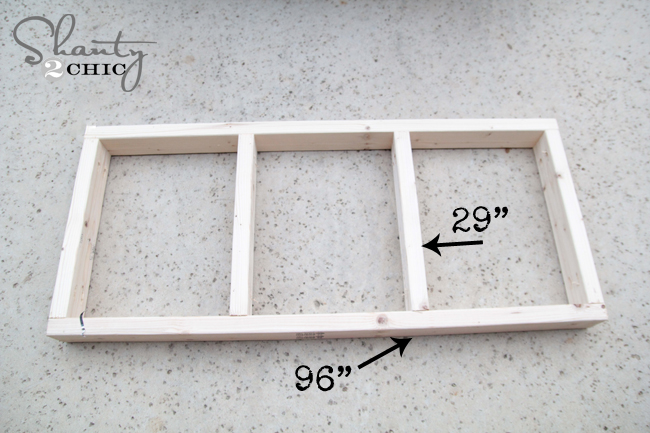
This is actually a different frame photographed because my shot turned out terrible. But… It is the same exact build. Only I added an extra 29″ piece to my frame when building the cart.
I used my Kreg Jig to build this whole thing!
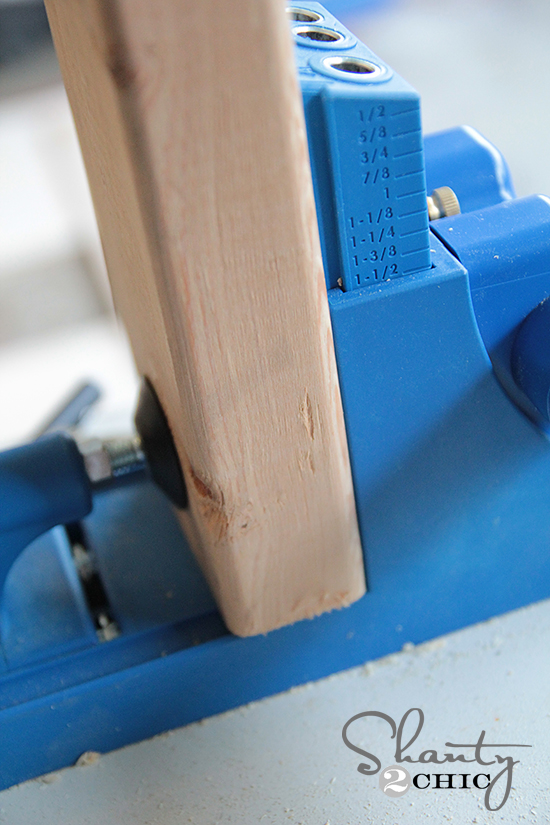
For those of you thinking… What the heck is a Kreg Jig?… Be sure to check out our quick video explaining it. You can see that HERE.
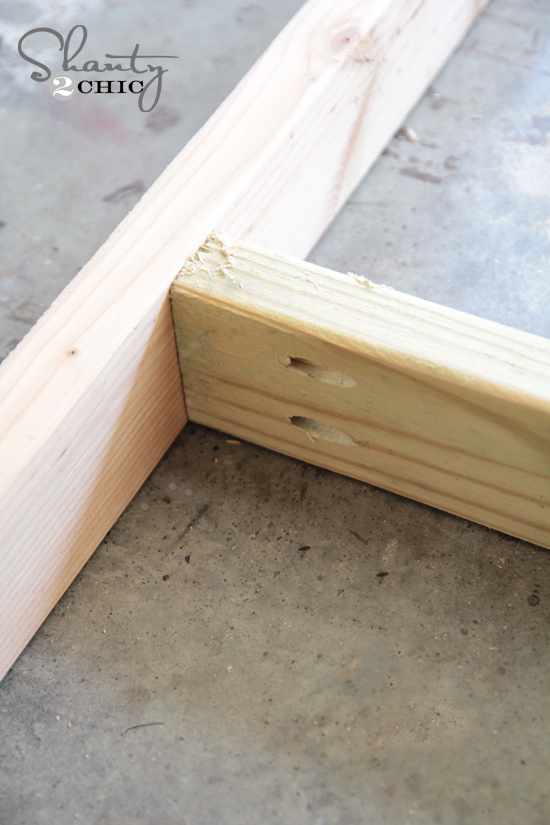
I used 1 1/2″ pocket holes and 2 1/2″ pocket holes for all of the corners like this.
Next, I covered that frame with 3/4″ PureBond Plywood. I love me some PureBond! After learning all of the benefits of this great brand, it has become our number 1 choice for plywood. Plus, it’s beautiful! Win win.

I had the guys at Home Depot cut this base piece to 32″ x 8′. I used the remaining 16″ piece on the dividers below.
On top of the 3/4″ plywood base, I built the storage rack for my long boards. These are all made from the 2x3x8 boards. I made three of these, all the same size. I attached them to the plywood base using pocket hole screws. You can place your shelf boards where you want them as long as all three are in the same place. Mine are all about 12″ from each other.
After finishing those, I attached another piece of PureBond to the back of these 3 frames. I used wood screws through the plywood and into the back of the frames to hold them in place. I had Home Depot cut this piece to 40″ x 8′. I use that 8″ scrap on a part below.
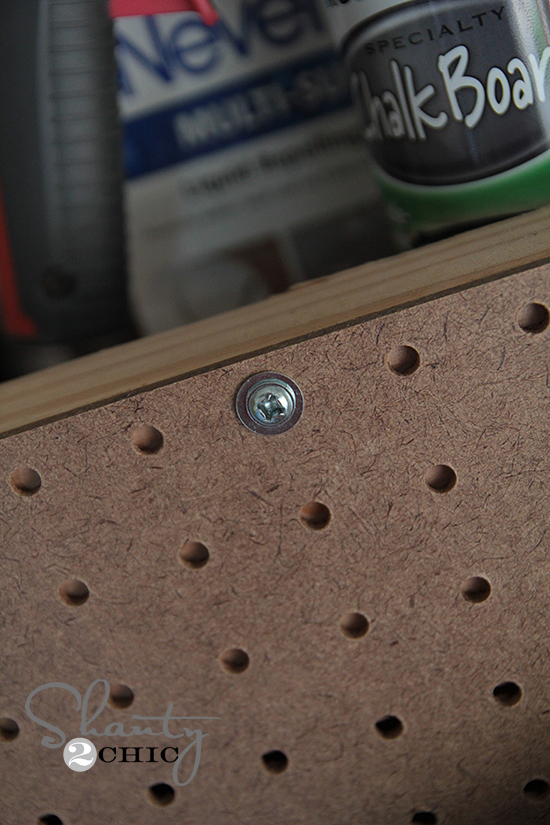
I added a 2 4×4 sheets of peg board to this side. I would have done a full 4×8′ sheet, but it didn’t fit so well with the 5 kids in the Suburban 😉 I used wood screws with small washers to attach it to the frame like this.
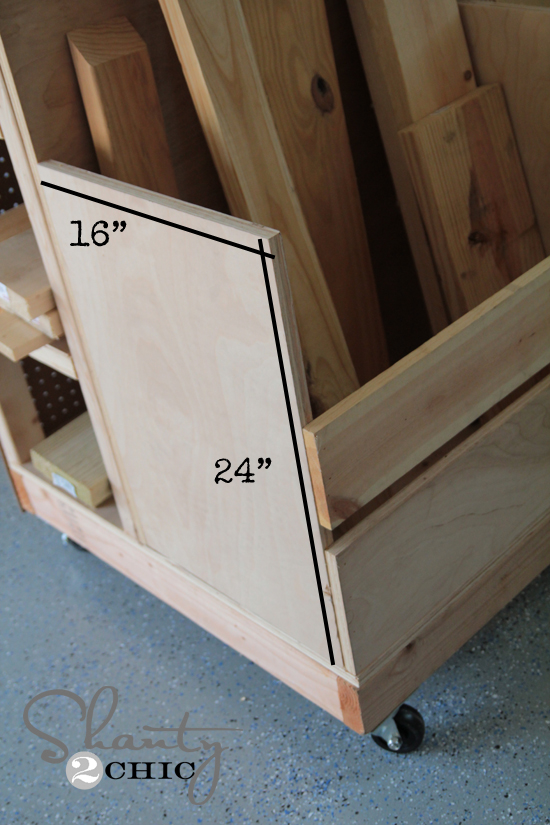
Next, I cut 5 pieces of 3/4″ PureBond Plywood for the dividers. These were all 16″ x 24″.
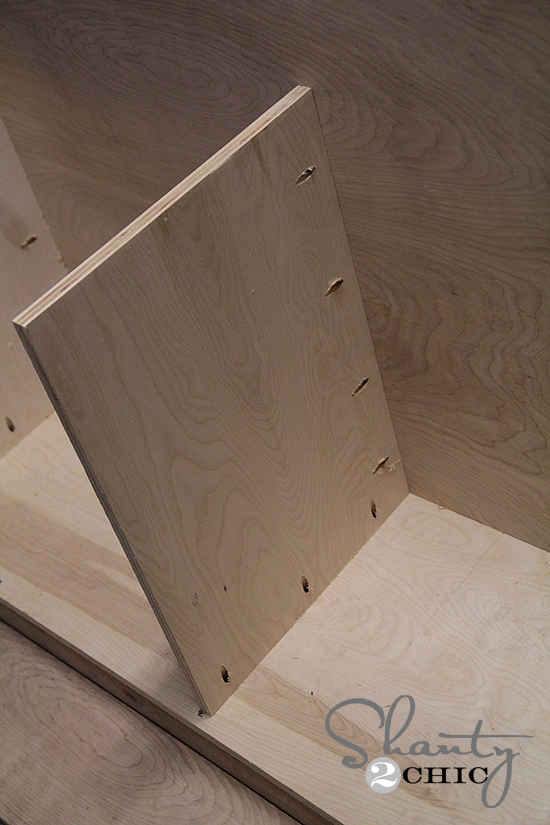
I used 3/4″ pocket holes and 1 1/4″ pocket hole screws into both the base and the back plywood piece like this…
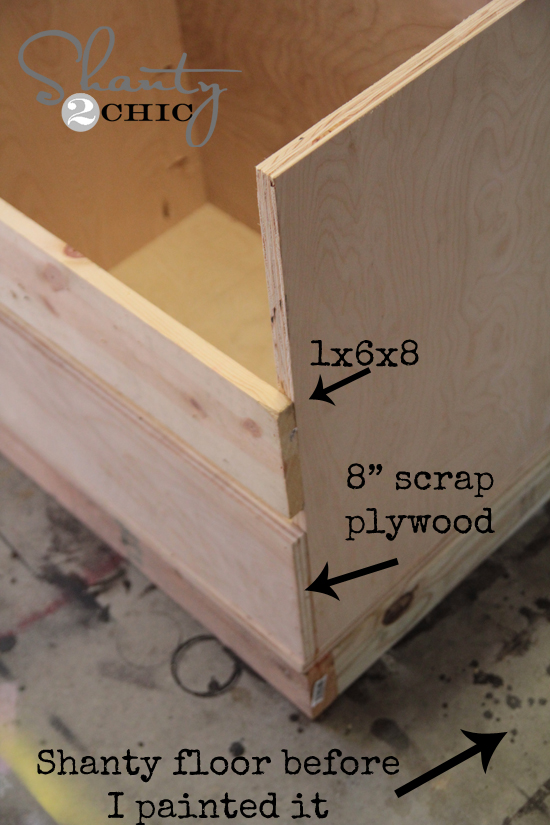
For the front I used an 8′ scrap from one of the PureBond pieces and a 1x6x8 board to keep the wood inside the dividers. For this part I used Gorilla Wood Glue and finish nails.


For the long board shelves I added 1/4″ PureBond plywood strips to create a shelf. These would normally be too thin as a shelf, but since I will only be using 8′ pieces in this area, the weight is even over the whole thing and it helps the boards slide in easy.

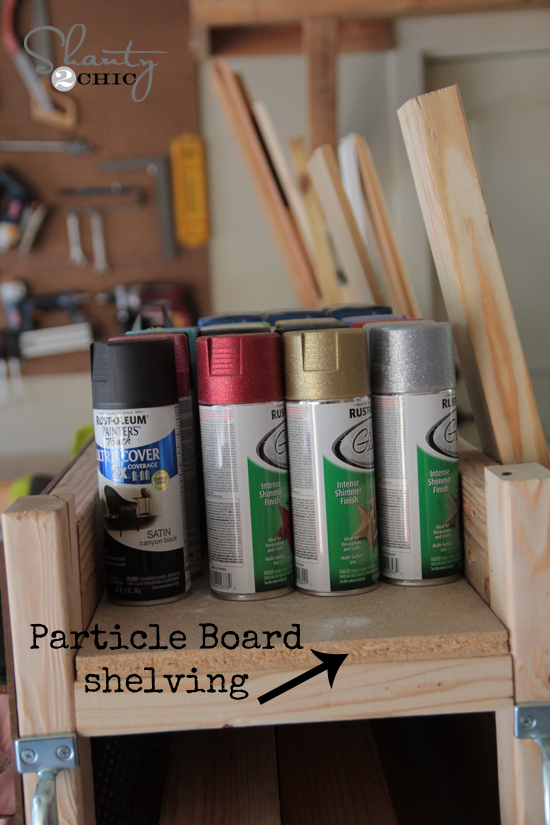
I used particle board shelves for my top shelf. These were the cheapest option and the perfect size for that to shelf. I wanted it to be strong and hold my extra goodies.
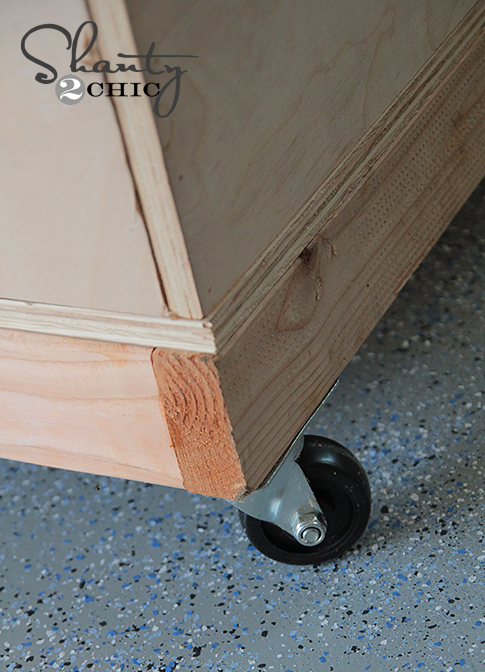
Finally I added some casters! I started with four 250lb casters, but decided it would roll much easier by adding a couple more to the center. So glad I did this. It only cost about $10 more, and this baby is super easy to move around… Even loaded down with wood!
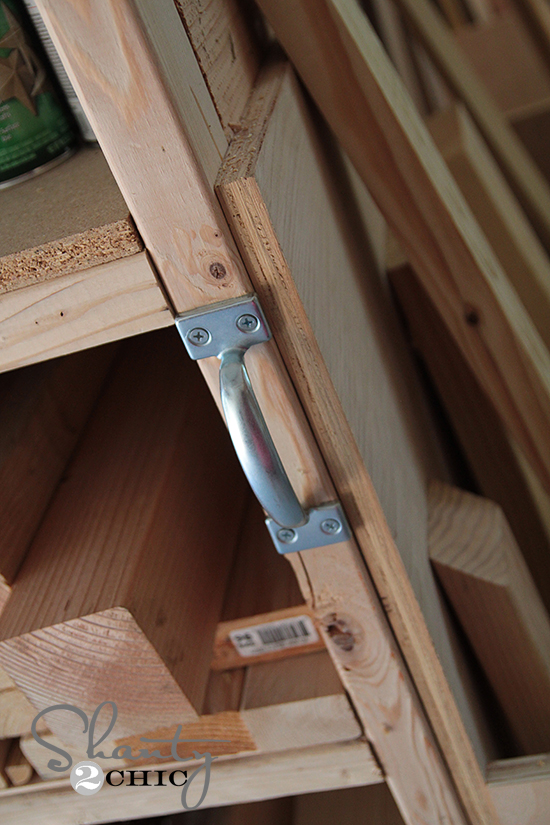
I topped it off with a set of pull handles on each side close to the top. These are great! I found them at Lowe’s. They are actually called gate pulls and you can find them in the outdoor hardware aisle.
And my final FINAL step was loading it up!!

What do you think?? This has been a lifesaver for me. Literally… I am not tripping over wood anymore. And, I can actually see my scraps and what I have! Did I mention that I love it?? Good… Just checking.
Remember, you can download or print the full set of FREE plans by clicking HERE!!
Thank you so much for stopping by! I hope I explained everything well, but let me know if you have any questions at all! I would love for you to pin this and share it with your peeps below!
Have a great weekend!
~Whitney
Click below to purchase a Kreg Jig Master System!

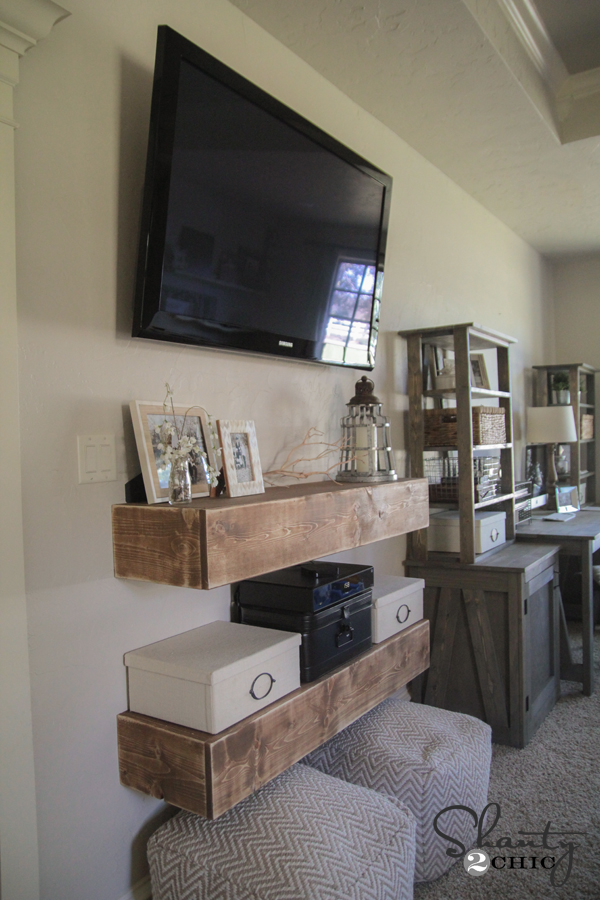

I’m dying to know how you did the shelves above the door there. I want those!
That is an awesome cart! You did a fabulous job on it. Thank you for being so nice and giving us the info needed to be able to make our own. I am also totally jealous of that floor in your garage. It’s really wonderful.
Thank you Vicki! Happy to help and thank you for your sweet message!
Oh I am totally in Need and Love with this!! Can’t wait to get some time in my schedule {aka no clients furniture in my garage so I can build it!!}!!!
Yeah! Good luck with the free time 😉 Send pics if you get one made!
Wow, I’m totally drooling over this thing!!! I just finished building a farmhouse table with a friend yesterday, and the garage is a total mess!! This would have saved me, both keeping the area organized, and also keeping me in good graces with my hubby!!! This is definitely my next build!! Great Job, Whitney!!! As usual!!!
Thank you Erin! Congrats on finishing the table… My garage looks like a war zone after a big build 🙂 This is helping! Thanks for your sweet message!
Could you please post a pic of your farmhouse table. Would love to see it.
Which one Dan? We actually have done 3!
oops, sorry Shanty. I was talking to Erin. But hey, I’ll be glad too look at yours. Any 3 please.;)
Shanty, could you show me any pics?
This is amazingly awesome! We have a major garage overhaul coming up and this is definitely going on my inspiration list.
Oh yeah! Mine has been major too… Hard work but so worth it! 🙂
I love this!!!!! I was just thinking about this as I was picking through my wood scrap pile. I am making the fancy x desk and was able to use a lot of my scrap wood for this project. I am going to have to make this so I can hunt for wood a lot easier. 🙂
Awesome Carolyn! That has been my favorite part… I can actually see my scraps!
I built something similar to this several years ago. Started out with the hard-plastic wheels like you’ve got there shown in pictures. After 3-4 years, the wheels went flat on the bottom, and it was almost impossible to move. So, upgraded to steel-wheels. I’d suggest going with them to begin with. You load that baby up and it will be heavy! Nice project.
Good to know John… I will keep that in mind when these start giving out on me. I don’t roll it around too much, so hopefully it will be a while before I need to. Thanks for the advice! 🙂
I love this and need it so bad! My basement is a disaster area with all my scrap wood lying around and I never can find anything. Do you know about how much this cost you?
I did the whole thing for about $150. It is a bit high, but so functional and worth it!
You all never cease to amaze me – I need this so bad – seems like there is never enough time for all the projects I want to tackle. Thanks again for sharing – always inspiring me to get moving!
Aww… Thank you! This comment made me smile 🙂
Awesome!
Thank you!! 🙂
I am building this for my husband!!
Good thinking… He will totally love you for it! 😉
I wish I had a garage to store something so big. I am envious! Nice work. Maybe I can make something smaller that will work in my storage shed. I really, really like it. 🙂
You could definitely modify! This one is big, but it’s amazing how much space it actually saves and creates!
Will you come fix my garage?!? It’s in desperate need of a makeover!
Haha! You know I will help…. As long as I can post about it 😉
WOW! Definitely building this for the garage
Yeah! Happy to hear it! Send pics if you get one done!
Amazing!!!! 🙂 Love it!!
Thanks so much!! 🙂