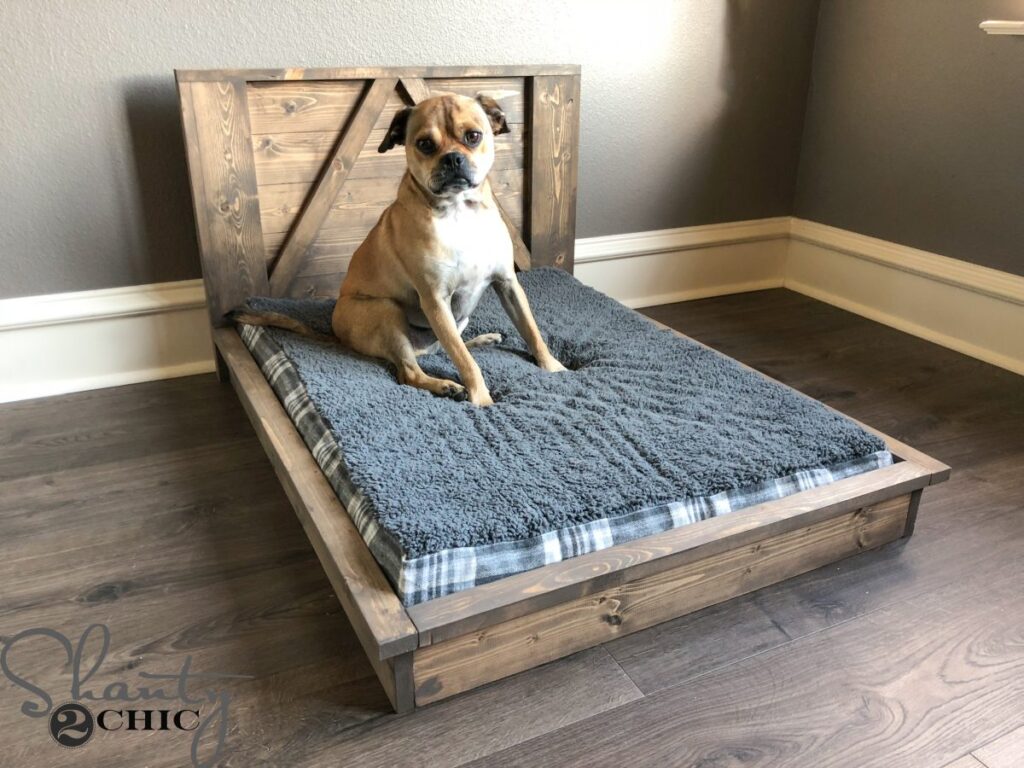
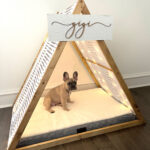
Learn how to build a Doghouse Bed with this step by step guide and free printable plans by Shanty2Chic. This is an easy DIY Project and perfect for beginners!
We are pet lovers so, not only do our kiddos get a Shanty bed, our pets do too! I just added a fur baby to our home and of course, I had to build her her very own pet bed. This is such an easy build, it’s perfect for beginners and it is so stinking cute! I spent under $60 for the materials!
You can check out how I built it on our Instagram Reel here and follow along with the how-to tutorial below.
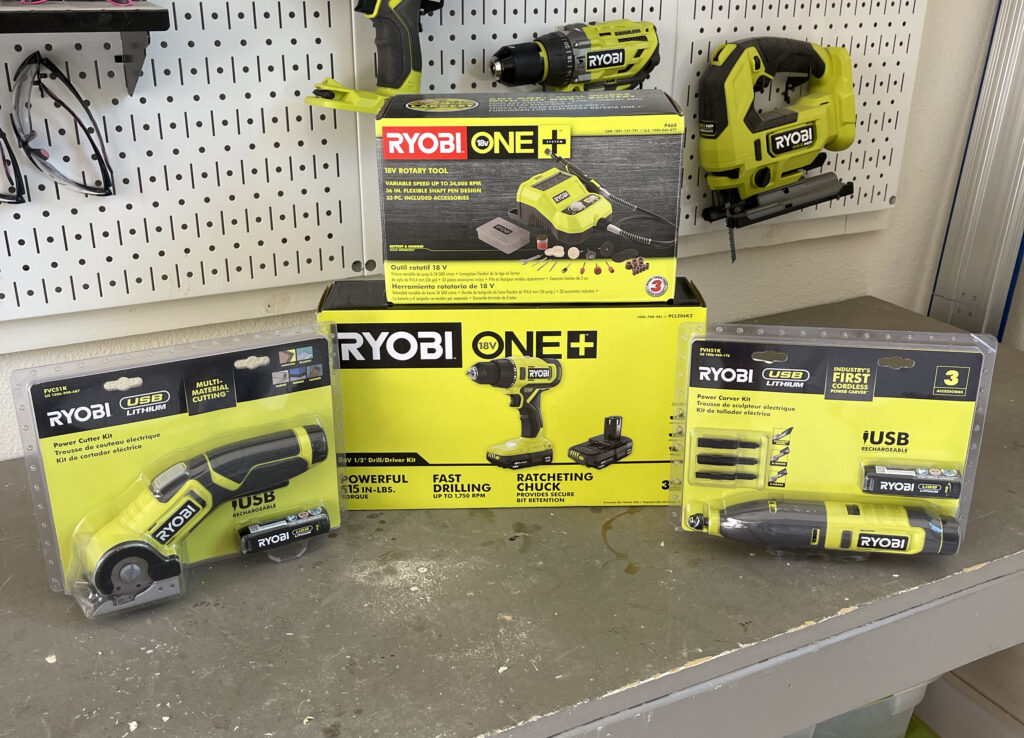
To celebrate Fall our friends at Ryobi are giving away a four tool giveaway set to 10 of our lucky readers! Scroll to the bottom of this post to learn about the tools they’re giving away and how to enter!
So, let’s get to building!
Click here to jump to the free printable plans!DIY Dog Bed
Table of Contents
Tools:
Supplies:
- 1 – 1x8x8 Pine
- 5 – 1/2″x48″ Round Dowels
- 1 1/4″ Pocket Hole Screws
- Wood Glue
- Fabric
- Scrap 1×6 board for sign (optional)
Building the Frame
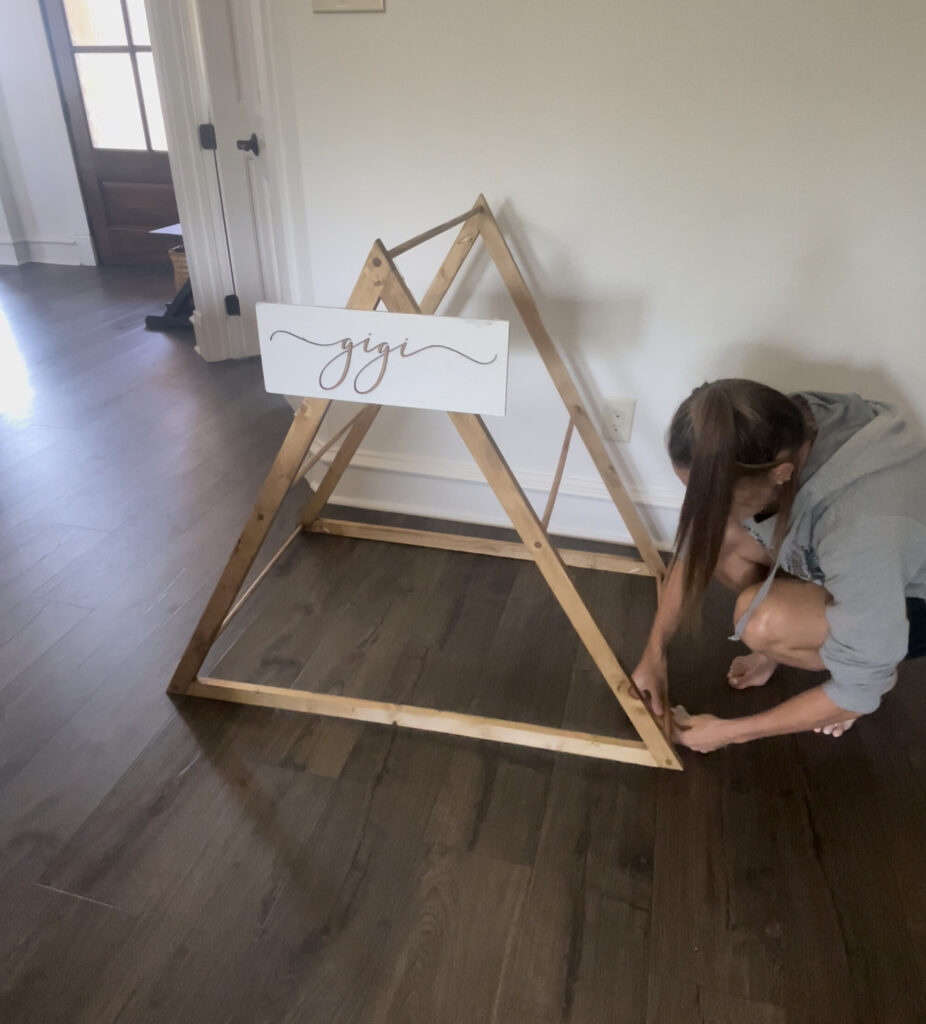
Step 1:
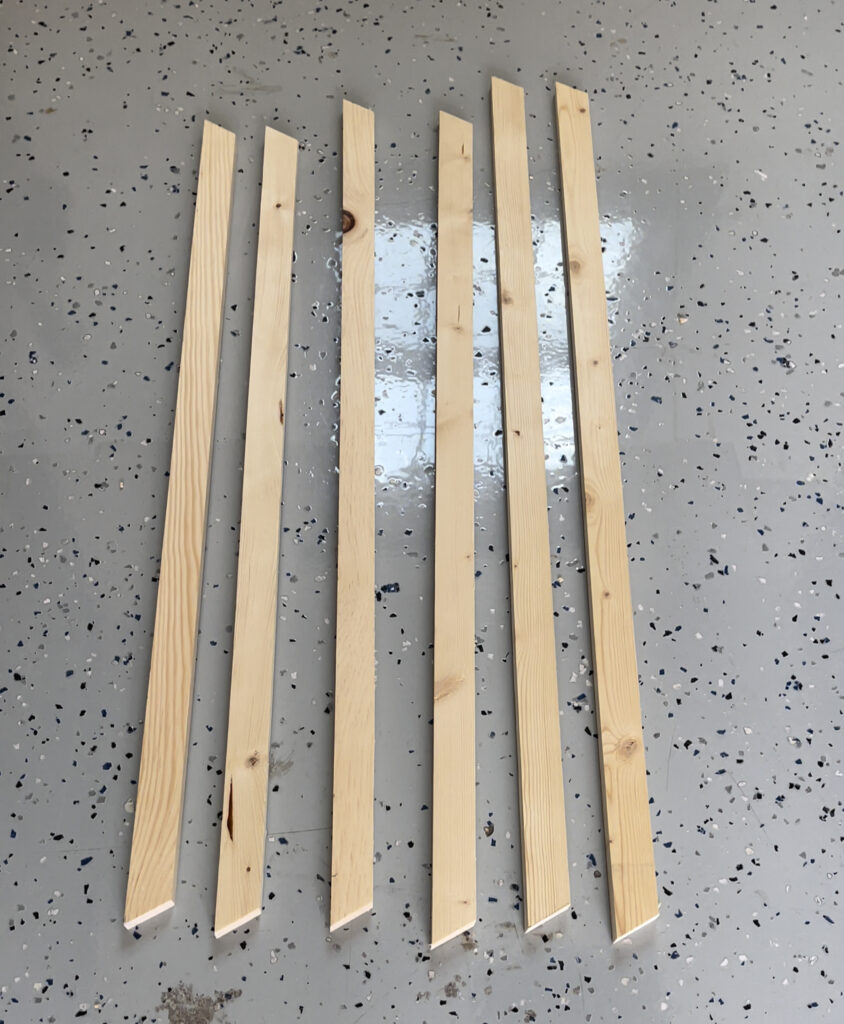
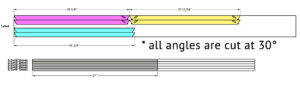
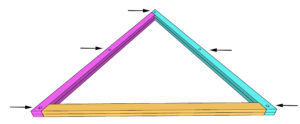
First, cut the frame pieces to size.
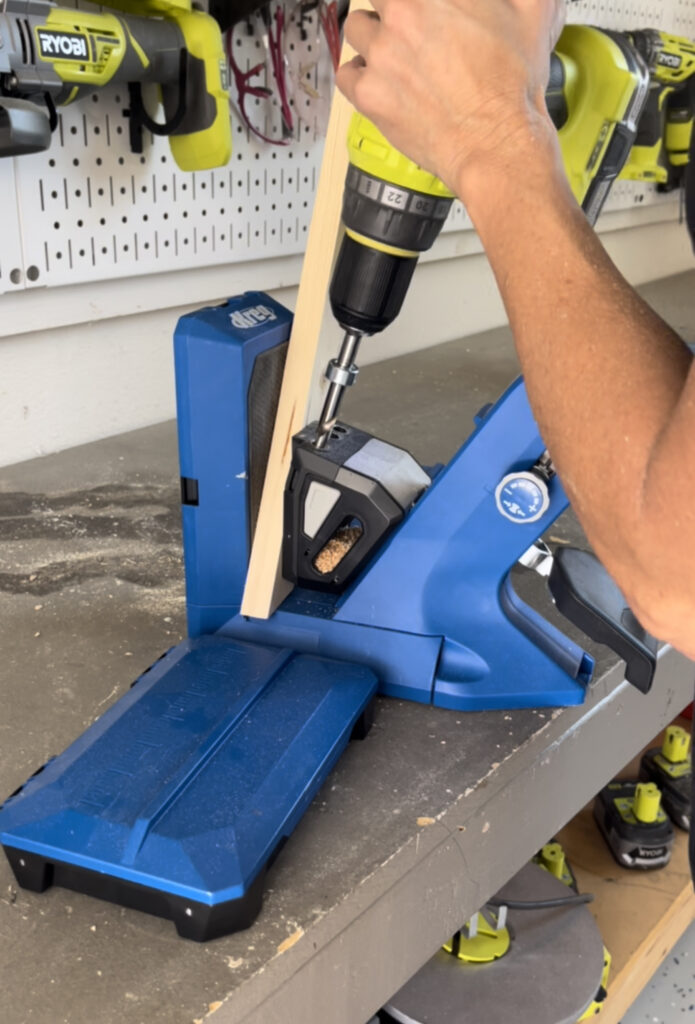
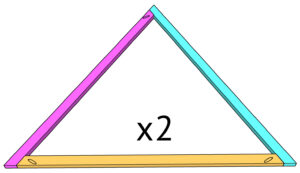
With a Kreg Jig, drill 3/4″ pocket holes, according to the cut list. Attach the left and right-side frame pieces together with 1 1/4″ pocket hole screws and wood glue.
- You can find our favorite Kreg Jig model here
Step 2:
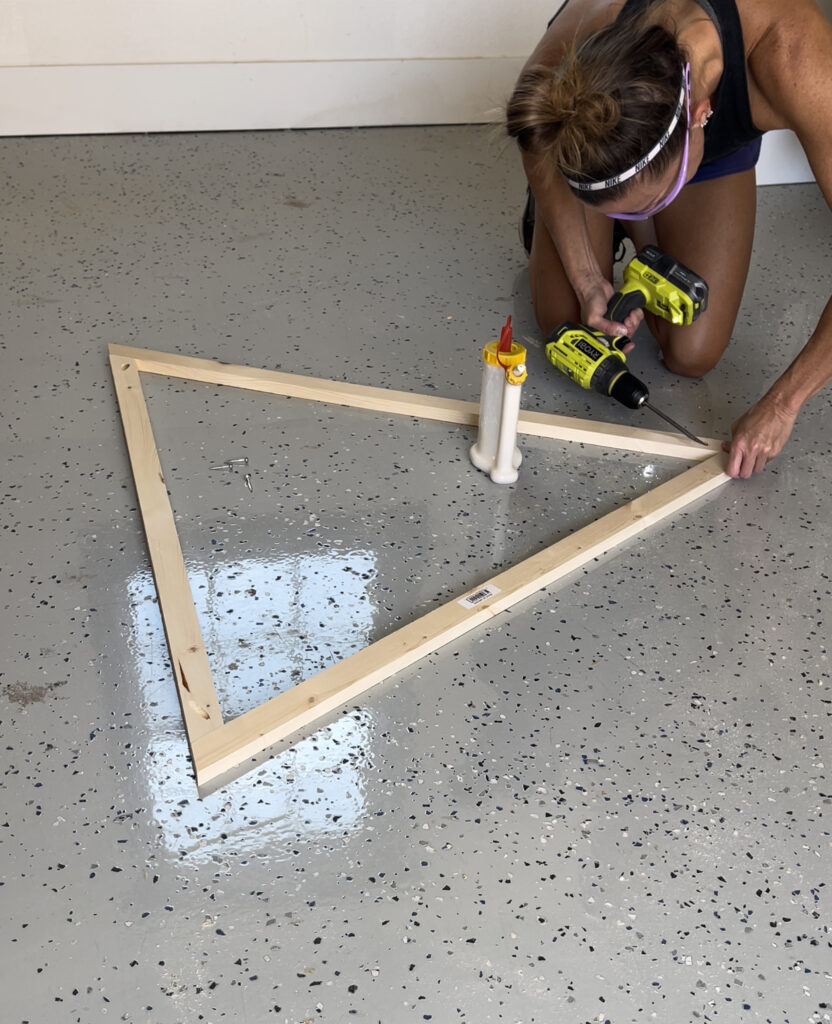
Attach the bottom frame piece to the side frame pieces with 3/4″ pocket hole screws and wood glue. Build two frame assemblies.
Drilling the Holes
Step 1:
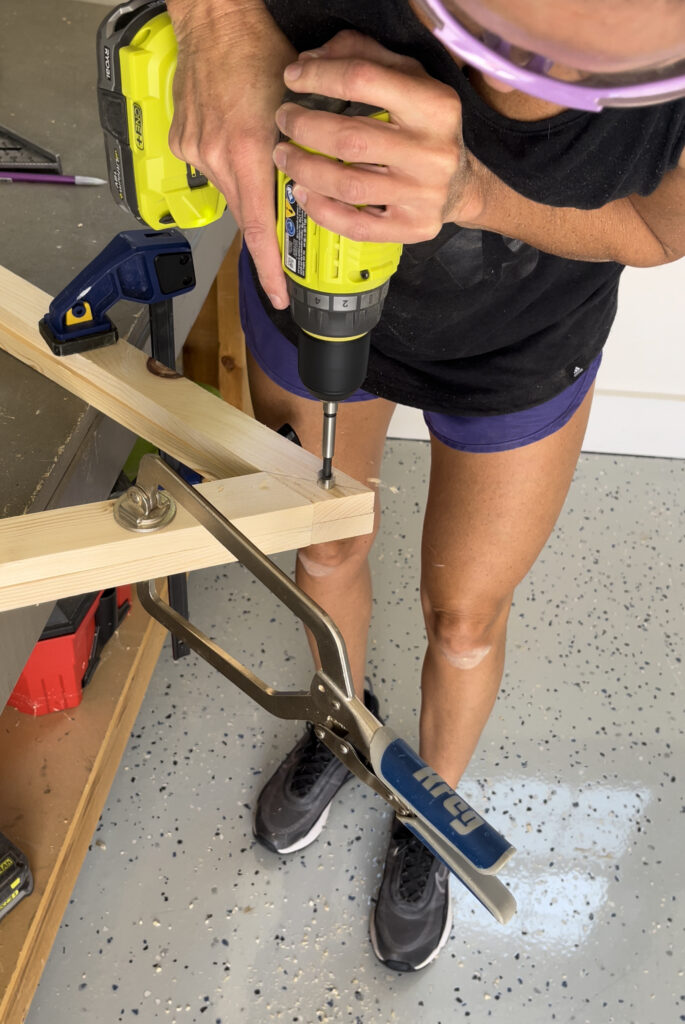
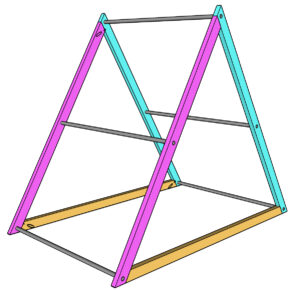
Stack the two frames on top of each other, so that the pocket holes are facing down. With a 1/2″ drill bit, drill a hole at every corner and the center of both side pieces. Make sure to use clamps to keep the frames in place while you drill. You can use measuring tape to mark center for each hole.
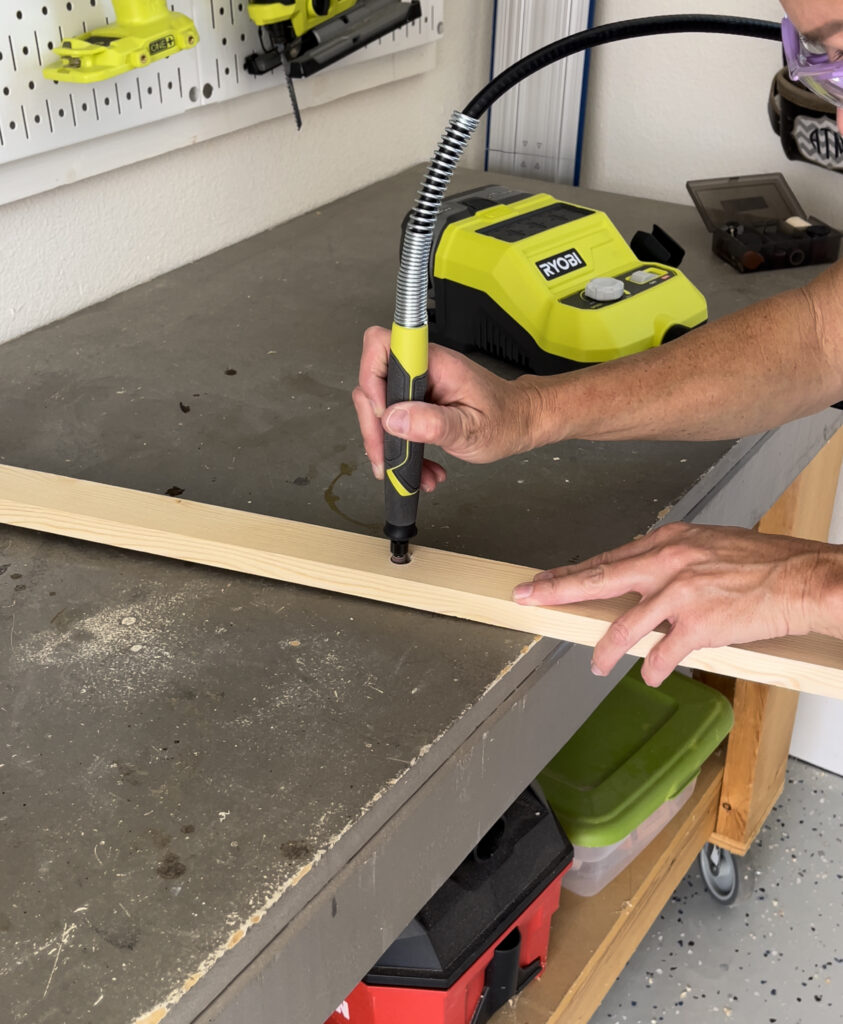
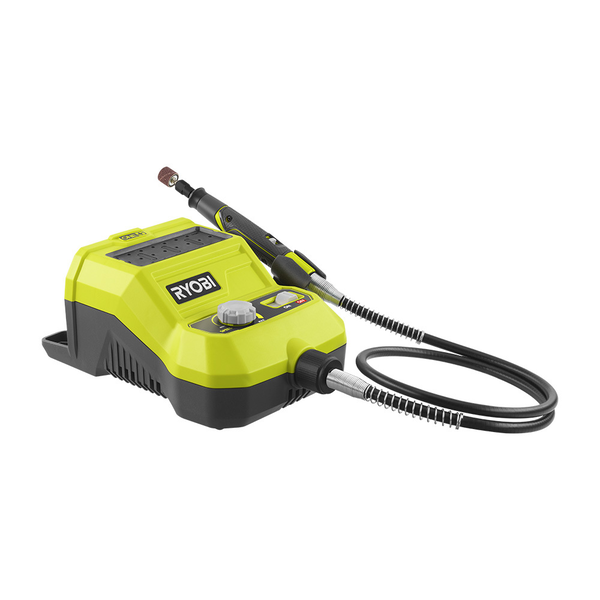
After I drilled all of the holes, I used my new Ryobi Rotary Tool to sand the edges and inside of each hole. This Rotary Tool is one of the 4 tools in the Ryobi tool giveaway!
Assembling the Dog House
Step 1:
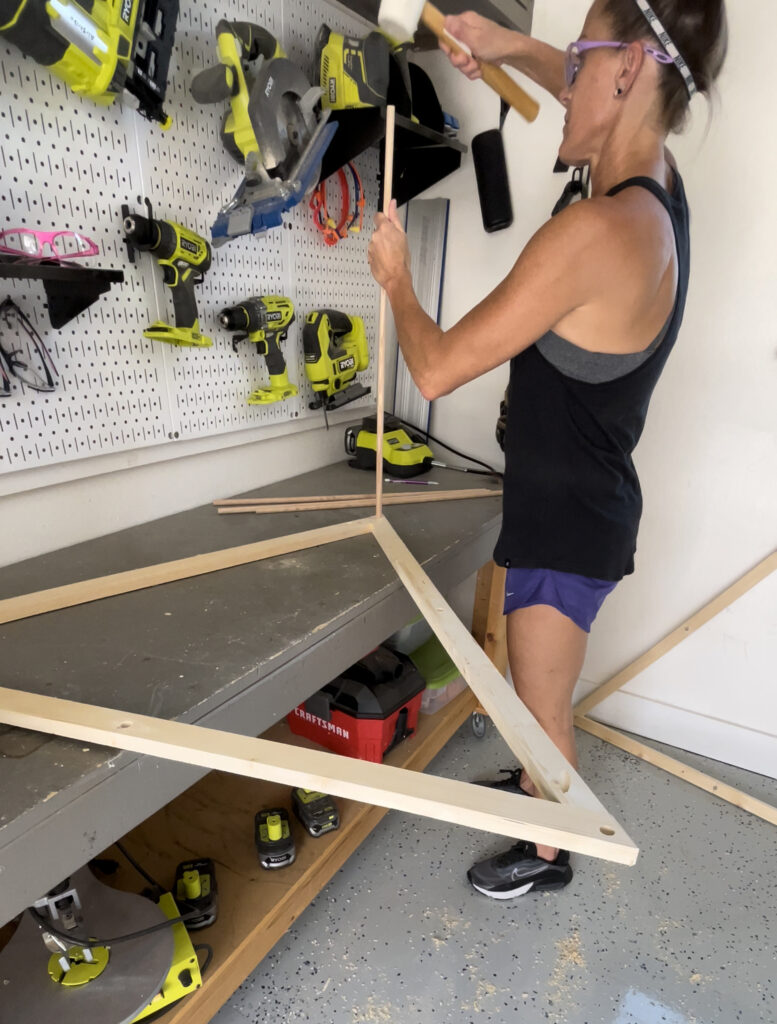
Cut the dowels to size and slide them inside of the holes on one side of the house.
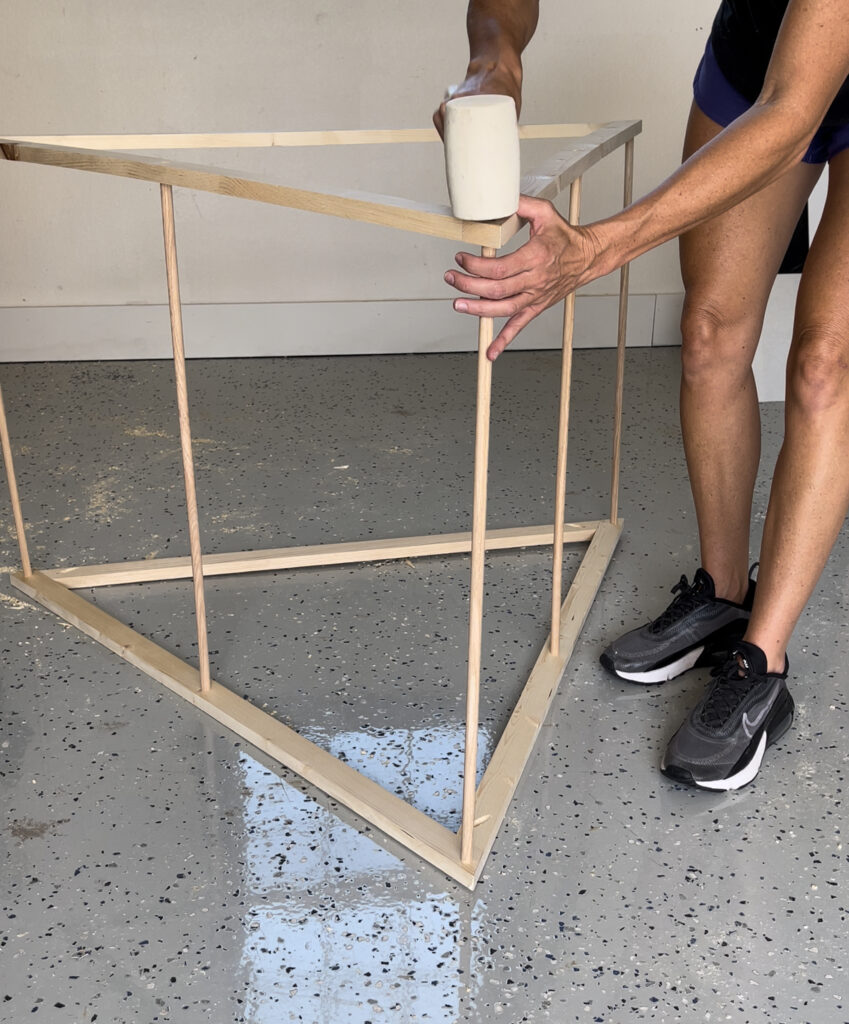
Then, slide the other frame over the dowels to create the tent. You may need to use a rubber mallet to get the dowels flush with the edges of the tent.
The Finish
Step 1:

Once the dowels are attached, sand the whole bed down, fill your pocket holes with wood filler and apply one coat of stain to the entire dog bed.
- You can find the stain that I used here
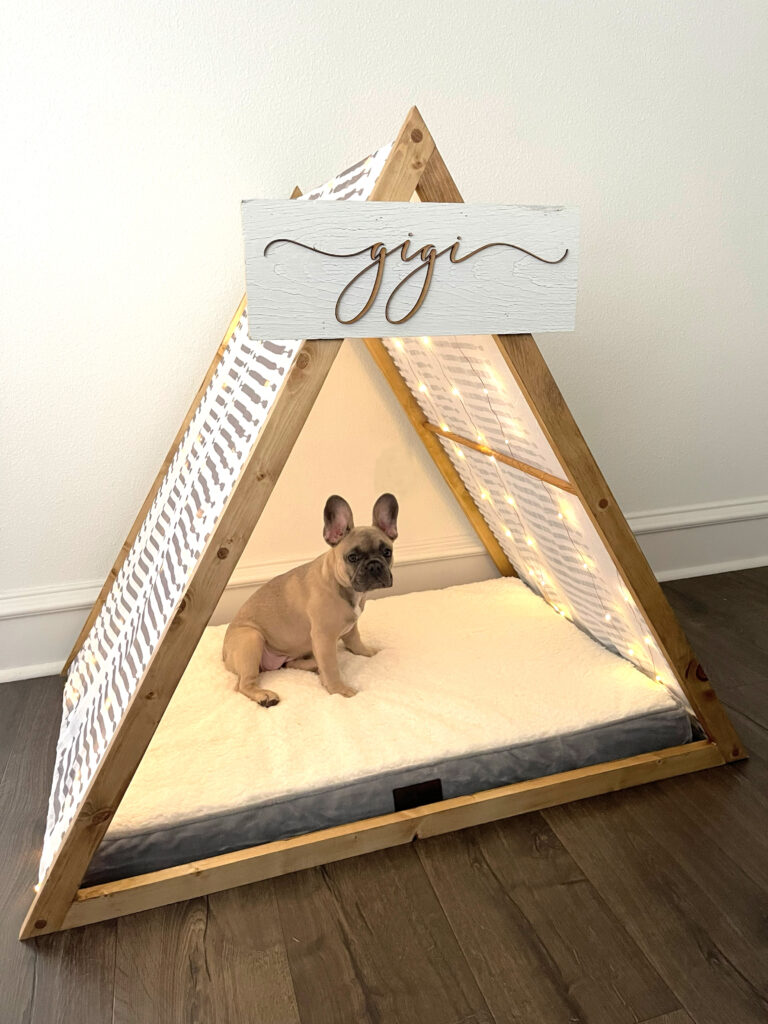
Creating the DIY No Sew Dog Bed
I am not great with a sewing machine or a needle and thread so, I went the no-sew dog bed route! If you can sew, that is great, if you can’t no worries! Here’s how I created the tent for this pet bed without sewing.
Step 1:
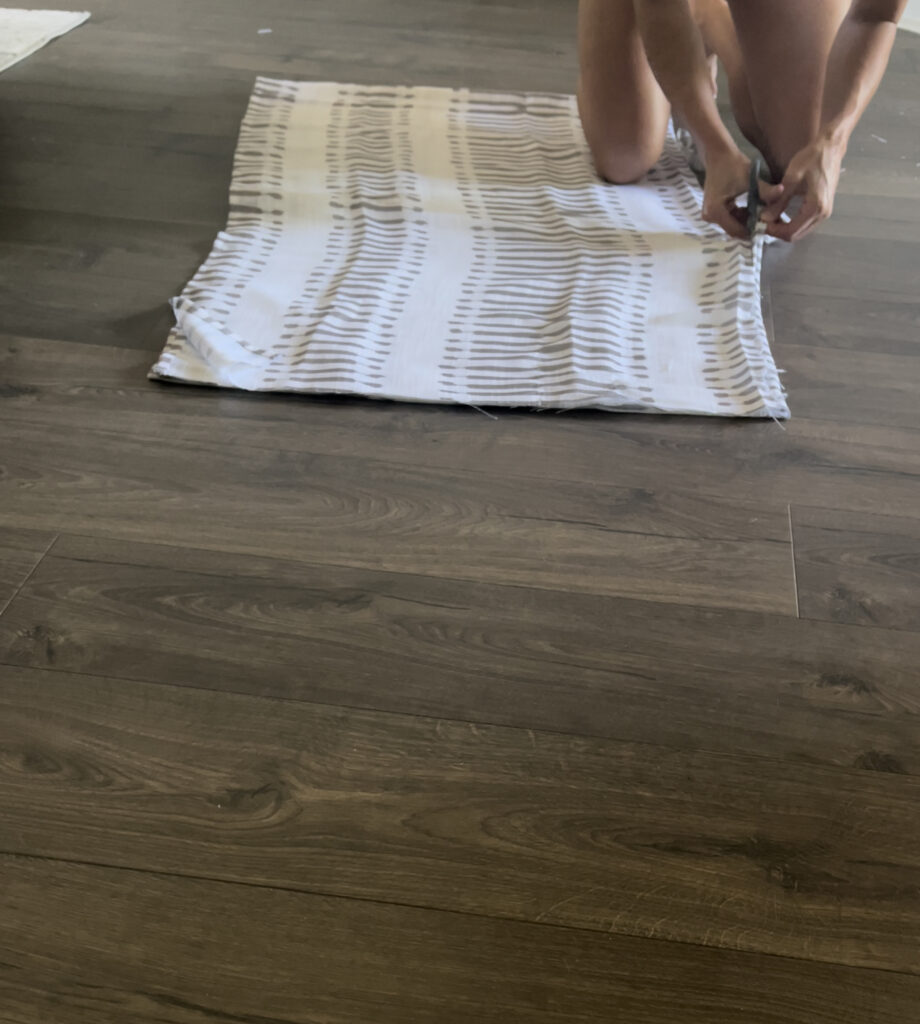
I found a curtain with a great pattern that I loved on Amazon! It comes with 2 curtains but you’ll only need one for this project. I measured for the fabric width to cover both sides of the tent and used fabric scissors to cut the curtain. I kept the seam on one side and the top of the curtain and cut off the other ends making sure to leave an extra inch on the width and about 4″ extra on the length.
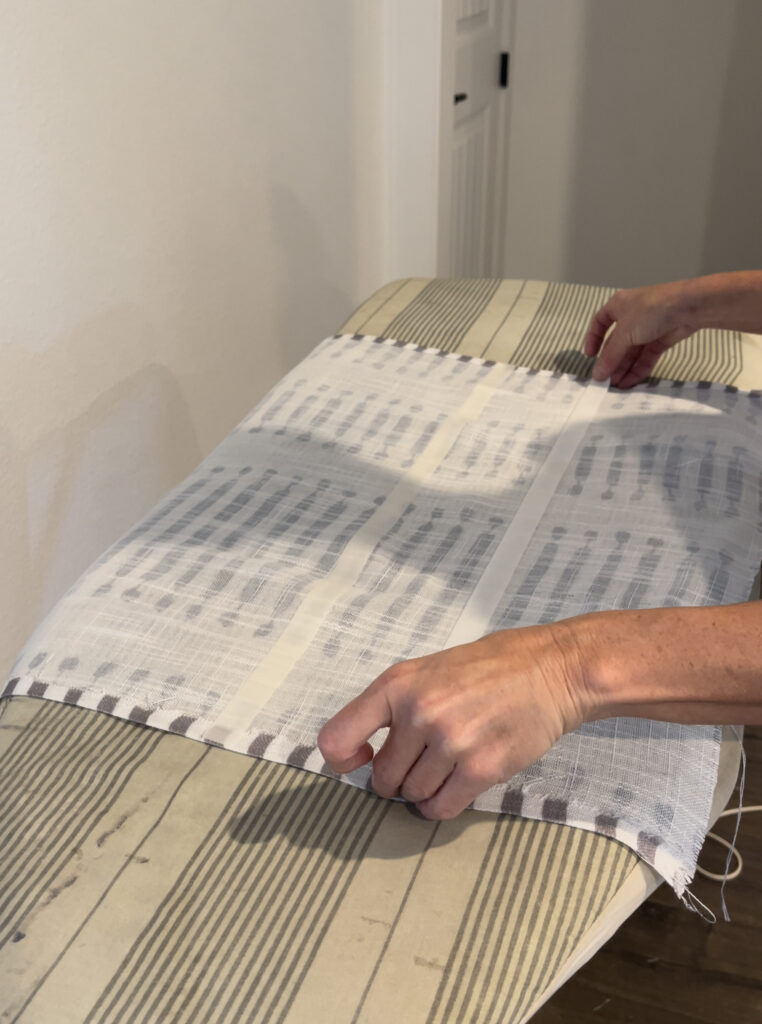
Step 2:
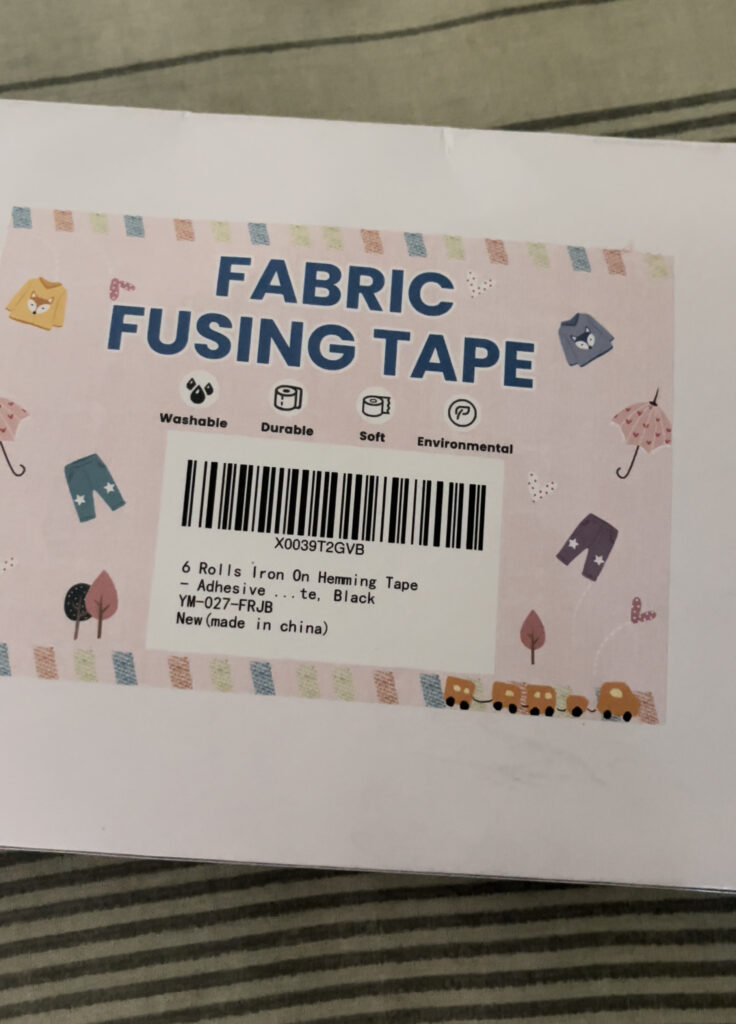
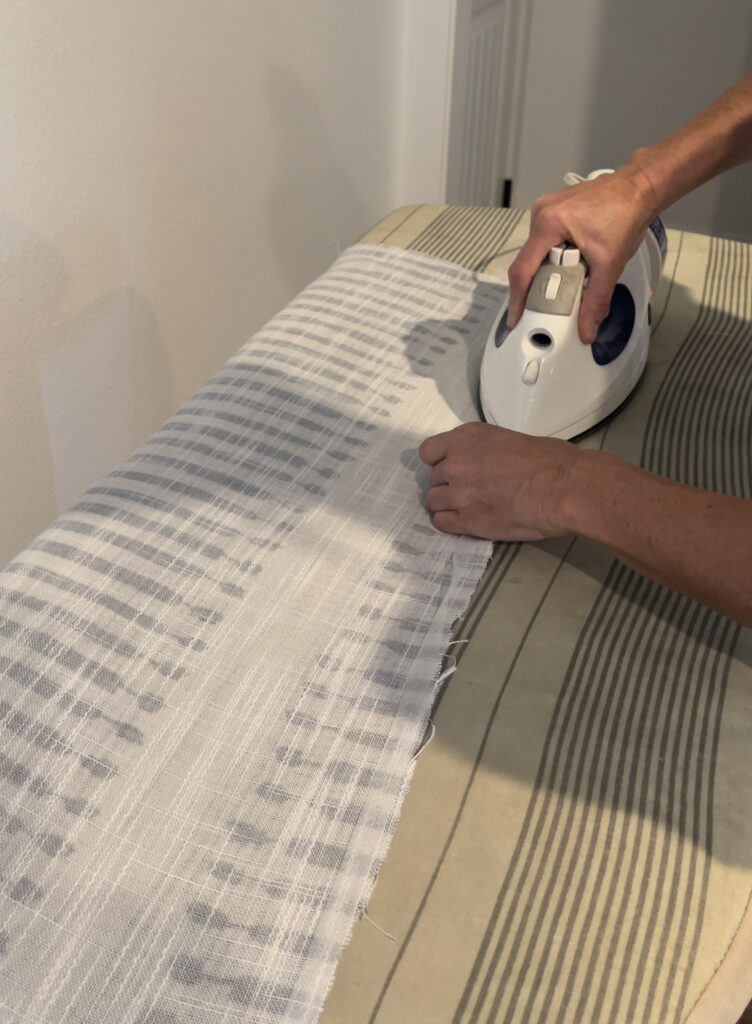
I used fabric tape and my iron to hem the cut edges, on my ironing board. You can find it at any craft store or on Amazon, like I did.
Step 3:
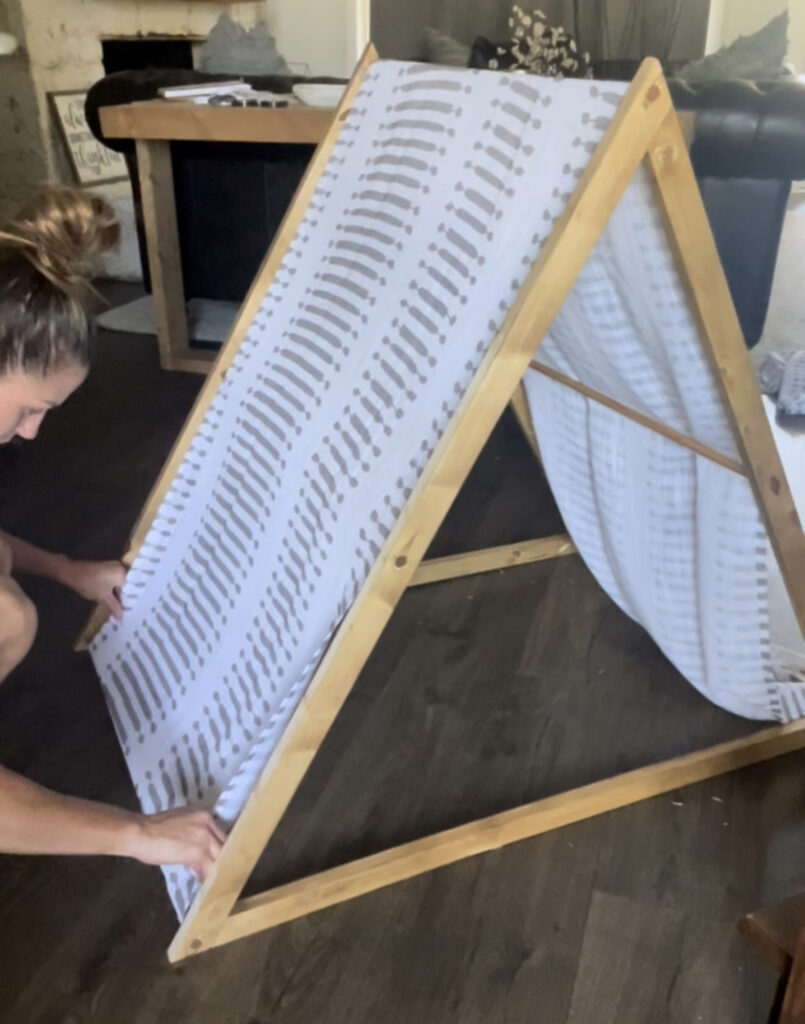
Once the hemming was all done, I put the fabric back over the tent to mark where to attach the velcro at both ends.
Step 4:
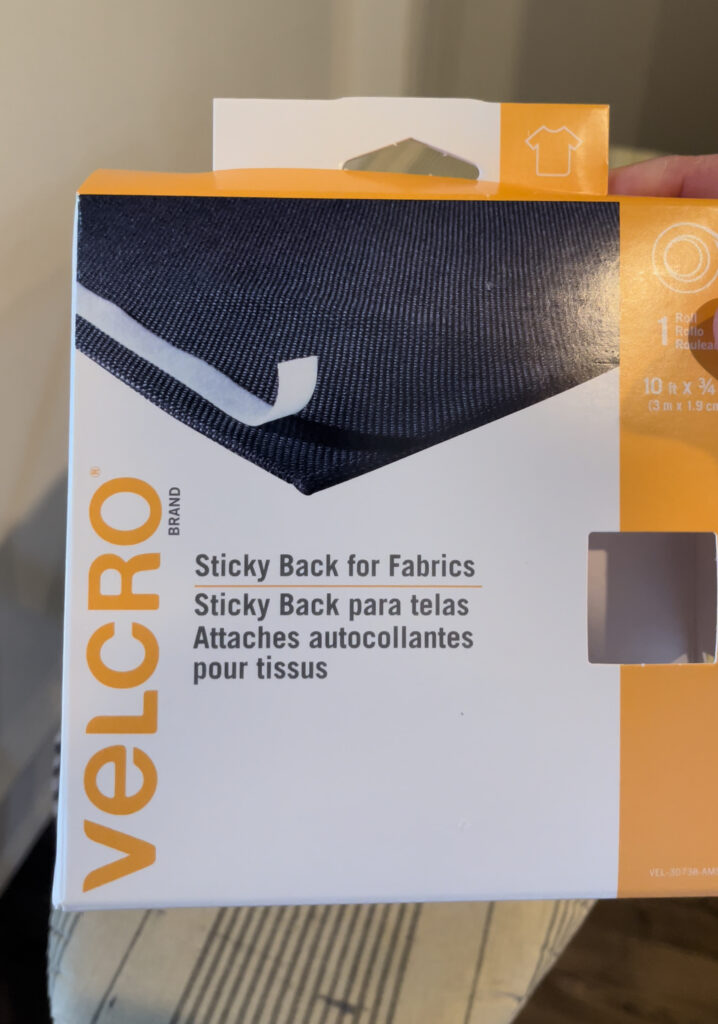
I used a sticky back velcro and attached one of each piece to both ends of the fabric. Using velcro allows me to change out the tent material whenever I want!
Once the velcro was secure I wrapped it around the pet tent!
Adding the Finishing Touches to the DIY Dog Bed
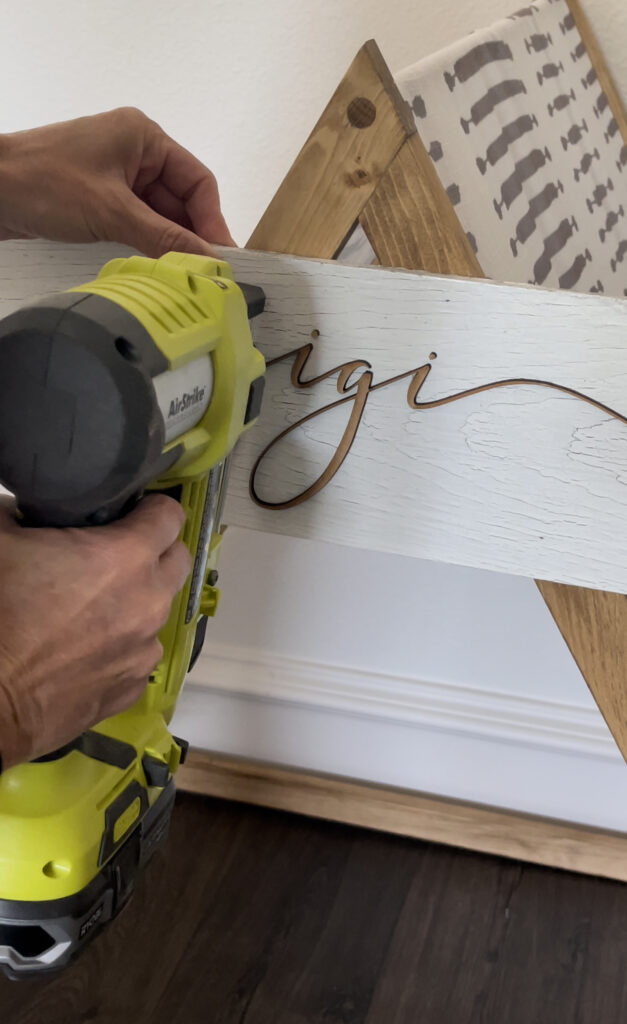
I used a piece of scrap 1×6 to create a sign for the dog bed with my Glowforge. I used my Ryobi Pin Nailer to attach it.
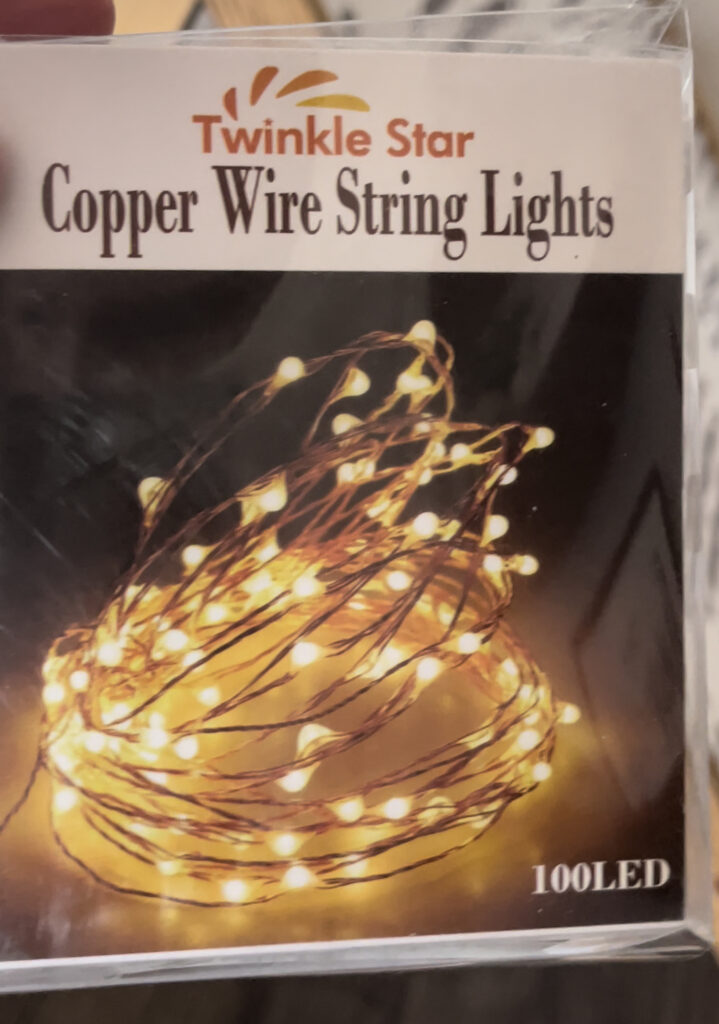
For the final touch, I couldn’t help myself but add some cute string lights on the inside of the bed.
These plug in to a USB and have 8 different settings! I chose them because they are copper wire so they’re easy to wrap around the dowels and hard for my pup to bother.
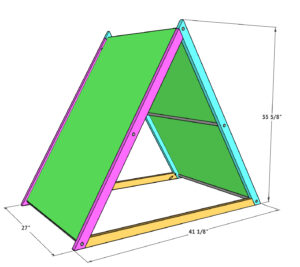
I designed this pet tent off of the measurements of a medium-sized, memory foam dog pillow. If you need a small or large dog bed, you can adjust the bed size in the plans easily to accommodate any size cushion.
- You can find the pet pillow that I designed this bed off herehttps://rstyle.me/+F8mSOc0fpj4CBX1wispv6A
I think my new pooch is in love with her new DIY Dog Bed! I love that it fits with my home’s decor and I think GiGi loves the comfort of it (or maybe she loves the lights;) )
We always appreciate when you share our projects on Instagram, Pinterest and Facebook and we would love for you to follow us on Youtube so you don’t miss any of our new videos!
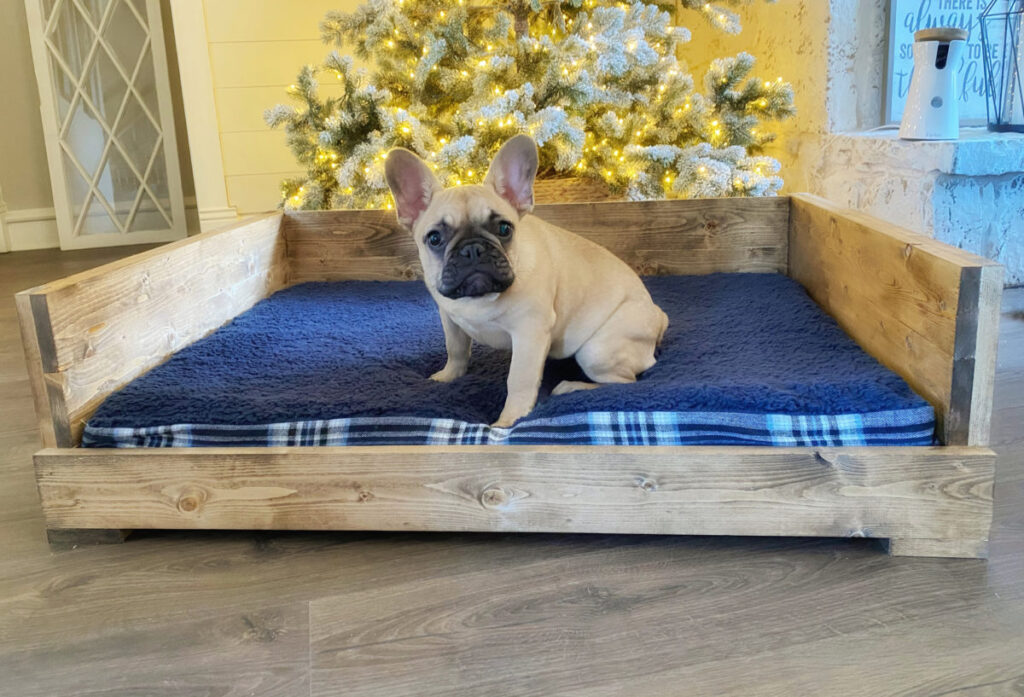
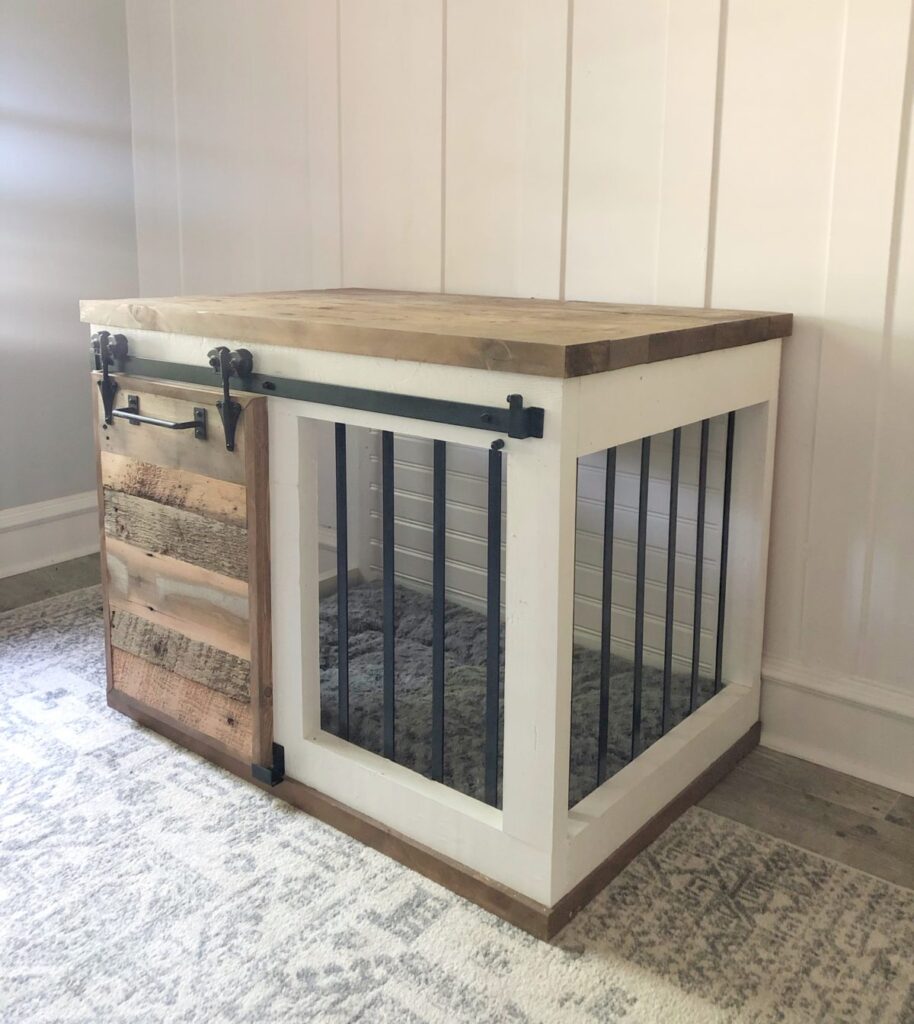
Check out our other cute dog beds that we’ve built in the past!
Now for the Ryobi Tools Giveaway!
10 of our lucky readers will win this set of 4 tools! Click the link under each tool for more info!
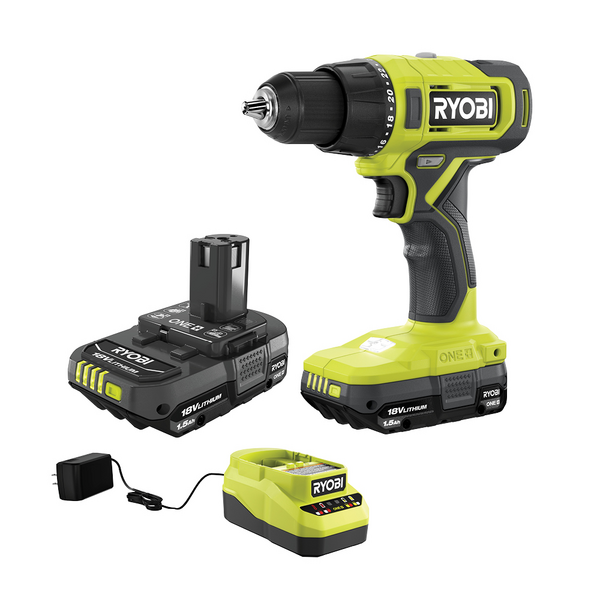
18Volt Drill/Driver Kit
To win:
Head over to our Instagram account to get entered to win! It’s that easy! Good luck and Happy Building!
DIY Dog Bed
Tools
- Miter Saw
- Drill
- Kreg Jig
- Sander
Supply List
- 1 1x8x8 Pine or Common Board
- 5 1/2×48" Round Pine Dowels
- 1 1/4" Pocket Hole Screws
- Wood Glue
- Fabric
- 1×6 Scrap for Sign
Instructions
Cut List
- Cut List 1

Building the Frame
- Cut the frame pieces to size and drill 3/4" pocket holes, according to the cut list. Attach the left and right frame pieces together with 1 1/4" pocket hole screws and wood glue.

- Attach the bottom frame piece to the side frame piece with 3/4" pocket hole screws and wood glue. Build 2 frame assemblies.


Drilling the Holes for the Dowels
- Stack the two frames on top of each other so that the pocket holes are facing down. With a 1/2" drill bit, drill a hole at every corner and the center of both side pieces. Make sure to use clamps to keep the frames in place while you drill.

- Cut the dowels to size and slide them inside of the holes on one frame and then the other to create the tent. You may need to use a rubber mallet to get the dowels flush with the frame.

The Finish
- Once the dowels are attached, sand it down, fill your pocket holes and add a finish!Check out our blog post to see how we created a no-sew-tent cover for our new pet tent!Make it your own and have fun with it! Be sure to share your builds with us on social media and use #shanty2chic so we can share them too!Happy Building!


It was a really nice dog bed. I have to do this for my cute dog, thank you very much.