Happy Wednesday!
I hope you are all having a great week! Today I am here to share the 7-can stackable canned food organizers. I will also be sharing my tips and tricks in the pantry and letting you know where I found all of my storage goodies! For those of you that waited 6 months for this post… Bless you! As I mentioned in my DIY Spice Rack post, Ash and I are on a mission to use our love of wood and DIY to create solutions for our kitchens and our homes that help things run more smoothly and efficiently.
Several months ago I tackled my pantry. It is one of the best “kitchen” decisions I have ever made! With a family of 7, we always keep a large variety of canned foods. What did I come up with?? These are individual canned food organizers thats store your cans, and rotate the cans to allow you to use the older dates first. Rather than making 1 single rack, I opted to make them individual so you can make as few or as many as you need for your canned food stash! Here is how they turned out…
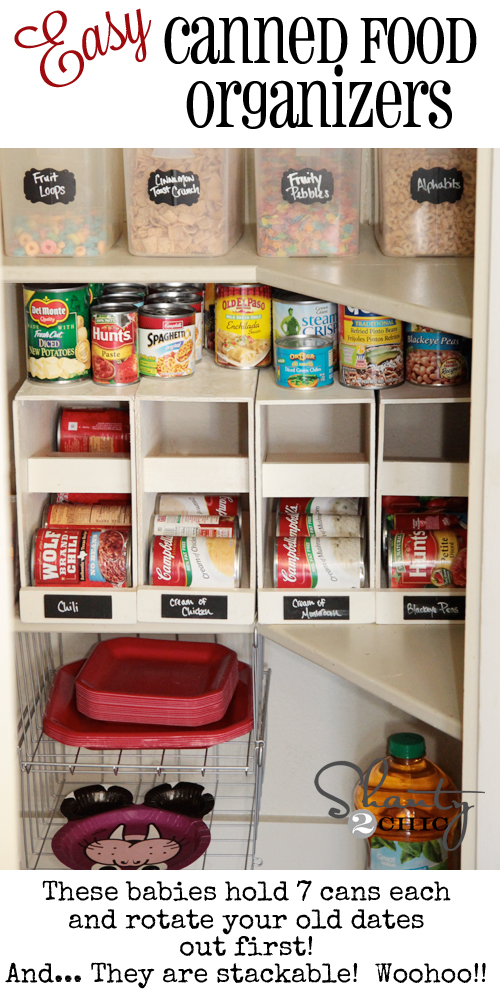
You can stack them on top of each other, or use the top piece as a shelf like I did here!
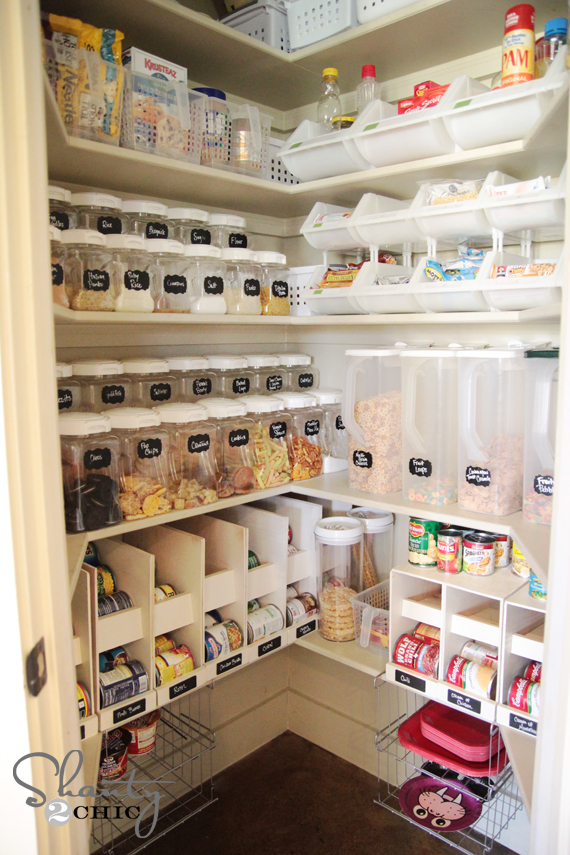
And here they are in a bigger shot…
Organizing my pantry hasn’t solved this though…
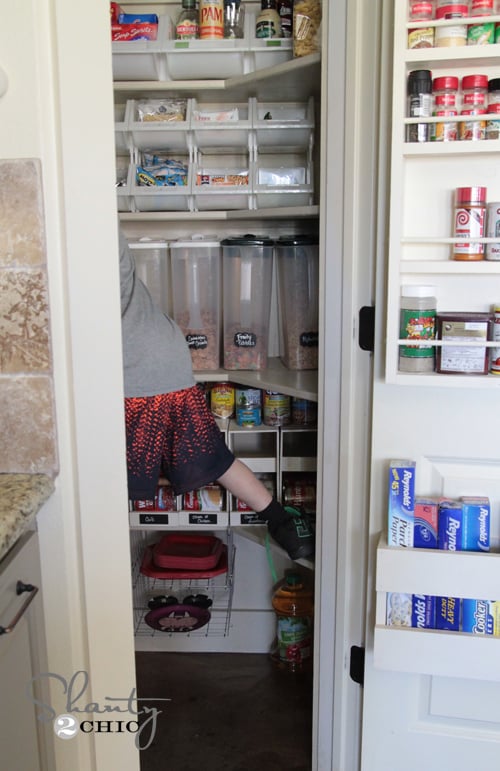
(No, he couldn’t wait for me to finish the photos) 🙂 Does this look familiar to anyone else??
Now… Let’s organize our cans!
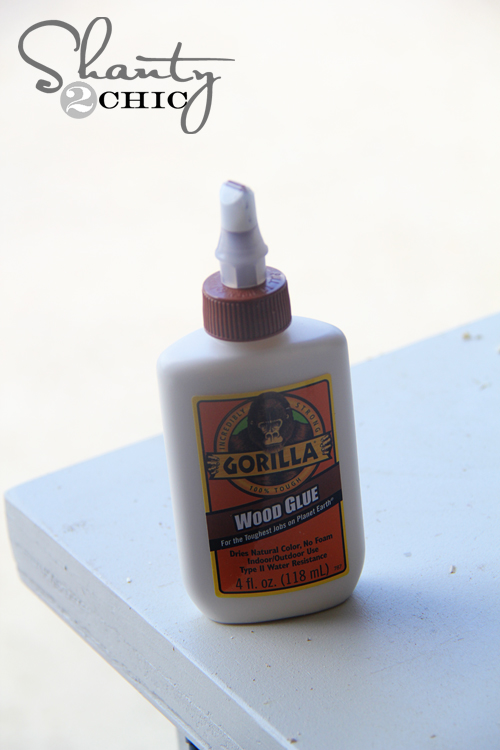
Supplies!
For each organizer I used 1/4″ hardwood plywood. I bought mine in a 4′x8′ sheet and had the guys at Home Depot cut it down into 11.5″ strips. You can also buy smaller panels like a 2′x2′ or 2′x4′ if you don’t need as many!
I also used a 1×12 for my shelf pieces. These also come in different lengths. I bought an 8′ board because I was making several, but you can buy a smaller one if you are not making as many.
I also use a 1/2″x2″ pine board for my bottom shelf front piece. A 4′ piece will make 8 dividers.
When you break it down, these cost under $5 a piece to make.
Cuts!
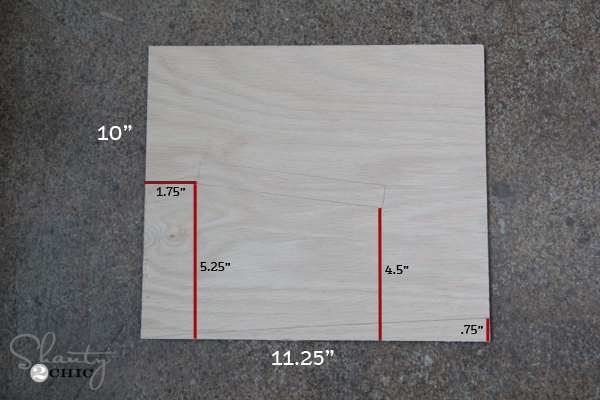
For the sides you will need 2 pieces of 1/4″ plywood cut to this…
There will be a small scrap from the middle shelf piece that I will use later on a different step.
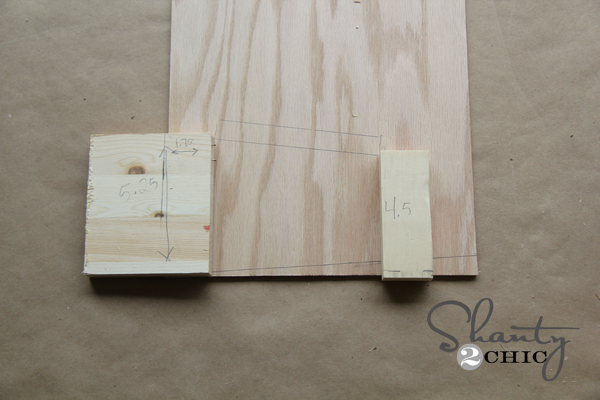
Next, I marked both of my side pieces for my shelves! Marking them with a pencil makes lining your shelf pieces up really easy, and it keeps you from having to guess where to nail from the side.
I found a really easy way to do this! I used some scrap pieces cut to the dimensions above to serve as a template for each piece. I would just lay them down, line up my middle shelf , and draw it out quick. No need to measure each time! This saves a ton of time!
Here are the cuts for my shelf pieces…
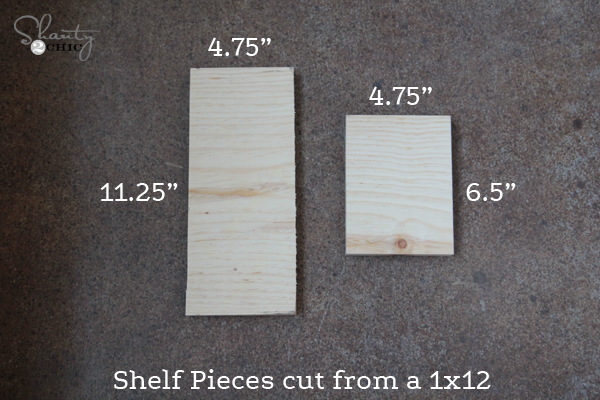
Excuse my shanty handwriting on the blocks! ![]()
Next I used Gorilla Wood Glue and finish nails to attach my shelves like this!
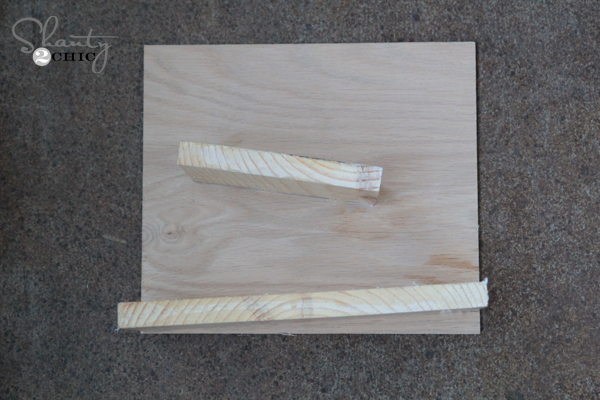
Easy! And because I drew my shelves on the other side, it makes this part simple! Just nail where the shelves are marked!
Next, I added some Gorilla Wood Glue to the shelf pieces, and attached my other side piece!


Now to finish off the front!
I used that scrap piece to cut my front piece.

This is for my middle shelf. I just added a little glue and nailed it in place!


I used a 1/2″ x 2″ pine board for my bottom shelf piece. Each one was 5.25″ long.


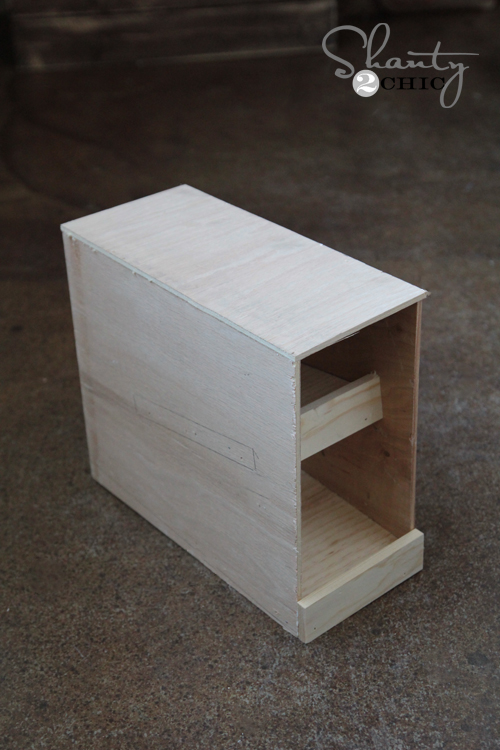
My favorite part about these babies is how they rotate my cans! You load the cans through the top, and it allows your older dates to rotate out from the bottom first! LOVE. Make sure to check out my 12 Can Organizers as well!
Now for a few more shots!
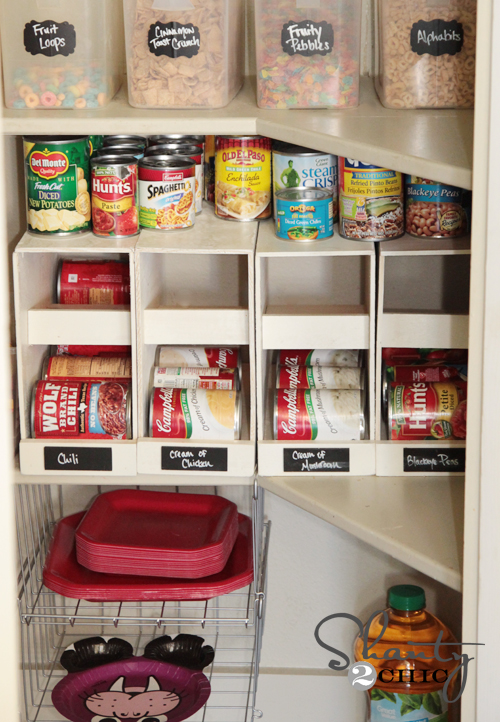
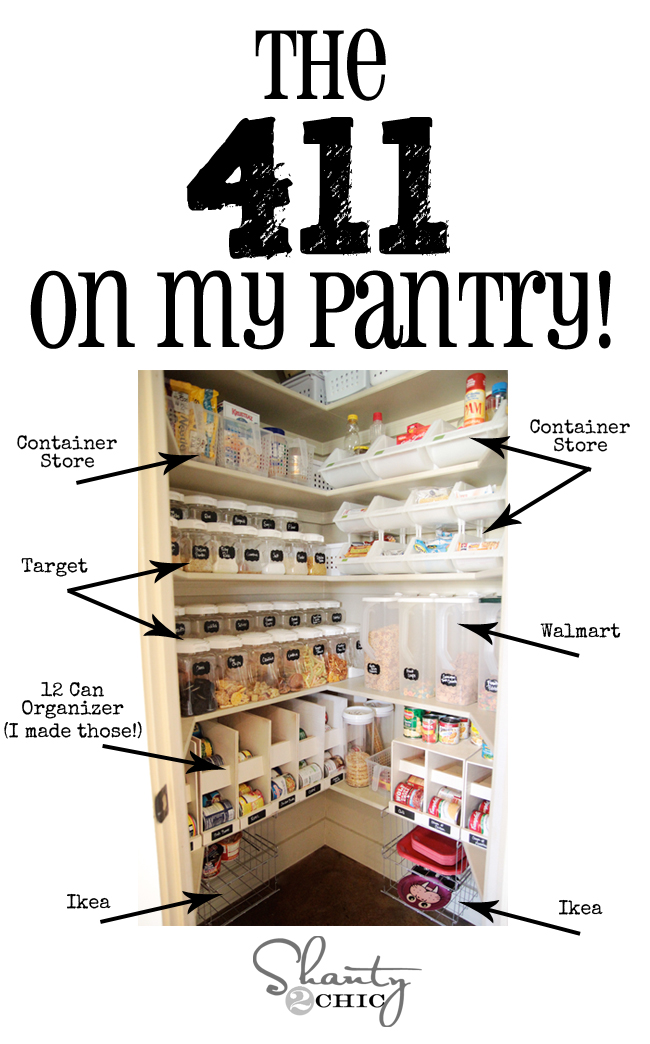
I get asked all the time where I found all of my storage goodies! Here is a list!
I LOVE the Snap Ware! It has been so great for my kids and keeps me from having open bags EVERYWHERE!
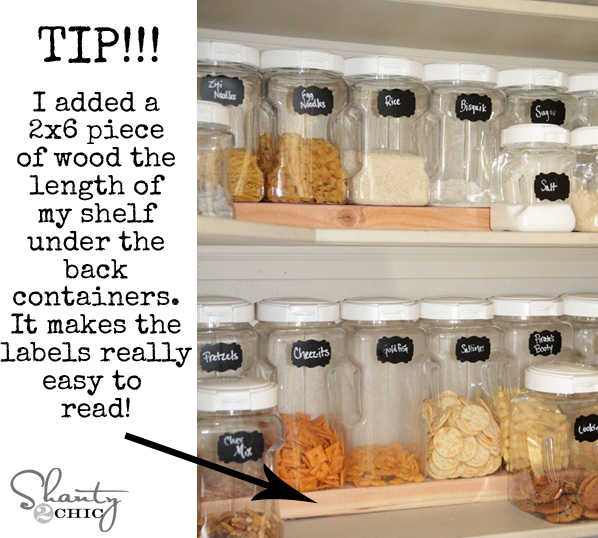
Here is a great little tip…
You can also see how I easily made my chalkboard labels HERE. They are wet erase… I LOVE them.
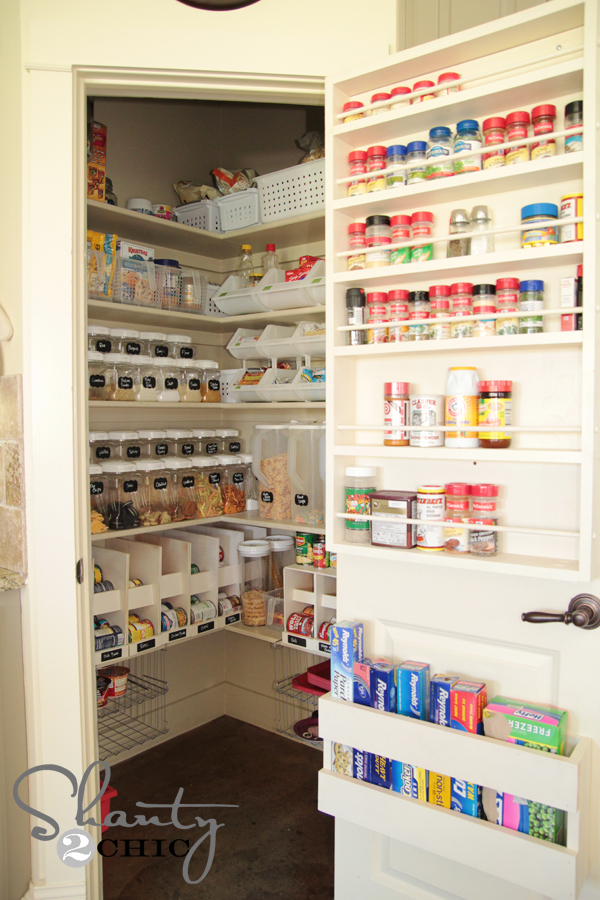
And for those of you that missed my door organizers…
The DIY Spice Rack can be found HERE!
and
The DIY Foil and Baggie Holder can be found HERE!
That’s it people! At least for now 😉
I hope it inspires you! Thanks so much for stopping by! I would love for you to share this post and pin it below!
You guys are great, and please let me know any questions you may have!
~Whitney


This is an awesome post! Thank you for the detailed information.
I love your pantry, it is so well organized. I am definiately going to be making some of those can organizers. Thanks for the details!
Love all the ideas! My biggest struggle is with “last in first out”. Any ideas on how to handle that with the snapware containers?
I know I’m a guy reading this, but I get inspiration where I can. My only comment, is that the shelves say they are cut from 1X12 pine, but the later pictures show them cut from plywood. Plywood would be a better choice in my opinion, because it will not warp, like pine try to do when exposed to humidity. I love the plans and plan on modifying them to be a two can system to fit into and existing area in my pantry. I hope my wife loves them.
I like Tupperware Modular mates they come in different sizes so you don’t need that board in the back….I do love the chalkboard labels that is a great idea….i had some whiteboard stickers on some too they are removable and reuseable
My pantry reorganization is done! Thanks for the inspiration & the specs to build the can shelves. I LOVE IT! Hopefully it stays this way 🙂
My pantry reorganization is done! Thanks for the inspiration & specs to build the can shelves! I LOVE IT!
Thanks so much for the inspiration! Ignore the fact that I had to quickly toss the cans on top and still have to organize everything–but look at the beautiful rotation shelves! I knew I wanted four of them side by side, so we modified the pattern a bit and just hooked them all together, this saving some of the “side wood” so I can make more! We have made two sets of four already and there are plans to make more next weekend. I sure appreciate the inspiration and pattern! ~Diana~
What did the finished dimensions end up being for this? Particularly the depth? I’m just wondering if I can fit it in my existing space. THANKS!
Absolutely love your pantry organizing, and the can dispensers are fabulous. I need to make those!! Thank you!!
Question…. on your supplies list, how many will it make? That way I can determine if I need to double or not. Thank you.
Your black eyed peas look an awfully lot like tomatoes! 😀 Any update on how they are holding up? What do you do if you have more that 12 different cans?
?I built my own using the plans at www. WoodworkPlans.info – highly recommended you check those out too. They are detailed and super easy to read and understand unlike several others I found online. The amount of plans there is mind-boggling… there’s like 16,000 plans or something like that for tons of different projects. Definitely enough to keep me busy with projects for many more years to come haha
Head on over to www. WoodworkPlans.info if you want to learn more – click the pink link above for some more plans! Best of luck on your building adventures!
✌✌✌✌✌✌✌✌✌✌✌
☁☁☁☁☁☁☁☁☁
☁☁??☁??☁☁
☁???????☁
☁???????☁
☁???????☁
☁☁?????☁☁
☁☁☁???☁☁☁
☁☁☁☁?☁☁☁☁
☁☁☁☁☁☁☁☁☁
That comment is spam. WoodworkPlans.info is a scam site.
Brian these are GREAT!! Thank you so much for sharing the plan!
I am making these can dispensers. this is genious. I created a 3d Model of them with some measurements in Sketchup if anyone would like to use it. you can find it here.http://sketchup.google.com/3dwarehouse/details?mid=b94c5e351f21fdfe0ac83090a555452
I can’t read the labels on all the containers from the pic. What do you keep in there? Just curious! I’ve never stored items out of their packaging before but as a mom of a toddler I’m doing much more cooking and baking and am looking for more ways tp organize! Thanks in advance <3
I just found this blog and I am so glad I did! I love the can organizers, and we have decided to get the things we need to be able to make them this winter. Thank you!