Learn how to build this DIY Modern Wood Coffee Table with just a few basic tools, inexpensive framing lumber, free plans and a how-to video by Shanty2Chic!

I have built so many DIY coffee tables in my years of DIY projects! They’re easy to build, change the look of a room and they’re pretty inexpensive to build yourself – having kids and dogs also takes it’s tole on the longevity of coffee table 😉 This Modern Chunky Coffee Table is no exception! I built this guy with just 12 2×6 and 4 2×4 boards. Total cost in lumber was right under $100!
This is a great build for beginners and we’ve got a how-to video to guide you through the process! Just lick the video below to build it with us!
Table of Contents
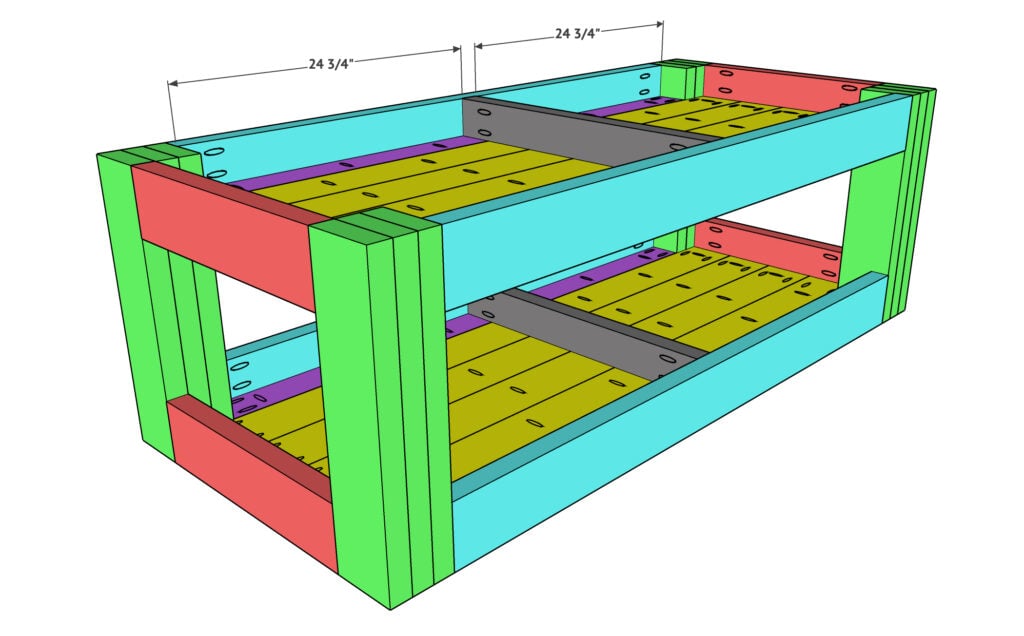
DIY Coffee Table Plans
Click here to download the free printable plans!Make sure to download the free printable plans and follow along with the step-by-step tutorial below. Now, let’s begin building!
Note: I did rip my 2×6 boards down to 4 1/2″ wide and the 2×4 boards to 3″ wide. This is not a necessary step but make sure to modify the cutting list if you choose not to rip your boards.
How to Build a DIY Modern Coffee Table
Tools:
Supplies:
- 4 – 2x4x8
- 12 – 2x6x8
- 2 1/2″ Pocket Hole Screws
- Wood Glue
- Paint or Stain
- Protective Finish
Why Do You Rip Your Boards:
We use our table saw to rip the round edges off of the framing boards we build with. This is an optional step but we like to do it to make the pieces of furniture look more expensive and not built with framing lumber. It really helps on a build like this table, especially on the legs. I stacked 3 2×6 boards that I ripped to 4 1/2″ wide. Ripping them down gives the stacked boards a solid clean look, like it’s one piece.
Building the Leg Assemblies
Step 1:

Cut the leg pieces to size. Stack 3 pieces together, with wood glue, and clamp them together for 24 hours. Build four leg assembles.
Planked Tabletop:
Step 2:
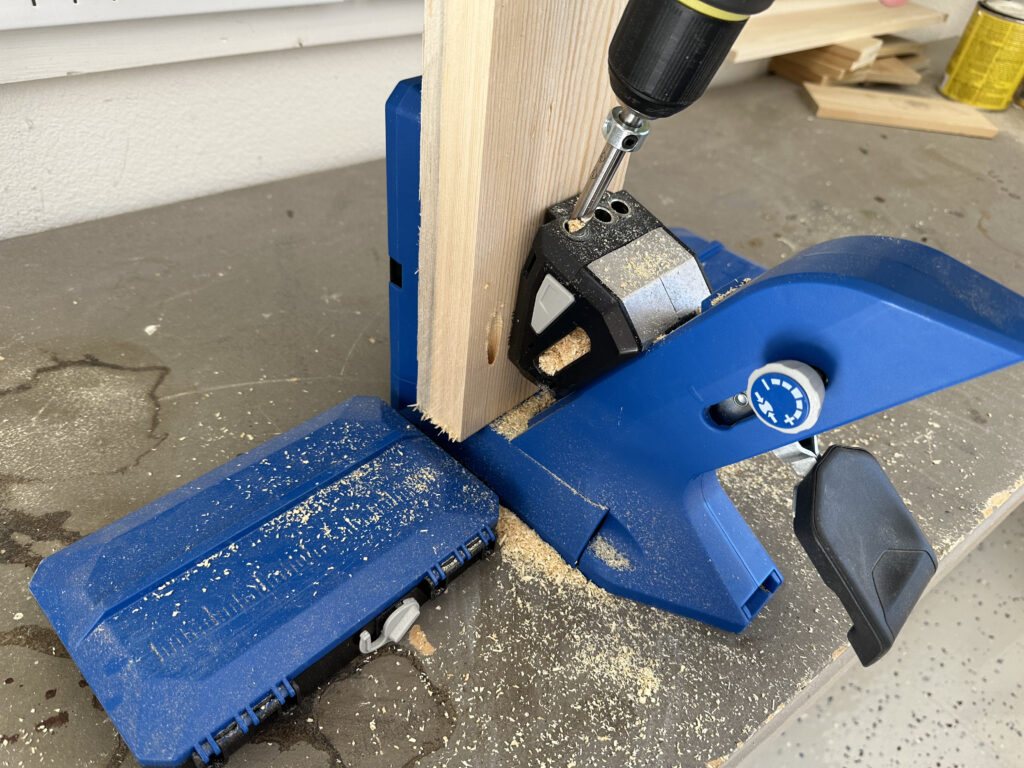
Cut the planks to size and drill 1 1/2″ pocket holes on one edge and both ends of each plank. I used our favorite Kreg Jig model to drill the pocket holes.

Attach them together with 2 1/2″ pocket hole screws. We like to use the Kreg Face Clamps at our pocket hole joints to get a smooth finish on our planked tops.
Assembling the Coffee Table Top
Step 3:

Cut the outside planks to size and drill 3/4″ pocket holes on one edge and and 1 1/2″ pocket holes on both ends. Attach two of the planks to two legs with 2 1/2″ pocket hole screws and wood glue. Do this for both sides.
Note: Drill 3/4″ pocket holes in the edge of these planks, only. This will avoid the pocket holes being seen on the outside edges. You will still use 2 1/2″ pocket hole screws.
Step 4:

Cut the short apron pieces to size and drill 1 1/2″ pocket holes on both ends. Attach them to the ends of both plank assemblies with 2 1/2″ pocket hole screws and wood glue.
Step 5:

Attach both legs assemblies to the top plank assembly with 2 1/2″ pocket hole screws and wood glue, through the side aprons and into the legs.
Build the Bottom Shelf of the Coffee Table
Step 6:

Attach the bottom plank assembly to the bottom of the legs with 2 1/2″ pocket hole screws and wood glue.
Step 7:
Attach the two remaining side planks to the bottom plank assembly with 2 1/2″ pocket hole screws and wood glue on the ends (where they attach to the legs).
Step 8:

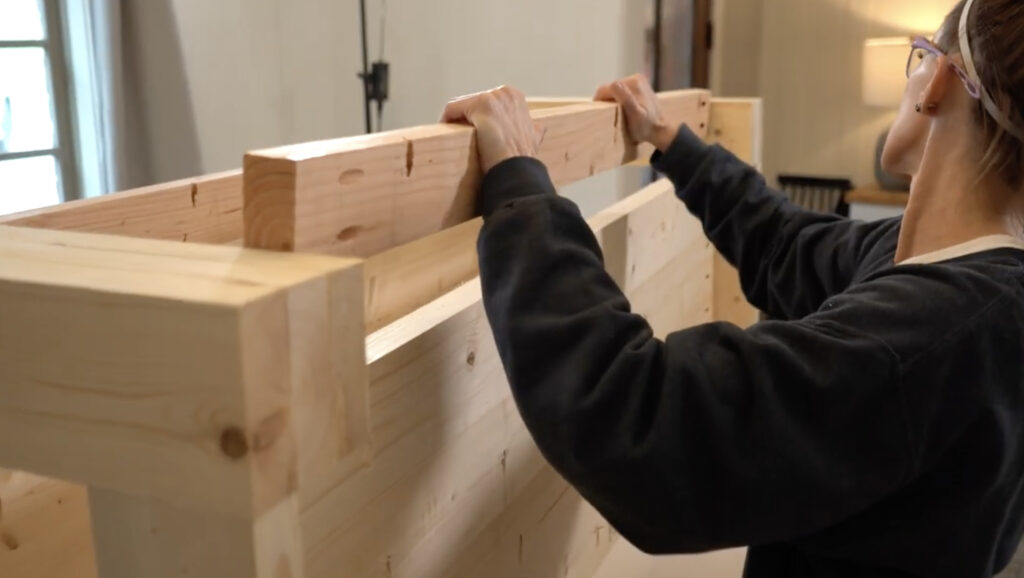
Cut the long apron pieces to size and drill 1 1/2″ pocket hole screws at both ends. Attach them to the plank assemblies and legs with 2 1/2″ pocket hole screws and wood glue.
Step 9:
Cut the support pieces to size and drill 1 1/2″ pocket holes at both ends. Center them under both plank assemblies and attach them to the long aprons with 2 1/2″ pocket hole screws and wood glue.
The Finish
Step 10:

Once the build was done, I used my orbital sander to sand down the entire coffee table with 80-grit sand paper followed by a 220- grit sandpaper. Make sure to look for any holes or uneven spots before sanding and fill with wood filler!
Step 11:
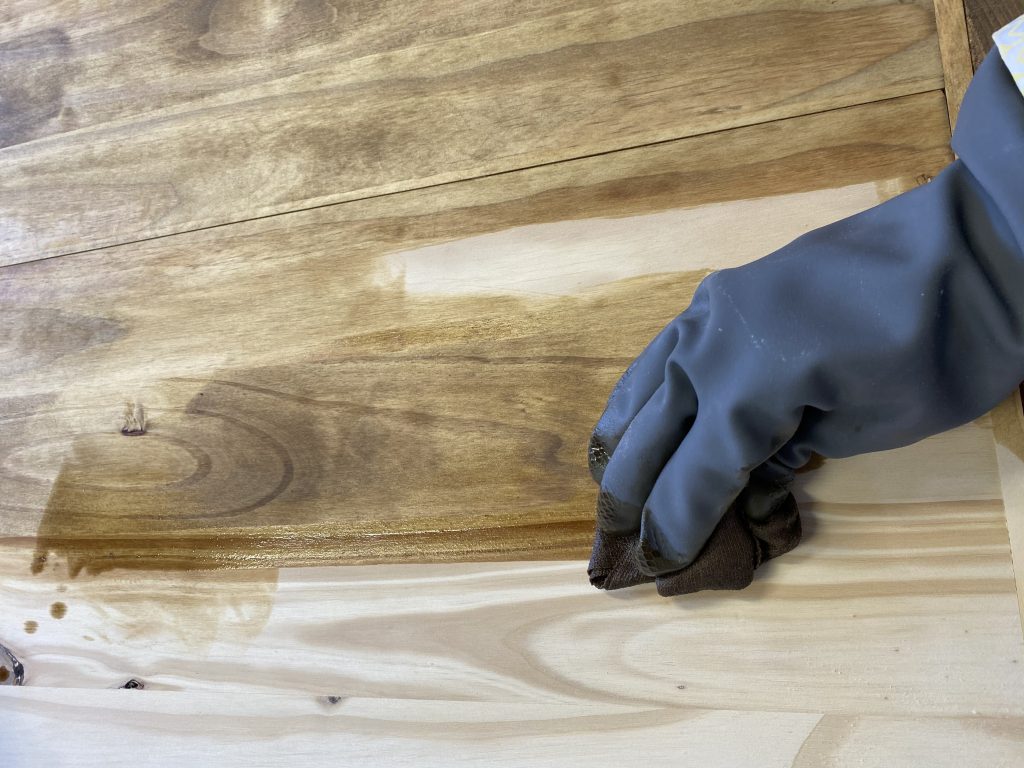
For the finish, I chose to stain my coffee table. I used one coat of my favorite stain color!
Step 12:
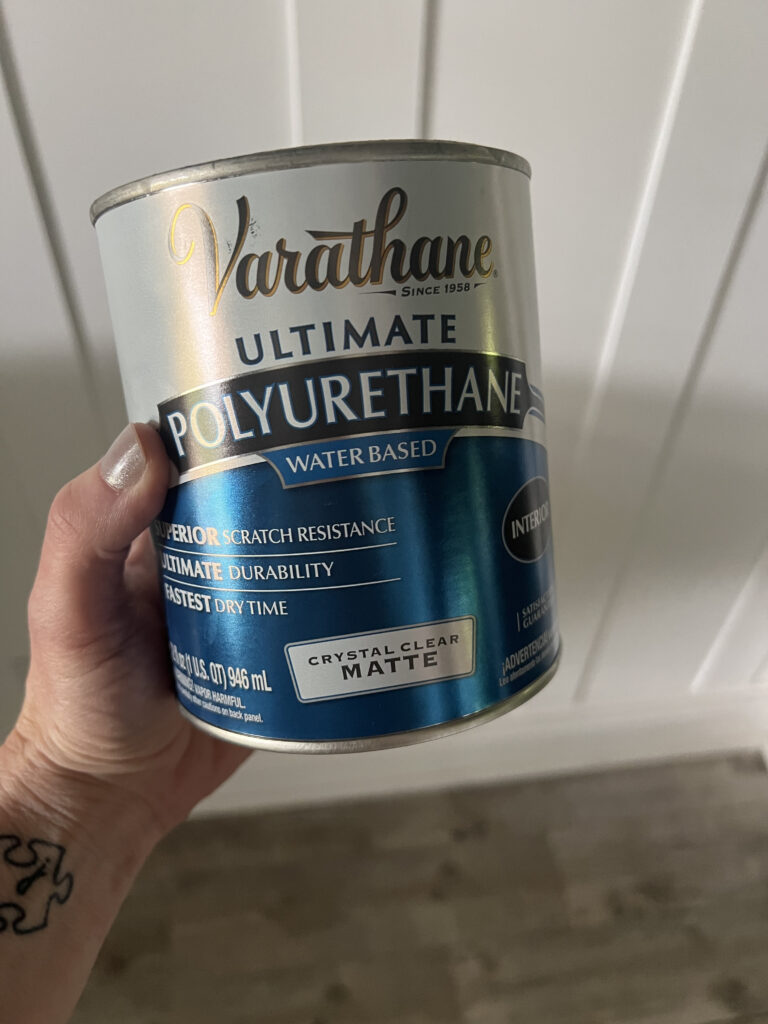
Make sure to add a protective finish. I used one of our favorite polyurethane’s, Triple Thick in a matte finish.
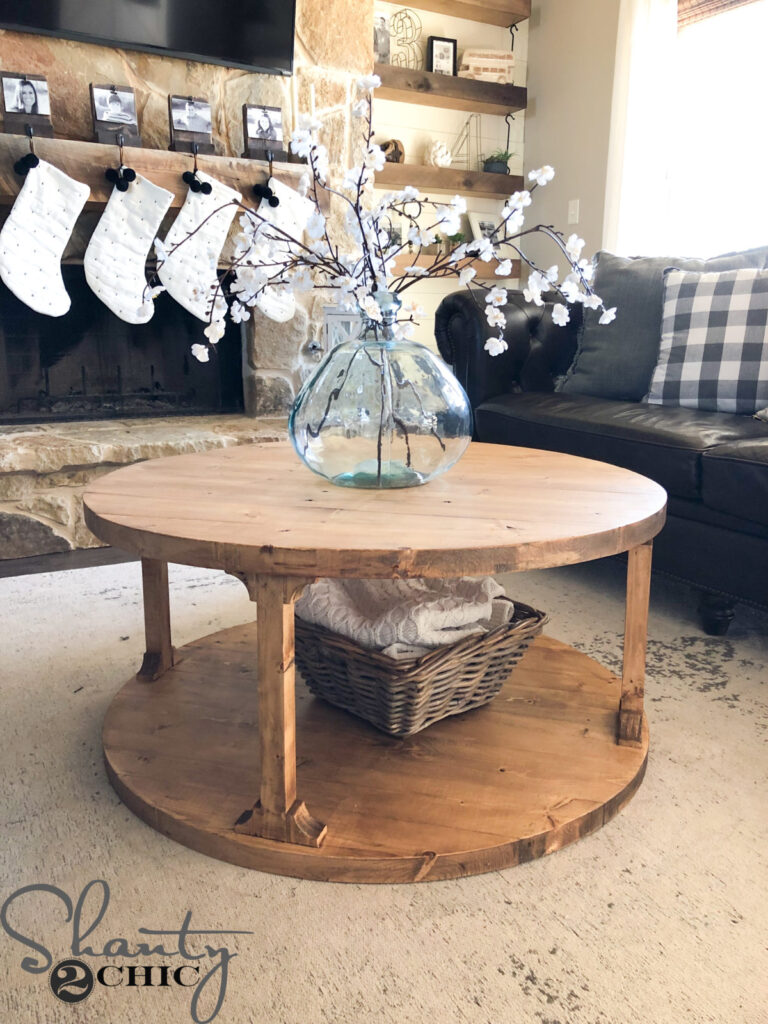
And that was it! A big chunky modern wood coffee table perfect for my space! I love the modern but rustic coffee table look and the added storage space is perfect for baskets with all the blankets and also serves as decor!


You can find the rug that I purchased for my living room here!
Make sure to share your builds with us on social media and use #shanty2chic so we can share them too!
Happy Building!
Other Shanty Woodworking Projects!
Check Out Our Other DIY Coffee Table Ideas with Free Plans!
Coffee Table with Hairpin Legs


Patio Coffee Table with Cooler


Coffee Table with Storage Crates

DIY Modern Wood Coffee Table
Tools
- Miter Saw
- Kreg Jig
- Drill
- Table Saw (optional)
Supply List
- 4 2x4x8 Framing Lumber
- 12 2x6x8 Framing Lumber
- 2 1/2" Pocket Hole Screws
- Wood Glue
- Paint or Stain
- Protective Finish
Instructions
Cut List
- Cut List

- Cut the leg pieces to size. Stack 3 pieces together, with wood glue, and clamp together for 24 hours. Build 4 leg assemblies

- Cut the planks to size and drill 1 1/2" pocket holes on one edge and both ends of each plank. Attach them together with 2 1/2" pocket hole screws.

- Cut the outside planks to size and drill 1 1/2" pocket holes on one edge and both ends. Attach 2 of the planks to 2 legs with 2 1/2" pocket hole screws and wood glue. Do this for both sides.

- Cut the short apron piece to size and drill 1 1/2" pocket holes on both ends. Attach them to the ends of both plank assemblies with 2 1/2" pocket hole screws and wood glue.

- Attach both leg assemblies to the top plank assembly with 2 1/2" pocket holes and wood glue, through the side aprons and into the legs.

- Attach the bottom plank assembly to the bottom of the legs with 2 1/2" pocket hole screws and wood glue.

- Attach the remaining side planks to the bottom plank assembly with 2 1/2" pocket hole screws and wood glue on the ends (where they attach to the legs).

- Cut the long apron pieces to size and drill 1 1/2" pocket hole screws at both ends. Attach them to the plank assemblies and legs with 2 1/2" pocket hole screws and wood glue.

- Cut the support pieces to size and drill 1 1/2" pocket holes at both ends. Center them under both plank assemblies and attach them to the long aprons with 2 1/2" pocket hole screws and wood glue.

- Sand down the entire table and add a finish! Make sure to share your builds with us on social media and use #shanty2chic so we can share them too!Happy Building!


Make sure to check our our complete collections of DIY Coffee Table Plans!


What is your favorite color of stain? The link won’t open
Can you please share your favorite stain. The link needs to be updated.
Hi there – love this table so much!
What colour stain did you use?
It shows the link but which colour sid you choose for this table?
Thank you kindly!
Thank you, I hope you will continue to share more useful articles about DIY Wood Coffee Table.
Such an elegant design! Absolutely adore it!
What a pretty design! I love it! And thank you for the detailed tutorial!
Love these kind of tables, very good step by step instructions!
Baggot Street Mercy is delegated to the healthcare professional and has got powerful scheduling tool that provides excellent service.
Looking forward to building it. But I didn’t want to “lick the video”. Might be a new experience! Keep up the great work ladies.