And, if you would like to get our posts delivered directly to your inbox, you can subscribe to our mailing list!
Hey guys! If you follow us on Instagram, you may have seen a sneak peak of this project (you may have even asked if the tutorial was up for it ;))
 It took me longer than usual to get final pics (finding a time when my kids rooms are actually picked up is near impossible in the summer 😉 ) but I managed! This is the last of my 3 kiddos beds. If you missed the first two, you can see them HERE and HERE! I have held off on this room because I wasn’t sure exactly what design I wanted but surprisingly, I was inspired by a reclaimed wood floor that I spotted in a restaurant – go figure 😉
*** Update – Free Printable Plans for this headboard are now available! Click the image below or HERE to print! And, a special thanks to Jay from Jay’s Custom Creations for creating the printable version of these plans!

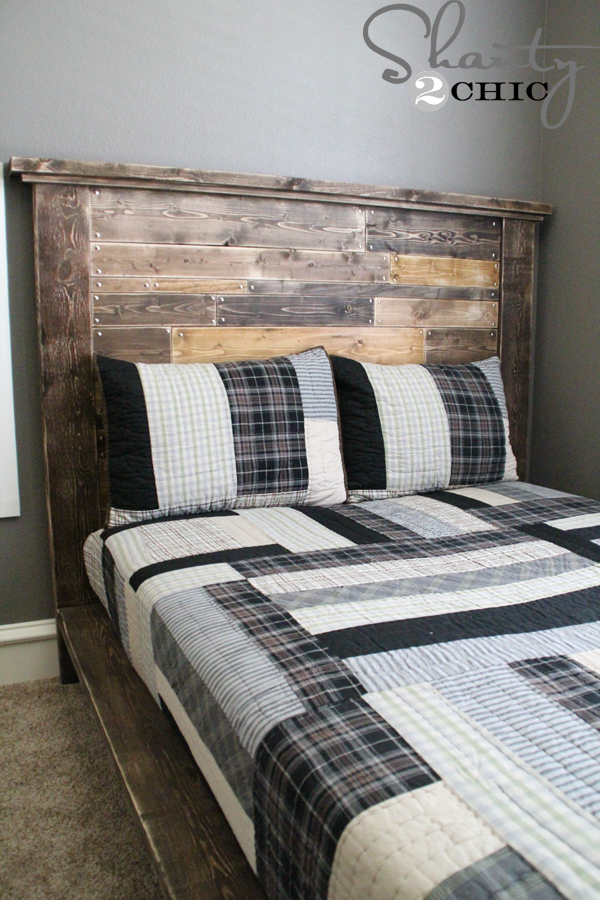
So, I came home and got to work! This is seriously such an easy headboard to build. There’s really no wrong way to do it but here’s what I came up with 🙂 This headboard is for a full mattress but very easy to convert to add width or subtract for another size.
 I started with a piece of 1/4″ Purebond Plywood that I had Home Depot rip down at 37.5″x52″. You can read all about why we LOVE Purebond Plywood HERE!
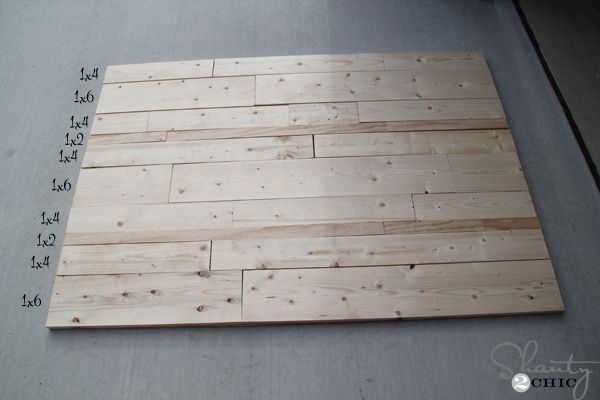 Next, I started cutting planks. This is a great project to use your scraps on! I chose 1×2, 1×4 and 1×6 boards and you can see in this picture that I alternated them. I put a 1×4 between each row. The first cut you make doesn’t matter, just make sure to stagger your joints as you go. I also tried to use longer pieces under rows where I used shorter pieces. The planks will fit flush around the edges of the plywood so that it is completely covered.
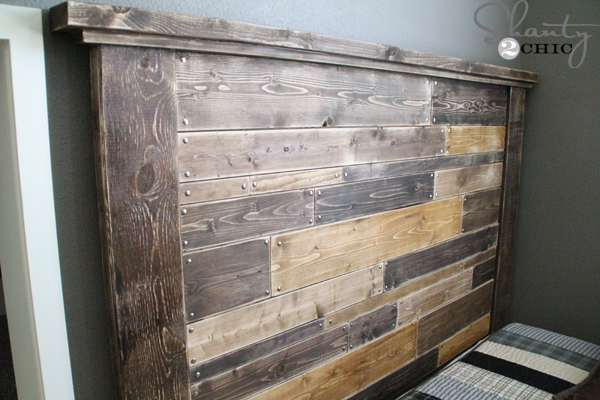
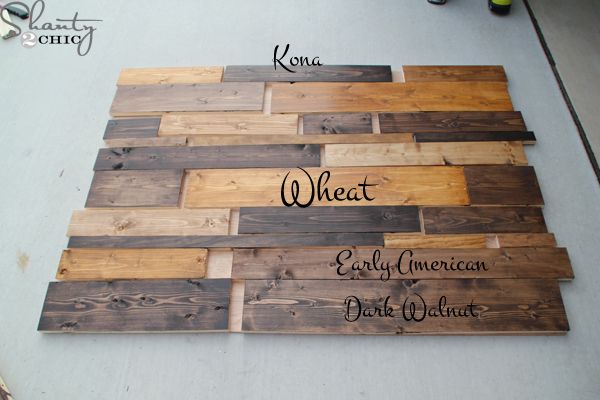 Next, I stained each of the boards using 4 of my favorite Varathane stains – Wheat, Early American, Dark Walnut and Kona (you can find the stains HERE on Amazon). Again, no rhyme or reason to the pattern, I just tried my best to mix them up so the same colors didn’t touch. Try to keep the pieces close to their original spots to save a headache 🙂 *** To stain these, I used a foam brush (one per color) and wiped on one-coat, let the stain sit for about 5 minutes then wiped it with a clean cloth.
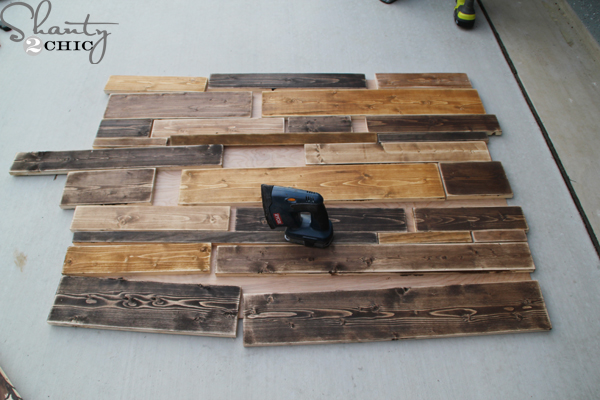 Once the stain dried, I used my Corner Cat Sander to distress the edges of the planks.
 Then, I glued each plank onto it’s spot on the plywood
 and placed them exactly where I wanted them. You can move them around a bit while the glue is drying.
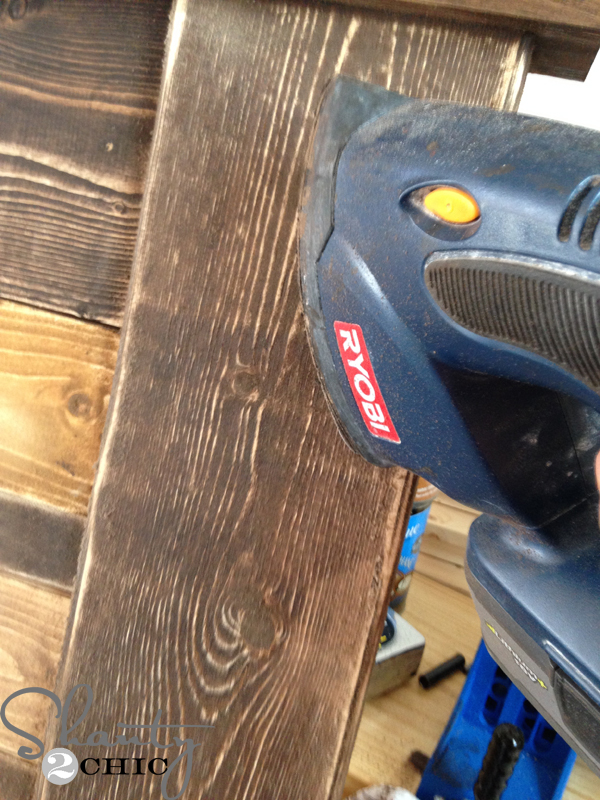
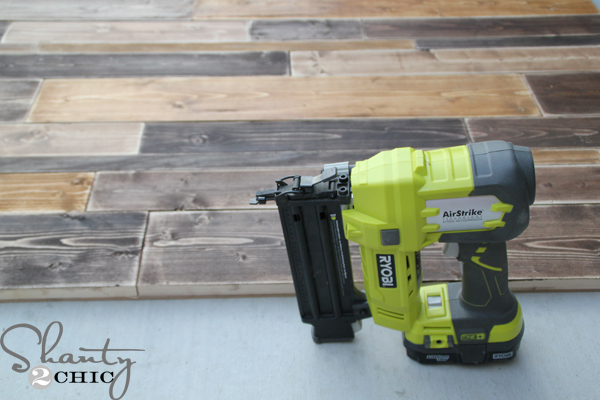 Once they were where I wanted, I used my brad nailer to shoot 1-inch nails through each of the planks – at least get a few on the ends of each plank and the center.
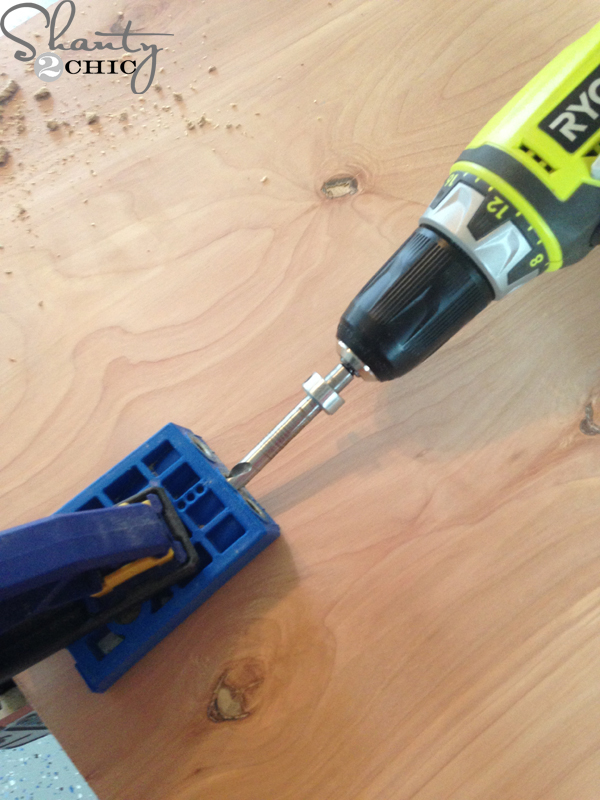 Once the glue was dry, I drilled 1 1/2″ Kreg Jig pocket holes into the back sides of the planked headboard (this will help attach the legs).
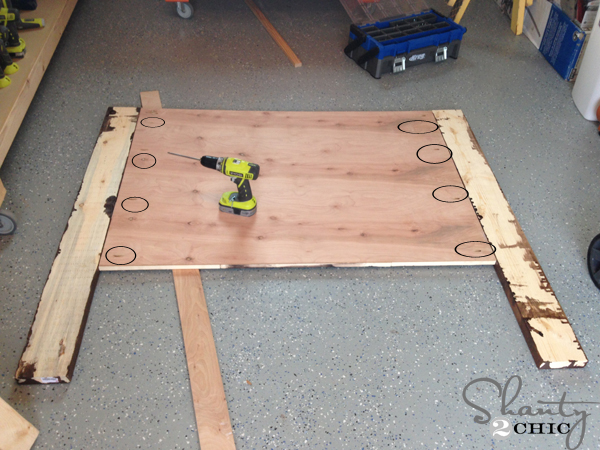 Then, I attached the legs with 2″ Kreg screws (the pocket holes are circled in the pictures). The legs are 2×6 boards cut at 53″. I stained the boards before attaching them to the headboard. You can use any stain for the legs, I chose Dark Walnut for mine.
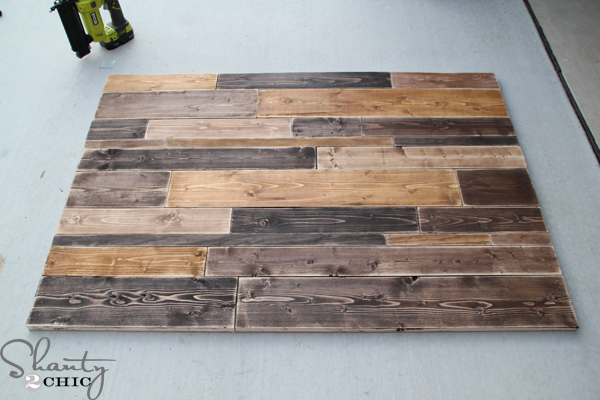
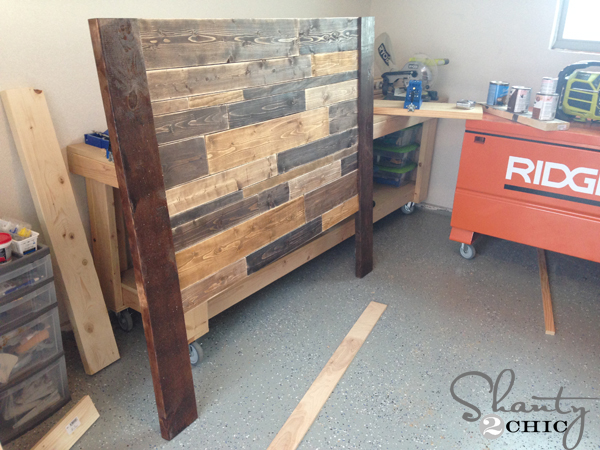 Progress so far!
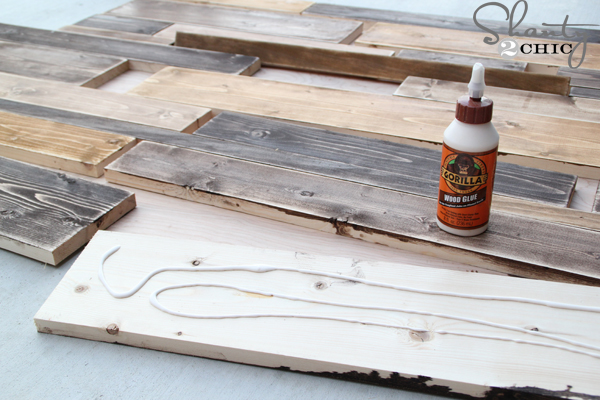
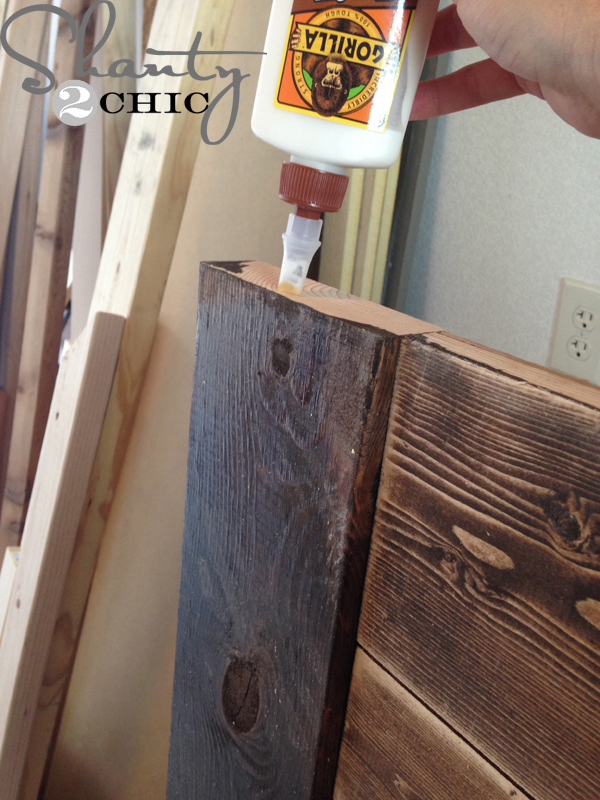 To dress the top up a bit, I applied a line of Gorilla Glue wood glue along the top of the headboard
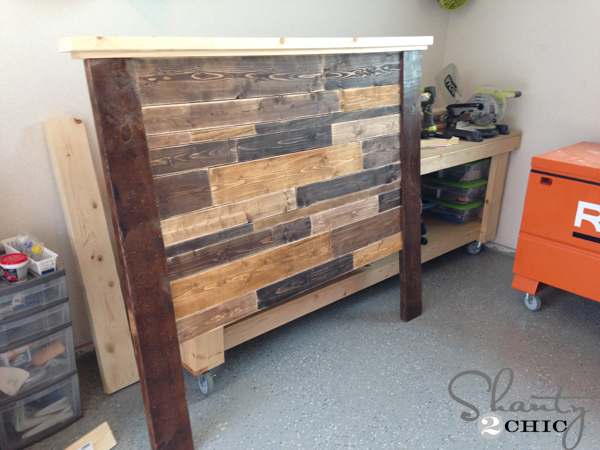
 and used my brad nailer with 1 1/4″ brad nails to attach a 1×3 to the top. (the 1×3 trim is cut at 65″ and centered on the headboard so that there is an overhang on the front and back side.
 For the top trim, I attached a 2×4 board, cut at 67″, with 2 1/2″ spax wood screws and wood glue. I like to use my impact driver when I’m drilling into 2x boards – saves the arms! You can also use your drill for this part! This board is centered on the 1×3 so that there is an overhang on the front and back and there will also be a 1″ overhang on each end.
 Here is the headboard with the trim pieces. I do recommend staining the trim pieces before you attach them – apparently I was just too darn excited to get this sucker done 🙂 It was a pain to stain it after.
 I also distressed the legs once the stain was dry.
 Woohoo!!!!! One last finishing touch!
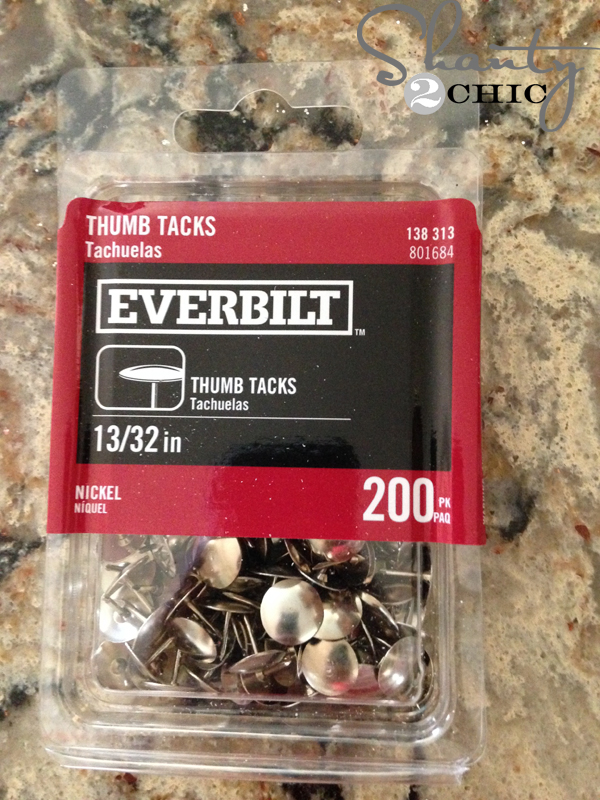 What I loved so much about the restaurant floor was the exposed nail heads on each plank. So, I picked up a package of nickel thumb tacks at Home Depot – athey did the trick 😉
 I just hammered them in to the corners of each plank. This part doesn’t have to be perfect, just eye ball it. I did off-set mine from plank to plank.

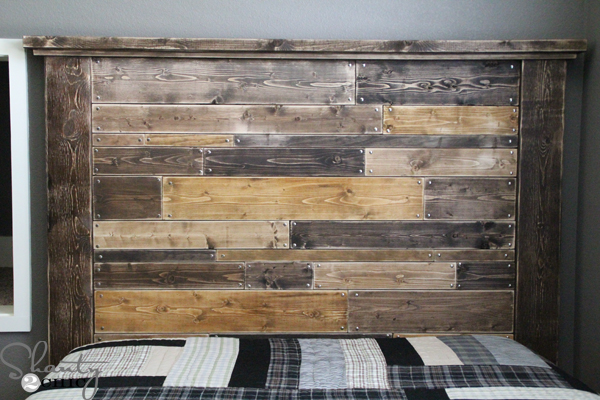
Now, all of my kiddos have their mattresses up off of the floor and on really cute (cool for my boys) custom beds 🙂 And, the best part is….I can start on mine!!!!! I found the quilt at Pottery Barn Teen but I don’t think it is available anymore. You can look at their quilts HERE!
I do love the platform bed that I designed for this headboard and you can find the Free Plans for that as well HERE!
Thanks so much for stopping by!
~Ashley
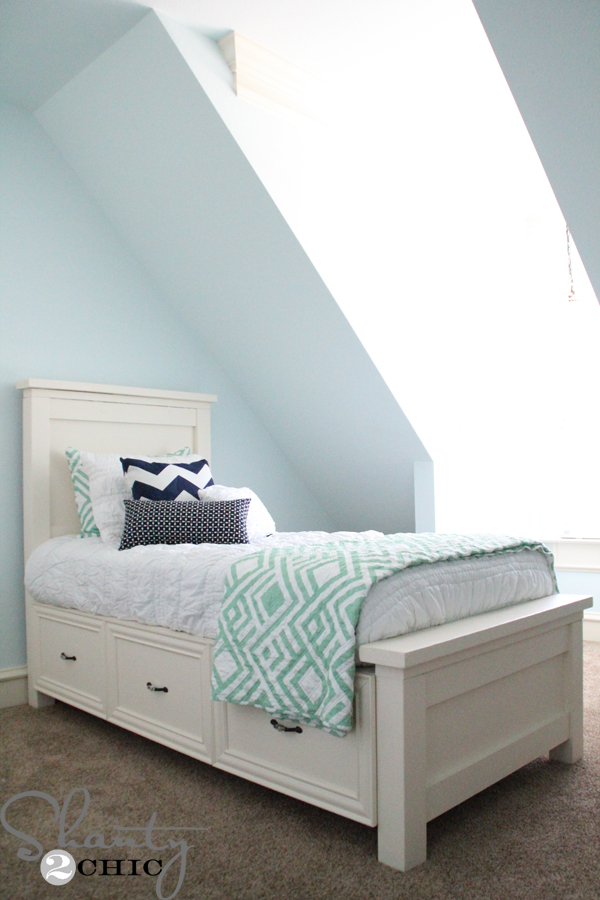
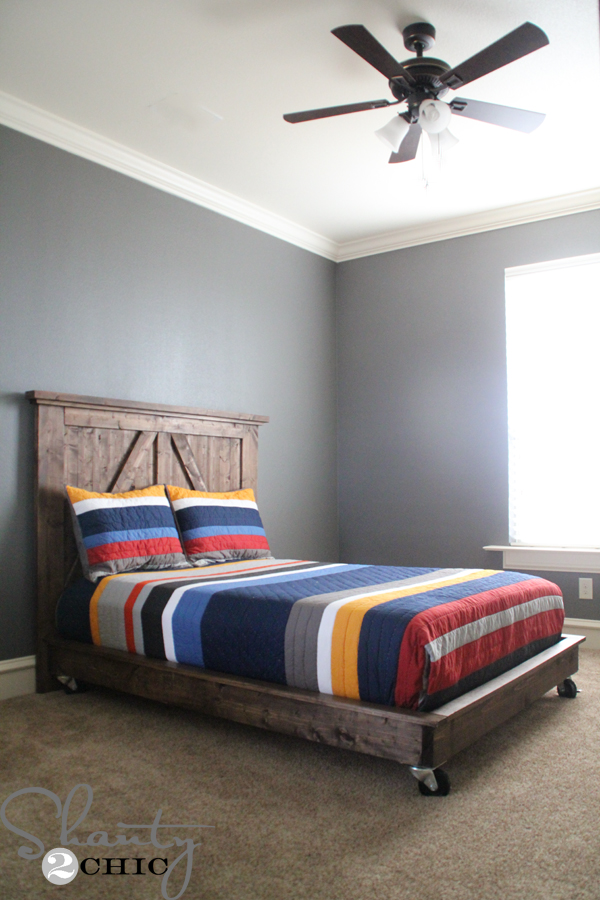
Here are the beds that I build for our other kiddos 🙂


Can you tell me if this can be made without the kreg jig? I desperately want to make this headboard and platform but do not have access to that tool. Thanks!!
How would I adjust this for a twin size bed?
What would be the measurements for a queen?
PLEASE can someone help me with measurements for a King? I have the added measurements for the platform frame but can’t find anything in the comments here for the King Planked Headboard! THIS is BEAUTIFUL!! so excited about making it!! Thanks
Hi. If you want to build it yourself just google for ‘woodprix’ . I know you’ll find good solutions for your idea.
These are so beautiful. I just have two question. I am planning on building one for our king size bed. How did you attach the headboard to the platform? Do you have the dimensions/cuts for a king size platform and headboard?
Thank you!
Wow great looking headboard and I love everything the look. I am all new to this but I appreciate you sharing it
Tod
Hi! I love this platform bed frame and headboard,definitely going to be making both! I have a question though, when you nailed the planks to the plywood did you nail from behind or the front of it….im thinking behind, but i want to make sure
thanks!
I really want to make this bed but I need it for a twin mattress. I am guessing these plans are not for a twin????
In person what are the undertones of the Dark Walnut
and the undertones of the early american?
I love this…looks great. Two questions:
1) Do you have pictures of the frame that the mattress sits on? Or did you build just the runners?
2) Do you seal or do any finish after you distress the edges of the wood? If not, is there any concern that the wood isn’t sealed? I ask because I genuinely do not know.
New subscription for my reader!
Hi Ross! I’m so sorry I missed this. So happy to have you subscribe 🙂 I just posted the tutorial for the platform frame and the mattress sits on cleats. I just added a link to the beginning of this post to find that tutorial. I didn’t use anything to seal the edges. We usually only seal pieces that will see a lot of wear, like table tops etc. However, it is probably best to protect the finish but we won’t tell if you don’t 😉
O how I wish I would have thought of making my kids beds before wasting all the money ordering from pbk! This is soooo awesome! I LOVE the look of the tacks it just adds the perfect touch! Maybe I will have to sell my boys beds and make two of these for them! LOL! Thanks for always sharing y’alls amazing plans! Love them all!!!
I would LOVE it if you guys made plans for a wishing well!!
Love it! The thumbtacks add so much to it. Great idea.
Just one question regarding the Kreg jig. When you attached the side legs to the headboard you did a 1 1/2 hole and then used 2″ screws. Can you explain how why you used this measurement? I am new to the kreg so I haven’t had to do something like this yet.
Thank you.
Deb
Sure! That’s a great question! You always set the Kreg jig pocket hole for the wood you are drilling into. In this case I was drilling into a 2×6 which is 1.5″ so I set my pocket hole for 1.5 inches and you use 1/2″ longer screws so that’s where 2″ screw comes in. If you are drilling for 3/4″ holes you use 1 1/4″ screws. Hope this makes sense 🙂
You can read all about why we LOVE Purebond Plywood HERE! You seem to missing a link. I was very interested. Thank you for your attention to detail with all your projects!
Thank you Angela! I totally left the link off. It is there now 🙂
Hi, it is under picture number 2 and sorry to reports, the HTML link is not there. Can you simply provide the url, so I can take a look? I did a search for Purebond plywood on the website and different projects came up – quite a few actually. Thanks for your help!
Hmmm that’s weird. It’s showing a link on my end. Here it is! https://www.shanty-2-chic.com/2012/08/shanty-hall-tree-bench.html
I have a bed with a standard metal frame keeping it off the ground. Any suggestions for attaching a headboard like this to one?
Hi Melissa!
That shouldn’t be hard. You should be able to screw the bed frame directly into the 2×6 legs of the headboard! Hope this helps 🙂
I absolutely LOVE this! We are in the process of moving and I am planning on building all our furniture for the new home. I love all your plans so much I can’t figure out what I want to do first. Probably a table (my kids are kind of tired of sitting on the floor to eat). Thanks for keeping the great plans coming.
Thank you Rachal! I did the same with our new home and a table was the very first thing on my list followed by beds:) good luck! Send us pics when you finish!
I am wondering what kind 9f wood you used on this headboard!
Love it!